
Grill Plasticote DIY with PICS

Thread Starter
Lexus Fanatic
Joined: Jan 2014
Posts: 5,371
Likes: 526
From: BC Canada
Based on some pics I saw here, I decided to give my grill a new look and paint it black. I had done the same treatment to my BMW 745i last year and really liked the look it gave....a little less "blingy".
I also decided to do the $5 chrome treatment to the lower valance that others have also done.
Obviously I used a rattle can of the Plastidip paint in black:
[IMG]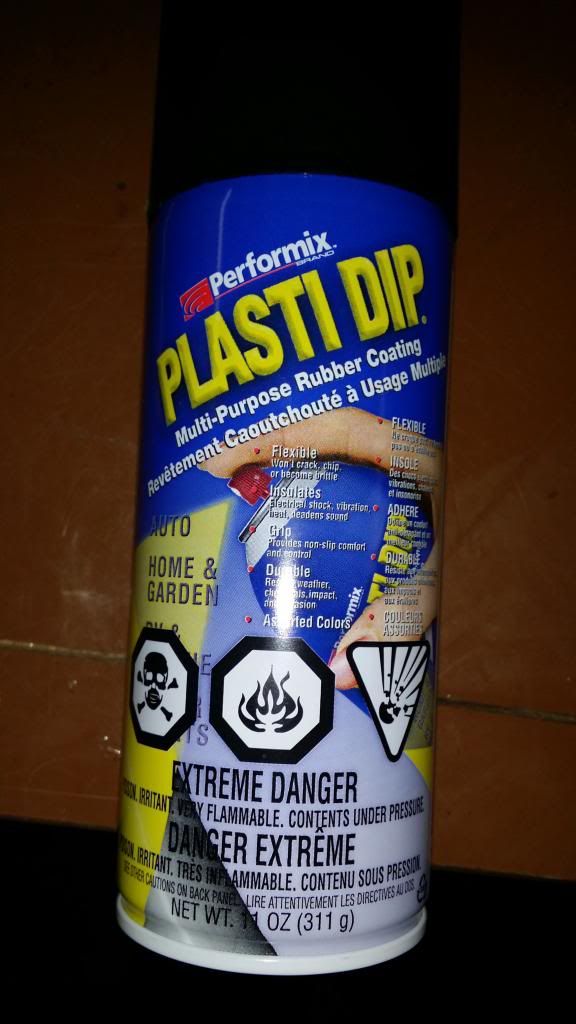 [/IMG]
I considered just taping around the grill right on the vehicle, but because of the weather and such, I decided to remove the grill from the vehicle - a VERY simple task....one bolt, and a few clips, and out she came. Once the assembly was out, the center grill piece was easily removed from the outer frame...again, with clips. I then masked it up:
[IMG]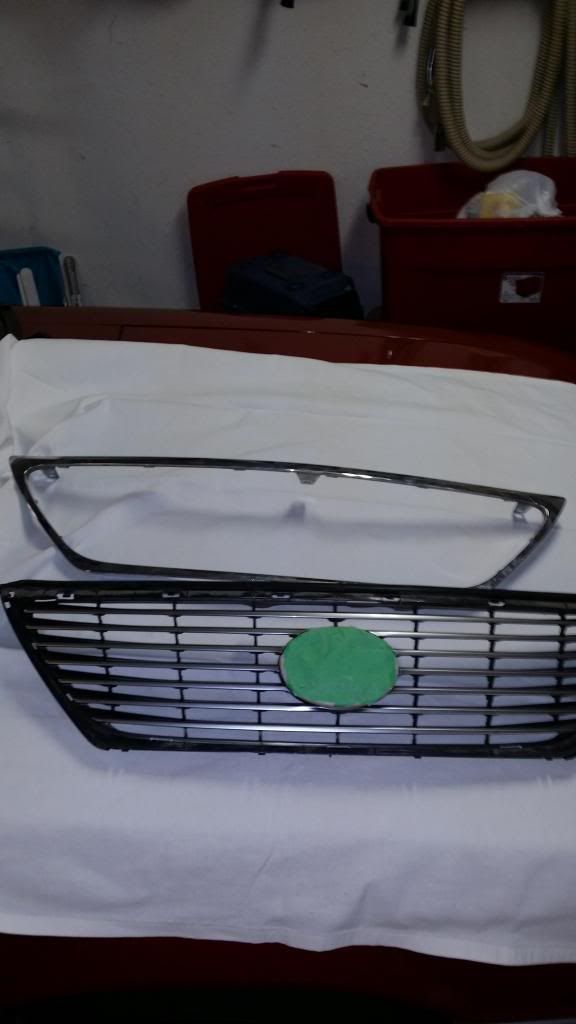 [/IMG]
[IMG]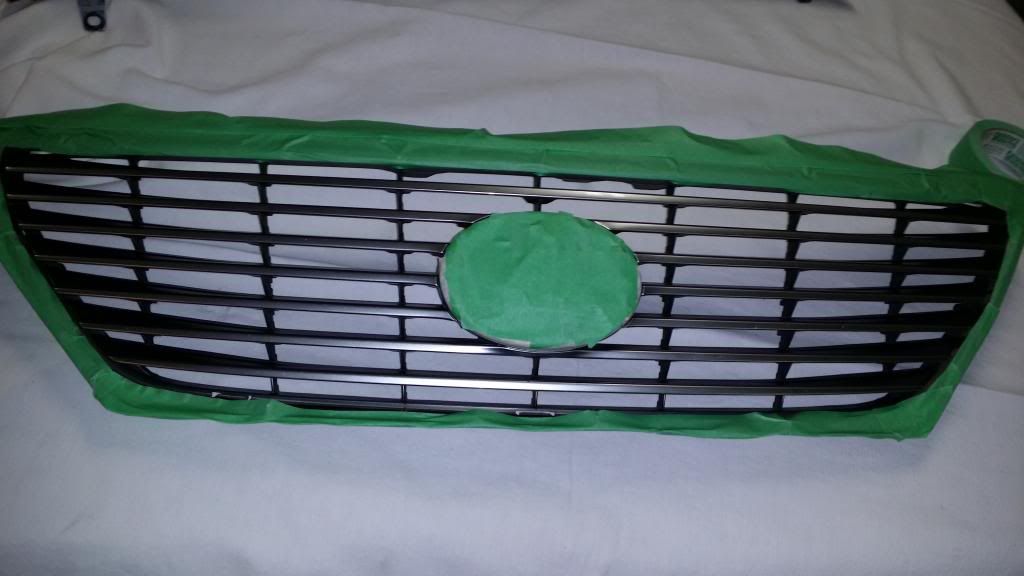 [/IMG]
The beauty of Plastidip is that it is so forgiving and masking does not need to be perfect, as any overspray just rubs off or peels away. Its really an amazing product. The beauty is, if you don't like the results, just peel away the rubbery coat of color and you're back to OEM.
[IMG]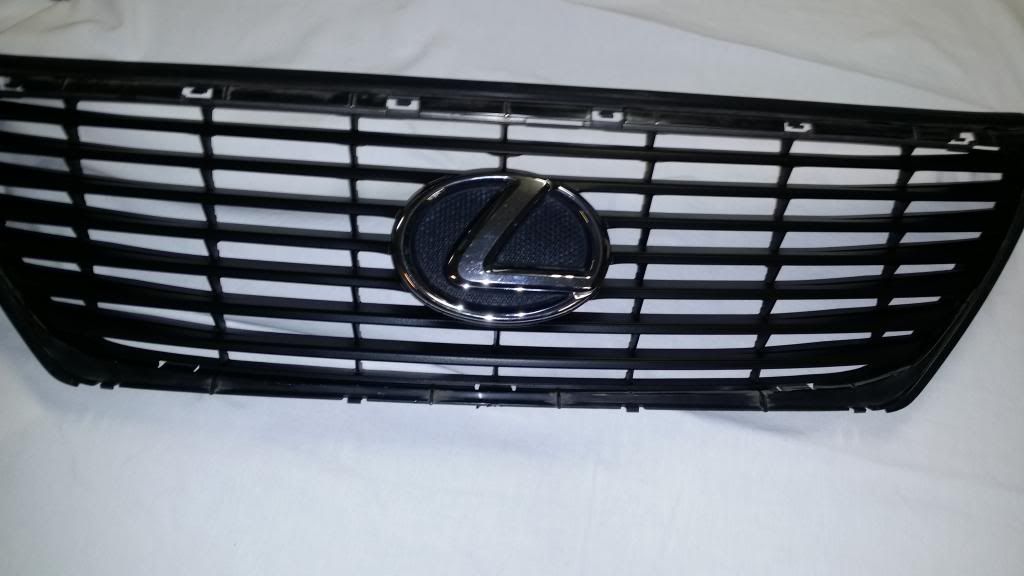 [/IMG]
I debated following up with a can of the Glossifier", but read several reviews that said the Glossifier made the black look somewhat, grey. Regardless, I really like the semigloss/satin results I got from the can as is.
[IMG]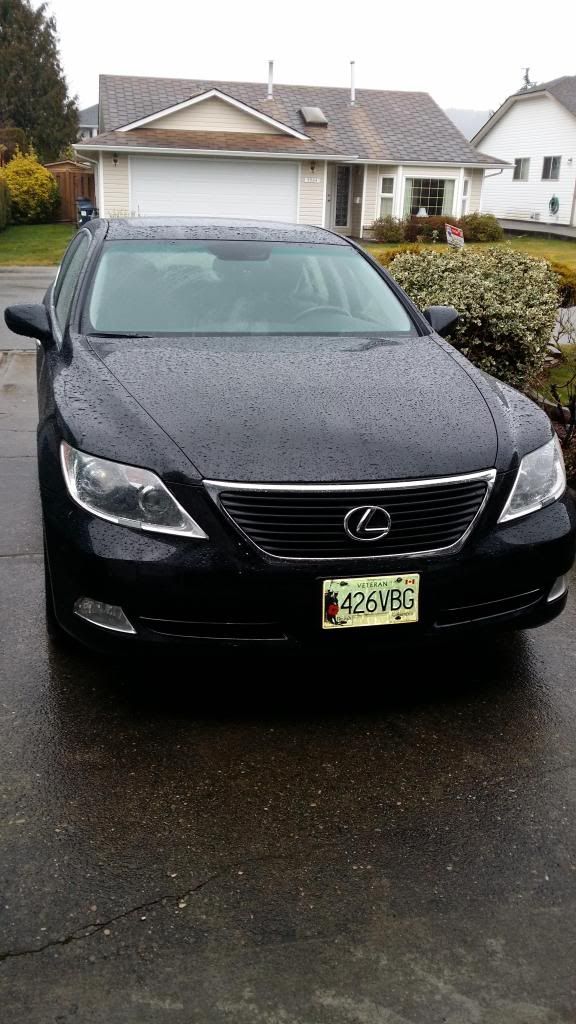 [/IMG]
The final result with the chrome door edge guard trims on the lower valance:
[IMG]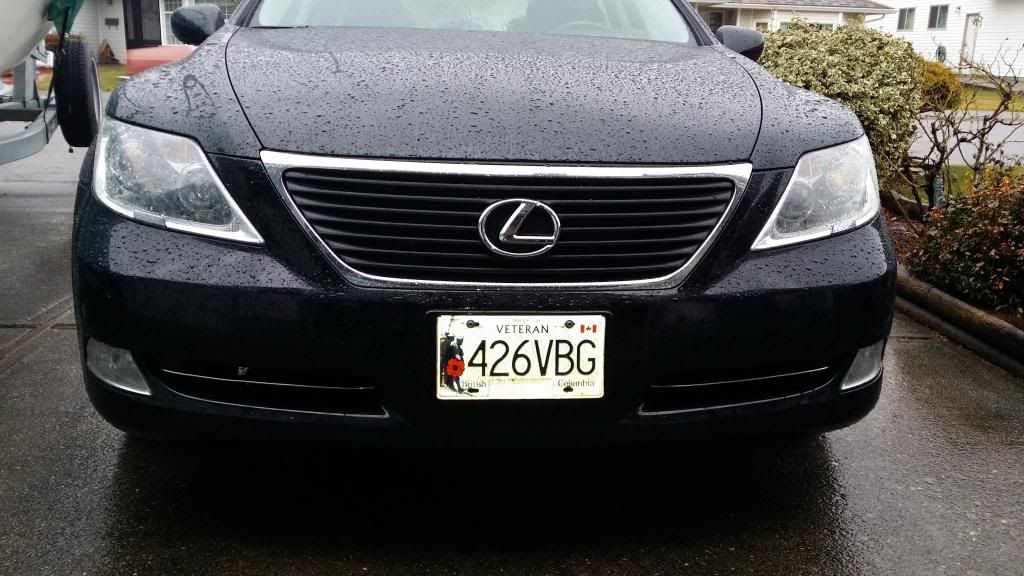 [/IMG]
It's been on the car for nearly a week through all kinds of weather and speeds as well as a touchless car wash and there is no sign of any wear. Thanks to those who set me on this quest! I really like the results!
I also decided to do the $5 chrome treatment to the lower valance that others have also done.
Obviously I used a rattle can of the Plastidip paint in black:
[IMG]
 [/IMG]
I considered just taping around the grill right on the vehicle, but because of the weather and such, I decided to remove the grill from the vehicle - a VERY simple task....one bolt, and a few clips, and out she came. Once the assembly was out, the center grill piece was easily removed from the outer frame...again, with clips. I then masked it up:
[IMG]
 [/IMG]
[IMG]
 [/IMG]
The beauty of Plastidip is that it is so forgiving and masking does not need to be perfect, as any overspray just rubs off or peels away. Its really an amazing product. The beauty is, if you don't like the results, just peel away the rubbery coat of color and you're back to OEM.
[IMG]
 [/IMG]
I debated following up with a can of the Glossifier", but read several reviews that said the Glossifier made the black look somewhat, grey. Regardless, I really like the semigloss/satin results I got from the can as is.
[IMG]
 [/IMG]
The final result with the chrome door edge guard trims on the lower valance:
[IMG]
 [/IMG]
It's been on the car for nearly a week through all kinds of weather and speeds as well as a touchless car wash and there is no sign of any wear. Thanks to those who set me on this quest! I really like the results!

Thread Starter
Lexus Fanatic
Joined: Jan 2014
Posts: 5,371
Likes: 526
From: BC Canada
Can you link us to the product you used for the lower valances?
http://www.ebay.com/itm/U-STYLE-3M-x...-/221270549880
You can find it at Walmart in the automotive section for about 5 bucks. Just cut it to size.

4th Gear
Joined: Mar 2015
Posts: 4
Likes: 1
From: La
How hard is it to take off the grill?
Based on some pics I saw here, I decided to give my grill a new look and paint it black. I had done the same treatment to my BMW 745i last year and really liked the look it gave....a little less "blingy".
I also decided to do the $5 chrome treatment to the lower valance that others have also done.
Obviously I used a rattle can of the Plastidip paint in black:
[IMG][/IMG]
I considered just taping around the grill right on the vehicle, but because of the weather and such, I decided to remove the grill from the vehicle - a VERY simple task....one bolt, and a few clips, and out she came. Once the assembly was out, the center grill piece was easily removed from the outer frame...again, with clips. I then masked it up:
[IMG][/IMG]
[IMG][/IMG]
The beauty of Plastidip is that it is so forgiving and masking does not need to be perfect, as any overspray just rubs off or peels away. Its really an amazing product. The beauty is, if you don't like the results, just peel away the rubbery coat of color and you're back to OEM.
[IMG][/IMG]
I debated following up with a can of the Glossifier", but read several reviews that said the Glossifier made the black look somewhat, grey. Regardless, I really like the semigloss/satin results I got from the can as is.
[IMG][/IMG]
The final result with the chrome door edge guard trims on the lower valance:
[IMG][/IMG]
It's been on the car for nearly a week through all kinds of weather and speeds as well as a touchless car wash and there is no sign of any wear. Thanks to those who set me on this quest! I really like the results!
I also decided to do the $5 chrome treatment to the lower valance that others have also done.
Obviously I used a rattle can of the Plastidip paint in black:
[IMG]
[/IMG]I considered just taping around the grill right on the vehicle, but because of the weather and such, I decided to remove the grill from the vehicle - a VERY simple task....one bolt, and a few clips, and out she came. Once the assembly was out, the center grill piece was easily removed from the outer frame...again, with clips. I then masked it up:
[IMG]
[/IMG][IMG]
[/IMG]The beauty of Plastidip is that it is so forgiving and masking does not need to be perfect, as any overspray just rubs off or peels away. Its really an amazing product. The beauty is, if you don't like the results, just peel away the rubbery coat of color and you're back to OEM.
[IMG]
[/IMG]I debated following up with a can of the Glossifier", but read several reviews that said the Glossifier made the black look somewhat, grey. Regardless, I really like the semigloss/satin results I got from the can as is.
[IMG]
[/IMG]The final result with the chrome door edge guard trims on the lower valance:
[IMG]
[/IMG]It's been on the car for nearly a week through all kinds of weather and speeds as well as a touchless car wash and there is no sign of any wear. Thanks to those who set me on this quest! I really like the results!
Trending Topics


Racer


Joined: May 2004
Posts: 1,717
Likes: 89
From: FL
Very nice! Car is looking good.
Have you considered adding DRL LED strips (the kind initially installed by Tee and CJITTY)? It fits the opening on the 2007-09 bumper quite nicely, together with the door edge chrome pieces.
Have you considered adding DRL LED strips (the kind initially installed by Tee and CJITTY)? It fits the opening on the 2007-09 bumper quite nicely, together with the door edge chrome pieces.
Thread Starter
Lexus Fanatic
Joined: Jan 2014
Posts: 5,371
Likes: 526
From: BC Canada


Racer
Joined: May 2004
Posts: 1,717
Likes: 89
From: FL
Ha! Those look familiar 
Curious... As I was typing earlier, I had a vague recollection that you did have these, but I didn't see them in your signature (may have missed them - sleep deprivation will do that to me). Did I imagine this, or did you just install (or reinstall, post-PlastiDip project)?
Curious... As I was typing earlier, I had a vague recollection that you did have these, but I didn't see them in your signature (may have missed them - sleep deprivation will do that to me). Did I imagine this, or did you just install (or reinstall, post-PlastiDip project)?
Thread Starter
Lexus Fanatic
Joined: Jan 2014
Posts: 5,371
Likes: 526
From: BC Canada
Ha! Those look familiar
Curious... As I was typing earlier, I had a vague recollection that you did have these, but I didn't see them in your signature (may have missed them - sleep deprivation will do that to me). Did I imagine this, or did you just install (or reinstall, post-PlastiDip project)?
Curious... As I was typing earlier, I had a vague recollection that you did have these, but I didn't see them in your signature (may have missed them - sleep deprivation will do that to me). Did I imagine this, or did you just install (or reinstall, post-PlastiDip project)?

-Joe
Thread Starter
Lexus Fanatic
Joined: Jan 2014
Posts: 5,371
Likes: 526
From: BC Canada
I've got to hand it to you roadfrog, that actually looks very good and well placed. It looks like it fits very well. I'm sure we all see cars that try to add LED strips or bars and it never looks like its supposed to be there mostly because of fitment, but what you did looks like it was designed that way!
-Joe
-Joe