


is250 FX-R retrofit


Thread Starter
Rookie

Joined: Mar 2011
Posts: 29
Likes: 0
From: TX
 is250 FX-R retrofit
Hi everyone,
I wanted to share my FX-R retrofit with the community since I haven't seen one done yet.
My IS250 is non-equipped with factory HID's. I bought a plug and play kit from DDM, and even though I could see better at night, I'm sure that I blinded the hell out of oncoming traffic. Just a month back I did the clear lens swap with the SC430 hoping to get a more concentrated light pattern, but still wasn't happy with the results. The only way to get what I wanted was to retrofit.
I've read the TSX retrofit thread, but knew I wanted bi-xenon capabilities. The FX-R is similar in dimension, more readily available, so I figured to go that route.
Luckily my friend recently retrofitted his GS300 and planned on doing his SC300 this past weekend so we decided to make it an HID party. He found a local vendor that sold the FX-R's for a very good price ( project.ors.order@gmail.com ) as well as accessories.
For those of you not aware, most plug and play kits have AMP connectors. Those are the two plugs found running off of the ballast that plug into the bulb. D2S is a totally different connector found on many OEM HID equipped cars. If you have an aftermarket plug and play kit wanting to do a D2S retrofit, you can keep your ballast by buying an AMP to D2S connector and D2S bulbs. This is what I thought HAD to buy.
http://www.theretrofitsource.com/pro...fphn190jlvpban
Project.ORS recommended D2H bulbs which fit D2S projectors, but have amp connectors to go into the ballast I already have. This saves me money from buying adapters and gives me more room behind the projector.
http://www.theretrofitsource.com/pro...roducts_id=251
From the TSX thread, all the materials I needed were screws, nuts and metal strips to securely mount the projector to the oem bracket.
Screws: #8 x 1'' ( qty. 8 ) w/ corresponding nuts
Metal: 3' x 1/8'' aluminum strip, ran about 4-5 dollars
To be very brief, I removed the bumper, headlights, and baked them open via information on the forum. I removed the OEM shroud and then the OEM projector. I then test fitted the FX-R in the opening.
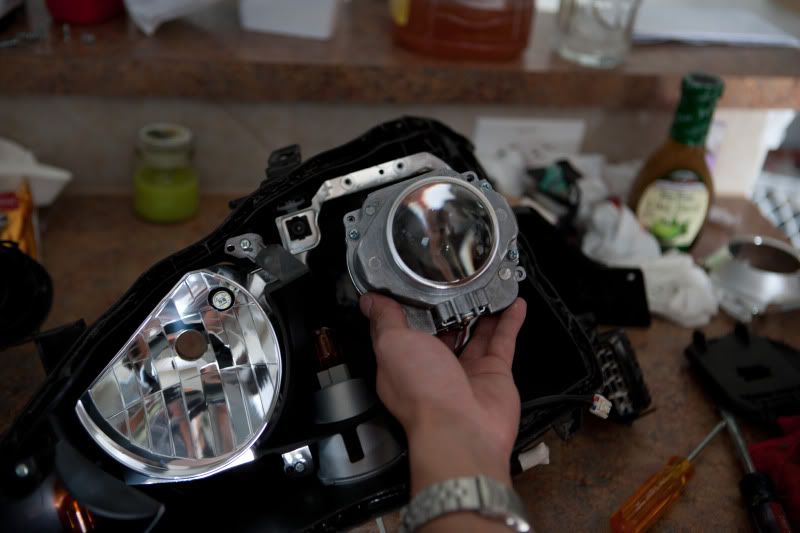
All I needed to do was to mount the projector leveled on the OEM bracket. With this process, I would still have factory adjust-ability with minimal work on my part. At first I thought I would use the holes already in the OEM bracket, but figured I'd drill my own. Things are easier without pre-existing conditions.
I took a piece of cardboard, wedged it between the projector and OEM bracket, and marked my holes. I took that paper template and transferred it to my metal stick. I cut the metal to size and drilled the holes.
I noticed that the projector stayed very snug against the inner side of the headlight when attached with the outer brackets I made. With everything re-installed I was sure that it would not budge.
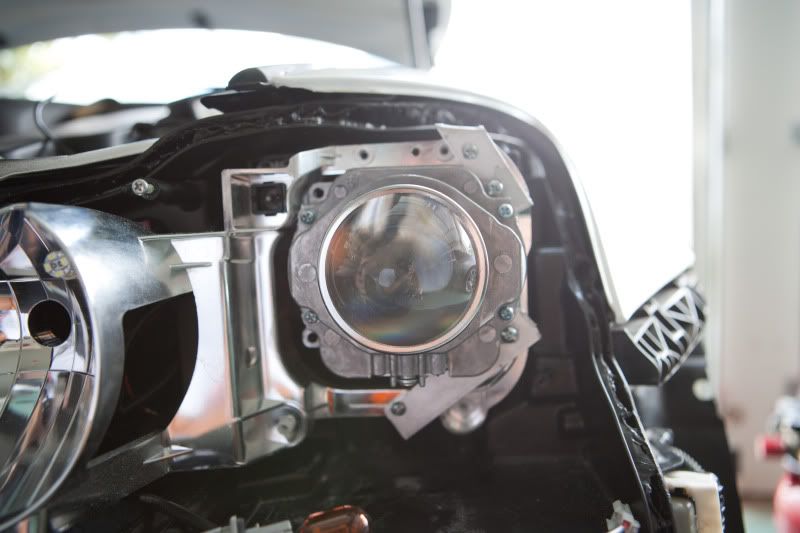
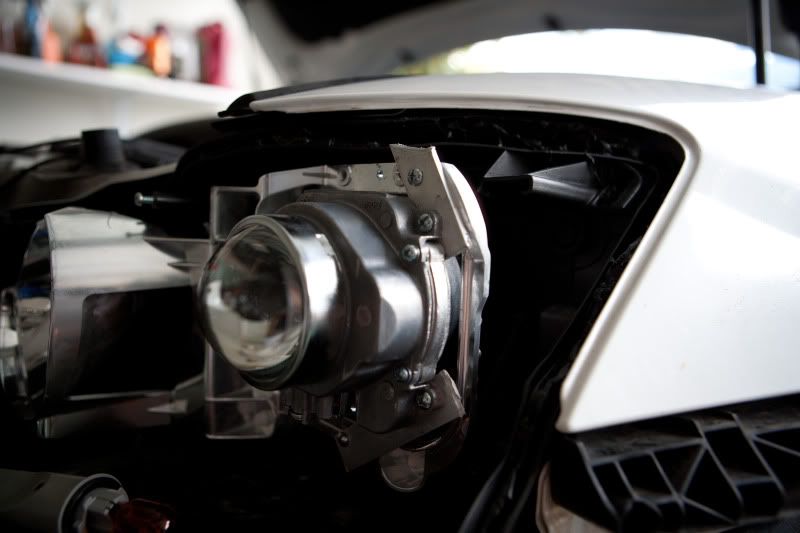
Both sides done
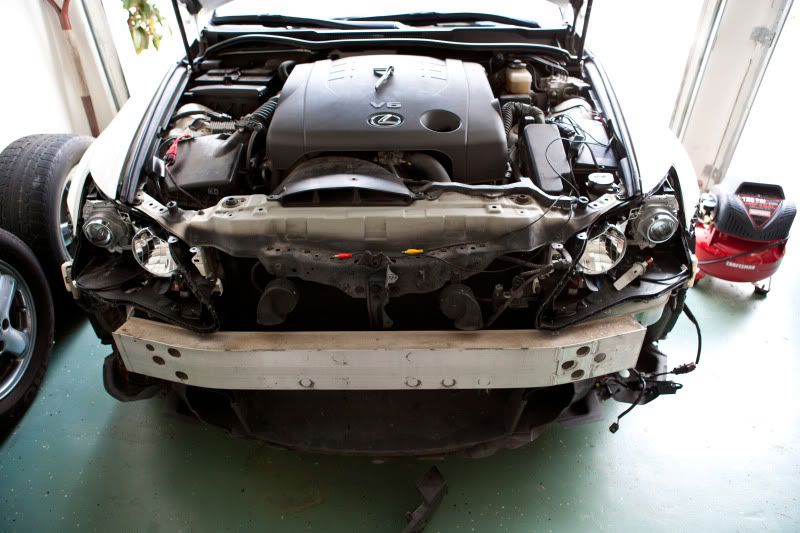
Here is a REALLY big point that I have no pictures for. Our OEM projectors are side fed. The FX-R projectors require the bulbs to go straight in through the back. In the TSX retrofit thread, the OP had to cut the back of the housings to make the bulb fit. When Project.ORS sold me the D2H bulbs, I thought it was just a money saver. But with all the room saved by those bulbs, I ran the wires through the OEM side slot. NO CUTTING!!!! Now I know when the bulbs go out I have to bake the headlights apart, but at least I didn't have to cut and worry about moisture seeping into the headlights due to a poor back seal. Well worth it to me.
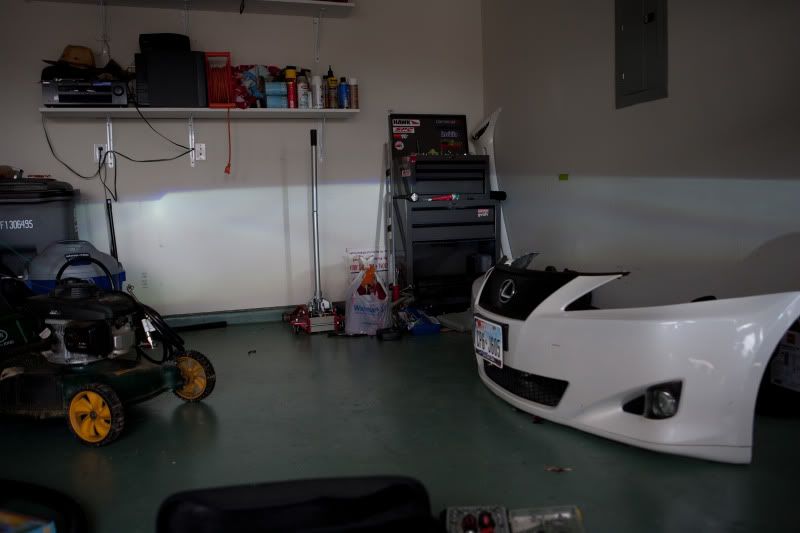
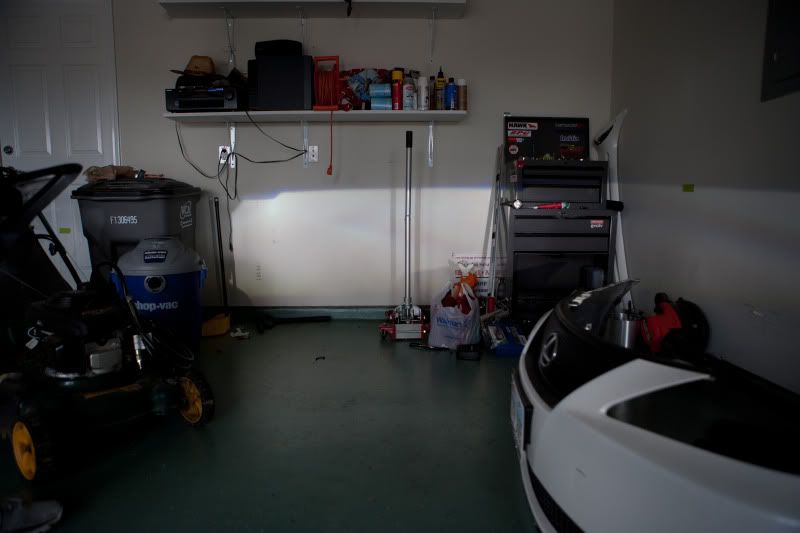
Here is a quick test fire after mounting the FX-R
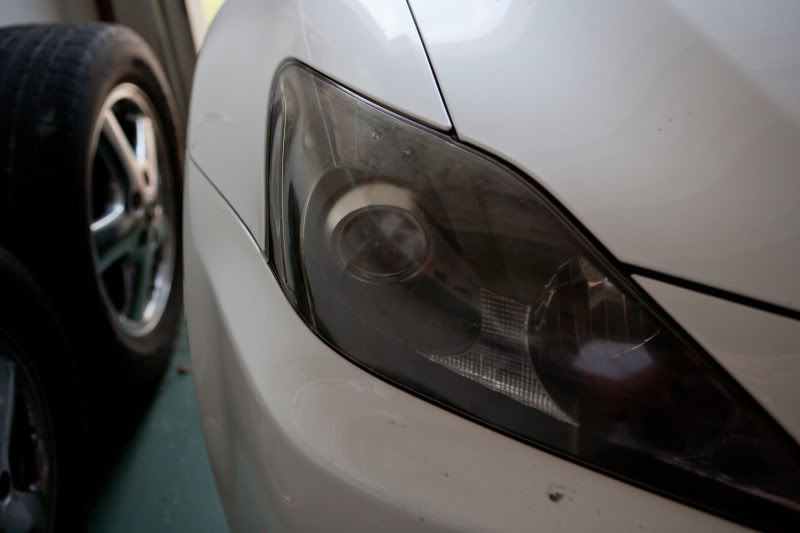
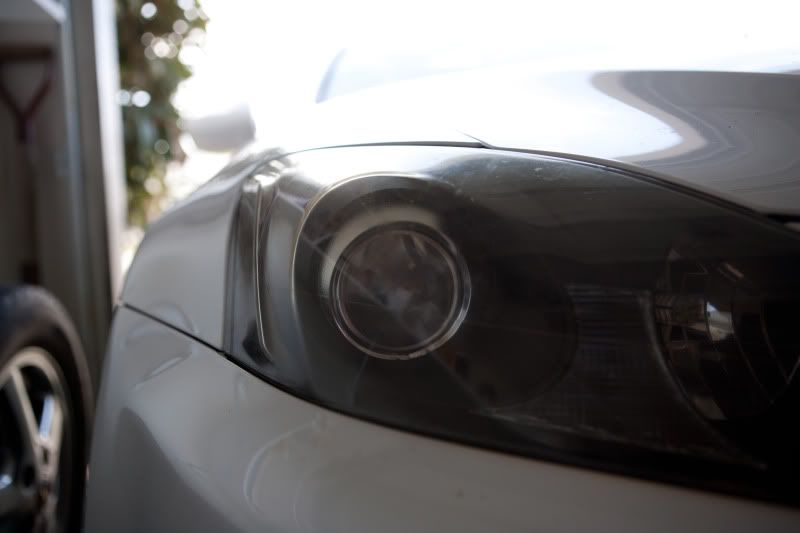
Next thing to tackle were the shrouds. This is all personal preference, but with the bezel and lens re-installed, there would be a huge gap left from the projector ( FX-R sits a little bit lower than the OEM projector ). I wanted to use the OEM shroud to clean things up, and that required cutting. I had to whack off the bottom of the shroud as close to the chrome inner ring as possible. Here's a photo of the finished product with everything re-installed.
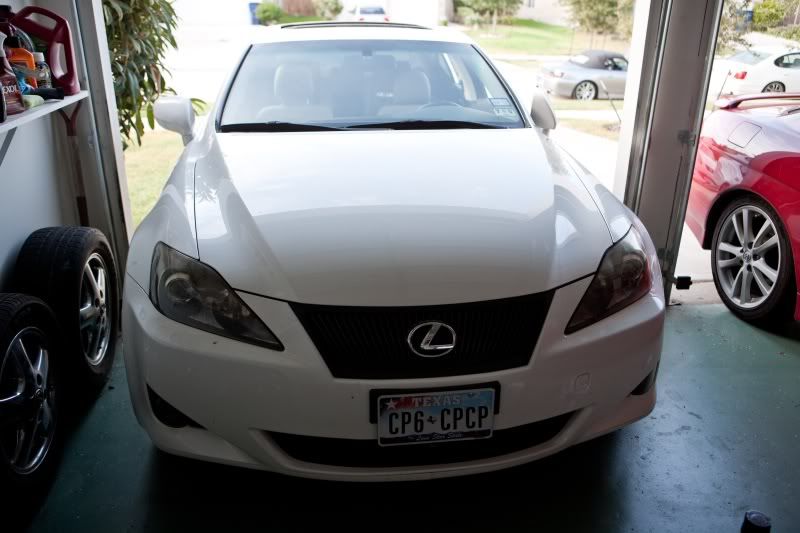
Overall, I'm very happy with the turnout. The visibility between non-OEM-HID vs. FX-R is night and day. All the work during a hot Texas afternoon was worth it. I hope this thread can be a contribution towards our IS community.
I wanted to share my FX-R retrofit with the community since I haven't seen one done yet.
My IS250 is non-equipped with factory HID's. I bought a plug and play kit from DDM, and even though I could see better at night, I'm sure that I blinded the hell out of oncoming traffic. Just a month back I did the clear lens swap with the SC430 hoping to get a more concentrated light pattern, but still wasn't happy with the results. The only way to get what I wanted was to retrofit.
I've read the TSX retrofit thread, but knew I wanted bi-xenon capabilities. The FX-R is similar in dimension, more readily available, so I figured to go that route.
Luckily my friend recently retrofitted his GS300 and planned on doing his SC300 this past weekend so we decided to make it an HID party. He found a local vendor that sold the FX-R's for a very good price ( project.ors.order@gmail.com ) as well as accessories.
For those of you not aware, most plug and play kits have AMP connectors. Those are the two plugs found running off of the ballast that plug into the bulb. D2S is a totally different connector found on many OEM HID equipped cars. If you have an aftermarket plug and play kit wanting to do a D2S retrofit, you can keep your ballast by buying an AMP to D2S connector and D2S bulbs. This is what I thought HAD to buy.
http://www.theretrofitsource.com/pro...fphn190jlvpban
Project.ORS recommended D2H bulbs which fit D2S projectors, but have amp connectors to go into the ballast I already have. This saves me money from buying adapters and gives me more room behind the projector.
http://www.theretrofitsource.com/pro...roducts_id=251
From the TSX thread, all the materials I needed were screws, nuts and metal strips to securely mount the projector to the oem bracket.
Screws: #8 x 1'' ( qty. 8 ) w/ corresponding nuts
Metal: 3' x 1/8'' aluminum strip, ran about 4-5 dollars
To be very brief, I removed the bumper, headlights, and baked them open via information on the forum. I removed the OEM shroud and then the OEM projector. I then test fitted the FX-R in the opening.
All I needed to do was to mount the projector leveled on the OEM bracket. With this process, I would still have factory adjust-ability with minimal work on my part. At first I thought I would use the holes already in the OEM bracket, but figured I'd drill my own. Things are easier without pre-existing conditions.
I took a piece of cardboard, wedged it between the projector and OEM bracket, and marked my holes. I took that paper template and transferred it to my metal stick. I cut the metal to size and drilled the holes.
I noticed that the projector stayed very snug against the inner side of the headlight when attached with the outer brackets I made. With everything re-installed I was sure that it would not budge.
Both sides done
Here is a REALLY big point that I have no pictures for. Our OEM projectors are side fed. The FX-R projectors require the bulbs to go straight in through the back. In the TSX retrofit thread, the OP had to cut the back of the housings to make the bulb fit. When Project.ORS sold me the D2H bulbs, I thought it was just a money saver. But with all the room saved by those bulbs, I ran the wires through the OEM side slot. NO CUTTING!!!! Now I know when the bulbs go out I have to bake the headlights apart, but at least I didn't have to cut and worry about moisture seeping into the headlights due to a poor back seal. Well worth it to me.
Here is a quick test fire after mounting the FX-R
Next thing to tackle were the shrouds. This is all personal preference, but with the bezel and lens re-installed, there would be a huge gap left from the projector ( FX-R sits a little bit lower than the OEM projector ). I wanted to use the OEM shroud to clean things up, and that required cutting. I had to whack off the bottom of the shroud as close to the chrome inner ring as possible. Here's a photo of the finished product with everything re-installed.
Overall, I'm very happy with the turnout. The visibility between non-OEM-HID vs. FX-R is night and day. All the work during a hot Texas afternoon was worth it. I hope this thread can be a contribution towards our IS community.


Nice nice!! I considered going D2H instead of D2S, but I wanted D2S specifically because there is a much wider range of bulbs that I can choose from, in case my bulbs burn out or some other issues. Mine has a hole cut in the rear to feed the AMP -> D2S adapter. Good to know you did it without cutting the rear! Output looks fantastic! What bulbs and color temperature did you go with? It looks very OEM.

Thread Starter
Rookie
Joined: Mar 2011
Posts: 29
Likes: 0
From: TX
Nice nice!! I considered going D2H instead of D2S, but I wanted D2S specifically because there is a much wider range of bulbs that I can choose from, in case my bulbs burn out or some other issues. Mine has a hole cut in the rear to feed the AMP -> D2S adapter. Good to know you did it without cutting the rear! Output looks fantastic! What bulbs and color temperature did you go with? It looks very OEM.
Thread Starter
Rookie
Joined: Mar 2011
Posts: 29
Likes: 0
From: TX
Trending Topics


Thread Starter
Rookie
Joined: Mar 2011
Posts: 29
Likes: 0
From: TX
 but we need to do some night shots and rolling shots..
5000k is legit. That's what I'm running. Beautiful cutoff with the blue.
@MV: Projectors aren't too expensive. I know TRS has the FX-R's for like $140~...pretty cheap compared to most OEM projectors.
@MV: Projectors aren't too expensive. I know TRS has the FX-R's for like $140~...pretty cheap compared to most OEM projectors.
Thread Starter
Rookie
Joined: Mar 2011
Posts: 29
Likes: 0
From: TX


Thread Starter
Rookie
Joined: Mar 2011
Posts: 29
Likes: 0
From: TX
 everyone after that is easy