When you click on links to various merchants on this site and make a purchase, this can result in this site earning a commission. Affiliate programs and affiliations include, but are not limited to, the eBay Partner Network.
buy yourself a good swivel allen head socket, preferably long. not sure the size exactly. makes a night and day difference when replacing on the car.
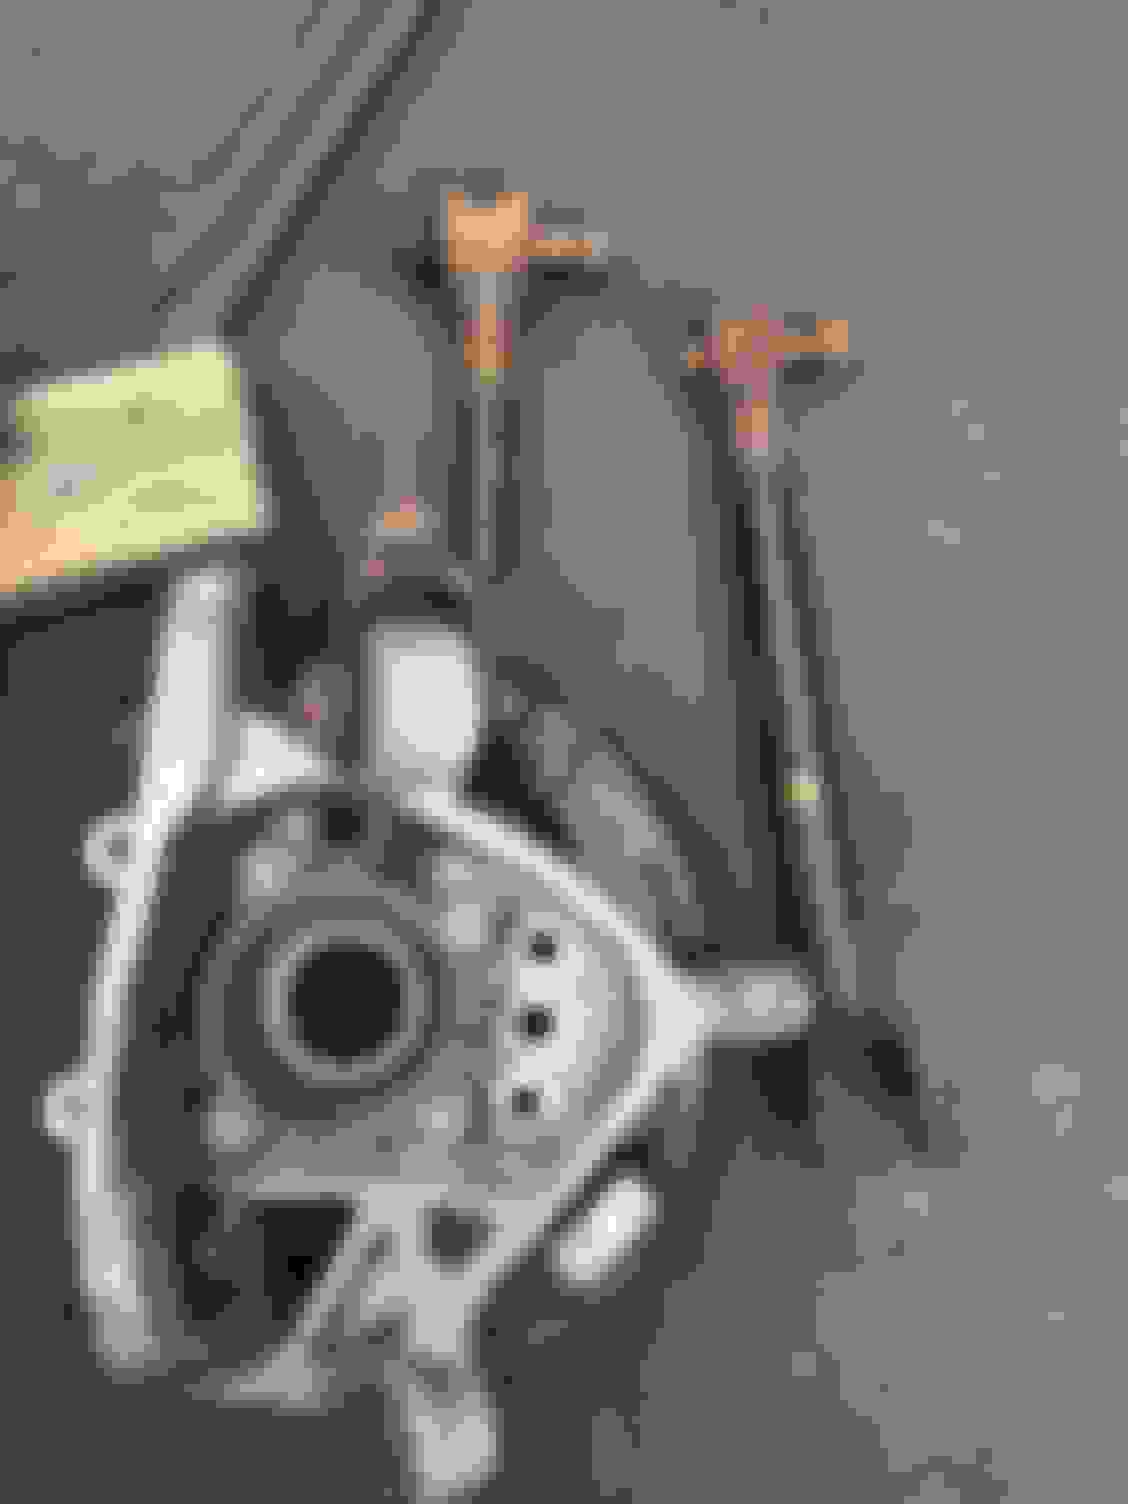
if done on the vehicle just make sure to remove the wheel speed sensor prior to removal of bearing. also you may end up fighting this dust ring, just make sure it goes on evenly during install. I do recommend a new axle nut(make sure to stake it after torqued down)
allen head bolts for bearing- 52ft�lb
axle nut- 214ft�lb
stake it? i just got done installing a whole used carrier, as i was doing the struts and the bolts were all seized and you cant buy the bushings, lexus wants 500 plus for the carrier...but there's something loose back there now. i don't think i tightened down the axel nut properly, and the bottom spherical bushing bolt connecting carrier to lower arm next to strut, already completely backed off. in lots of trouble here. thank you for posting the allen torque that what i was looking for, but dont know what you mean by stacking...hope you still active...
hey smitty was the screw for the ABS sensor seized as well? mine was. so i dont know what size it is and isnt listed as a part. i dont dare take the other one out for feer of the same problem,
buy yourself a good swivel allen head socket, preferably long. not sure the size exactly. makes a night and day difference when replacing on the car.
if done on the vehicle just make sure to remove the wheel speed sensor prior to removal of bearing. also you may end up fighting this dust ring, just make sure it goes on evenly during install. I do recommend a new axle nut(make sure to stake it after torqued down)
allen head bolts for bearing- 52ft�lb
axle nut- 214ft�lb
I know this is an old post but the key to the dust ring is use your 1/4 inch drive extension and put it in the hole where the abs sensor goes to line up the ring, then use a bearing puller to press the axle in so you have wiggle room, then use the 1/4 drive extension like a lever and press that side of the dust ring in first and hold it directly on the opposite side of the ring use a flat head screwdriver and leverage it between the axle and ring to get it to pop in. After that just go around the edges and make sure you are in all the way. Then check that the abs sensor fits flush. If not then try again. There might be score Mark's on the ring from when you unscrewed the hub bolts if so that will also help you align it make sure the score mark is dead center the hub bolt. All in all it took me 7 hours my first time because of the dusting once I figured out the puzzle of it the second side took an hour.
hey smitty was the screw for the ABS sensor seized as well? mine was. so i dont know what size it is and isnt listed as a part. i dont dare take the other one out for feer of the same problem,
Not that I remember. The bolt came out OK, but the sensor was siezed in the knuckle.
Originally Posted by Jeremyis35
I know this is an old post but the key to the dust ring is use your 1/4 inch drive extension and put it in the hole where the abs sensor goes to line up the ring, then use a bearing puller to press the axle in so you have wiggle room, then use the 1/4 drive extension like a lever and press that side of the dust ring in first and hold it directly on the opposite side of the ring use a flat head screwdriver and leverage it between the axle and ring to get it to pop in. After that just go around the edges and make sure you are in all the way. Then check that the abs sensor fits flush. If not then try again. There might be score Mark's on the ring from when you unscrewed the hub bolts if so that will also help you align it make sure the score mark is dead center the hub bolt. All in all it took me 7 hours my first time because of the dusting once I figured out the puzzle of it the second side took an hour.
Good info! I remember on mine I just pushed the dust cover back in and didn't press it or tap it in
Originally Posted by FNSSESPORT
Thought I'd add to this thread since I just replaced by left rear wheel hub over the past couple weekends. Why did it take a couple of weekends you ask? Well, my IS250 is my winter car, (I live in Canada) and the corrosion was insane! I had to take a few different approaches to replacing the wheel hub:
Approach 1: I watched a few Youtube videos that make it look easy - undo the four bolts holding the hub assembly, put on the wheel, or use a slide hammer and pull the hub out. I discovered two issues with this method. 1) It would be extremely difficult when putting the new hub back in to get the deflector to line up, the tolerance is crazy tight. Which would lead to the question issue above. 2) When the deflector and hub are extremely corroded, this happens:
Actually separated the wheel bearing. *note, yes i removed the axle nut before trying to remove the bearing, i put it back on to avoid damaging any threads while working around it
Approach 2: Follow TIS method for replacing the hub which involves removing the whole knuckle assembly. Even this wasn't easy due to the corrosion. i ended having to cut a lot of the bolts out, and even cut one of the upper control arms:
I ended up getting a used knuckle and control arms of eBay, but the challenge wasn't over. Pressing the deflector onto the new hub was a huge PIA. There is a Toyota SST for doing it, but I used a 4 x 4 block of wood and a hammer, and eventually got it.
New (used) knuckle with new hub and new deflector installed
I also had to replace the speed sensor because I broke the tip trying to get the hub out originally, and even once the old hub was removed, the speed sensor was fused into the aluminum knuckle.
Finally got everything back together:
New hub. And yes, I did stake the axle nut after this pic was taken
Before tightening all of the control arms, I stabilized the suspension, torqued everything down to spec, and added shiny new rotors and pads to my not so shiny calipers.
Moral(s) of the story:
i. Working on corroded Canadian cars sucks!
ii. If doing it again, corrosion or not, I would follow the TIS procedure, instead of just trying to pull the hub. Not sure how you can properly/accurately seat the deflector otherwise. If you can easily remove the control arm bolts attaching the knuckle, this whole process wouldn't take more than a few hours. It took me several weekends because I had to order the used hub and control arms, and wait for them to arrive.
-R
I feel your pain! That same control arm you couldn't get out is the same issue on my car. That damn thing kept me from being able to tilt the knuckle outward and work on it easier. I now have all 8 control arms on order and plan to buy all new hardware if/when I start cutting bolts out!
I hope Kroil, MAP torch and impact gun are my friends!
Not that I remember. The bolt came out OK, but the sensor was siezed in the knuckle.
Good info! I remember on mine I just pushed the dust cover back in and didn't press it or tap it in
I feel your pain! That same control arm you couldn't get out is the same issue on my car. That damn thing kept me from being able to tilt the knuckle outward and work on it easier. I now have all 8 control arms on order and plan to buy all new hardware if/when I start cutting bolts out!
I hope Kroil, MAP torch and impact gun are my friends!
Yep, once I have all the arms and hardware it's game on and no holding back. Hell with all the replacement stuff on hand I am less likely to "be nice" so I make sure the job gets done and I don't try to save bushings etc.
@FNSSESPORT and @2013FSport do you know if the rear tow links can be removed/installed without lowering the cradle? The cam bolts on the cradle side looks like it would hit the frame sliding the bolt toward the front fo the car?
I found some toe link replacement videos for a GS and IS300 which makes it seem like it's possible to do? The subframe tab has slots which allows the arm to be angled and the bolt slide out?
Pleas please please tell me it's possible without lowering the cradle LOL
�Stake� it means you need to use a punch on the axle nut to indent it (see arrow in pic below). This prevents the nut from spinning off.
are you still around.... I replaced my rear bearing hub by just pulling it, broke the ABS senor and cant insert the new one since, like you said, that deflector doesnt line up... so Im gonna remove it all again, remove the knuckle and hope I can somehow insert that deflector.. any tips??

 07-19-19, 08:54 PM