


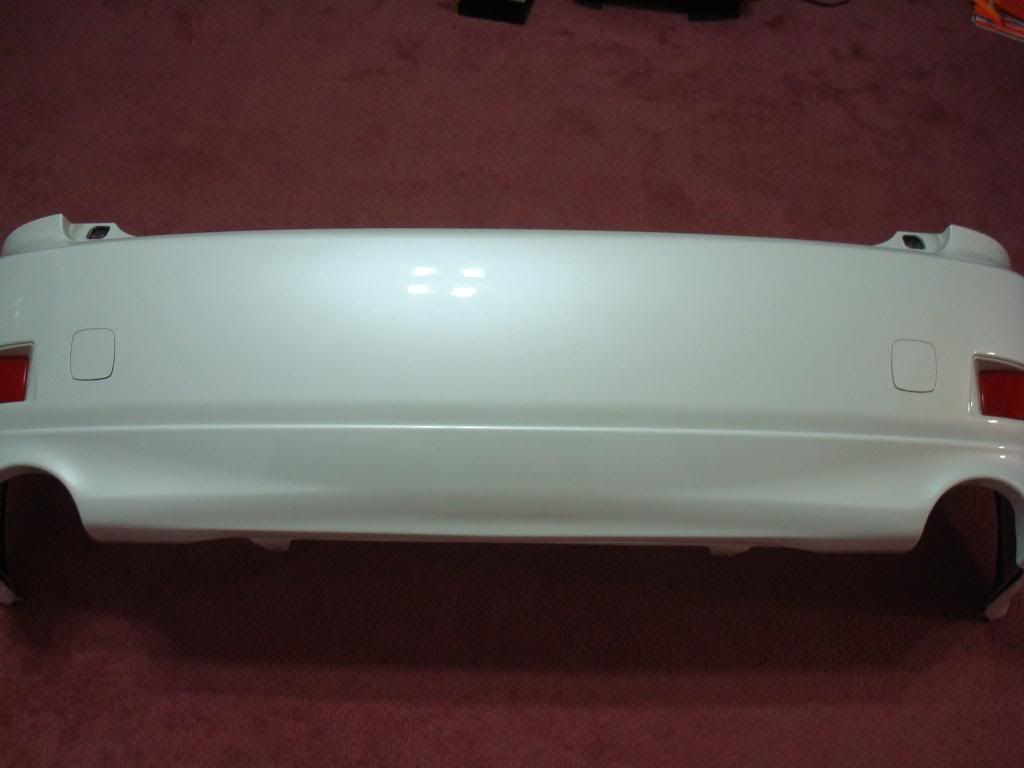
DIY Rear GFX (Cutting Method)
I didn't really see a rear GFX DIY so I decided to make one. The lip I had to paint it myself (turned out perfect) with the help of my auto body professor. Anyways, the dealership quoted me $295 for the install! I was like forget that and pocket that money for some Tein S-Techs  . Hopefully this will be sufficient enough fo you guys to tackle this on your own as it's not all that hard
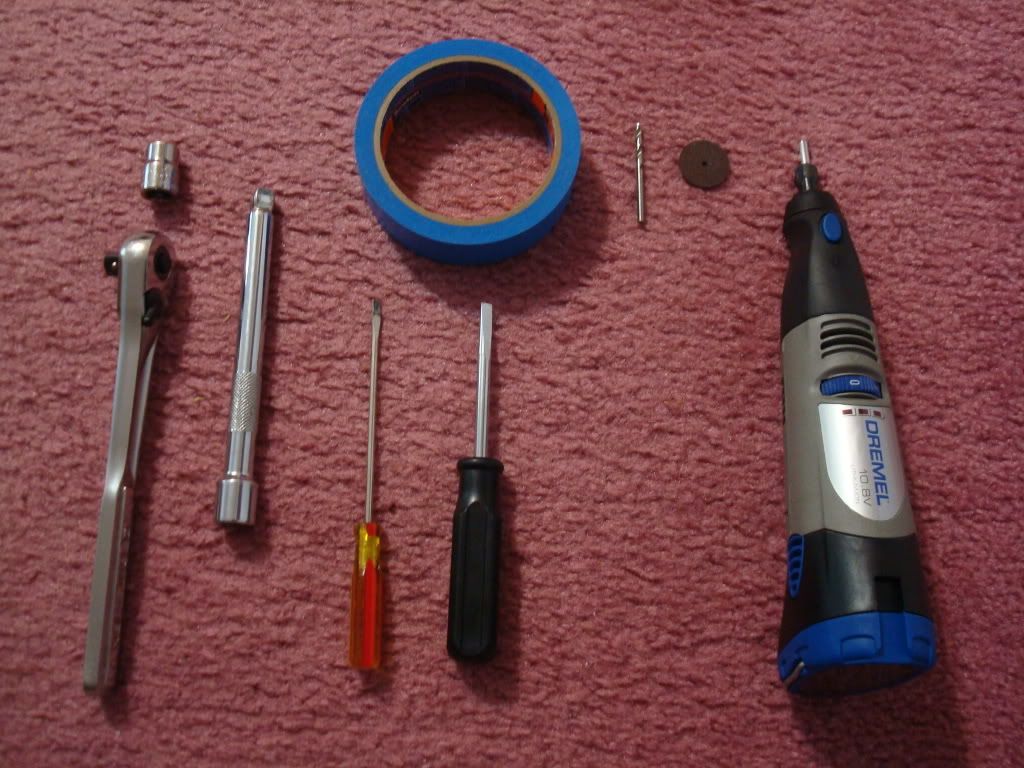
Tools I used:
-Dremel cordless (w/cutting disc and drill bit)
-Painters tape
-Flathead screwdrivers
-Ratchet
-6" ratchet extender
-10mm socket
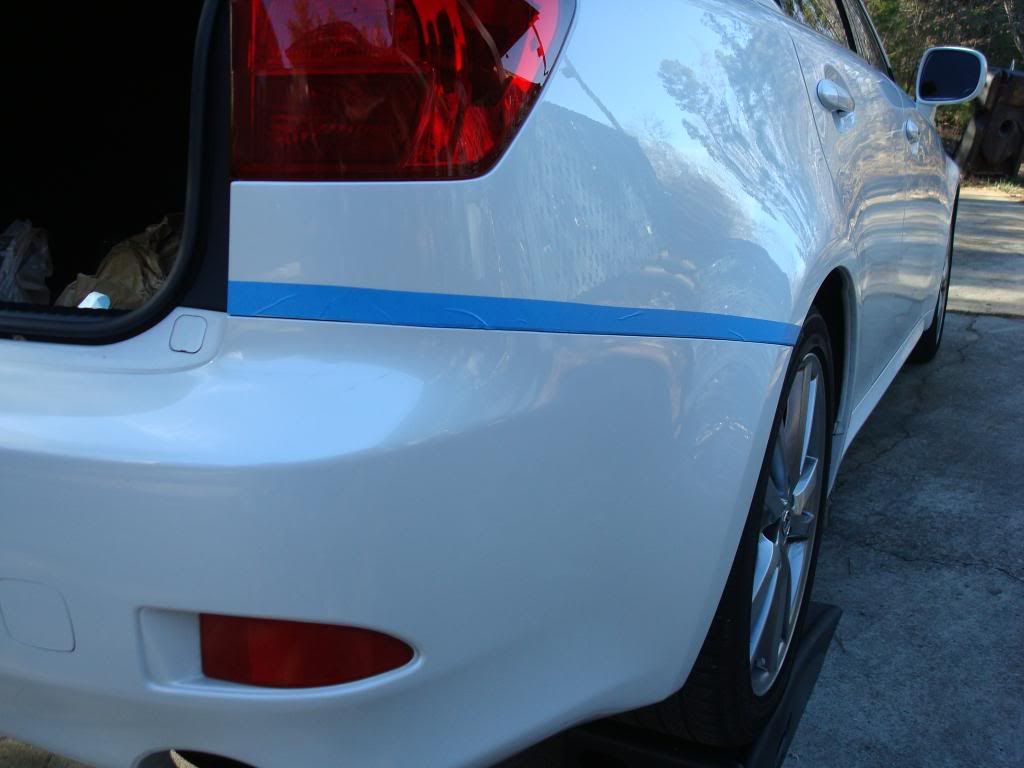
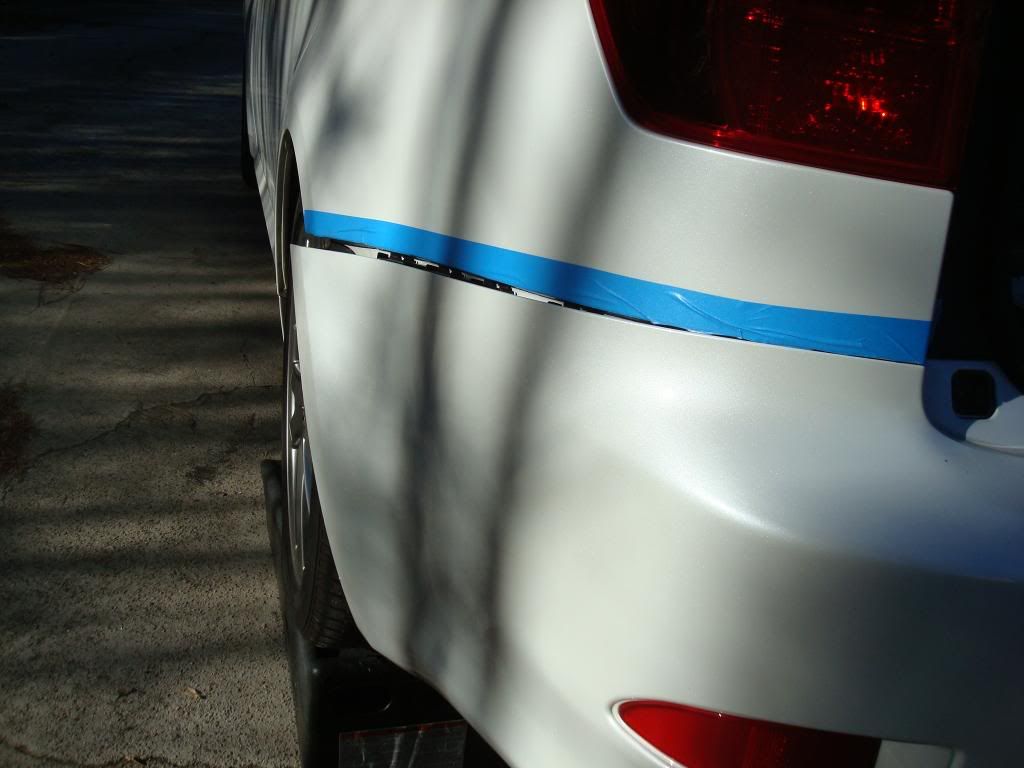
Take the painters tape and tape right above the bumper line on both sides. This is for when you're removing and reinstalling the tabs of the bumper won't hit and scratch the paint. Easy with another buddy though.
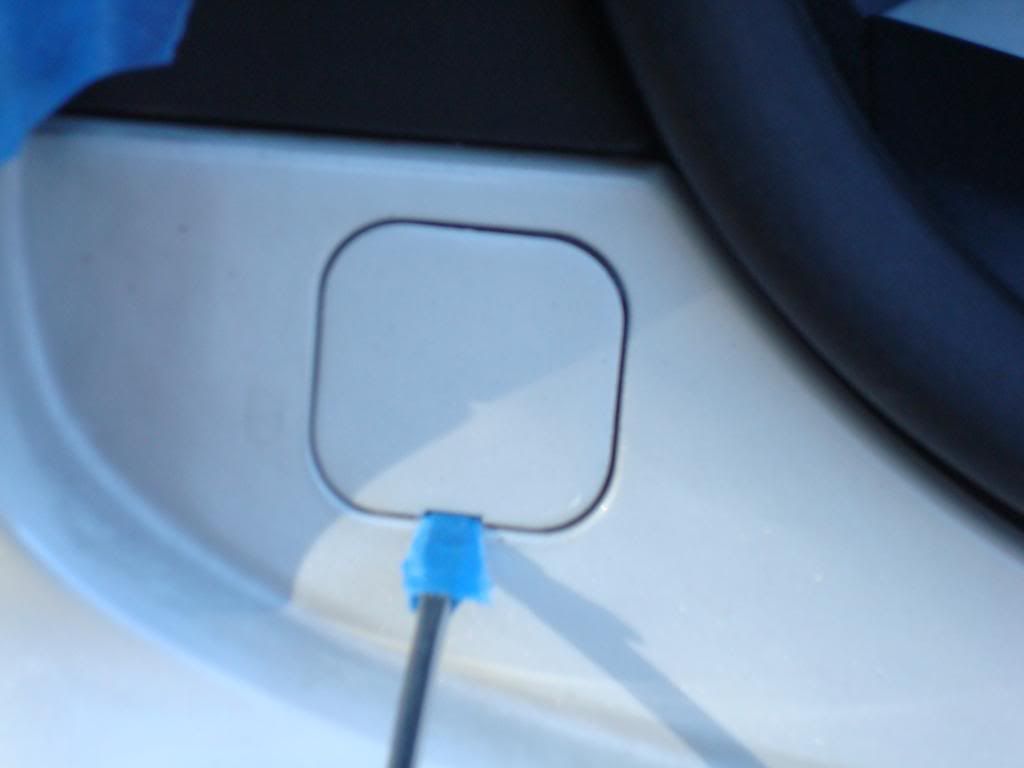
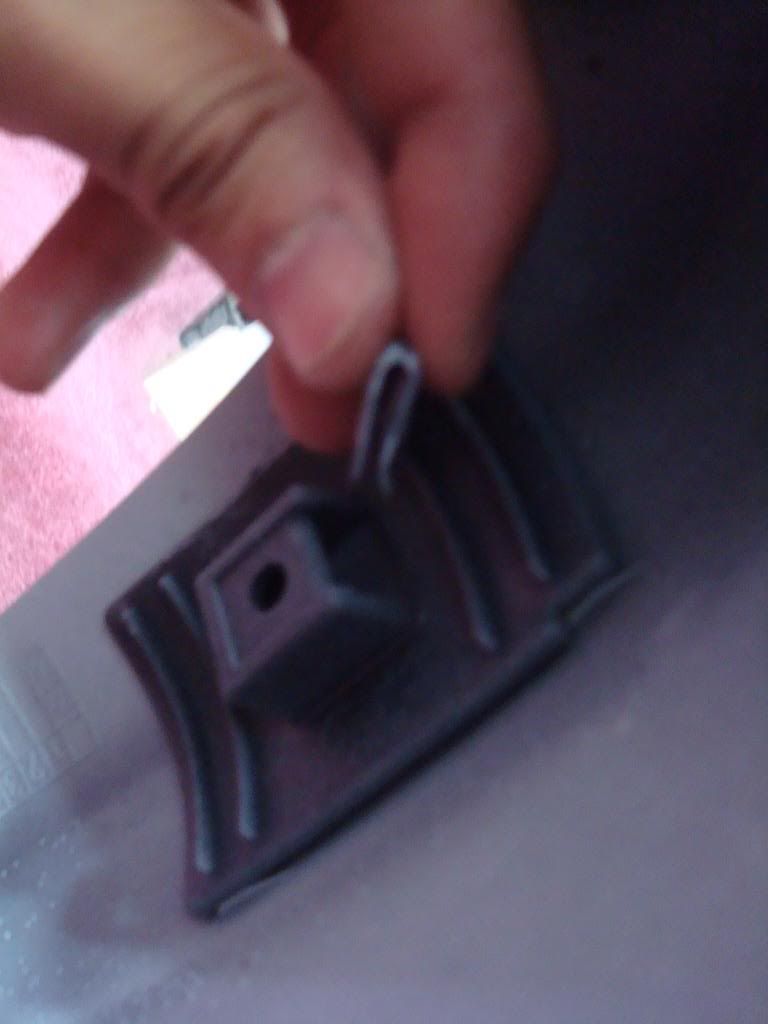
There are 2 little squares on each side of the trunk. Pop them off with the flathead. I used tape on it because I didn't wanna risk anything.
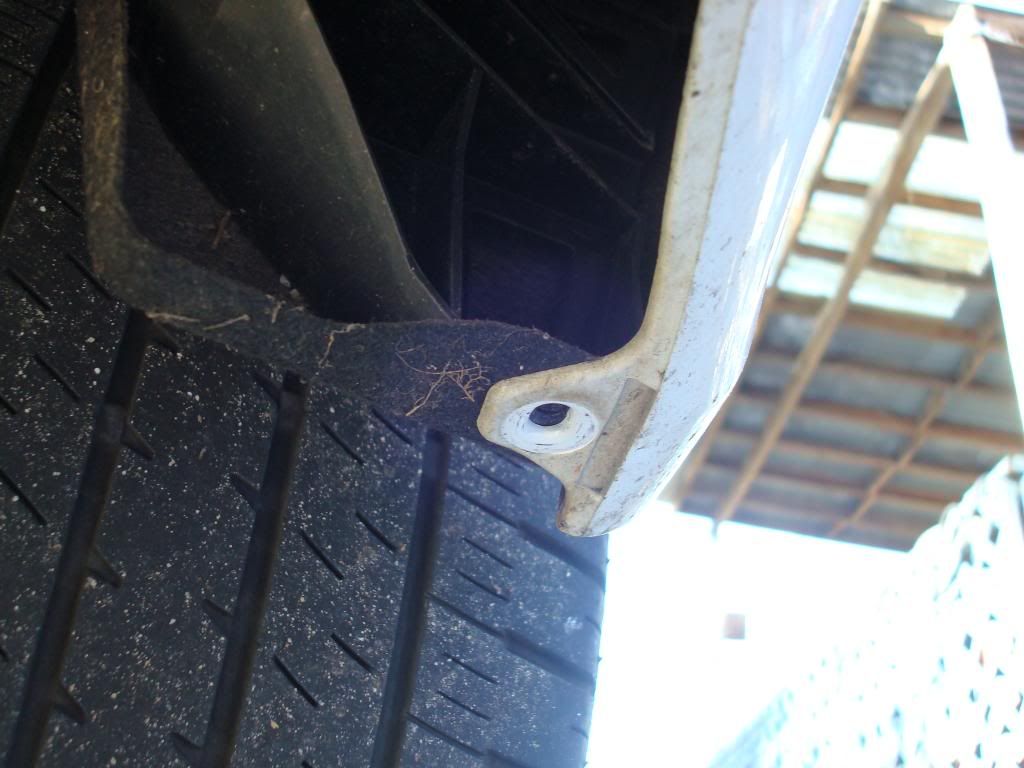
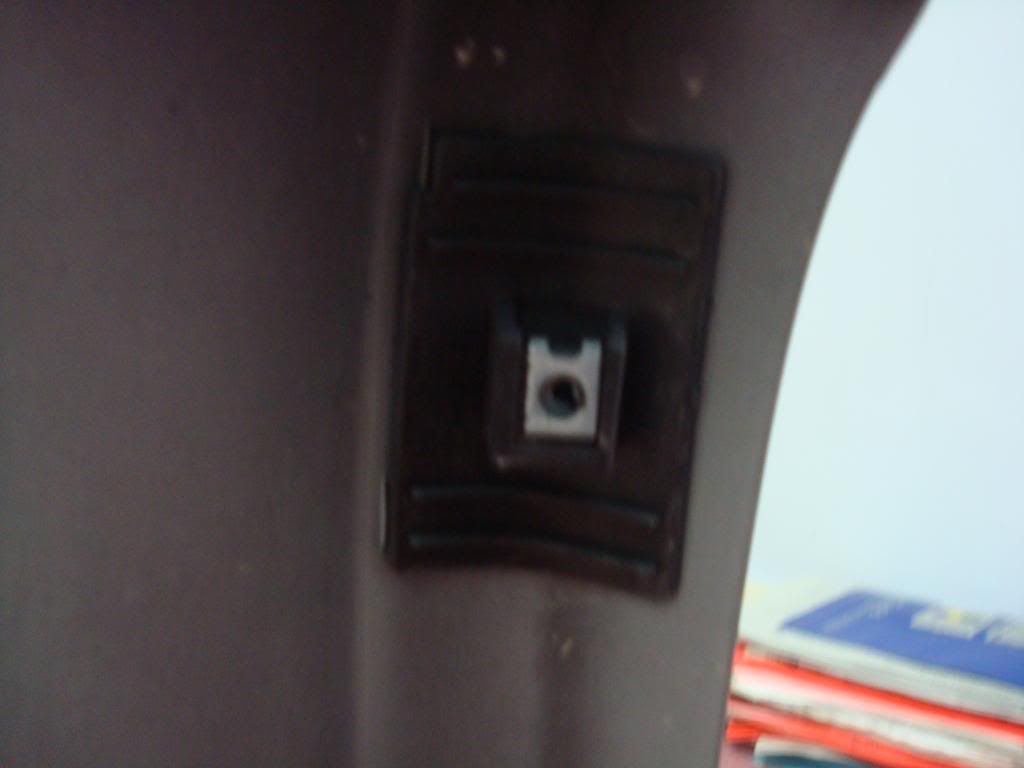
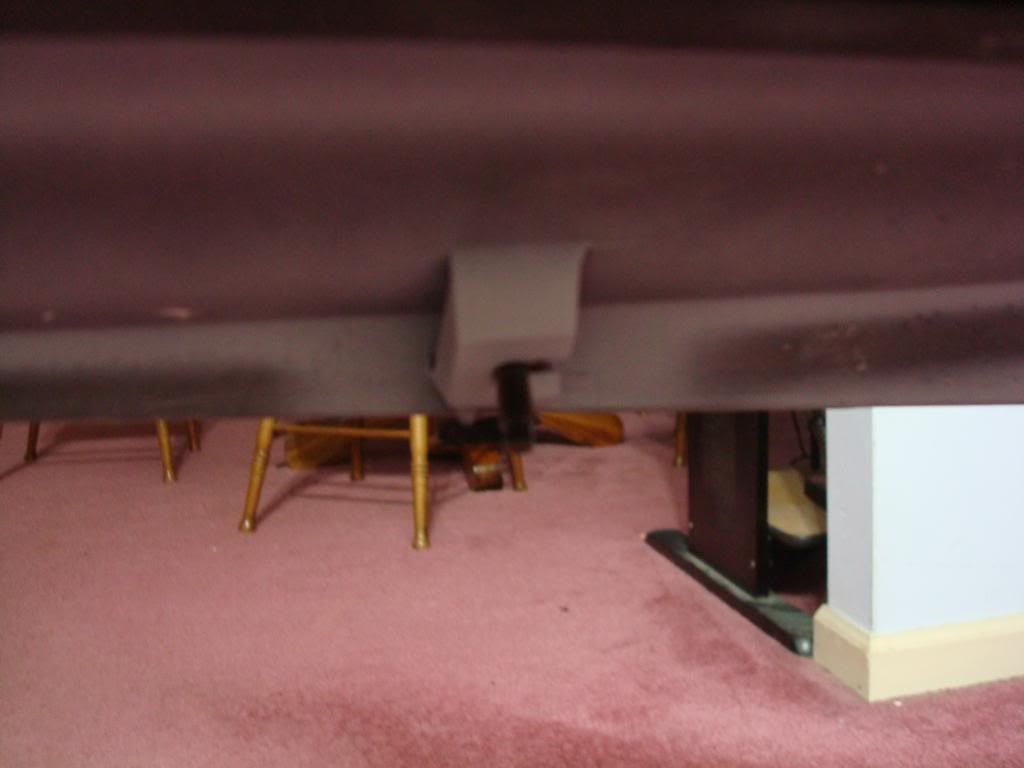
Now the underside. You'll see four black clips. Just remove the 2 that are on the white bumper tabs.
There are 2 10mm screws on each side on the end of the bumper. Remove them with the rachet.

. Hopefully this will be sufficient enough fo you guys to tackle this on your own as it's not all that hard Tools I used:
-Dremel cordless (w/cutting disc and drill bit)
-Painters tape
-Flathead screwdrivers
-Ratchet
-6" ratchet extender
-10mm socket
Take the painters tape and tape right above the bumper line on both sides. This is for when you're removing and reinstalling the tabs of the bumper won't hit and scratch the paint. Easy with another buddy though.
There are 2 little squares on each side of the trunk. Pop them off with the flathead. I used tape on it because I didn't wanna risk anything.
Now the underside. You'll see four black clips. Just remove the 2 that are on the white bumper tabs.
There are 2 10mm screws on each side on the end of the bumper. Remove them with the rachet.
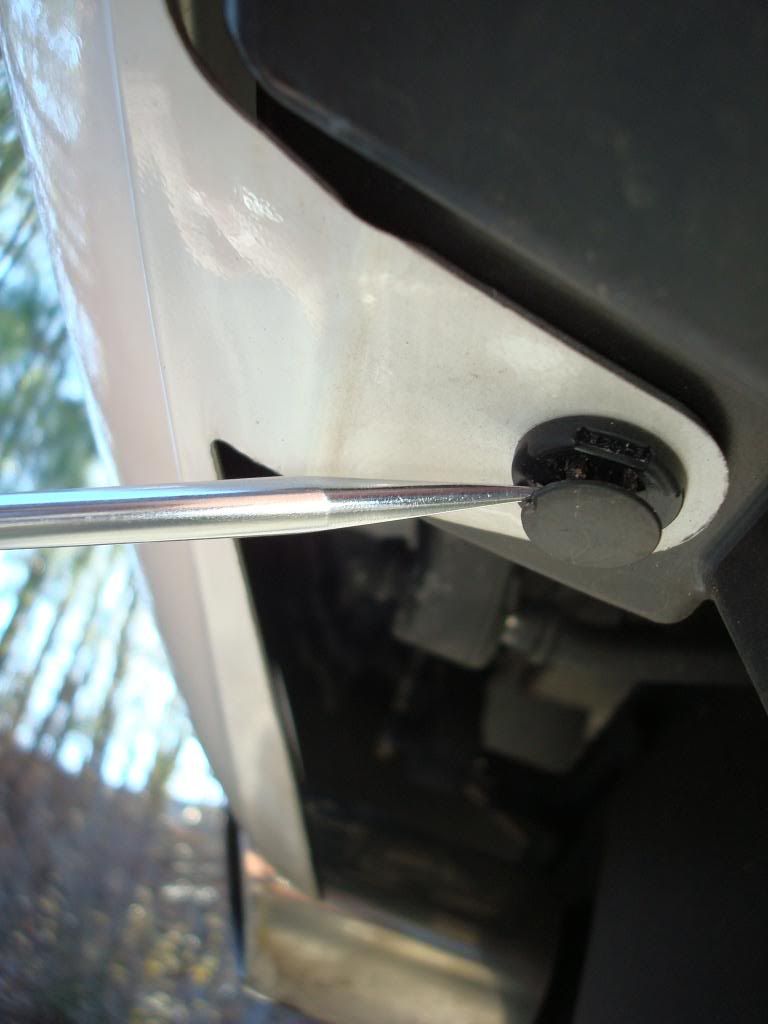
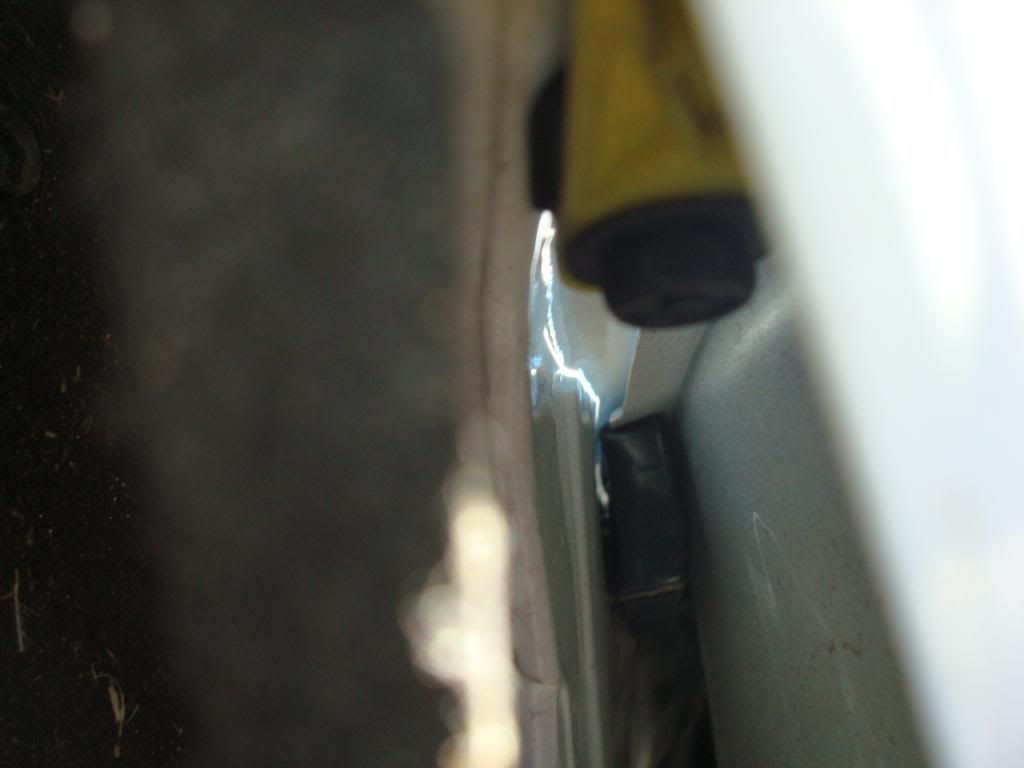
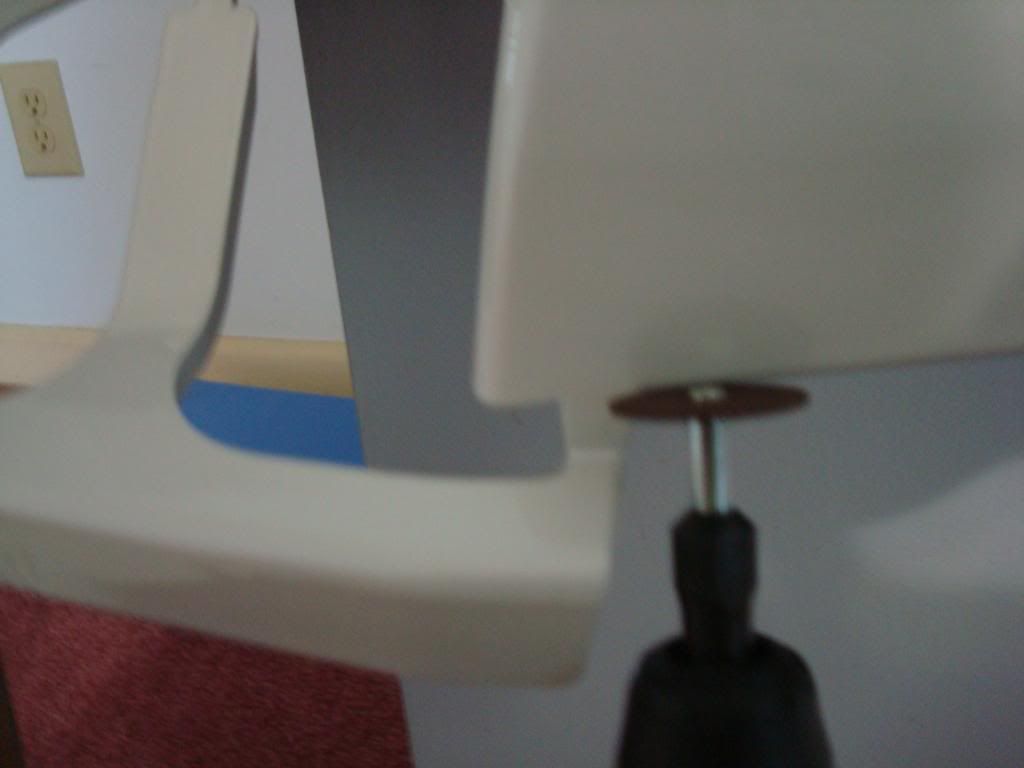
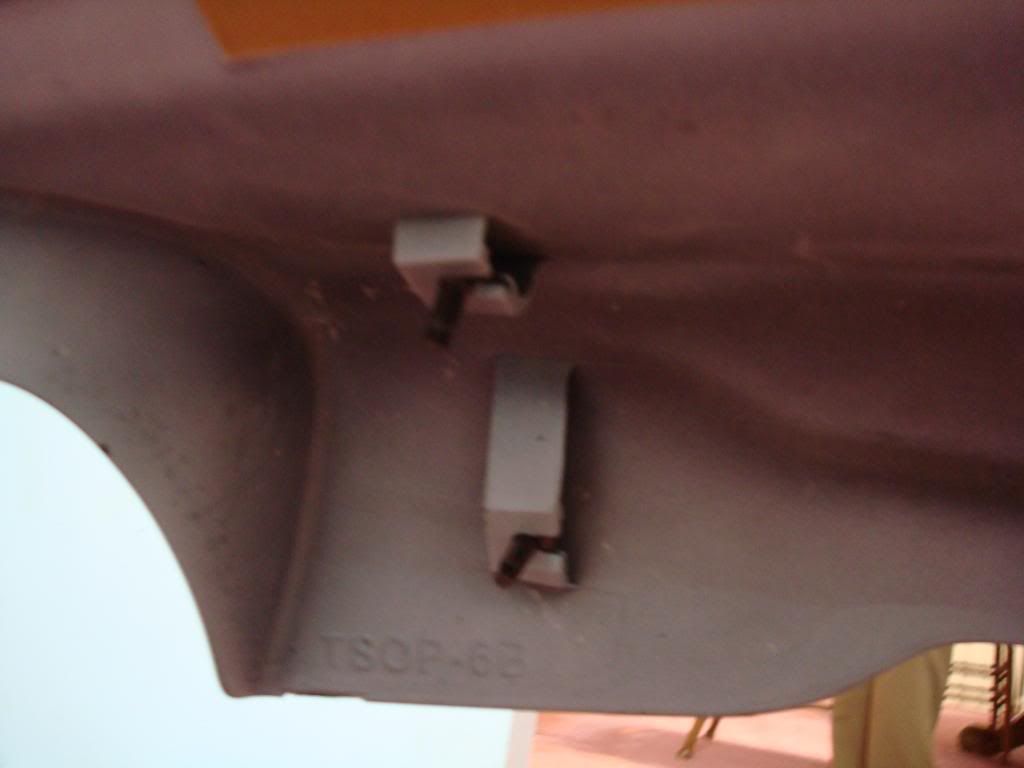
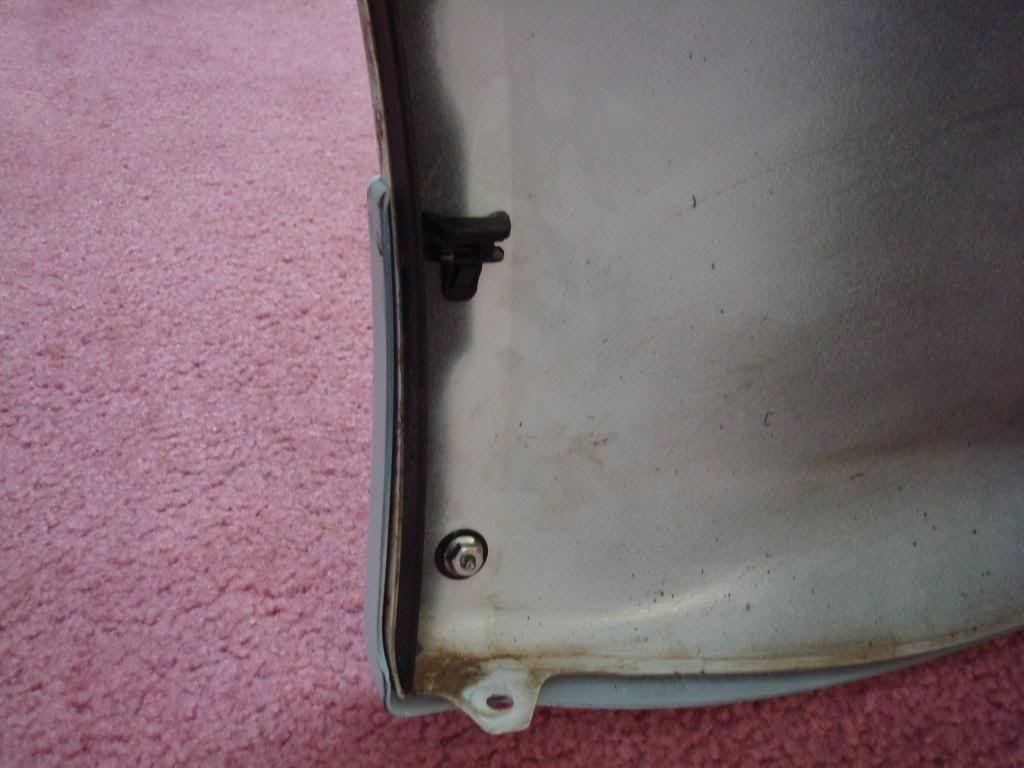
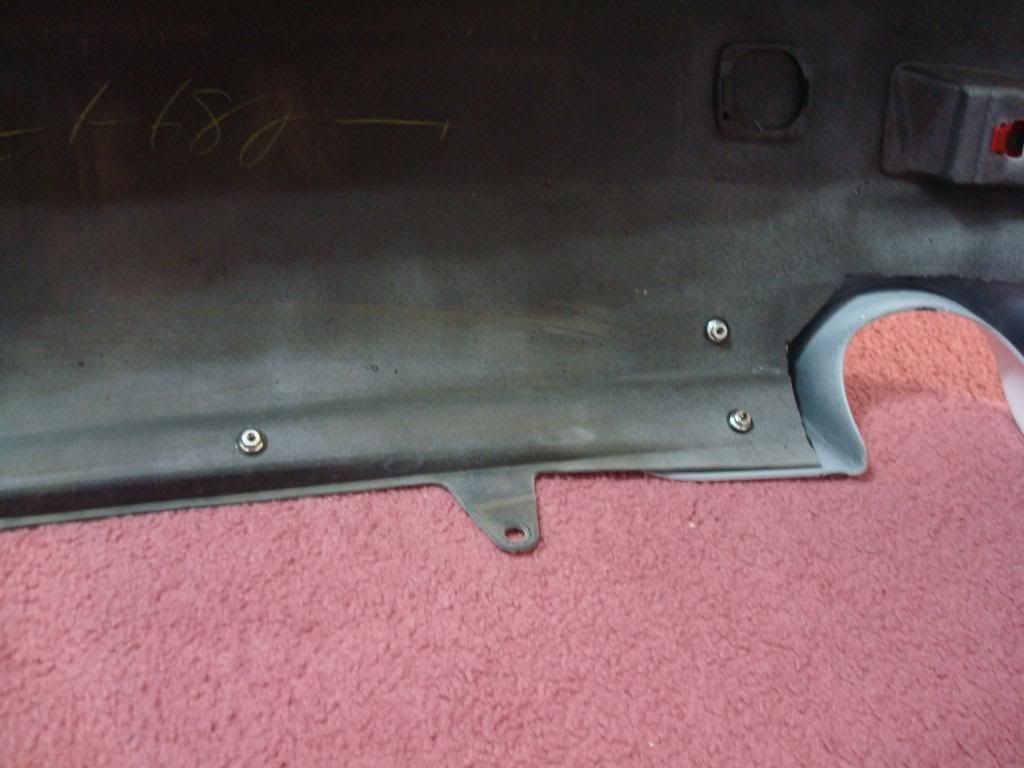
Now what you wanna do is kinda pull back the felt liner on both sides and expose the 10mm screw holding the top ends of the bumper in place. Use the 6" extension to make it easier to get to.
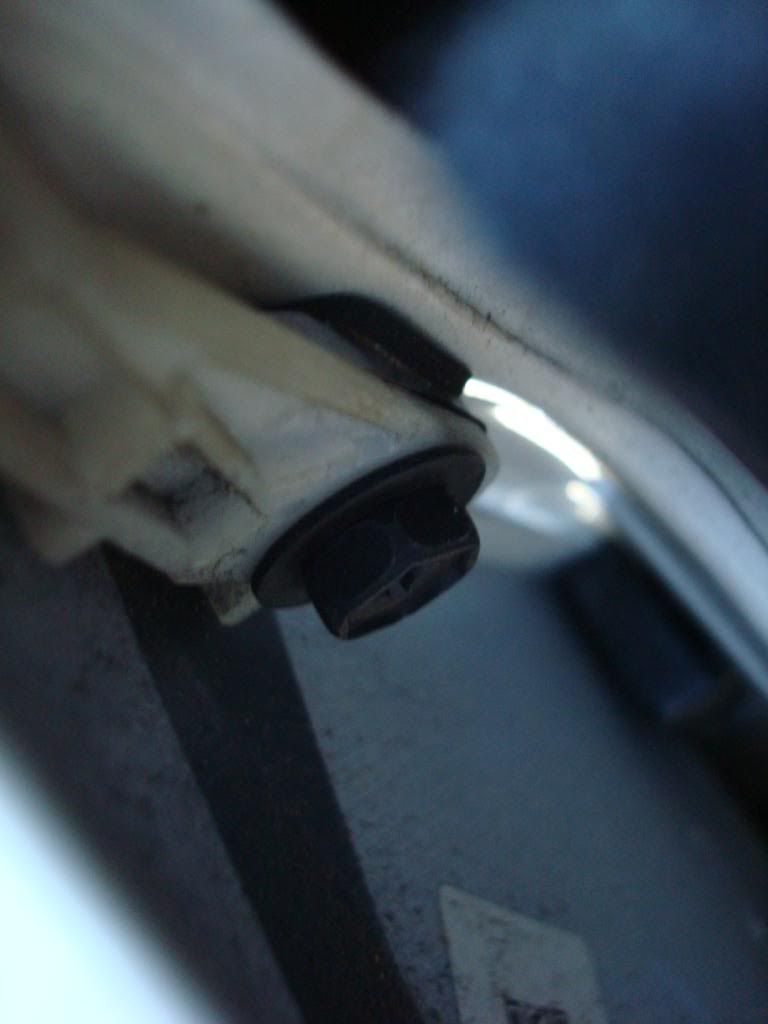
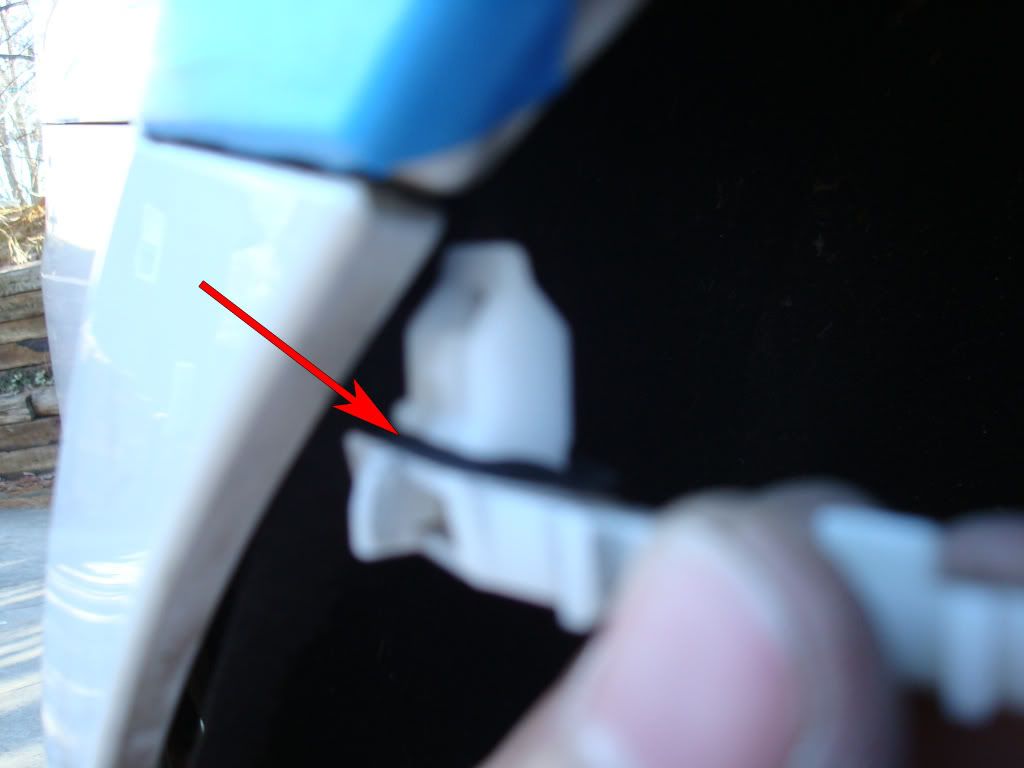
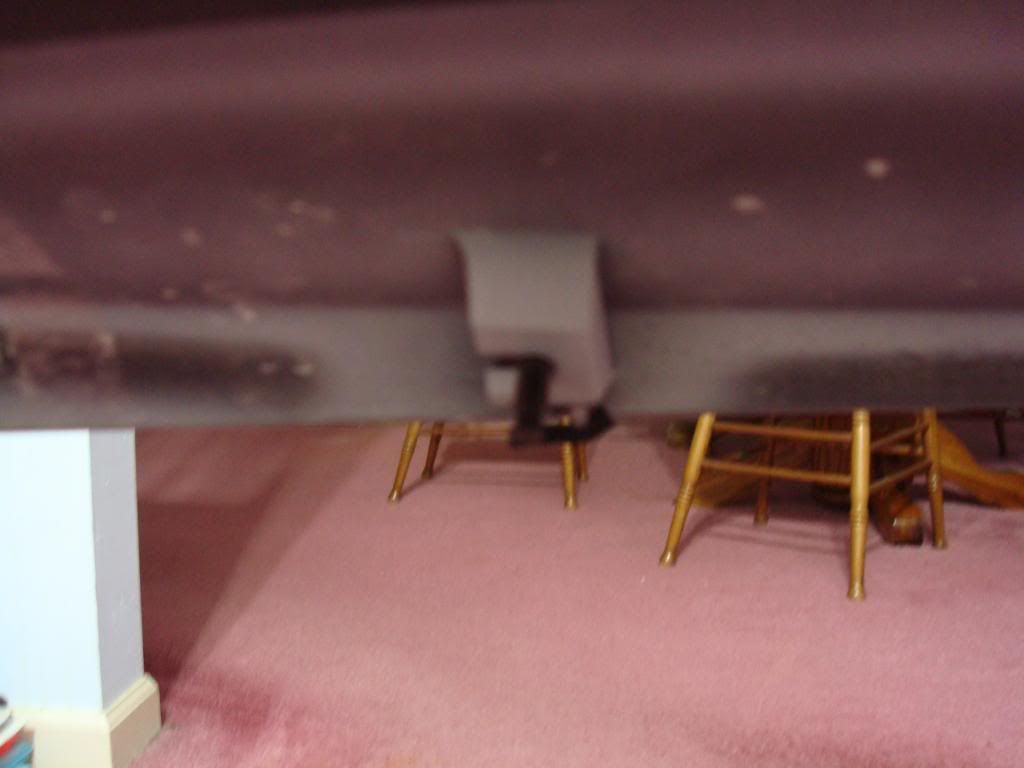
When you get the screw off, you can try to sorta wiggle it around and see if it'll come out. But I used the flathead as a wedge and it came off. When it's still in its place, push the flathead inbetween where I have the red arrow and it should pop out.
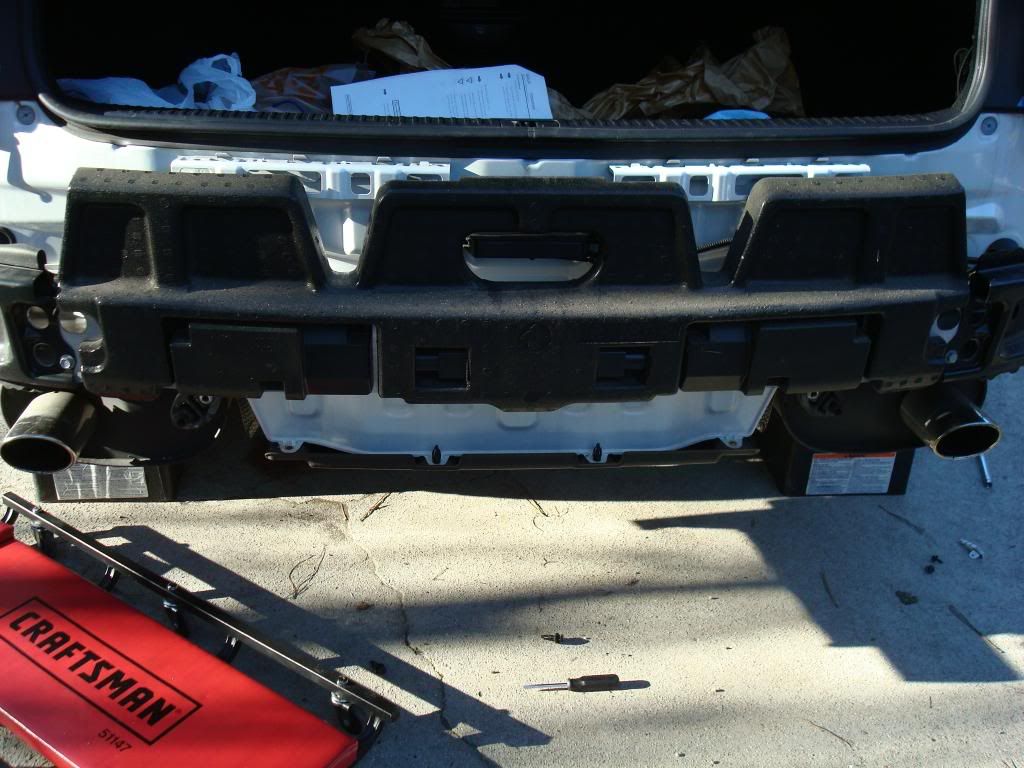
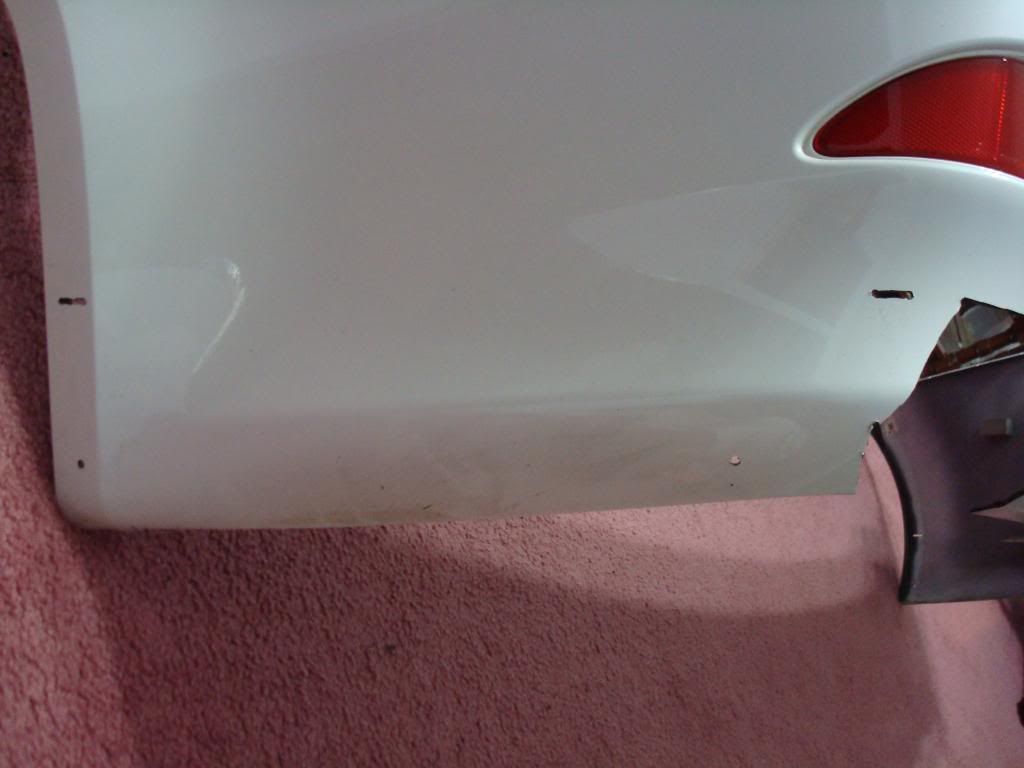
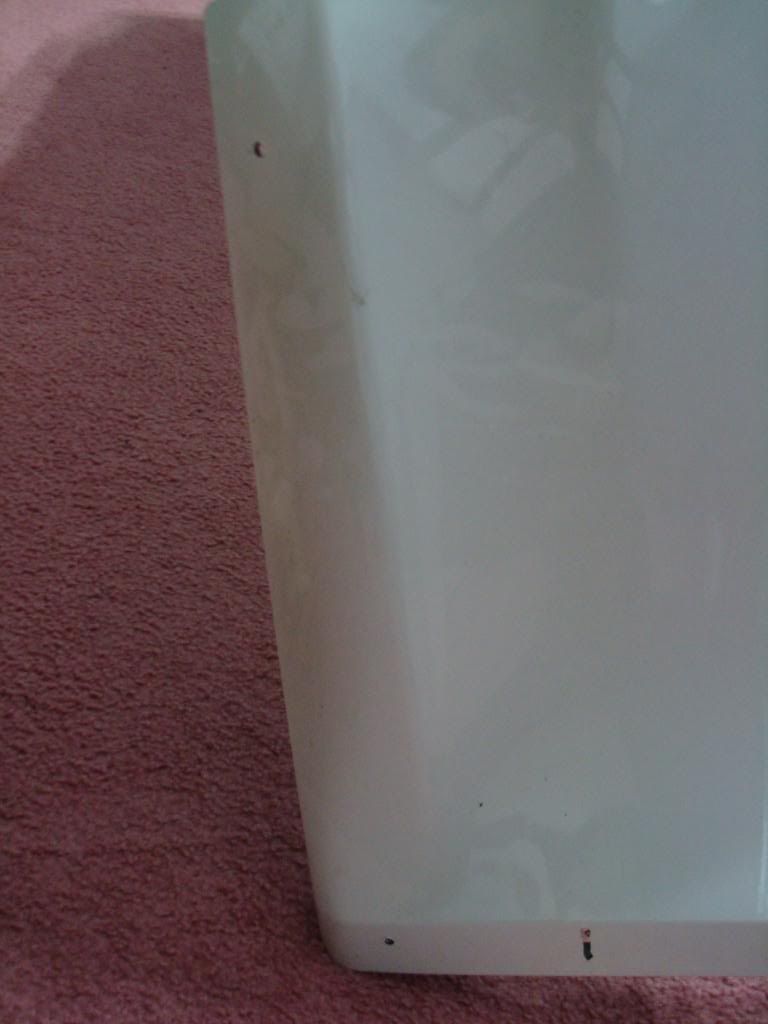
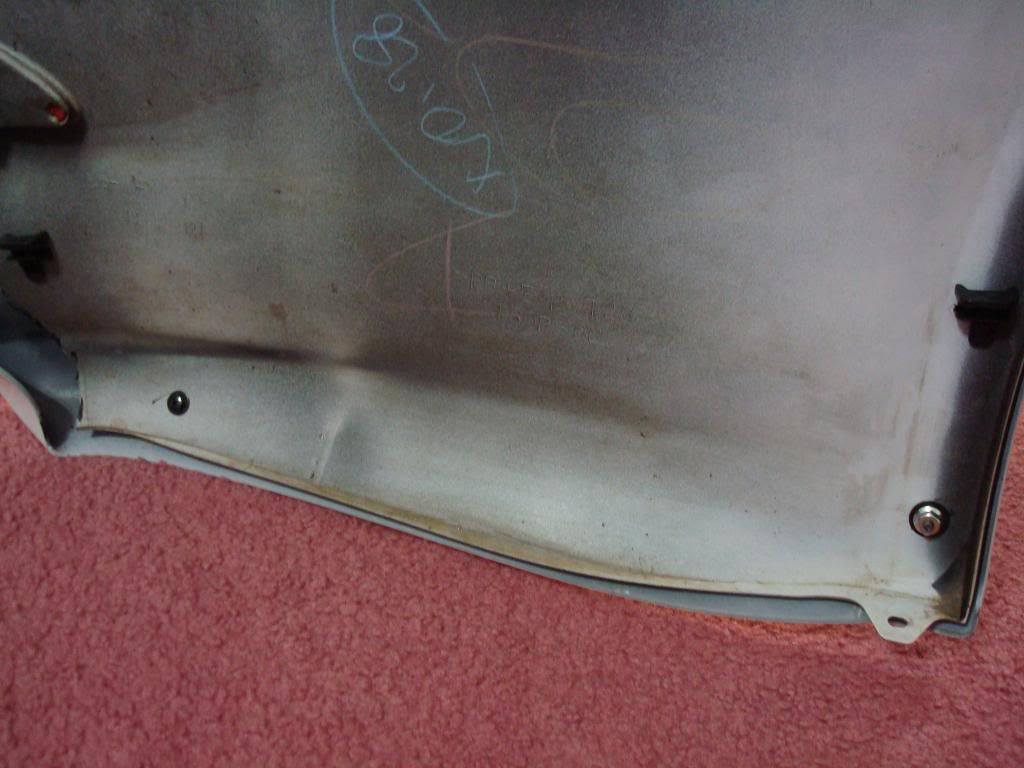
Time to strip it and expose the booty Gently pull the upper bumper ends towards you and work your way to the back. Might be a little tough at first but just take your time and run your fingers along the way and pull.
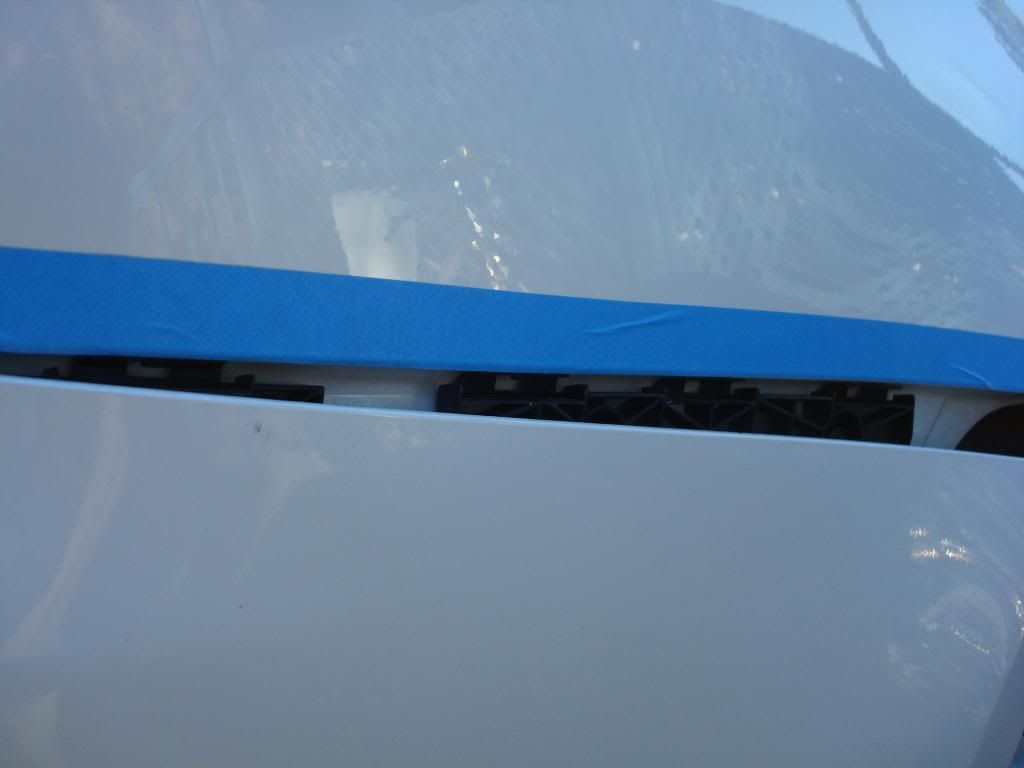
When you get the screw off, you can try to sorta wiggle it around and see if it'll come out. But I used the flathead as a wedge and it came off. When it's still in its place, push the flathead inbetween where I have the red arrow and it should pop out.
Time to strip it and expose the booty
Gently pull the upper bumper ends towards you and work your way to the back. Might be a little tough at first but just take your time and run your fingers along the way and pull.
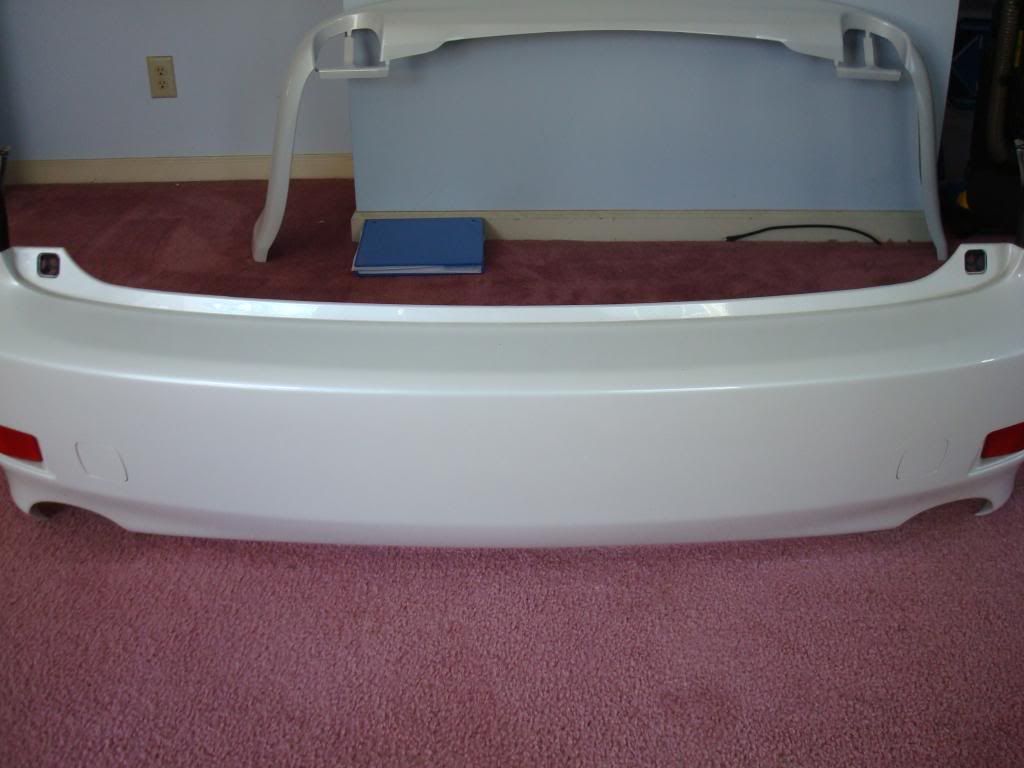
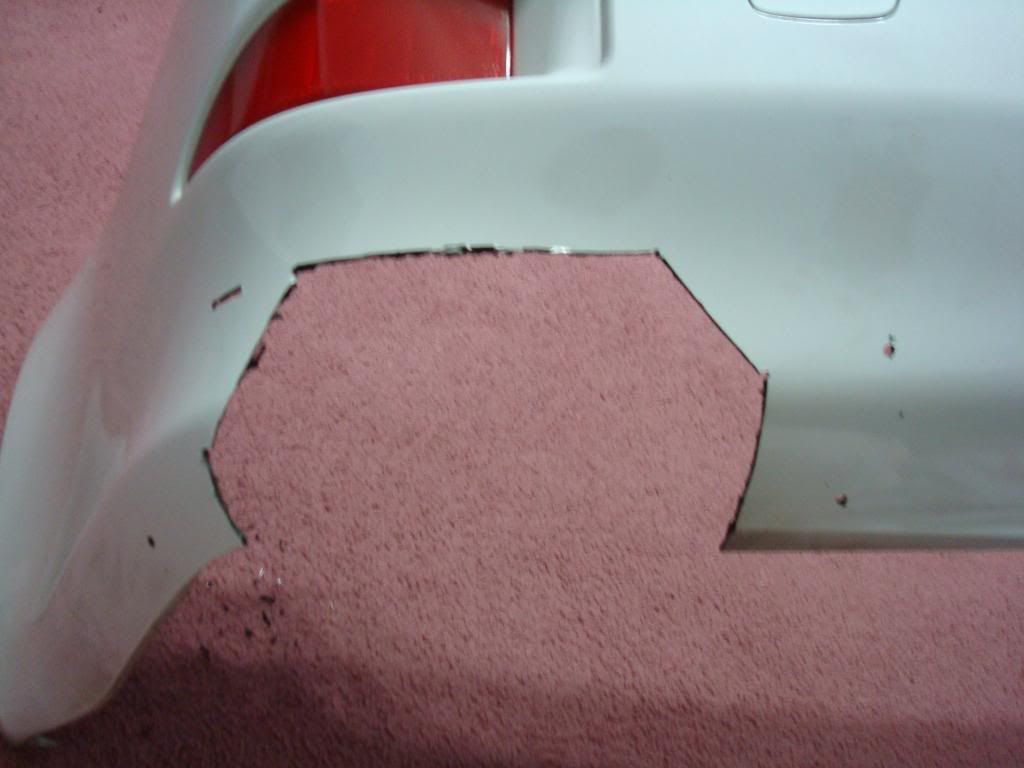
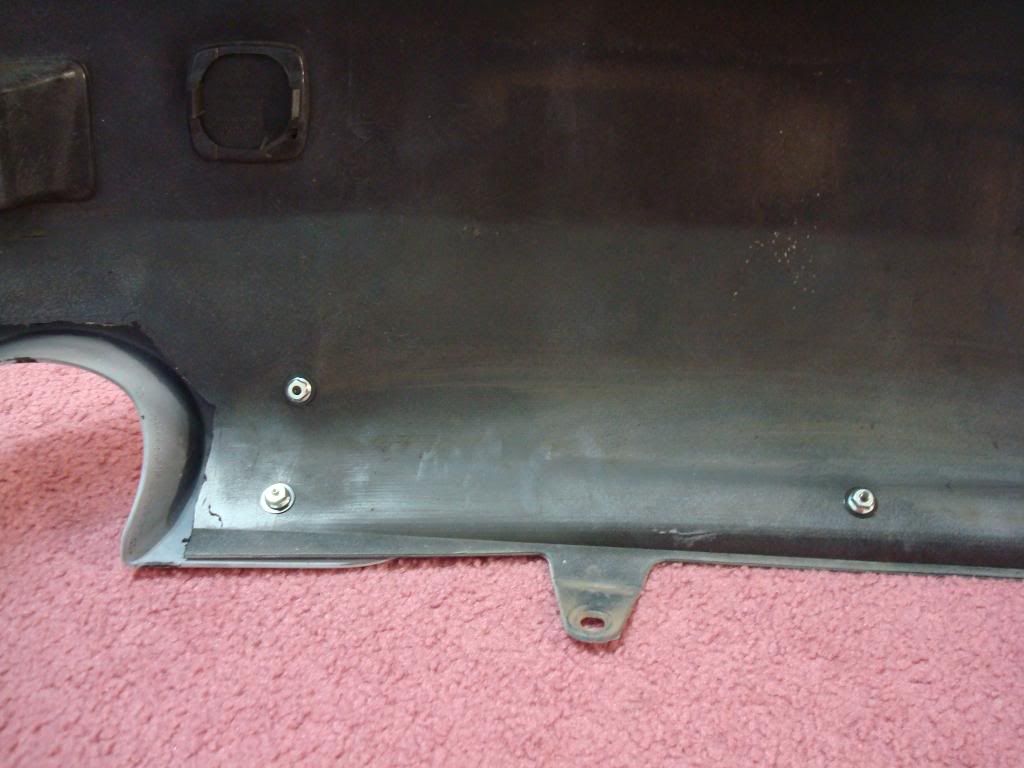
If you haven't already done so, cut the tips support? Not sure what to call it.
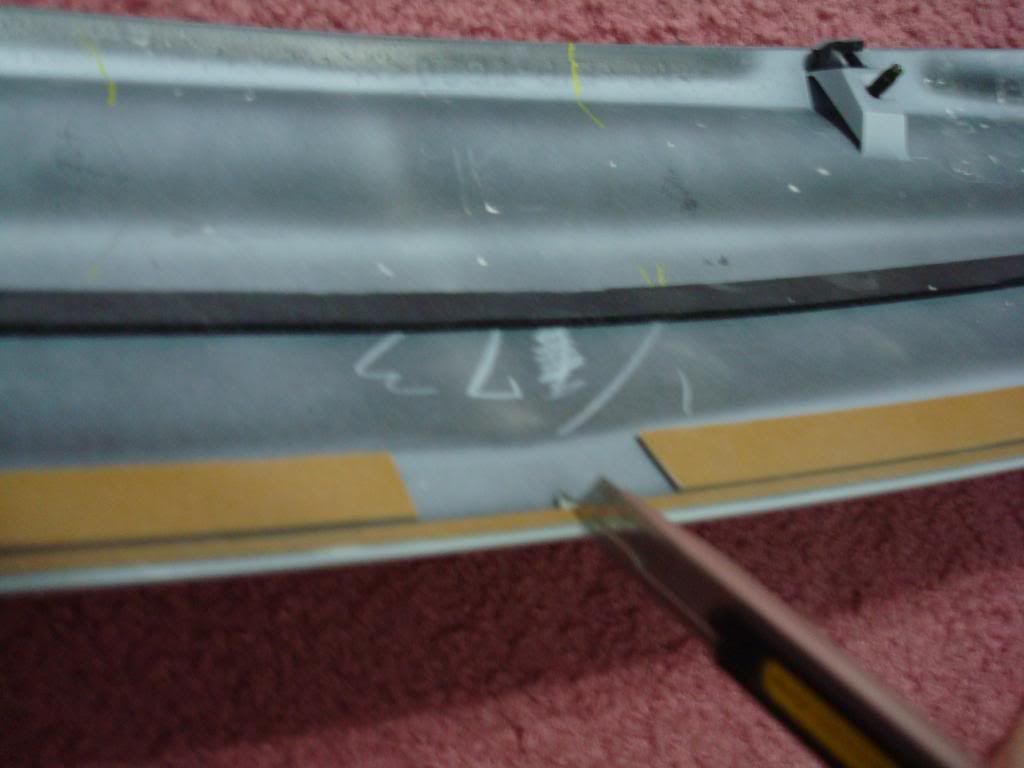
Now to the cutting. Could be intimitating at first but the lip will hide the sloppy cutting so it's all If you have any dirt built up on the back of the bumper, wipe it down with wet paper towel. There are markings in the back on where to drill and cut. The part for the exhaust cut out I cut inbetween the lines, you'll know what I'm talking about.
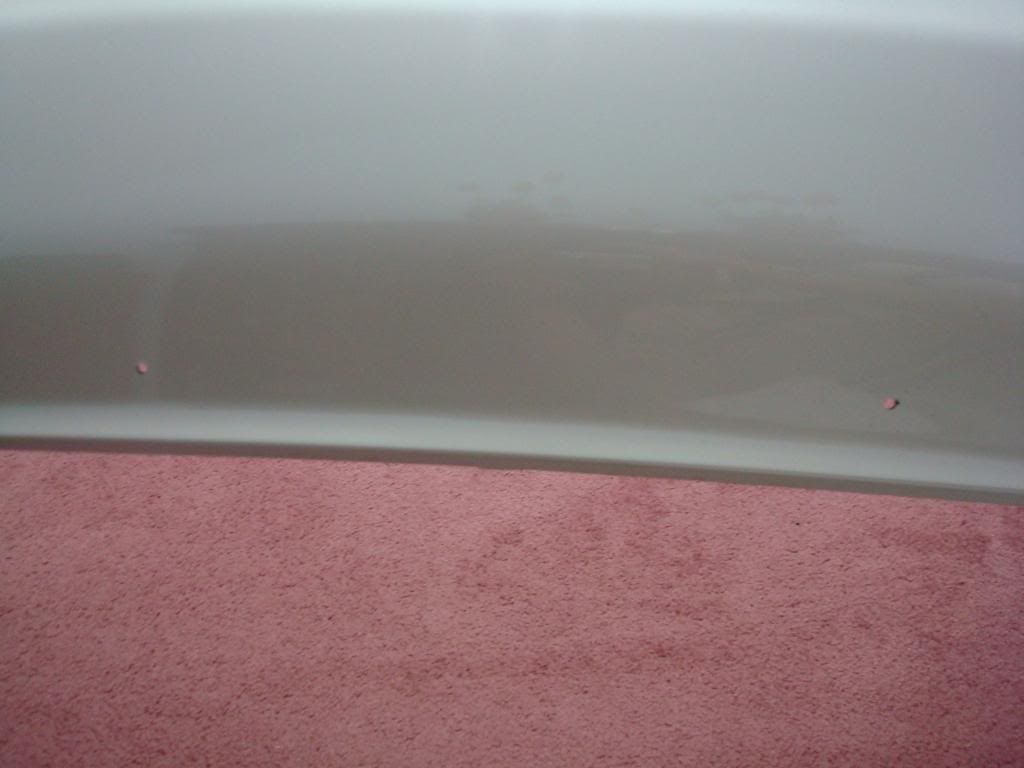
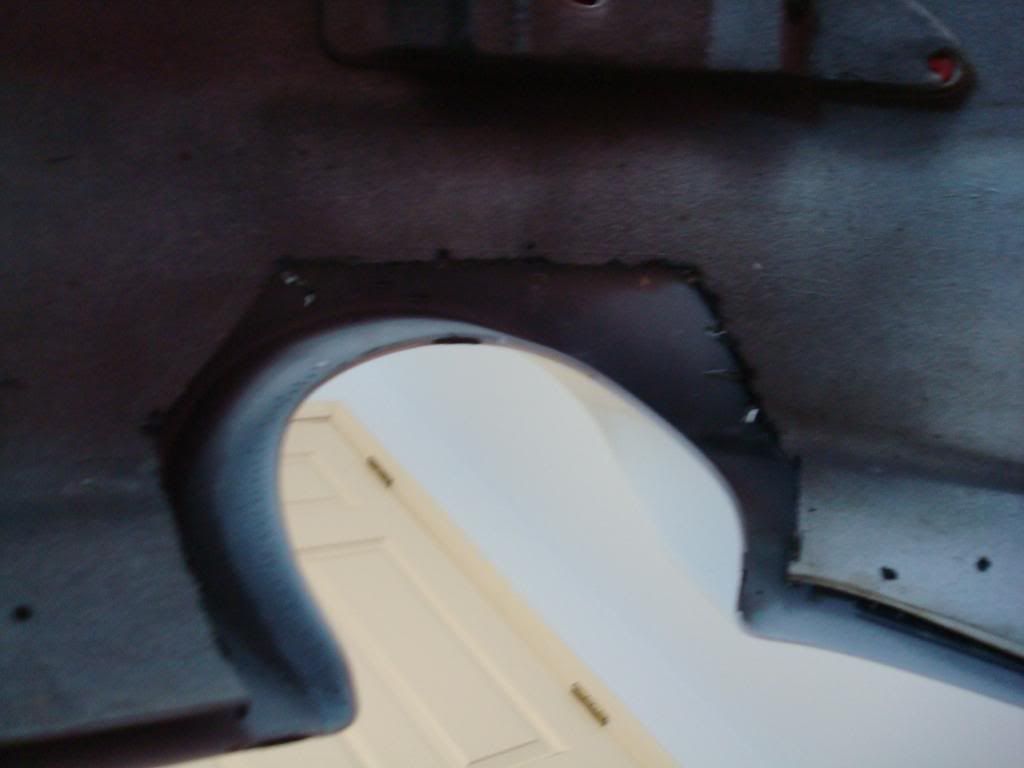
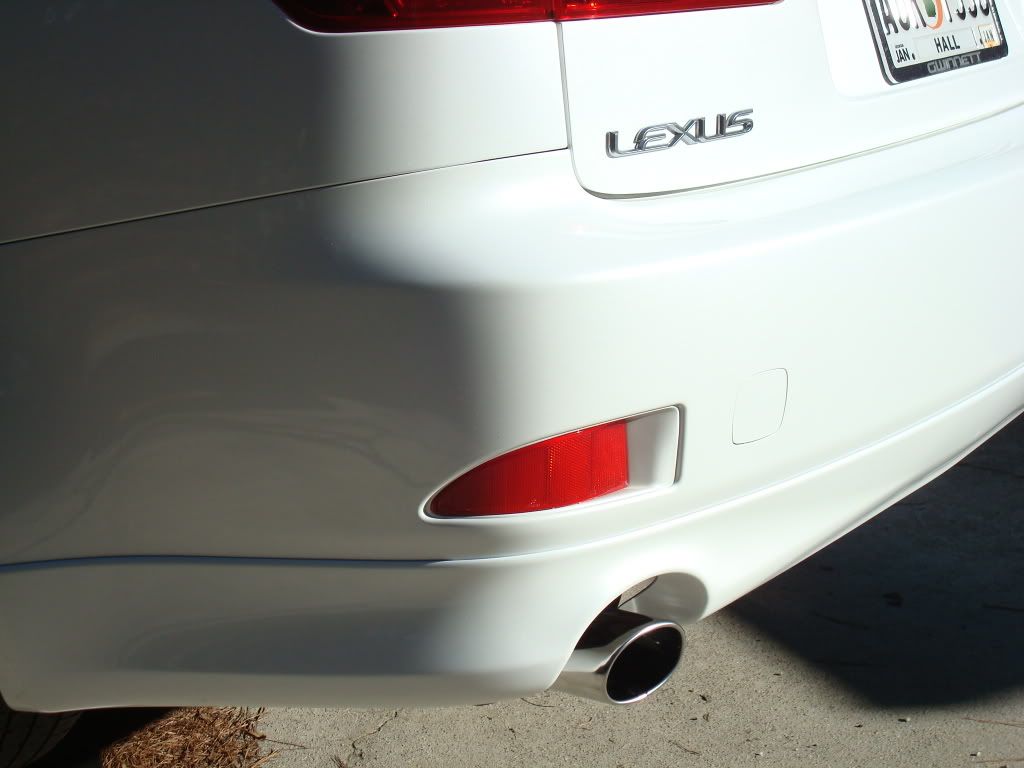
Quick test fit before everything is secured
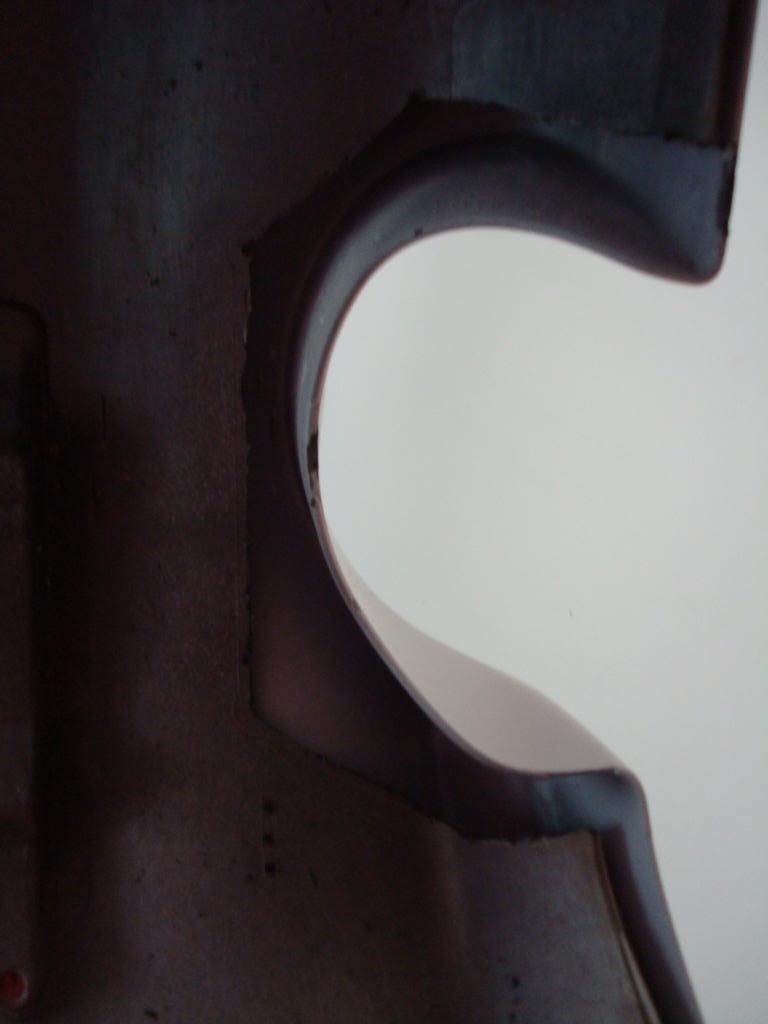
Now to the cutting. Could be intimitating at first but the lip will hide the sloppy cutting so it's all
If you have any dirt built up on the back of the bumper, wipe it down with wet paper towel. There are markings in the back on where to drill and cut. The part for the exhaust cut out I cut inbetween the lines, you'll know what I'm talking about.Quick test fit before everything is secured
Put the 2 speed nuts in place on each side. Remember to have the curled part to the inside.
Now put the squares screws into its place.

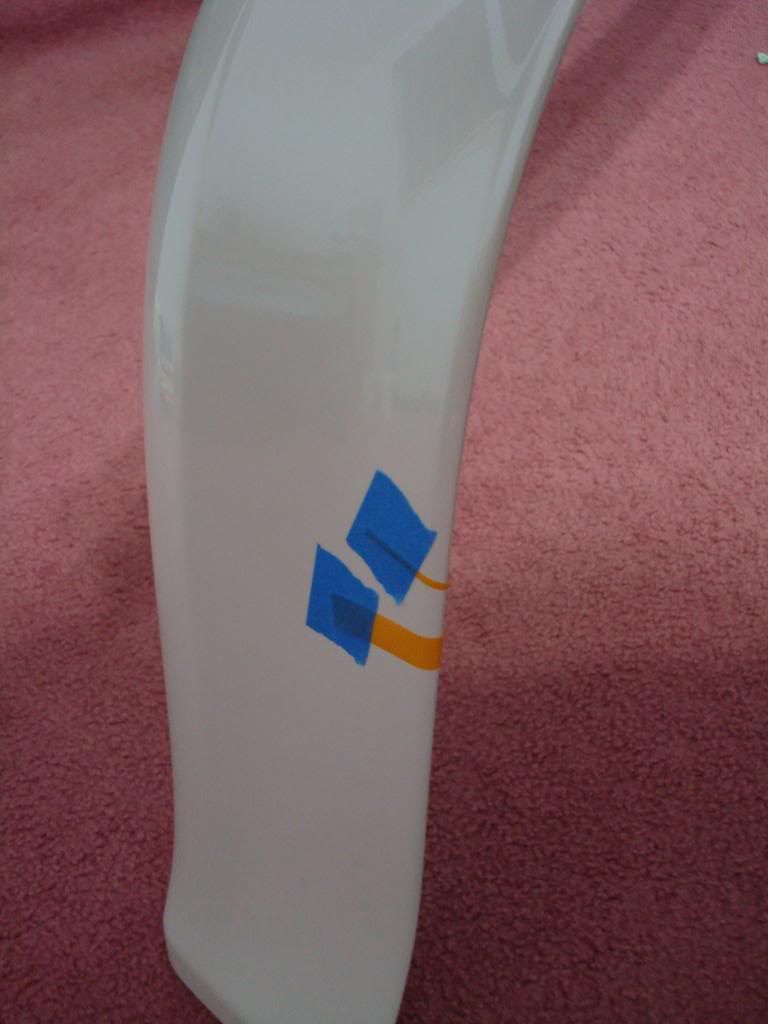
Use some wax and degreaser to clean the area where the tape will be sticking. I used alcohol wipes and a tack cloth. Cut the small top strip of tape so that you'll have four sections. Use the painters tape and tape back the lip's tape.


Now put the squares screws into its place.
Use some wax and degreaser to clean the area where the tape will be sticking. I used alcohol wipes and a tack cloth. Cut the small top strip of tape so that you'll have four sections. Use the painters tape and tape back the lip's tape.
While peeling back the lip tape, firmly press the lip to the bumper as you peel. Then check for minimal to no gap.

Now that the tape is somewhat holding the lip in its place, use the washers and nuts to secure (don't over tighten, til it stops and another quarter turn or so). The 2 leftover screws are for the 2 self tapping spot near the exhaust cutout.
Now that the tape is somewhat holding the lip in its place, use the washers and nuts to secure (don't over tighten, til it stops and another quarter turn or so). The 2 leftover screws are for the 2 self tapping spot near the exhaust cutout.
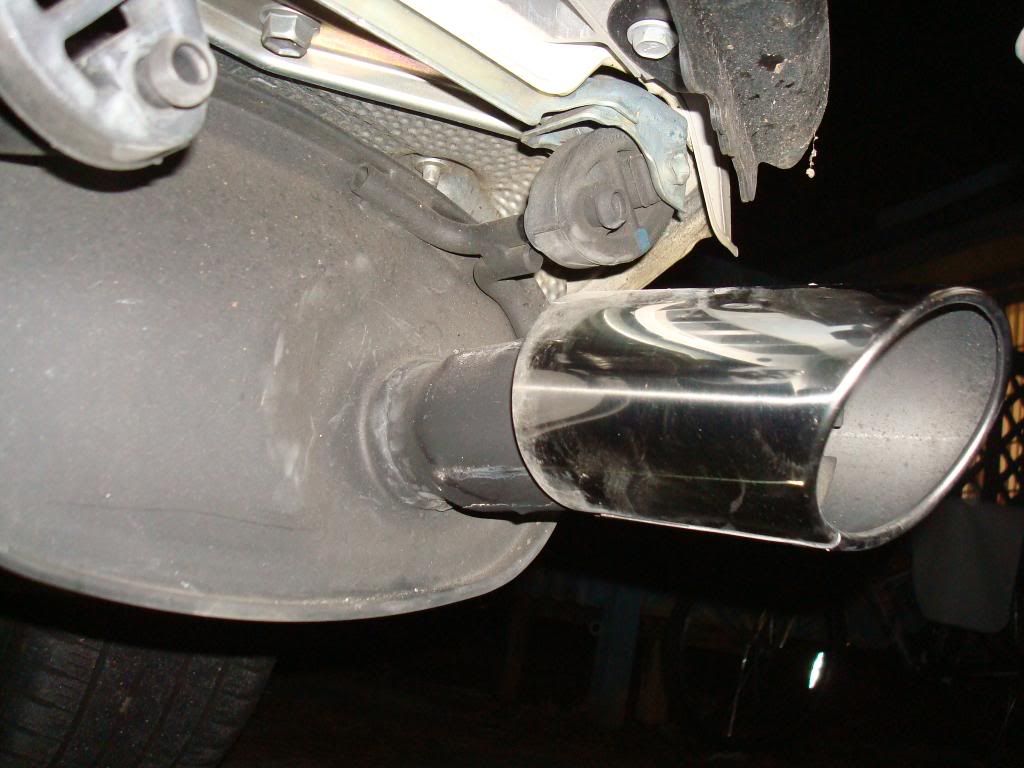
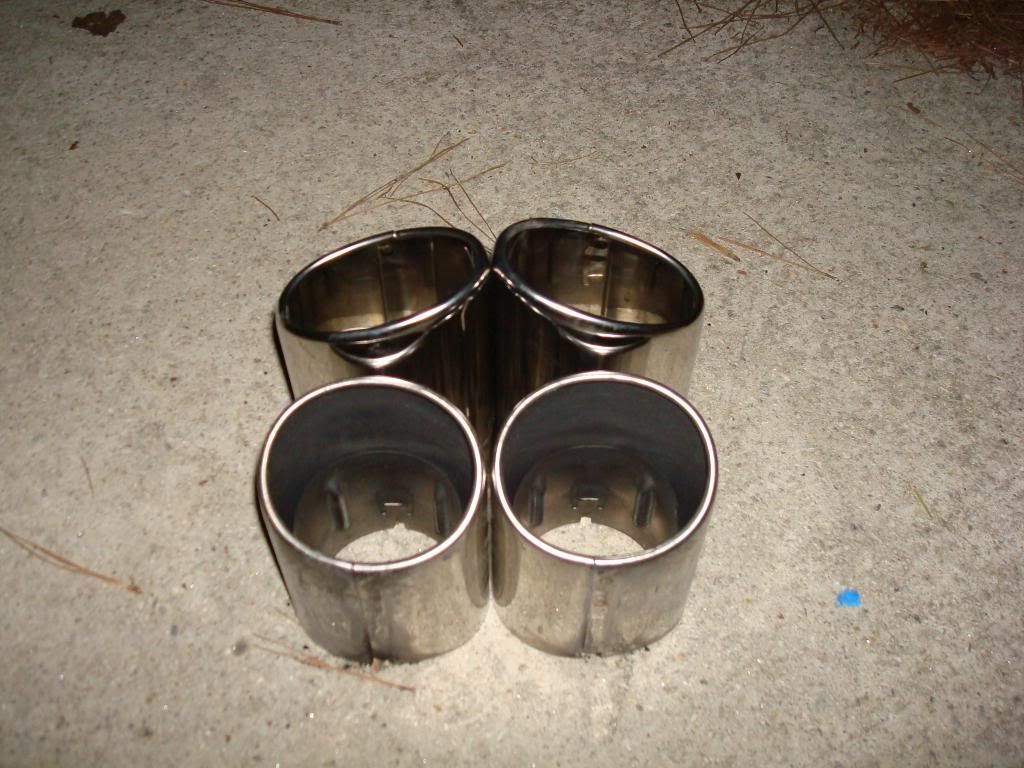
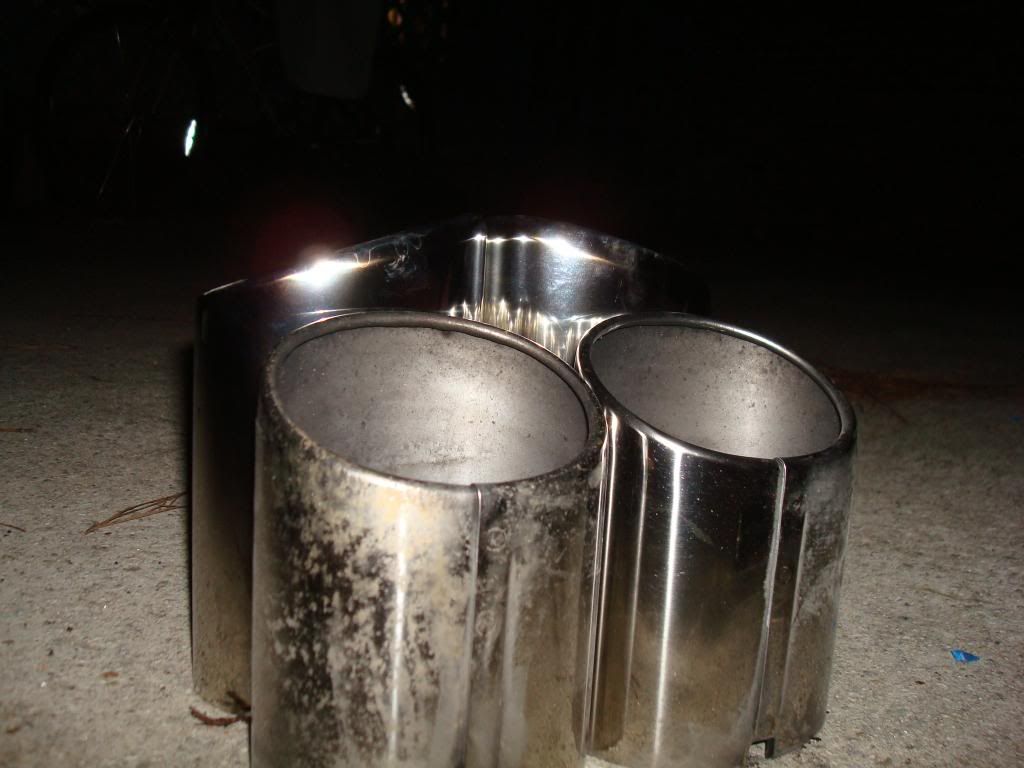
Gotta remove the old exhaust tips. Mine were a pain to get off. You'll have to wiggle the tip side to side, up and down and twist. Once it's off, tap the new one in. In the instructions it said from the muffler can and the end of the tip it's about 14mm. To me I have it sticking out a tiny bit more than that though. Really up to you how far in you want it.
Now everything is snugged and secure, time to put it back on. Everything is reverse as you taken it off. It's a lot easier putting it on then taking it off, it just slides and pops into place. I would put where the 2 screws in the little squares first after you have the bumper in place.
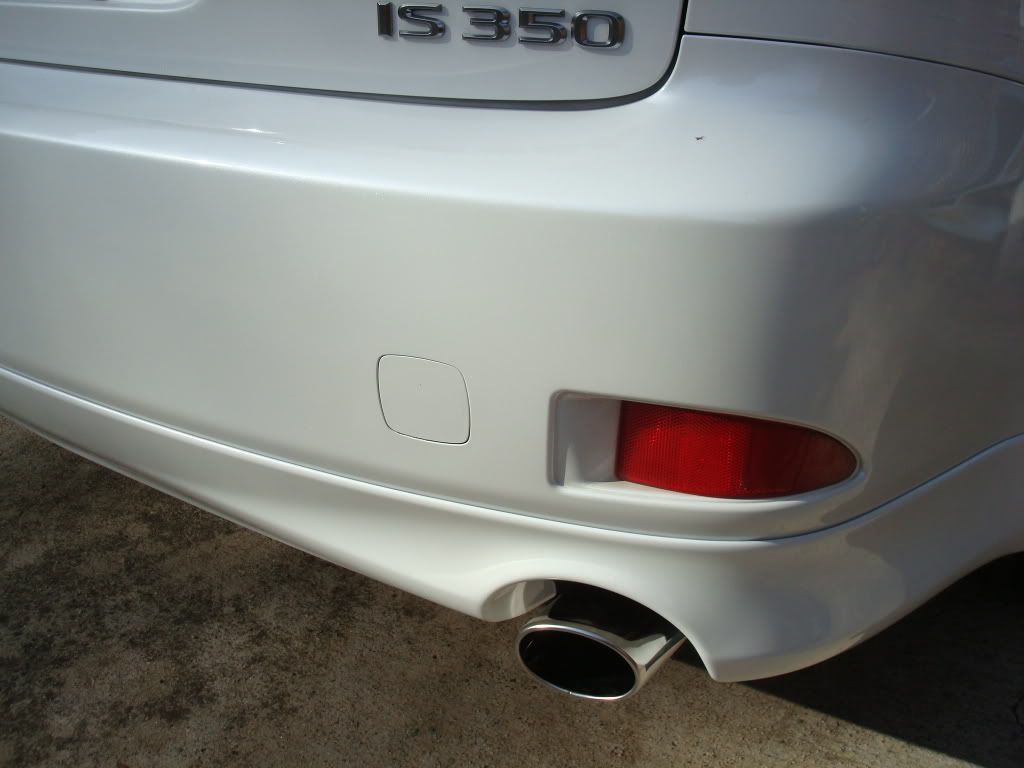

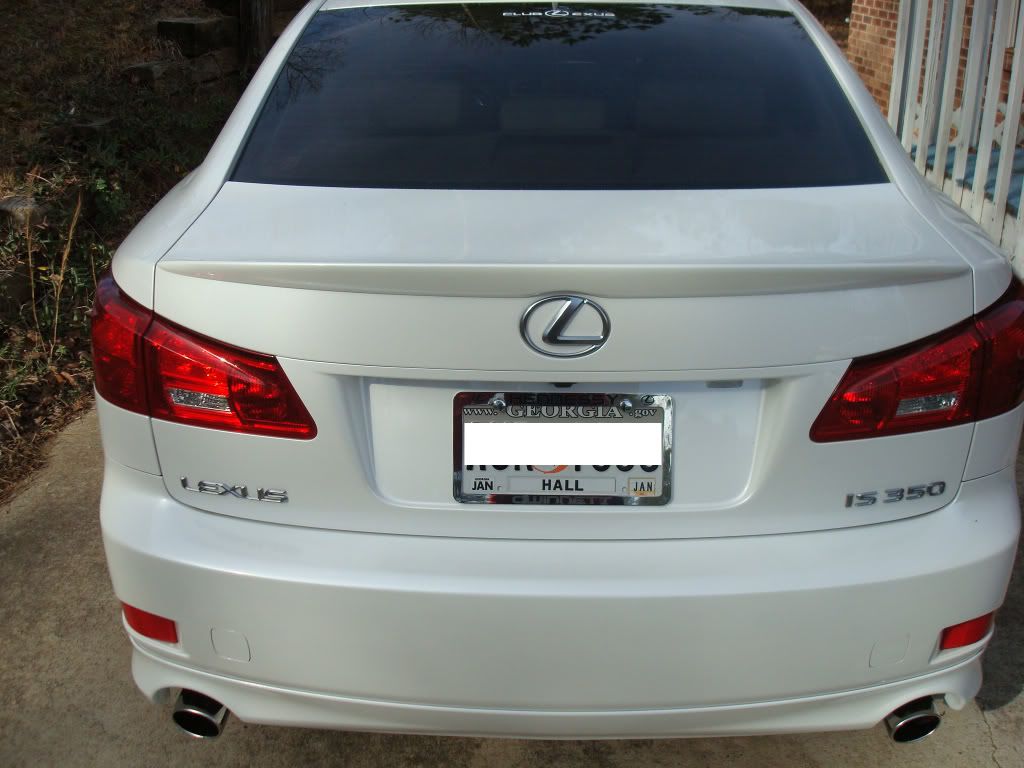
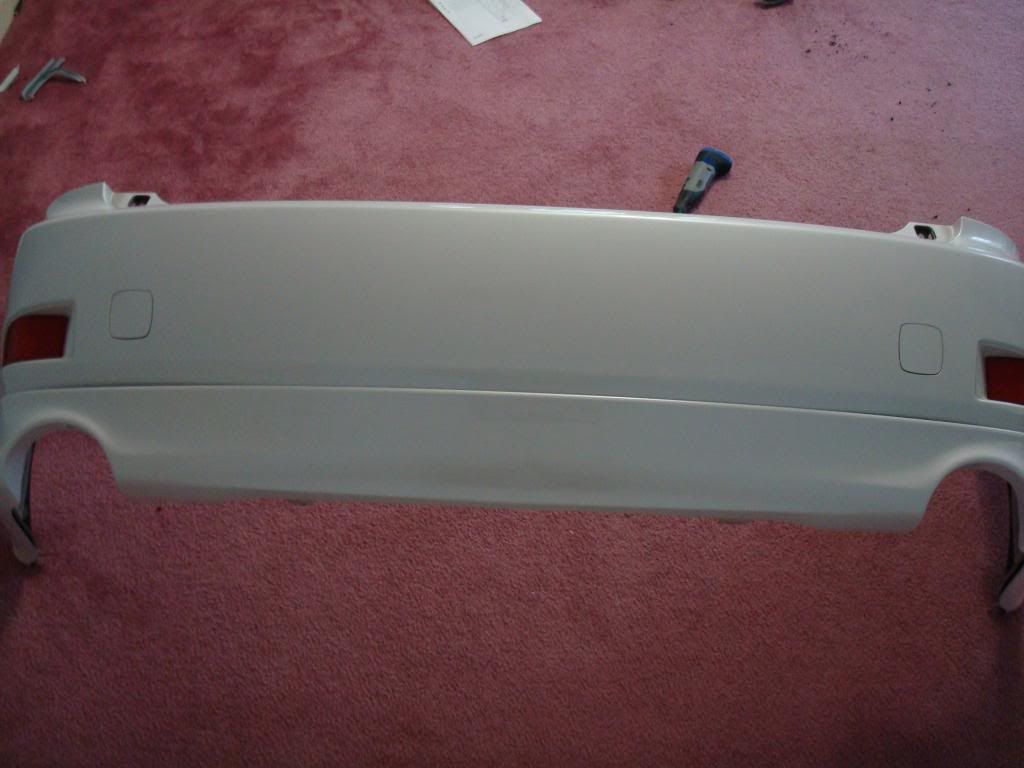
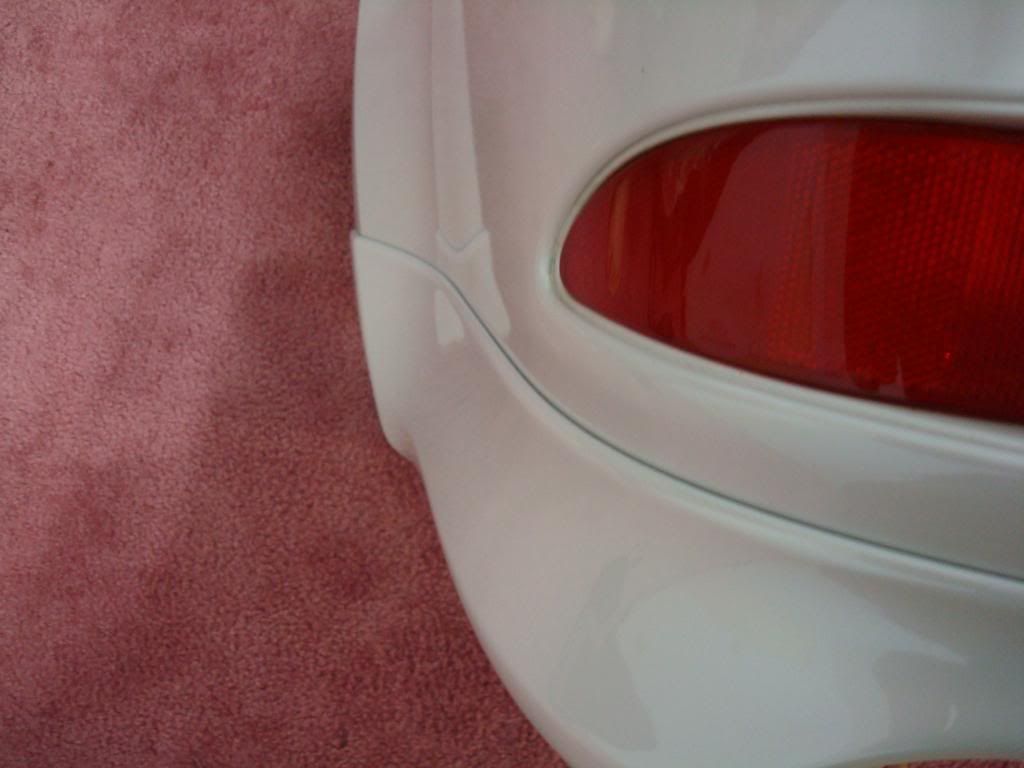
Finally, just stand back and admire Hope this was useful to anyone kinda on the fence bout doing it.
Now everything is snugged and secure, time to put it back on. Everything is reverse as you taken it off. It's a lot easier putting it on then taking it off, it just slides and pops into place. I would put where the 2 screws in the little squares first after you have the bumper in place.
Finally, just stand back and admire
Hope this was useful to anyone kinda on the fence bout doing it.
Trending Topics
ClubLexus Stories
Celebrating Lexus & Toyota from Around the Globe

Lexus NX 350h: A Fuel-Sipping Secret Hot Hatch???
Michael S. Palmer
5 Best & 5 Worst Lexus Daily Drivers
Joe Kucinski
Top 5 Hottest Lexus & Toyotas in 2026 (Hardest To Buy)
Brett Foote
2026 Lexus IS 350 F Sport Review: The Last of Its Kind Still Rocks
Michael S. Palmer
Top 10 Most Confusing Things Lexus Has Ever Done!
Joe Kucinski
2026 Lexus ES Review: Lexus Re-Embraces Founding Principles
Michael S. Palmer
10 Lexus Bargains That are Cheaper Than a New Toyota RAV4
Joe Kucinski
8 Weirdest Things Lexus Has Ever Built
Verdad Gallardo
10 Lexus Designs That Have Aged Like Fine Wine
Verdad GallardoYeah it took about 3 hours from start to finish. 30 mins of it was me thinking about drilling the first hole lol.
Thanks for the GREAT writeup. I'm doing this in the near future! I am still debating if I should cut or if I should just let the double sided tape hold most of it up. A ton of people say you don't need to cut and it's fine, but I am learning towards the cutting approach...
Thanks for the GREAT writeup. I'm doing this in the near future! I am still debating if I should cut or if I should just let the double sided tape hold most of it up. A ton of people say you don't need to cut and it's fine, but I am learning towards the cutting approach...