
DIY: Removing the dash, center console, and painting them *tons of pics*


Thread Starter
Pole Position
Joined: Jun 2008
Posts: 315
Likes: 1
From: Moorpark, CA
Preparation.
Here is what I used:
Paint thinner

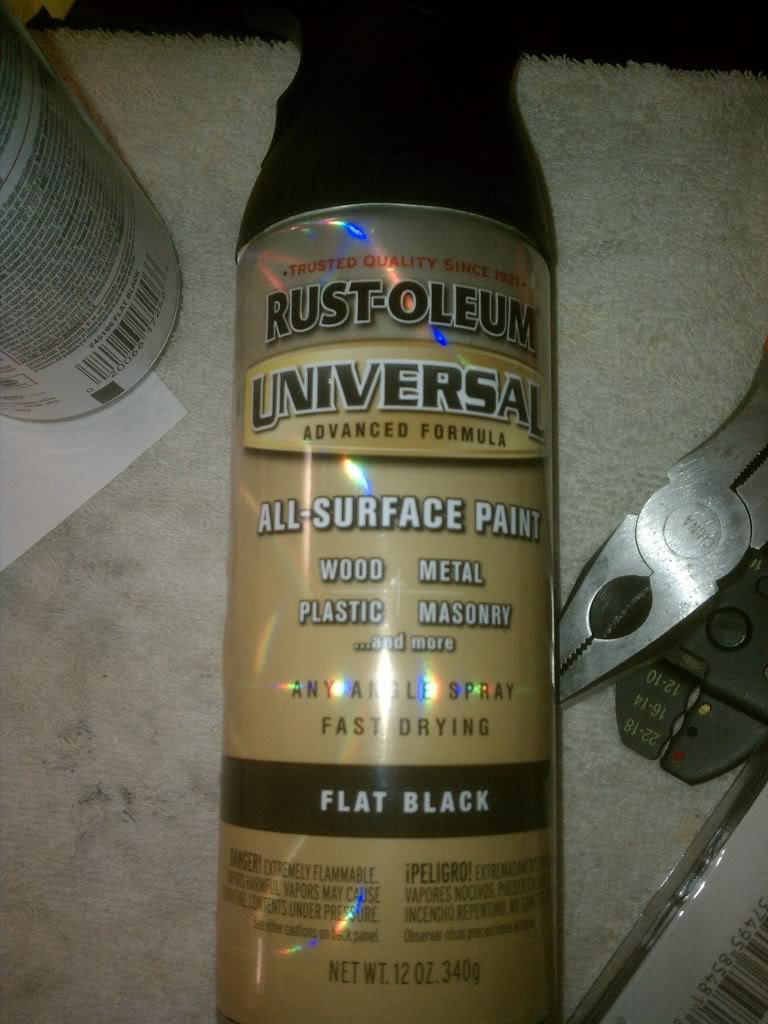
2-3 cans of flat black paint (must be able to bond to PLASTIC)
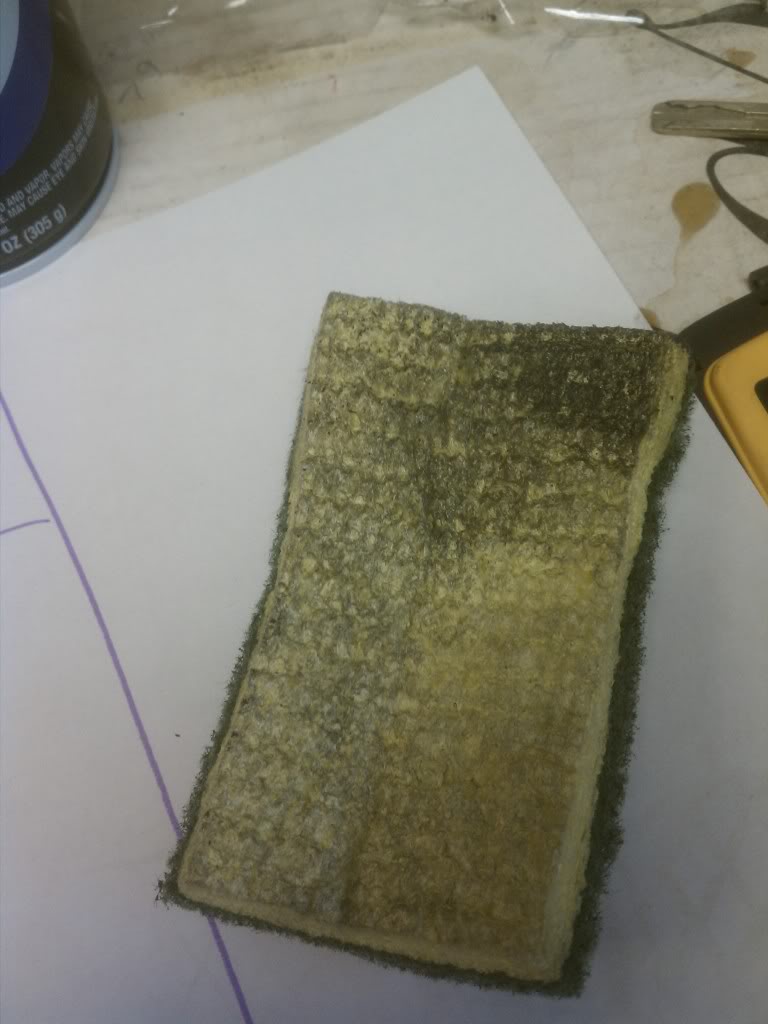
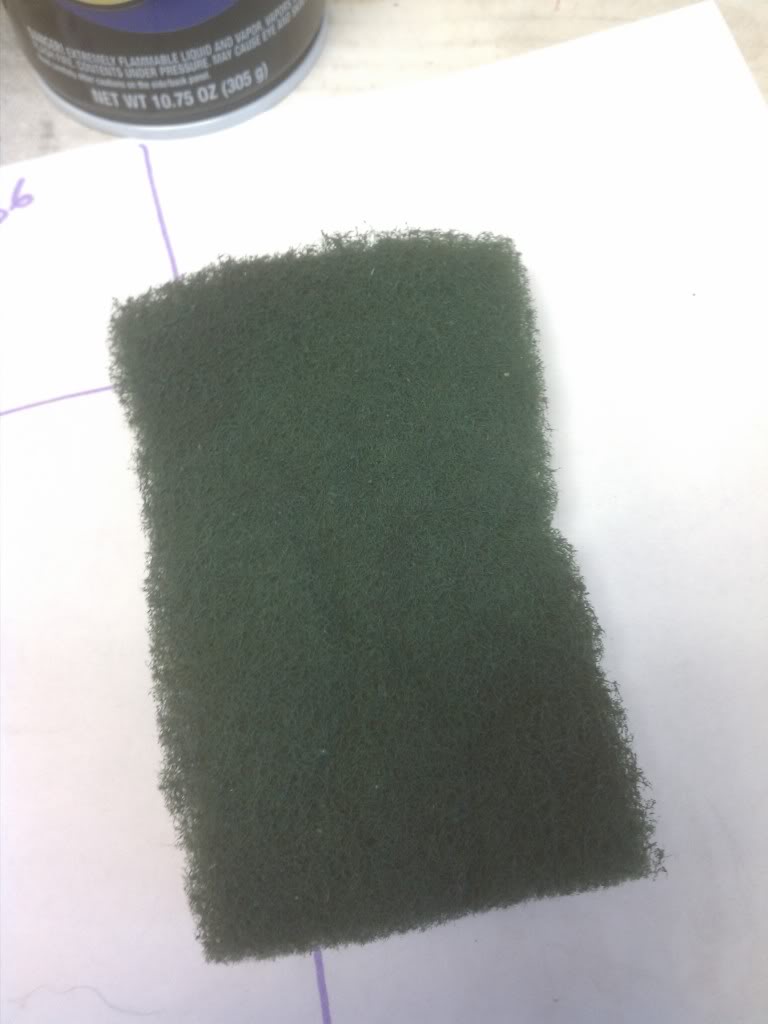
Sponge (2 sided)
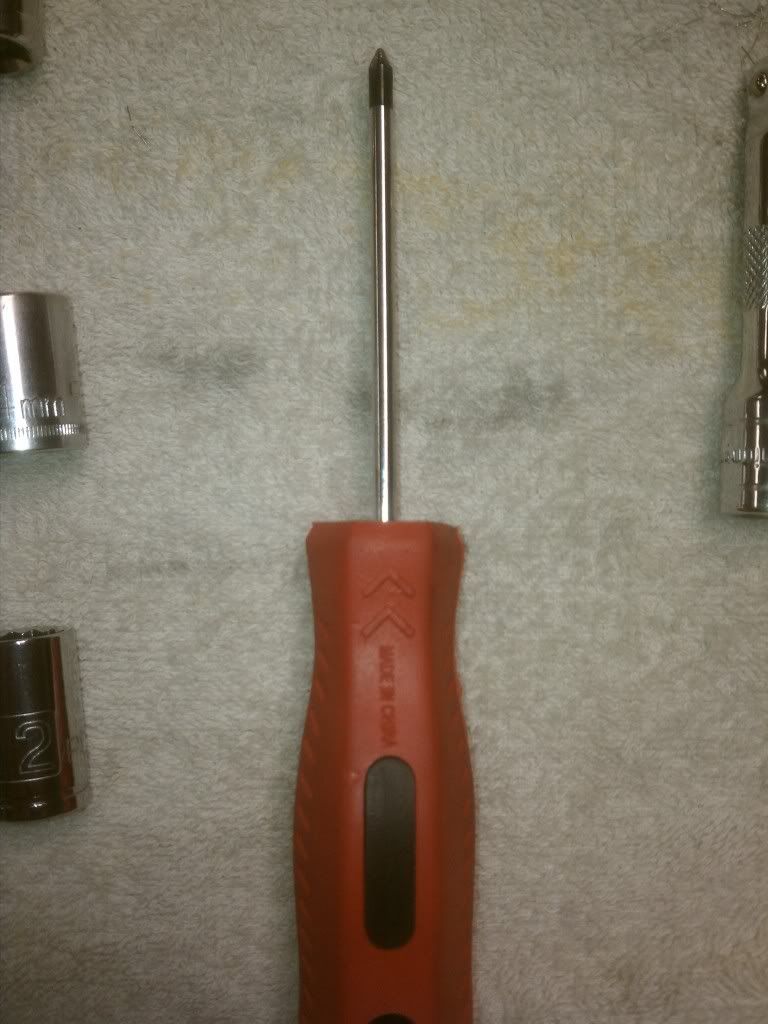
Philip head screw driver
Ratchet (I used 3/8 drive) and extensions
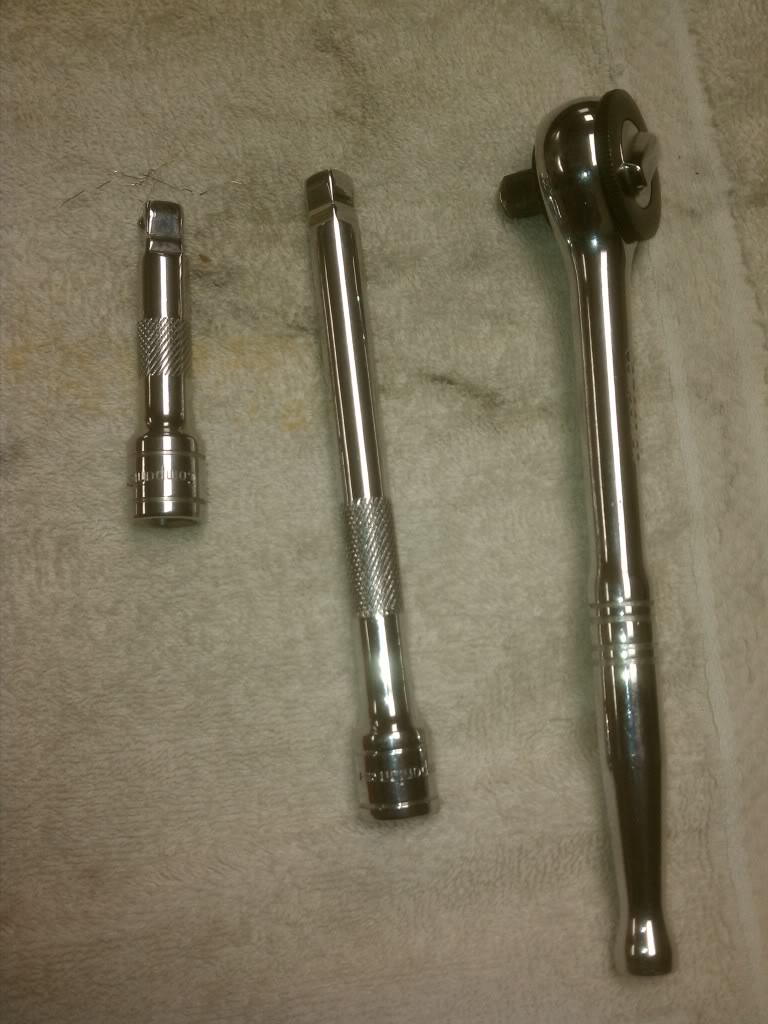
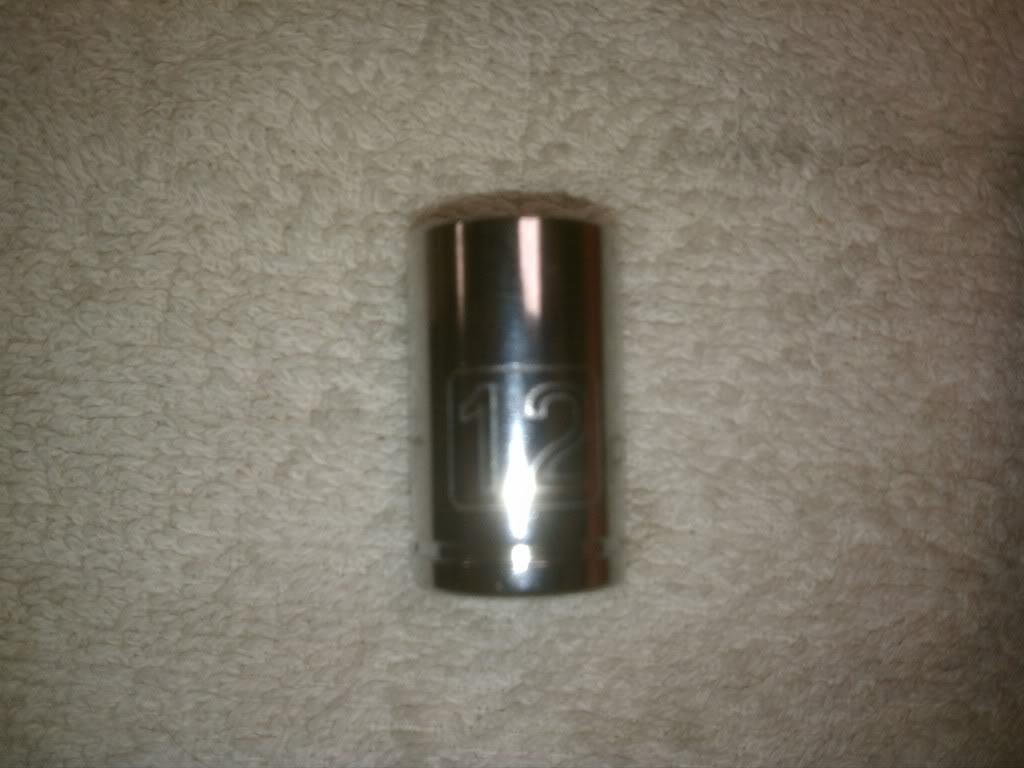
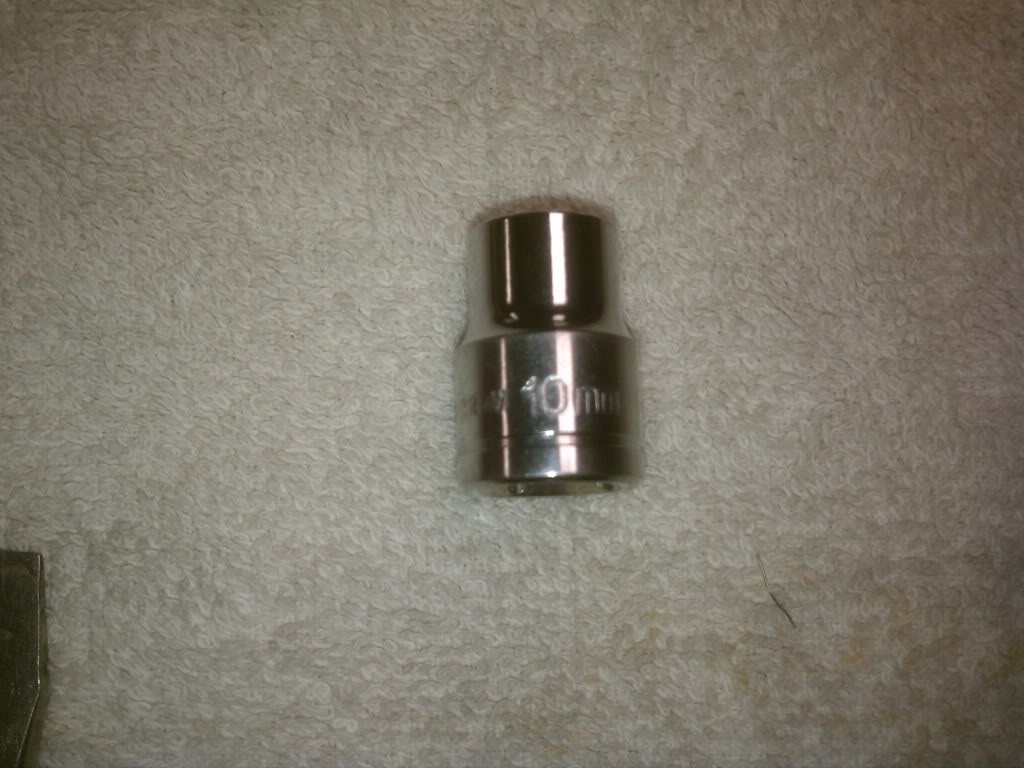
14mm socket, 12mm socket, 10mm socket
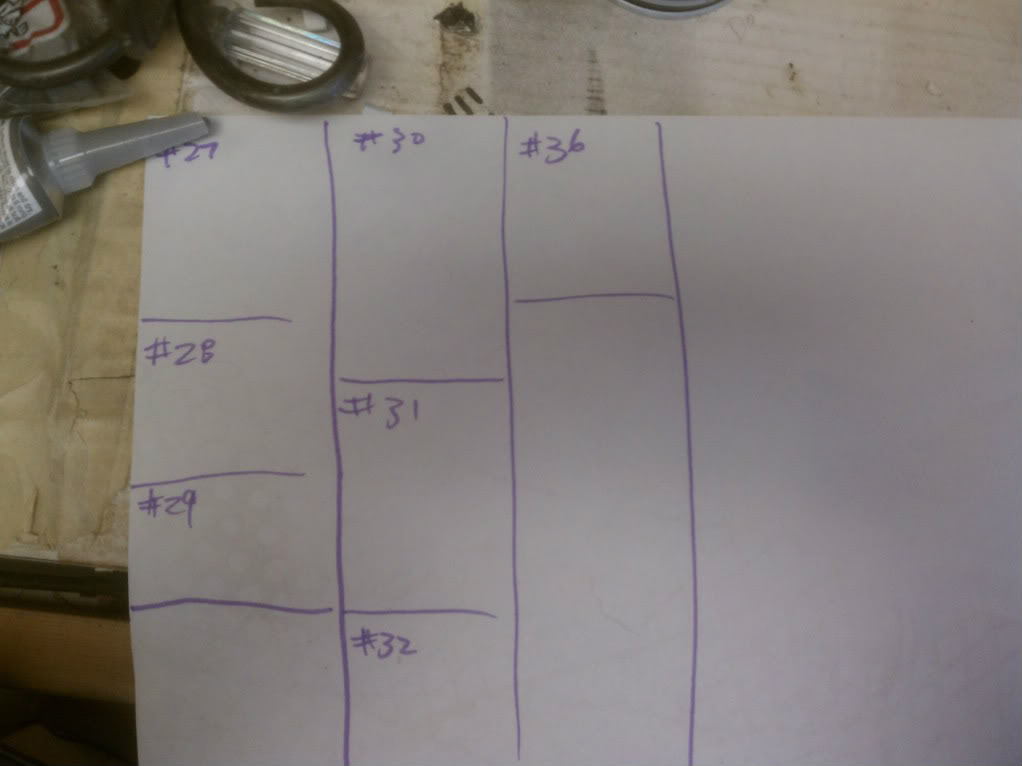
Something to label your nuts n bolts, etc (so you don't lose any, or use the wrong ones when assembling everything back together)
Here is what I used:
Paint thinner
2-3 cans of flat black paint (must be able to bond to PLASTIC)
Sponge (2 sided)
Philip head screw driver
Ratchet (I used 3/8 drive) and extensions
14mm socket, 12mm socket, 10mm socket
Something to label your nuts n bolts, etc (so you don't lose any, or use the wrong ones when assembling everything back together)
Thread Starter
Pole Position
Joined: Jun 2008
Posts: 315
Likes: 1
From: Moorpark, CA
Removing the dash.
Originally Posted by chris_hill
Edited by MY2J with some of my .02 cents
*DONT ASSUME THESE STEPS ARE 100% ACCURATE*
USE COMMON SENSE WHEN WORKING ON YOUR CAR!
DONT BLAME ME IF YOU BREAK SOME ****
Easier done if the seats are removed/set all the way back...
Usually only takes about 1-2 hours, assuming you are good at stripping cars.
#1 Disconnect Battery, Do Not perform work until 5 mins pass.
If you let the car sit without power for 5 mins you lessen the chance popping your airbag. Once the airbag is disconnected your safe, as long as you aren't jacking with it!
You will not need to disconnect the drivers side airbag.
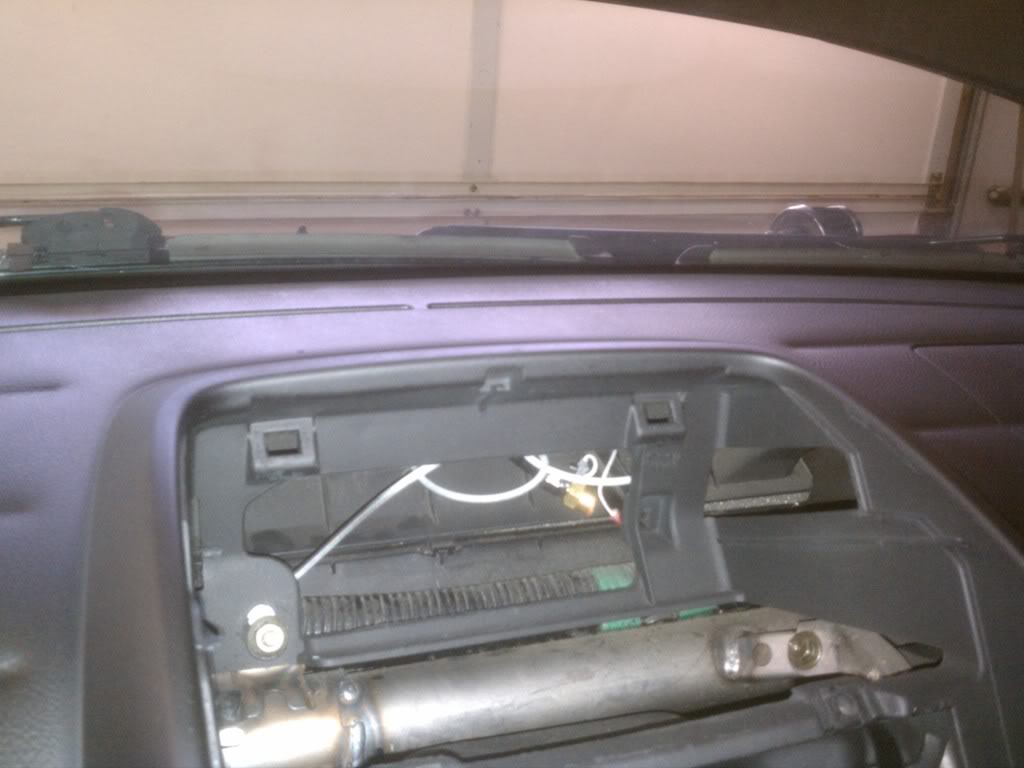
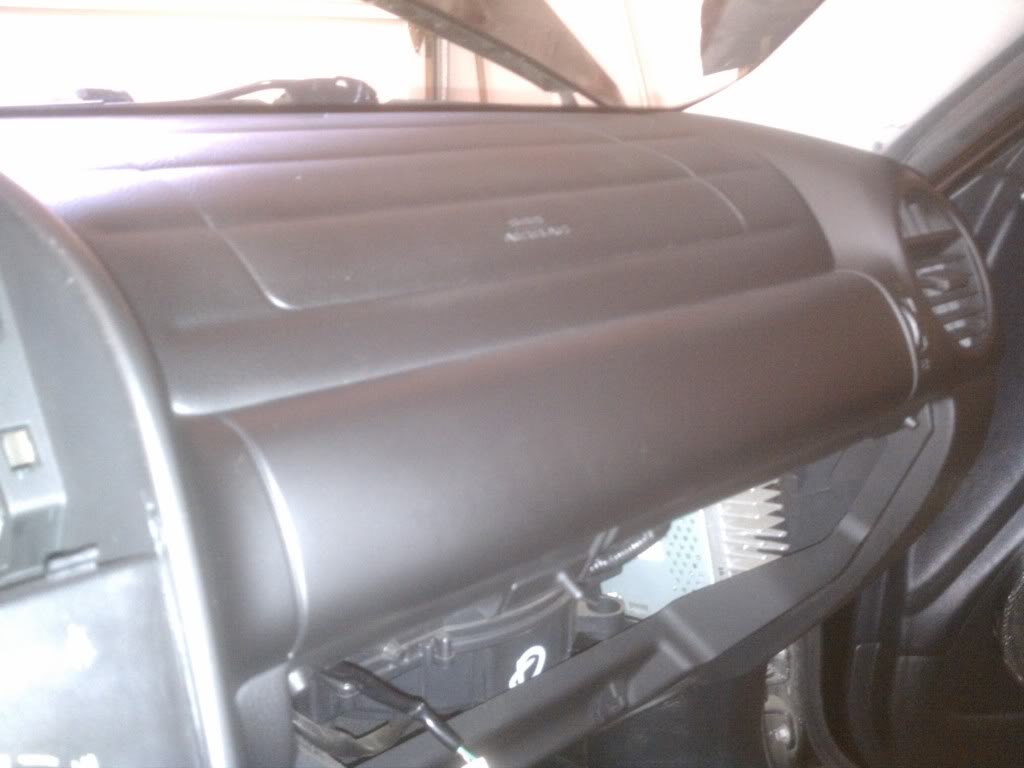
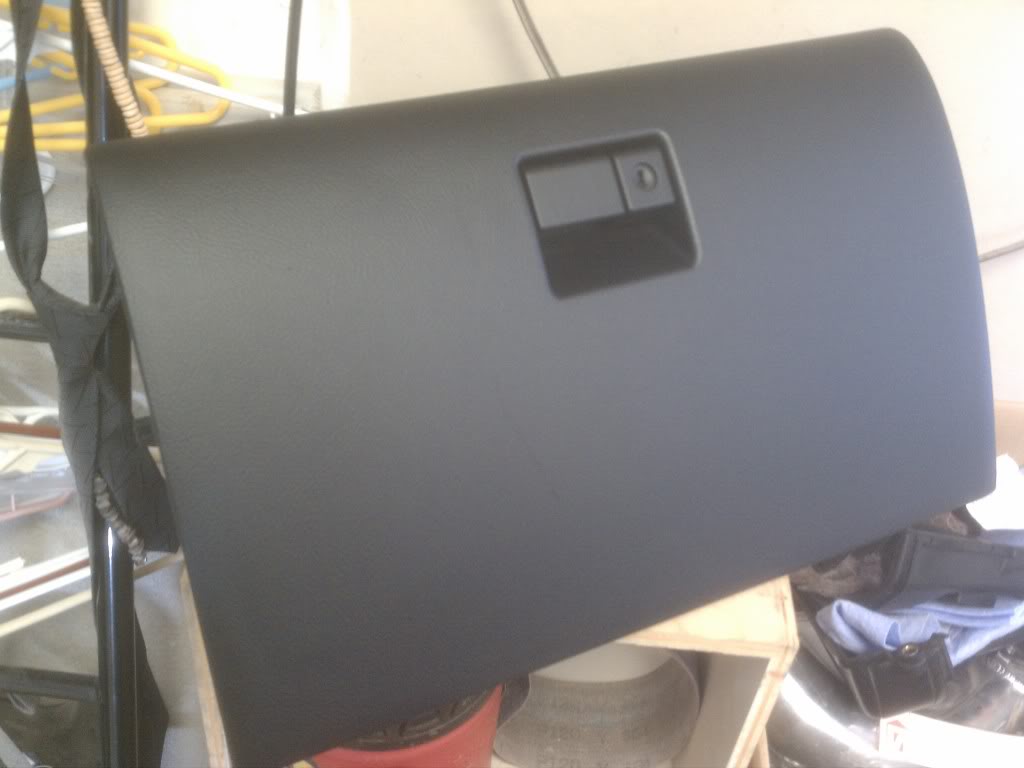
#2 Remove Glove Box by removing the two plastic pins at the hinge and the 10mm/phillips head bolt.
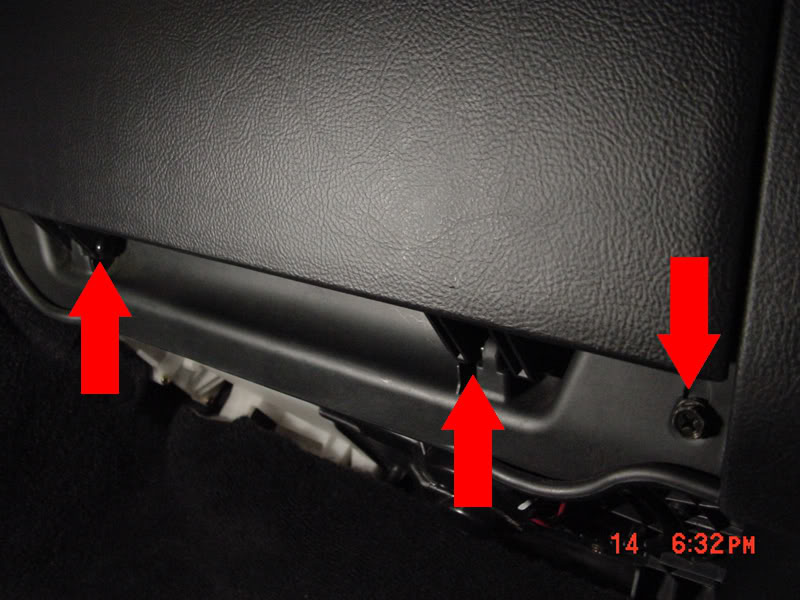
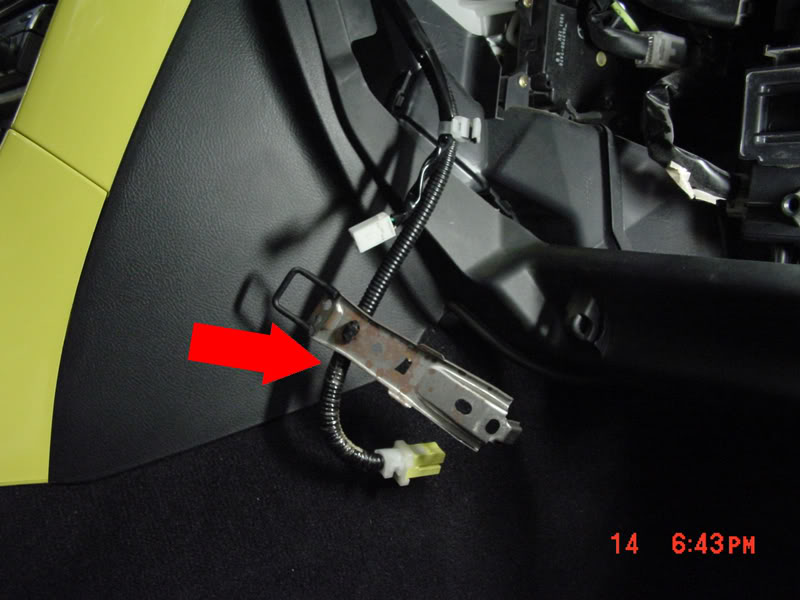
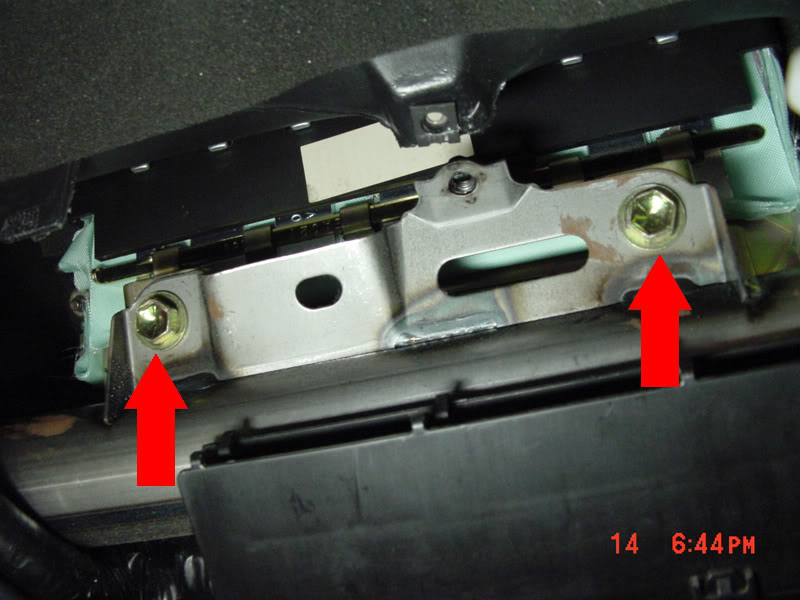
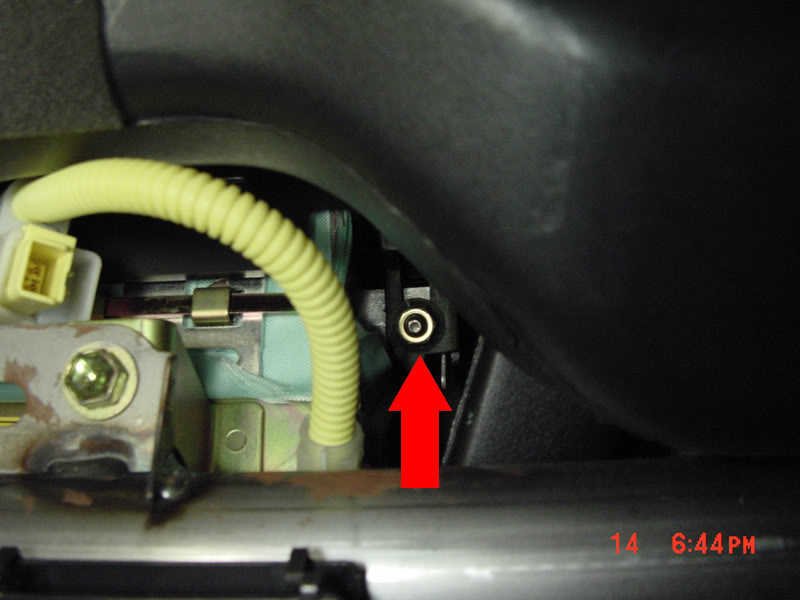
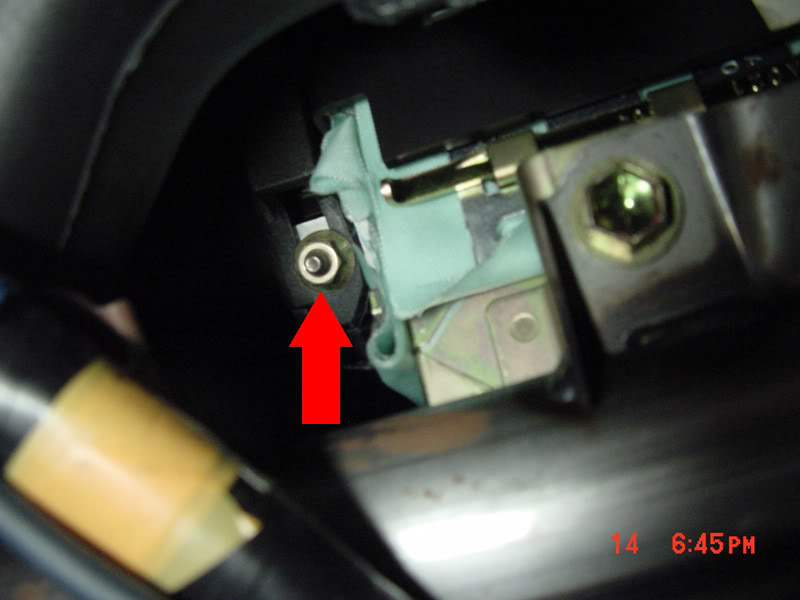
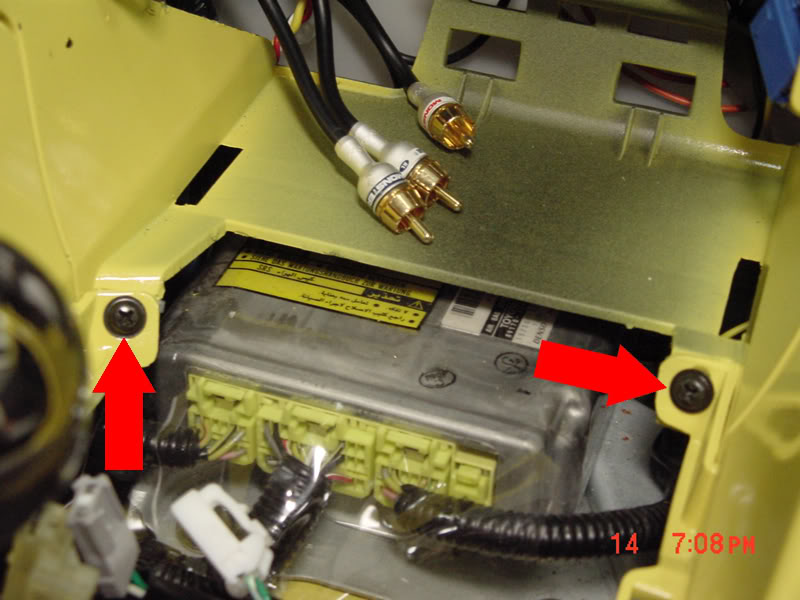
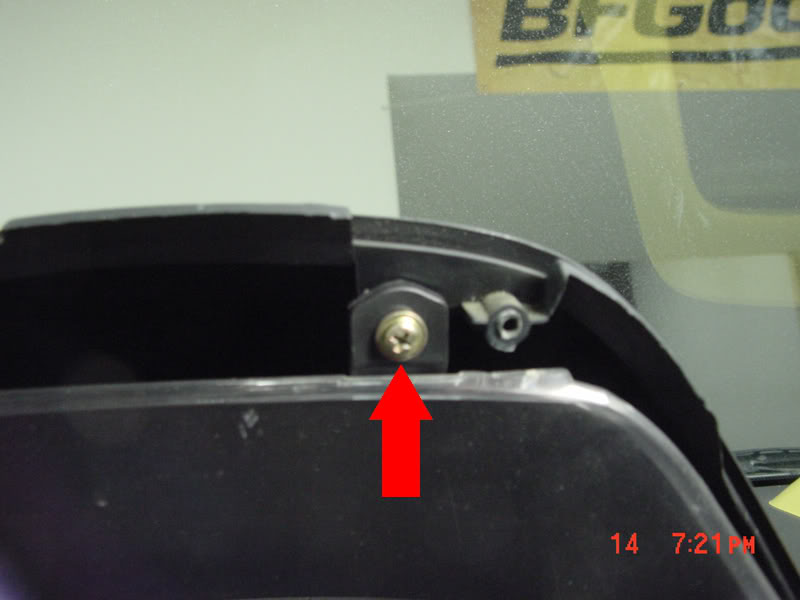
#3 Remove Glove box hook bracket by removing the two phillips head screws, and the 10mm bolt.
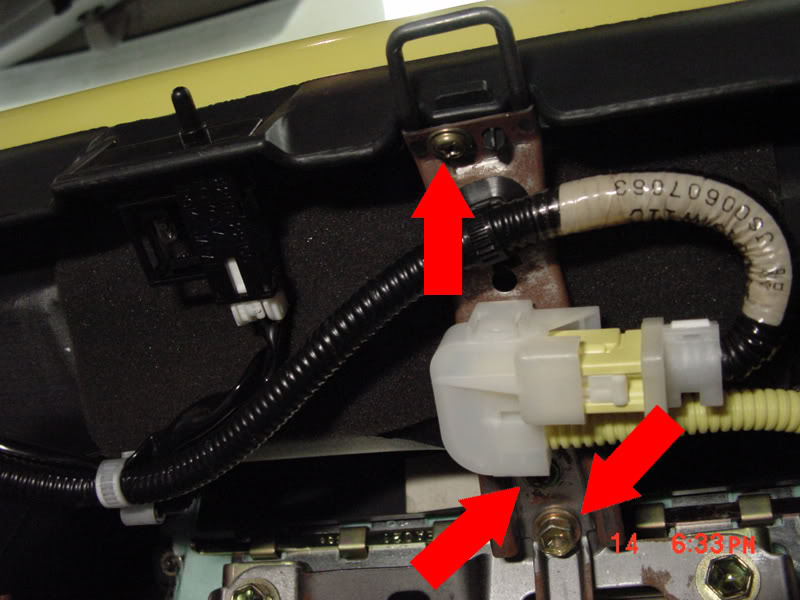
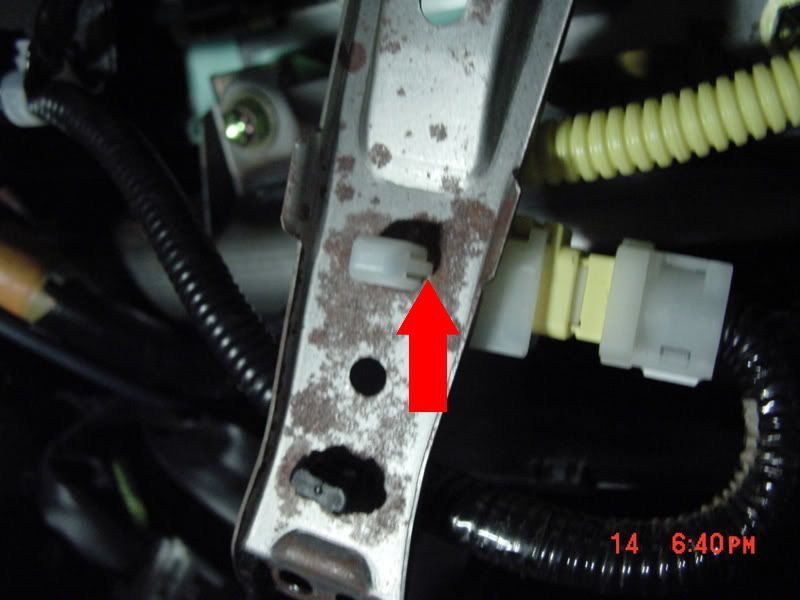
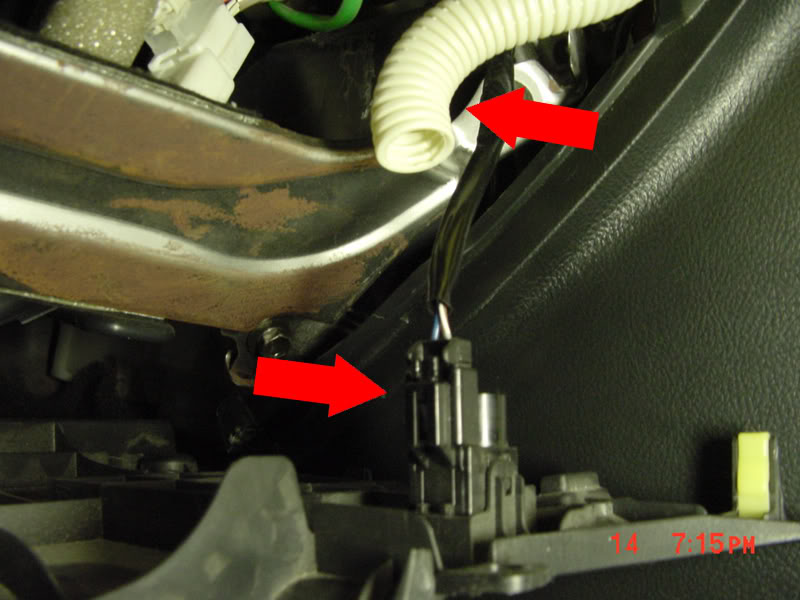
#4 Using a pair of needle nose pliers, squeeze the airbag wire retaining clip out of the glove box hook bracket.
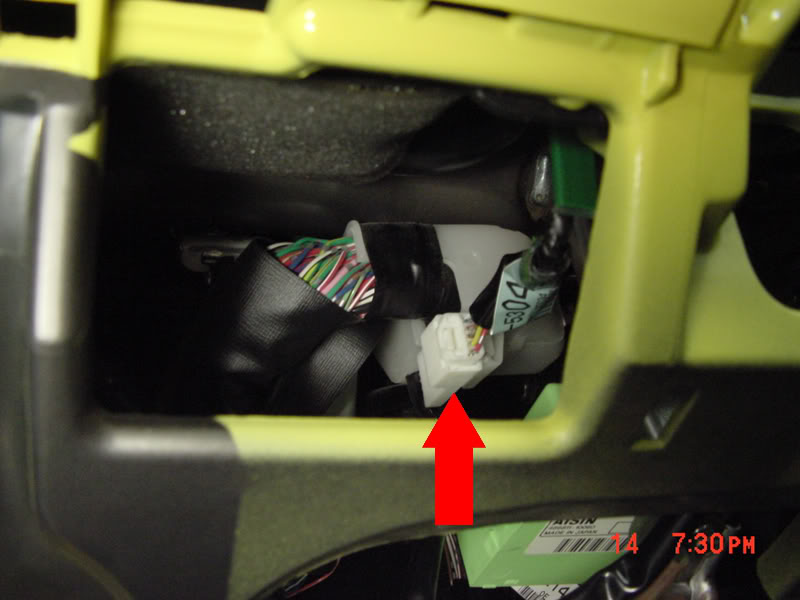
#5 Now that the harness is free, unplug it by pulling back the white tab on the plug. Now you are pretty safe from deploying your airbag.
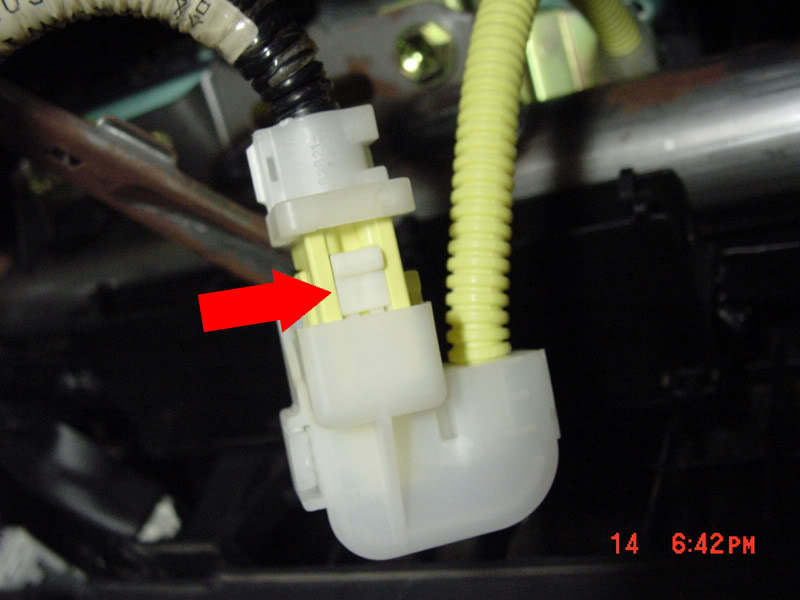
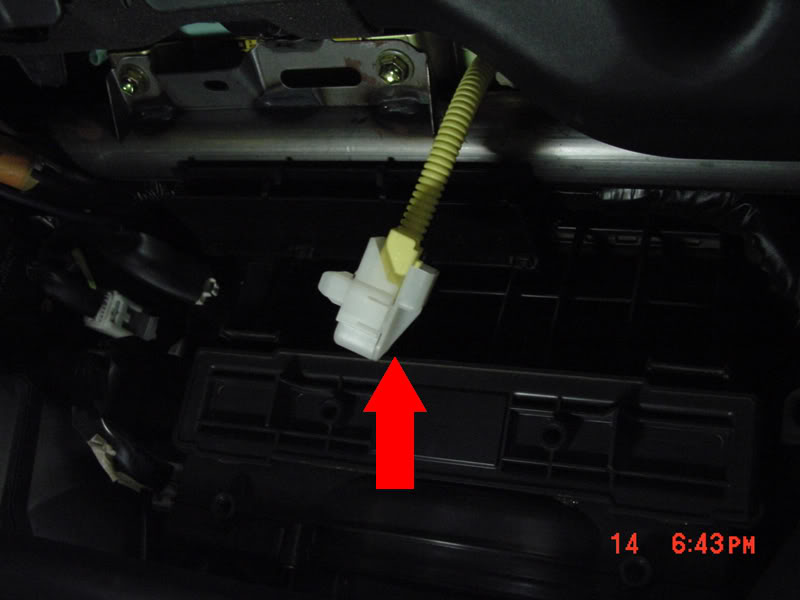
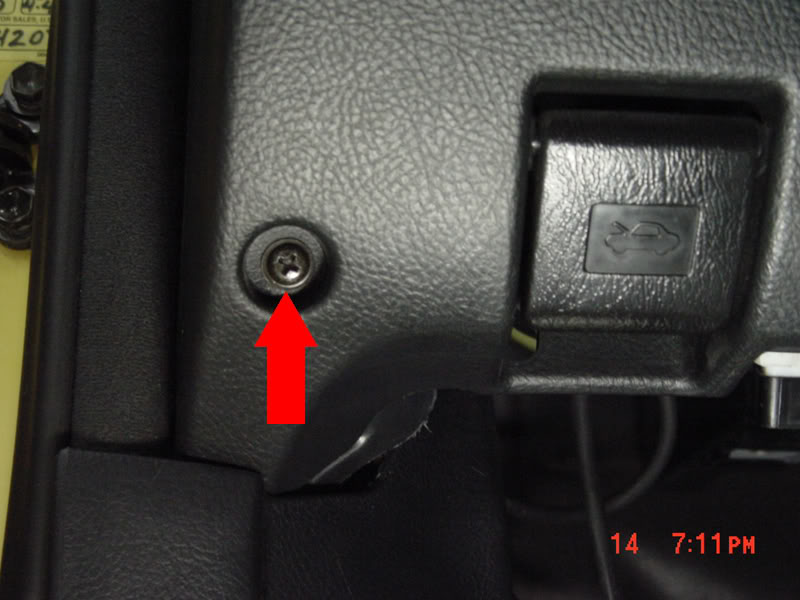
#6 Disconnect the glove box light switch. Shown in step #3
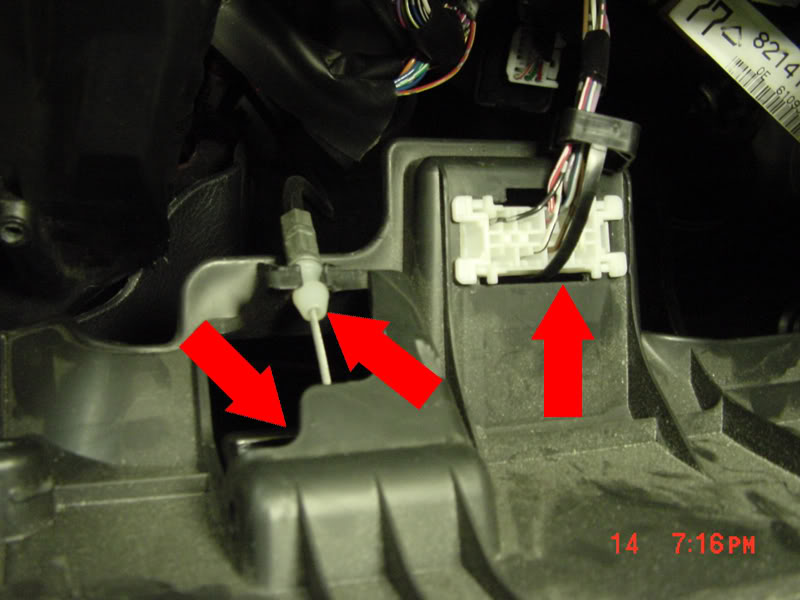
#7 Remove the clip that holds the wire loom in place by wiggleing it back and forth with pulling.
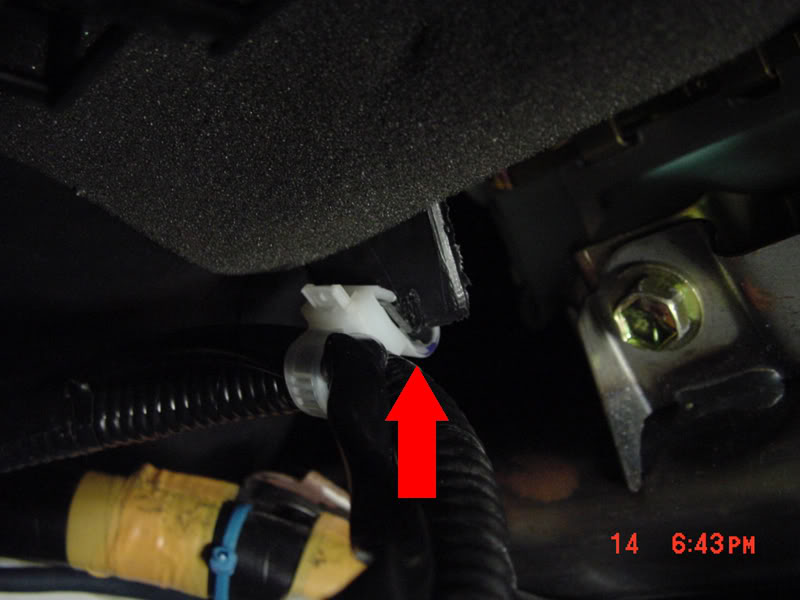
#8 Now the wire loom should be free.
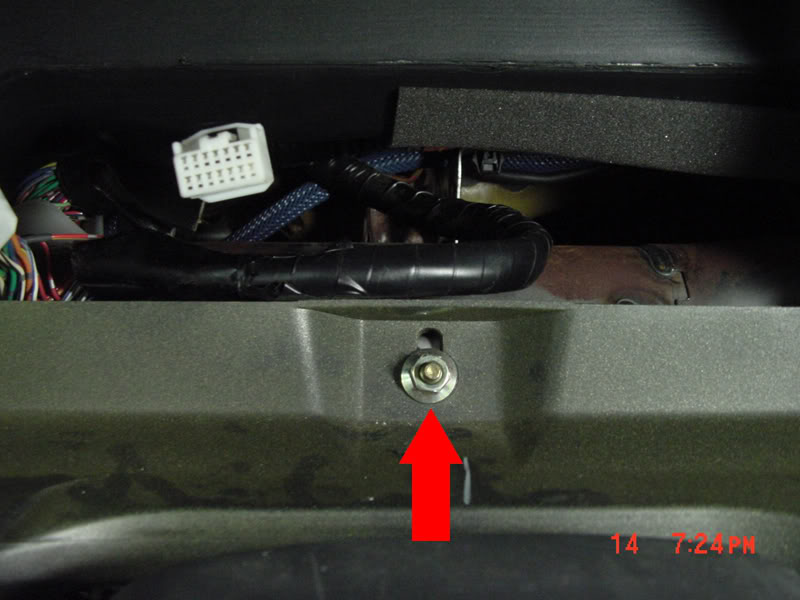
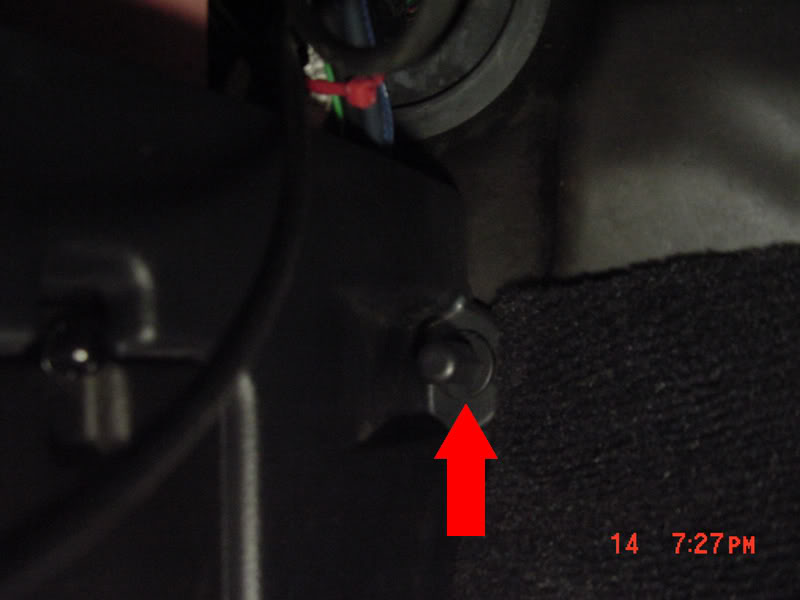
#9 Remove the nuts (2 10mm) and bolts (2 12mm) that hold the airbag in place.
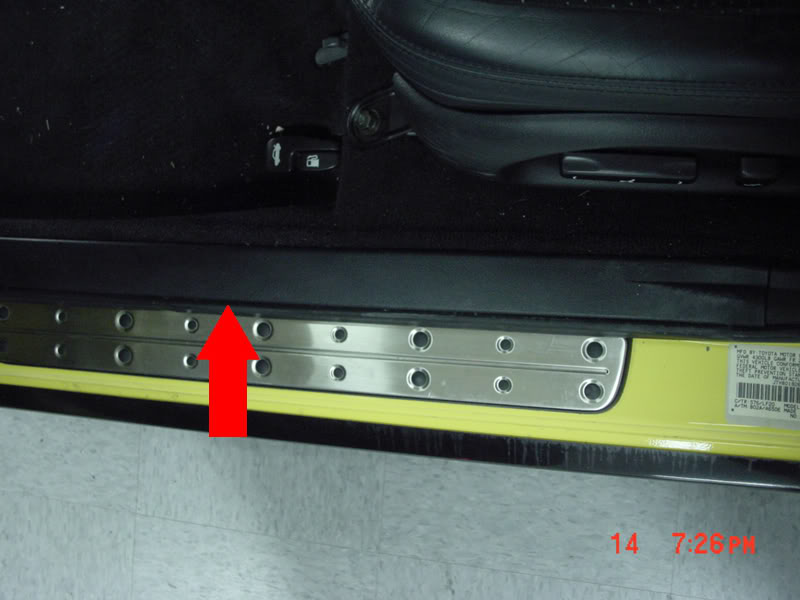
#10 Remove the black passenger door sill panel.
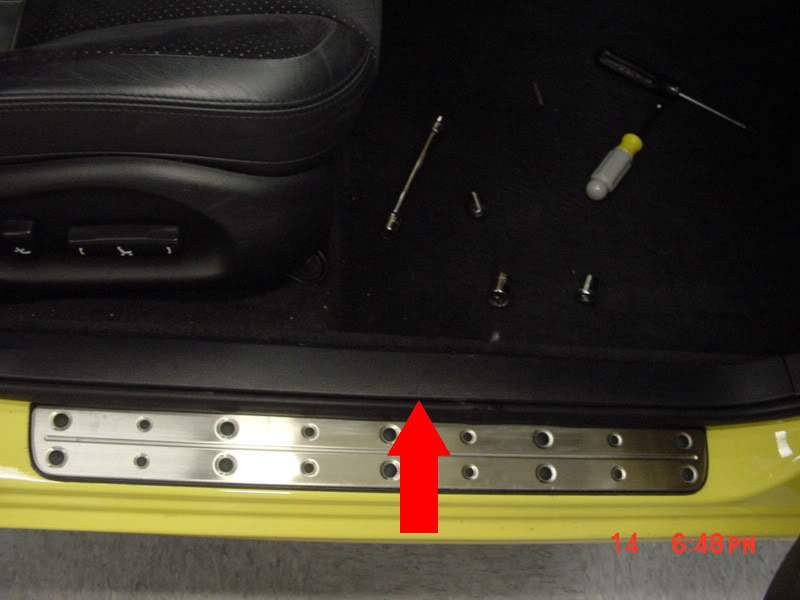
#11 Remove the black plastic push nut from the passenger kickpanel.
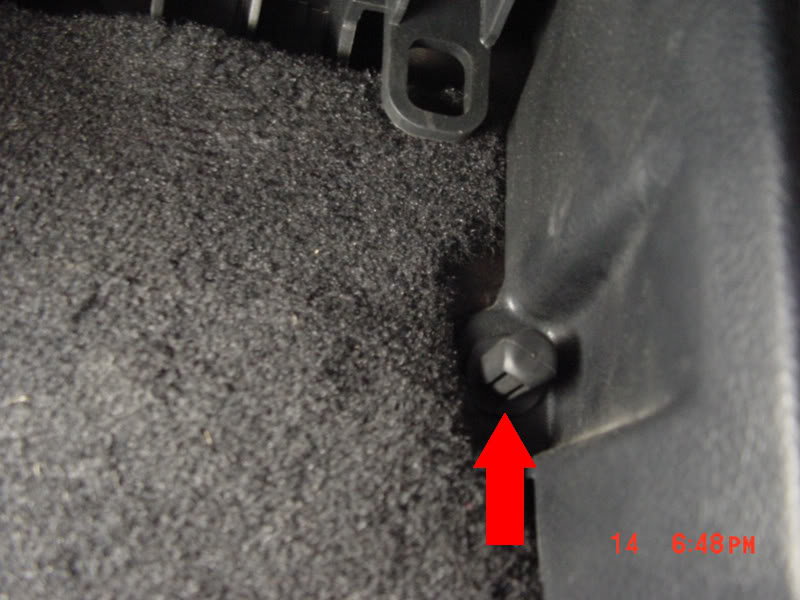
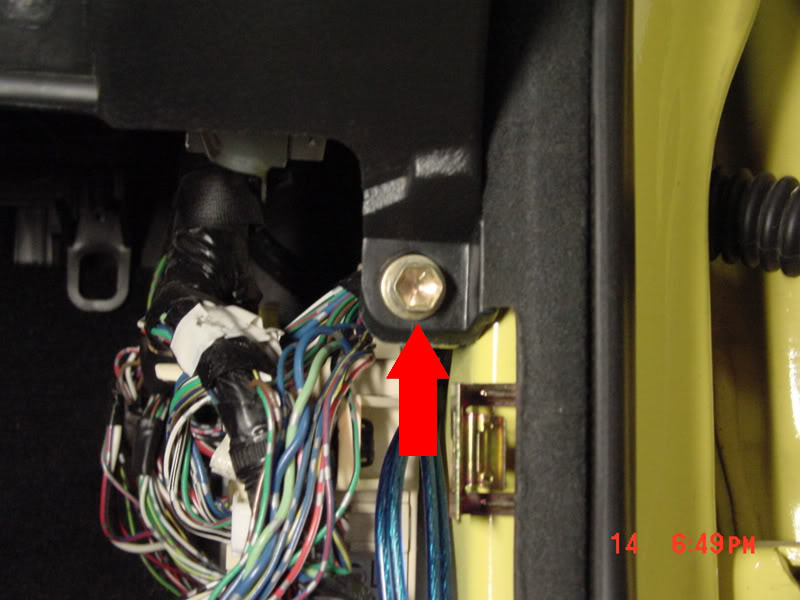
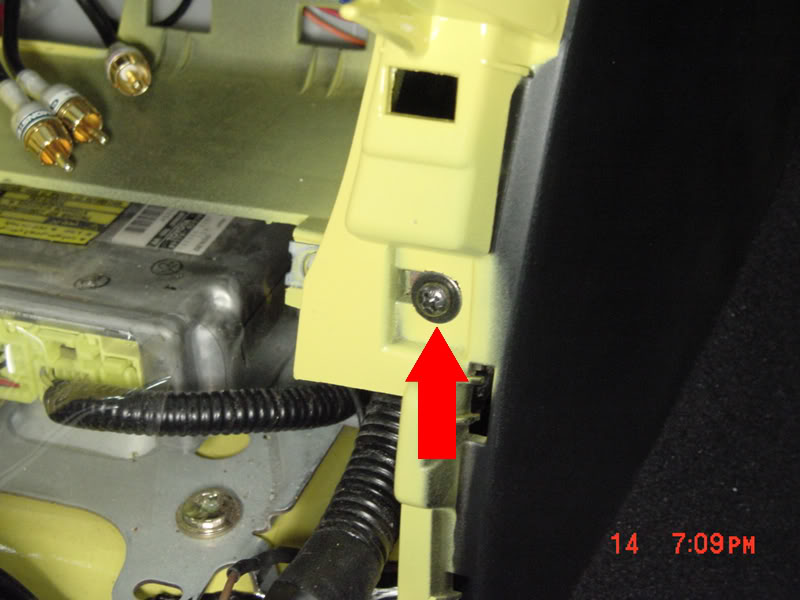
#12 Remove the kickpanel by pulling towards you. Then remove the 10mm bolt that is revealed.
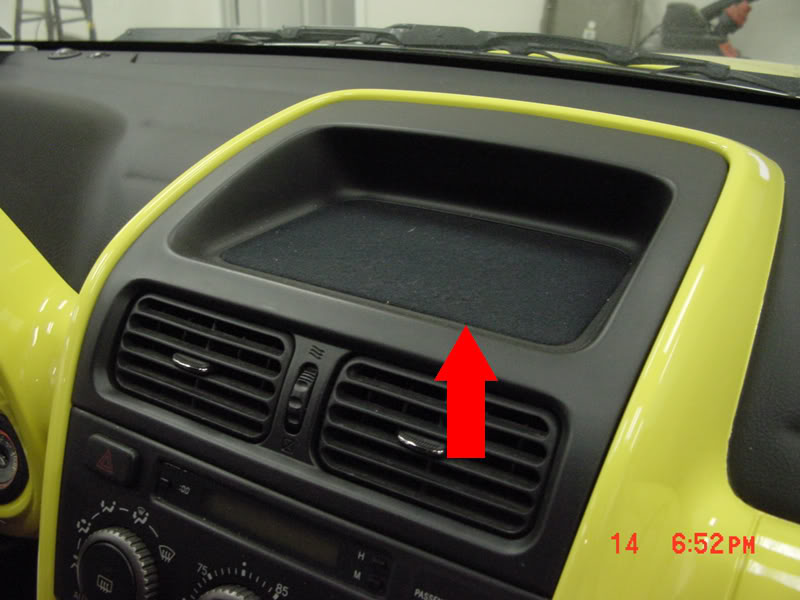
#13 Remove the cloth dash tray panel by prying the front of cloth covered panel with a pick or small screwdriver. Use a folded paper towel to protect the plastic.
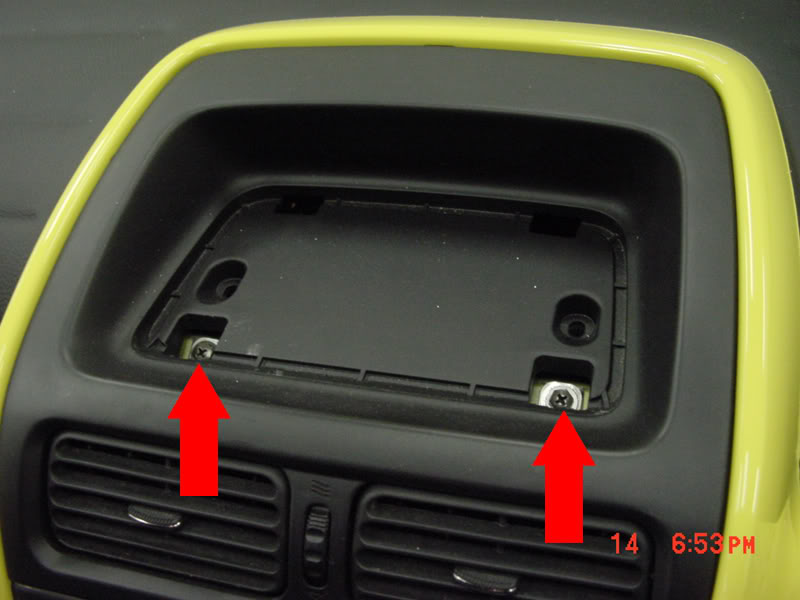
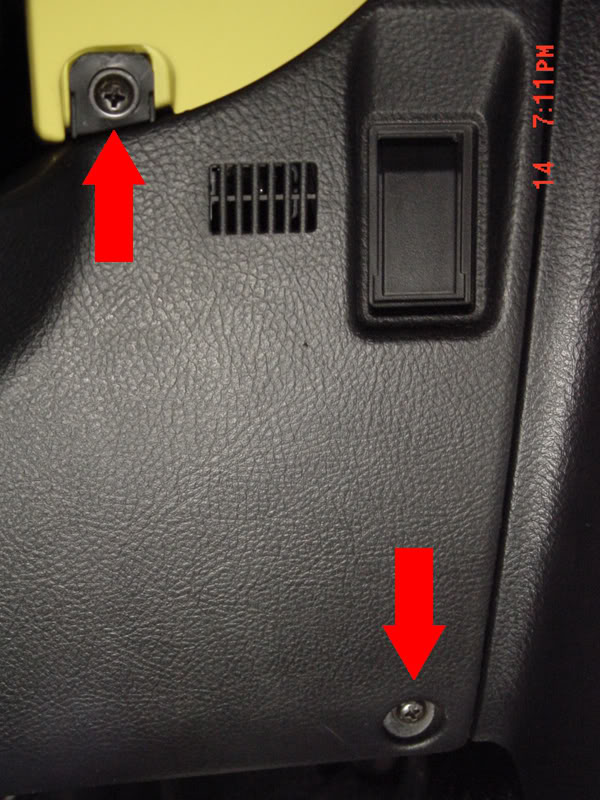
#14 Remove the two phillips head/10mm screws that are revealed.
#15 Remove the dash tray by pulling straight out, it will take some force.
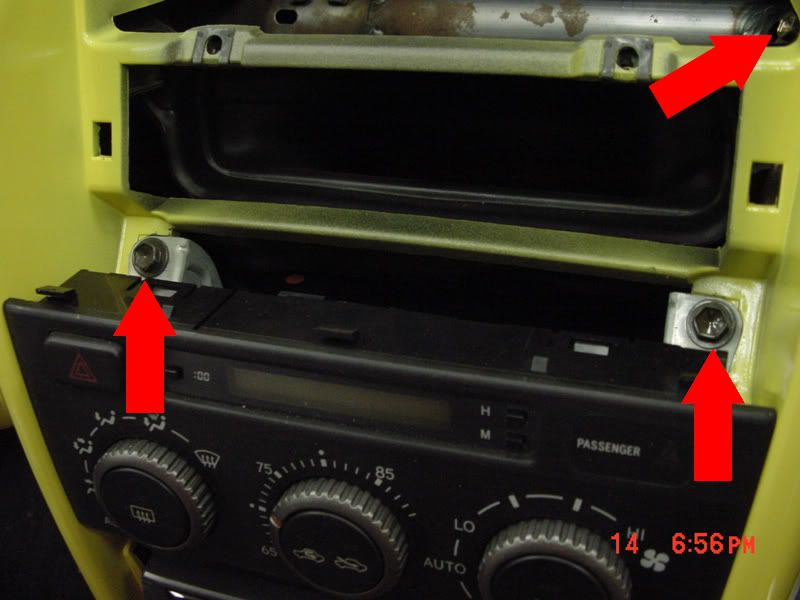
#16 Remove the 10mm nut, the 10mm bolt, and the top 2 10mm bolts that hold the AC/Radio bracket in.
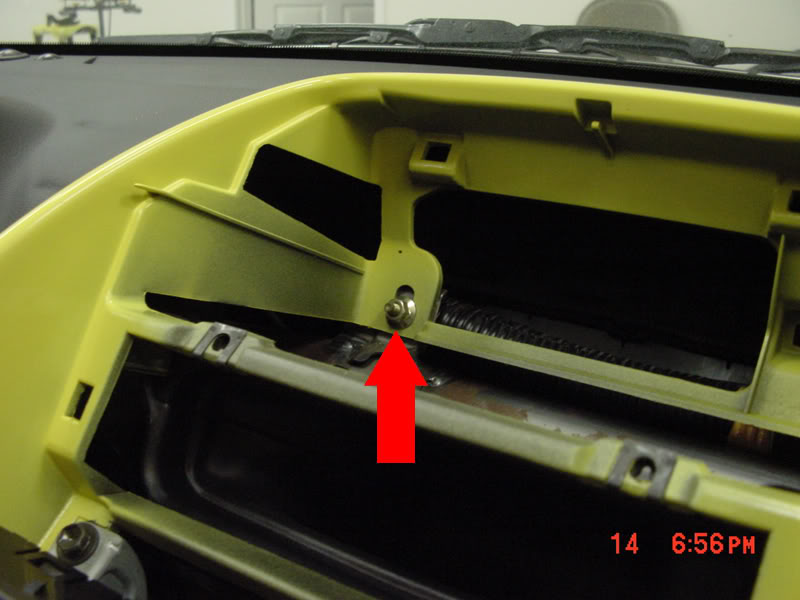
#17 Remove the trim panel that holds the 'trac' switch buy applying pressure the the underneath side, and pulling straigt out.
#18 Remove the two 10mm bolts that are revealed.
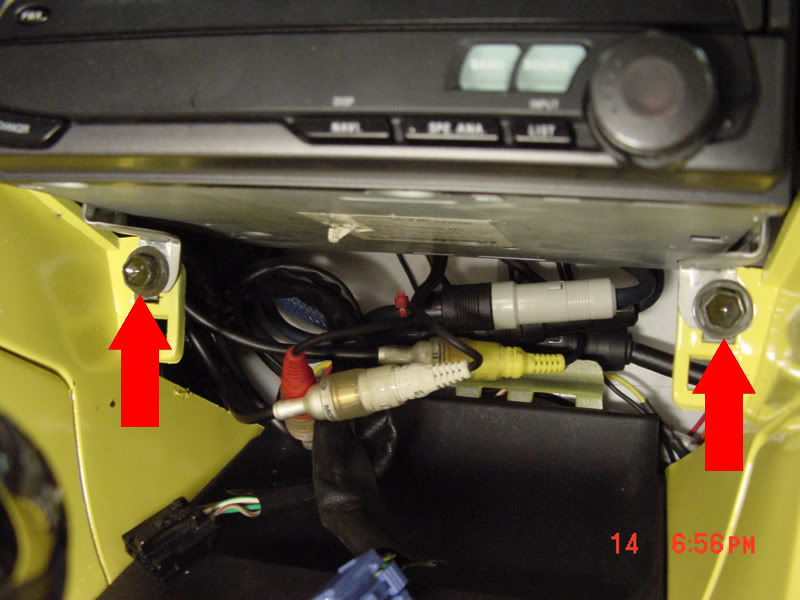
#19 Now remove radio/ac unplugging the wires before you pull to far.
Originally Posted by chris_hill
Edited by MY2J with some of my .02 cents
*DONT ASSUME THESE STEPS ARE 100% ACCURATE*
USE COMMON SENSE WHEN WORKING ON YOUR CAR!
DONT BLAME ME IF YOU BREAK SOME ****
Easier done if the seats are removed/set all the way back...
Usually only takes about 1-2 hours, assuming you are good at stripping cars.
#1 Disconnect Battery, Do Not perform work until 5 mins pass.
If you let the car sit without power for 5 mins you lessen the chance popping your airbag. Once the airbag is disconnected your safe, as long as you aren't jacking with it!
You will not need to disconnect the drivers side airbag.
#2 Remove Glove Box by removing the two plastic pins at the hinge and the 10mm/phillips head bolt.
#3 Remove Glove box hook bracket by removing the two phillips head screws, and the 10mm bolt.
#4 Using a pair of needle nose pliers, squeeze the airbag wire retaining clip out of the glove box hook bracket.
#5 Now that the harness is free, unplug it by pulling back the white tab on the plug. Now you are pretty safe from deploying your airbag.
#6 Disconnect the glove box light switch. Shown in step #3
#7 Remove the clip that holds the wire loom in place by wiggleing it back and forth with pulling.
#8 Now the wire loom should be free.
#9 Remove the nuts (2 10mm) and bolts (2 12mm) that hold the airbag in place.
#10 Remove the black passenger door sill panel.
#11 Remove the black plastic push nut from the passenger kickpanel.
#12 Remove the kickpanel by pulling towards you. Then remove the 10mm bolt that is revealed.
#13 Remove the cloth dash tray panel by prying the front of cloth covered panel with a pick or small screwdriver. Use a folded paper towel to protect the plastic.
#14 Remove the two phillips head/10mm screws that are revealed.
#15 Remove the dash tray by pulling straight out, it will take some force.
#16 Remove the 10mm nut, the 10mm bolt, and the top 2 10mm bolts that hold the AC/Radio bracket in.
#17 Remove the trim panel that holds the 'trac' switch buy applying pressure the the underneath side, and pulling straigt out.
#18 Remove the two 10mm bolts that are revealed.
#19 Now remove radio/ac unplugging the wires before you pull to far.
Thread Starter
Pole Position
Joined: Jun 2008
Posts: 315
Likes: 1
From: Moorpark, CA
#20 Remove the 10mm bolt thats revealed.
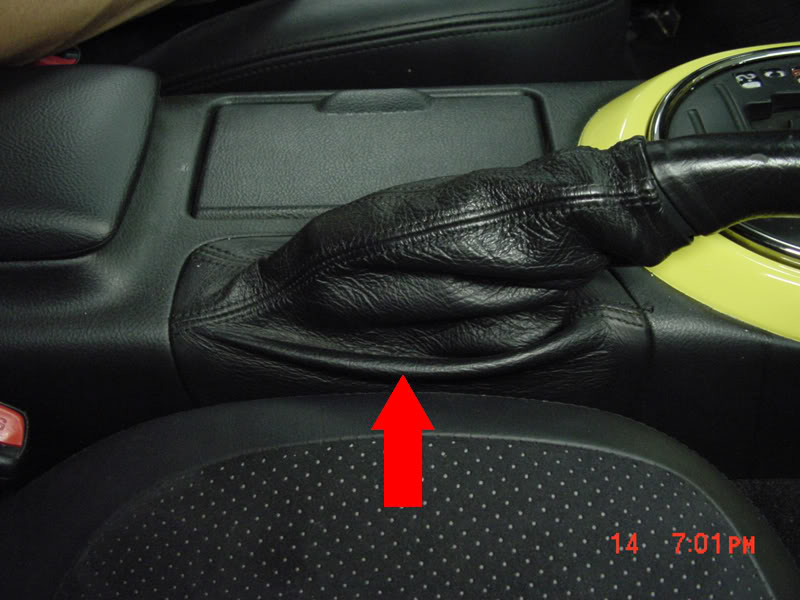
#21 Remove the leather e-brake boot by first setting the e-brake, then pulling up the boot (pinch the leather on both sides of the e-brake).
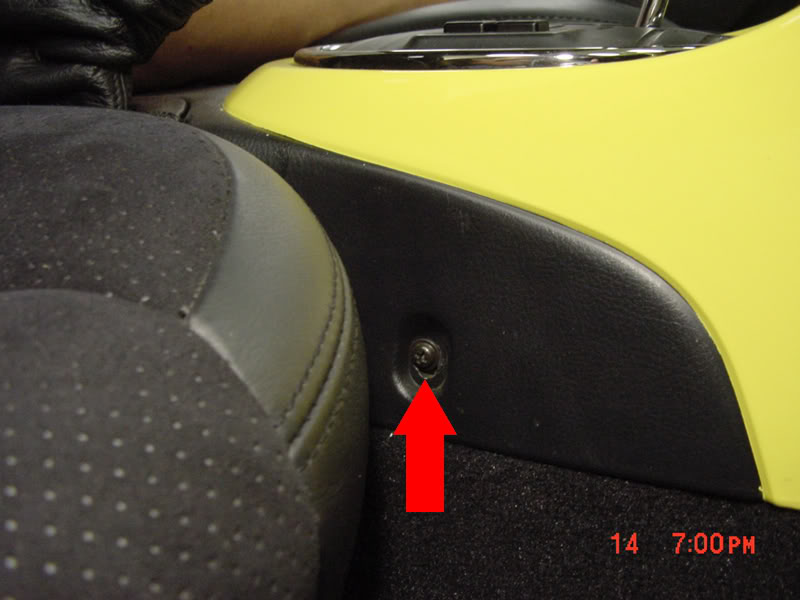
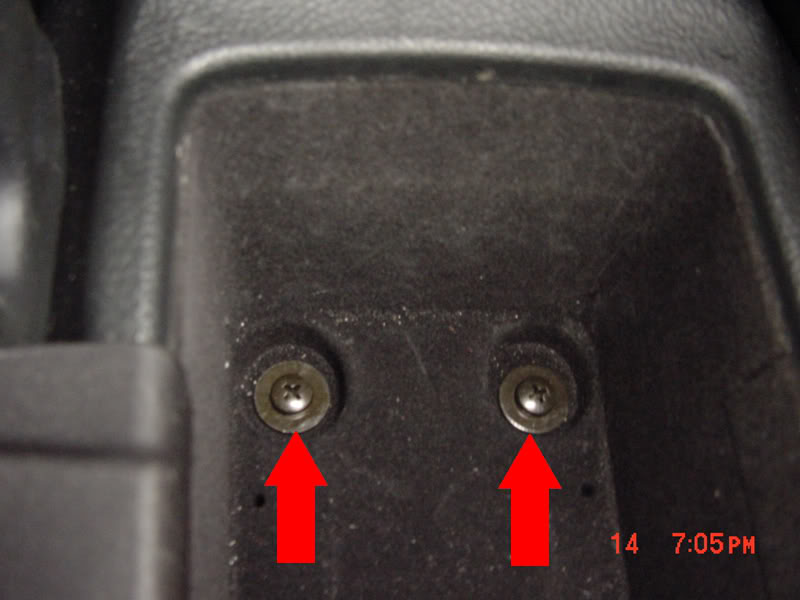
#22a Start to remove the center console by removing the 2 phillips head screws on both sides of the console, the two in the pocket behind the e-brake.
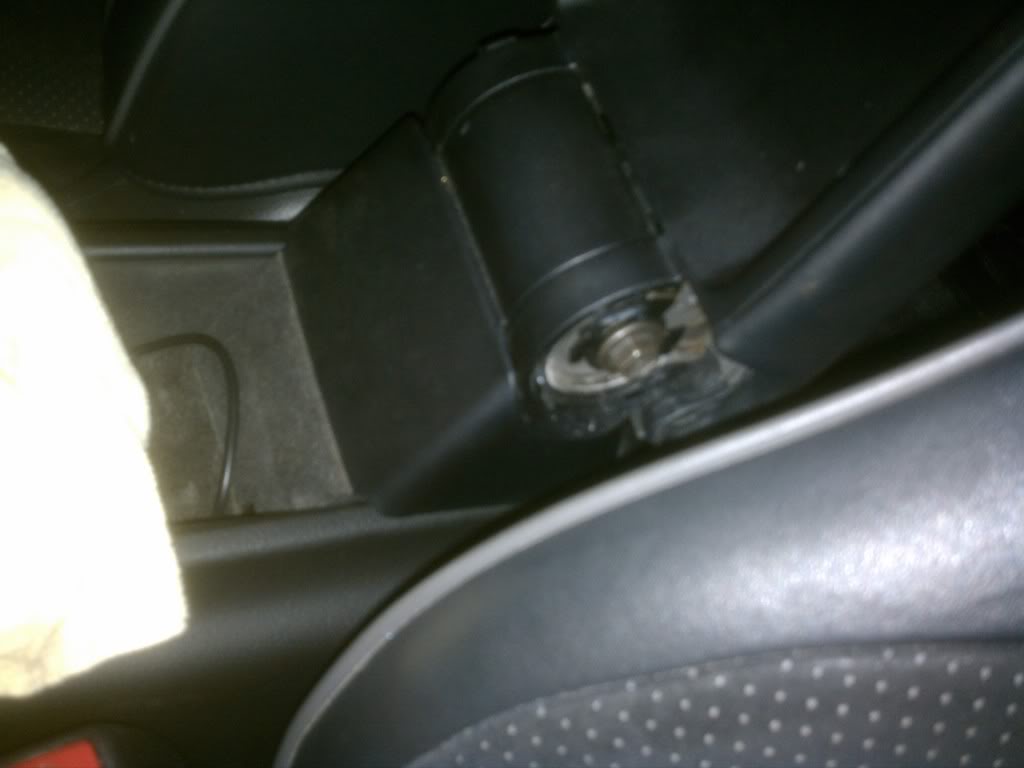
#22b If you have an 02+ then there are 2 more 14mm bolts holding the center console underneath the 2 caps on either side behind the armrest. Once the bolts are out you can lift the armrest off and pull the center console out.
#23 Now Remove the trim panel that holds the cig lighter, and ashtray by prying up around the chrome ring that's around the shifter. Once loose use your hands to pull up the rest of the panel. Unplug the cig lighter, cig lighter light, and ashtray light.
#24 Now remove the two phillips head screws that are revealed.
#25 Remove the center console by pulling straight back. Once loose lift it out of place.
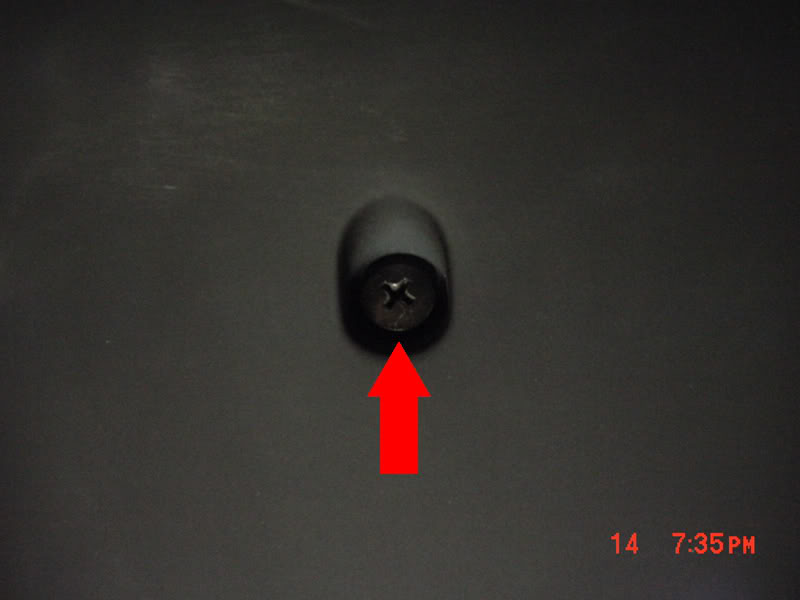
#26 Remove the phillips head screw that is revealed.
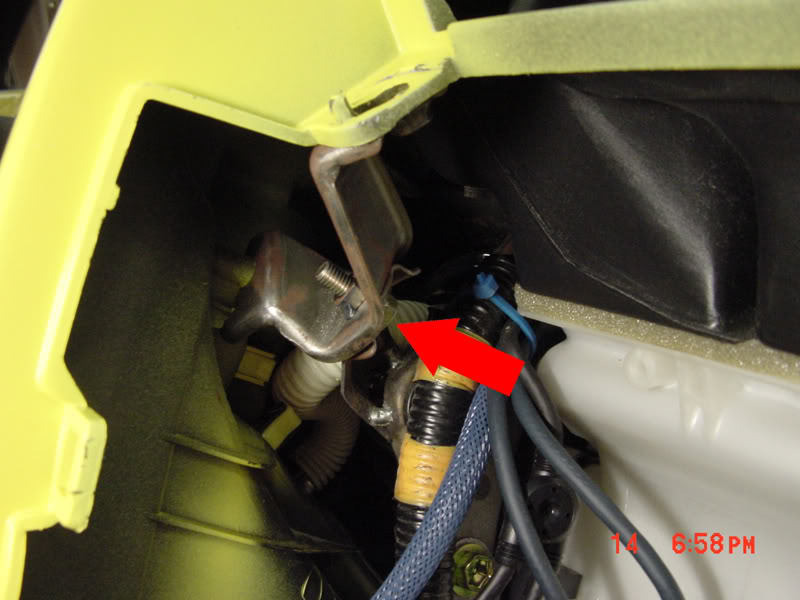
#27 remove the access panel thats under the steering column by removing the 3 phillips head screws that hold it in place. Unplug the temp sensor and hose, remove diag plug, and remove hood cable.
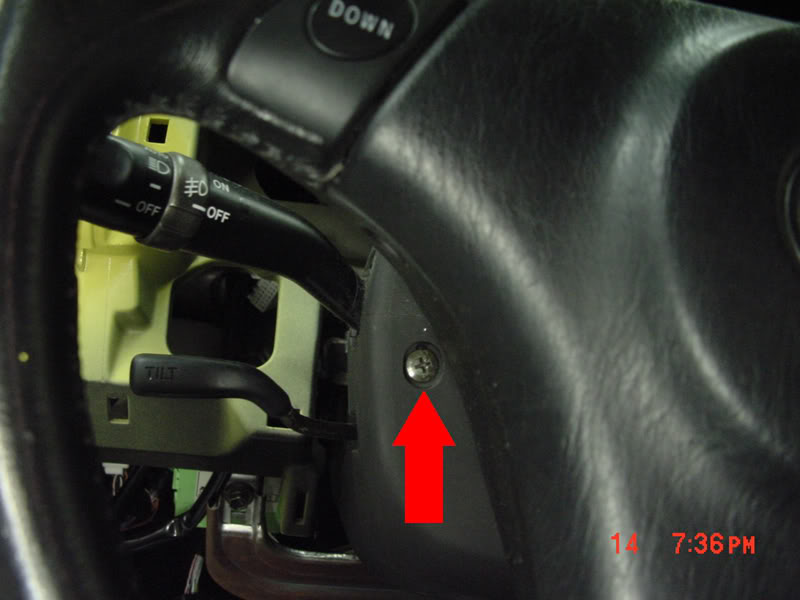
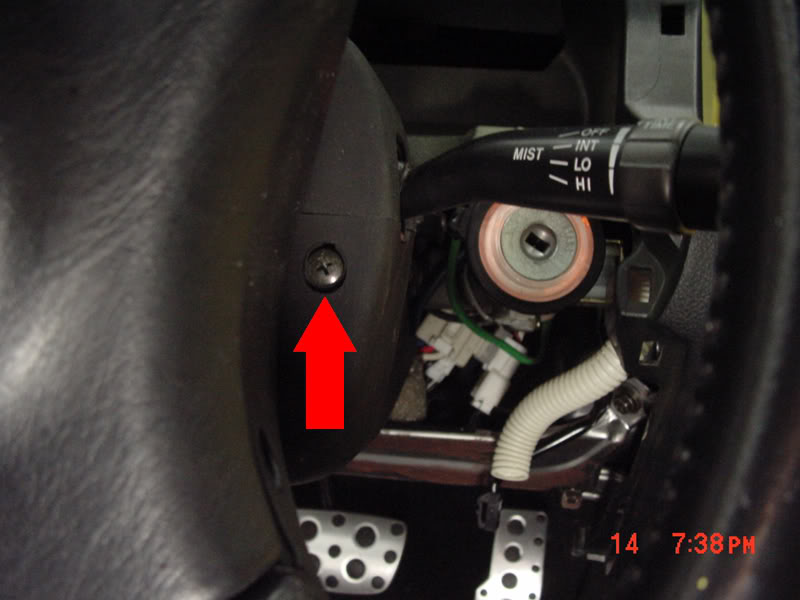
#28 Remove the bottom portion of the steering column trim by removing the three phillips head screws. One is on the bottom of the trim panel. The other two will require turning the steering wheel right or left. Once screws are removed, gently pull the bottom off.
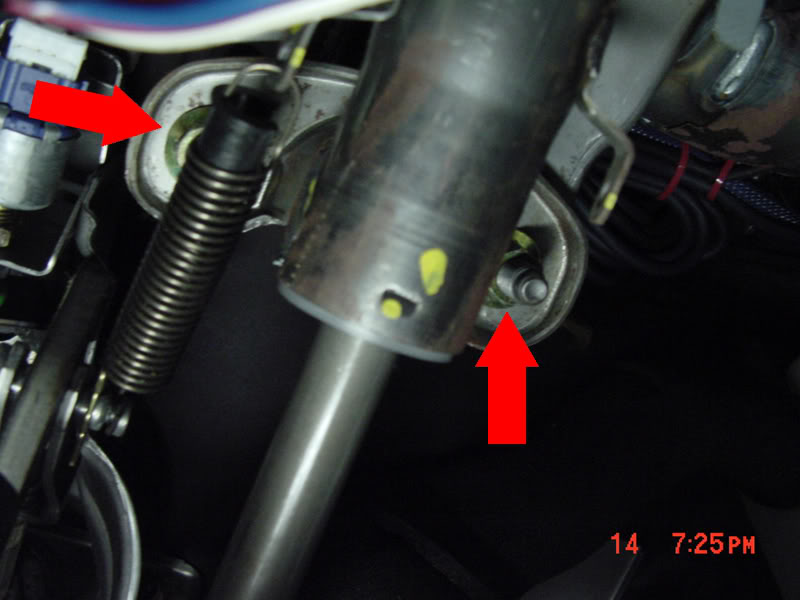
#29 Remove the 4 14mm nuts that hold the steering column in place. Let the column drop and rest on the metal cross brace below the column. The upper two are easy to spot, the rear two are harder to get to, and will require that you push the tilt spring out of the way with your socket.
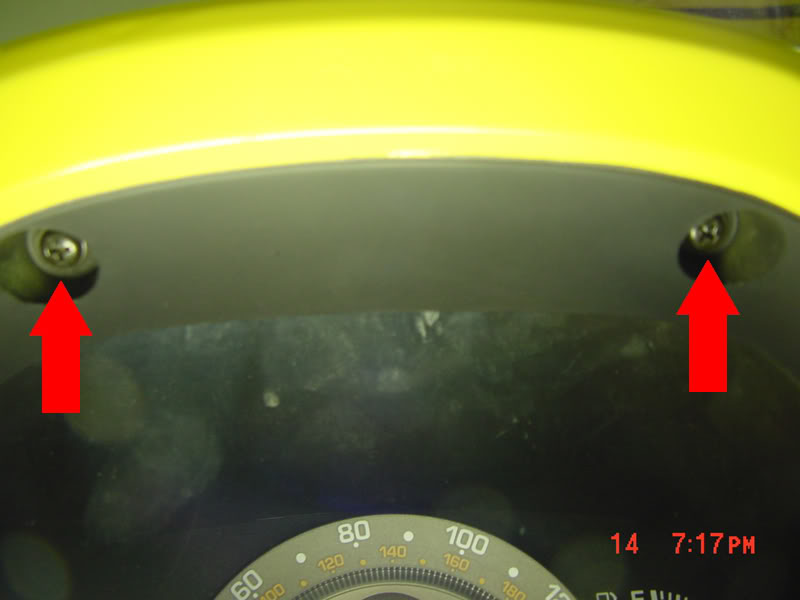
#30 Remove guage cluster trim by removing the 2 phillips head screws. Then pulling out slightly until free. Unplug dimmer wire.
#31 Remove the 3 phillips head screws that hold the guage cluster in.
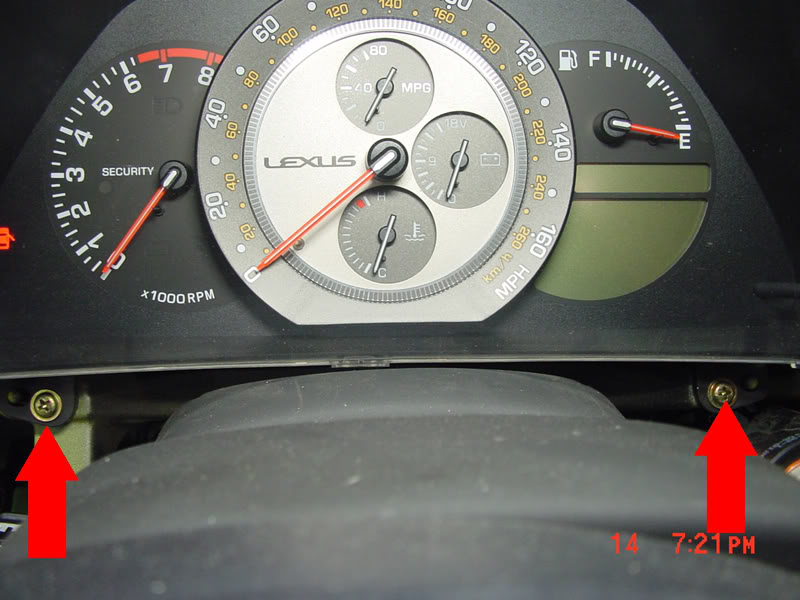
#32 Remove cluster, unplug the 2 harnesses. Once removed, remove the 10mm nut that is revealed.
#33 Unplug the light sensor harness.
#34 Remove driver side black door sill trim.
#35 Remove black plastic push nut from drivers side kick panel.
#36 Remove drivers side kick panel by pulling towards you, then remove the 10mm bolt that is revealed.

#21 Remove the leather e-brake boot by first setting the e-brake, then pulling up the boot (pinch the leather on both sides of the e-brake).
#22a Start to remove the center console by removing the 2 phillips head screws on both sides of the console, the two in the pocket behind the e-brake.
#22b If you have an 02+ then there are 2 more 14mm bolts holding the center console underneath the 2 caps on either side behind the armrest. Once the bolts are out you can lift the armrest off and pull the center console out.
#23 Now Remove the trim panel that holds the cig lighter, and ashtray by prying up around the chrome ring that's around the shifter. Once loose use your hands to pull up the rest of the panel. Unplug the cig lighter, cig lighter light, and ashtray light.
#24 Now remove the two phillips head screws that are revealed.
#25 Remove the center console by pulling straight back. Once loose lift it out of place.
#26 Remove the phillips head screw that is revealed.
#27 remove the access panel thats under the steering column by removing the 3 phillips head screws that hold it in place. Unplug the temp sensor and hose, remove diag plug, and remove hood cable.
#28 Remove the bottom portion of the steering column trim by removing the three phillips head screws. One is on the bottom of the trim panel. The other two will require turning the steering wheel right or left. Once screws are removed, gently pull the bottom off.
#29 Remove the 4 14mm nuts that hold the steering column in place. Let the column drop and rest on the metal cross brace below the column. The upper two are easy to spot, the rear two are harder to get to, and will require that you push the tilt spring out of the way with your socket.
#30 Remove guage cluster trim by removing the 2 phillips head screws. Then pulling out slightly until free. Unplug dimmer wire.
#31 Remove the 3 phillips head screws that hold the guage cluster in.
#32 Remove cluster, unplug the 2 harnesses. Once removed, remove the 10mm nut that is revealed.
#33 Unplug the light sensor harness.
#34 Remove driver side black door sill trim.
#35 Remove black plastic push nut from drivers side kick panel.
#36 Remove drivers side kick panel by pulling towards you, then remove the 10mm bolt that is revealed.
Thread Starter
Pole Position
Joined: Jun 2008
Posts: 315
Likes: 1
From: Moorpark, CA
#37 Pull the rubber seal away from the car on both the passenger and drivers side.
#38a Remove both the passenger and driver side pillar trim.
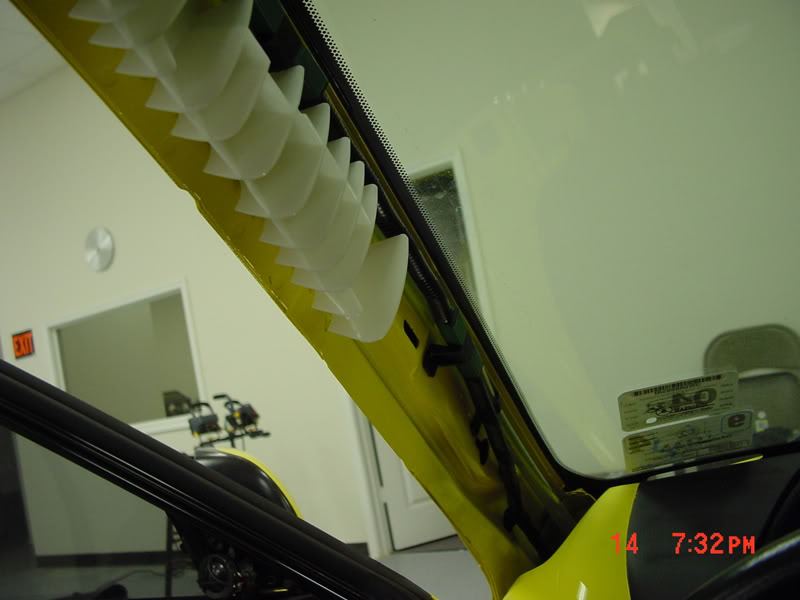
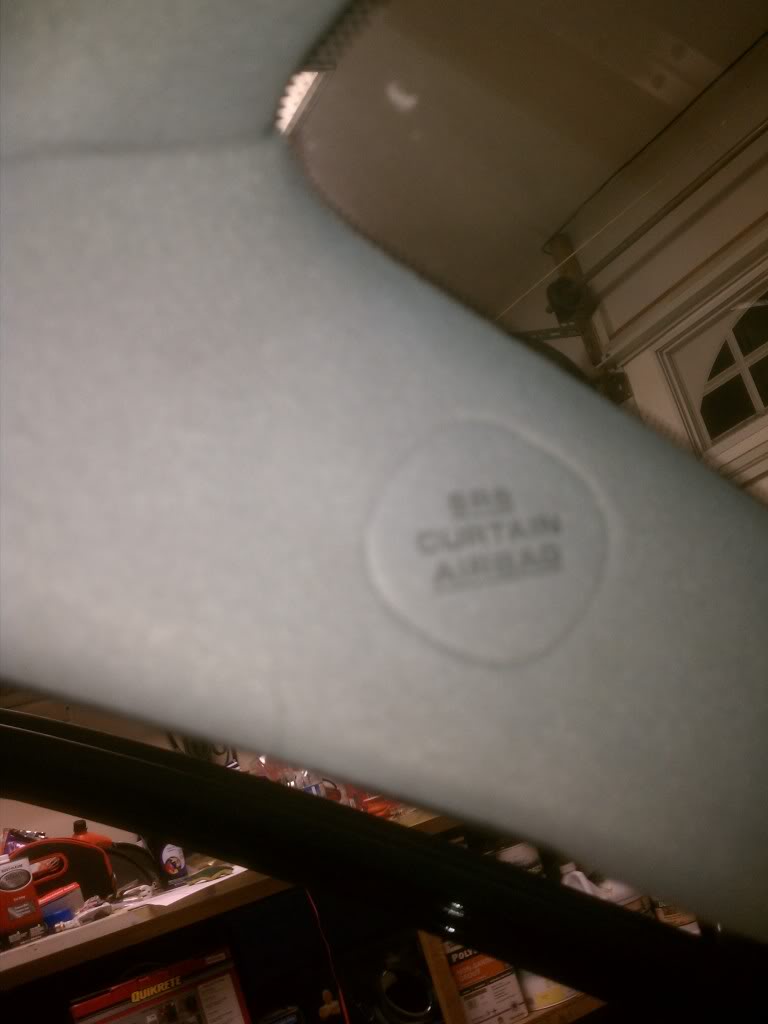
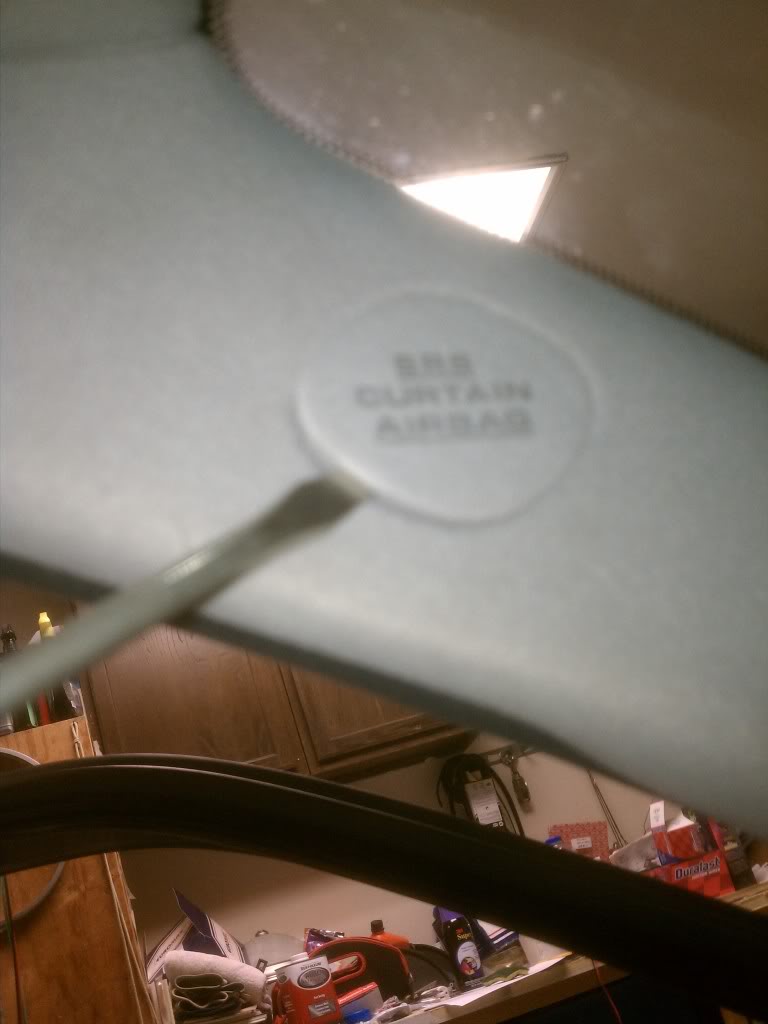
#38b If you have an 02+ then there will be air bags in the side pillars. Remove them by lifting the tabs and using a 10mm socket to loosen the pillar trim from the pillar.
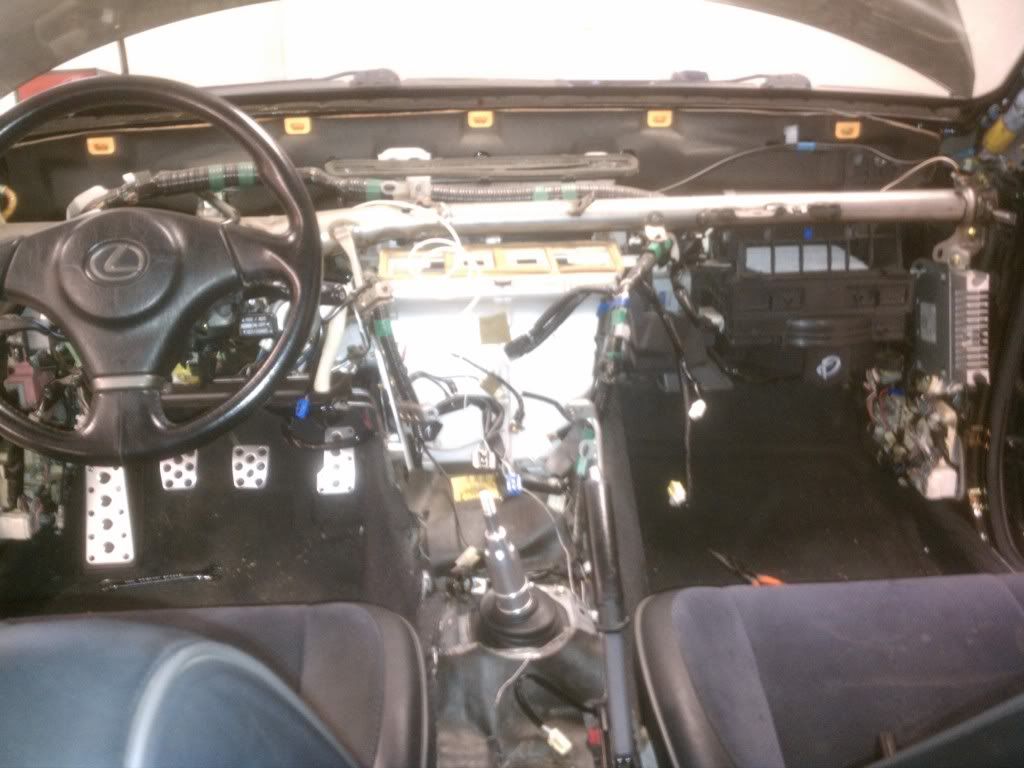
#39 The dash is now ready to be removed. From the center pull with slight force. the dash will unclip and be loose. Make sure you have the dash completely loose.
#40 Once you are sure it's loose lean it forward a bit, then lift it over the steering wheel, and out the passenger side of the car.
side notes:
After #40, I found that it was easiest to pull the dash out buy starting from the passenger side first, then middle, then driverside. The clips holding the dash secure are all located right under the windshield. And also, pull the steering column off of the studs completely, it will make it easier to pull the dash out with minimal problems. Leave the column detached from the studs for when you put the dash back in as well.
Before putting the dash back in, I'd recommend covering the steering wheel with a towel, because it gets kind of tricky putting the dash back in without scratching the steering wheel. Also, wait until the paint is COMPLETELY dry, I'd recommend waiting over night to be sure so that it doesn't scuff when putting it back in the car, maybe even tape the edges with painters tape/masking tape so that when it rubs on the windshield or pillars it doesn't scuff either.
#38a Remove both the passenger and driver side pillar trim.
#38b If you have an 02+ then there will be air bags in the side pillars. Remove them by lifting the tabs and using a 10mm socket to loosen the pillar trim from the pillar.
#39 The dash is now ready to be removed. From the center pull with slight force. the dash will unclip and be loose. Make sure you have the dash completely loose.
#40 Once you are sure it's loose lean it forward a bit, then lift it over the steering wheel, and out the passenger side of the car.
side notes:
After #40, I found that it was easiest to pull the dash out buy starting from the passenger side first, then middle, then driverside. The clips holding the dash secure are all located right under the windshield. And also, pull the steering column off of the studs completely, it will make it easier to pull the dash out with minimal problems. Leave the column detached from the studs for when you put the dash back in as well.
Before putting the dash back in, I'd recommend covering the steering wheel with a towel, because it gets kind of tricky putting the dash back in without scratching the steering wheel. Also, wait until the paint is COMPLETELY dry, I'd recommend waiting over night to be sure so that it doesn't scuff when putting it back in the car, maybe even tape the edges with painters tape/masking tape so that when it rubs on the windshield or pillars it doesn't scuff either.
Thread Starter
Pole Position
Joined: Jun 2008
Posts: 315
Likes: 1
From: Moorpark, CA
Painting - Befores and afters.
Once you get here, you're ready to paint your scuffed up/melted dash
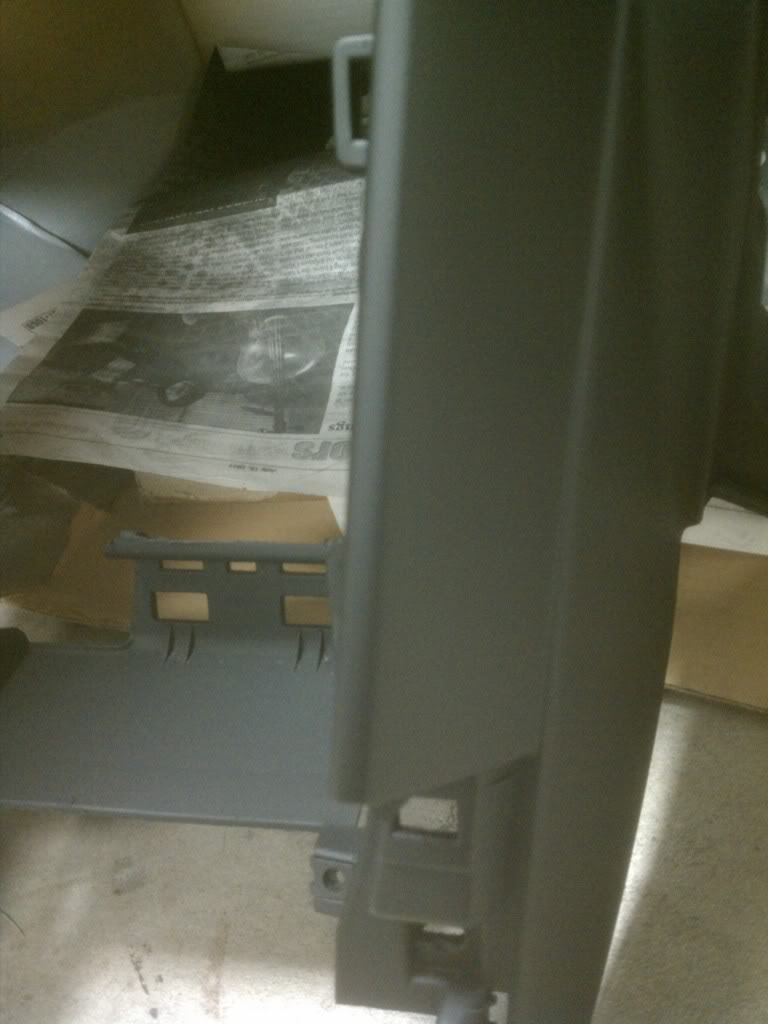
Set up a nice place to paint with some fresh air, for your safety
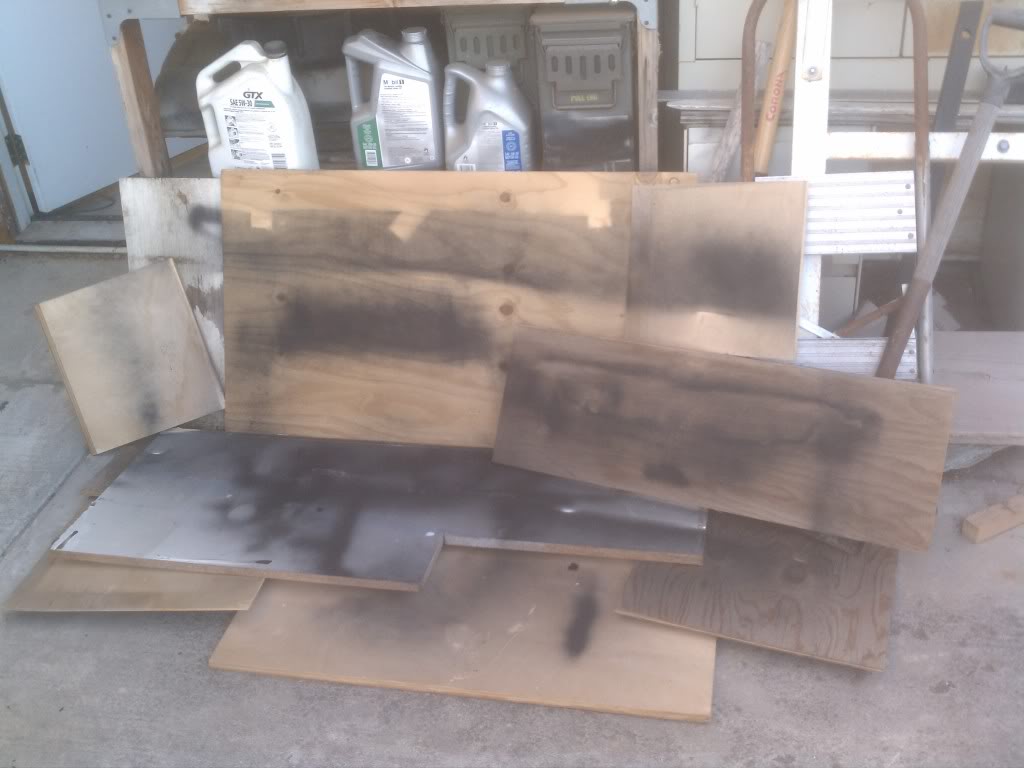
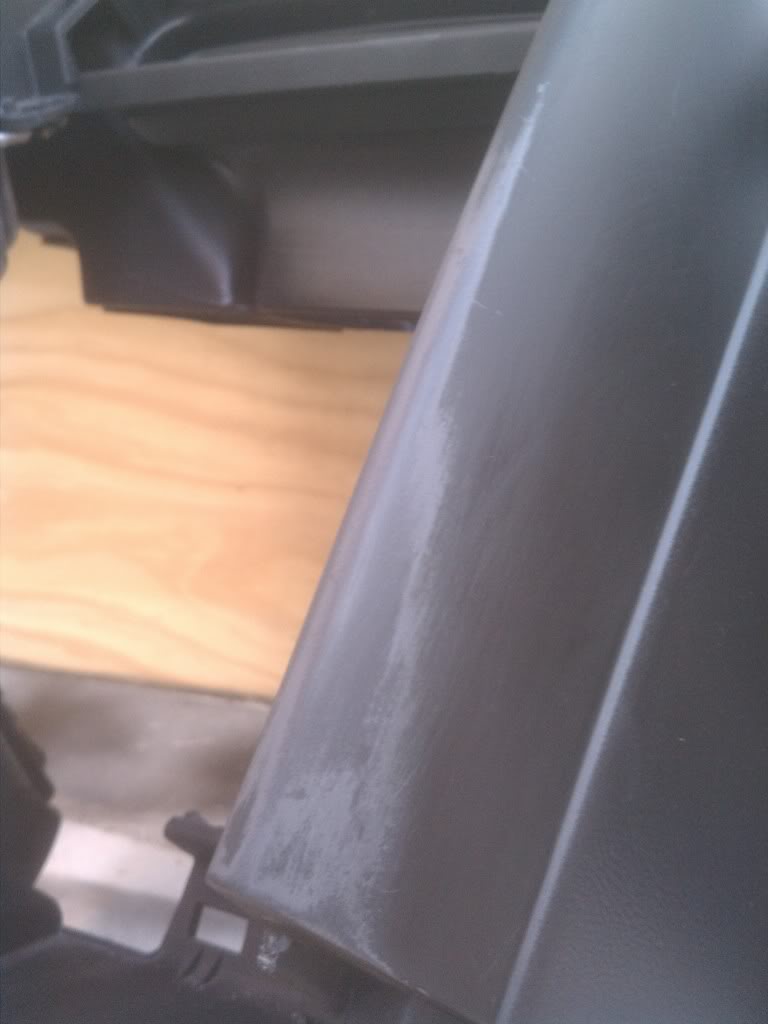
On the areas where there are alot of scratches and scuffs, you can use the paint thinner to remove the layers of scratches down to the plastic/primer. By doing this, it's like sanding the layers so that once the new paint applied dries, you won't be able to see the scratches underneath, making it nice and smooth. If you really have time, you should apply the paint thinner to the entire dash to ensure that everything comes out smooth. I used the soft part of the sponge to apply the paint thinner, and then the rougher part to help pull the paint off quicker. Once you're satisfied with the parts you've touched up, rinse off your sponge, and get a bucket of soapy water. Apply the soapy water sponge to your dash, center console, glovebox, and anything else you want to paint. You want a nice clean surface to paint over, any dirt or dust that gets painted over will show up when the paint dries.
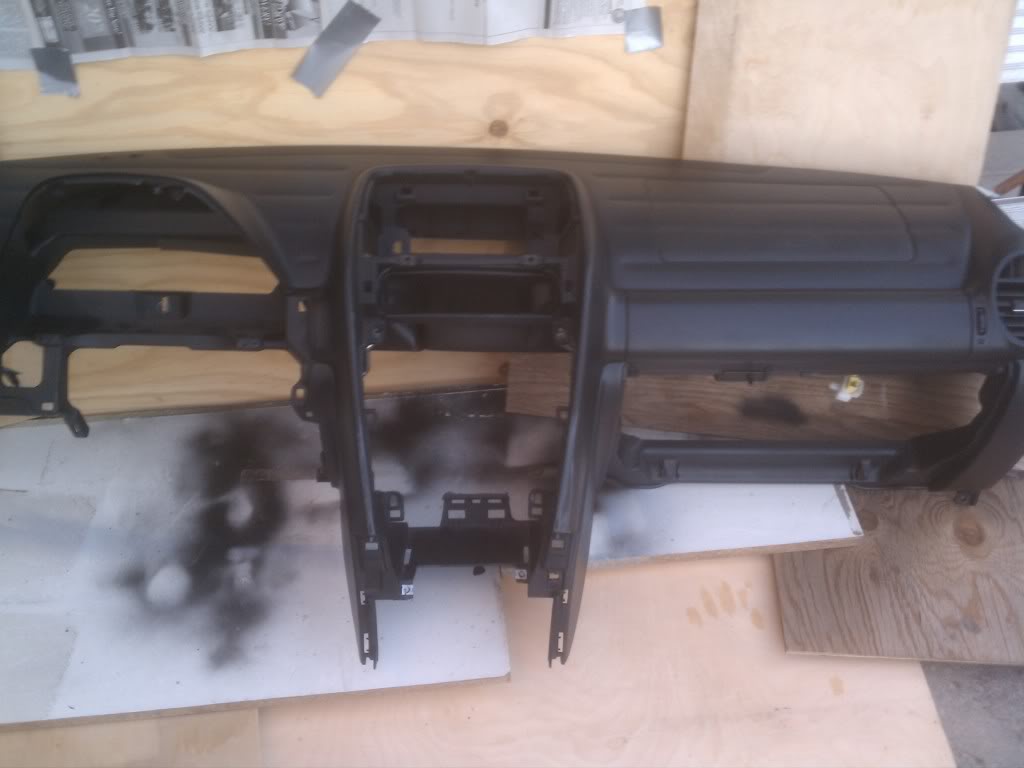
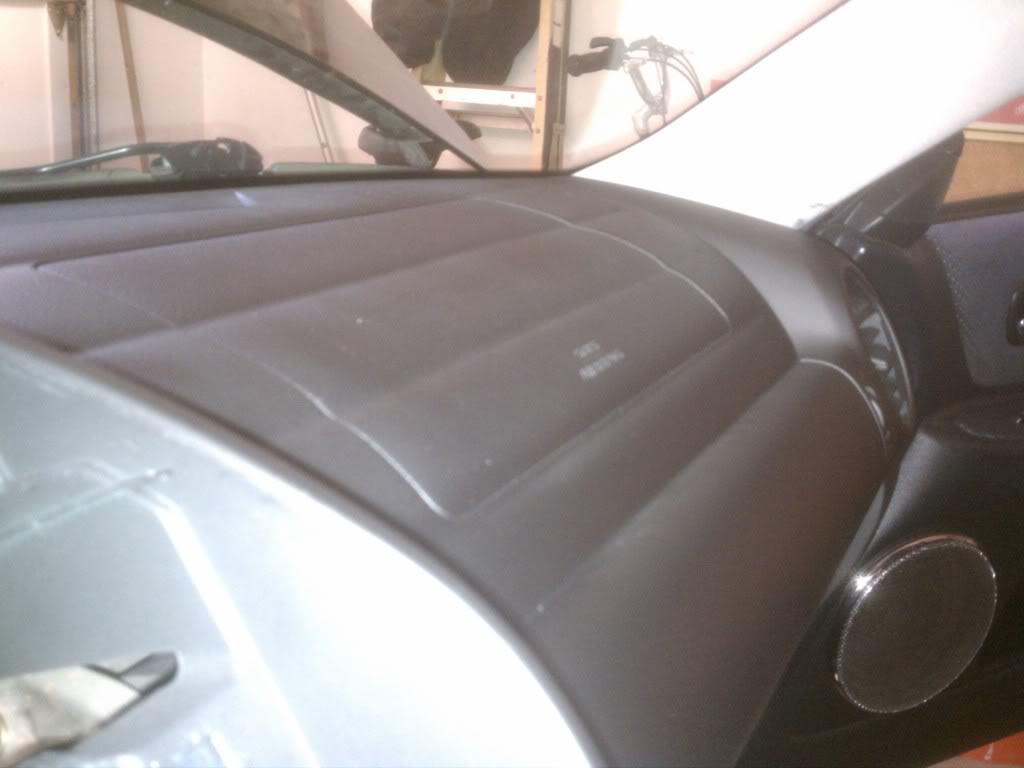
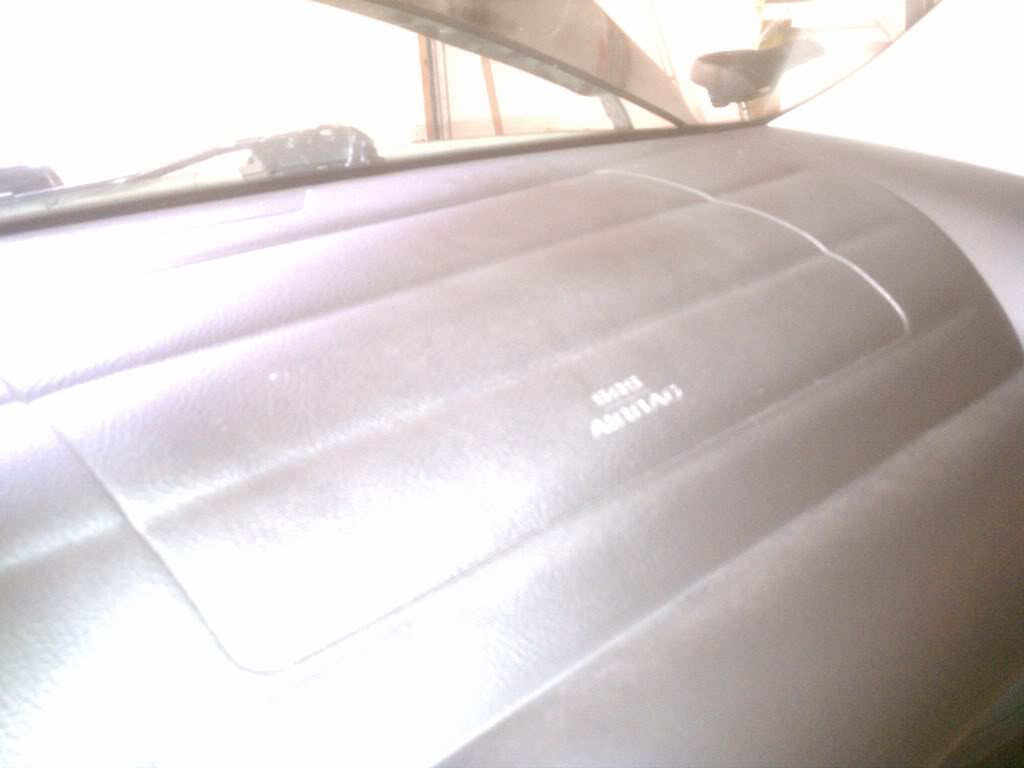
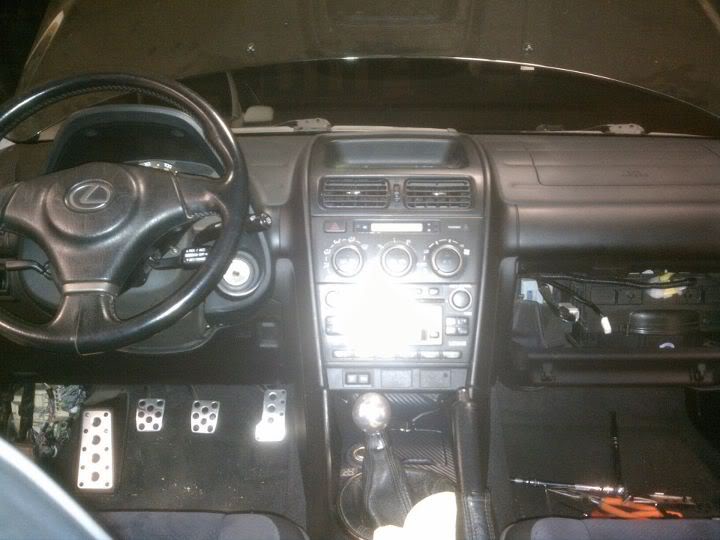
Before (notice the layers of paint, this area of the dash was where I had the most noticeable scratches and scuffs)
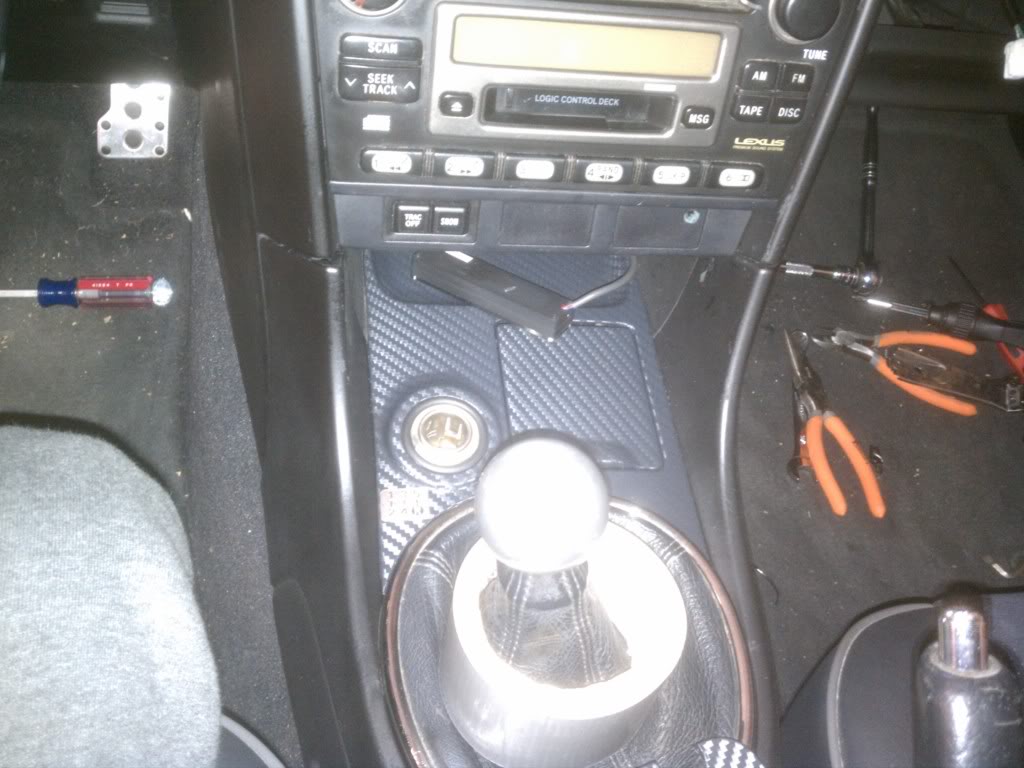
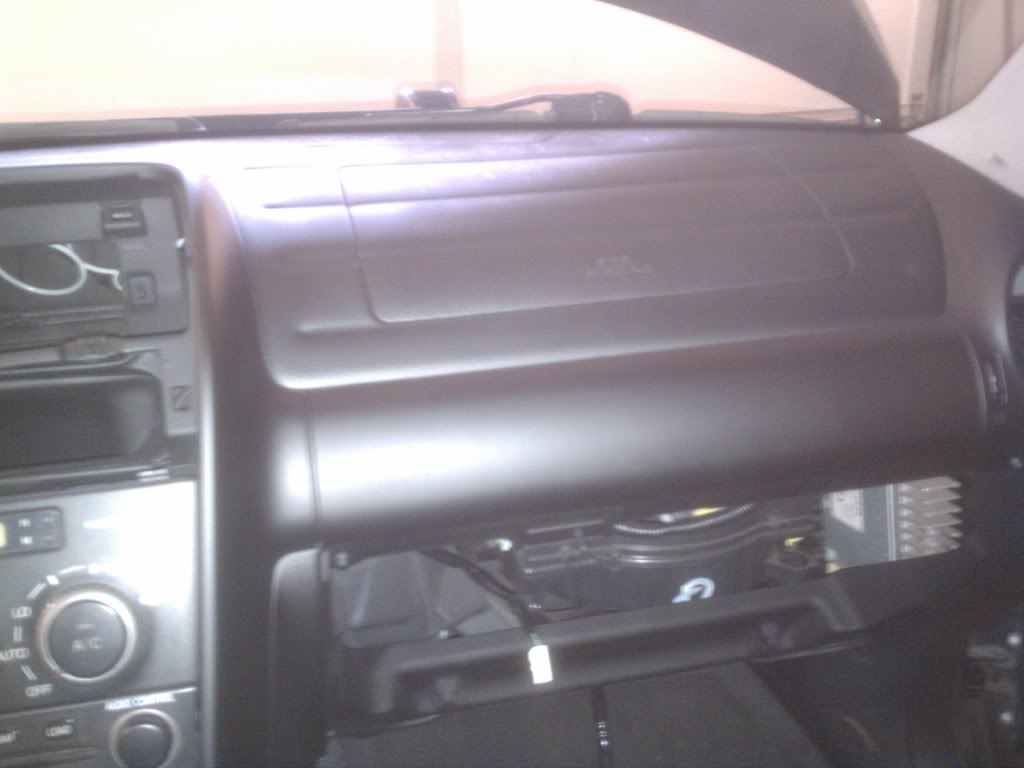
After (putting the radio/AC back in was kind of difficult to put in without getting minor scuffs, for future reference, I'd tape them up while installing them back in, as well as the center console. I will be touching this area up soon)


Once you get here, you're ready to paint your scuffed up/melted dash
Set up a nice place to paint with some fresh air, for your safety
On the areas where there are alot of scratches and scuffs, you can use the paint thinner to remove the layers of scratches down to the plastic/primer. By doing this, it's like sanding the layers so that once the new paint applied dries, you won't be able to see the scratches underneath, making it nice and smooth. If you really have time, you should apply the paint thinner to the entire dash to ensure that everything comes out smooth. I used the soft part of the sponge to apply the paint thinner, and then the rougher part to help pull the paint off quicker. Once you're satisfied with the parts you've touched up, rinse off your sponge, and get a bucket of soapy water. Apply the soapy water sponge to your dash, center console, glovebox, and anything else you want to paint. You want a nice clean surface to paint over, any dirt or dust that gets painted over will show up when the paint dries.
Before (notice the layers of paint, this area of the dash was where I had the most noticeable scratches and scuffs)
After (putting the radio/AC back in was kind of difficult to put in without getting minor scuffs, for future reference, I'd tape them up while installing them back in, as well as the center console. I will be touching this area up soon)

Trending Topics


Thread Starter
Pole Position
Joined: Jun 2008
Posts: 315
Likes: 1
From: Moorpark, CA
Yes, kinda-sorta, except the passenger airbag. You need to disconnect the harness as the airbag is connected to the dash. Also, you have to unhook the hood latch cable, and your gauge cluster is also not connected...I'm sure you could screw it back in with the dash out if you wanted to.

Driver School Candidate
Joined: Apr 2016
Posts: 2
Likes: 0
From: SC
Hey,
just wanted to commend you on the awesome write-up with pictures. As the Service Manager at a car dealership, I was a little daunted by the Mitchell's write-up, but you've set my mind at ease. I'll be repainting my dash while my whole a/c system is being replaced (compressor died and contaminated the system).
Thanks for the hard work!!
