
replacing map lights


 07-16-18, 09:15 AM
#2
6. REMOVE MAP LIGHT ASSEMBLY
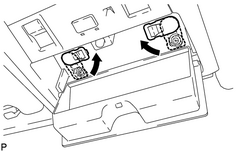
Open the holder.Using a screwdriver with its tip wrapped with protective tape, disengage the 2 claws.*1
Protective Tape
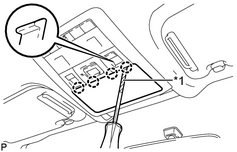
 Rotate the 2 caps as shown in the illustration until the screws are visible.
 Using a screwdriver with its tip wrapped with protective tape, disengage the 4 claws and disconnect the cover.*1
Protective Tape
 Remove the 2 screws.
 Using a moulding remover, disengage the 2 claws and 2 clips.
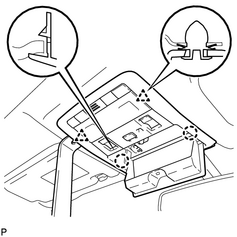 Disconnect the connector and remove the map light assembly.
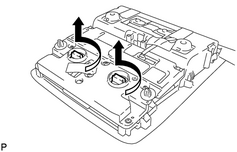
REMOVE MAP LIGHT BULBTurn the 2 map light bulbs and 2 map light sockets in the direction indicated by the arrows in the illustration and remove them as a unit.
Open the holder.Using a screwdriver with its tip wrapped with protective tape, disengage the 2 claws.*1
Protective Tape
Rotate the 2 caps as shown in the illustration until the screws are visible.Using a screwdriver with its tip wrapped with protective tape, disengage the 4 claws and disconnect the cover.*1Protective Tape
Remove the 2 screws.Using a moulding remover, disengage the 2 claws and 2 clips.Disconnect the connector and remove the map light assembly.REMOVE MAP LIGHT BULBTurn the 2 map light bulbs and 2 map light sockets in the direction indicated by the arrows in the illustration and remove them as a unit.
The following users liked this post:
epicurean (01-08-19)


Thread
Thread Starter
Forum
Replies
Last Post