When you click on links to various merchants on this site and make a purchase, this can result in this site earning a commission. Affiliate programs and affiliations include, but are not limited to, the eBay Partner Network.
JDM HS250h Radio Receiver ASSY disassembly to remove the HDD
The Japanese market HS 250h came with a radio receiver assembly with a CD/DVD player, a Sony Minidisc, a Japanese digital television receiver, hard disk drive ripping and storage of music, and of course Bluetooth audio and aux input. This infotainment receiver "plays" a number of car features, including the GPS and telematics, ETC electronic toll receiver, voice control, navigation including VICS receiver, reversing video camera, parking sensors and "perimeter monitoring", and the car's computer user interface on the main screen.
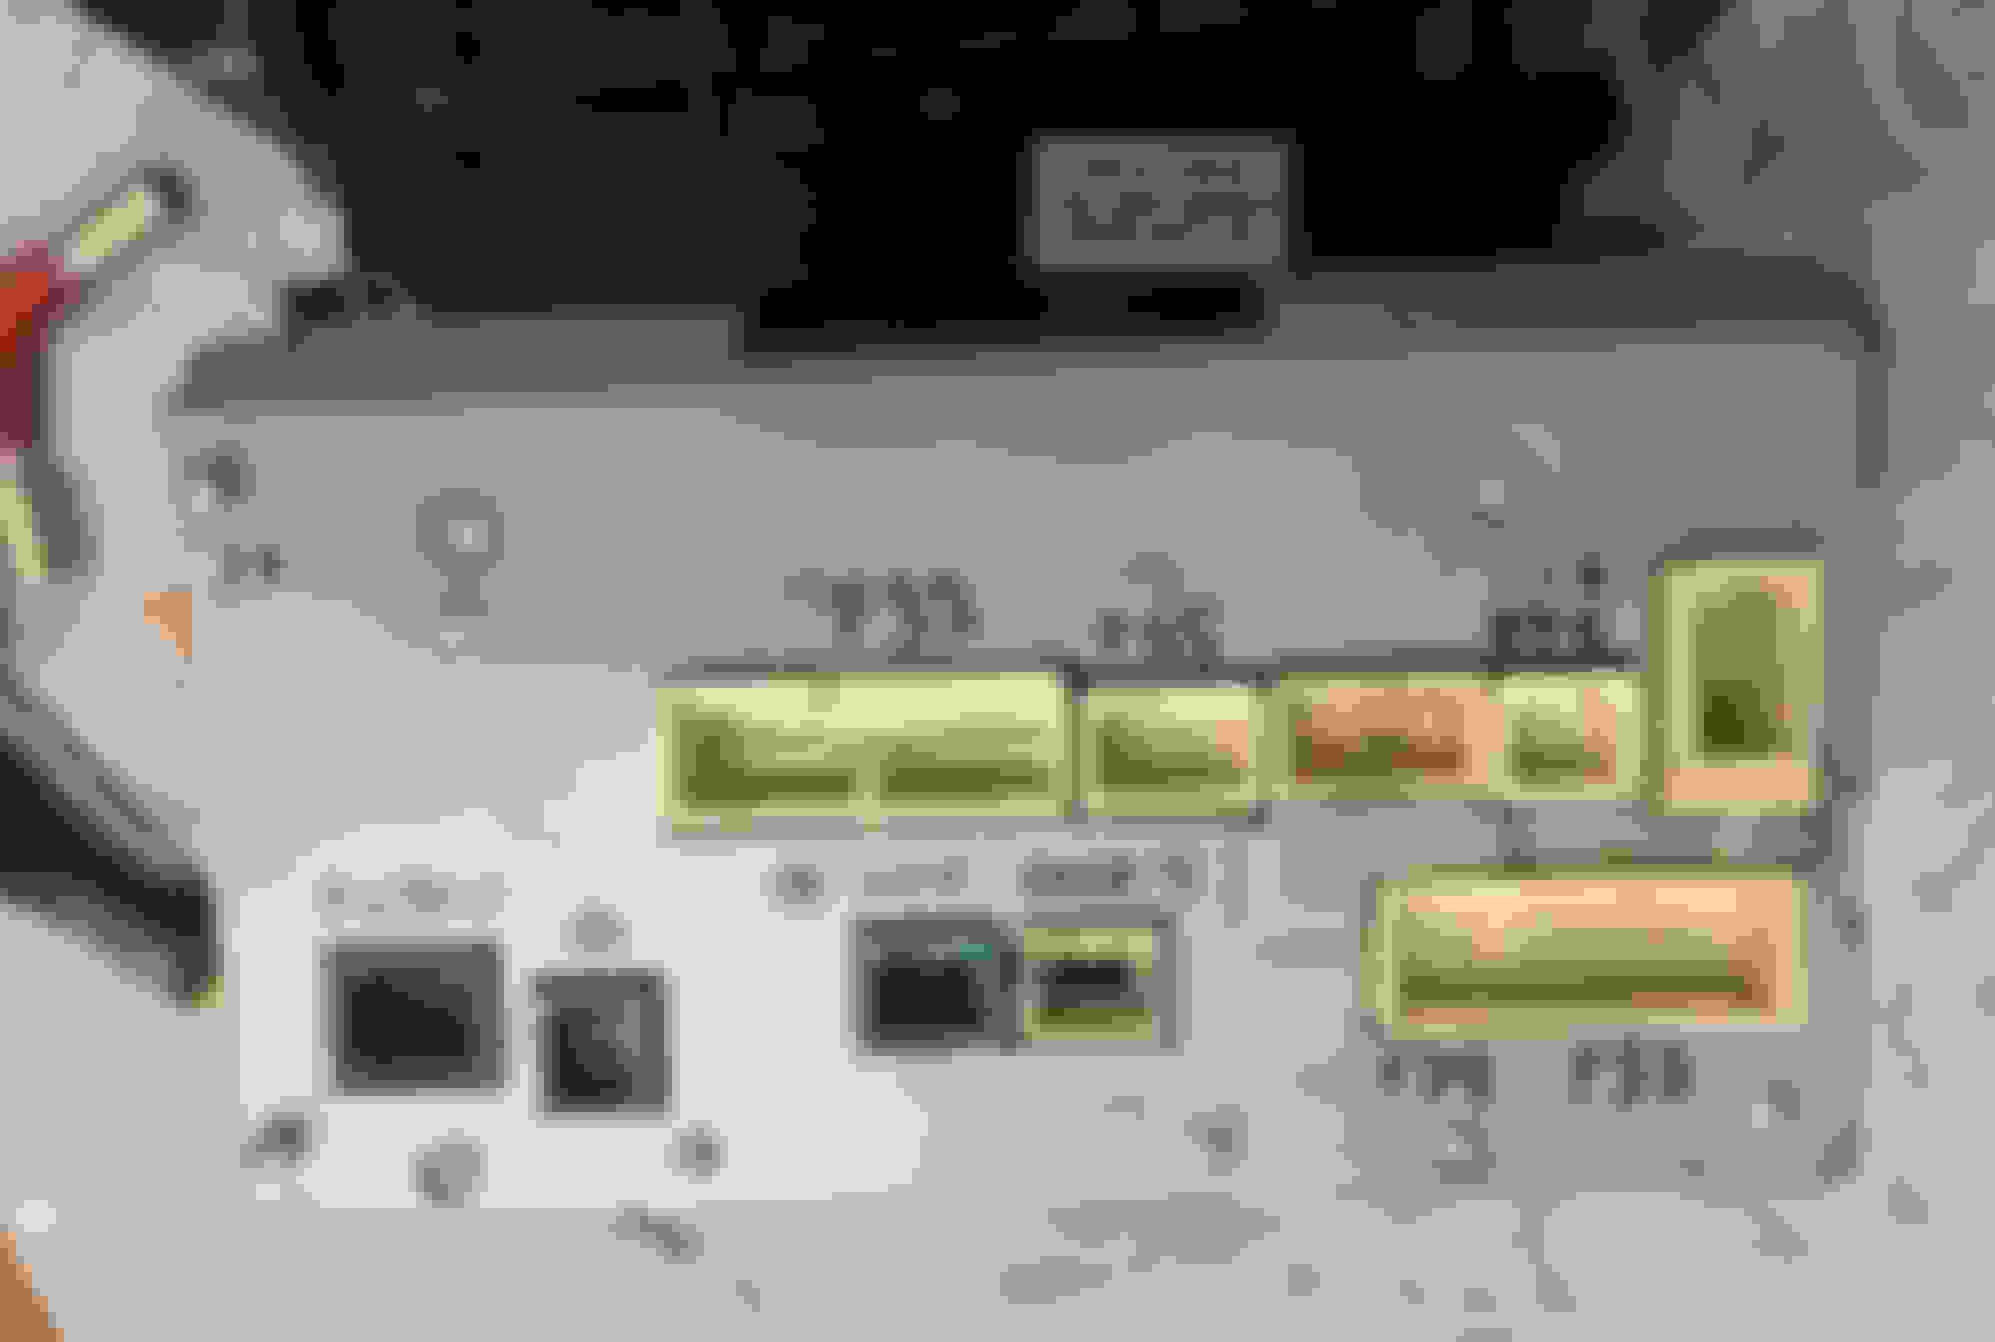
My particular part from 2012 is the Radio Receiver ASSY 86120-75271 manufactured by Fujitsu TEN, and marked with "100063" on the front.
The primary user interface, navigation, ripped music content are all stored on the receiver's internal hard disk drive. Some Lexus stereos have a side hatch to make this disk drive relatively accessible; in the case of this particular Radio Receiver ASSY, this is not at all the case and the disk is difficult to access. Further, the shop manual does not describe the procedure for disassembly; only to remove, reinstall, and test it.
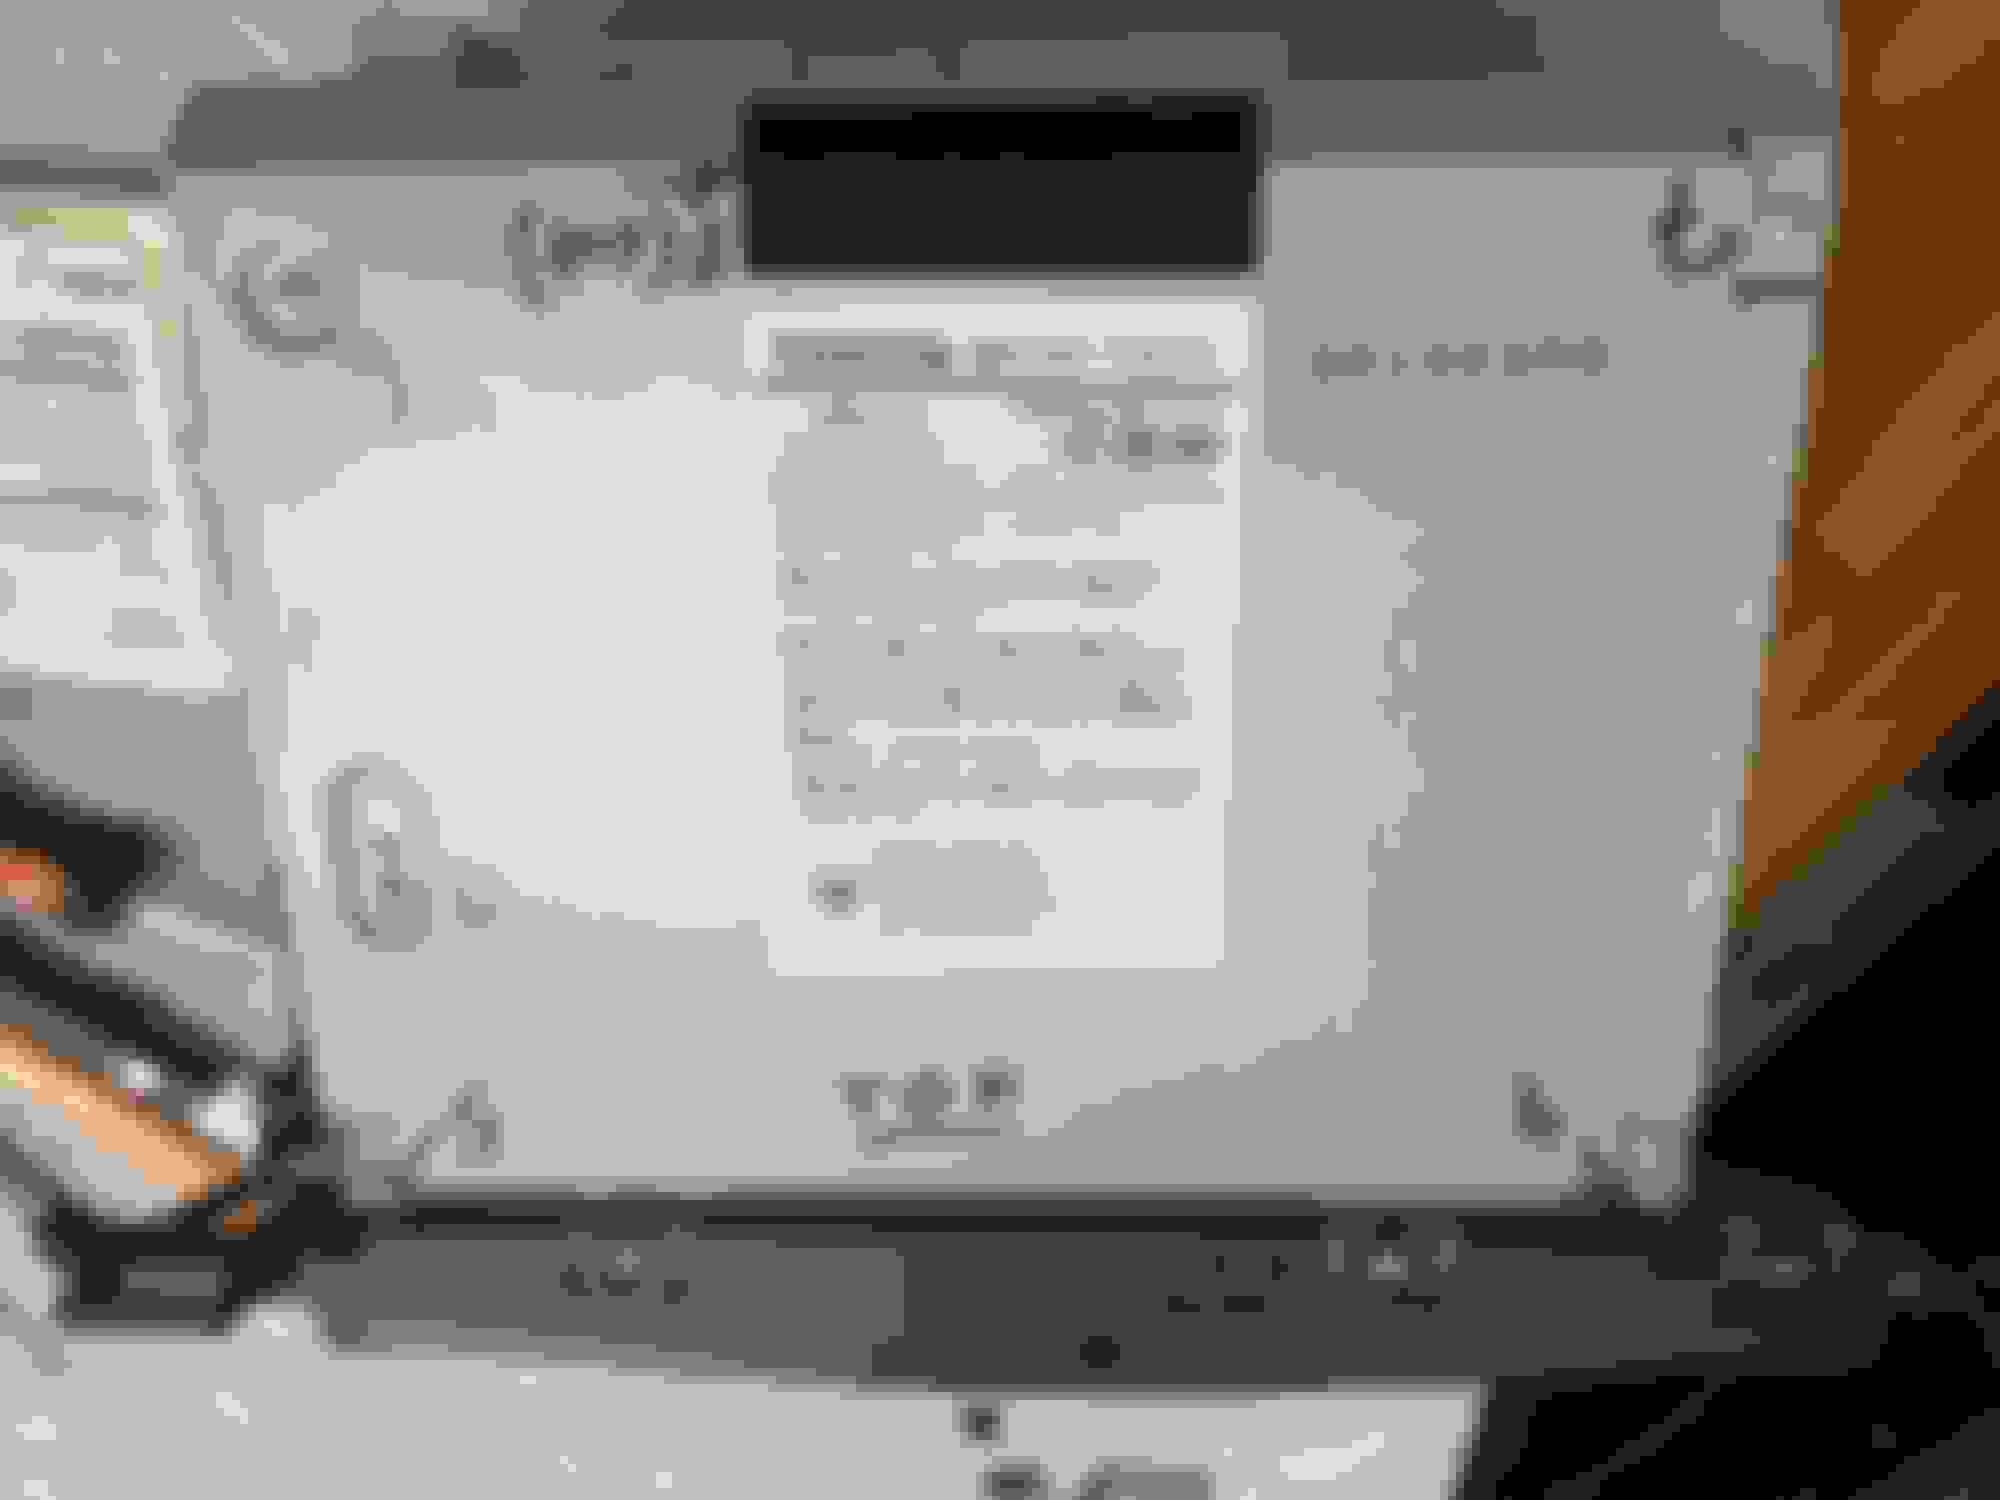
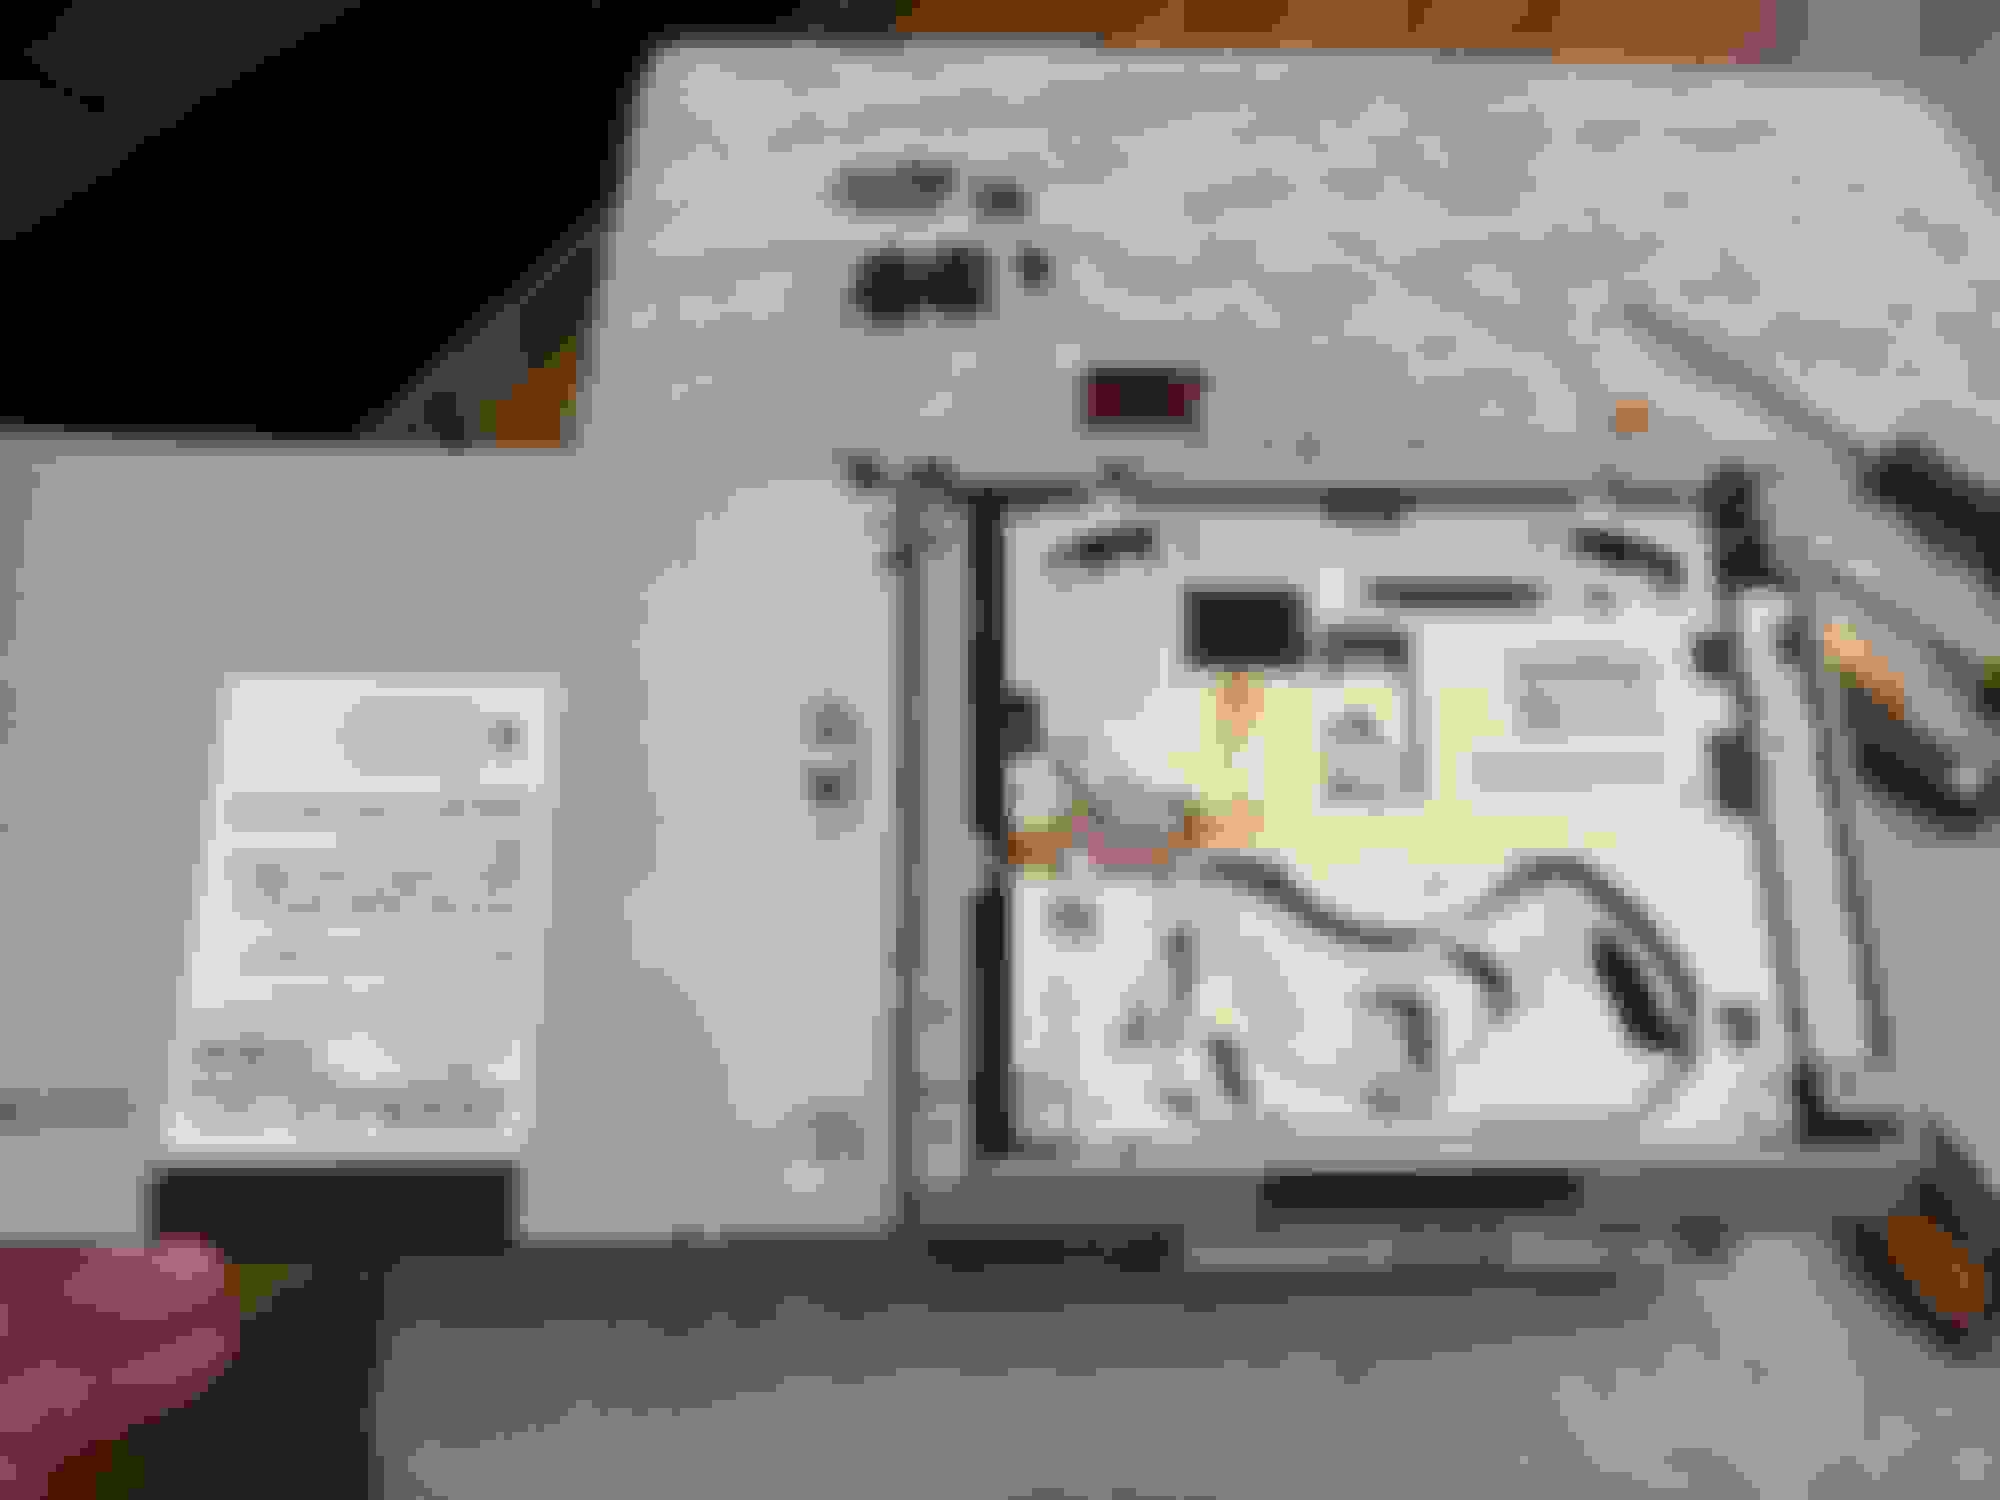
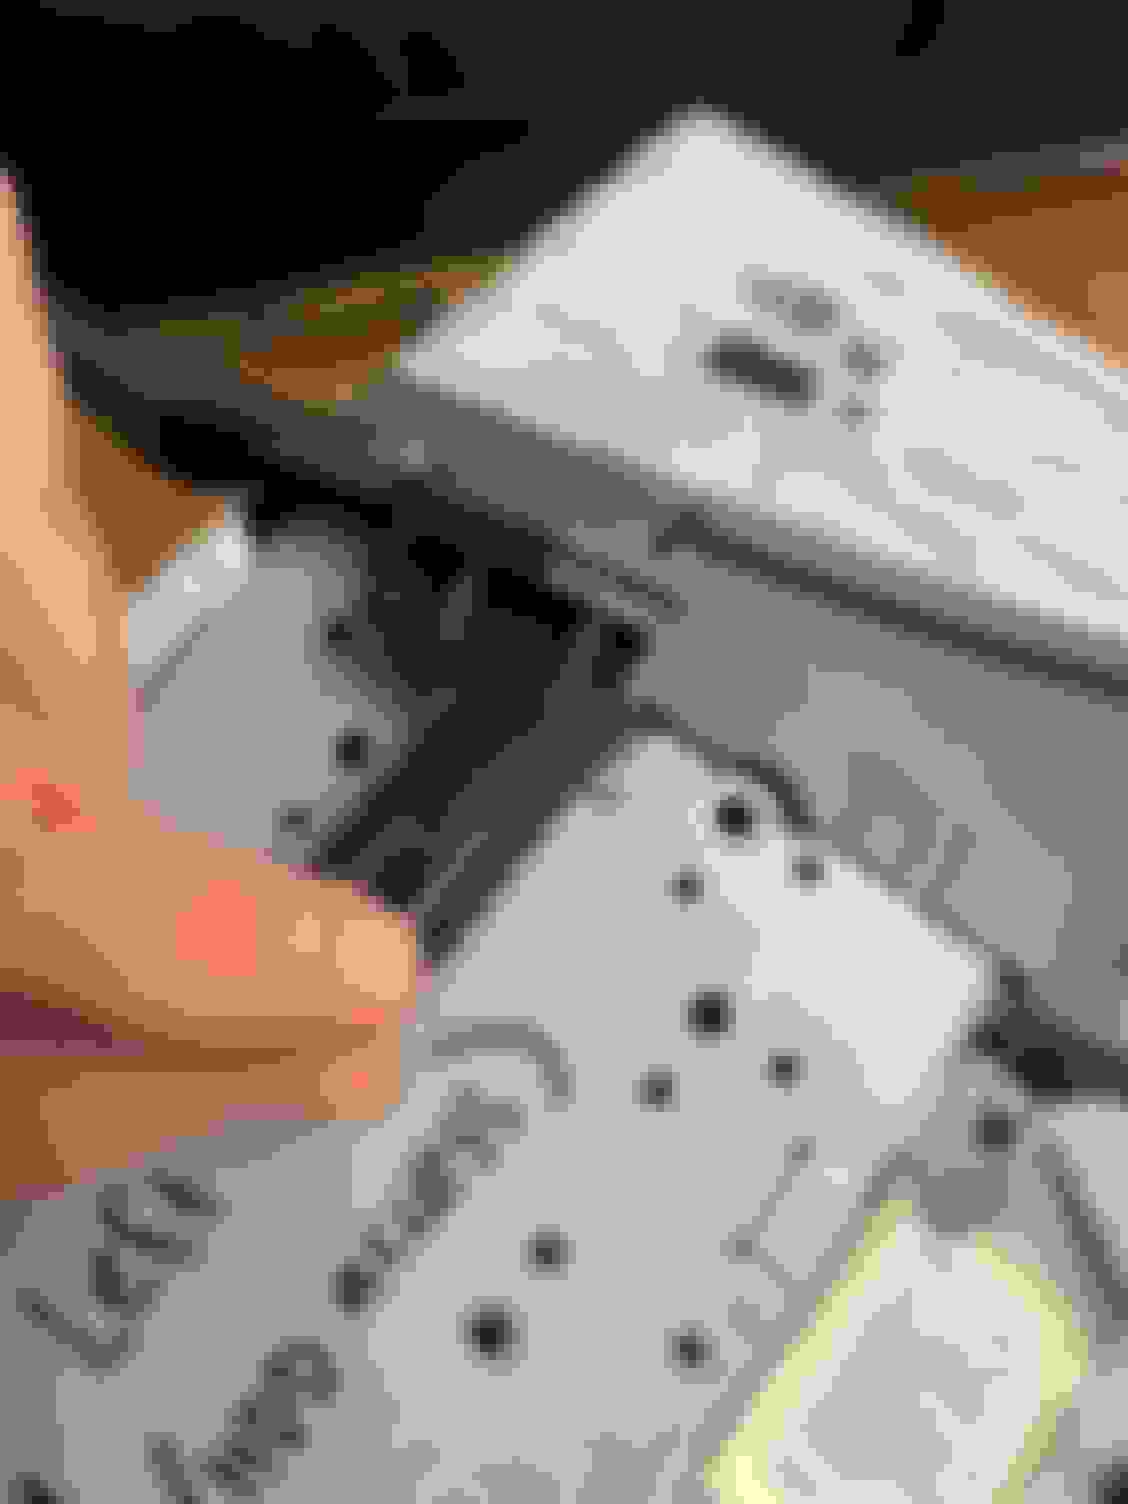
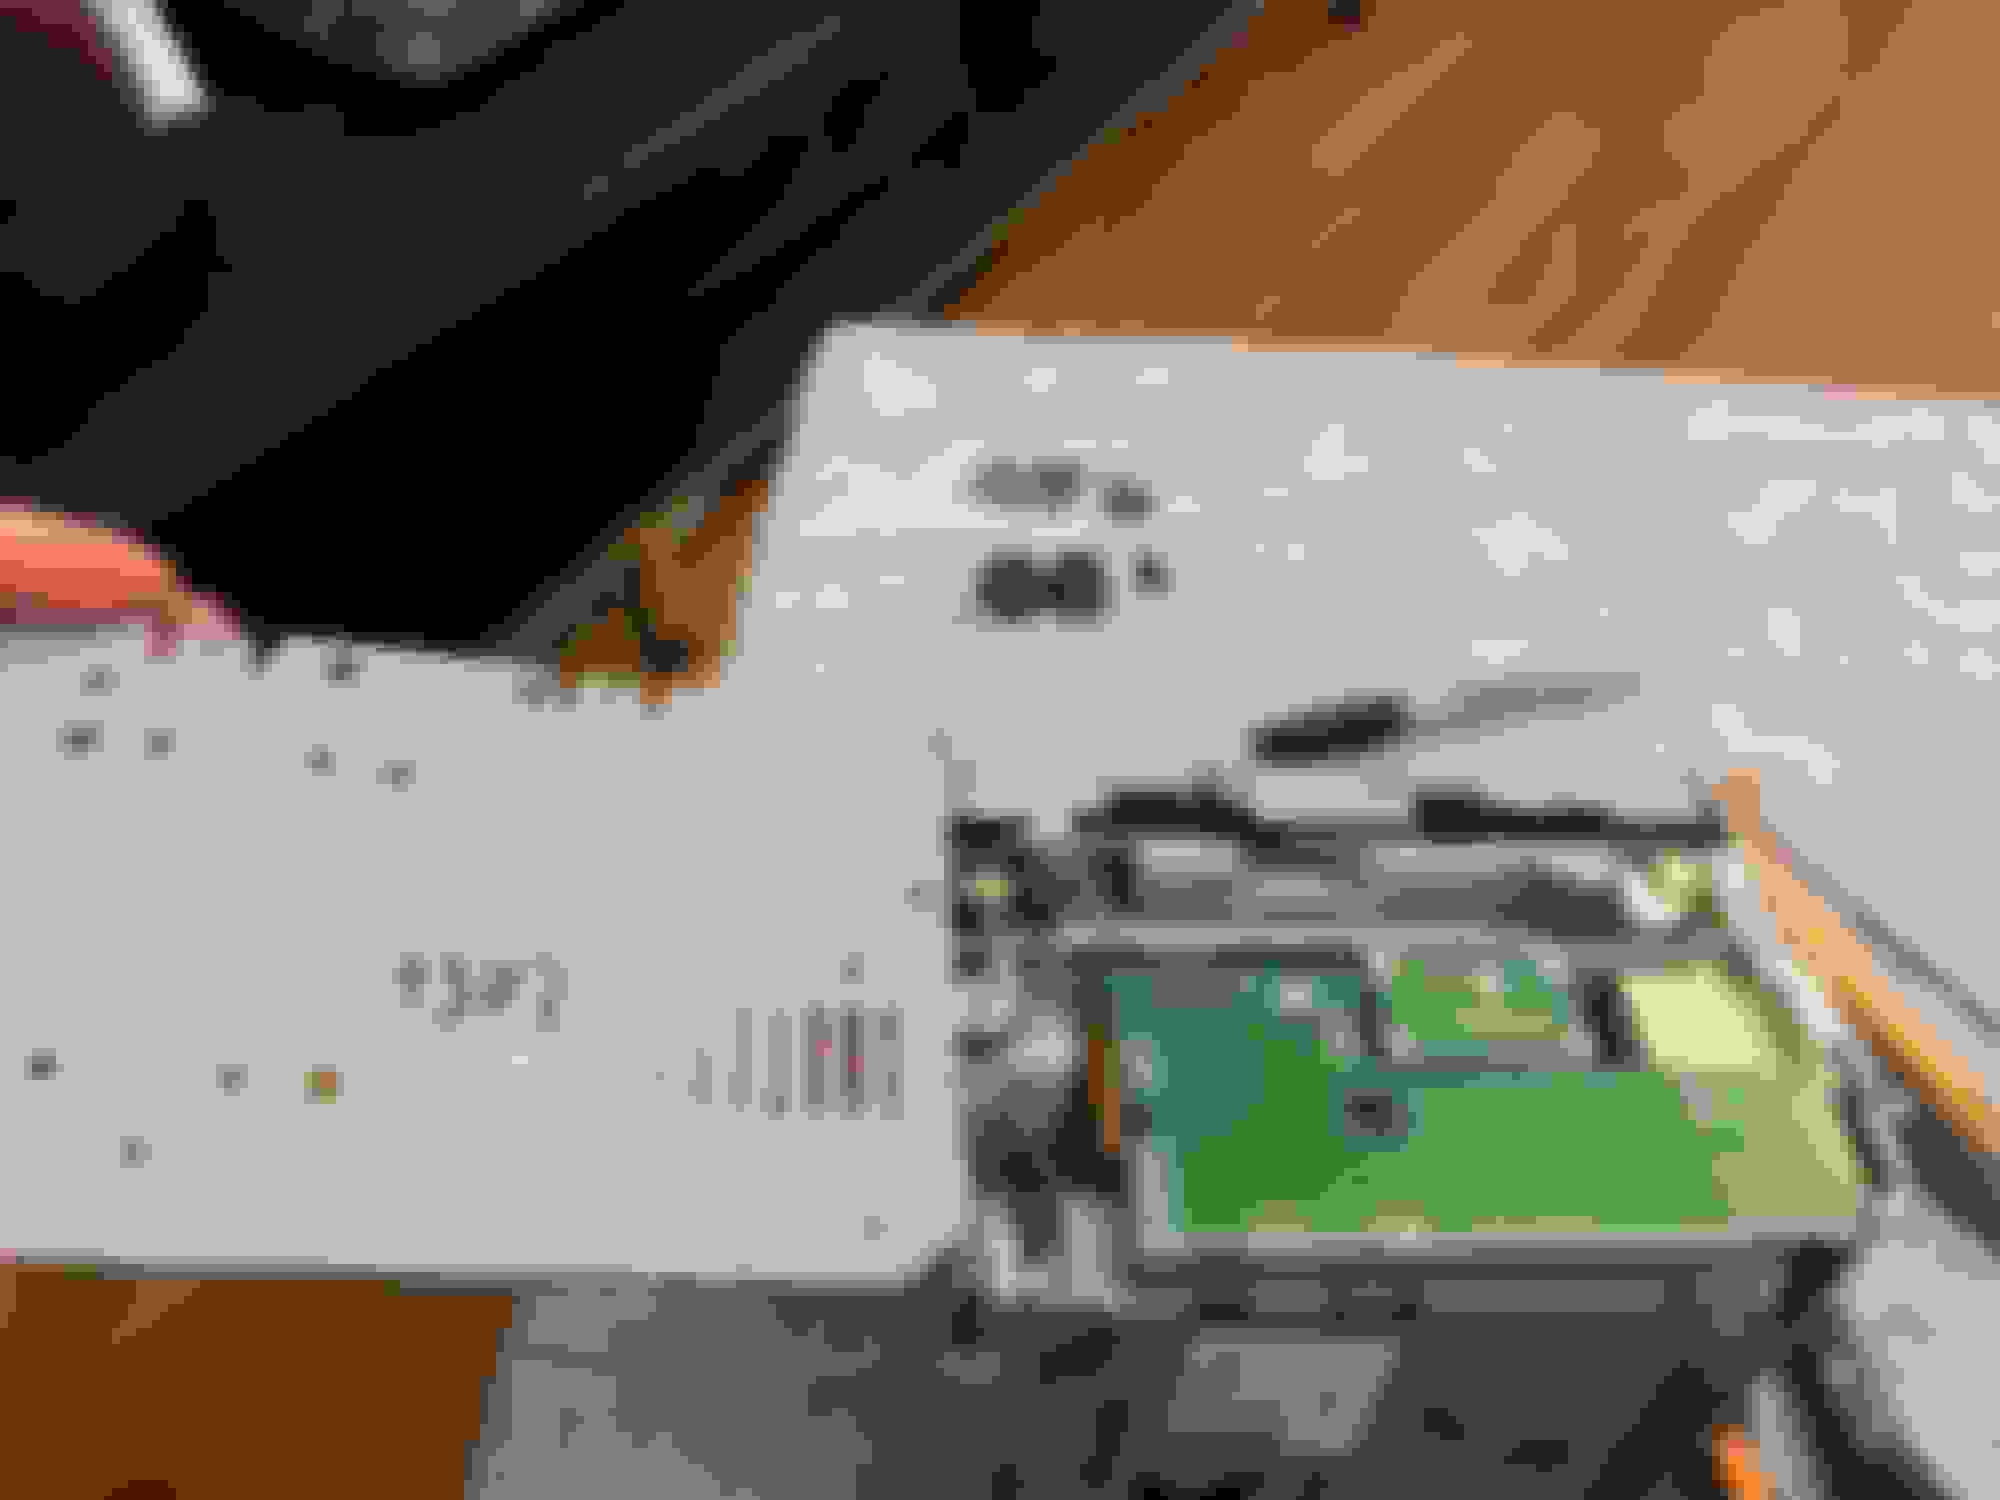
I removed a good many screws and disassembled some parts I didn't need to, so upon reassembly I marked the minimum number of screws that need to be removed and numbering these and taking photograhs. To disassemble your Radio Receiver ASSY 100063, follow these steps in reverse order, starting with the highest numbered screws and moving down to #1. The front face of the Radio Receiver ASSY marked with 100063. The back face, which I have labeled with the connector numbers per the EWD. Note, there is an IEEE 1394 Firewire 800 port on this device. It is used for updating the navigation maps, using a device Toyota sells for over $1000. The accessible end of the firewire port is under the glove box. The bottom of the radio receiver ASSY. The left side of the assembly. First remove the four silver screws and two black screws, which are anchored into plastic. You will need a 9mm socket and a Phillips driver. There is one additional screw attaching the bracket to the Telematics Transceiver. It does not need to be removed. On the right side of the assembly.... Next remove the six silver screws and one black screw. Set aside the brackets and Telematics Transceiver ASSY. The brackets have sharp edges. Next detach the climate control control panel (Toyota calls it the Integration Control and Panel ASSY). The black plastic faces are secured together using two plastic tabs, one horizontal and one vertical. Use a flat screwdriver to flex the tabs so they release through the rectangular tab sockets. It doesn't feel like these parts will separate; but they will. A bit like Legos. The top panel. Next you will need to cut down the middle of this black anti-vibration tape. As the next step will be to separate the top panel. Loosen the five screws numbered here with a very small Phillips tip. The top panel removed. On the left side, there is a removable black plastic tab assembly. Remove this with a phillips screwdriver. The tab obscures two screws we will need to remove in the next step. The left panel. Remove the three screws shown, and then use a large flat screwdriver or spatula to slide the panel up. Notice at the bottom of the photo, there are two tabs seated snugly into slots. You need to pry the panel upward to pull the tabs out (without cutting yourself!) The left panel removed. The hard disk drive is now exposed in its carriage. Two Phillips screws anchor it down, and then a clear plastic pull tab allows you to unplug the disk. Note in this step it is very important to use a magnetic driver tip; or else to be aware of the risk of the screws falling down into the machinery. The disk drive. I will now send this to an expert for analysis. The controls have an English language setting, but many parts of the system are excluded from the translated content and are still shown in Japanese.
Last edited by dougaliscious; 04-27-24 at 09:06 AM.
Reason: adding reverse video camera
 04-27-24, 08:46 AM