
DIY: 3GS Stereo Display Removal

Thread Starter
Pole Position
Joined: Mar 2009
Posts: 356
Likes: 5
From: Alberta
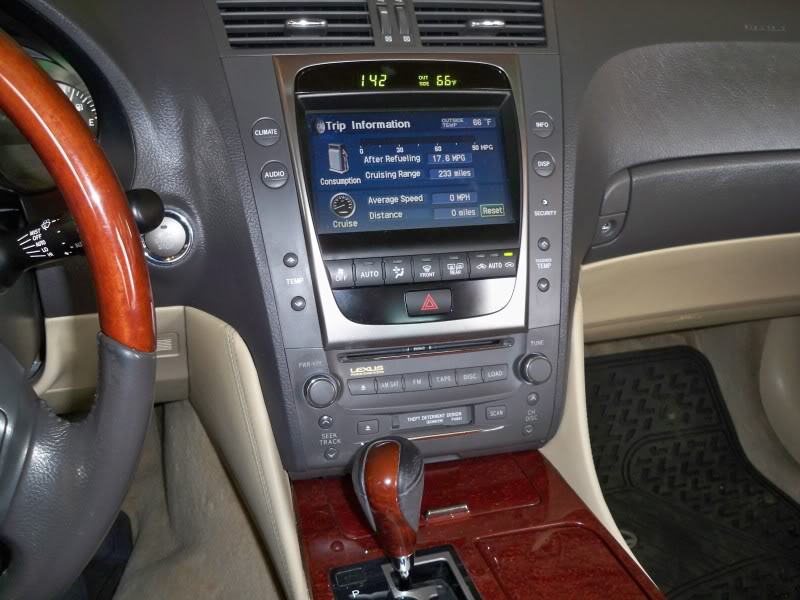
Lexus 3G stereo display removal:
Note: This was done a 2006 GS300 AWD, but the removal should be the same for a 3G's.
Things you will need:
-Phillips screw driver
-10 mm socket / ratchet
-round edge panel popper
-about 15 min of time
STEP 1:
remove the shift ****. You will do this to remove the wood trim that covers the center console so you do not scuff it up.
STEP 2:
Use a panel popper to pop of the wood trim. DO NOT pry it up use a twisting motion so you don't crack the plastic, and start from a hidden spot just in case.
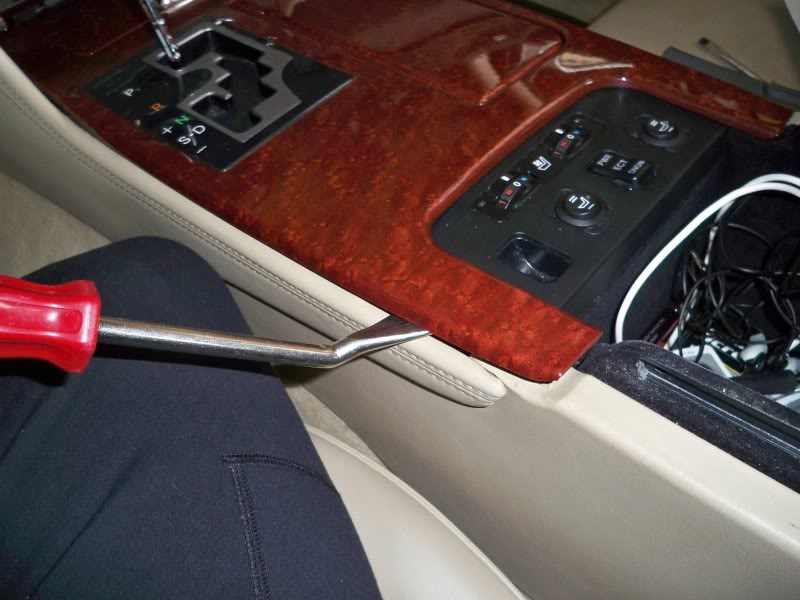
STEP 2.5:
Use a panel popper to remove the small thin plastic part right under the tape deck
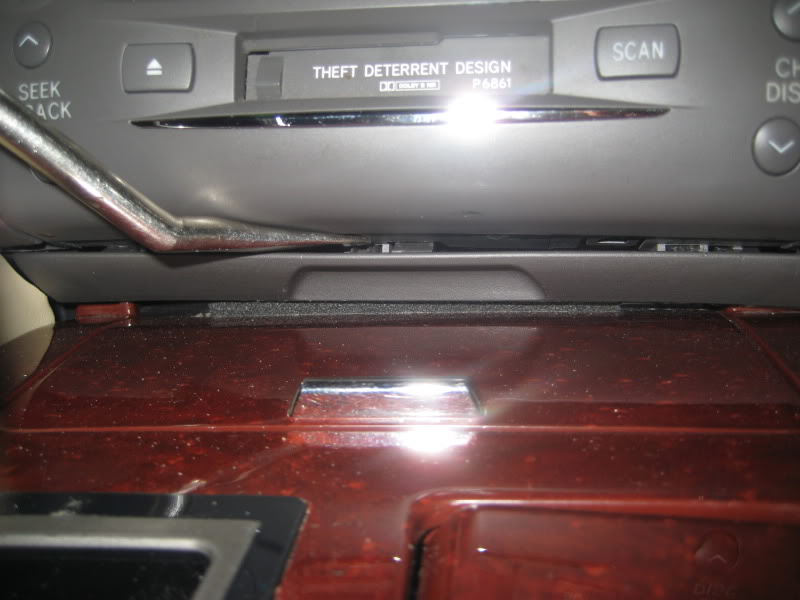
STEP 3:
Put the car in Neutral !!!! MAKE SURE THE E-BRAKE IS ON!!!. Then move the wooden plastic trim over the shifter and disconnect the two (2) small plugs. These two (2) plugs go to the cig lighter and a small light FYI.

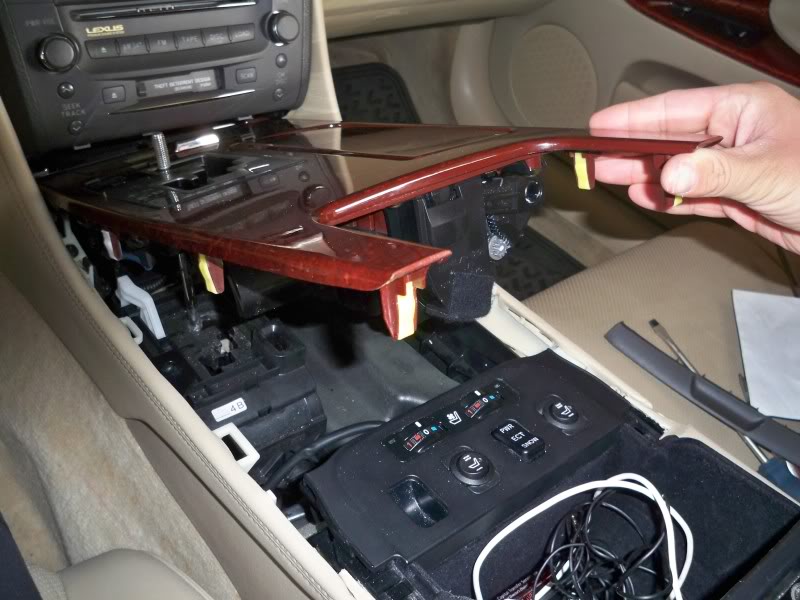
STEP 4:
You can now pu the car back in park. The center console in now wide open.
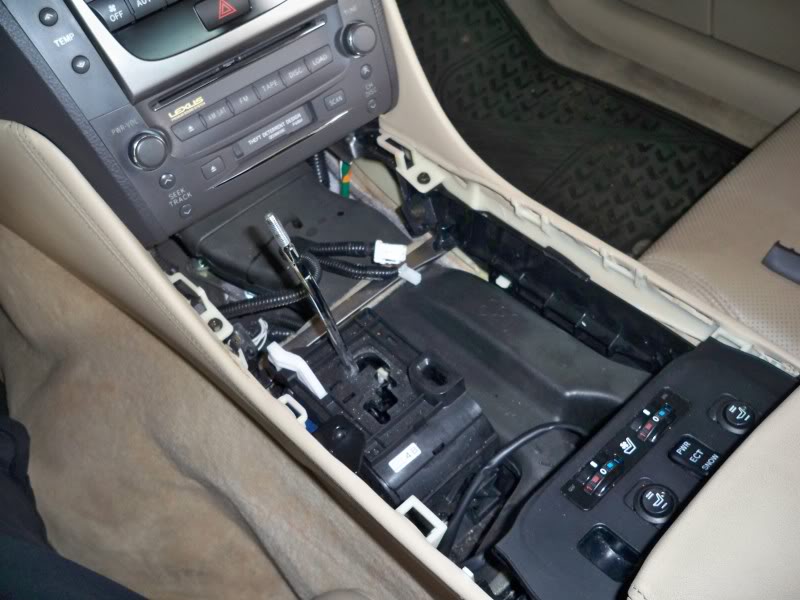
STEP 5:
You will need to remove the Leather side parts of the center console. These remove with a simple phillips screw on each side. There is a clip on the end of these leather parts closest to the rear of the car make sure you use a panel popper to pop them out. Once you undo the screw and pop the clips out a small amount of sliding force to the rear of the car will make them come loose

STEP 6:
Once the leather side covers are removed you can access the four (4) 10mm bolts that hold the display unit in place. There will be Two (2) bolts on the bottom right and left sides of the unit, and Two (2) 10mm bolts on the top right and left side as shown in the pictures.
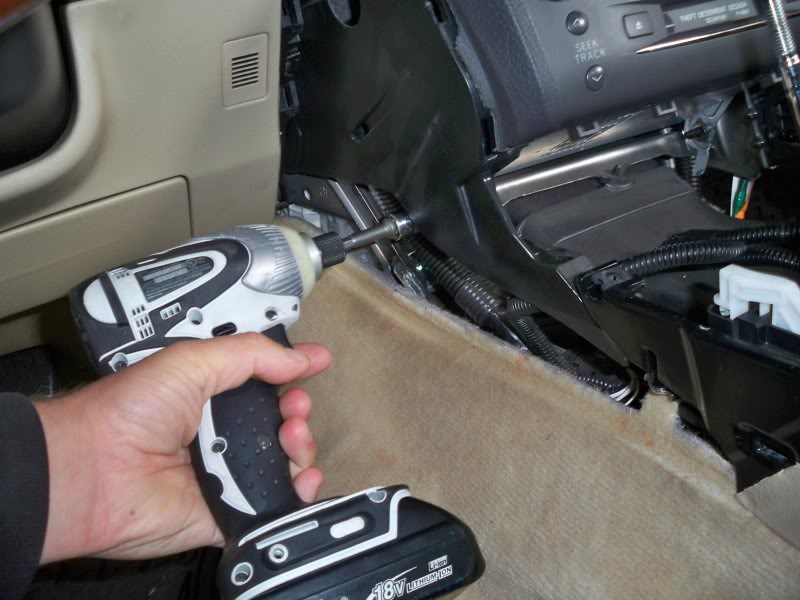
Bottom Left
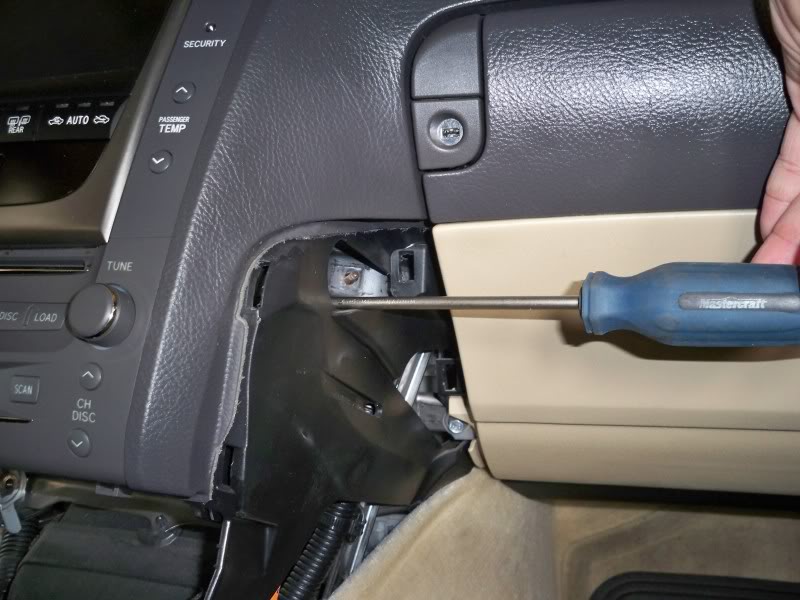
Top right ( I used a screw driver just to show you the hole)
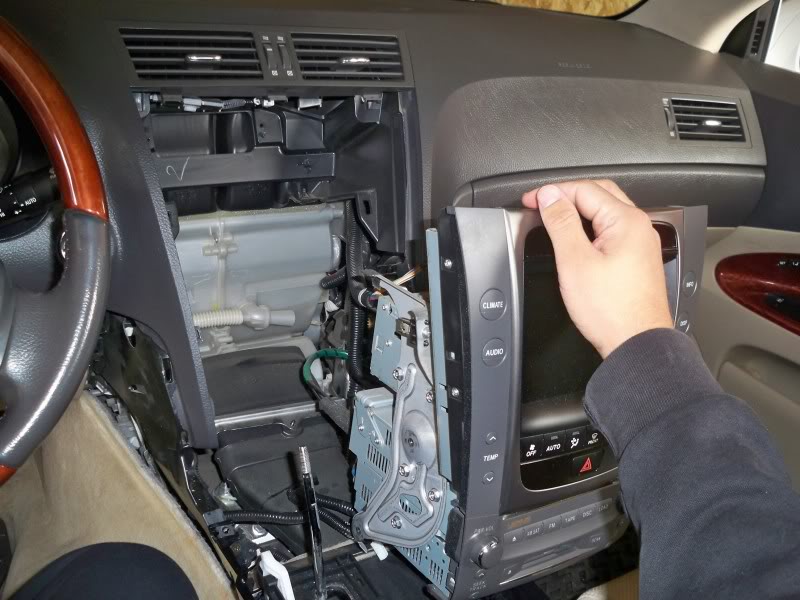
STEP 7:
Once all 10mm bolts are out you will slide you hand under and behind the unit trying to pop the unit out. DO NOT USE A TON OF FORCE. You want to simply wiggle the unit out. Grab the unit a shake it back and forth in a controlled motion until it pops out.
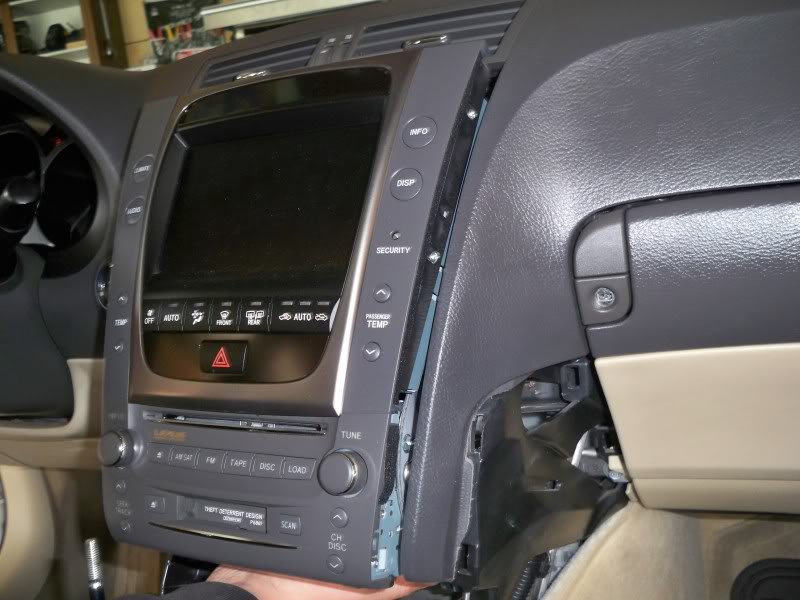
STEP 8:
Once it comes loose your in the home stretch. CAREFULLY pull the unit out and unplug the clips and wires. Don't worry each plug only fits in one spot so as long as you plug them all back in your ok. I had a blue plug on the display unit that did NOT have anything plugged into it.
** ! BE CAREFUL NOT TO PUT THE SHIFTER ROD THROUGH THE SCREEN ! **
STEP 9:
Once pulled out, do as you wish. Add your dvd bypass, video input etc. To put it back together just repeat steps backwards.
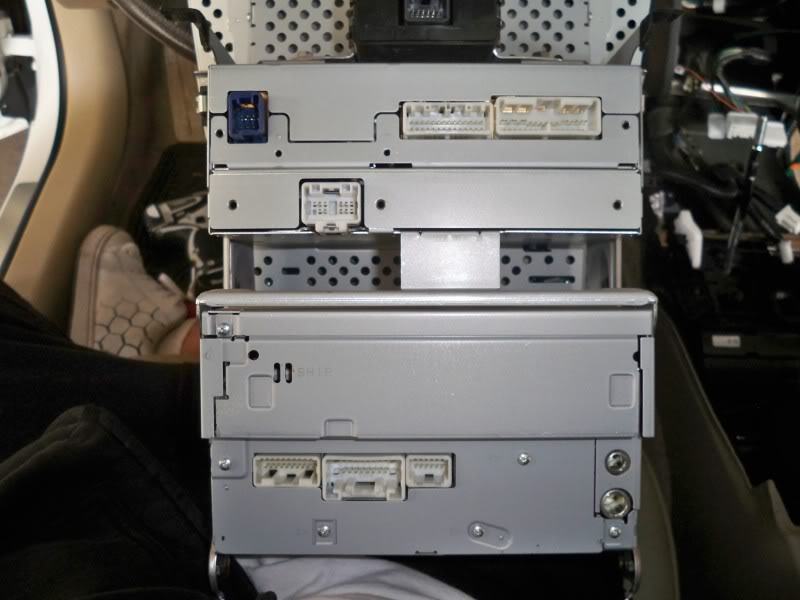
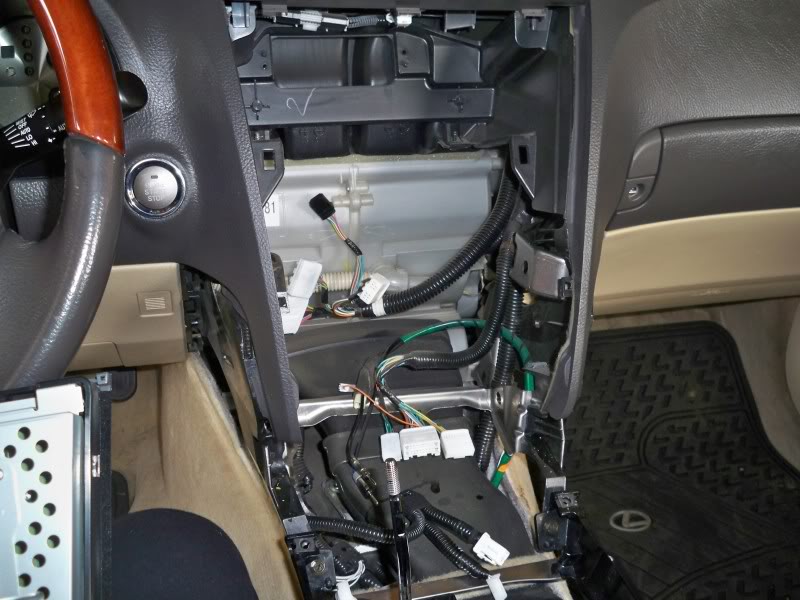
Here are some pictures of the back of a 2006 GS300 display unit with
NO ML or NAVI. And the cavity behind the display unit.
Any other questions please let me know.
MODS!!! IF your reading this PLEASE PLEASE PLEASE sticky this. Way to many people ask the same question on how to remove this unit
-The.K.W.C-
Note: This was done a 2006 GS300 AWD, but the removal should be the same for a 3G's.
Things you will need:
-Phillips screw driver
-10 mm socket / ratchet
-round edge panel popper
-about 15 min of time
STEP 1:
remove the shift ****. You will do this to remove the wood trim that covers the center console so you do not scuff it up.
STEP 2:
Use a panel popper to pop of the wood trim. DO NOT pry it up use a twisting motion so you don't crack the plastic, and start from a hidden spot just in case.
STEP 2.5:
Use a panel popper to remove the small thin plastic part right under the tape deck
STEP 3:
Put the car in Neutral !!!! MAKE SURE THE E-BRAKE IS ON!!!. Then move the wooden plastic trim over the shifter and disconnect the two (2) small plugs. These two (2) plugs go to the cig lighter and a small light FYI.
STEP 4:
You can now pu the car back in park. The center console in now wide open.
STEP 5:
You will need to remove the Leather side parts of the center console. These remove with a simple phillips screw on each side. There is a clip on the end of these leather parts closest to the rear of the car make sure you use a panel popper to pop them out. Once you undo the screw and pop the clips out a small amount of sliding force to the rear of the car will make them come loose
STEP 6:
Once the leather side covers are removed you can access the four (4) 10mm bolts that hold the display unit in place. There will be Two (2) bolts on the bottom right and left sides of the unit, and Two (2) 10mm bolts on the top right and left side as shown in the pictures.
Bottom Left
Top right ( I used a screw driver just to show you the hole)
STEP 7:
Once all 10mm bolts are out you will slide you hand under and behind the unit trying to pop the unit out. DO NOT USE A TON OF FORCE. You want to simply wiggle the unit out. Grab the unit a shake it back and forth in a controlled motion until it pops out.
STEP 8:
Once it comes loose your in the home stretch. CAREFULLY pull the unit out and unplug the clips and wires. Don't worry each plug only fits in one spot so as long as you plug them all back in your ok. I had a blue plug on the display unit that did NOT have anything plugged into it.
** ! BE CAREFUL NOT TO PUT THE SHIFTER ROD THROUGH THE SCREEN ! **
STEP 9:
Once pulled out, do as you wish. Add your dvd bypass, video input etc. To put it back together just repeat steps backwards.
Here are some pictures of the back of a 2006 GS300 display unit with
NO ML or NAVI. And the cavity behind the display unit.
Any other questions please let me know.
MODS!!! IF your reading this PLEASE PLEASE PLEASE sticky this. Way to many people ask the same question on how to remove this unit
-The.K.W.C-
Last edited by THE.K.W.C; Sep 9, 2009 at 01:42 PM.


Instructor
Joined: Mar 2007
Posts: 842
Likes: 6
From: S. FL
the 2nd day i got the car, i popped open onto the center wood trim is to get to my cig lighter to hardwire my V1. Was sweating because i was scared to scratch something. Ever since then, i didn't end up getting an ipod interface because im too chicken to open it back up.
And also because i don't want to welcome any rattles.
And also because i don't want to welcome any rattles.
Trending Topics

Pole Position
Joined: Jul 2007
Posts: 239
Likes: 0
From: BC

Intermediate

Joined: Jan 2005
Posts: 425
Likes: 8
From: ID


Pole Position
Joined: Oct 2009
Posts: 3,154
Likes: 14
From: Toronto
I did this for my matrix to replace the rubbish standard GM radio that was in it, overall this looks like a lot more stuff to scratch and tabs to break than that job. I don't think I'll be doing anything like this so long as the rest of the car is in decent shape. :P
