
Clear the deck


Thread Starter
Advanced

Joined: Sep 2009
Posts: 664
Likes: 3
From: NC
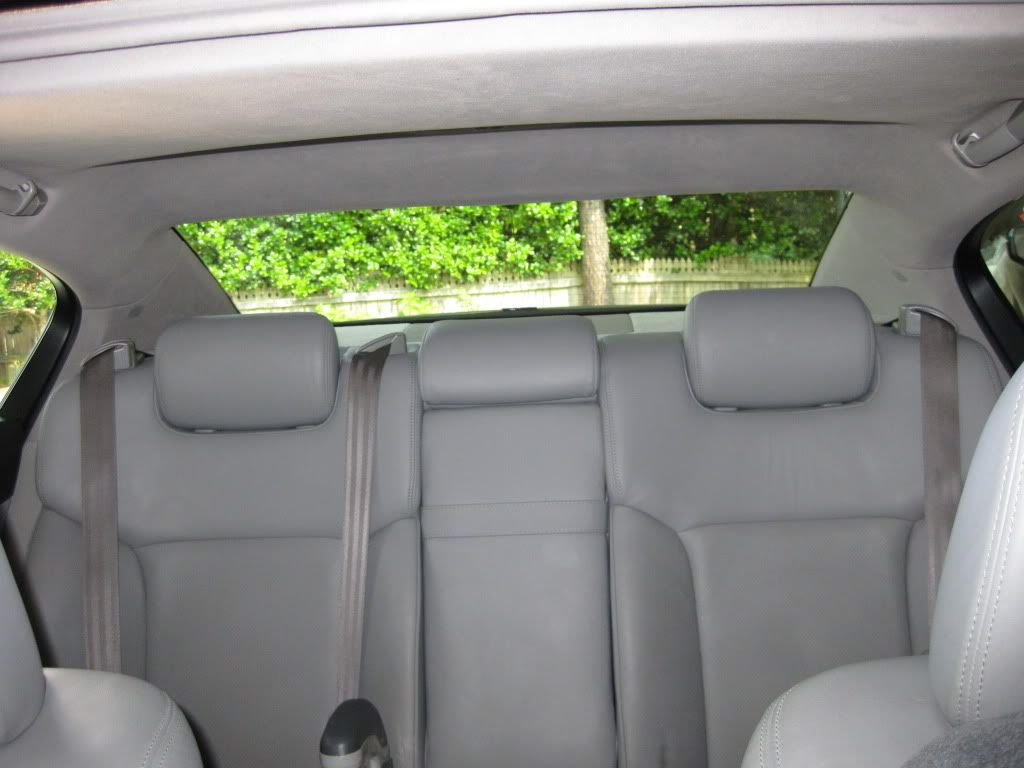
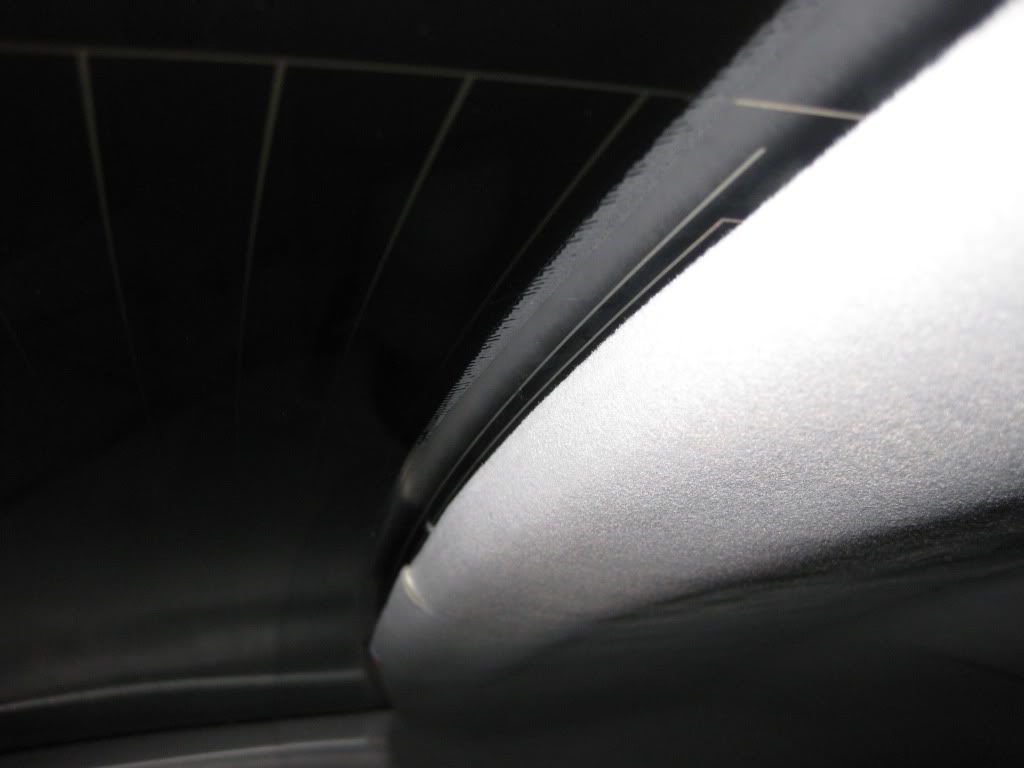
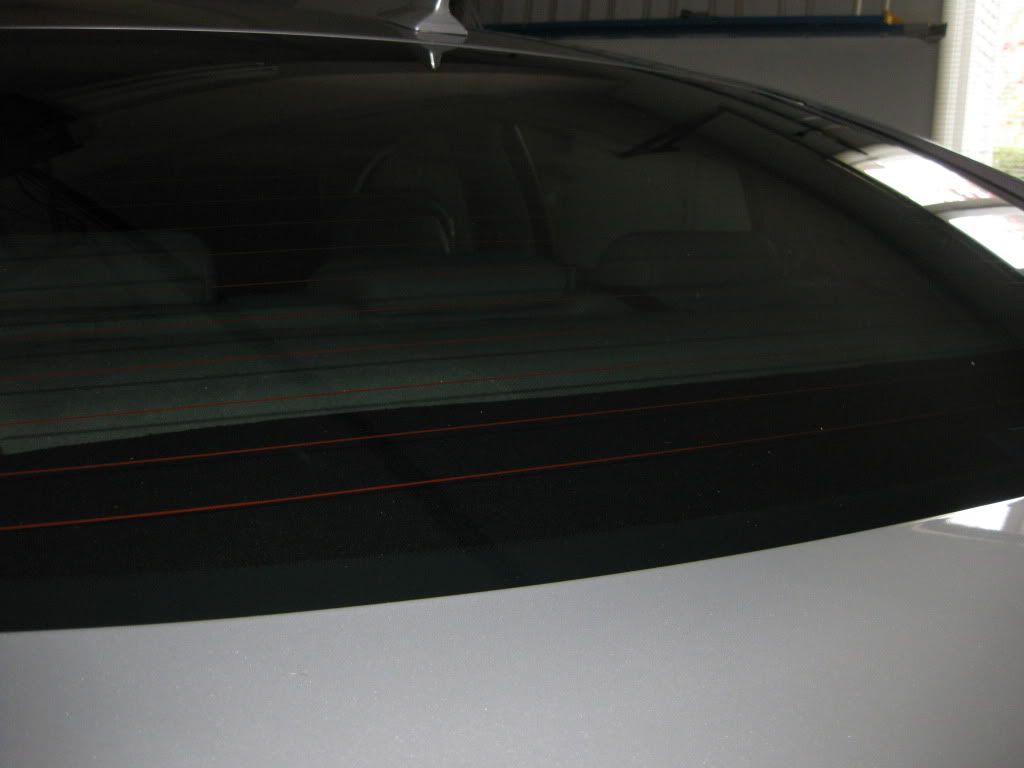
The back edge of the headliner and the brake light are both invisible from the outside unless you get up on it with a flashlight.


Lexus Fanatic
Joined: Jul 2009
Posts: 5,595
Likes: 61
From: CA
[QUOTE=CAK 500;5625110]Thanks rominl.
I moved the LED fixture (the lens and the LED board) into the headliner right above the window. I had to cut two slits into the headliner to make it look right, but if I go back to stock, the slits are completely hidden from view.
Here's a better view ...
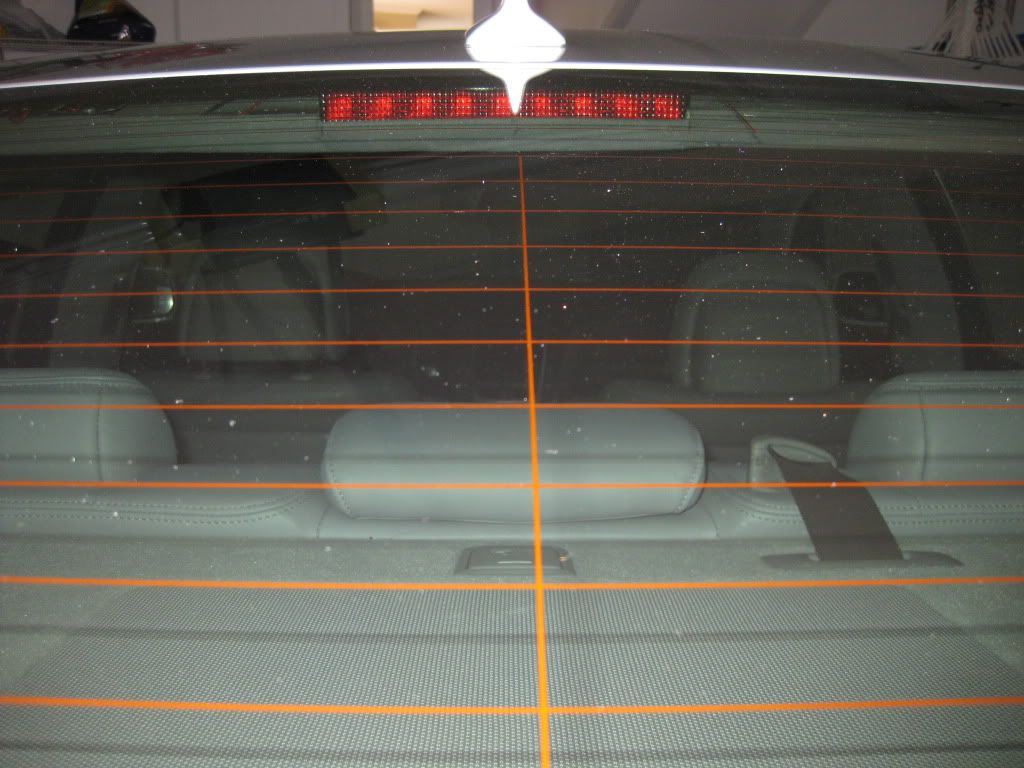
i really like this mod. something different, but gives homage to the LS line, IMO (good thing). maybe its the nitpicky side of me, but from the picture, it looks like its slightly towards the driver side. if you look at where the heated window lines are, i think it would look more central if the fifth light was directly in line with the middle heating line. currently it looks like its just a few millimeters off.
I moved the LED fixture (the lens and the LED board) into the headliner right above the window. I had to cut two slits into the headliner to make it look right, but if I go back to stock, the slits are completely hidden from view.
Here's a better view ...
i really like this mod. something different, but gives homage to the LS line, IMO (good thing). maybe its the nitpicky side of me, but from the picture, it looks like its slightly towards the driver side. if you look at where the heated window lines are, i think it would look more central if the fifth light was directly in line with the middle heating line. currently it looks like its just a few millimeters off.
Thread Starter
Advanced
Joined: Sep 2009
Posts: 664
Likes: 3
From: NC
[QUOTE=bnizzle87;5631297]
Yes, it's definitely off center in that pic. I eventually got it centered perfectly. Things like that drive me crazy, too.
Thanks rominl.
I moved the LED fixture (the lens and the LED board) into the headliner right above the window. I had to cut two slits into the headliner to make it look right, but if I go back to stock, the slits are completely hidden from view.
Here's a better view ...
i really like this mod. something different, but gives homage to the LS line, IMO (good thing). maybe its the nitpicky side of me, but from the picture, it looks like its slightly towards the driver side. if you look at where the heated window lines are, i think it would look more central if the fifth light was directly in line with the middle heating line. currently it looks like its just a few millimeters off.

Thread Starter
Advanced
Joined: Sep 2009
Posts: 664
Likes: 3
From: NC
 Will try and get it together and post tomorrow.
Thread Starter
Advanced
Joined: Sep 2009
Posts: 664
Likes: 3
From: NC
DIY Clear the Deck - Center Brake Light and ECD Sensor Relocation
Description
This DIY describes how to remove the center brake light and ECD sensor from the rear deck, giving a cleaner appearance, improving rear view visibility and increasing the sensitivity of the ECD. In bright light, the ECD prevents reflections and glare on the instrument panel. The ECD sensor monitors light levels, and when it detects strong light, the electrochromatic glass on the gauge cluster automatically becomes less transparent, reducing glare or reflections.
What you�ll need
Phillips screwdriver, needle nose pliers, razor blade, large wrench, utility knife, wire, soldering iron, solder, electrical tape, tape measure, plastic scraper, 1 yard of fabric (to cover the back half of the deck ... I used a black polar fleece type), small cutting board, two-foot long object (I used a racquetball racket).
Time
About two hours. The space between the rear deck and the window is very difficult to work in and makes this a slow process at times. Removing the rear head rests will help, as will plenty of light and patience.
Steps
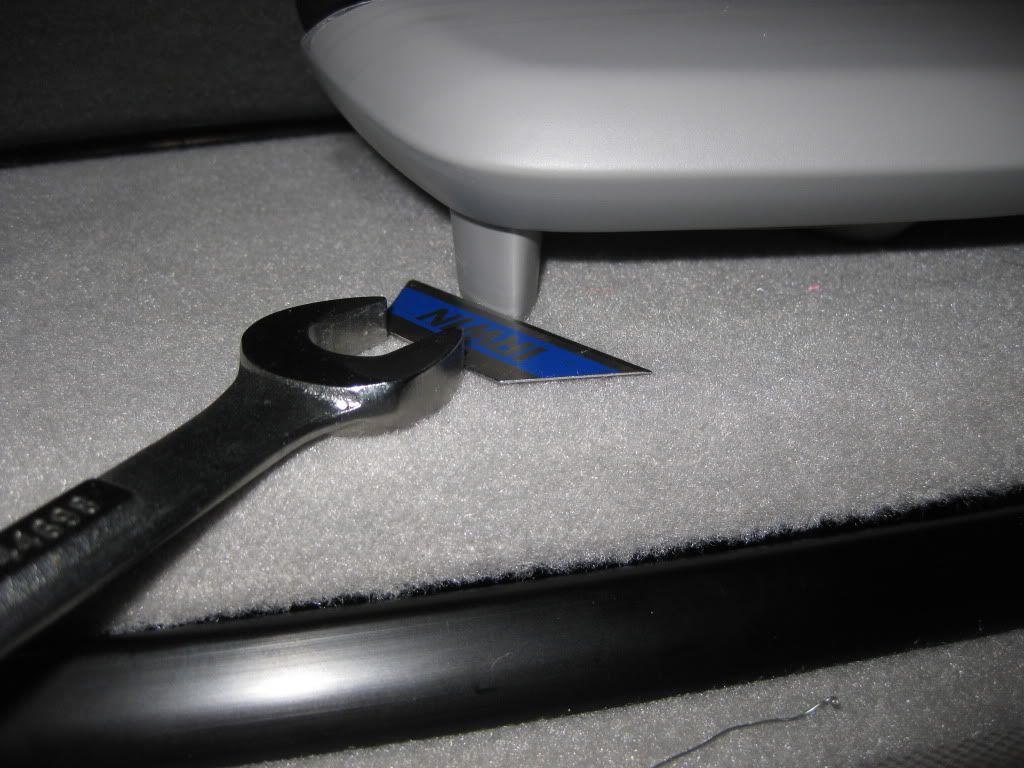
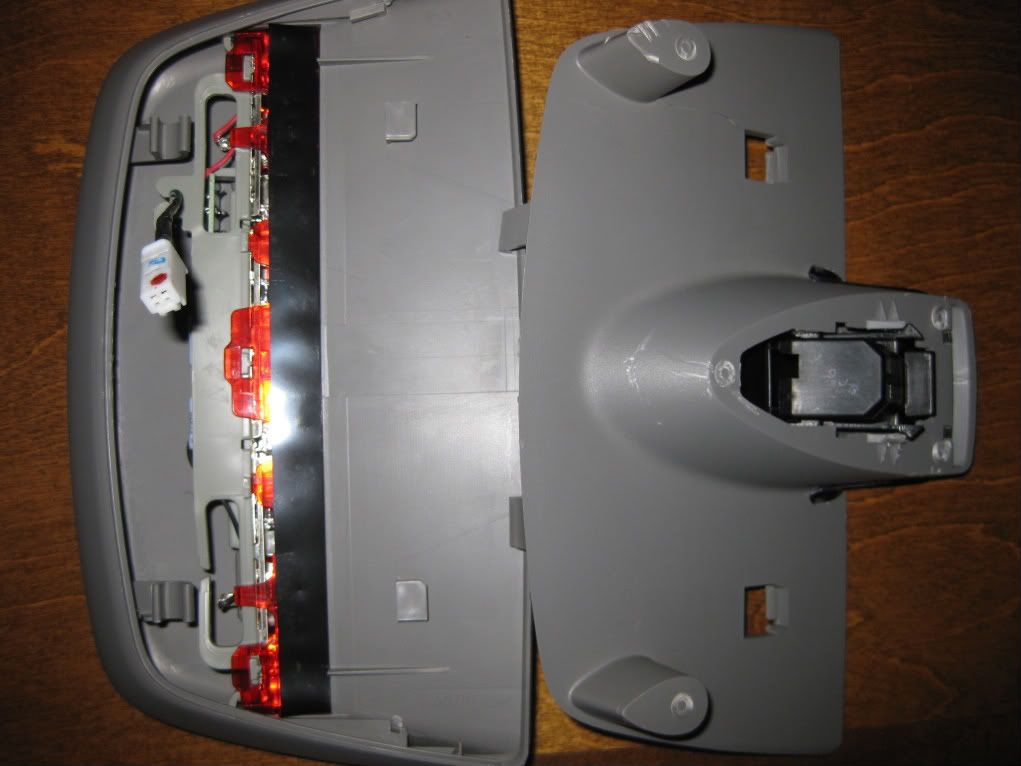
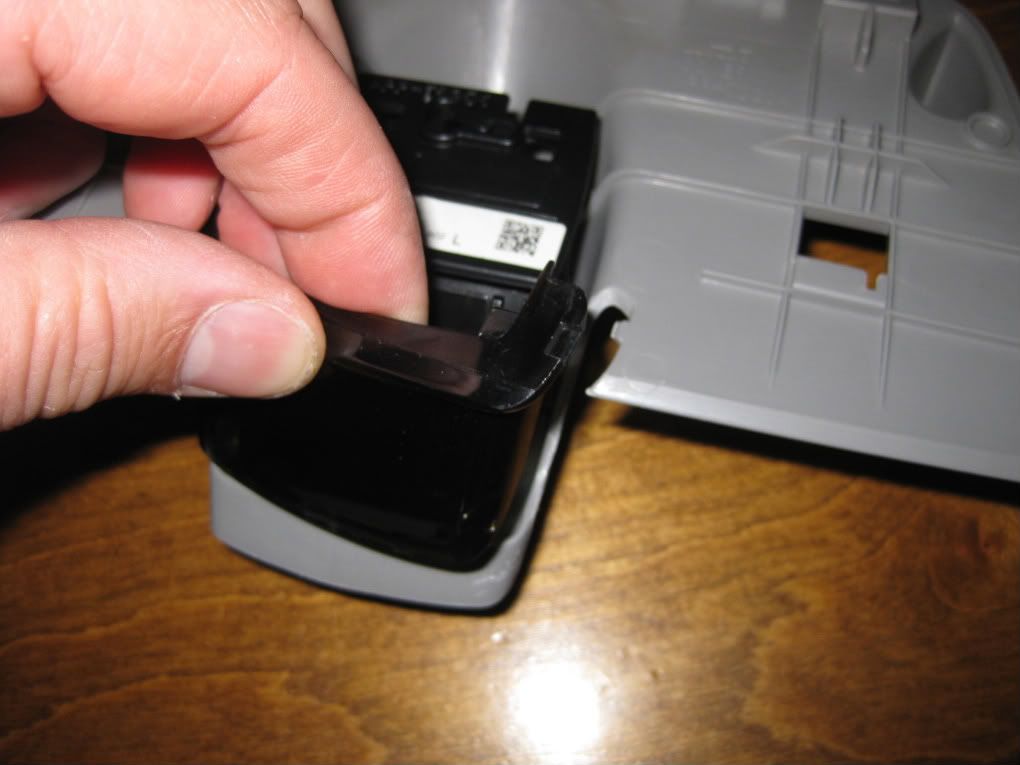
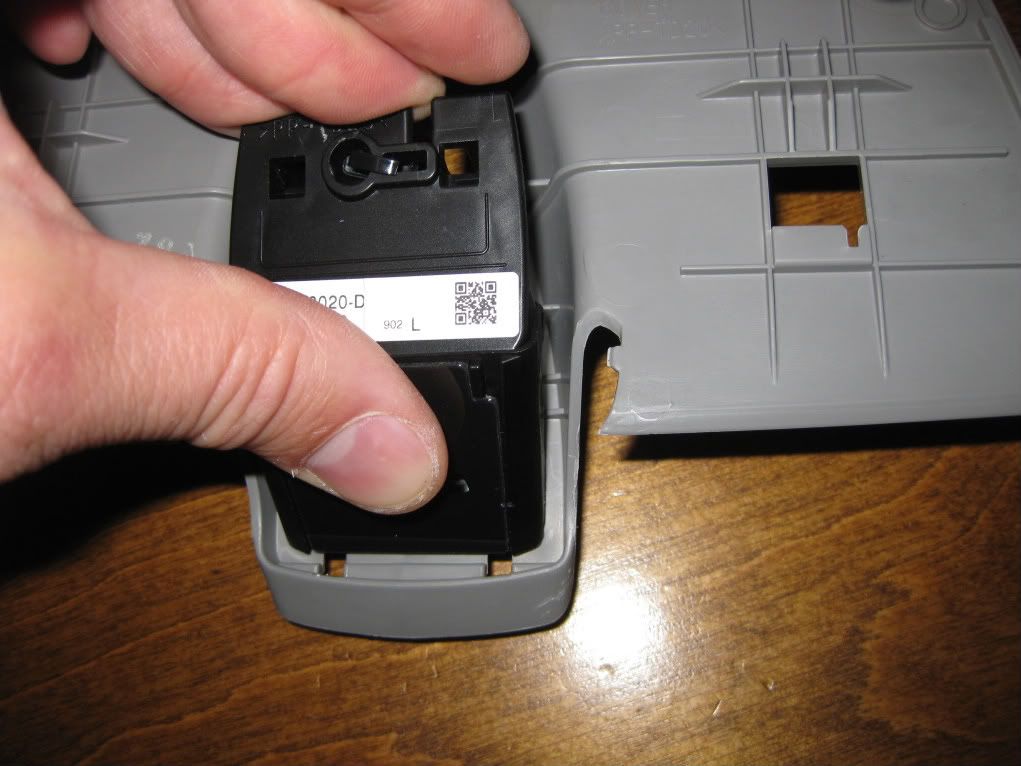
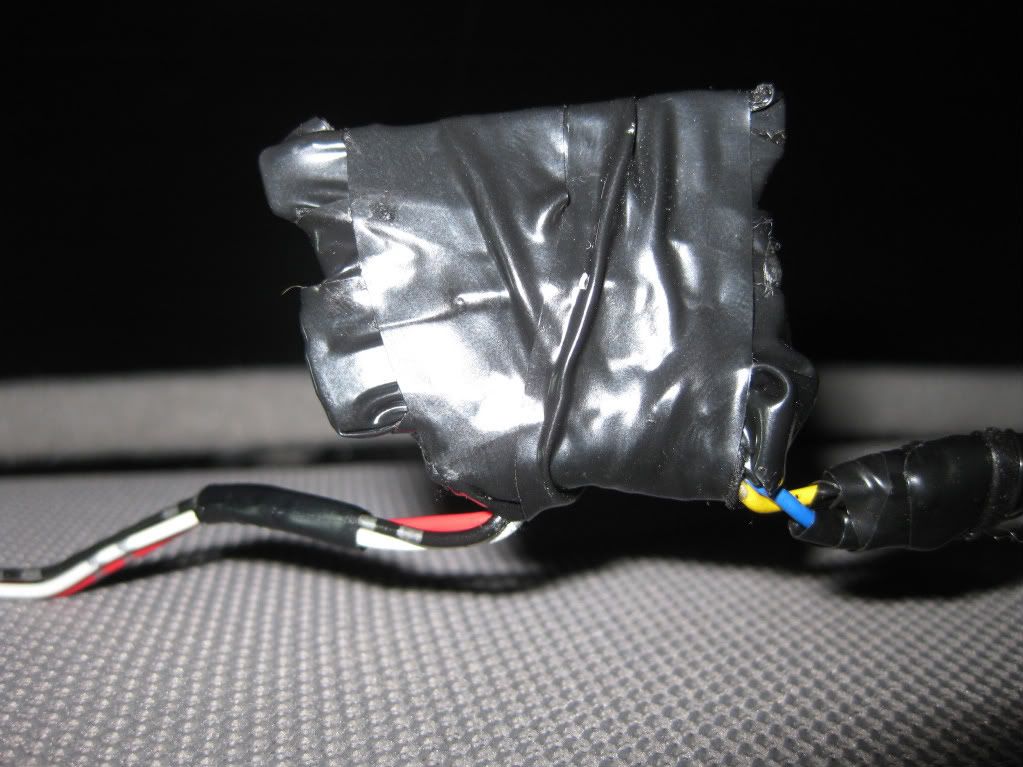
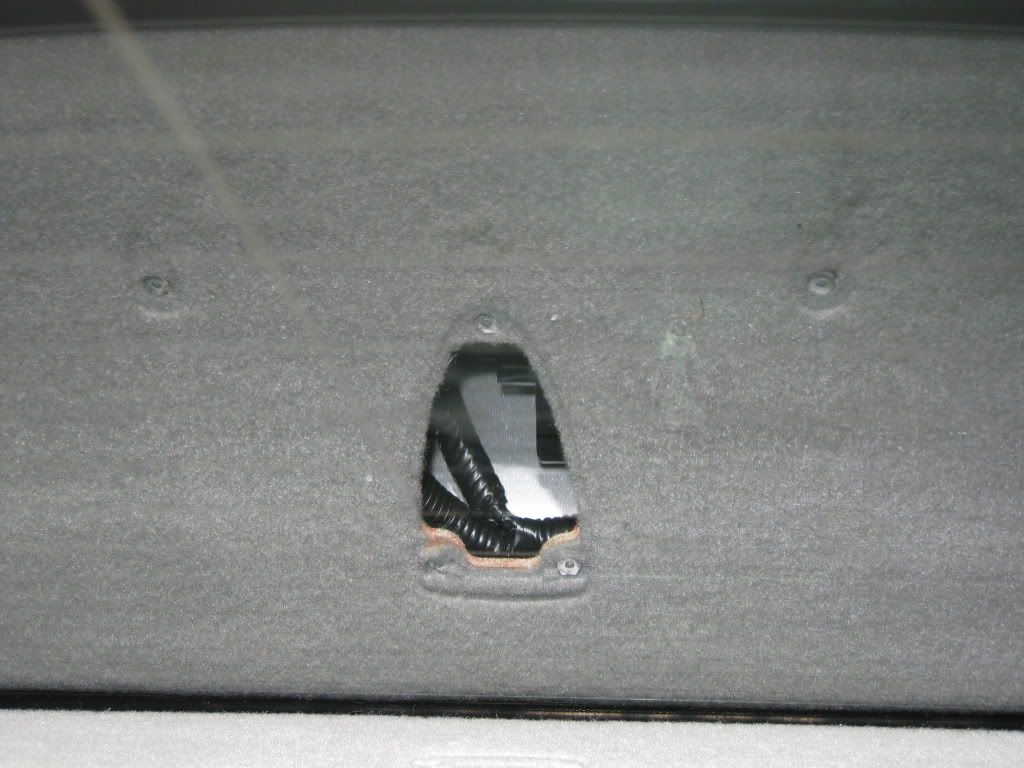
1. Remove center brake light/ECD sensor housing:
The housing is secured to the deck by 5 plastic pegs that are permanently affixed into the deck. To remove it, you can shear these pegs using a wrench and a razor blade. The locations of the pegs are indicated below. If you need to go back to stock, one small drop of super-glue on each peg will be more than adequate to re-secure the unit to the deck.

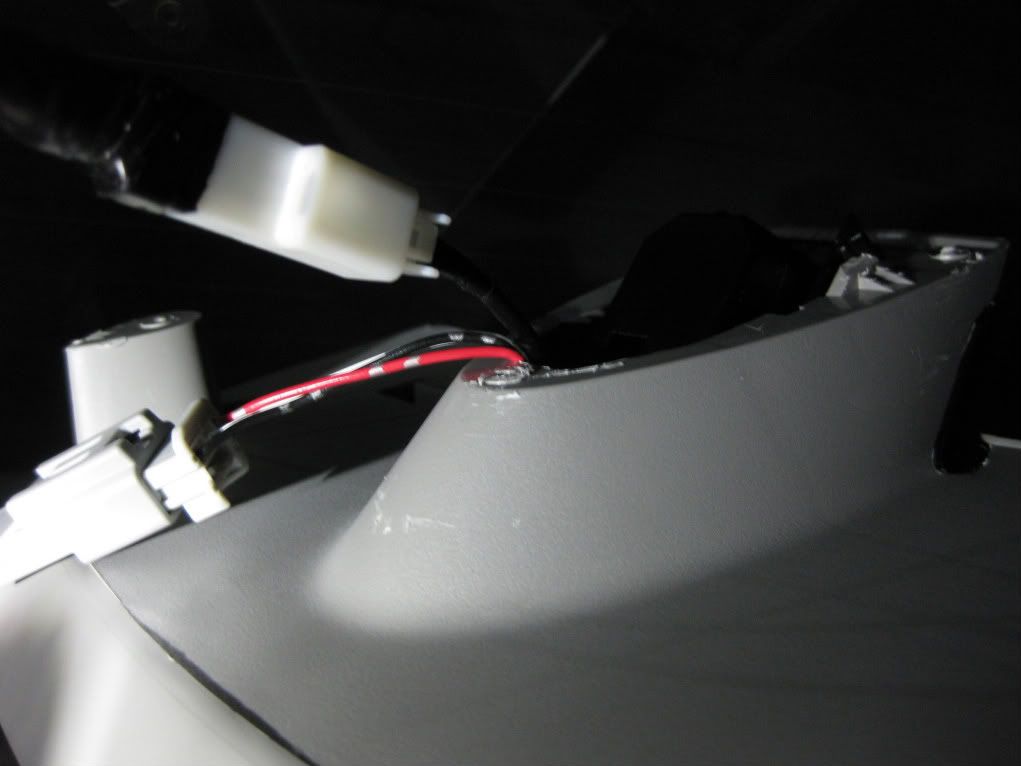
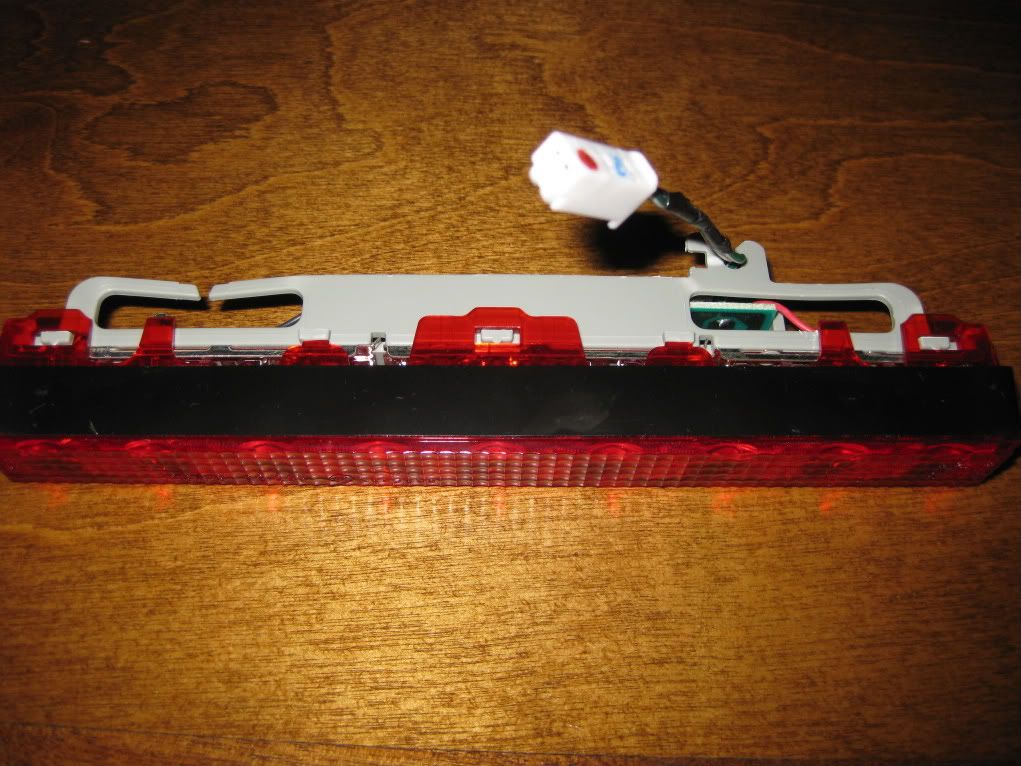
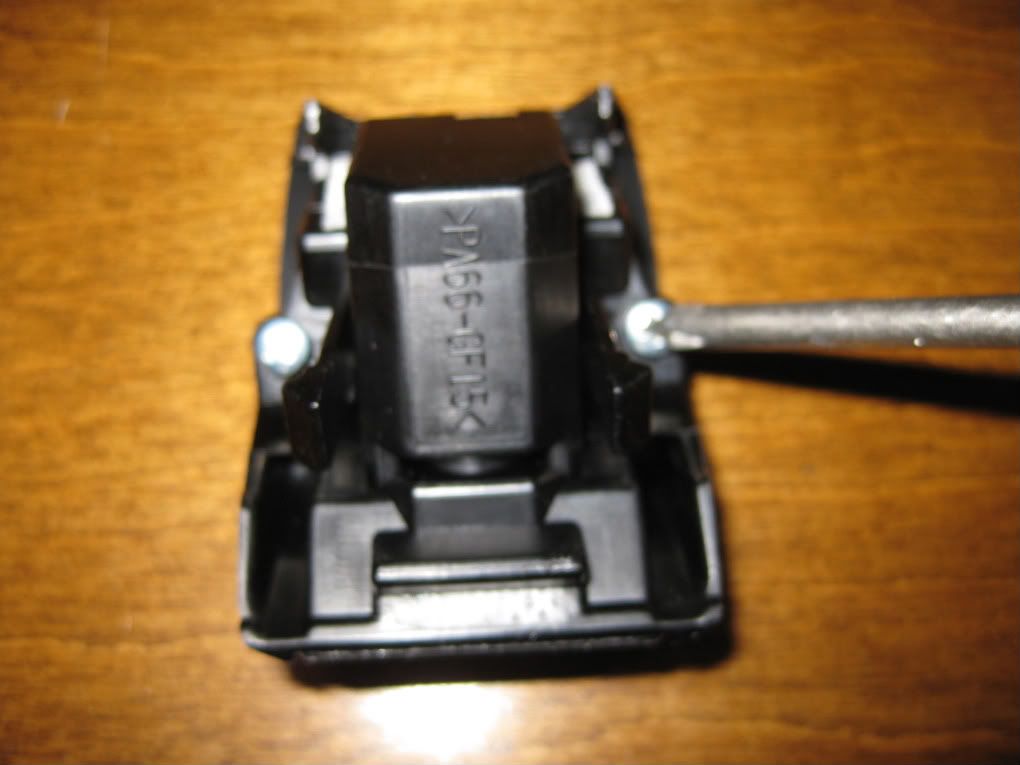
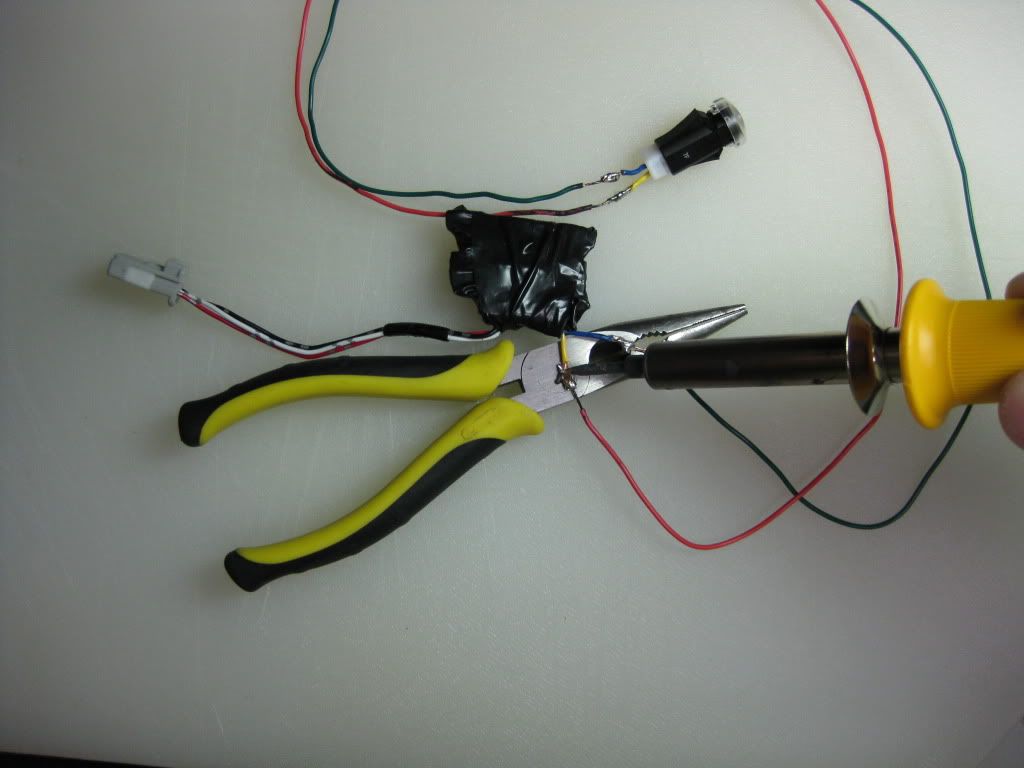
2. Extract LED board /lens and ECD sensor/circuit board: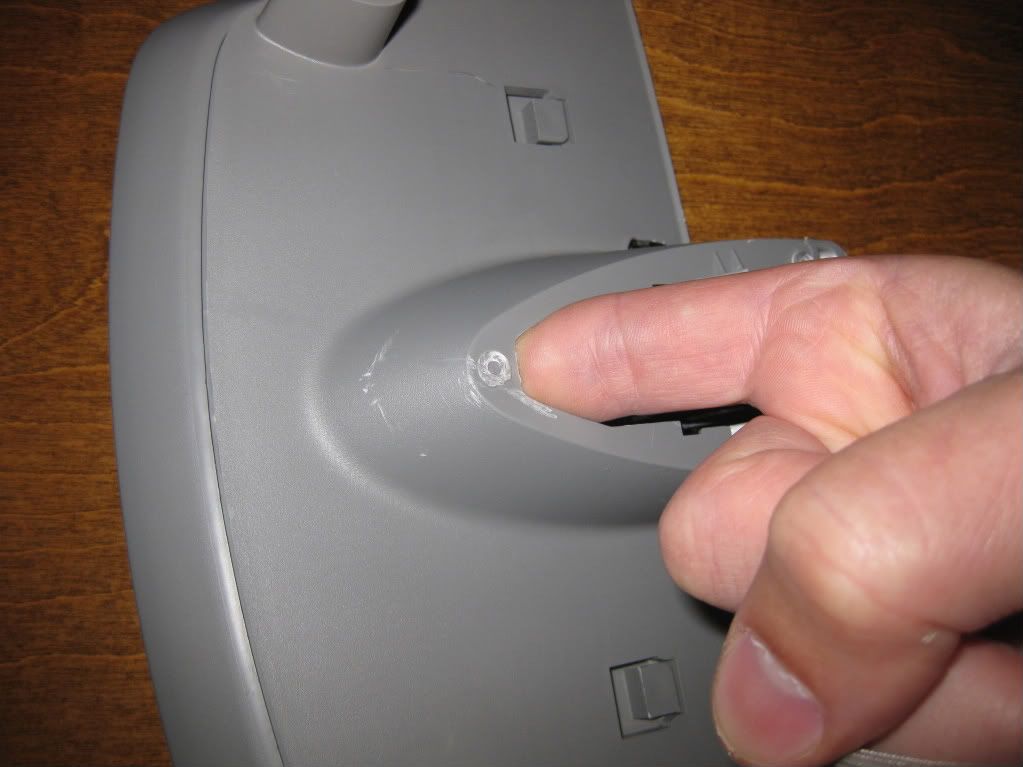
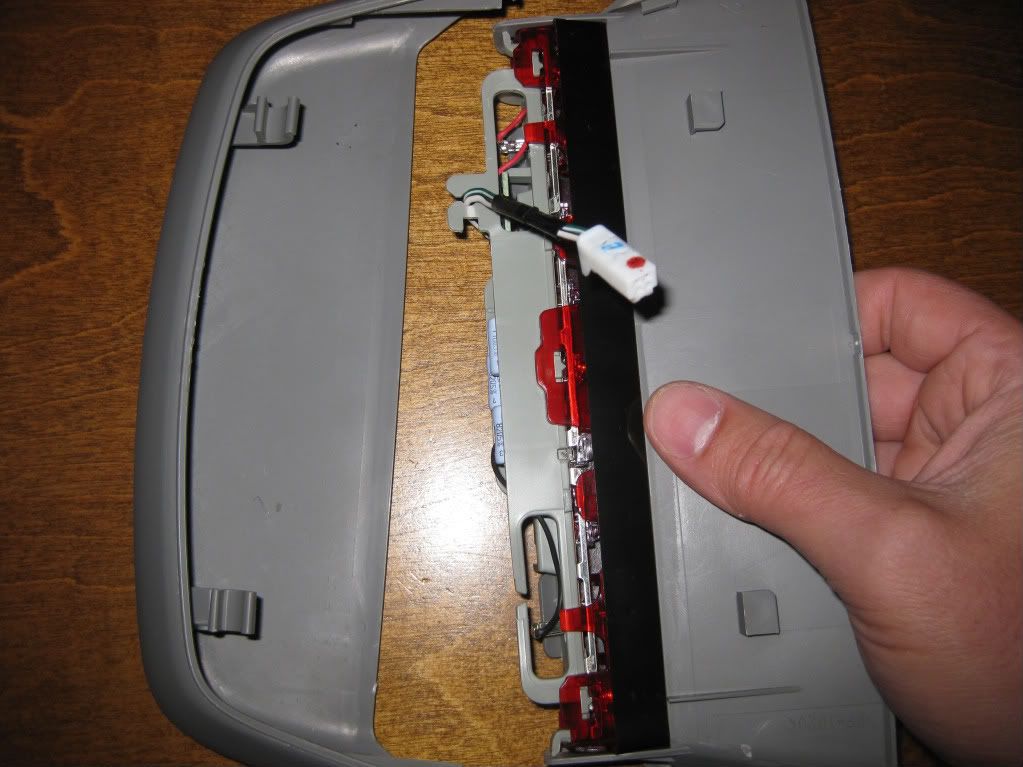
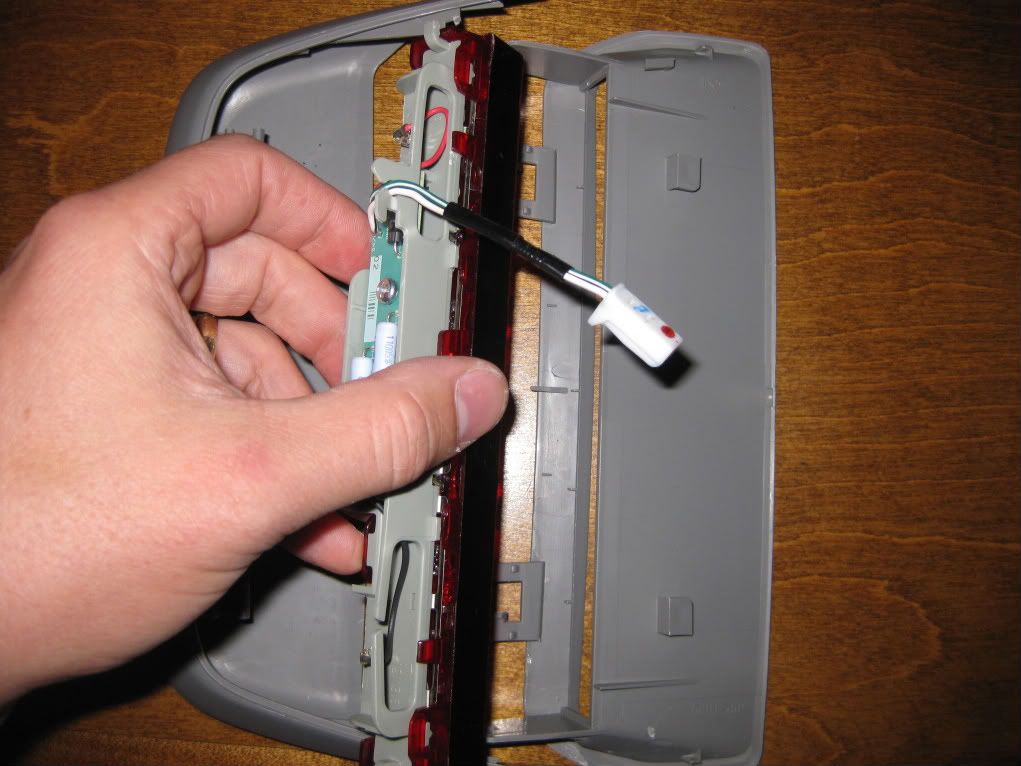
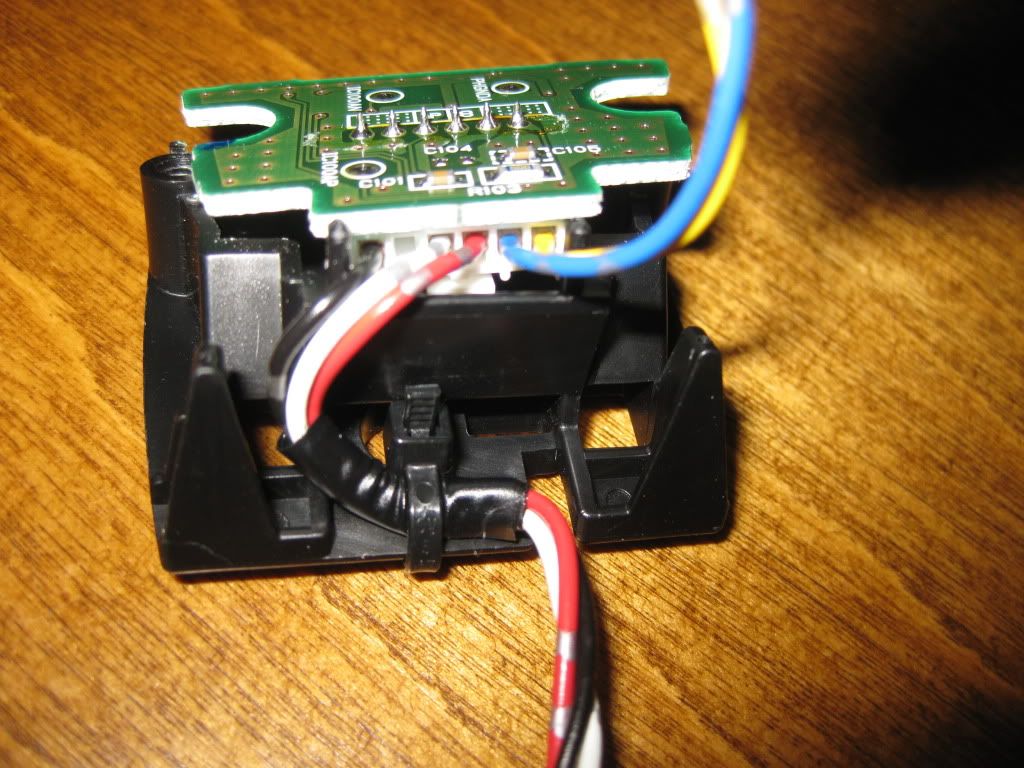
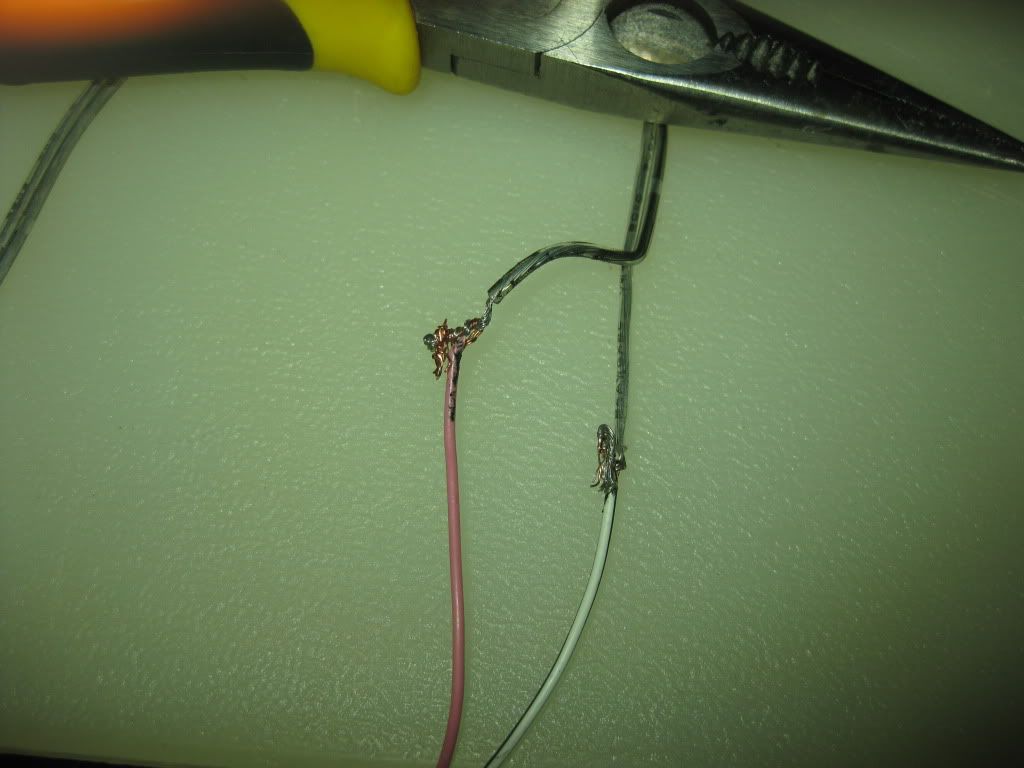
3. Splice in new wires with those that were cut:
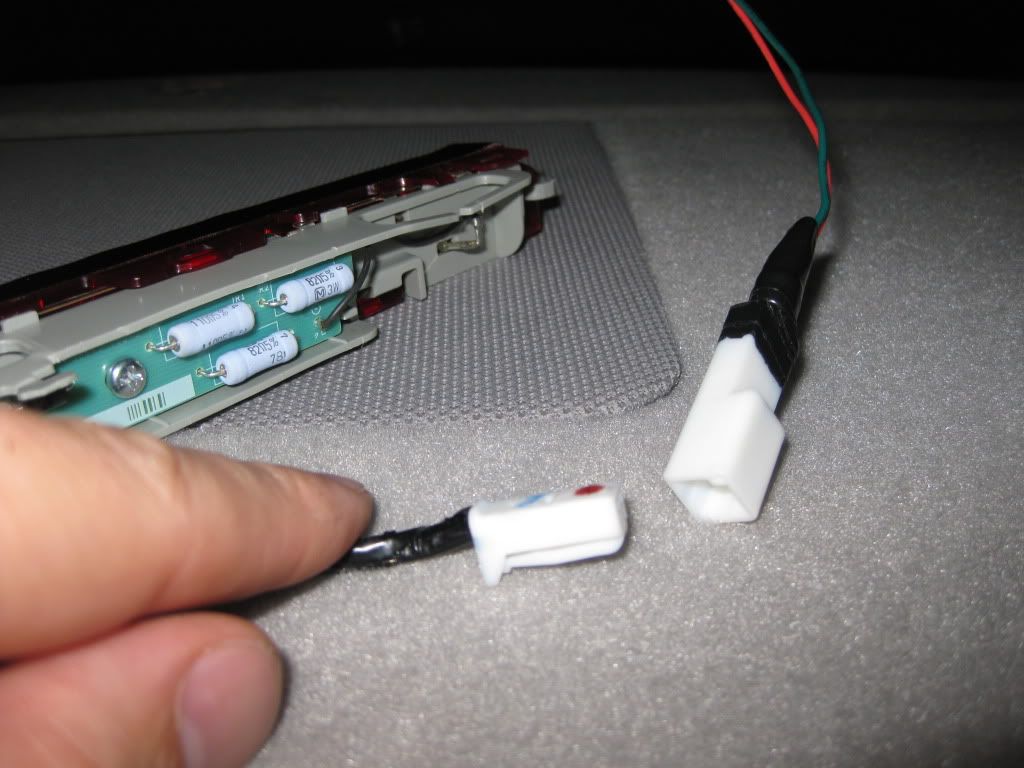
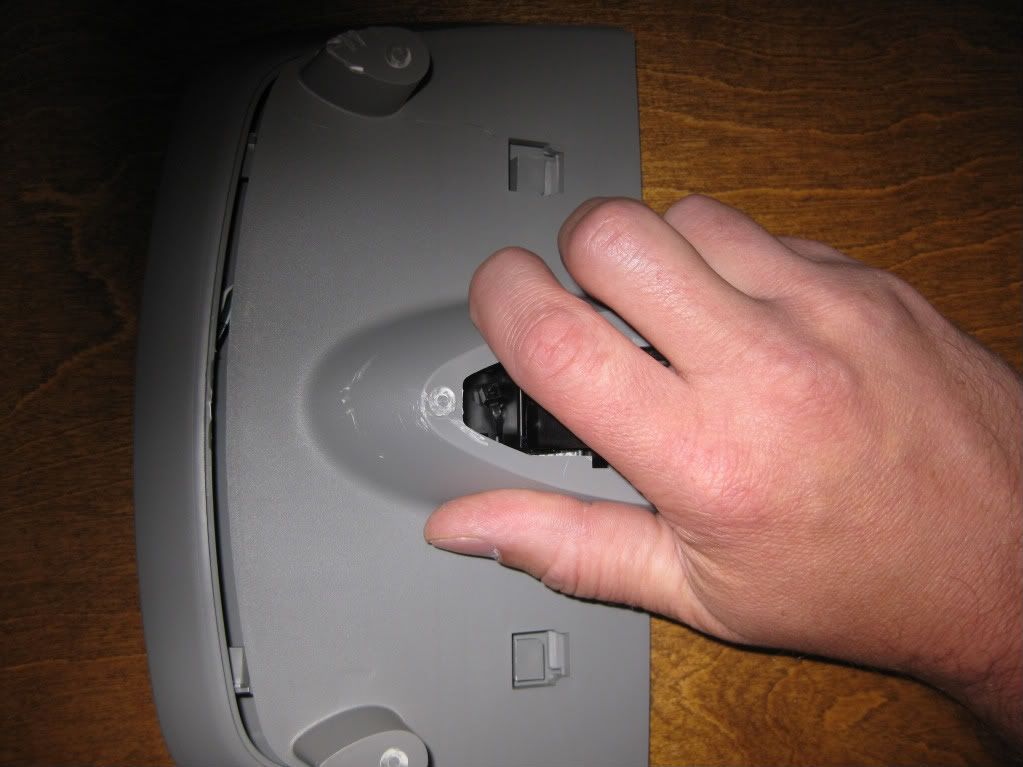
4. Test lights and ECD sensor:
5. Measure, mark and cut headliner using the utility knife.
Measure to find the center point, mark 3 1/2 inches on each side. Cut vertical slits at these two points.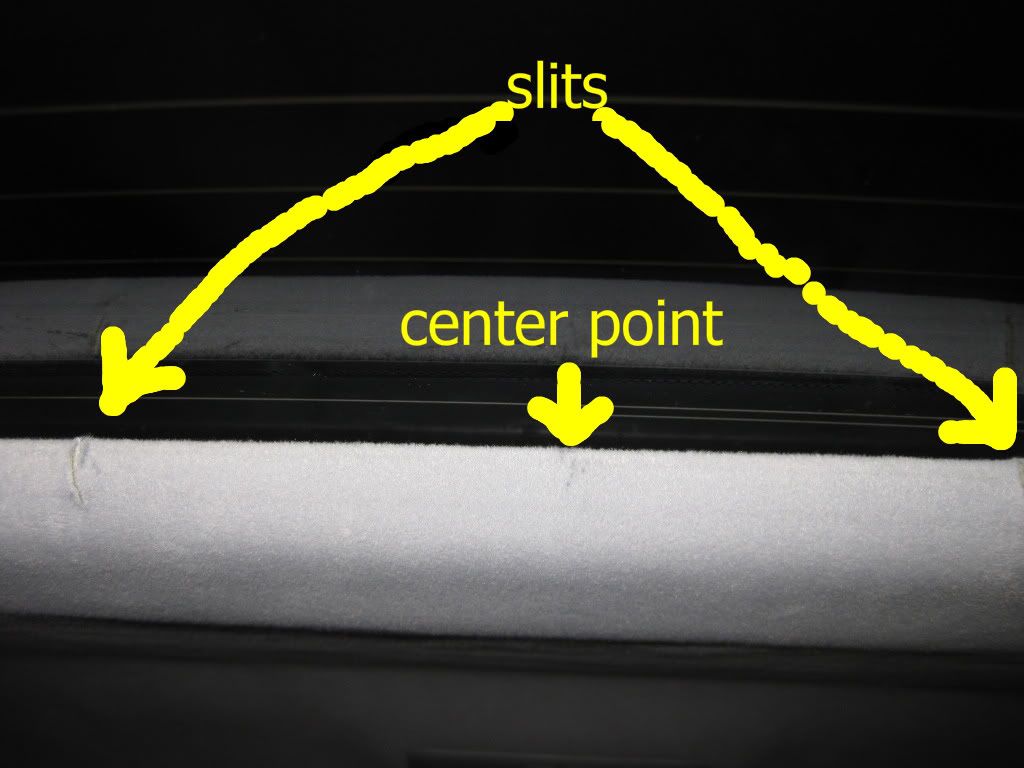
6. Position center brake light into headliner opening and conceal all wiring beneath headliner, C-pillar trim and deck. Deck fasteners will release if you apply firm pressure upwards.
7. Position ECU sensor in gap between rear deck halves. Conceal wiring beneath deck. Be sure to keep wiring clear of sunshade, if vehicle is equipped with one.

8. Make sure all wiring is in place and concealed. Snap deck back down.
9. Prepare deck fabric cover.
This will conceal the big hole in your deck.
If you use black, it will also prevent light from reflecting onto the glass from the deck. This greatly improves clarity on sunny days.
Cut deck cover fabric to a one foot by three foot rectangle.
10. Install fabric cover over deck, stretching it from the center outward and tucking the edges into the trim seams with a plastic scraper.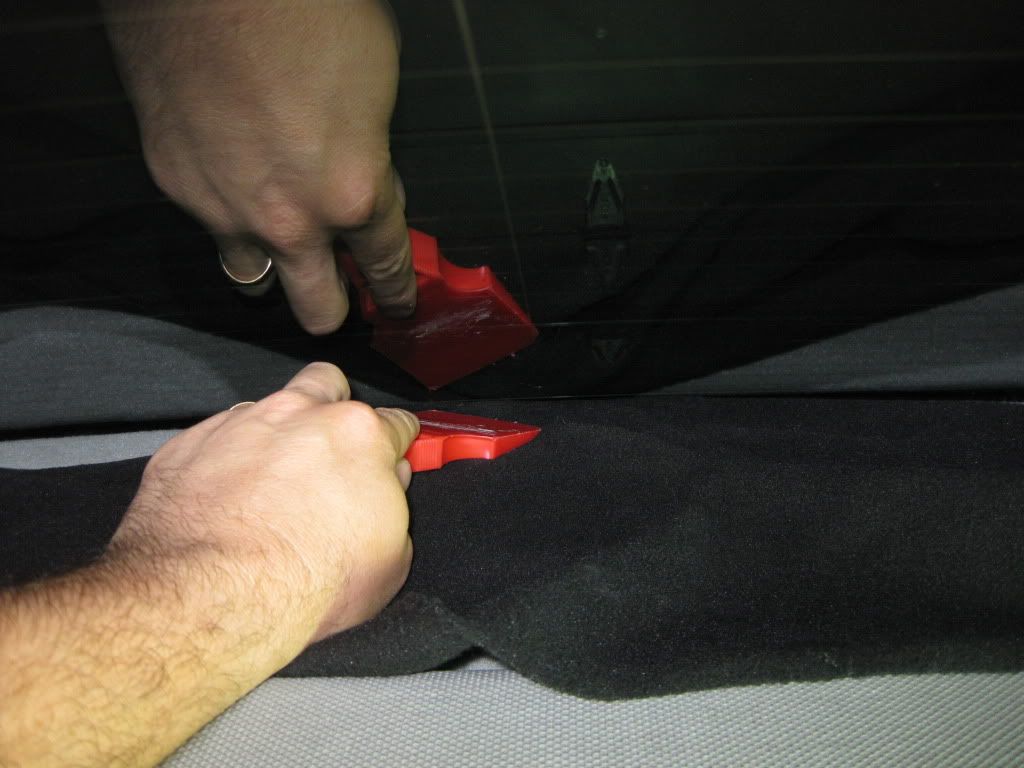

Enjoy the new view!
Description
This DIY describes how to remove the center brake light and ECD sensor from the rear deck, giving a cleaner appearance, improving rear view visibility and increasing the sensitivity of the ECD. In bright light, the ECD prevents reflections and glare on the instrument panel. The ECD sensor monitors light levels, and when it detects strong light, the electrochromatic glass on the gauge cluster automatically becomes less transparent, reducing glare or reflections.
What you�ll need
Phillips screwdriver, needle nose pliers, razor blade, large wrench, utility knife, wire, soldering iron, solder, electrical tape, tape measure, plastic scraper, 1 yard of fabric (to cover the back half of the deck ... I used a black polar fleece type), small cutting board, two-foot long object (I used a racquetball racket).
Time
About two hours. The space between the rear deck and the window is very difficult to work in and makes this a slow process at times. Removing the rear head rests will help, as will plenty of light and patience.
Steps
1. Remove center brake light/ECD sensor housing:
The housing is secured to the deck by 5 plastic pegs that are permanently affixed into the deck. To remove it, you can shear these pegs using a wrench and a razor blade. The locations of the pegs are indicated below. If you need to go back to stock, one small drop of super-glue on each peg will be more than adequate to re-secure the unit to the deck.
2. Extract LED board /lens and ECD sensor/circuit board:
3. Splice in new wires with those that were cut:
4. Test lights and ECD sensor:
5. Measure, mark and cut headliner using the utility knife.
Measure to find the center point, mark 3 1/2 inches on each side. Cut vertical slits at these two points.
6. Position center brake light into headliner opening and conceal all wiring beneath headliner, C-pillar trim and deck. Deck fasteners will release if you apply firm pressure upwards.
7. Position ECU sensor in gap between rear deck halves. Conceal wiring beneath deck. Be sure to keep wiring clear of sunshade, if vehicle is equipped with one.
8. Make sure all wiring is in place and concealed. Snap deck back down.
9. Prepare deck fabric cover.
This will conceal the big hole in your deck.
If you use black, it will also prevent light from reflecting onto the glass from the deck. This greatly improves clarity on sunny days.
Cut deck cover fabric to a one foot by three foot rectangle.
10. Install fabric cover over deck, stretching it from the center outward and tucking the edges into the trim seams with a plastic scraper.
Enjoy the new view!

just got this done and now its time to carpet the rear deck.. luckily i have black interior so there is no disparity in color.. thanks for the amazing diy!! BTW, did you put the light near the edge of the headliner or is it sunken in a little?
this is one of the best and most effective mods ever for our ride.. Totally makes it stand out above the rest.. Now if we can just get the mirrors to fold in automatically when we lock the car...
Lexus Fanatic
Joined: Sep 2007
Posts: 22,608
Likes: 105
From: Waiting for next track day
clean work but arent those lights placed there under design and safety regulations. It is what it is and I dont think the cops in the area would know any better even it was illegal