Notices
GS - 2nd Gen (1998-2005) Discussion about the second generation GS300, GS400 and GS430 (1998 - 2005)

My DIY custom front bumper

Thread Tools
 
Search this Thread
 
Old Dec 27, 2015 | 12:22 AM
  #1  
77i9's Avatar
77i9
Thread Starter
Lead Lap
iTrader: (14)
 
Joined: Aug 2009
Posts: 426
Likes: 2
From: Yokohama, Japan
Default My DIY custom front bumper

Being here in Japan, there are lots of option when it comes to body kits. But I've been wanting something that's different but I didn't have the big bucks for a custom work. So I figured I'd make my own. I searched the internet for videos and pics on how to go about my project. After feeling confident that I can do it, I gathered what I needed and started working. It took me about 6 months because it was my first time doing something like this. I wanted to take my time to minimize mistakes and re-work. Also, I was only able to work on it on my free time not including the weekends.

After doing the measurement I did the cut on the OEM bumper. I figured that using the top and side will be the easiest way to ensure good if not perfect fitment.
Name:  bmp1_zpsvjocklp9.jpg
Views: 1196
Size:  149.3 KB

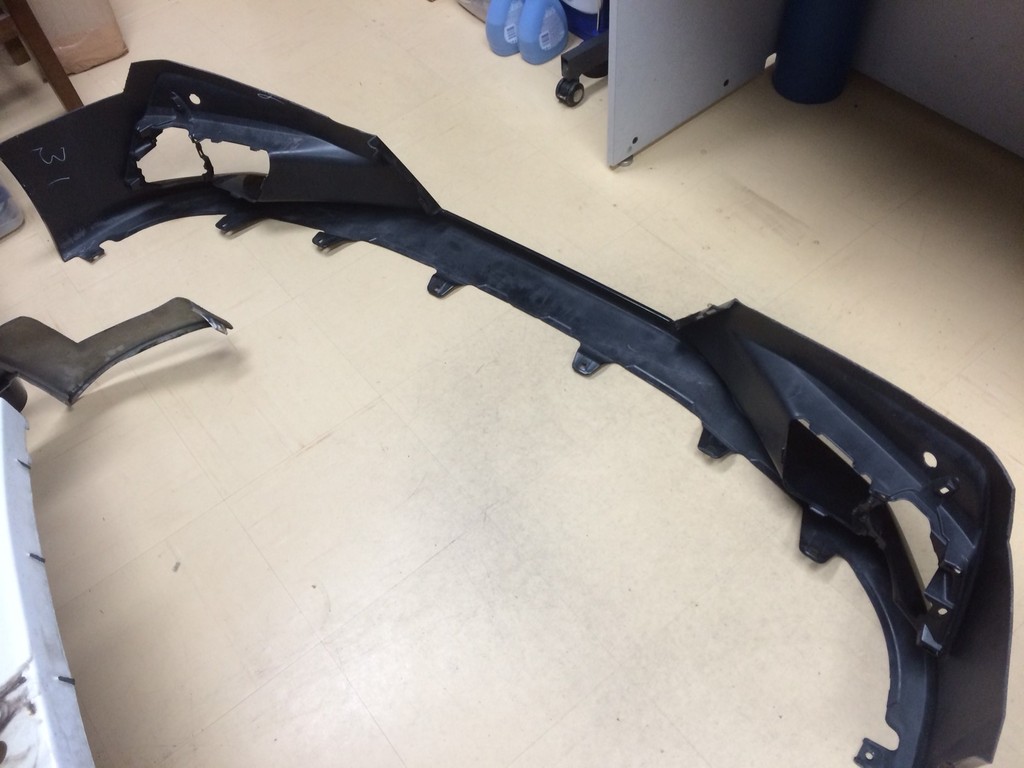
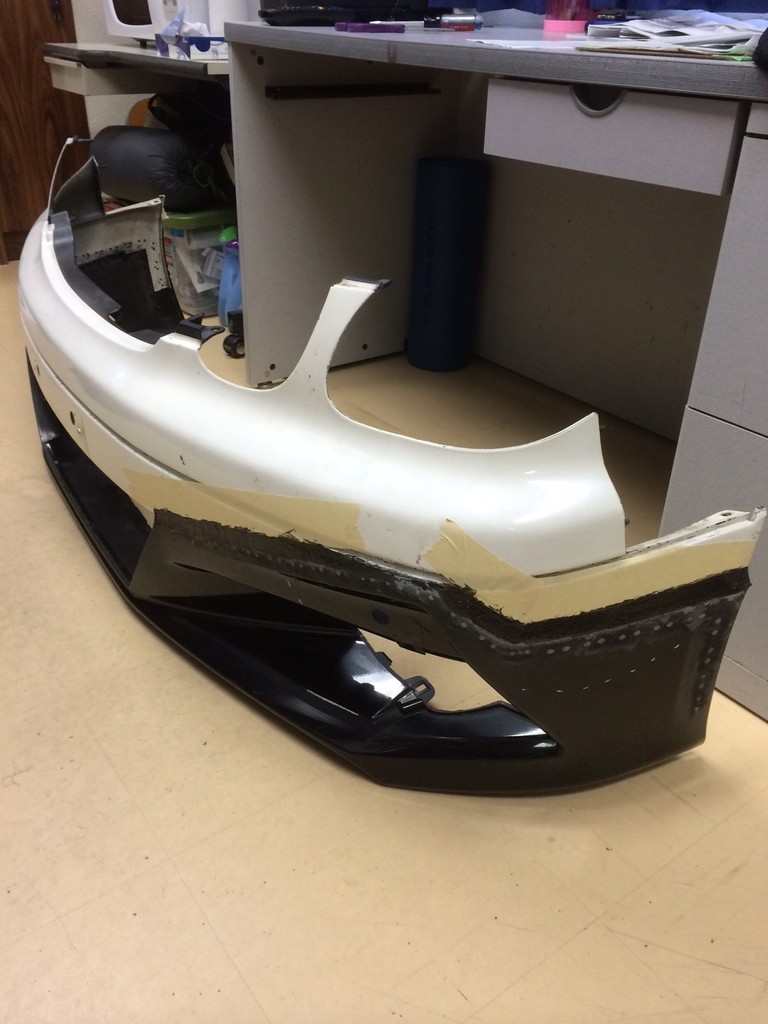
Then I had to figure out and made the cut on the donor bumper.
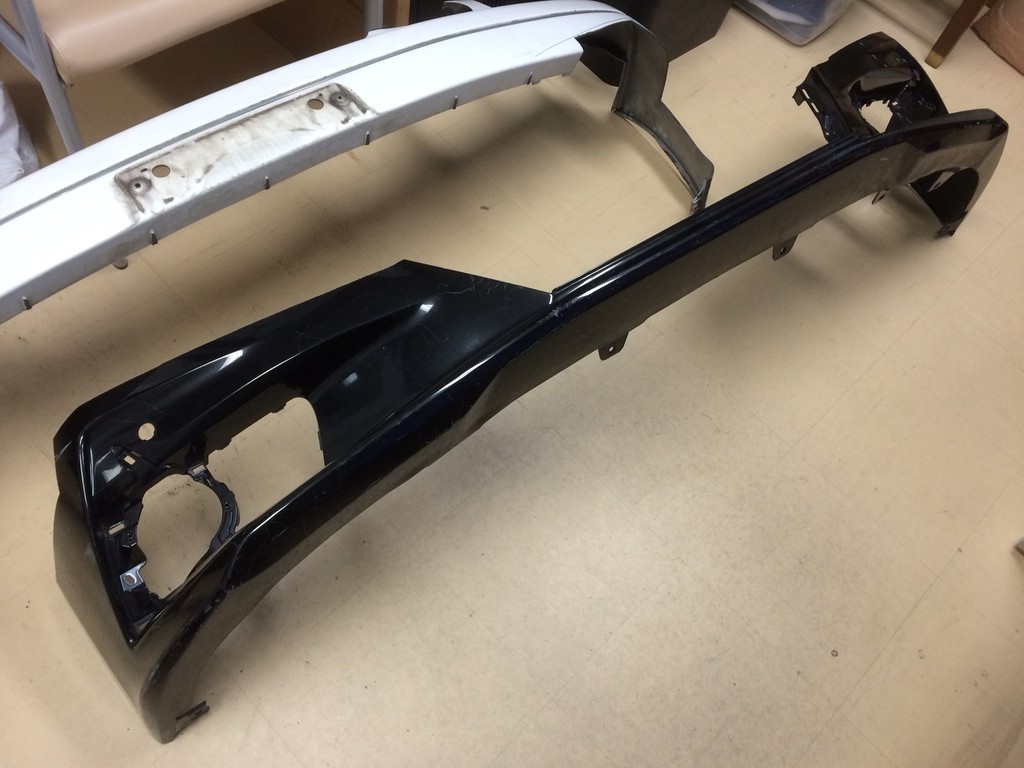
Name:  bmp2_zpsggx6g6sd.jpg
Views: 1259
Size:  146.9 KB
Name:  bmp3_zpsk11szzk3.jpg
Views: 1096
Size:  131.6 KB

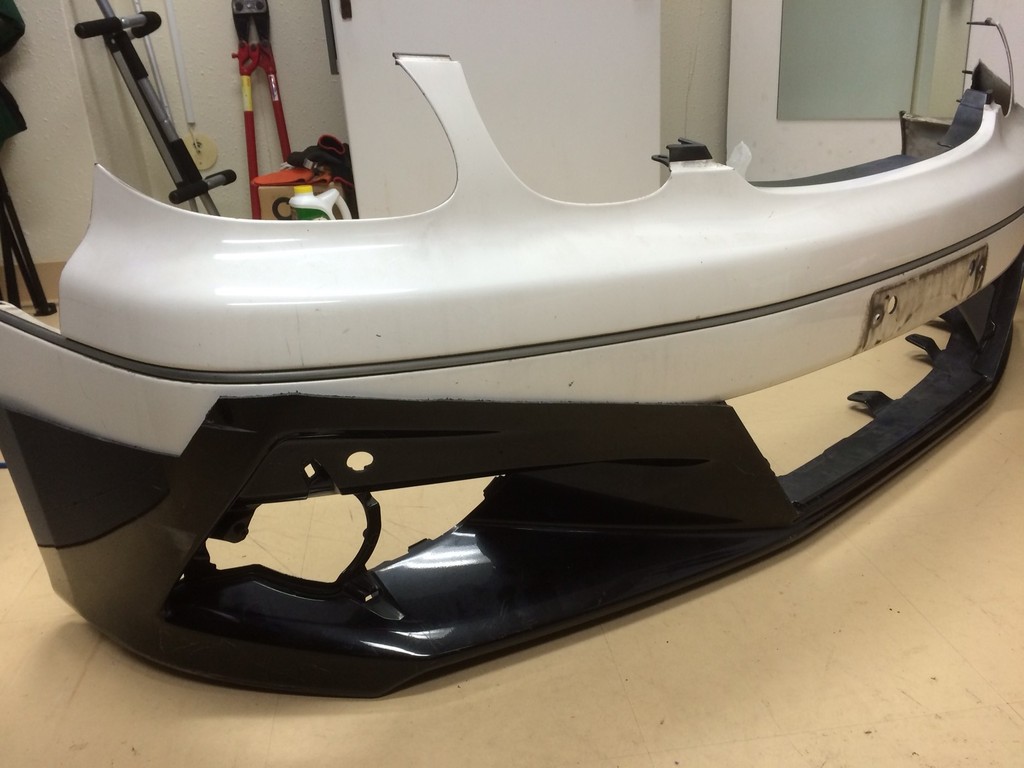
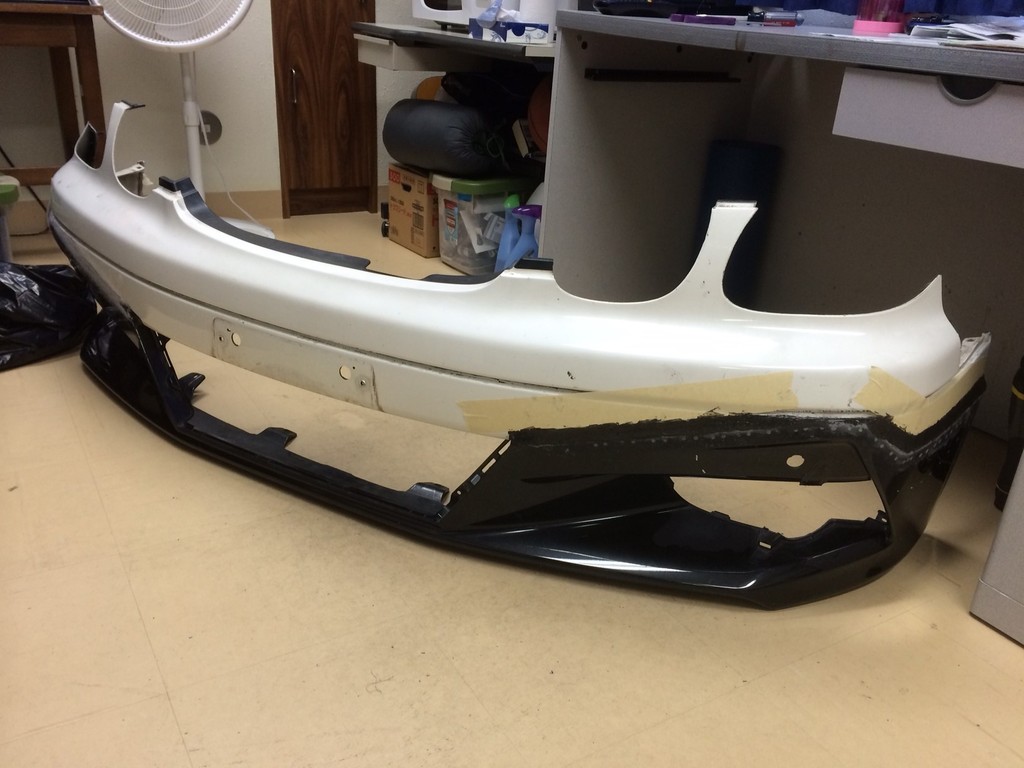
Quick test fit before I glued them together.
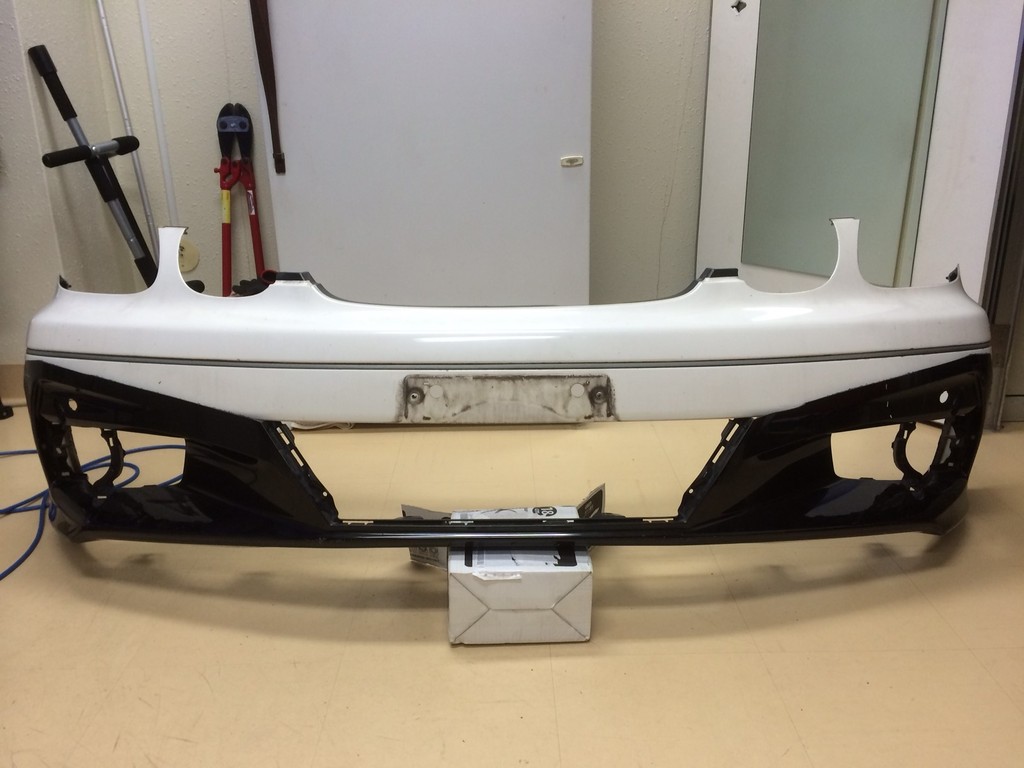
Name:  bmp4_zpsbstahtbo.jpg
Views: 1546
Size:  129.0 KB
Name:  bmp5_zpsurzubg1e.jpg
Views: 1589
Size:  131.6 KB

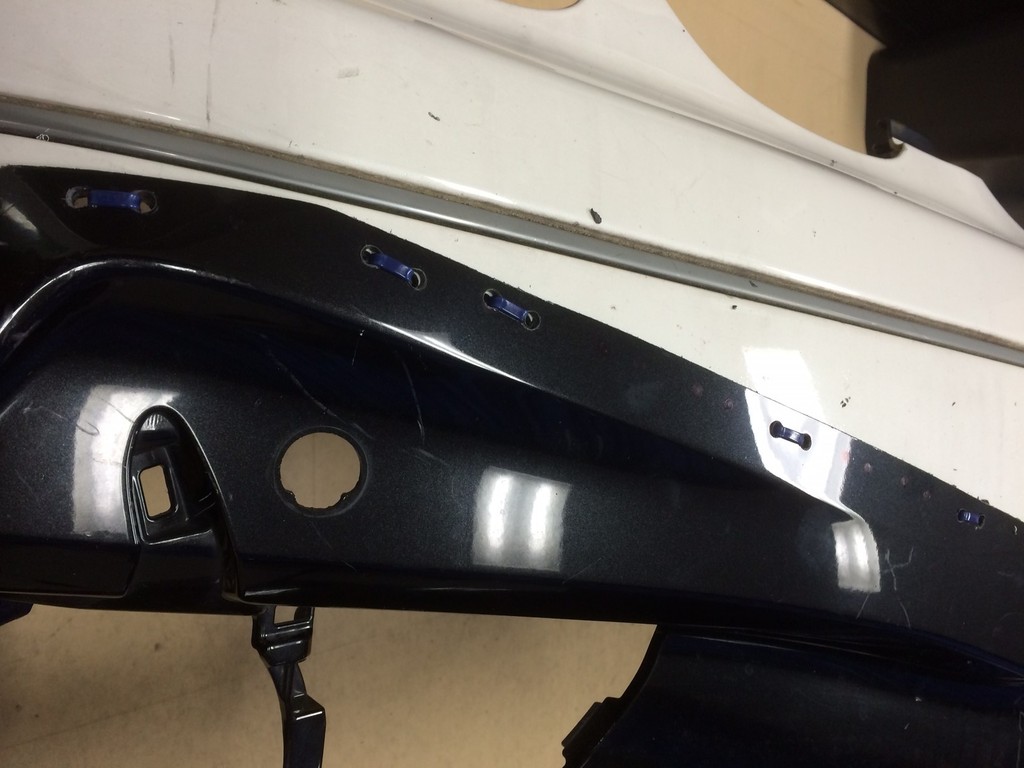
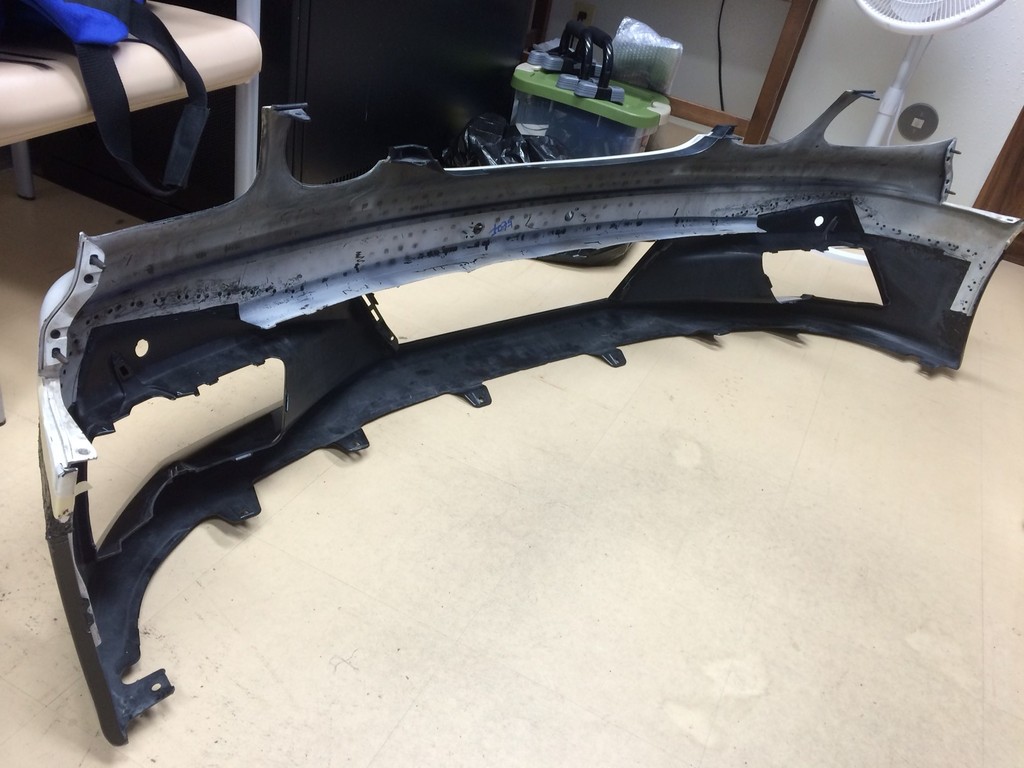
Drilled holes for the zipties that will hold the two parts together while the glued is drying
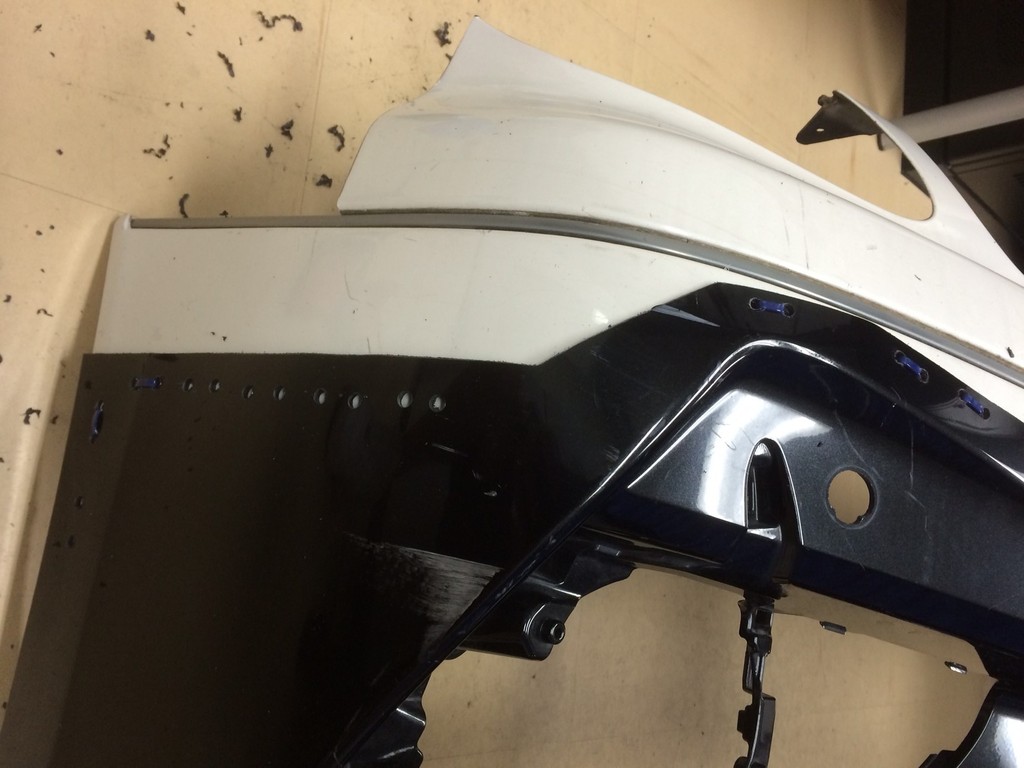
Name:  bmp6_zpsivkvttug.jpg
Views: 1101
Size:  131.2 KB
Name:  bmp7_zpsel1vuubw.jpg
Views: 1087
Size:  131.8 KB

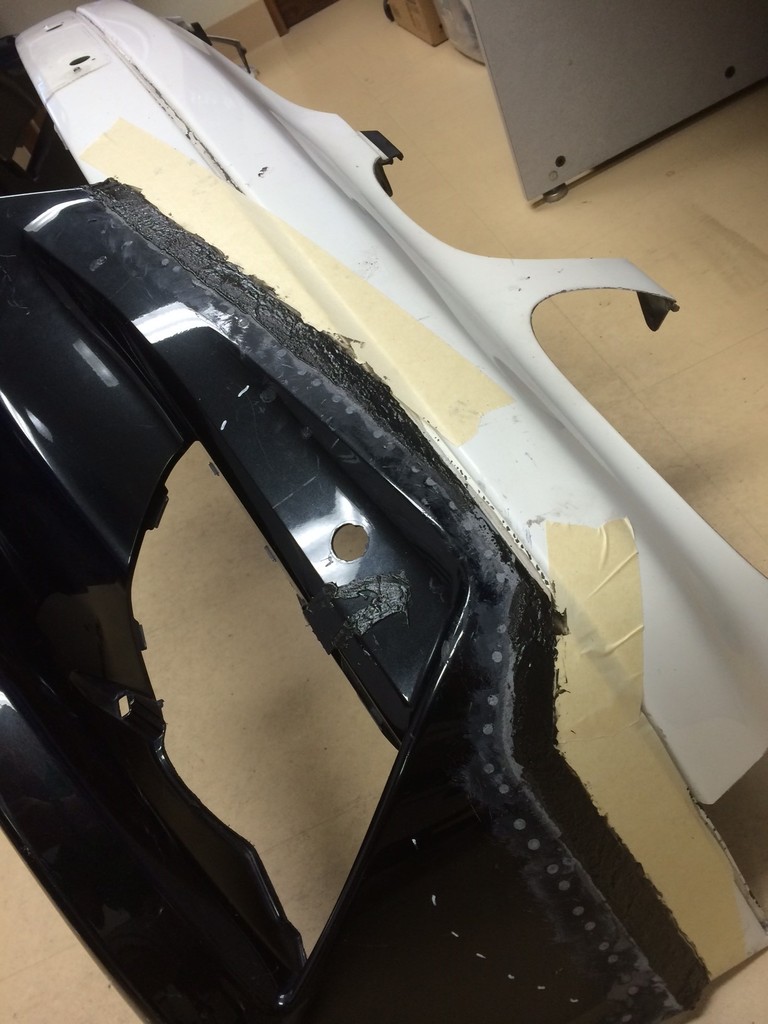
Here it is after the glue has dried and the zipties have been removed. Filled the holes with some glue.
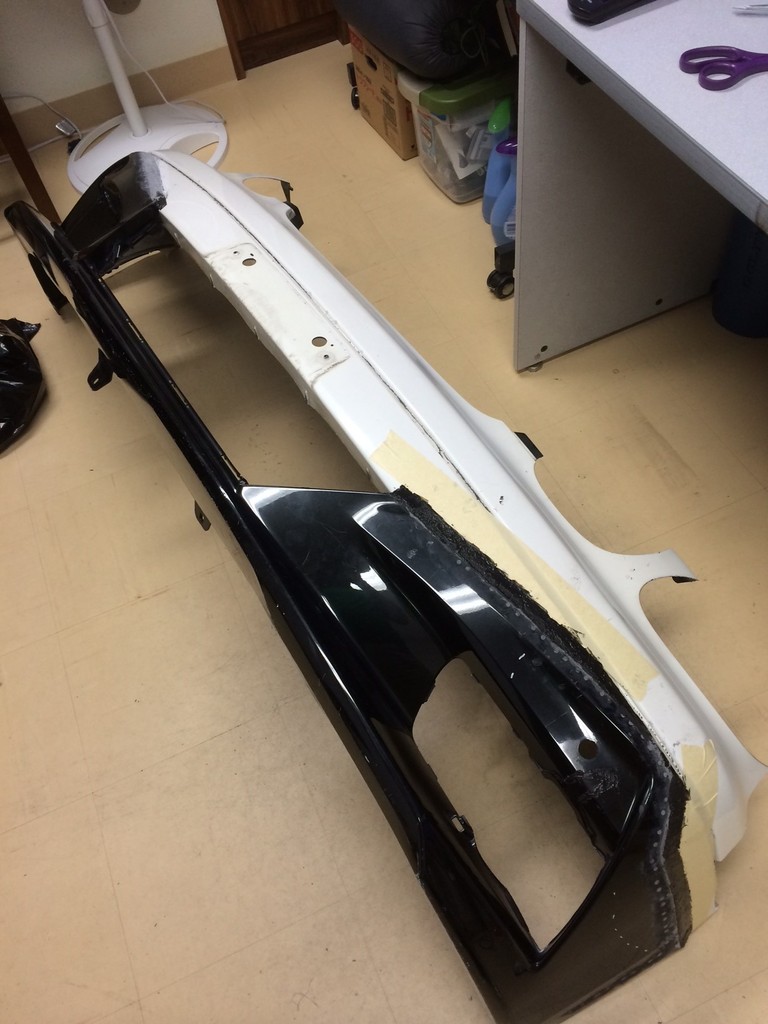
Name:  bmp8_zpsufhokels.jpg
Views: 1161
Size:  149.3 KB
Name:  bmp9_zpsfvpvuwdx.jpg
Views: 1074
Size:  147.9 KB
Name:  bmp10_zpssaxooew5.jpg
Views: 1105
Size:  140.4 KB
Name:  bmp11_zpse14pedo2.jpg
Views: 1085
Size:  152.6 KB
Name:  bmp12_zps4v5mxrwv.jpg
Views: 1144
Size:  143.0 KB

I will skip the boring part of sanding, filling, and painting (which by the way is probably what took the longest to do).
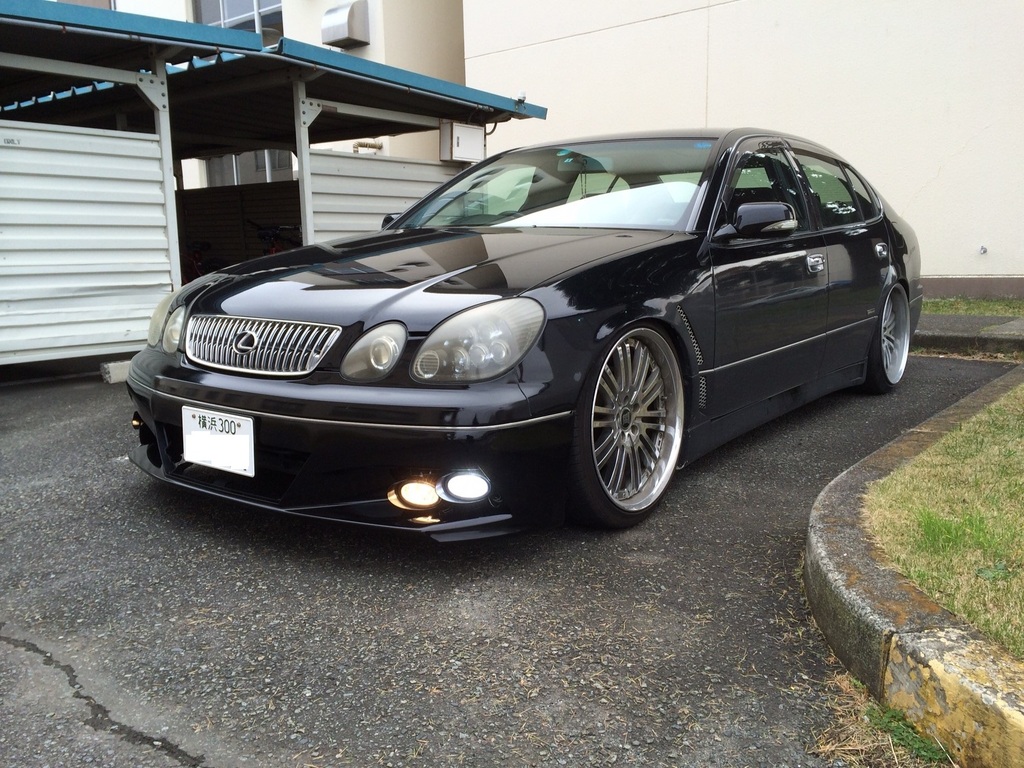
Here's the finished product as it sits right now.
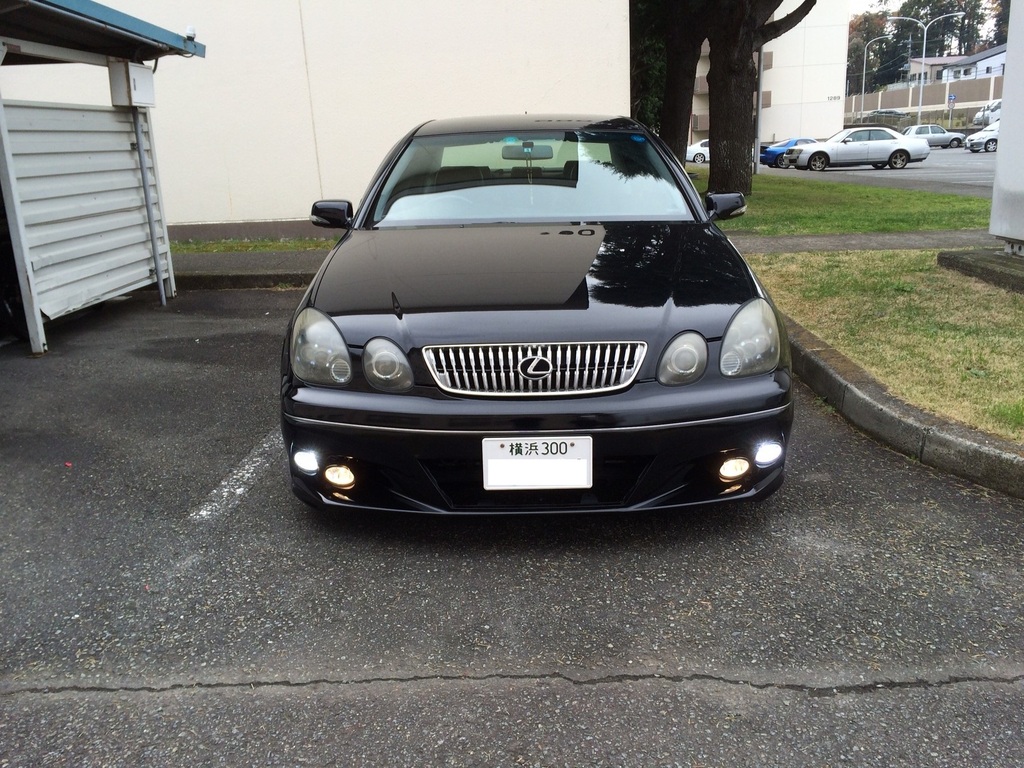
Name:  1o1_zps28yuxx3i.jpg
Views: 1123
Size:  346.3 KB
Name:  1o3_zpstozhpjvt.jpg
Views: 1111
Size:  337.2 KB
Reply
Old Dec 27, 2015 | 07:45 AM
  #2  
super51fan's Avatar
super51fan
Rookie
10 Year Member
 
Joined: Sep 2011
Posts: 87
Likes: 1
From: IN
Default

It looks great! I love your attention to detail. What bumper is the lower half from?
Reply
Old Dec 27, 2015 | 10:09 AM
  #3  
nelson09's Avatar
nelson09
Lead Lap
iTrader: (3)
 
Joined: Nov 2013
Posts: 541
Likes: 10
From: CA
Default

Merging a bumper!
Nice work.
Respect for doing it yourself!
Did you use plastic weld to merge them?
I've been eying a few donors LS460, S Class, R Class.
Reply
Old Dec 27, 2015 | 10:56 AM
  #4  
SoCal Cyco's Avatar
SoCal Cyco
Pole Position
15 Year Member
Photogenic
Photoriffic
iTrader: (20)
 
Joined: Dec 2007
Posts: 3,151
Likes: 49
From: SoCal
Default

very well done!!!!
Reply
Old Dec 27, 2015 | 12:07 PM
  #5  
sugzz's Avatar
sugzz
Pole Position
15 Year Member
iTrader: (9)
 
Joined: Apr 2008
Posts: 324
Likes: 4
From: New York
Default

Came out great. Nice work.
Reply
Old Dec 27, 2015 | 09:33 PM
  #6  
JEBAAY's Avatar
JEBAAY
Driver
 
Joined: Mar 2010
Posts: 174
Likes: 0
From: CA
Default

Nice and clean! What bumper did you use ?
Reply
Old Dec 28, 2015 | 04:49 AM
  #7  
77i9's Avatar
77i9
Thread Starter
Lead Lap
iTrader: (14)
 
Joined: Aug 2009
Posts: 426
Likes: 2
From: Yokohama, Japan
Default

Thank you for the compliments!
I used the grs210 crown for the lower half.
I used lord fusor medium adhesive to fuse them together.
I would suggest using lord fusor long set, the medium set time is too quick.
Reply
Old Dec 28, 2015 | 05:04 AM
  #8  
Mcon's Avatar
Mcon
Lexus Test Driver
iTrader: (1)
 
Joined: Jan 2014
Posts: 1,144
Likes: 19
From: North America
Default

77i9,

Well done. I really love it. ����
Reply
Old Dec 30, 2015 | 01:10 PM
  #9  
vipXjunky's Avatar
vipXjunky
Lexus Test Driver
iTrader: (28)
 
Joined: Feb 2009
Posts: 1,241
Likes: 3
From: Southern CA, 562
Default

looks really professional for a first timer! excellent work my man.
Reply
Old Dec 31, 2015 | 08:35 AM
  #10  
juvi22003's Avatar
juvi22003
Lead Lap
iTrader: (2)
 
Joined: Oct 2011
Posts: 3,677
Likes: 8
From: TX
Default

Damn i like it...good work !
Reply
Old Dec 31, 2015 | 01:17 PM
  #11  
Grod's Avatar
Grod
Driver School Candidate
 
Joined: Apr 2012
Posts: 37
Likes: 0
From: Toronto
Default

That's really cool!! A lot of ingenuity using the zip ties to glue them together, would have never thought of that.
Looks good!
Reply
Old Jan 2, 2016 | 05:43 AM
  #12  
77i9's Avatar
77i9
Thread Starter
Lead Lap
iTrader: (14)
 
Joined: Aug 2009
Posts: 426
Likes: 2
From: Yokohama, Japan
Default

Originally Posted by vipXjunky
looks really professional for a first timer! excellent work my man.
thanks! but my work is waay far from being professional looking

Originally Posted by juvi22003
Damn i like it...good work !
thanks!

Originally Posted by Grod
That's really cool!! A lot of ingenuity using the zip ties to glue them together, would have never thought of that.
Looks good!
I really can't take credit for the zip tie idea, I borrowed it from somebody else
Reply
Old Jan 5, 2016 | 12:26 AM
  #13  
tmf2004's Avatar
tmf2004
5% Club. Killing it!!!
20 Year Member
Liked
Loved
Community Favorite
iTrader: (15)
 
Joined: Nov 2004
Posts: 21,942
Likes: 64
From: FL
Default

looks good.. saw this on instagram i believe..
Reply
Old Jan 7, 2016 | 11:39 AM
  #14  
TYPEII's Avatar
TYPEII
Racer
20 Year Member
Liked
Loved
iTrader: (5)
 
Joined: Jan 2005
Posts: 1,769
Likes: 12
From: Utah
Default

Looks awesome Gill... Time well spent.
Reply
Old Jan 9, 2016 | 05:27 PM
  #15  
PATDOW1's Avatar
PATDOW1
Rookie
 
Joined: Nov 2015
Posts: 61
Likes: 2
From: SoCal
Default

Nice work
Reply


All times are GMT -7. The time now is 05:15 AM.