


Smoked Tails DIY


Thread Starter
Lexus Champion
Joined: Apr 2004
Posts: 1,659
Likes: 2
From: California
 Smoked Tails DIY
Well as some of you might know I smoked my tails a while ago but wasn't very happy w/ it's finish so I went ahead and tackled it today w/ a full write-up. Its sort of neat doing a DIY report, I just wished I did some more in the past.... well more to follow! enjoy
1st w/ a flathead screwdriver I popped out the bolt covers on the rear tails.

remove 2 bolts w/ 10mm socket or phillips head. I prefer socket to save from stripping the grooves.

w/ the trunk open look at the end of the tail light inside the trunk liner. There will be a pin holding the carpet and plastic piece to the inner frame. Just pop a flat head in there and pop that sucker out.

Peel the liner out so you can get inside the tail light area.

take these 2 bolts off w/ a 10mm socket and ratchet


now from the rear end of the car gently remove the tails towards the rear. Bring them out approx 3-4 inches and tilt the top down towards you exposing the light sockets. Unplug the lights from the tail lights. (Note: This is a good chance for you to change the bulbs to any that you desire)

1st w/ a flathead screwdriver I popped out the bolt covers on the rear tails.
remove 2 bolts w/ 10mm socket or phillips head. I prefer socket to save from stripping the grooves.
w/ the trunk open look at the end of the tail light inside the trunk liner. There will be a pin holding the carpet and plastic piece to the inner frame. Just pop a flat head in there and pop that sucker out.
Peel the liner out so you can get inside the tail light area.
take these 2 bolts off w/ a 10mm socket and ratchet
now from the rear end of the car gently remove the tails towards the rear. Bring them out approx 3-4 inches and tilt the top down towards you exposing the light sockets. Unplug the lights from the tail lights. (Note: This is a good chance for you to change the bulbs to any that you desire)
Thread Starter
Lexus Champion
Joined: Apr 2004
Posts: 1,659
Likes: 2
From: California
Lightly sand your tails w/ 2000grit sandpaper so the tint can bond to them. (I originally went w/ 800 grit following some Aholes directions online, which degraded my final finish of my lights)
Clean the surface area real well and dry. Now spray the tint on approx 4-6 inches away to get a smooth even coat.

even comes w/ instructions!!!

Let dry approx 1hr between coats. I used a heating lamp to speed up the process to 30-45minutes between. I ended up w/ 4 light coats.
Once all dry you can choose to clear coat it to maintain its durability. I opted not too but will probably chance my mind later on. I dont want my lights to be too shiny and over power my rear.
Then the finishing steps.....

I wet sanded w/ 1000grit sandpaper w/ LOTS of water. Make sure you know how to wetsand properly. Application should be very light and smooth. I had imperfections so I started w/ 1000grit. If your finish is nice then go straight to 2000.

What I did was keep the running water on my tails and wrap a sponge w/ the sand paper. Make sure the sponge is drenched. As I sand down I squeeze more and more water. It should never feel like sanding but should glide over the surface area.

Next I used 3m rubbing compound applied by cotton swab on my lights because I needed it. Some ppl might be able to skip this step.
Clean the surface area real well and dry. Now spray the tint on approx 4-6 inches away to get a smooth even coat.
even comes w/ instructions!!!
Let dry approx 1hr between coats. I used a heating lamp to speed up the process to 30-45minutes between. I ended up w/ 4 light coats.
Once all dry you can choose to clear coat it to maintain its durability. I opted not too but will probably chance my mind later on. I dont want my lights to be too shiny and over power my rear.
Then the finishing steps.....
I wet sanded w/ 1000grit sandpaper w/ LOTS of water. Make sure you know how to wetsand properly. Application should be very light and smooth. I had imperfections so I started w/ 1000grit. If your finish is nice then go straight to 2000.
What I did was keep the running water on my tails and wrap a sponge w/ the sand paper. Make sure the sponge is drenched. As I sand down I squeeze more and more water. It should never feel like sanding but should glide over the surface area.
Next I used 3m rubbing compound applied by cotton swab on my lights because I needed it. Some ppl might be able to skip this step.
Thread Starter
Lexus Champion
Joined: Apr 2004
Posts: 1,659
Likes: 2
From: California
Then me and my trusty porter cable went to town on the lights at 2400rpm's w/ the DACP.
I let them dry and wiped clean w/ a microfiber towel. Then the NXT went on. I wish I had kept my Zaino b/c I think it would really of gone well w/ the type of fnish I was looking for.

let dried and taken off w/ Microfiber, its good to have alot of Microfiber towels in your garage arsenal.

comparo between finished and unfinished....

Now reverse the removal process to install them back onto the car. For the inner trunk lights I didn't take them out but taped off the sides and went thru the process right on the trunk.
before

after:


PS the pictures really dont do them any justice. In person they look 10X's better then from before...
I let them dry and wiped clean w/ a microfiber towel. Then the NXT went on. I wish I had kept my Zaino b/c I think it would really of gone well w/ the type of fnish I was looking for.
let dried and taken off w/ Microfiber, its good to have alot of Microfiber towels in your garage arsenal.
comparo between finished and unfinished....
Now reverse the removal process to install them back onto the car. For the inner trunk lights I didn't take them out but taped off the sides and went thru the process right on the trunk.
before
after:
PS the pictures really dont do them any justice. In person they look 10X's better then from before...


Trending Topics


Lexus Champion
Joined: Jan 2004
Posts: 2,577
Likes: 1
From: Northern California
cool writeup, and nice end result from your hard work!!! I definitely need to brave the DIY projects, but am inclined to mess it up one way or another. Oh well, at least I can enjoy and appreciate the DIY projects that you skilled CL members do! Great work again UptownGS!


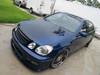


I like the look of the smoke effect. Looks so much EURO style like the AMG stuff. Now it makes me wanna do that to my Junction Produce tails. Should i do it or i shouldn't???
Tommy
Tommy



hey that's nice stuff, uptown!!! awesome looking!!!!!!
so now you gotta find that ahole and kick his *** for the 800 grid sandpaper idea? hey hey hey, who are you going to give credit this time j/k
congrats again man, they look very nice on your car!
so now you gotta find that ahole and kick his *** for the 800 grid sandpaper idea?
hey hey hey, who are you going to give credit this time j/kcongrats again man, they look very nice on your car!