
MK3 Supra / 1uzfe / Single Turbo Build Thread

Thread Starter
Lexus Fanatic
iTrader: (10)
Joined: Oct 2006
Posts: 5,006
Likes: 4
From: Tampa, Florida
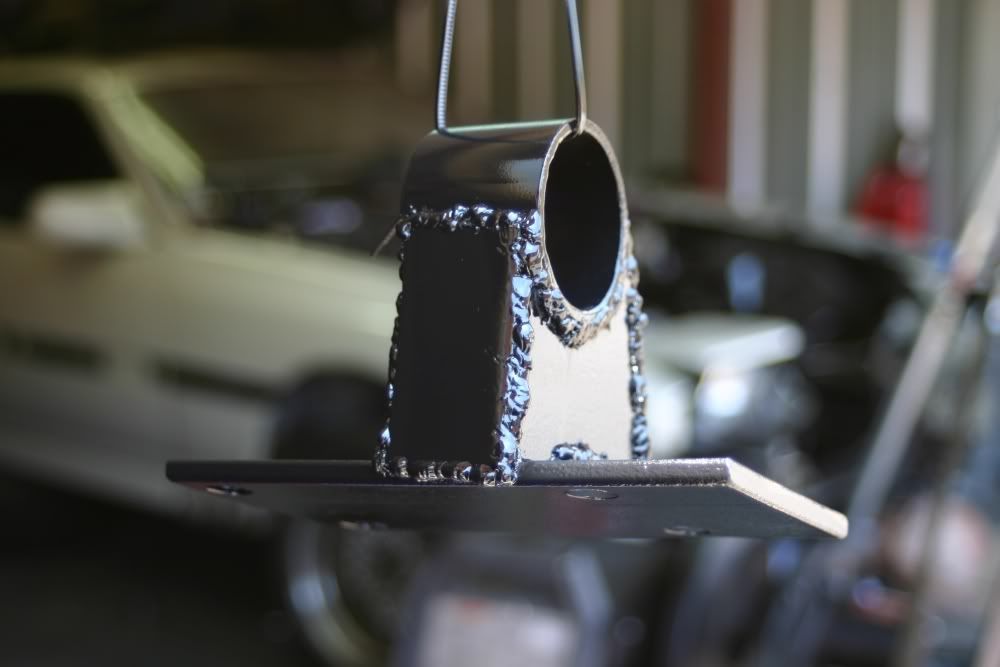
I have! No pics yet, wanted to get a bunch of pics before I post more.... However, I did fully weld the new mount stand on the subframe, ground off the old one, new motor mount, and made the passenger side "box frame" for the piece I cut out... came out good and progress is taking place!
Thread Starter
Lexus Fanatic
iTrader: (10)
Joined: Oct 2006
Posts: 5,006
Likes: 4
From: Tampa, Florida
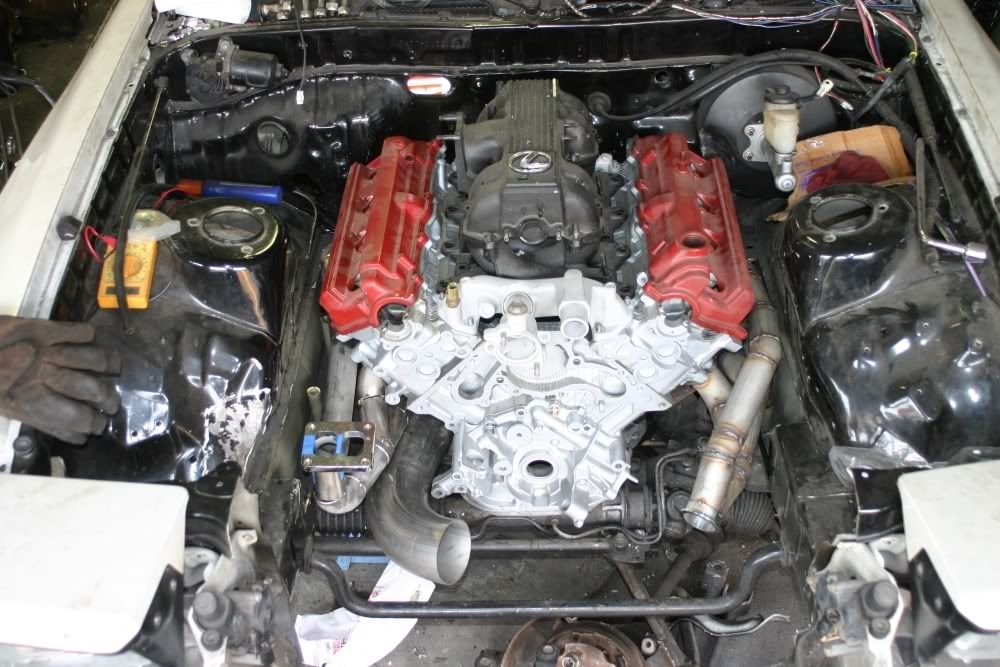
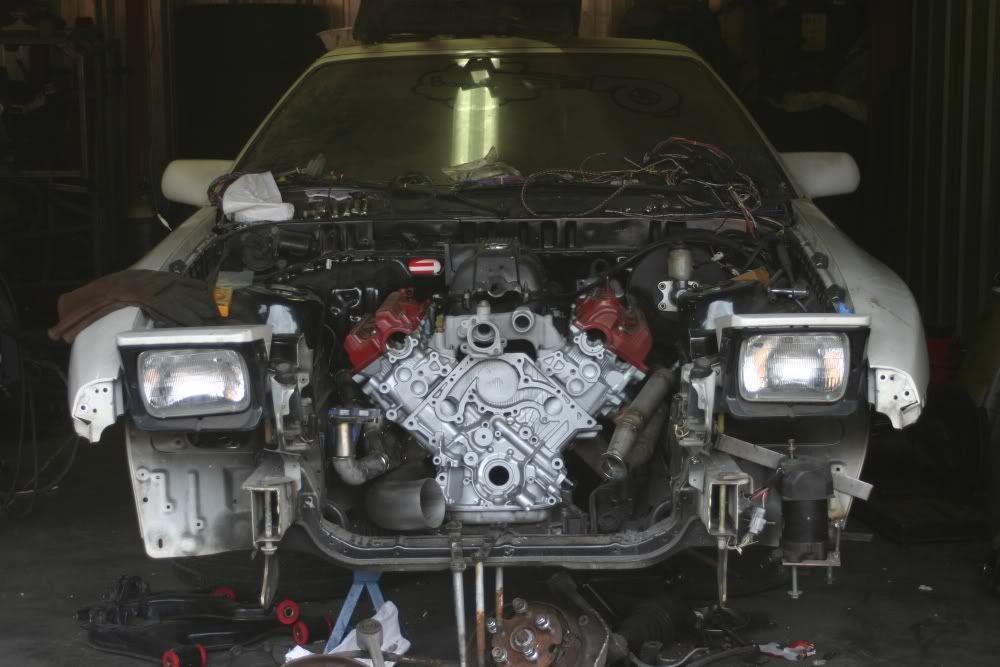
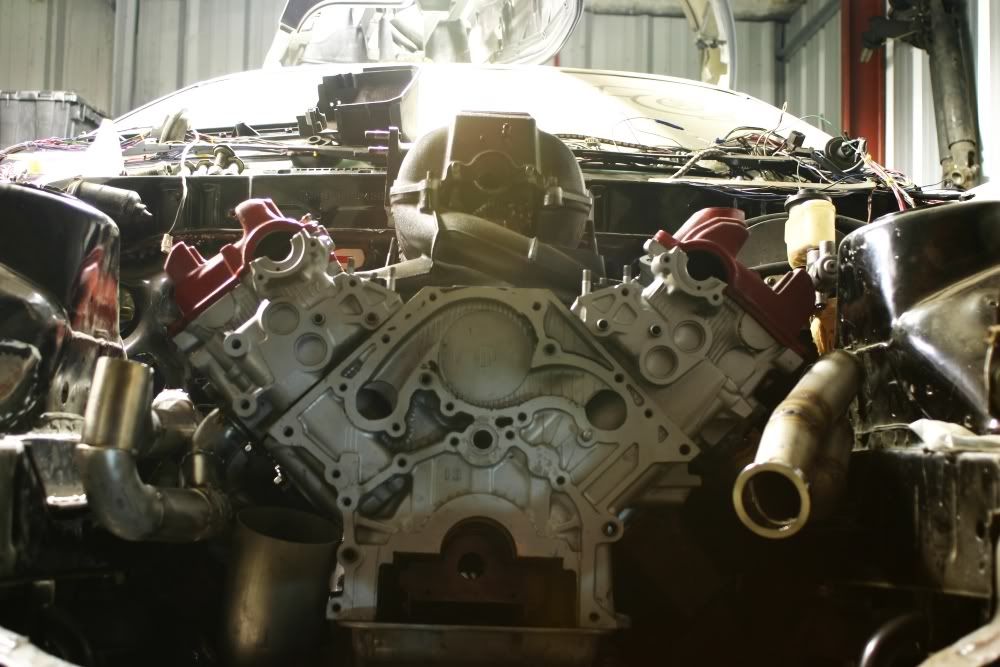
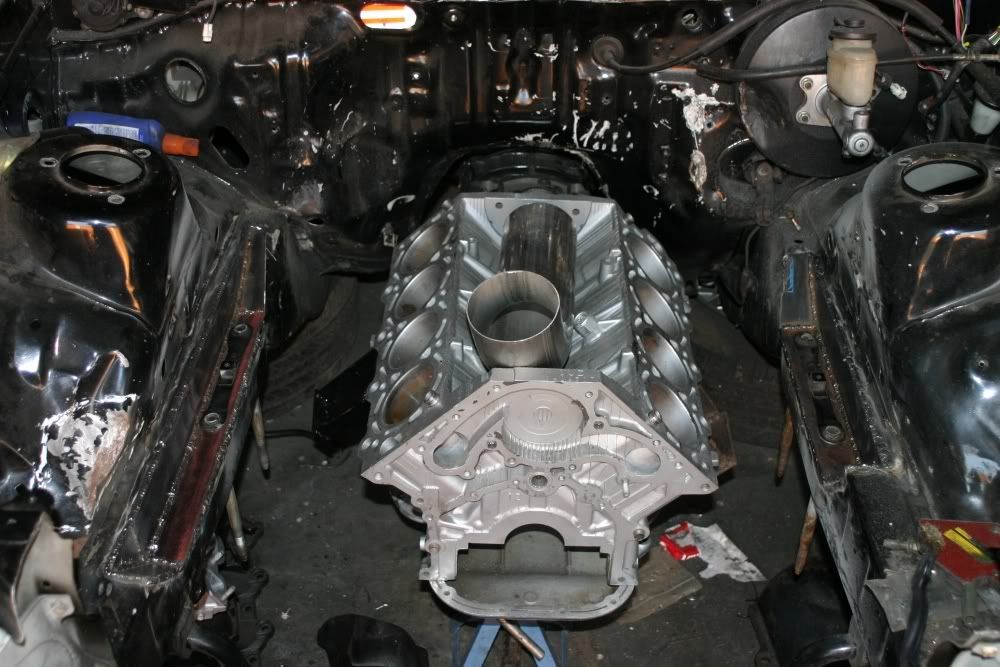
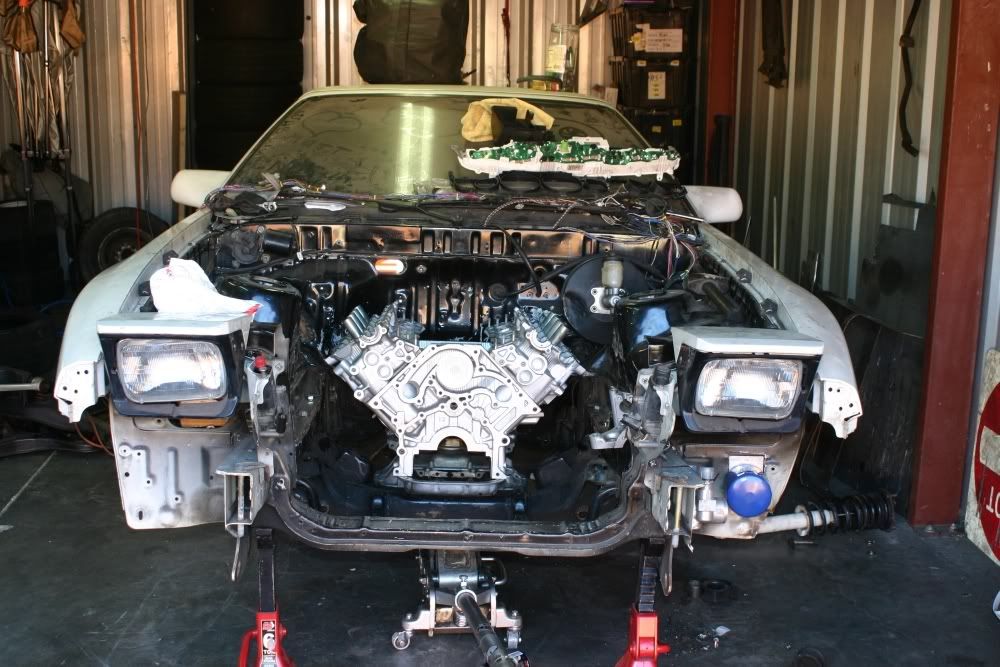
Alright so I test fit the engine with the modified frame rails... besides needing to modify the engine mounts again, it all fits... So I started to do the welding. May not look like a lot... but trust me... it was no such thing.

Thread Starter
Lexus Fanatic
iTrader: (10)
Joined: Oct 2006
Posts: 5,006
Likes: 4
From: Tampa, Florida
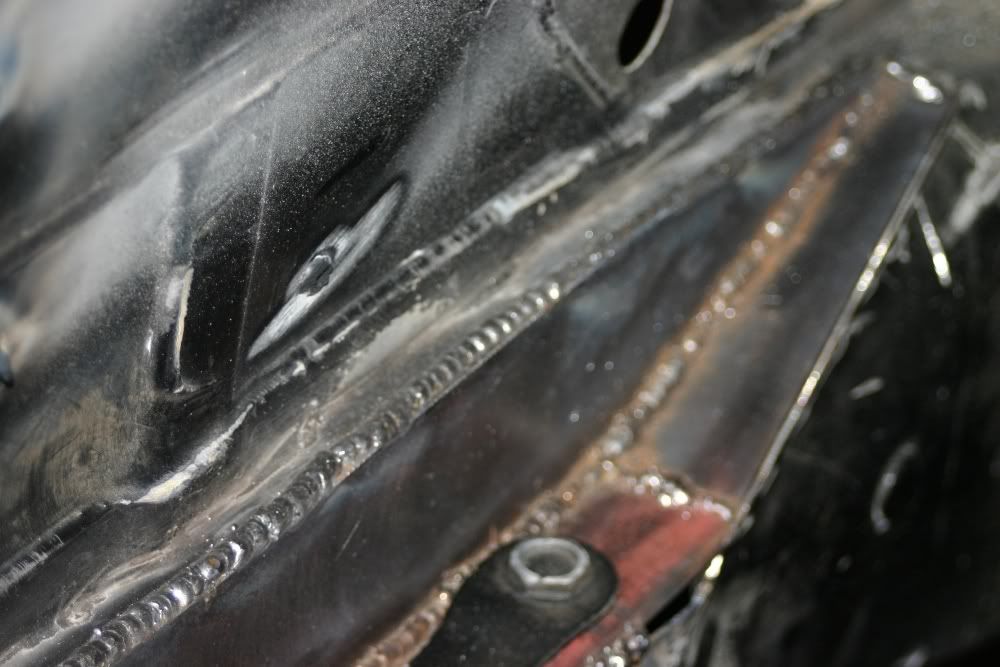
Okay, this was a whole lot of WTF... but the front subframe started to seperate? lol no idea, but when you bang the subframe again, the 2 stamped steel pieces move between each other, so I clamped them back together and welded them together... I guess I will do more on the subframe to strengthen it, but for now...
Thread Starter
Lexus Fanatic
iTrader: (10)
Joined: Oct 2006
Posts: 5,006
Likes: 4
From: Tampa, Florida
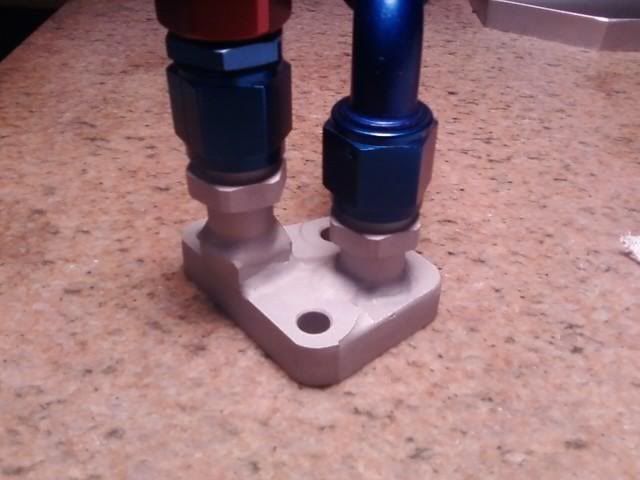
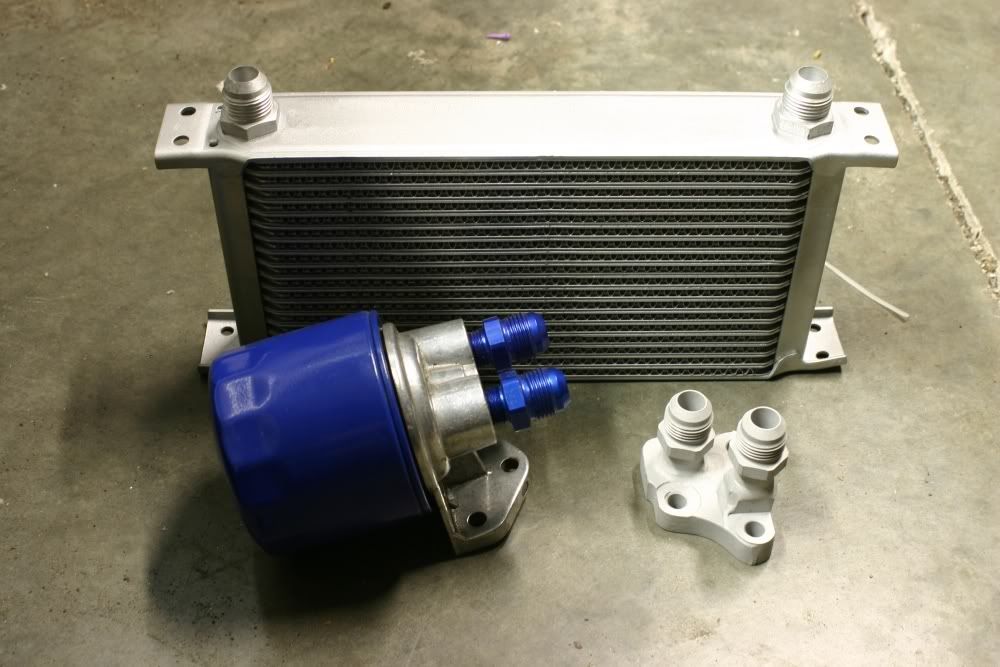
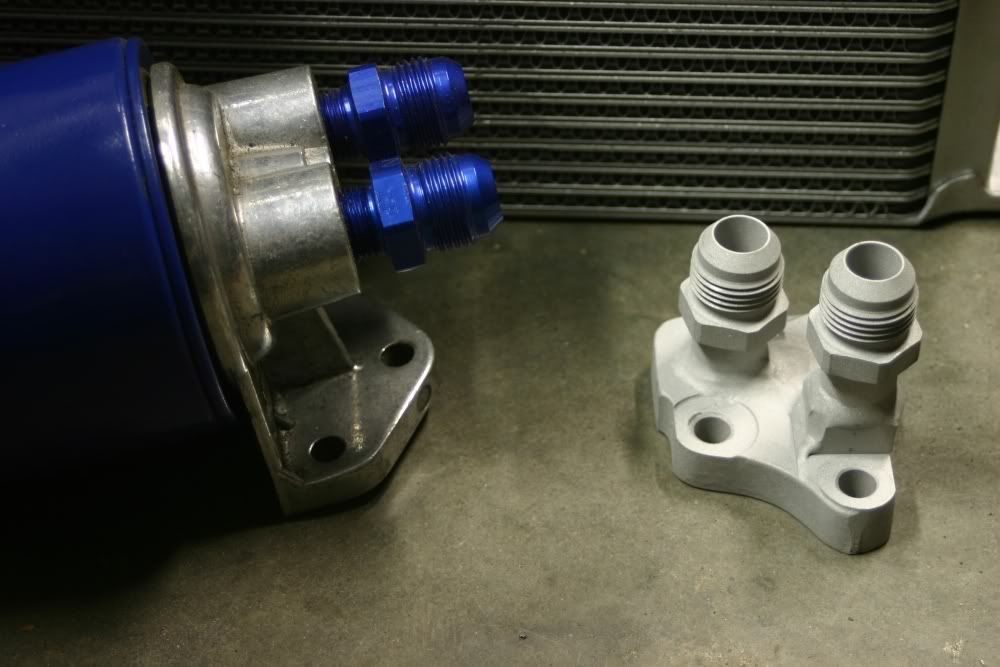
Alright, so my buddy sent over a pic of my modified oil filter housing.. basically machined it down to the base and welded 2 -10an fittings to it... First set in my oil system...
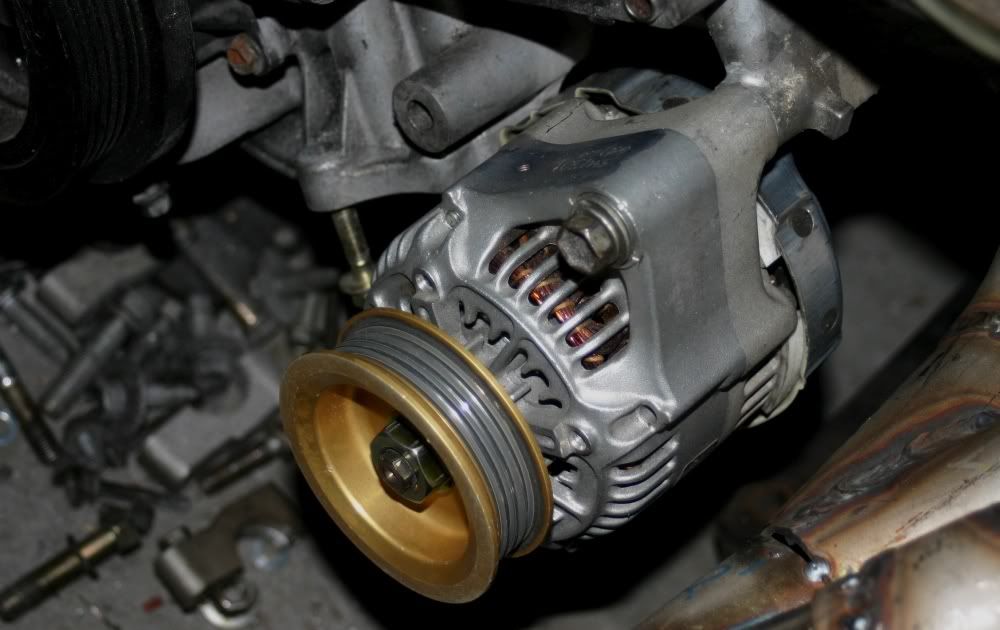
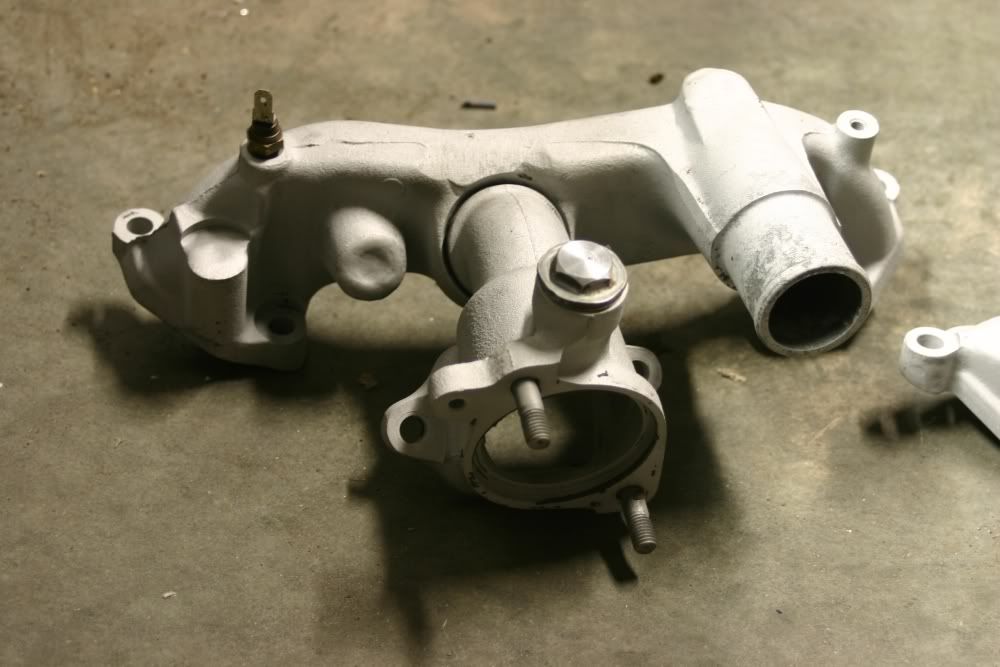
So I looked at how much room I have..... and I have none! So I had to cut and modify my driver side manifold to clear my alternator which needed to be moved to clear the oil fittings... I got a pulley off my friends 20v MR2 that works great on this alternator.
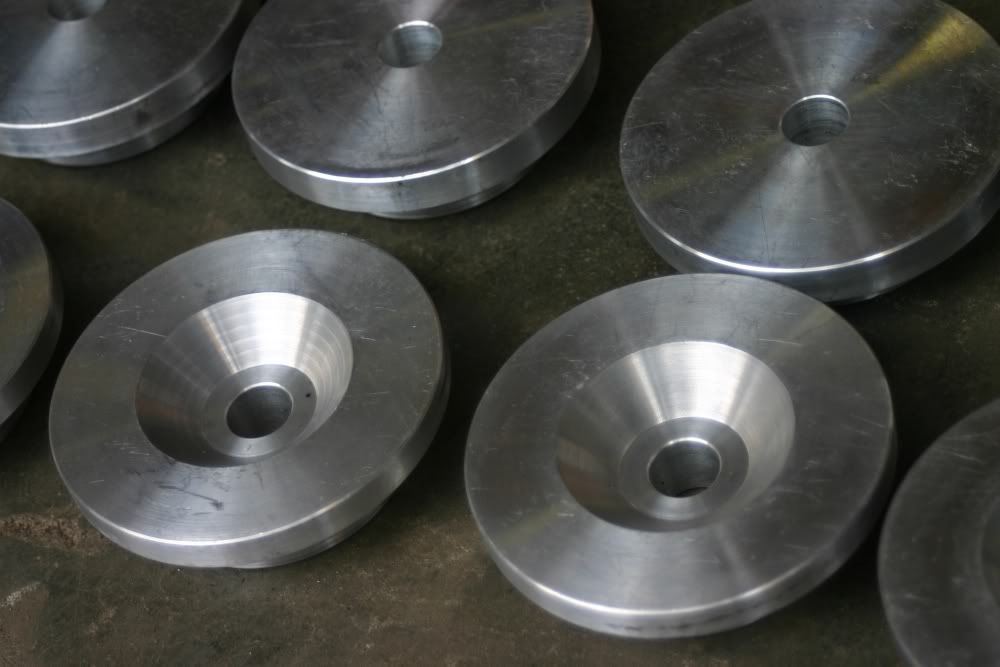
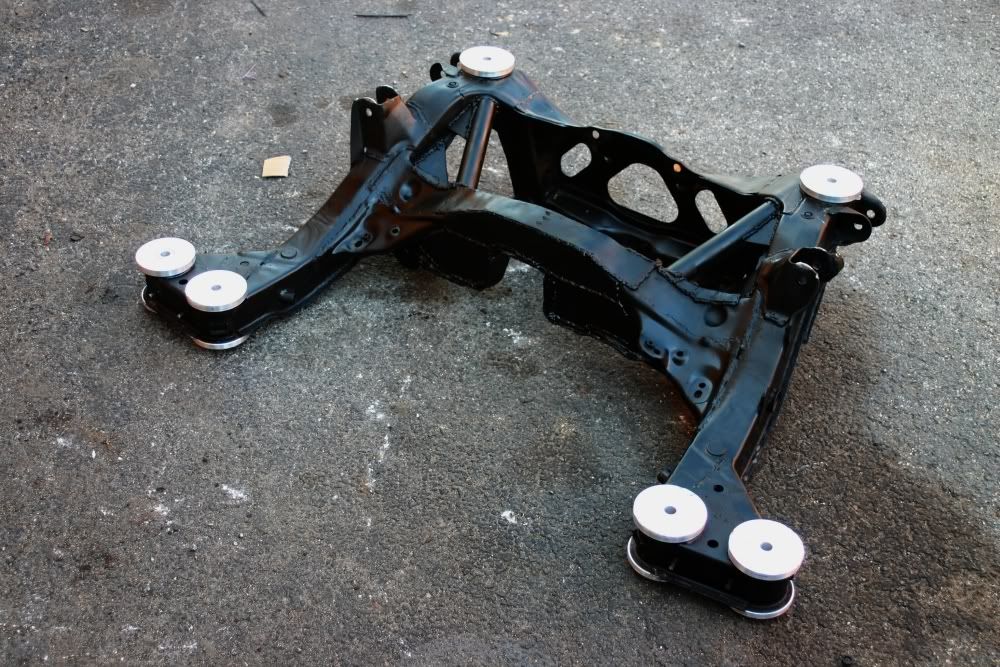
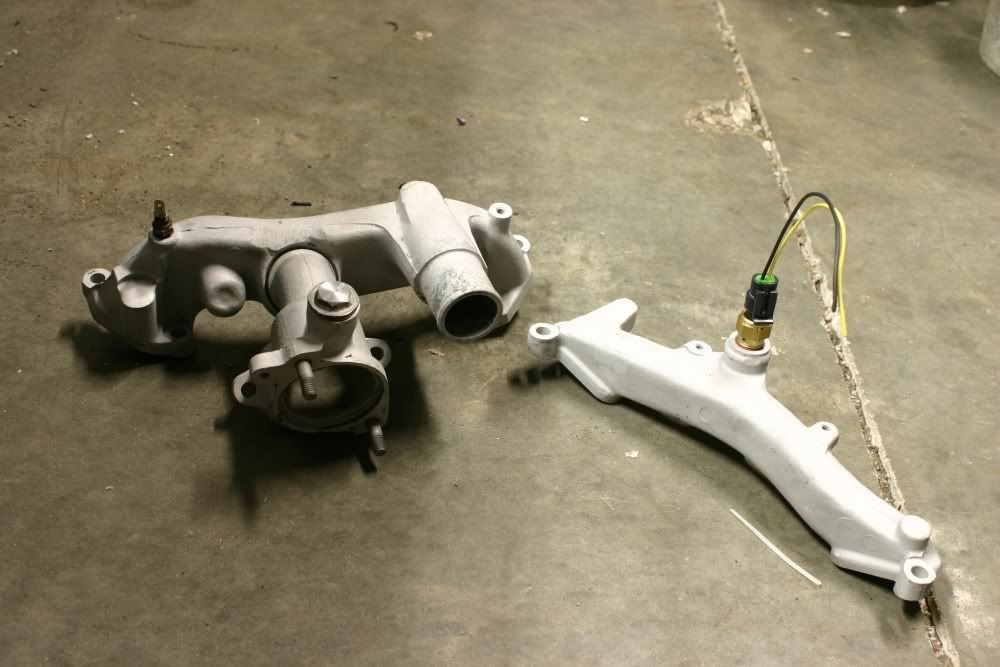
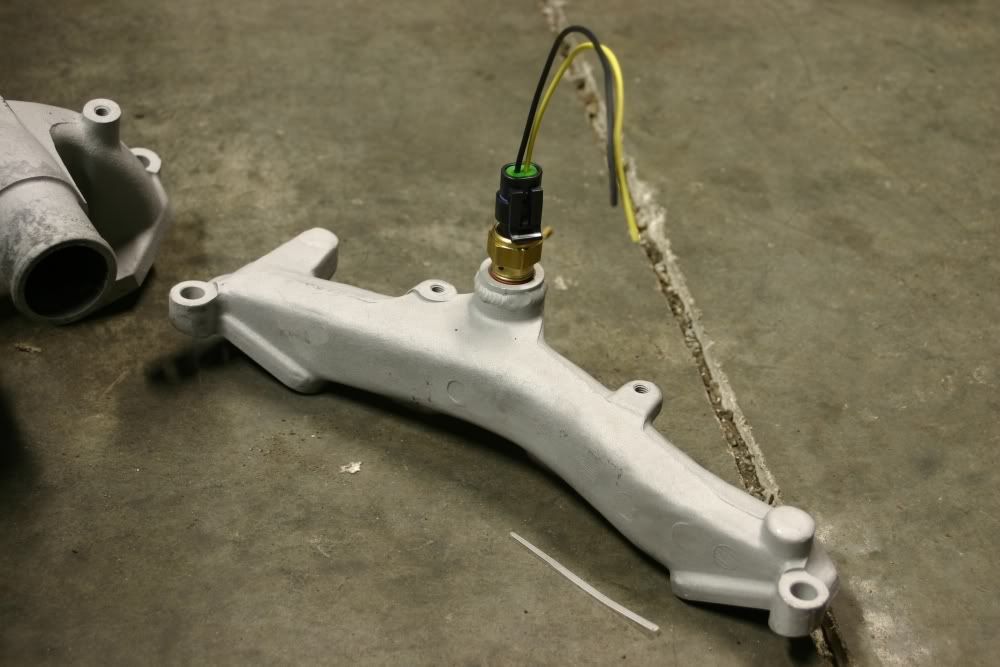
And then to get the ball rolling and moving... I modified my rear sub frame with 3/16" steel and 1.75" DOM tubing.. reinforcing it to prevent ANY cracking. Also Quantum Auto solid billet aluminum sub frame bushings.
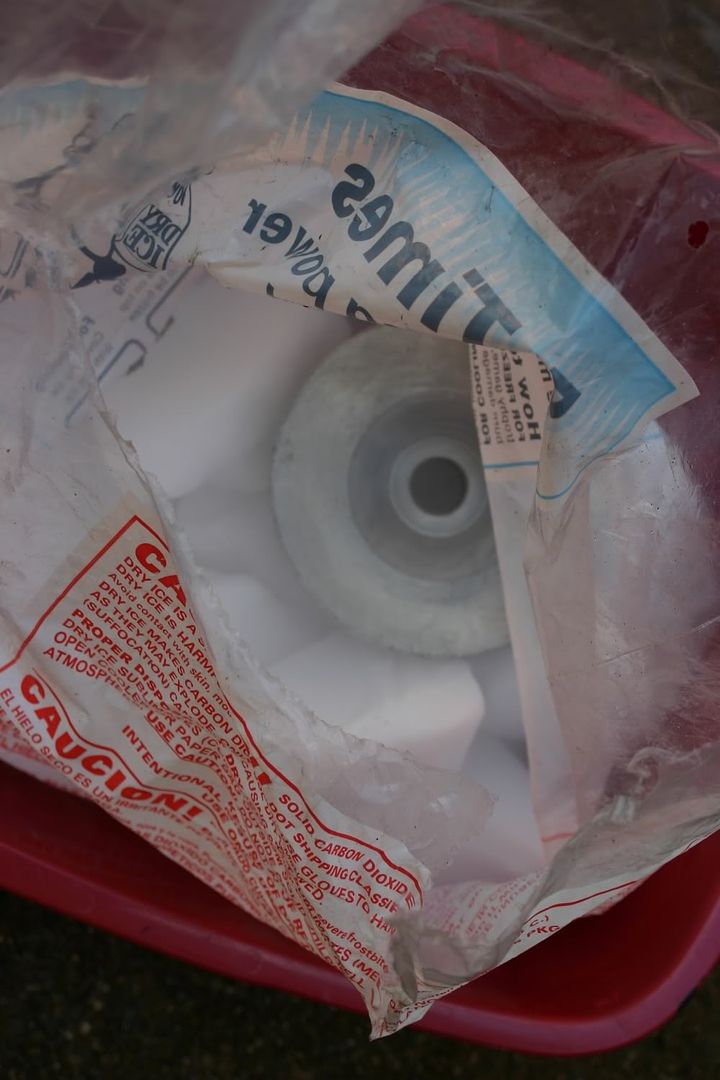
Little dry ice makes everything so much easier...
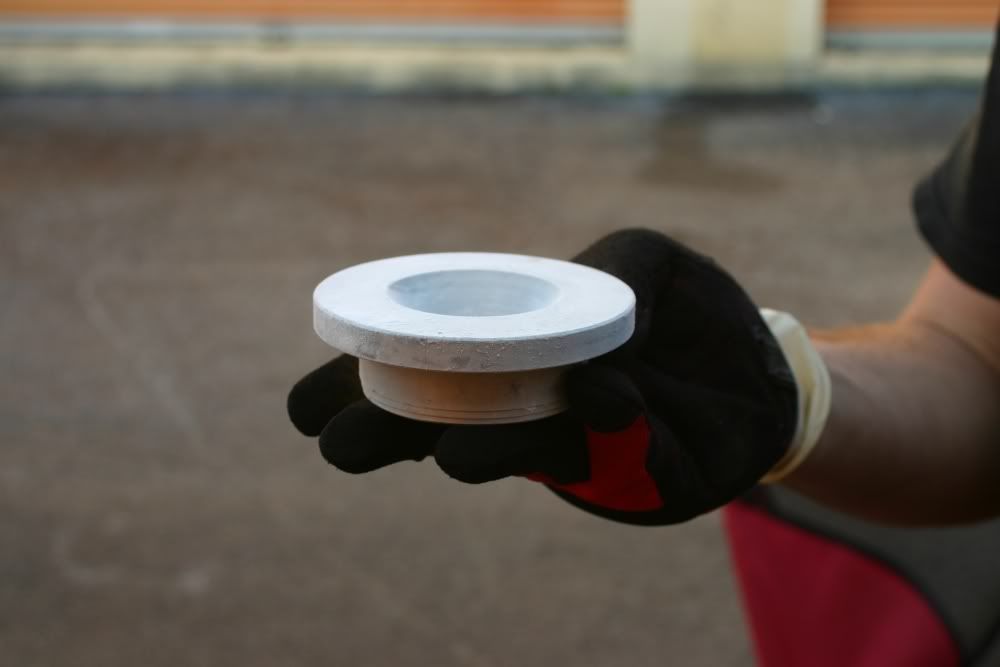
And the finished product.
Enjoy for now...
So I looked at how much room I have..... and I have none! So I had to cut and modify my driver side manifold to clear my alternator which needed to be moved to clear the oil fittings... I got a pulley off my friends 20v MR2 that works great on this alternator.
And then to get the ball rolling and moving... I modified my rear sub frame with 3/16" steel and 1.75" DOM tubing.. reinforcing it to prevent ANY cracking. Also Quantum Auto solid billet aluminum sub frame bushings.
Little dry ice makes everything so much easier...
And the finished product.
Enjoy for now...
Thread Starter
Lexus Fanatic
iTrader: (10)
Joined: Oct 2006
Posts: 5,006
Likes: 4
From: Tampa, Florida
Some more pics of some goodies... no progress since last post... waiting on some bolts int he mail for the subframe.
However...
My shaved water bridges... kept the original temp sensor (now wishing I relocated it but whatever) and the rear bridge has the spot for the coolant sensor for the MS3x... other than that its cleaned up... and also turned down the head of the bolt for the bleeder to clear the FFIM better...
Some of my oil goodies... -10an all around... relocation, adapter and cooler...
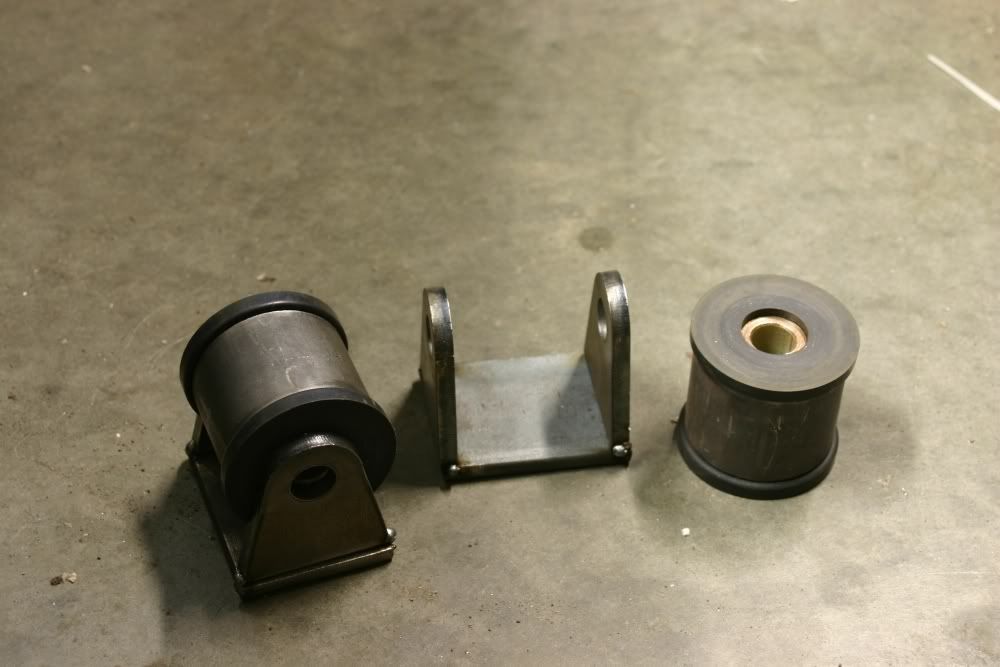
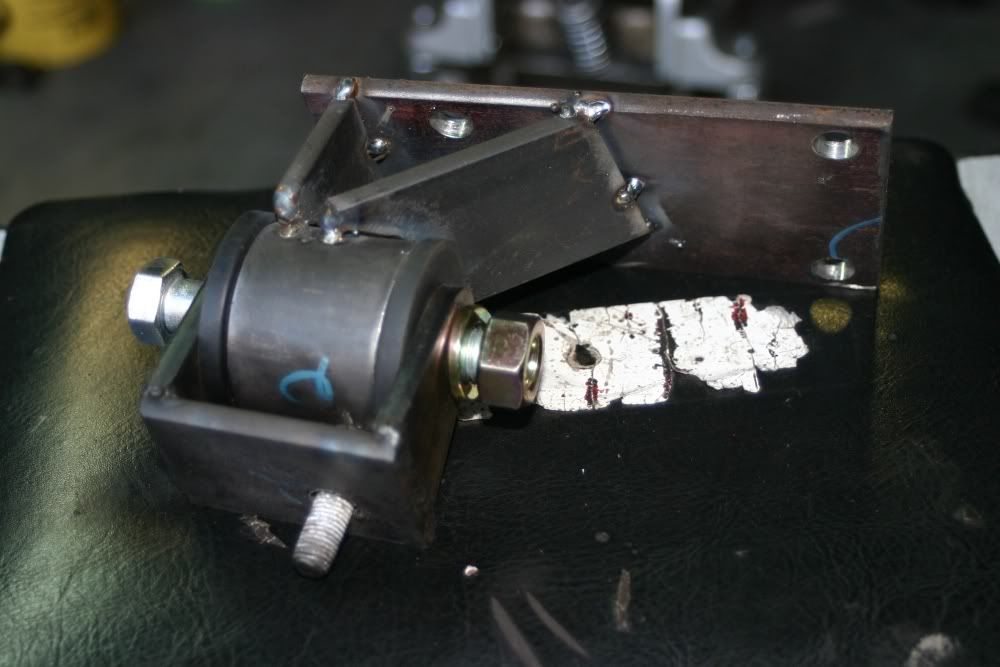
And the start of version 3 of my motor mounts.. using poly bushings.

However...
My shaved water bridges... kept the original temp sensor (now wishing I relocated it but whatever) and the rear bridge has the spot for the coolant sensor for the MS3x... other than that its cleaned up... and also turned down the head of the bolt for the bleeder to clear the FFIM better...
Some of my oil goodies... -10an all around... relocation, adapter and cooler...
And the start of version 3 of my motor mounts.. using poly bushings.
Thread Starter
Lexus Fanatic
iTrader: (10)
Joined: Oct 2006
Posts: 5,006
Likes: 4
From: Tampa, Florida
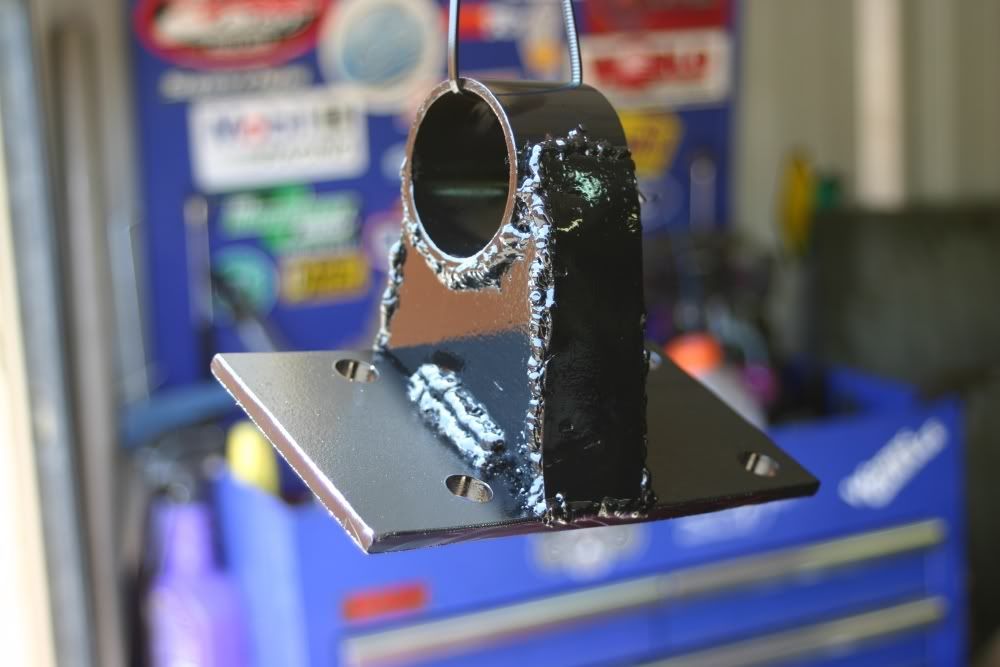
Passnger side... Its a little weird because I had to relocate the mount stand on the subframe... But its strong as hell.
Driver Side is complete... No bushings on it and the subframe side is not in the pics.. but this is the part that goes to the engine.
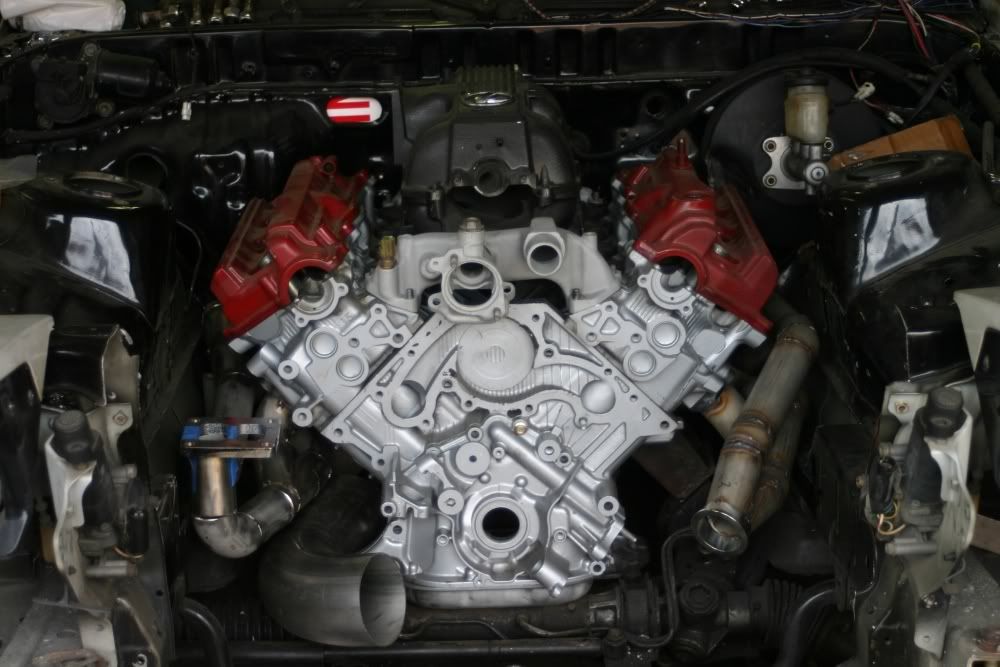
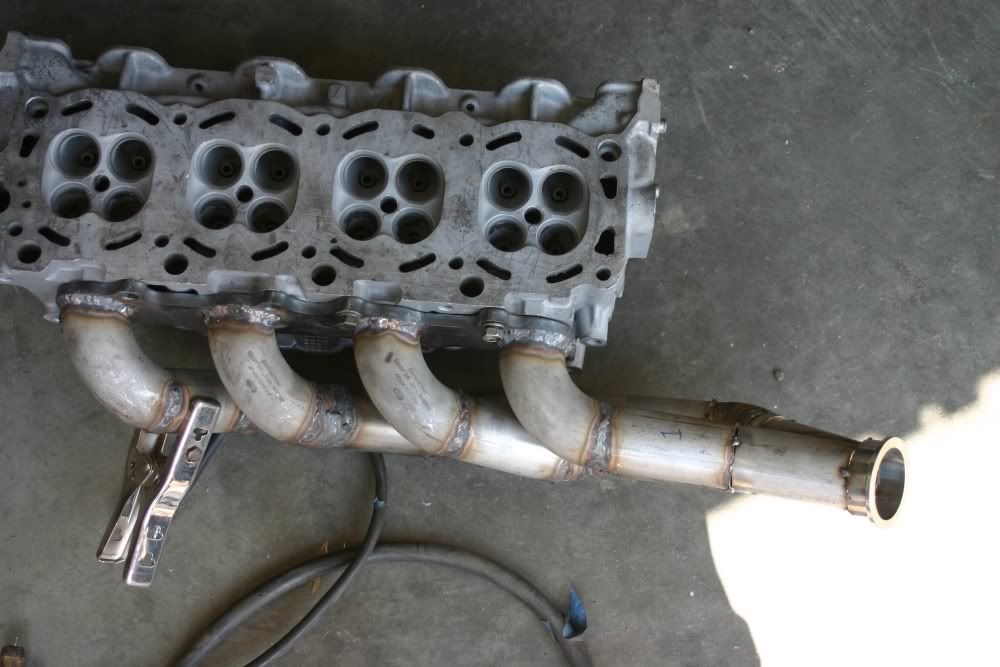
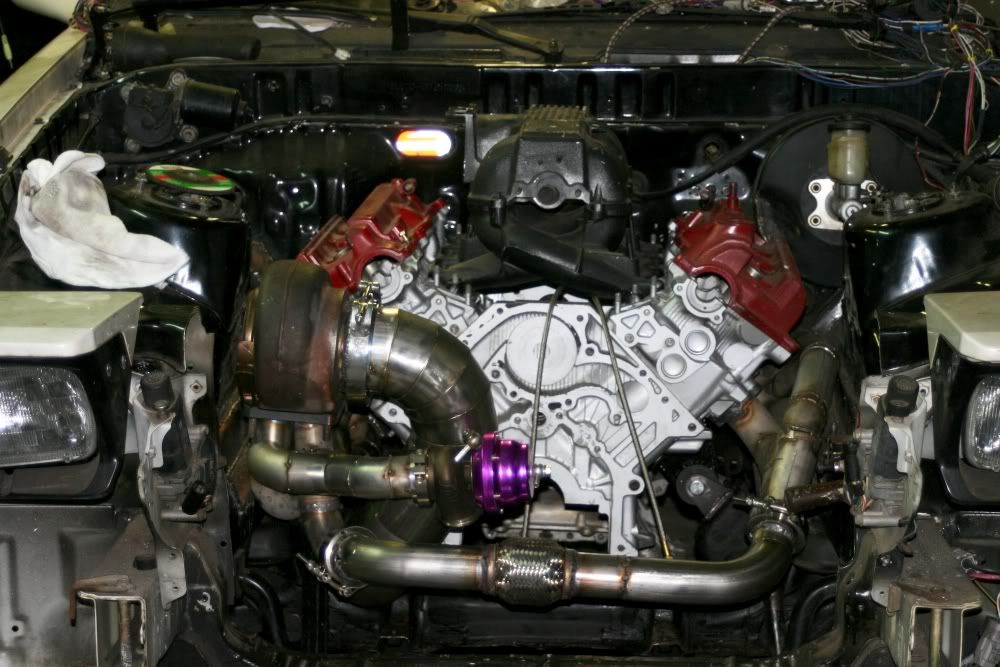
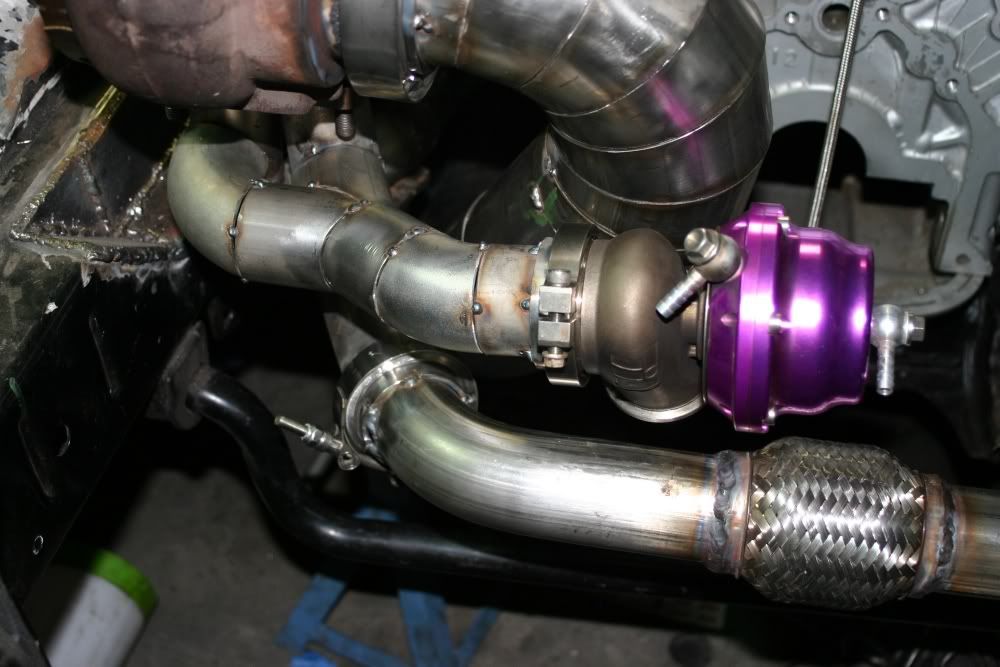
Adjusted the vband and collector to allow the alternator to fit... Here is it sort of together...
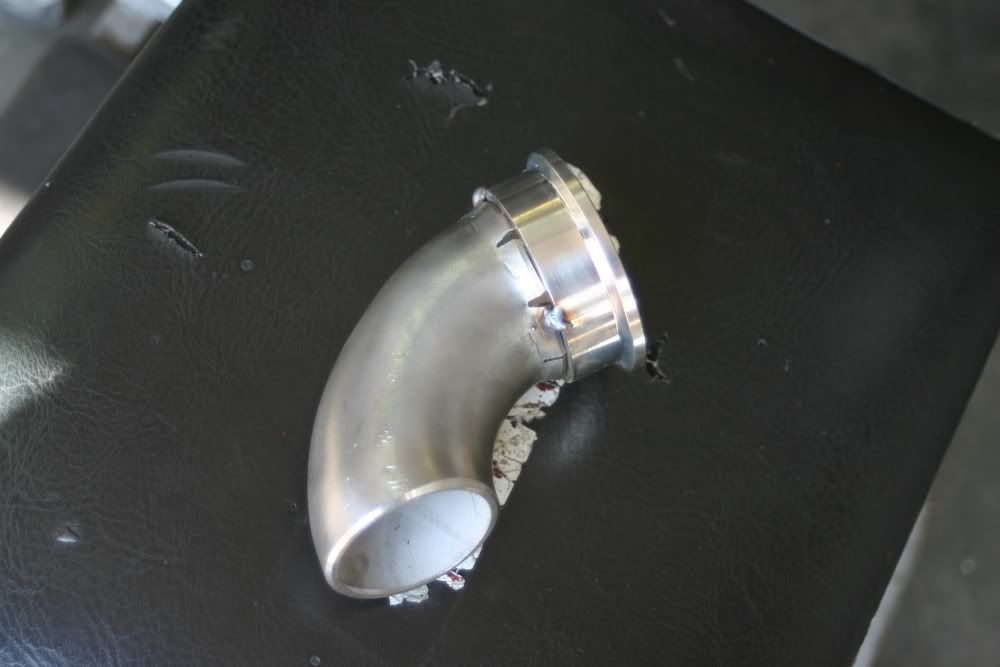
Easy way to get some pipe that is just a little smaller then the vband to fit...
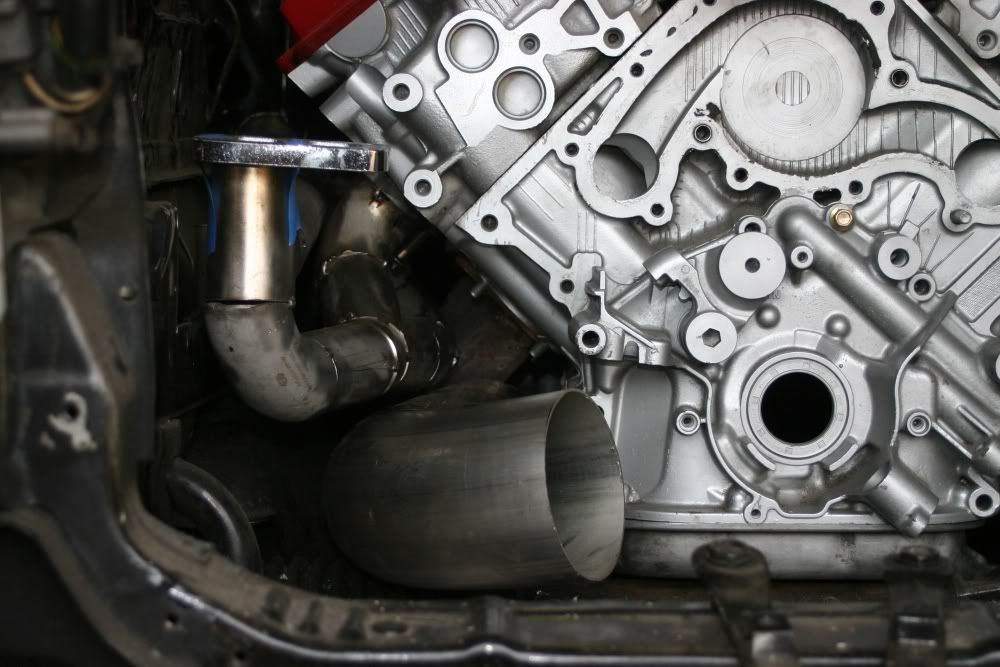
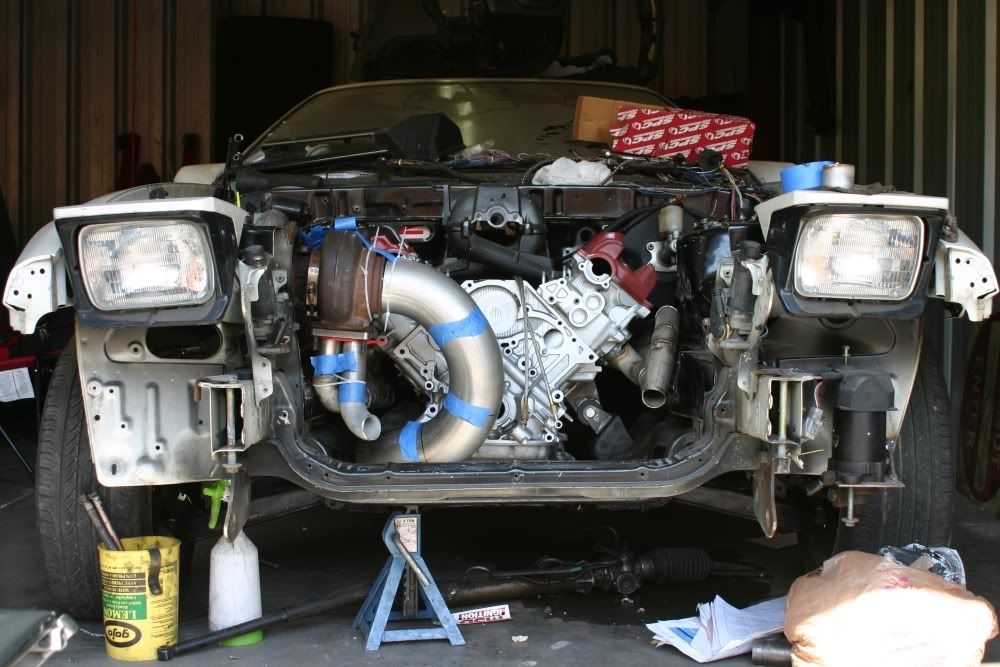
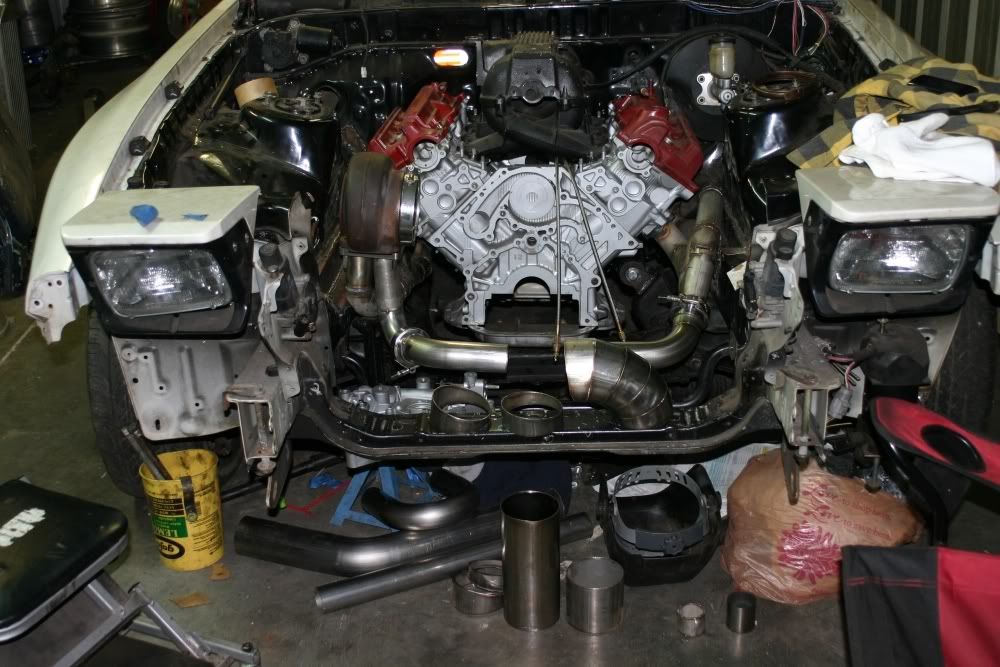
Oh... And some nice mock up... since the engine bay will be a lot of piping, I need to route everything before I start to weld it up... The turbo sits 10 degree clock wise to allow the cold side to clear the frame rail easily... And I just used a bunch of my 4" bends I have laying around to see what works... looks like it will be fairly easy.

Driver Side is complete... No bushings on it and the subframe side is not in the pics.. but this is the part that goes to the engine.
Adjusted the vband and collector to allow the alternator to fit... Here is it sort of together...
Easy way to get some pipe that is just a little smaller then the vband to fit...
Oh... And some nice mock up... since the engine bay will be a lot of piping, I need to route everything before I start to weld it up... The turbo sits 10 degree clock wise to allow the cold side to clear the frame rail easily... And I just used a bunch of my 4" bends I have laying around to see what works... looks like it will be fairly easy.


Thread Starter
Lexus Fanatic
iTrader: (10)
Joined: Oct 2006
Posts: 5,006
Likes: 4
From: Tampa, Florida
Been awhile since I updated... new job = less time to work.. but it is what it is. Anyways, some pics over the last few weeks...
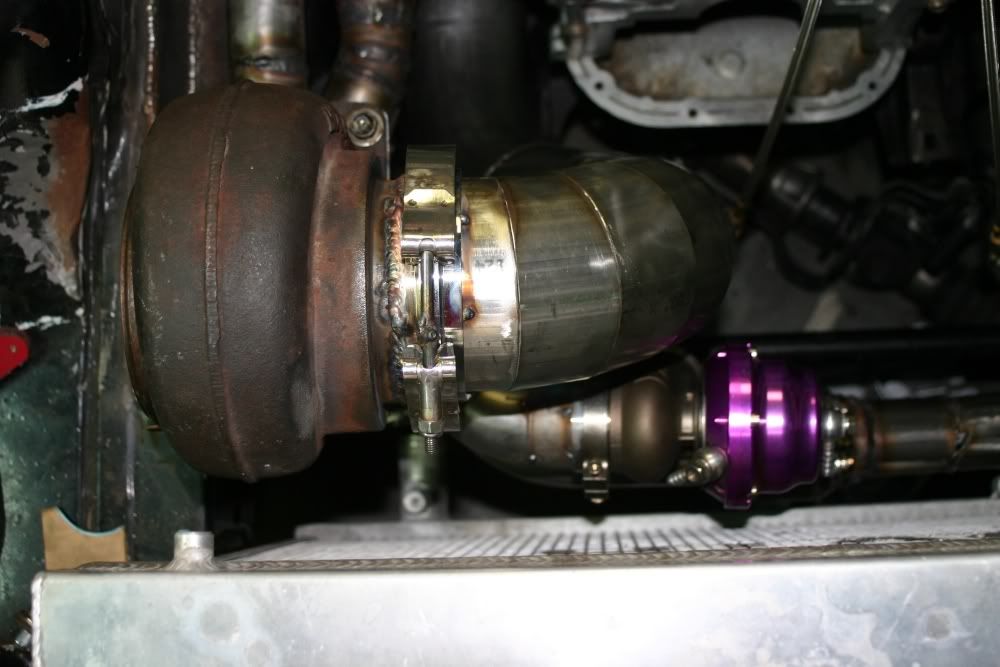
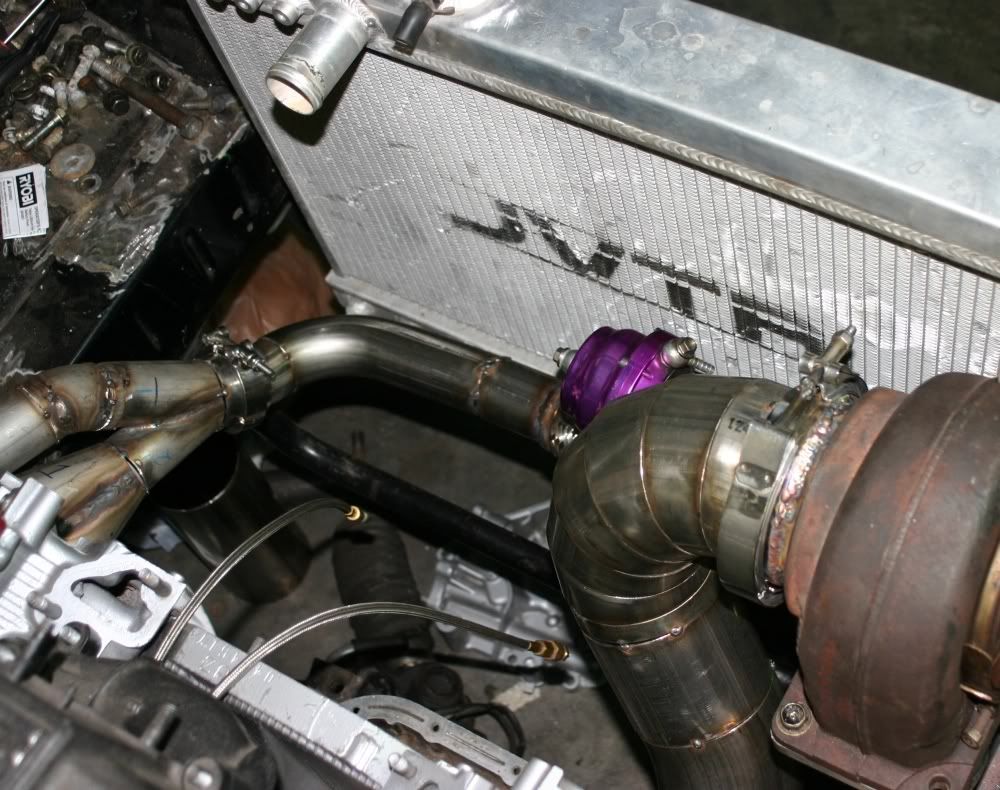
Start of my downpipe and the rest of the stuff......

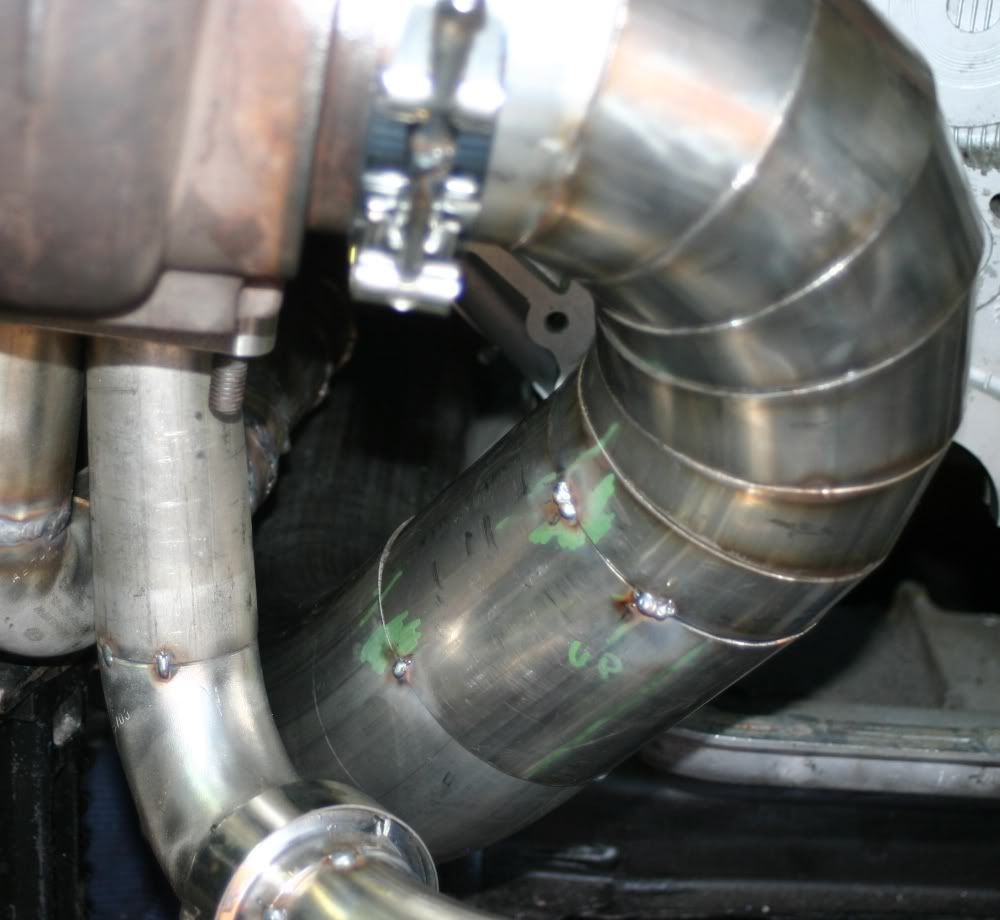
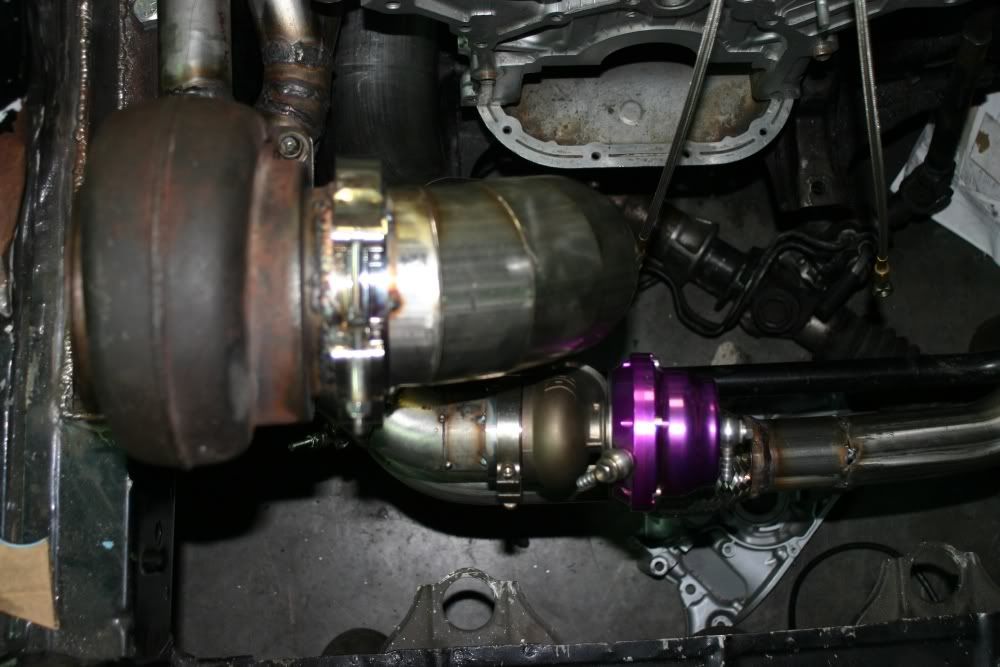
More completed. Not sure I how I like the WG location... its the only way I can really get it to fit, but I prefer it a few inches closer... I dont foresee any issues with boost creep though, speak up if you do.
Start of my downpipe and the rest of the stuff......
More completed. Not sure I how I like the WG location... its the only way I can really get it to fit, but I prefer it a few inches closer... I dont foresee any issues with boost creep though, speak up if you do.
Thread Starter
Lexus Fanatic
iTrader: (10)
Joined: Oct 2006
Posts: 5,006
Likes: 4
From: Tampa, Florida
Haha... well not much to take pictures of. Its been a lot of loose ends... starting to tie up.
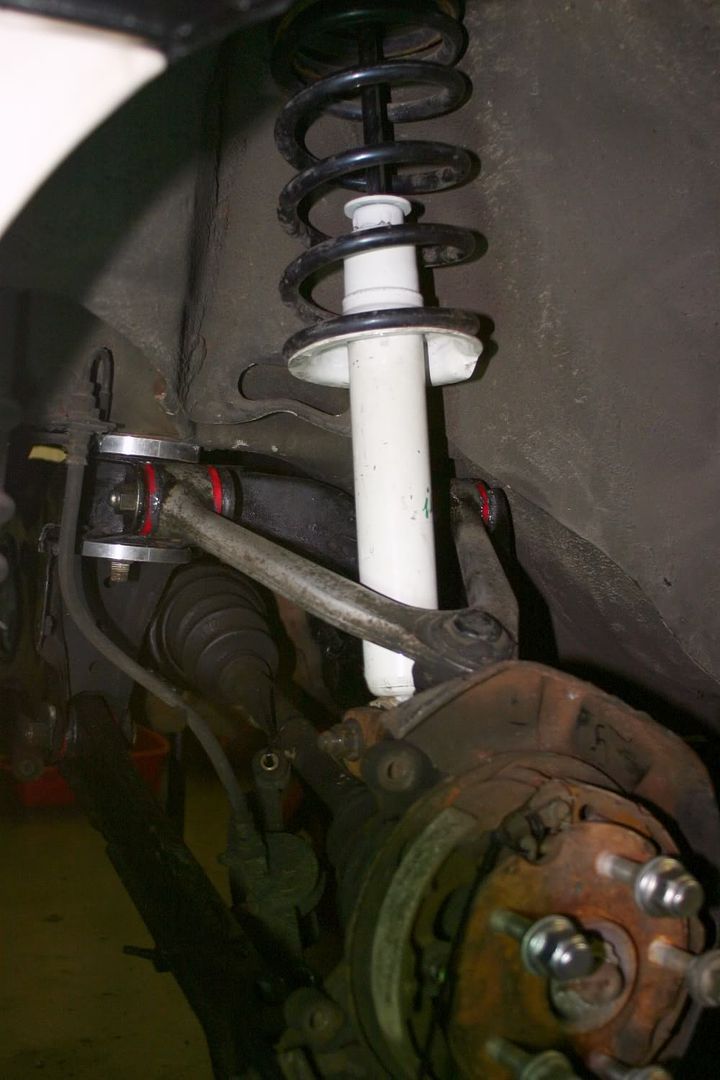
First off, the subframe is mounted in... got most of the bushings done (traction arm isnt complete in the following picture..). I had to buy new eccentric cam bolts for the arms. Very pricey, but it needs to come off jackstands eventually! I picked up Tokico Illumina rears locally for $50 to match my fronts which came on the car. So I finally have a matching complete spring/shock combo.. H&R and Tokico Illuminas... good enough for now! Ordered some parking brake parts which I broke or age broke. Diff is fully rebuilt and installed... axle cv's have been repacked... it was not my intention to do it, but I knocked the cover plate off, so I was forced to do so
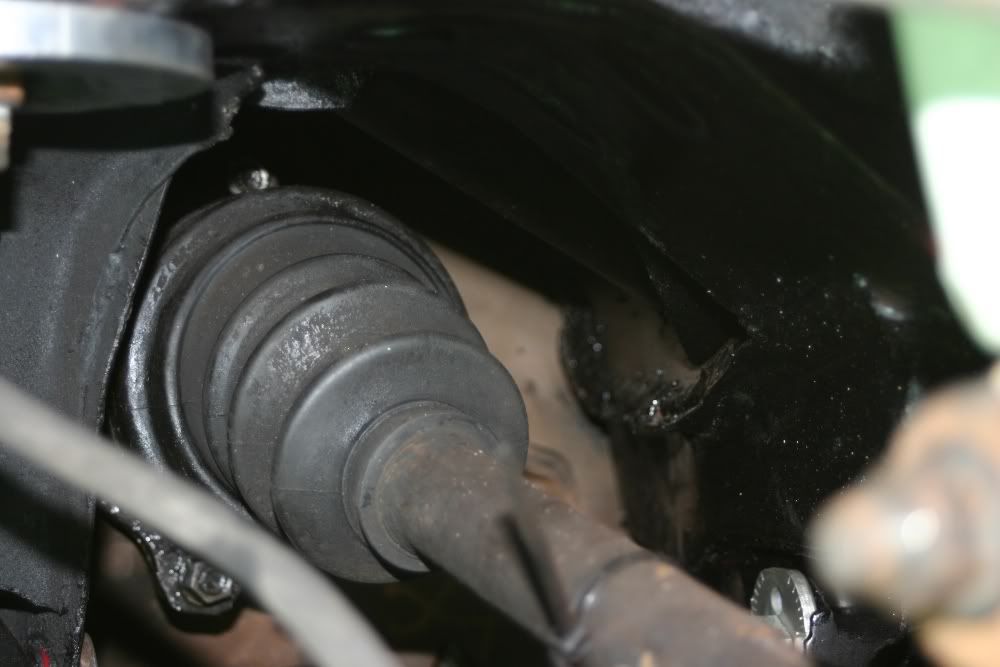
In this pic if you look closely you can see the 1.75" DOM tubing that helps brace the subframe. (above axle)
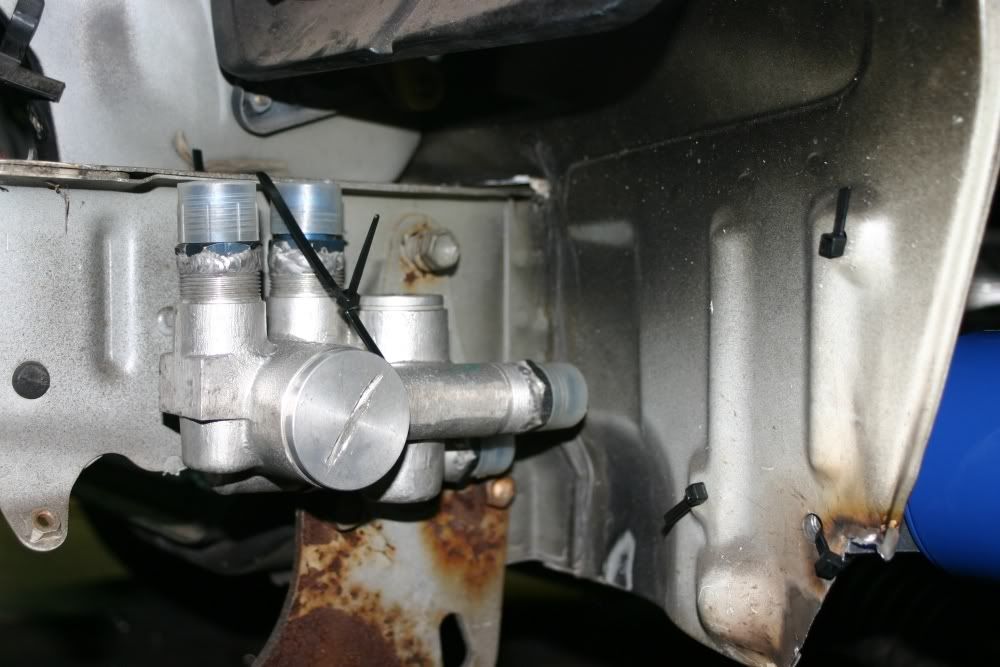
Bought a modified Porsche oil thermostat. Has -10an fittings already welded on.. not bad for $50... opens at 175* or so like every other one.
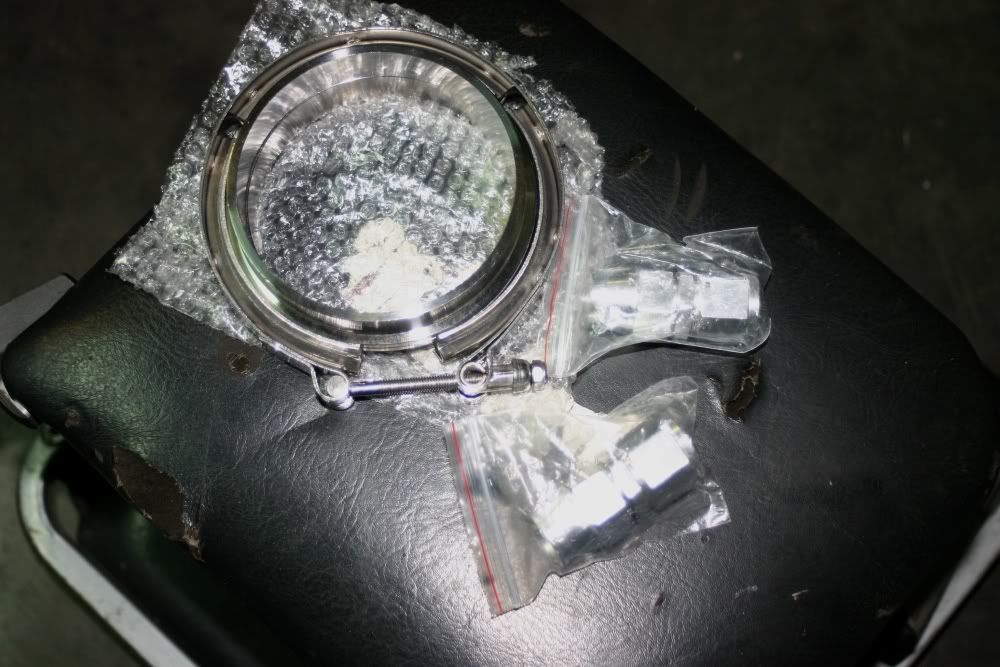
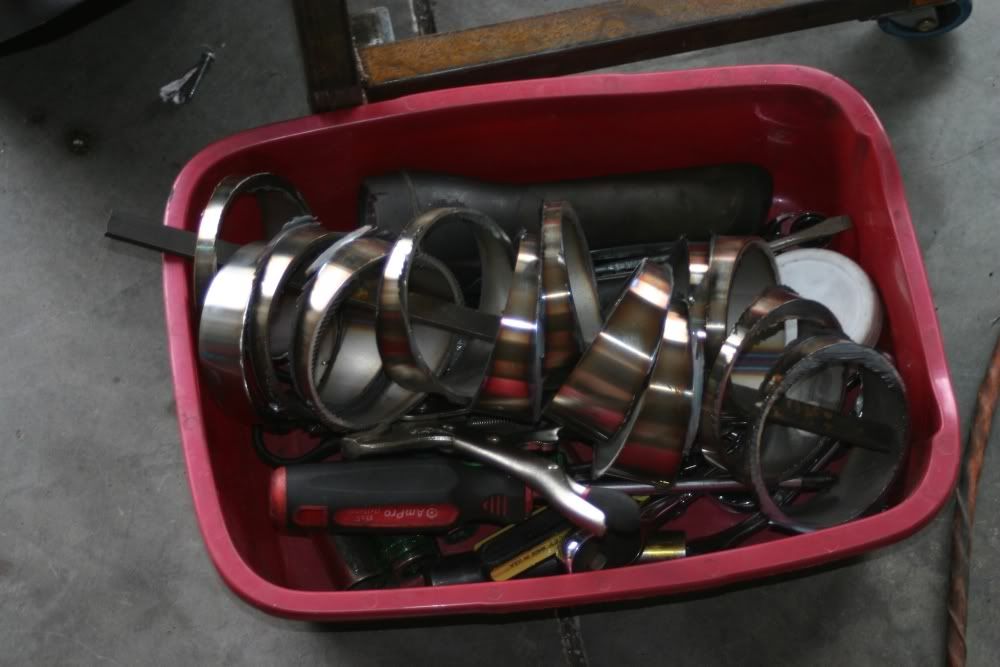
Bought another 4" SS Vband assembly... and bought some silver -10an hose ends to see if I like this color theme... Nice thing about silver, they wont show scratches... bad this is its kind of boring... I just feel black may scratch too fast/bad if I need to take it off without tape or anything.
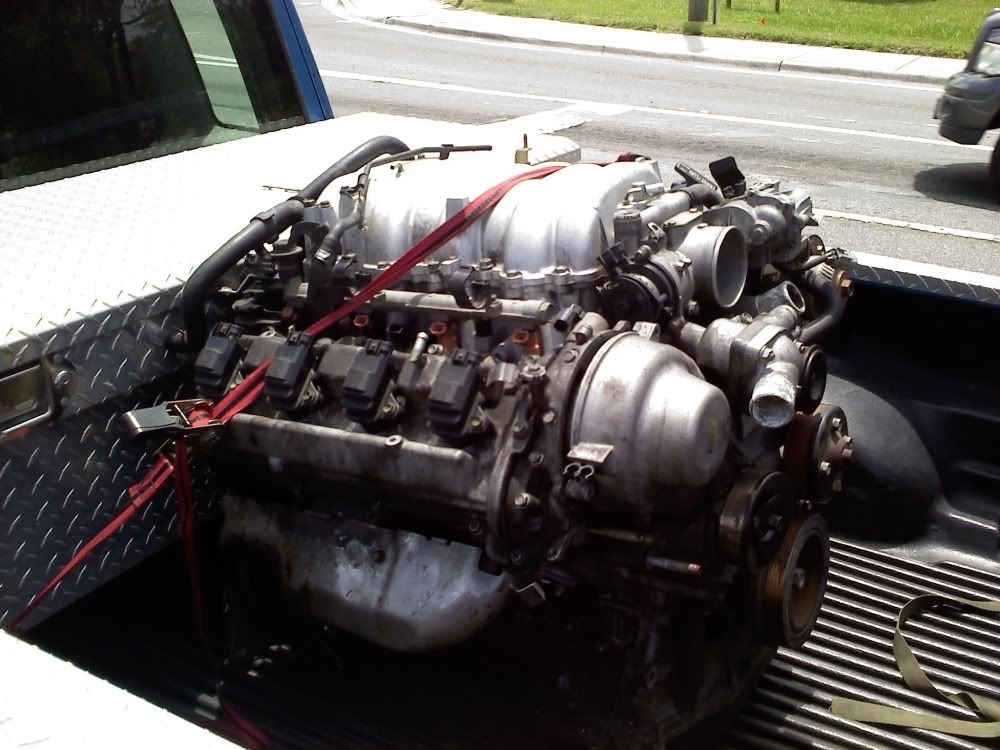
I bought a 1uzfe VVTI engine with a BHG for $100... I will eventually build this engine up for the Supra... but for now, it sits... because it was such a good deal, I had to buy it haha...
%%%%%%%%%%%%%%%%%%%%%%%%%%%%%%%%%%%%%%%%%%
%%%%%%%%%%%%%%%%%%%%%%%%%%%%%%%%%%%%%%%%%%
Alright its been awhile since I updated. Besides being busy like everyone excuse... I have been having troubles with my downpipe. I cannot fit the size I want through the subframe without just hitting everything in the way. Its partially due to the manifold design. So instead of making new manifolds and wasting more time and money, I will be bumper dumping the exhaust. Yes it will be loud, but I will be making a smaller sized muffler fit without it being noticable along the way. This will allow me to run the stock location of my steering rack (had to lower it because of the DP) and stock mount location (had to move it for the DP).
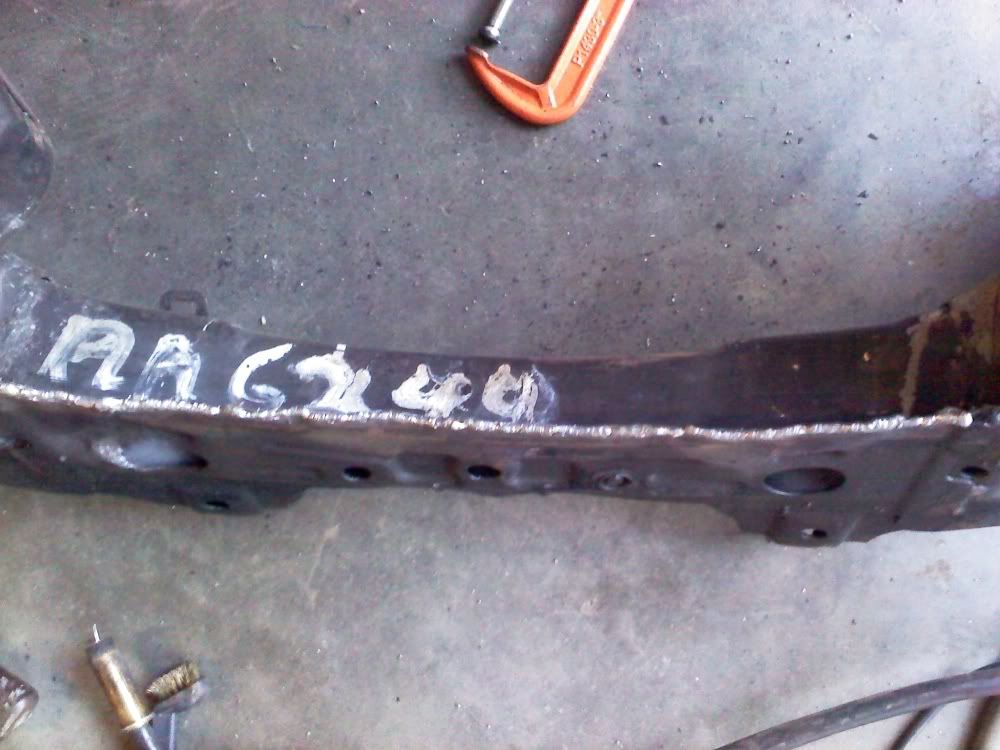
So I picked up an 89+ subframe for $50 locally and started to get everything ready to go to make new mounts etc.
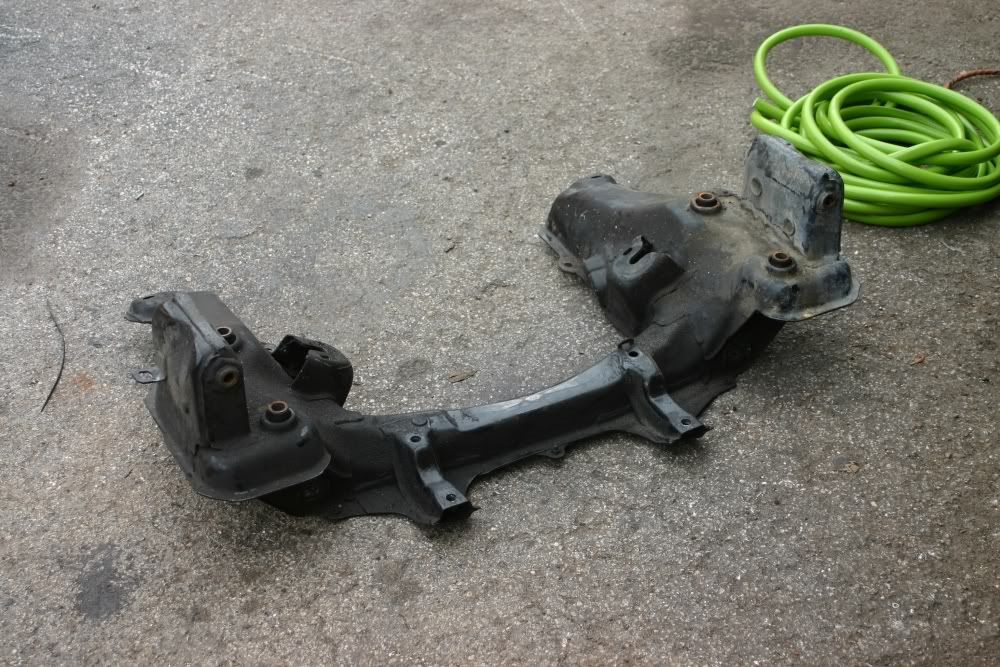

Cut a lot of pie cuts to make my tight radius bumper dumper... so when I have time this weekend I will start to work on this. I went 3.5" this time.. I didnt feel 4" was needed (except to have bragging rights) and it was really tough to fit through the subframe.. so I got 3.5" and now im having it go out the bumper anyways..... so... since its nice clean fresh tubing, 3.5" dump.
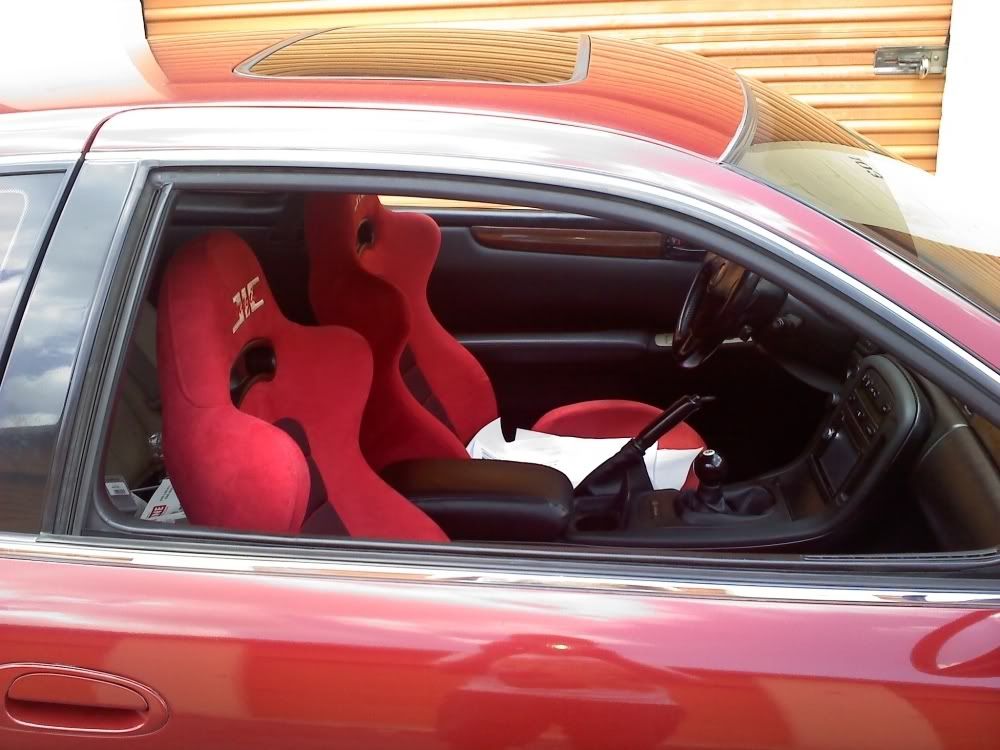
I sold my SC400, but managed to keep the JIC seats... so those will be going in the Supra... The interior of the Supra will be black.
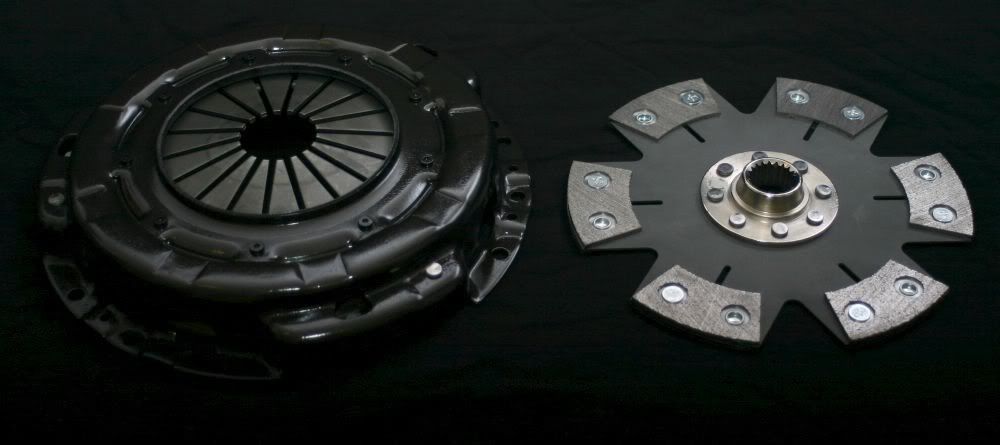
And I got my Quantum Auto Feramic Clutch w/ 2050lbs clamping pressure on the pressure plate.
So thats it for now, luckily since this DP will be resolved like so, the engine will go in as soon as I receive my clutch.... once I get everything squared away in the engine bay, I will fill the holes, make some custom heat shields, paint the bay blitz black and put all the **** back in.. again... lol.
First off, the subframe is mounted in... got most of the bushings done (traction arm isnt complete in the following picture..). I had to buy new eccentric cam bolts for the arms. Very pricey, but it needs to come off jackstands eventually! I picked up Tokico Illumina rears locally for $50 to match my fronts which came on the car. So I finally have a matching complete spring/shock combo.. H&R and Tokico Illuminas... good enough for now! Ordered some parking brake parts which I broke or age broke. Diff is fully rebuilt and installed... axle cv's have been repacked... it was not my intention to do it, but I knocked the cover plate off, so I was forced to do so
In this pic if you look closely you can see the 1.75" DOM tubing that helps brace the subframe. (above axle)
Bought a modified Porsche oil thermostat. Has -10an fittings already welded on.. not bad for $50... opens at 175* or so like every other one.
Bought another 4" SS Vband assembly... and bought some silver -10an hose ends to see if I like this color theme... Nice thing about silver, they wont show scratches... bad this is its kind of boring... I just feel black may scratch too fast/bad if I need to take it off without tape or anything.
I bought a 1uzfe VVTI engine with a BHG for $100... I will eventually build this engine up for the Supra... but for now, it sits... because it was such a good deal, I had to buy it haha...
%%%%%%%%%%%%%%%%%%%%%%%%%%%%%%%%%%%%%%%%%%
%%%%%%%%%%%%%%%%%%%%%%%%%%%%%%%%%%%%%%%%%%
Alright its been awhile since I updated. Besides being busy like everyone excuse... I have been having troubles with my downpipe. I cannot fit the size I want through the subframe without just hitting everything in the way. Its partially due to the manifold design. So instead of making new manifolds and wasting more time and money, I will be bumper dumping the exhaust. Yes it will be loud, but I will be making a smaller sized muffler fit without it being noticable along the way. This will allow me to run the stock location of my steering rack (had to lower it because of the DP) and stock mount location (had to move it for the DP).
So I picked up an 89+ subframe for $50 locally and started to get everything ready to go to make new mounts etc.
Cut a lot of pie cuts to make my tight radius bumper dumper... so when I have time this weekend I will start to work on this. I went 3.5" this time.. I didnt feel 4" was needed (except to have bragging rights) and it was really tough to fit through the subframe.. so I got 3.5" and now im having it go out the bumper anyways..... so... since its nice clean fresh tubing, 3.5" dump.
I sold my SC400, but managed to keep the JIC seats... so those will be going in the Supra... The interior of the Supra will be black.
And I got my Quantum Auto Feramic Clutch w/ 2050lbs clamping pressure on the pressure plate.
So thats it for now, luckily since this DP will be resolved like so, the engine will go in as soon as I receive my clutch.... once I get everything squared away in the engine bay, I will fill the holes, make some custom heat shields, paint the bay blitz black and put all the **** back in.. again... lol.