

 12-16-14, 10:53 AM
Last edit by: IB Advertising
See related guides and technical advice from our community experts:
Browse all: Lexus IS Lighting Guides
- Lexus: How to Replace Your Headlights and Fog Lights
Step by step instructions for do-it-yourself repairs
Browse all: Lexus IS Lighting Guides

HID bulbs for fog lights
01-18-13, 09:28 PM
#31


 01-23-13, 08:17 PM
#34
Hey Lemon, I got my lighting kit yesterday...I'm guessing from the same place you got yours; Ebay. The bulbs have H8/H9/H11 on the wire harness. However the bulbs are straight not angled like the OEM bulbs in the owner manual...page 728. Are your bulbs from Ebay straight or angled (90*) like the ones in the owner manual?
01-24-13, 08:47 AM
#35
Hey Lemon, I got my lighting kit yesterday...I'm guessing from the same place you got yours; Ebay. The bulbs have H8/H9/H11 on the wire harness. However the bulbs are straight not angled like the OEM bulbs in the owner manual...page 728. Are your bulbs from Ebay straight or angled (90*) like the ones in the owner manual?
Last edited by lemon397; 01-24-13 at 08:50 AM.
01-24-13, 10:45 AM
#36
On pg 728 of the owner manual, the light bulb socket is 90*. The ones we got from EBay have straight light bulb sockets. I guess the straight ones will be ok as long as there's enough clearance. I haven't had the chance to look at my car's set up yet.
01-25-13, 10:39 AM
#39
Driver School Candidate

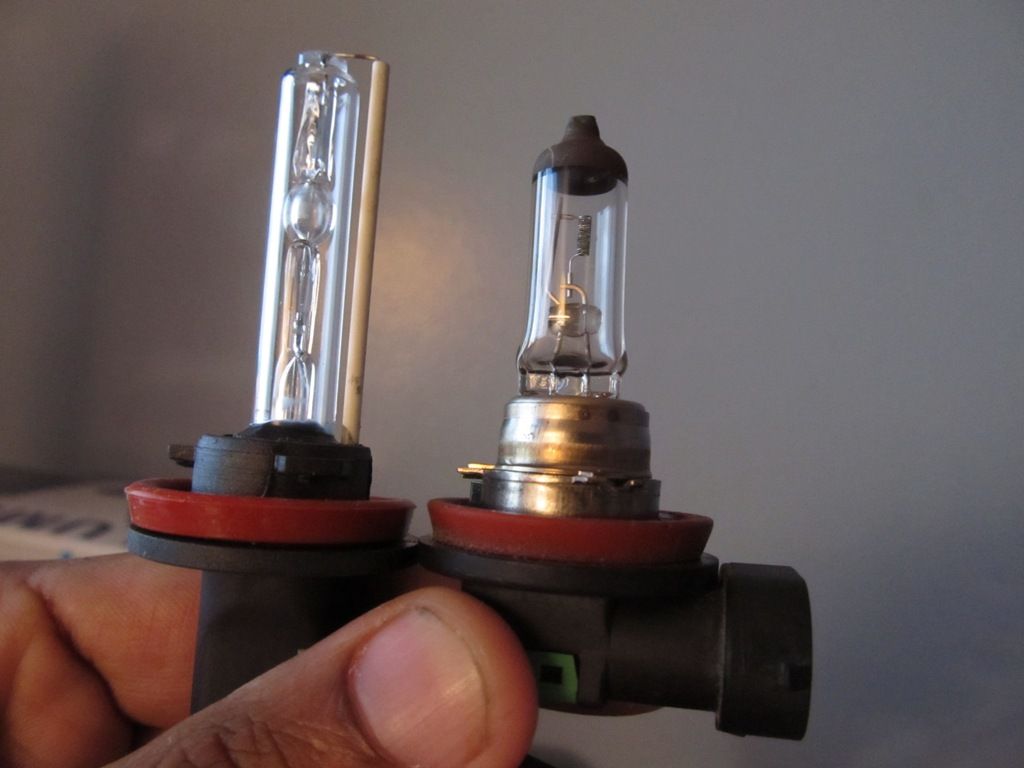
Here is a comparison Picture of what you should have recieved and stock light bulb.
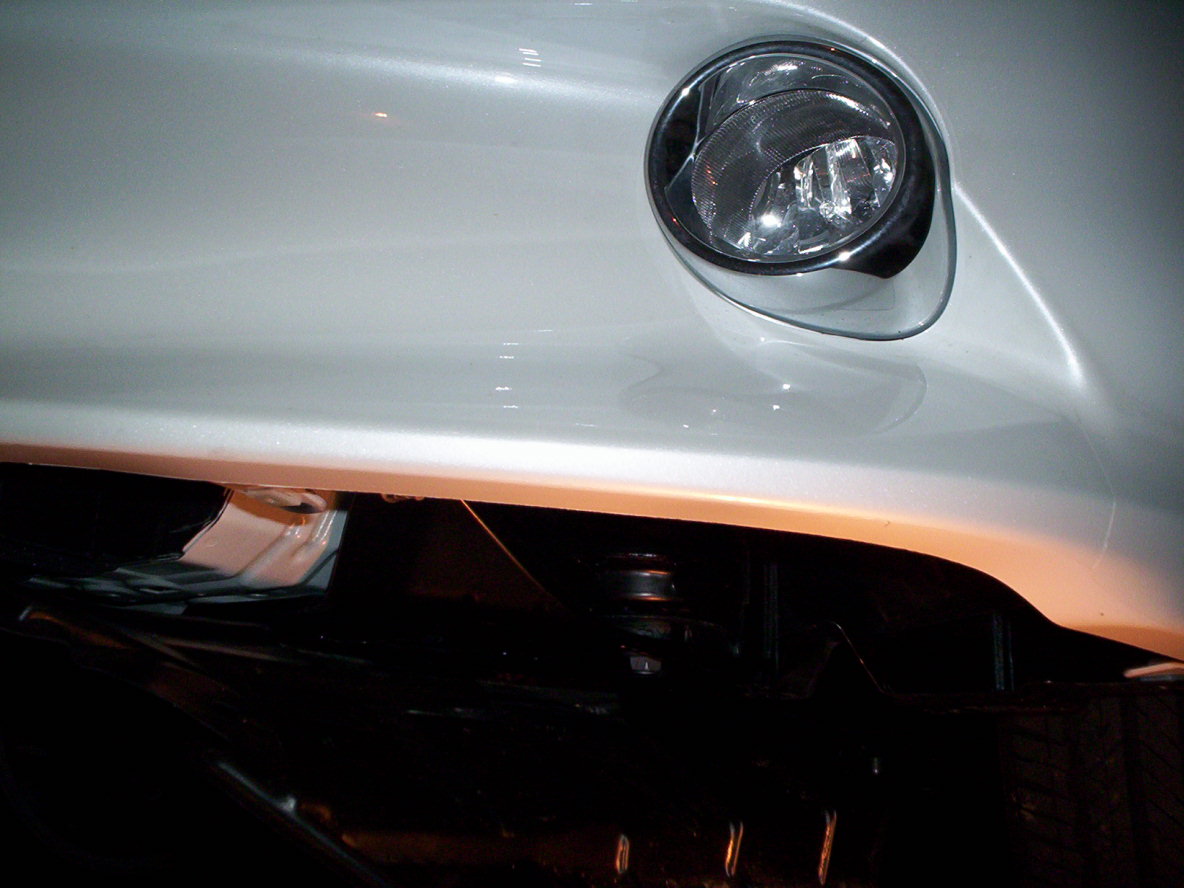
There is more than enough clearance to install H11 bulb. I installed my lights by taking off the panel from right under fog lights, It took me about 15 - 30 minutes to install as there were a bit of screws to take off. Once I took off panel there was plenty of room to work with and it was easy to find a place for ballast.
There is more than enough clearance to install H11 bulb. I installed my lights by taking off the panel from right under fog lights, It took me about 15 - 30 minutes to install as there were a bit of screws to take off. Once I took off panel there was plenty of room to work with and it was easy to find a place for ballast.
01-25-13, 07:06 PM
#40
[QUOTE=Lexos350;7725171]Here is a comparison Picture of what you should have recieved and stock light bulb.
There is more than enough clearance to install H11 bulb. I installed my lights by taking off the panel from right under fog lights, It took me about 15 - 30 minutes to install as there were a bit of screws to take off. Once I took off panel there was plenty of room to work with and it was easy to find a place for ballast.
Thanks Lexos for the pics and tips. I should be able to install mine this weekend.
01-26-13, 02:14 PM
#41
[quote=KennyLexus;7726110]
thanks Lexos350.
kennyleus: please post pics if you can.
Here is a comparison Picture of what you should have recieved and stock light bulb.
There is more than enough clearance to install H11 bulb. I installed my lights by taking off the panel from right under fog lights, It took me about 15 - 30 minutes to install as there were a bit of screws to take off. Once I took off panel there was plenty of room to work with and it was easy to find a place for ballast.
Thanks Lexos for the pics and tips. I should be able to install mine this weekend.
kennyleus: please post pics if you can.
01-26-13, 07:24 PM
#42
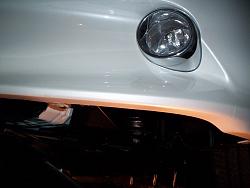
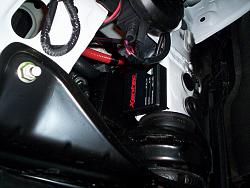
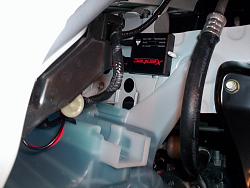
So I got bored tonight and decided to install the HID foglights. First, you're going to have to remove more than the (1) screw as the owner manual describes...unless you're a small child with little hands. I started on the driver side and removed (5) screws from the cover; (1) as the manual says and (4) in the surrounding area; you'll know which ones when you start the project.
This will allow plenty of access to remove the OEM bulb and install the HID. The connections are plug and play. However, I did take my time to find a good mounting spot for the ballast. Here's a couple pictures of the driver side mounted and the cover peeled back.
EDITED: DO NOT USE DOUBLE-BACK TAPE TO MOUNT BALLAST
Once you finish the driver side, now you get to do the passenger side. Screw removals are the same as driver side.
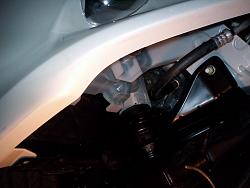
Project completed.
This will allow plenty of access to remove the OEM bulb and install the HID. The connections are plug and play. However, I did take my time to find a good mounting spot for the ballast. Here's a couple pictures of the driver side mounted and the cover peeled back.
EDITED: DO NOT USE DOUBLE-BACK TAPE TO MOUNT BALLAST

Once you finish the driver side, now you get to do the passenger side. Screw removals are the same as driver side.


Project completed.

Last edited by KennyLexus; 02-23-13 at 07:37 AM. Reason: Ballast mounting note
01-26-13, 09:10 PM
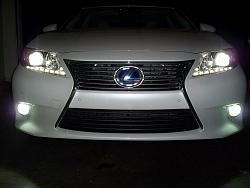
#44
The kit has everything you need just push the spaded wires (in the kit) into the hollow connector (in the kit). This will plug into the connector you disconnect from your OEM fog light. No splicing required. Be sure you match up the polarity [ +(red) and -(black) ] correctly.
01-28-13, 09:19 PM
#45
Driver School Candidate

Join Date: Dec 2012
Location: CA
Posts: 12
Likes: 0
Received 0 Likes
on
0 Posts
Thanks for the write up Kenny, I just finished doing my install today, I ordered the same bulbs as you from the same guy off the Ebay link, they arrived the very next day and with the help of your pics I was able to get the job done in about an hour total for both sides. The light it puts out looks awesome at night and much better accents the "high end" look of our cars as compared to the OEM fog lights. A nice upgrade to an already awesome ride!