Lexus IS: How to Replace Your Headlights and Fog Lights
Changing headlights and fog lights is a popular modification to customize the looks of the Lexus IS. Here's how to replace the headlight and fog light assemblies yourself.
This article applies to the Lexus IS (2005-2013).
Headlights and fog lights are the most popular modification that could make a significant difference between a stock and modified Lexus. Replacing headlight and fog light assemblies follow nearly identical steps, and both are covered in this how-to.

Materials Needed
- Phillips screwdriver
- 10mm socket and ratchet
- Small, thin flat head screwdriver
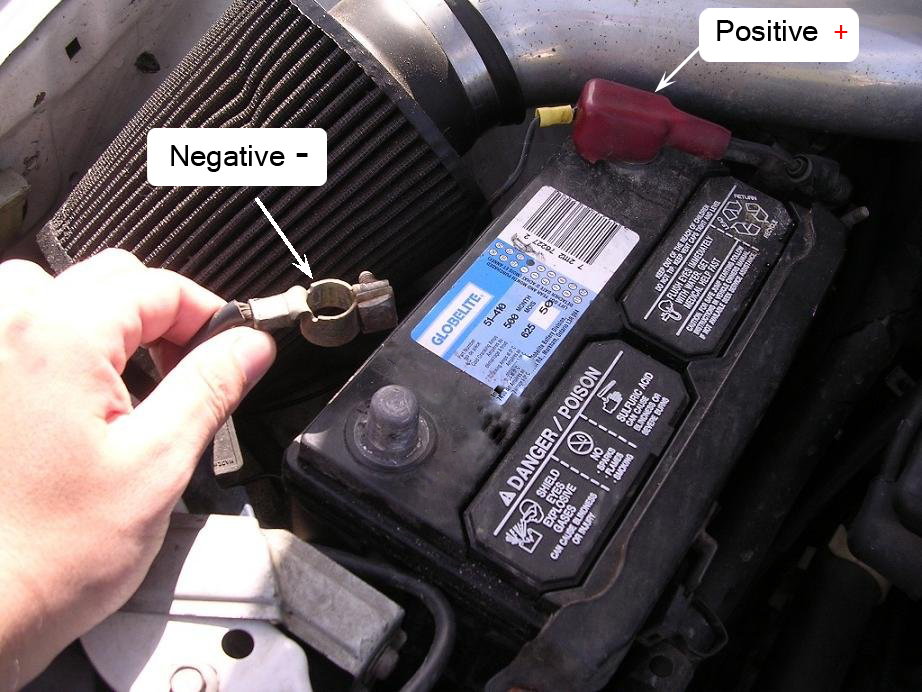
Step 1 - Disconnect the negative battery terminal
Disconnect the negative battery terminal so you don't accidentally short out or blow fuses.
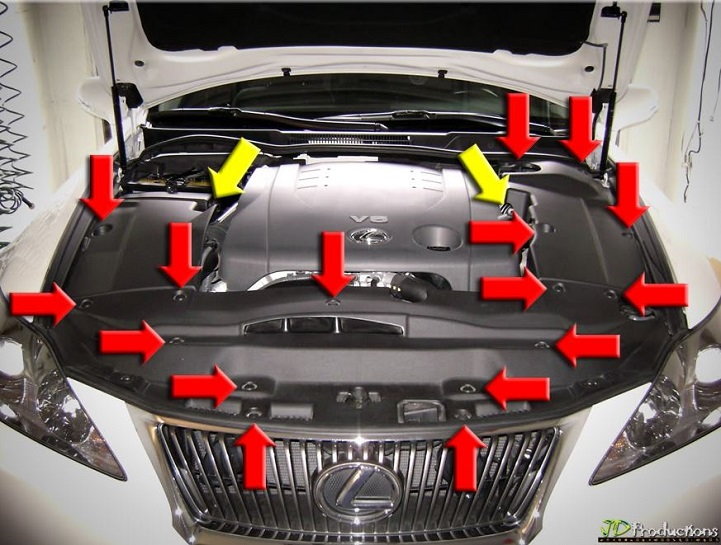
Step 2 - Remove engine covers
The engine covers are kept in place by 16 plastic push in clips. Carefully push them in and set aside in a safe place.
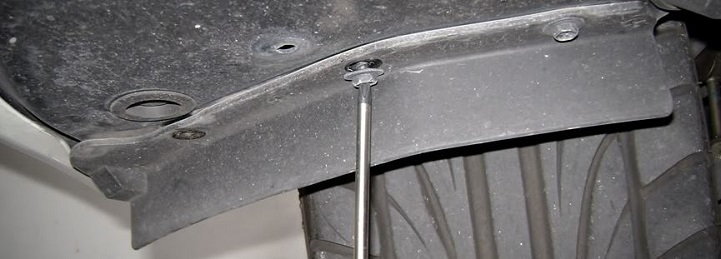
Step 3 - Remove front bumper protectors
Remove the three bolts located on the bottom of the bumper by the tires, pull the front bumper protector, and set it aside. Repeat for the other side.
Step 4 - Remove top front bumper connectors
There are plenty of plastic clips and one real 10mm bolt to remove. You will also have to turn the wheels all the way to the left and right to get into the wheel wells where more plastic clips are located. Across the front top of the grill there are two plastic Phillips screws and two metal Phillips screws counter sunk into a rubber grommet. Take these out and be very careful not to destroy the plastic screws. There are also four plastic clips that need to be carefully pried out with a very small and thin flat head screwdriver or similar tool. In the front and center is a traditional metal 10mm bolt that also needs removed.

Step 5 - Disconnect the wheel well bumper connectors
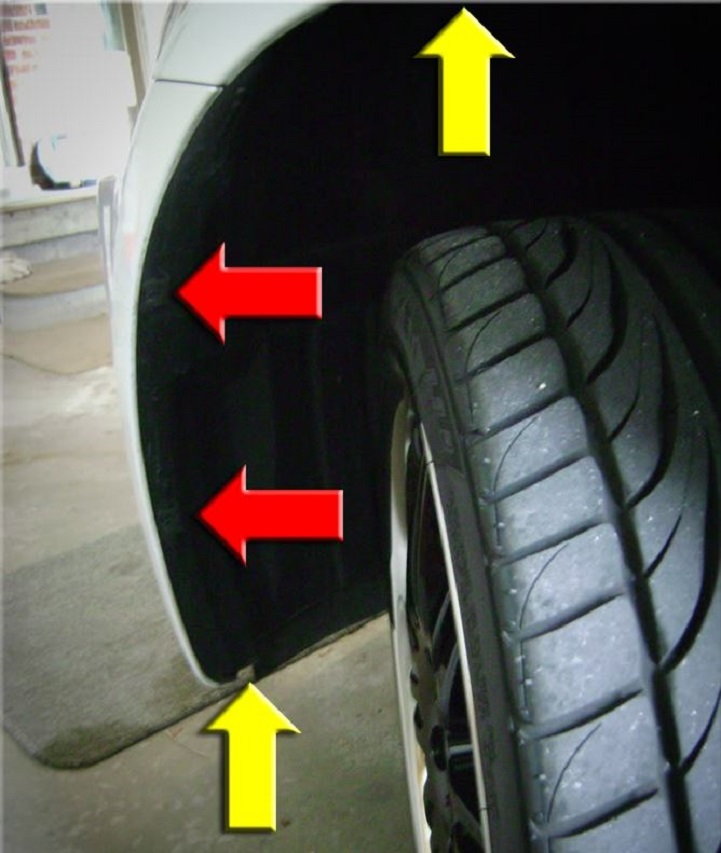
For the right side, turn the wheel as far to the left as possible. This gives you the access space you'll need to disconnect the two plastic clips and four 10mm bolts that attach the lower portion of the bumper to the frame. Repeat for the left side.
Step 6 - Remove the front bottom bumper connectors
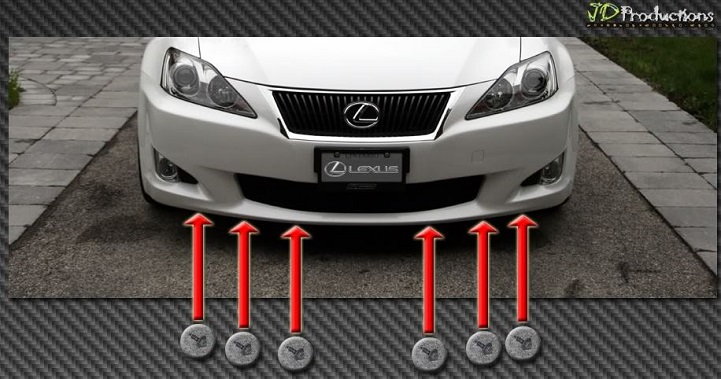
There are six 10mm bolts under the front bumper holding it to the front frame. Remove these to pull the bumper.
Step 7 - Pull the bumper from the frame and disconnect fog lights
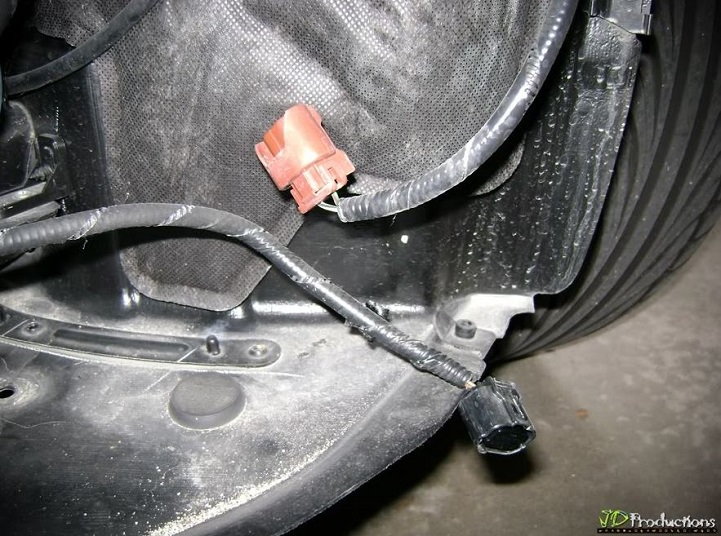
The front bumper is a bit heavy and odd to handle, so it might be best to have a helper pull it off to prevent scratching the car or damaging the bumper. The fog lamps are tethered to the bumper, so you won't get too far before running out of slack. You will need to disconnect the quick-disconnect clips to fully remove the bumper.
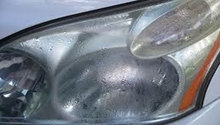
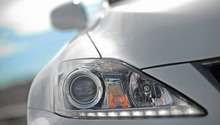
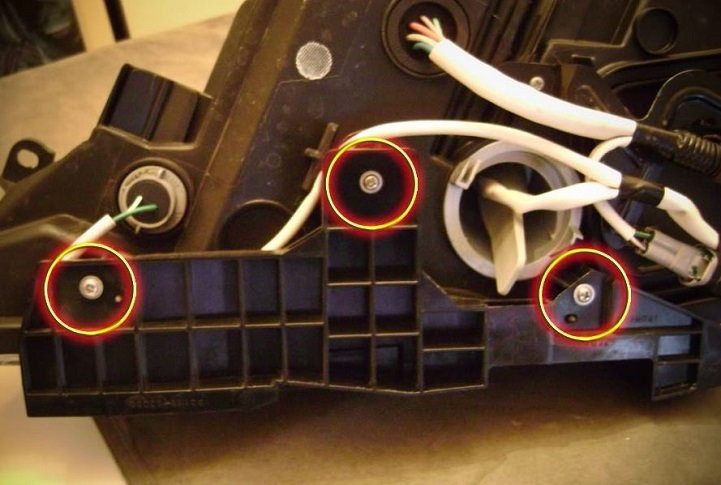
Step 8 - Remove the headlights
There are only three 10mm bolts holding the headlight in place. Pay particular attention to the bolts. Of the three bolts, the one on the side of the lamps is a little longer than the other two. Set the bolts aside and pull the headlight out just until you see the power cables. Unclip and then unplug this wire connector. The final step is to unlock the plastic headlight clip that holds the headlight to the frame. Gently lift up on the clip and the headlight should come out completely.

Figure 8. Headlamp bolt locations. 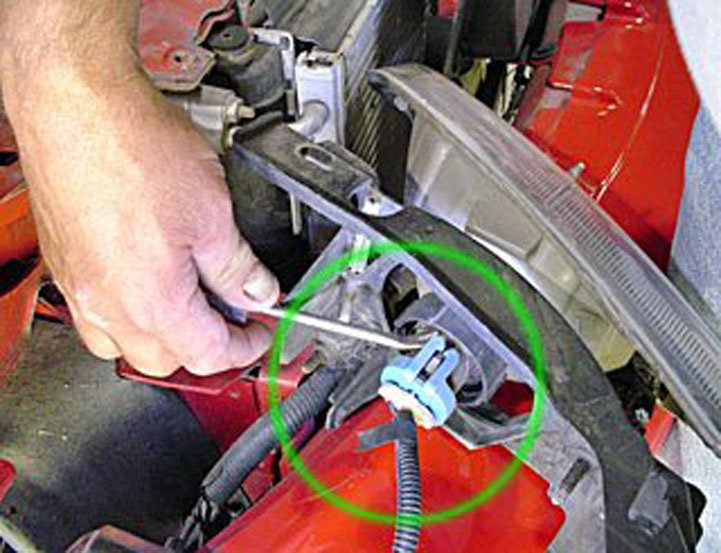
Figure 9. Pull the connector apart to unplug.
Step 9 - Remove headlight bracket
There are three small Phillips head screws in the bottom of the headlamp holding the bracket. Remove these screws to get the bracket off and ready for replacement onto the new HID headlamp. Once removed, this bracket may need to be cut in order to custom fit onto the new HID headlight. A Dremel-like hand tool is perfect for this job.
Step 10 - Swap flasher relay (if necessary)
The flasher relay powers the left hand and right hand turn signal on your dash display. Your new HID headlamp may have a different flasher relay terminating clip than what is currently in your vehicle. You will need to replace the OEM relay. You will find this relay behind the driver's side steering column panel which is about knee level. There are two Phillips head screws holding this panel in place. Remove these screws, pull off the panel, and find the OEM green flasher relay.
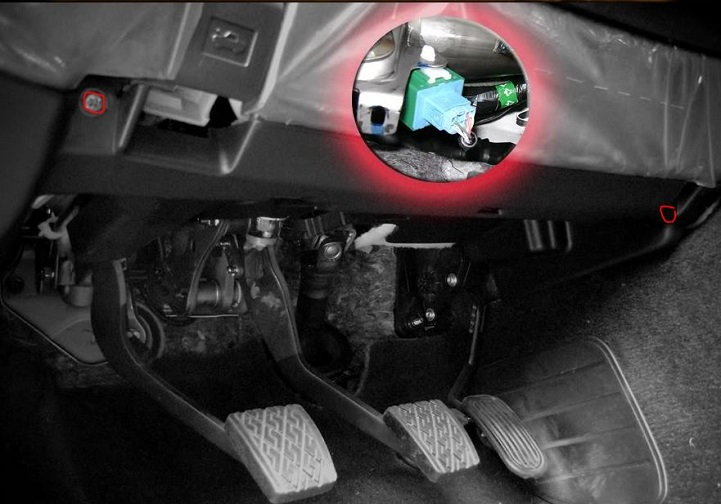
Step 11 - Remove OEM flasher relay
Use needle nose pliers to remove the old flasher relay. Simply press with the pliers on the clip, and pull it out.

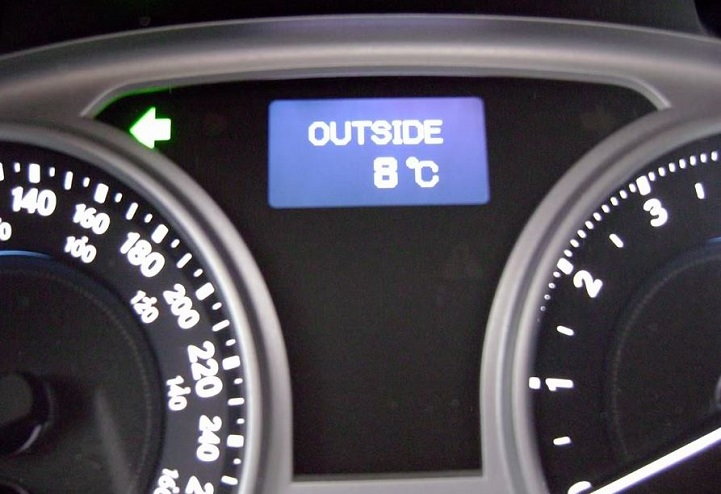
Step 12 - Install the new flasher relay
Connect the new quick-connect clips on the new flasher relay if they fit. Otherwise, you will need to remove the clips and manually replace the wires into their correct positions to work with the new flasher. Connect the battery's negative cable. Once installed, check the flasher indicator on the dash board before going any further. If this side is correct, repeat for the passenger side.
Step 13 - Re-install the headlights
Attach the custom cut bracket to the new HID headlights if you haven't done so already. Carefully place the headlight back into position in the front of the car and screw back in place with the three bolts. Remember that the longer of the three on each side goes into the side of the headlight. Re-connect the power cables and make sure to re-engage the locking clip that holds the headlamp to the frame. Install the bumper and the engine cover back.
Related Discussions
- DIY: 2012 My LED Headlight Installation - ClubLexus.com
- DIY: Remove Bumper, Replacing FOGS - ClubLexus.com
- How to Take Out Headlights and Foglights? - ClubLexus.com
- DIY: GS 350 Sport Fog Light Installation - ClubLexus.com