When you click on links to various merchants on this site and make a purchase, this can result in this site earning a commission. Affiliate programs and affiliations include, but are not limited to, the eBay Partner Network.
Sasnuke - 2014 IS250 F Sport Matador Red Mica Build
Hi All, Thought I would get in on the Build Thread action. It will be a slow build, so after the initial barrage of mods, I'll update once in awhile.
I will keep the mod list on the first post updated as new things are added. Shout out to all the Matador Red Mica's out there!!!
Vehicle: 2014 IS250 F Sport Series II - Matador Red Mica - Navigation, Backup Camera, Heated seats, Heated Steering wheel, sunroof, black leather interior (purchased used June/2016)
Current mods (Updated June 2019):
Avery clear hood tape (including fenders)
Trunk spoiler in Obsidian Black (purchased on eBay and painted by vendor)
PlastiDip rear emblems black
RS*R Downs Vertini RF1.1 Brushed Light Bronze 20X8.5 +35 235/30/20 (6mm Spacers in front)
Avery Gloss Black vinyl roof wrap Takeda Intake Tanabe Medallion Touring Exhaust Lamin-X "Tint" DRL & Front emblem
Winjet Fog lights w/OEM stalk switch
IS350 Front Brake Conversion
RCF/GSF Front lower control arm bushings
Future mods:
Precision LED - Premium LED conversion (once procurement application approved by the CFO [CFO=wife])
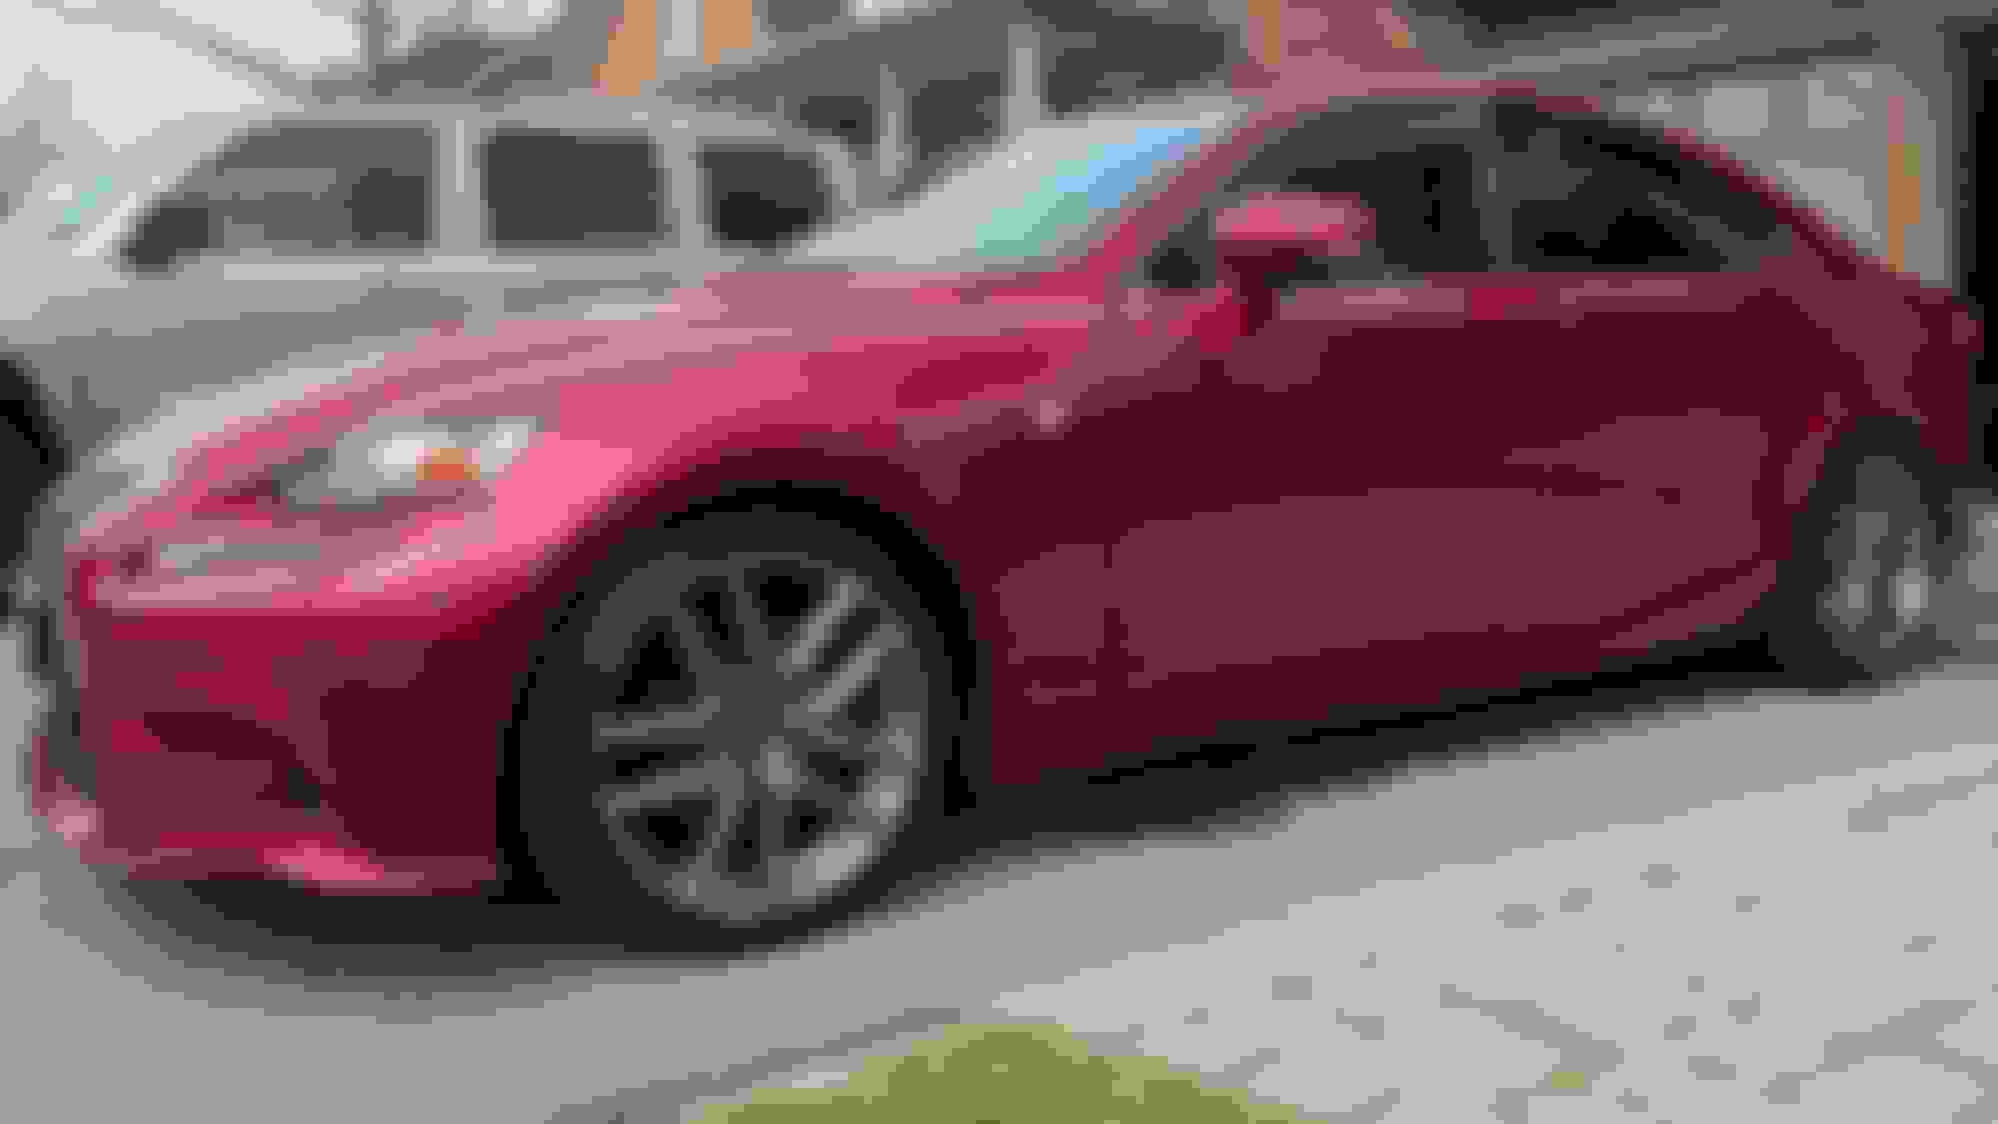
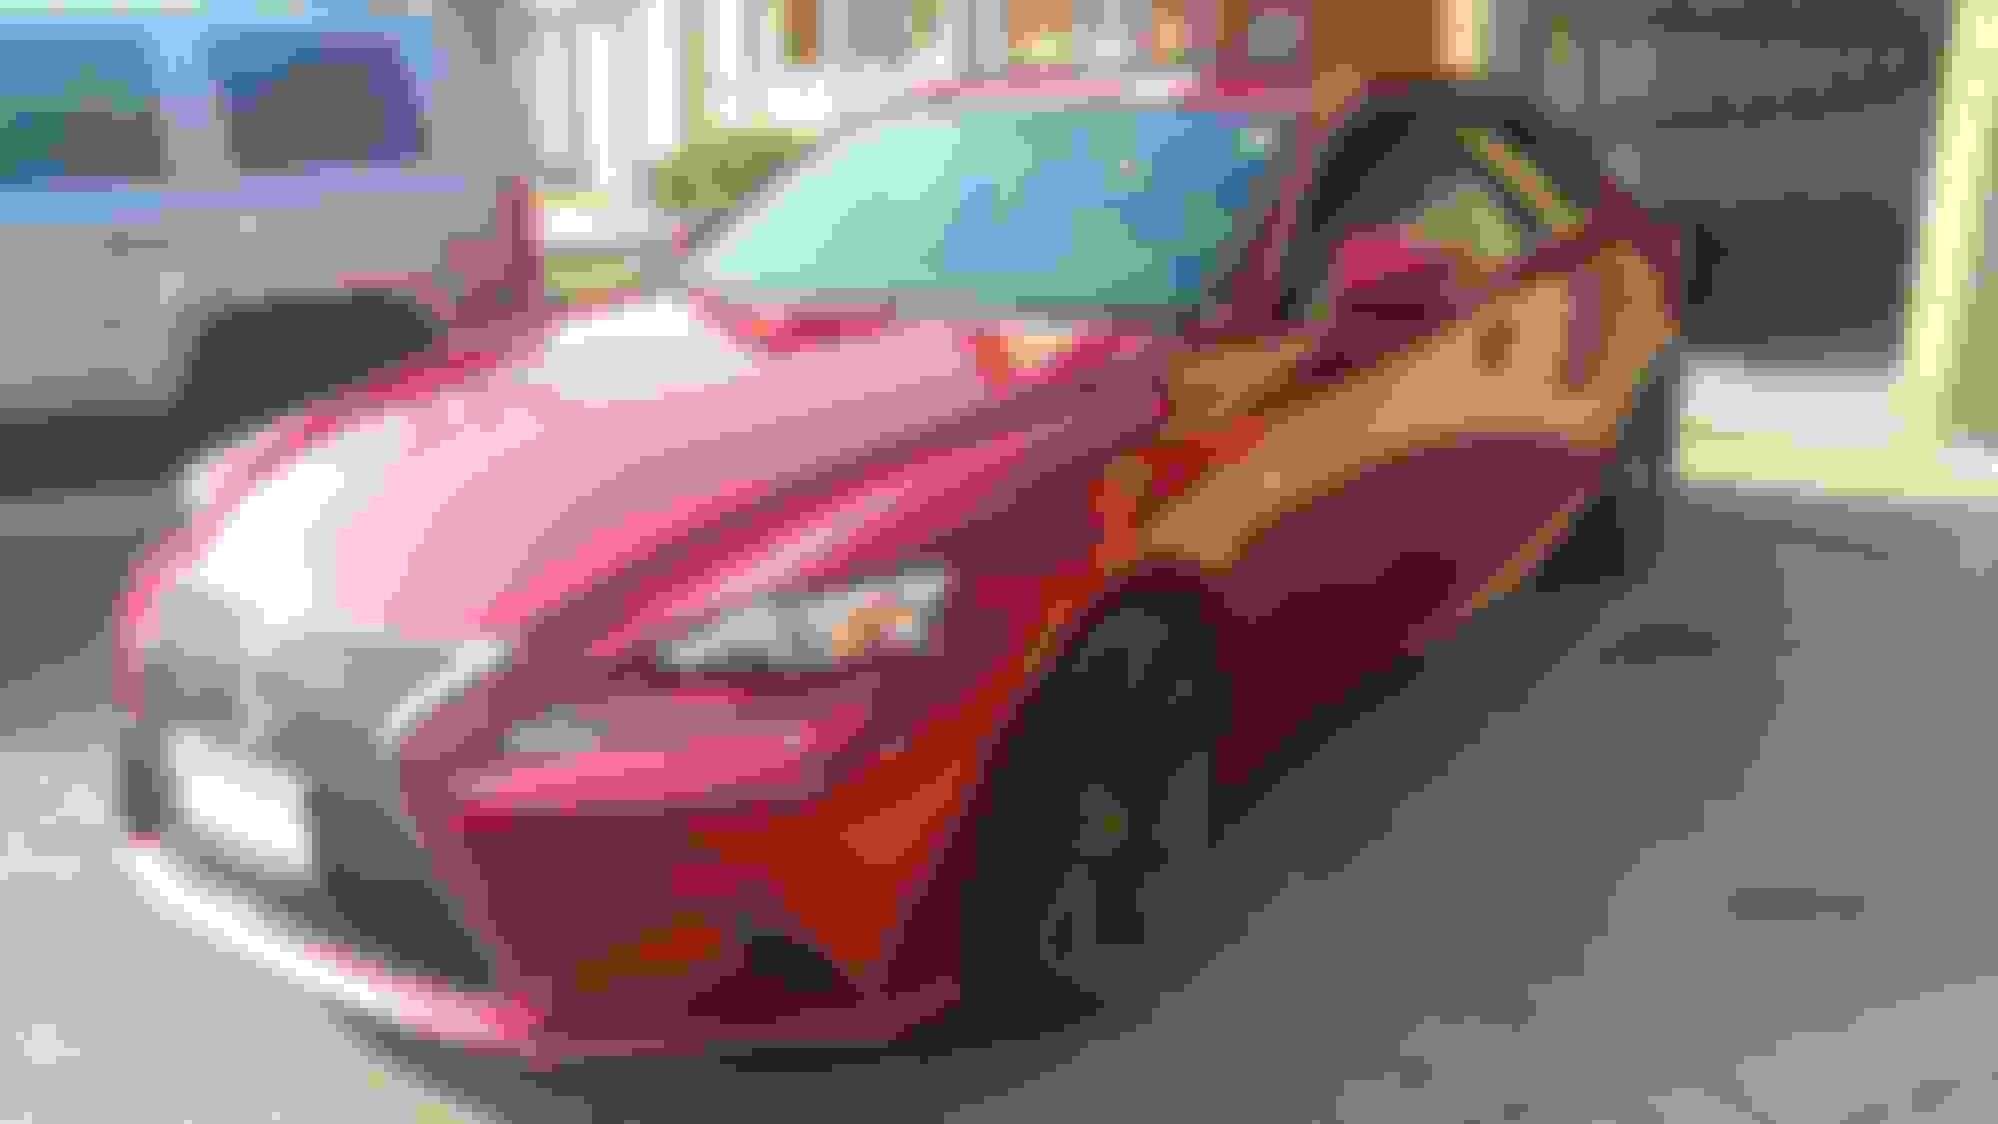
Hand washed moments ago RS*R Downs installed only yesterday - 5 hour DIY - needs to settle still before alignment Trunk spoiler in Obsidian Black and PlastiDip rear emblems
Here is the link for the spoiler I bought: http://www.ebay.ca/itm/182309900888?...%3AMEBIDX%3AIT
It is a PU spoiler and it came as a firm straight piece. The instructions tell you to use a heat gun to gently heat the spoiler so it becomes flexible to conform to the shape you want...ideally the curve of the trunk.
I was amazed to see how just a little bit of heat made the spoiler flexible that I could shape it to the trunk.
For the price and the fact it was painted, it's definitely a good buy.
Taping off the trunk as to where you want it to sit exactly is definitely a must. I sorta freehand installed it (not a good idea), it looks about 90% perfect. I got it centered perfect but the amount of curve could use some work...I didn't put enough curve into it.
It came with 3M tape too, so you just need to clean the surface. Having a second pair of hands also helps.
I have the same trunk spoiler. How much wheel gap do you have with the rs-r down springs?
It's been 4 days since I put them in, so they haven't settled completely yet.
I'll take a measurement on the weekend...should be at final rest height by then, or just about. There's not a lot of gap in the rear right now, the front is still a little high though.
Also the 20's go on this weekend too, so there will definitely be some pics posted. It's supposed to rain all weekend here, so the car might be wet in the pics
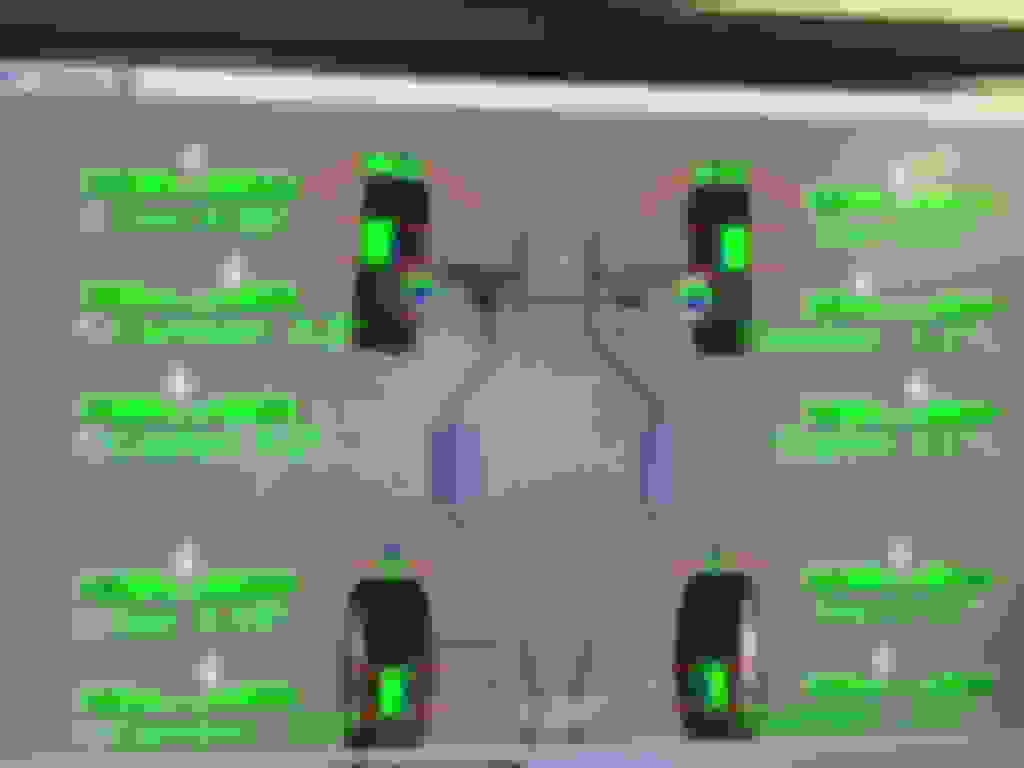
Alignment specs after RSR Downs installed.
After reading a lot of threads, it seems like several members have asked about how alignment is affected and can the vehicle be aligned with the factory adjusters...and are camber arms needed, etc.
As you can see from the above alignment reading after the springs were installed, everything is in the green using the factory adjusters.
Granted these are only RSR Downs...for something that drops the car lower and those riding on air, I'm sure adjustment beyond the factory adjusters is likely needed.
Thanks man! I wouldn't mind seeing that Sriracha color in person though...I agree with you on the Redline.
Hopefully it doesn't rain for the next 3 days like the weather is calling for and I can get some proper pics to post.
Wheels should be on in 12 hours!
Wheels have been installed. Washed the car just to take some pics. Note: I am no photographer Specs:
Vertini RF1.1 Brushed Light Bronze
20X8.5 +35 Offset (square fitment)
Othsu FP8000 235/30/20
Wheels have been installed. Washed the car just to take some pics. Note: I am no photographer Specs:
Vertini RF1.1 Brushed Light Bronze
20X8.5 +35 Offset (square fitment)
Othsu FP8000 235/30/20
Looks good! I'm sure your going to need camber arms in the rear cause I'm pretty sure your alignment not in green anymore with that natural camber. Spc camber arms will fix the negative for yah. Keep it up
Looks good! I'm sure your going to need camber arms in the rear cause I'm pretty sure your alignment not in green anymore with that natural camber. Spc camber arms will fix the negative for yah. Keep it up
Thank Dj! I'm gonna let the springs settle a little more before tackling another alignment. I'm more worried about the front than rear.

 04-09-17, 12:11 PM