

 01-06-15, 03:46 PM
Last edit by: IB Advertising
See related guides and technical advice from our community experts:
Browse all: Exterior Guides
- How to Install F Sport Lip Bumper
Step by step instructions for do-it-yourself repairs
Browse all: Exterior Guides

DIY to install the 11' Fsport lip?
07-29-12, 12:37 PM
#46
Driver School Candidate

Join Date: Jun 2012
Location: bc
Posts: 17
Likes: 0
Received 0 Likes
on
0 Posts
Hello fellow IS owners... first post here. I bought me a brand new 2012 IS250 AWD 4 weeks ago. Received my F-Sport lip from sewell on friday. Finally got the time to do the install this morning. Big thanks to 10lexISR6 for the detail info and pics about his install. I went for the 3M method and even took it a step further by doing the install WITHOUT taking the front bumper off. It was pretty simple and straight forward. I just cranked the steering wheel all the way to one side and got in to reach the fog lights thru the fender well. The one phillips screw was easy enough to reach and remove. Once the fog light was off, removing the foglight plastic cover was simple. Install took about an hour. Tools needed was a flat head and phillips screw driver. Socket wrench to remove one bolt underneath the bumper and 3M tape. thats it! LOL. Didnt even need to jack up the car. Hope this info helps out anyone that was wondering if it could be done without removing the front bumper. I'd say I probably saved myself 1.5 hours for bumper removal and re install.

 08-12-12, 06:17 PM
#48

Just installed mine today. It took longer than expected, but I was not rushing. I went ahead with the drilled method. I was so tempted to just do it like the one above(cirrus604). But I had plenty of time being that its a Sunday and all 
Great detail from previous owner, thank you so much. Could not have done it without you guys. Here are some pics. It was getting dark.
[IMG] [/IMG]
[IMG] [/IMG]
Great detail from previous owner, thank you so much. Could not have done it without you guys. Here are some pics. It was getting dark.
[IMG]
[/IMG][IMG]
[/IMG]
 [/IMG]
 [/IMG
[/IMG [/IMG][IMG]
 [/IMG]
 [/IMG]
 [/IMG]
 08-16-12, 06:39 PM
#52
Hello fellow IS owners... first post here. I bought me a brand new 2012 IS250 AWD 4 weeks ago. Received my F-Sport lip from sewell on friday. Finally got the time to do the install this morning. Big thanks to 10lexISR6 for the detail info and pics about his install. I went for the 3M method and even took it a step further by doing the install WITHOUT taking the front bumper off. It was pretty simple and straight forward. I just cranked the steering wheel all the way to one side and got in to reach the fog lights thru the fender well. The one phillips screw was easy enough to reach and remove. Once the fog light was off, removing the foglight plastic cover was simple. Install took about an hour. Tools needed was a flat head and phillips screw driver. Socket wrench to remove one bolt underneath the bumper and 3M tape. thats it! LOL. Didnt even need to jack up the car. Hope this info helps out anyone that was wondering if it could be done without removing the front bumper. I'd say I probably saved myself 1.5 hours for bumper removal and re install.
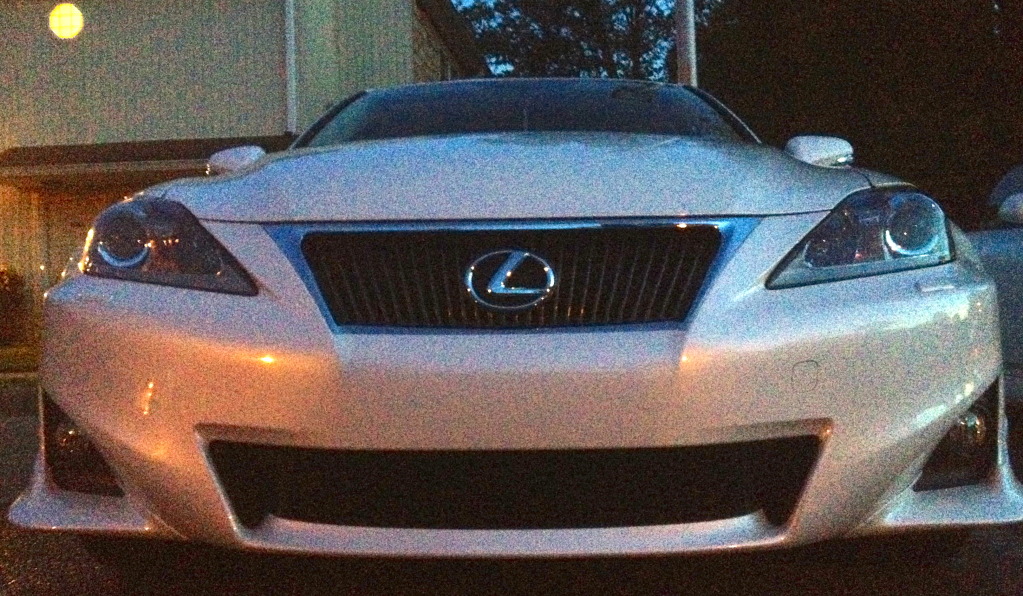
9 months later still strong as ever.

 07-29-13, 08:55 PM
#55
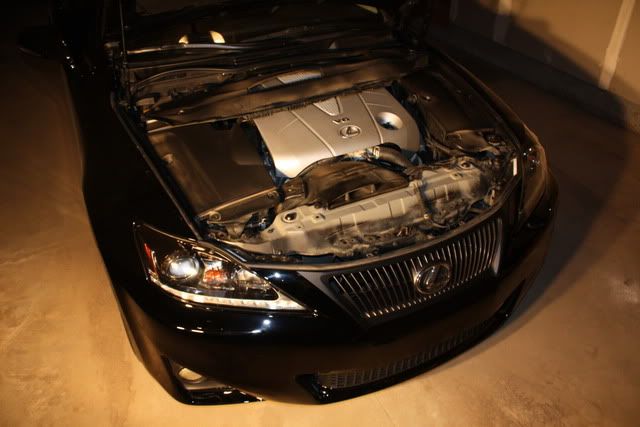
Ok, I took a few pictures along the way so hopefully this helps you out. Sorry for the leopard print sheets...it was the only sheet that my wife would let me use
First off breathe and take a deep breath, you'll have suck it up an get courageous because you will be cutting 10 large rectangles into your brand new bumper The tools you will need for this include a dremel, a power drill, sandpaper if you want to smooth out the cuts, sockets, flathead and phillips screwdrivers and wrenches.
Start by taking off the engine plastic covering and all the clips along the top of the bumper. I believe there are a couple of screws that need to be removed as well.
Next you can start taking off the front bumper. There are 2 bolts at each corner of the fender, you'll have to peel back the front wheel well lining to reach them. As well, there are a couple of unique clips holding the wheel well linging to the front bumper, you have to get these off.
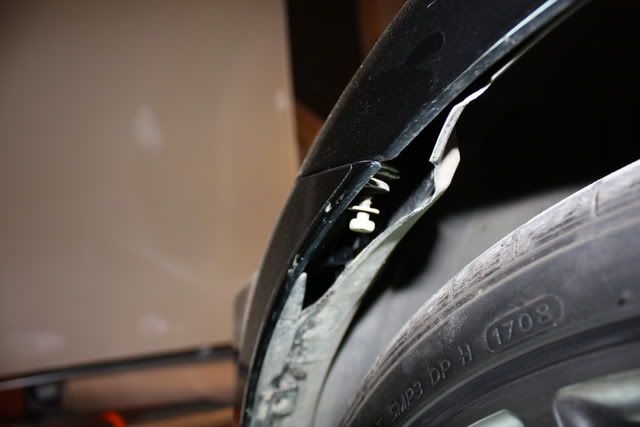
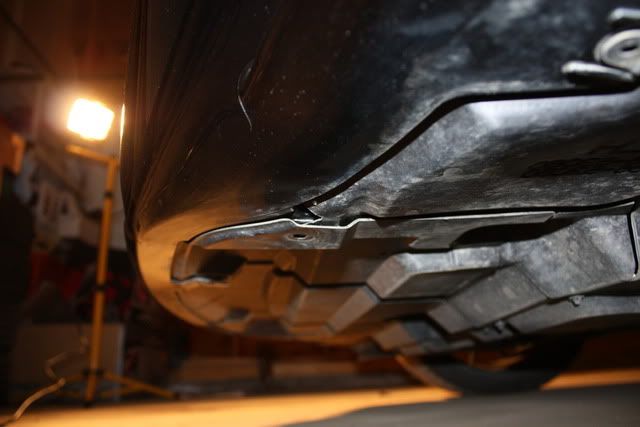
Along the bottom there are a number of clips and screws that you will have to remove.
If you have headlight washers built into the bumper, like I did, you will not have a ton of room to work with, you can dissconnect the washer hoses and clamp them off to completely take the bumper off, but I chose to work with the bumper still attached to the hoses.
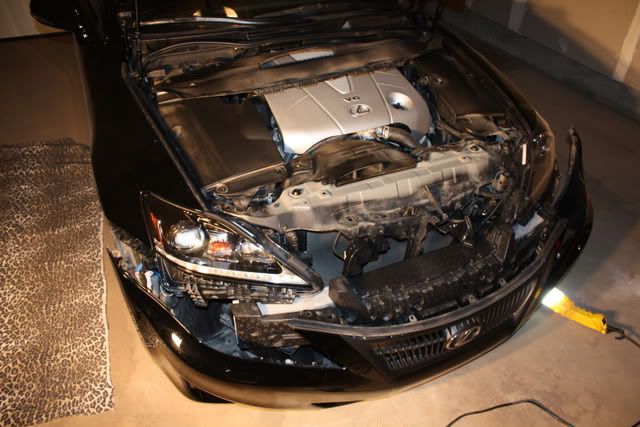
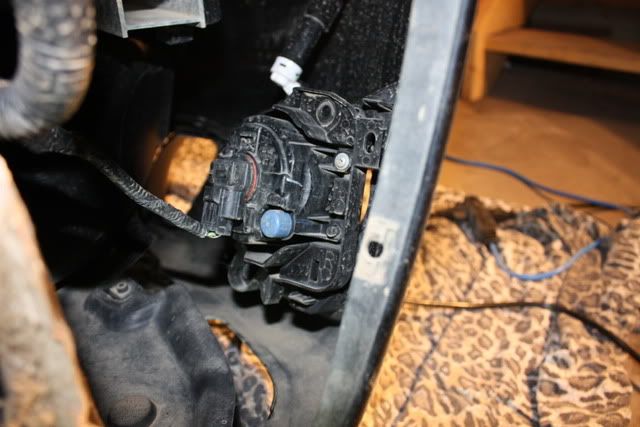
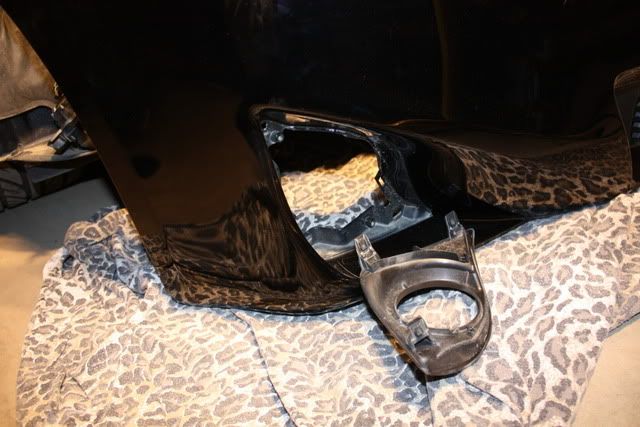
You can then take off the foglight housing. I remember there being a couple of screws and then you'll just have to unhook the clamps and it will slide right out. **This would be a great time to change your forlight bulbs if you want to I did mine the old fashioned way and cut my hands up all over the place.
You will not need the old plastic pieces as the lip has the new ones built right in.
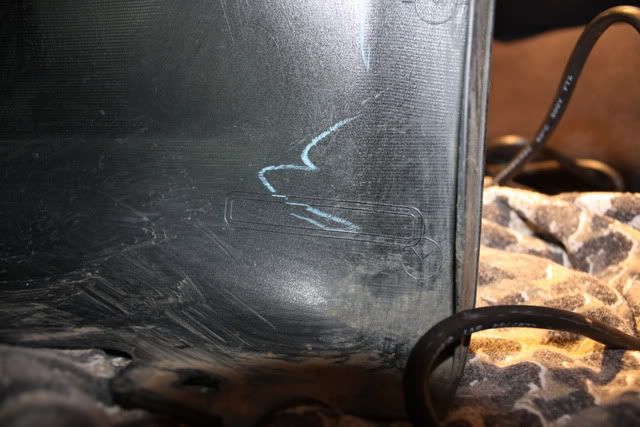
Next, wipe down the backside of your bumper with a wet rag so that you can pinpoint the cutouts. They are all marked and in total there should be 5. 3 closest to the fender and 2 along the lower lip.
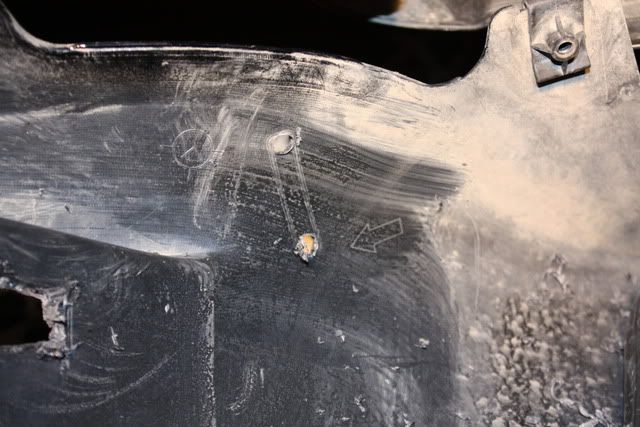
Now the fun begins. I started by drilling 2 holes on either side of the cutouts. Next, bring out the dremel and connect the holes! I found that if you line up the blade of the dremel in between the lines, it gave a perfect cut.
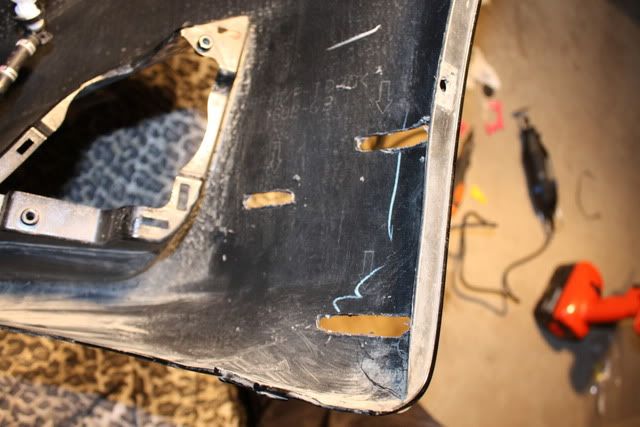
Then, line up the new lip peices and install the clips that are provided. Read and look at the instructions carefully, as it tells you which clips to install and where, as there are 2 types of clips provided. My first test fit was a bit off because I didnt cut one of the rectangles big enough, I had to take all the clips out and cut out a bit more.

After that, install the foglight housing back into the bumper, and repeat for side 2! That wasn't bad at all huh?

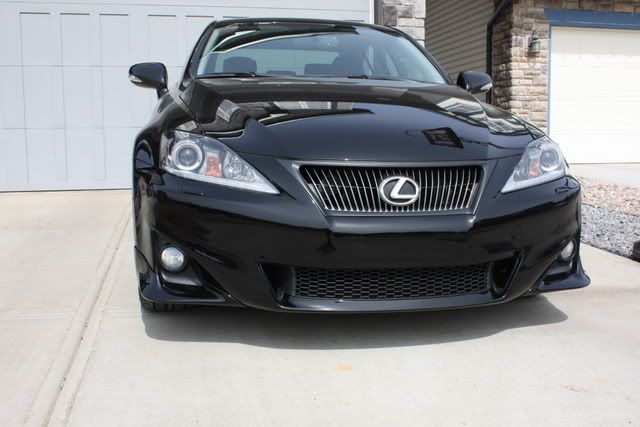
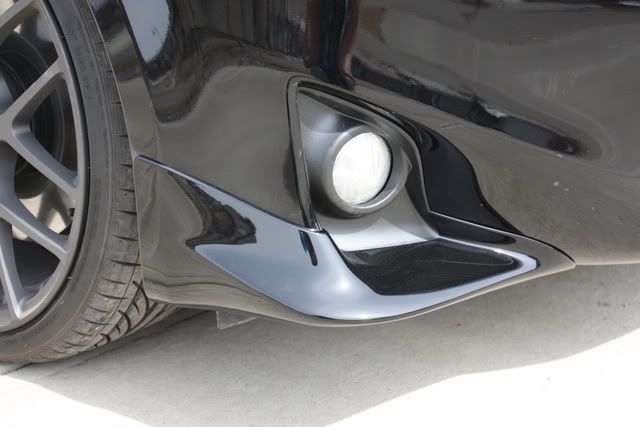
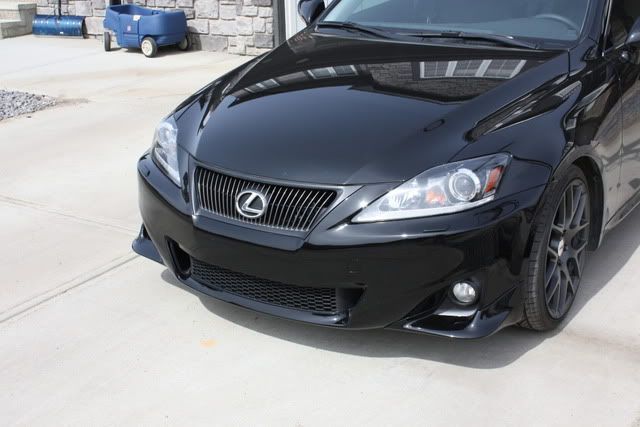
This is what the finished product should look like
First off breathe and take a deep breath, you'll have suck it up an get courageous because you will be cutting 10 large rectangles into your brand new bumper
The tools you will need for this include a dremel, a power drill, sandpaper if you want to smooth out the cuts, sockets, flathead and phillips screwdrivers and wrenches.Start by taking off the engine plastic covering and all the clips along the top of the bumper. I believe there are a couple of screws that need to be removed as well.
Next you can start taking off the front bumper. There are 2 bolts at each corner of the fender, you'll have to peel back the front wheel well lining to reach them. As well, there are a couple of unique clips holding the wheel well linging to the front bumper, you have to get these off.
Along the bottom there are a number of clips and screws that you will have to remove.
If you have headlight washers built into the bumper, like I did, you will not have a ton of room to work with, you can dissconnect the washer hoses and clamp them off to completely take the bumper off, but I chose to work with the bumper still attached to the hoses.
You can then take off the foglight housing. I remember there being a couple of screws and then you'll just have to unhook the clamps and it will slide right out. **This would be a great time to change your forlight bulbs if you want to
I did mine the old fashioned way and cut my hands up all over the place.You will not need the old plastic pieces as the lip has the new ones built right in.
Next, wipe down the backside of your bumper with a wet rag so that you can pinpoint the cutouts. They are all marked and in total there should be 5. 3 closest to the fender and 2 along the lower lip.
Now the fun begins. I started by drilling 2 holes on either side of the cutouts. Next, bring out the dremel and connect the holes! I found that if you line up the blade of the dremel in between the lines, it gave a perfect cut.
Then, line up the new lip peices and install the clips that are provided. Read and look at the instructions carefully, as it tells you which clips to install and where, as there are 2 types of clips provided. My first test fit was a bit off because I didnt cut one of the rectangles big enough, I had to take all the clips out and cut out a bit more.
After that, install the foglight housing back into the bumper, and repeat for side 2! That wasn't bad at all huh?
This is what the finished product should look like
 07-30-13, 04:58 PM
#57
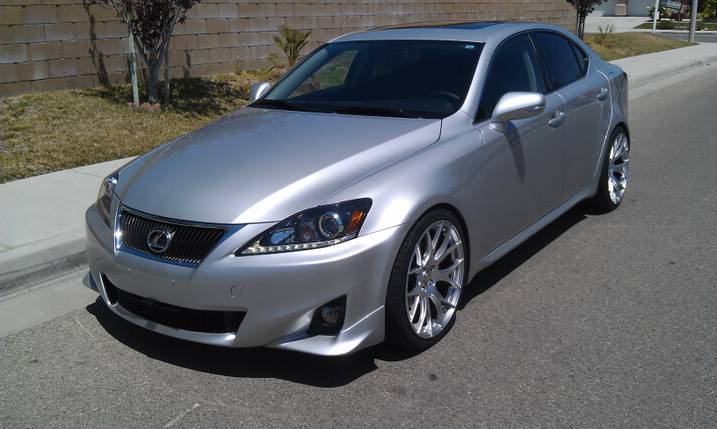
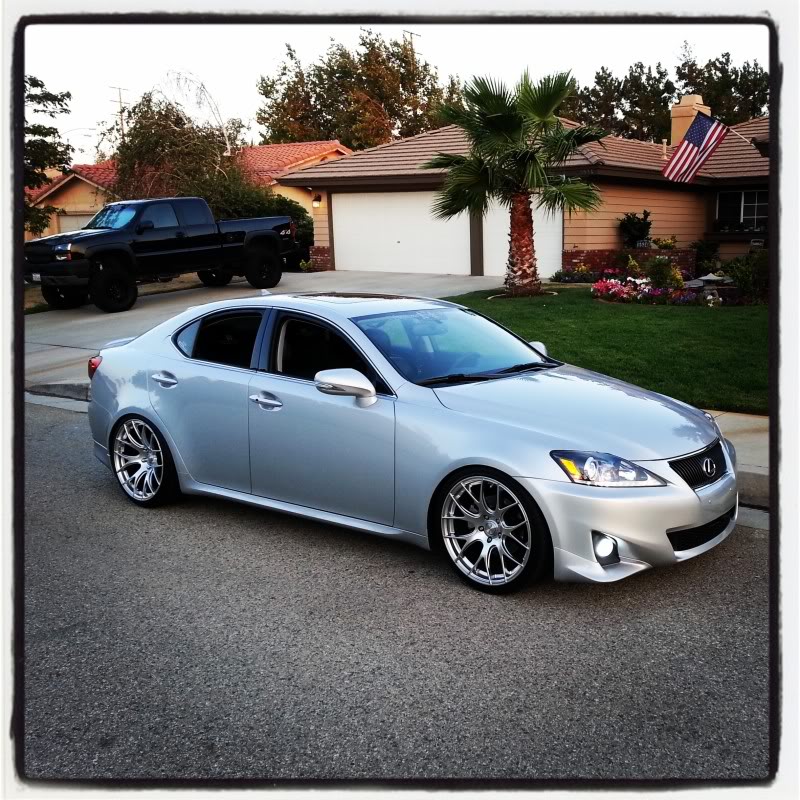
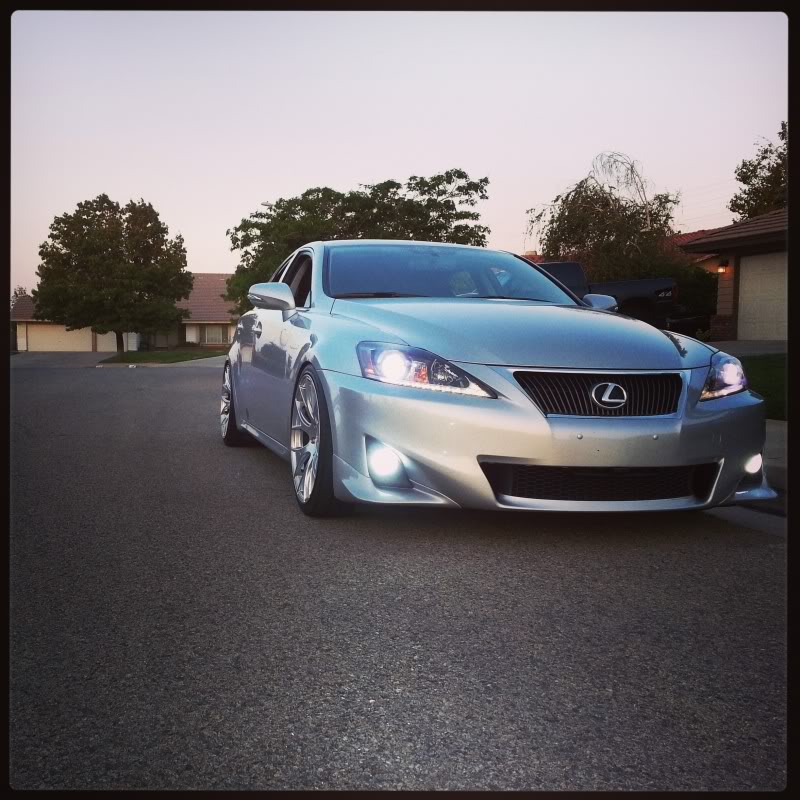
So I went ahead and just did the whole conversion to my car...2012 front bumper N fsport lips. I did the cut method but also added tape to it.
Attachment 292328
Attachment 292328
07-30-13, 08:05 PM
#58
Looks so sick! Are you rolling static? What are you dropped on and your wheel/tire specs? I just got on megan lp's but was rubbing so bad up front had to raise her after these photos I took. Im on 19x10 rear 19x8.5 front on 235/35/19 front 25/30/19 rear. No roll on fenders yet either.