Mating a GS350 F-Sport Front Bumper to the 2IS (Step by Step)
 01-17-13, 12:06 PM
#31
Currently Active Users Viewing This Thread: 45 (10 members and 35 guests)
I'll just let it speak for itself. Looks like you got yourself a pretty cool project. Good luck and thank you for putting the process out in the open for all of us to learn from. Looking forward to the final project!
I'll just let it speak for itself. Looks like you got yourself a pretty cool project. Good luck and thank you for putting the process out in the open for all of us to learn from.
Looking forward to the final project! 01-17-13, 12:48 PM
#32

I actually think the GS bumper might be a better choice. Obviously the 3IS bumper would look sick, but the GS bumper will give it a different look compared to the new 3IS' that will be on the road! People won't say 'oh looks it a 3IS..oh wait its a 2IS posing".. they'll say "what is that!?" lol.
Can't wait to see final pics!
Can't wait to see final pics!
01-17-13, 01:15 PM
#33
 01-17-13, 01:18 PM
#34
Forum Administrator

iTrader: (2)
Nice start to a DIY, looking forward to the results! Especially interested in how this will look in a 'milder' (non widebody) 2IS.
wlmngtn310, going to go a step further beyond what was stated earlier and ask you to exit this thread please and not carry this into the 4GS forum.
wlmngtn310, going to go a step further beyond what was stated earlier and ask you to exit this thread please and not carry this into the 4GS forum.
01-17-13, 01:27 PM
#35
You always have some awesome projects going on man... Thanks for keeping us all posted on them, this should turn out awesome!!! Keep up the good work, and you already know, but don't listen to the one guy who said it would look terrible... I mean he owns an Infiniti so he clearly has no taste in looks!! Good luck, cant wait to see it done!
 01-17-13, 05:48 PM
#39
Coming from the man that paved the way for us to statically tuck rim, I'm honored. Thank you for helping us in the fitment thread.
Wow, you posted! You rarely post. Thanks for chiming in here.
It's funny you post this. Was looking at this vs jdm oem lip.
LOL at you and your fogs. Thanks for the pic Joe, and for helping the community so much.
Thanks Dave for chiming in here. I also owe you a public apology for how rude I was in PM's in the past. Thanks for putting up with my antics.
Thank you for the very kind words
Josh, how does side video sound?
Your isf front will look sick once painted and installed. : thumbsup:
Currently Active Users Viewing This Thread: 45 (10 members and 35 guests)
I'll just let it speak for itself. Looks like you got yourself a pretty cool project. Good luck and thank you for putting the process out in the open for all of us to learn from. Looking forward to the final project!
I'll just let it speak for itself. Looks like you got yourself a pretty cool project. Good luck and thank you for putting the process out in the open for all of us to learn from.
Looking forward to the final project! Thanks for chiming in here.LOL at you and your fogs. Thanks for the pic Joe, and for helping the community so much.
You always have some awesome projects going on man... Thanks for keeping us all posted on them, this should turn out awesome!!! Keep up the good work, and you already know, but don't listen to the one guy who said it would look terrible... I mean he owns an Infiniti so he clearly has no taste in looks!! Good luck, cant wait to see it done!
Josh, how does side video sound?
Your isf front will look sick once painted and installed. : thumbsup:
 01-17-13, 07:42 PM
#42
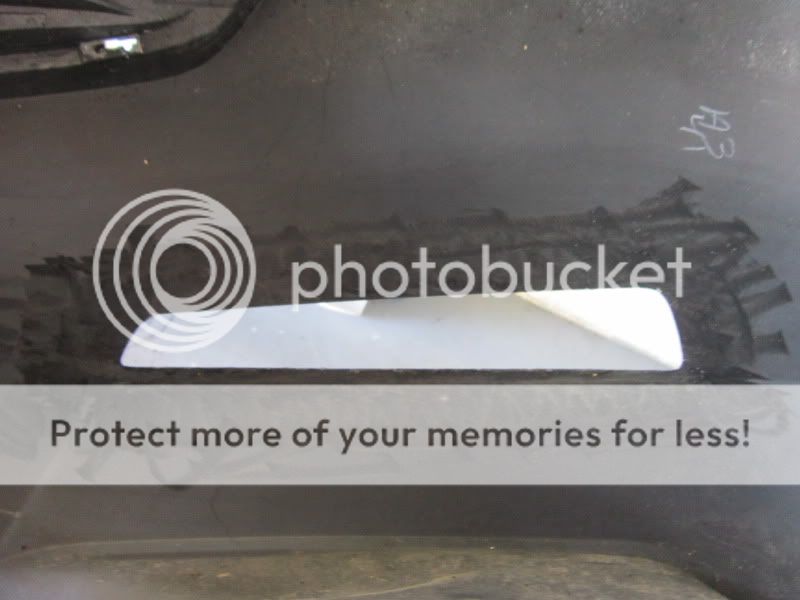
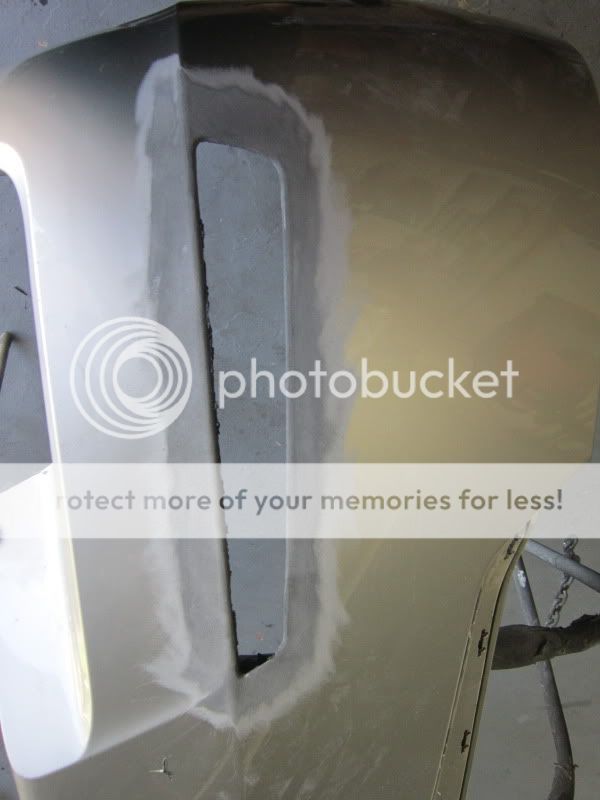
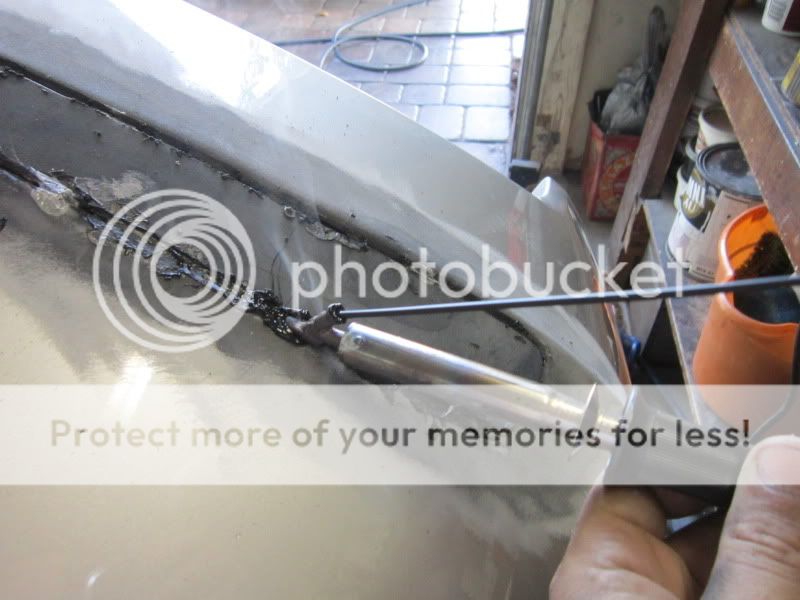
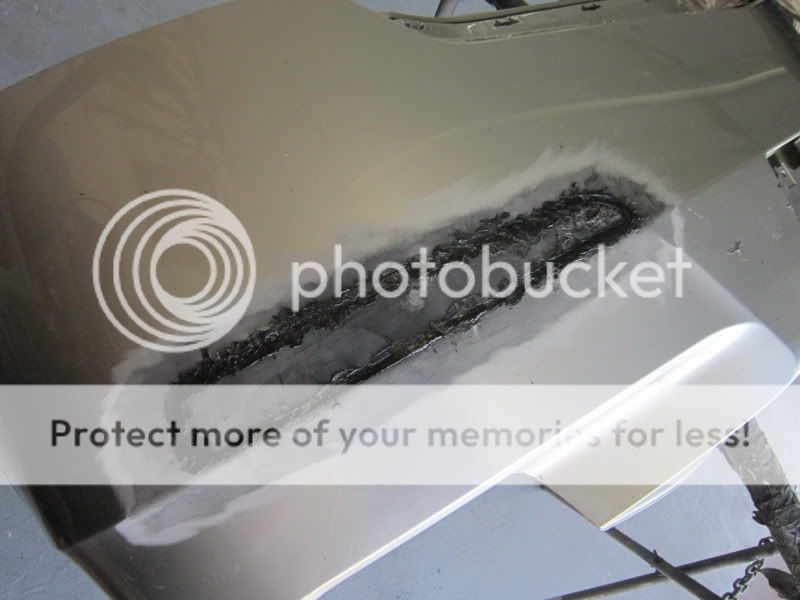
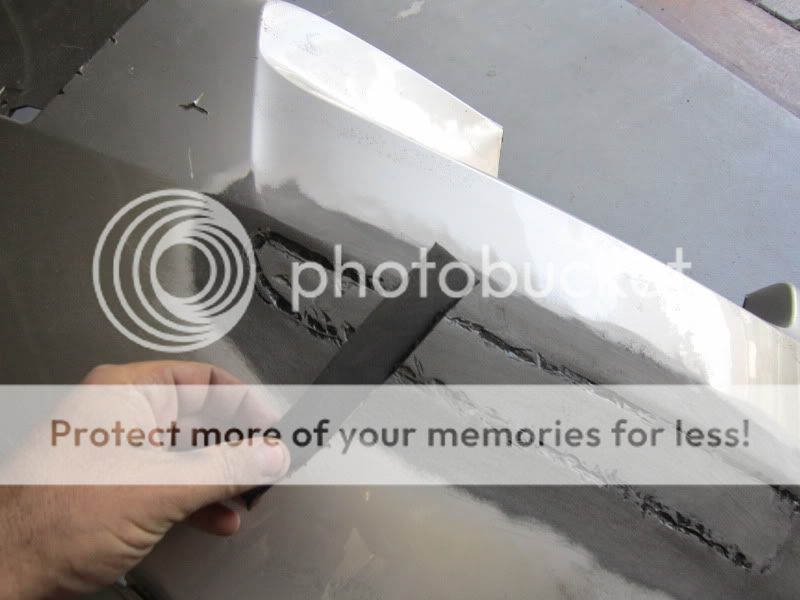
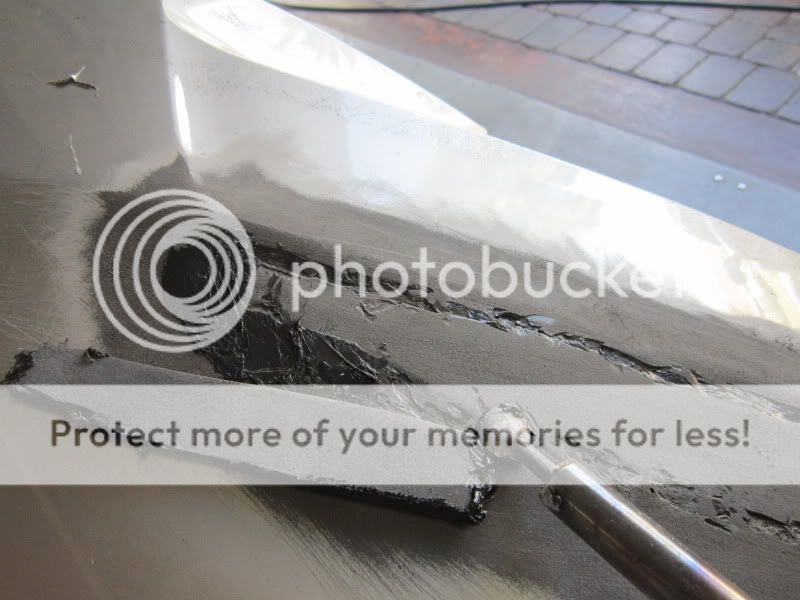
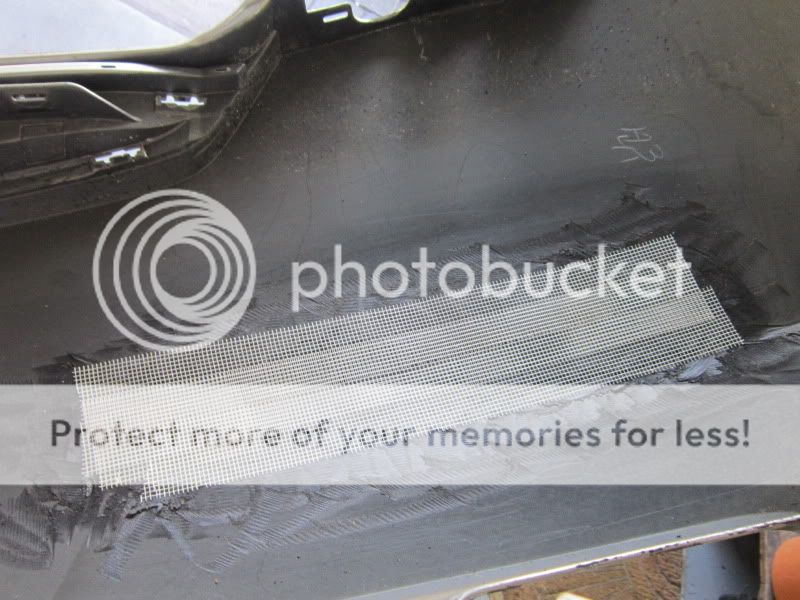
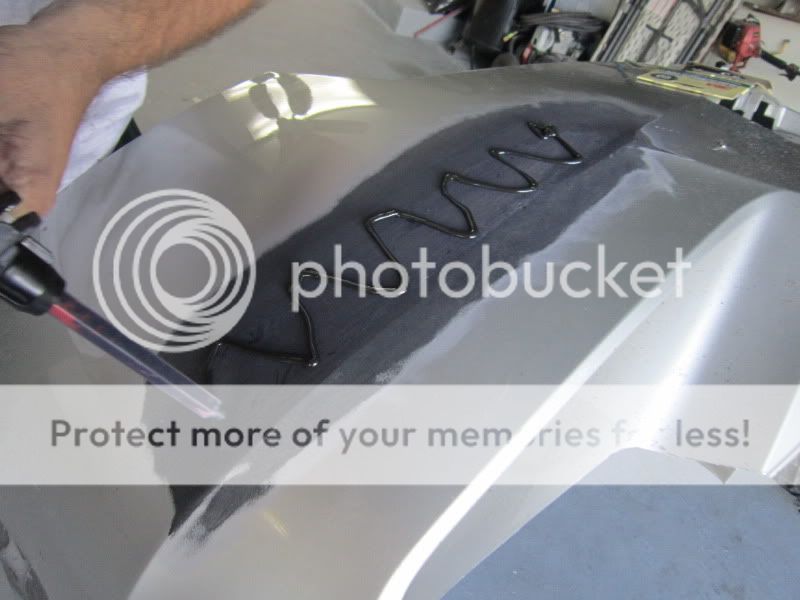
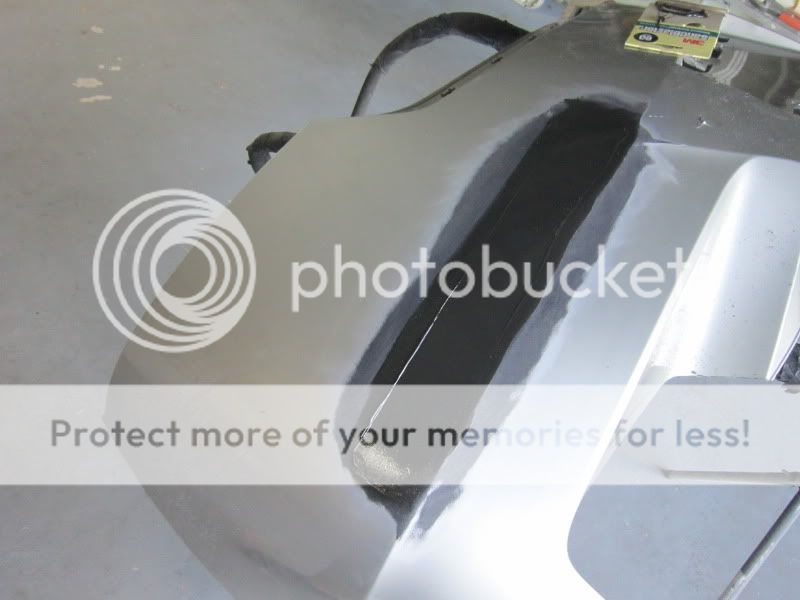
Obivously no bondo should be used at all, only plastic filler. I forgot to mention, I do this for a living. Staples are not a good idea. When heated (once completed) the stables will heat up at a different degree then the plastic due to the different materials. This allows for ghosting around each of the staples used. Staples are a great idea for tab repair. The best way to do it would to plastic weld it while on the car, then back it up with some fusor 100ez. on the rear with a mesh and then on the front. Sand it smooth and hope for the best. I would leave it in the sun in primer for a few days to see if it bubbles anywhere. Any air pockets will allow the air inside the pocket to expand, thus creating a bubble at the surface.
Take a look at the video you posted, none of the repairs are done to cosmetic areas, only structural areas that are not seen.
Best of luck.
Take a look at the video you posted, none of the repairs are done to cosmetic areas, only structural areas that are not seen.
Best of luck.