
Build Log
 06-20-13, 10:51 AM
#91
Did some interior modifications to make my controller sit like it belonged in the car. Took the wood trim on the center console out. the controller looked right at home behind the shifter plate. There were no clearance issues etc under it so taped the wood trim up, drew an outline of the controller and started cutting real slow. After everything was cut out, I taped up the controller, sprayed some wd40 on it and created a base with fiberglass and tiger hair.. looked pretty good.

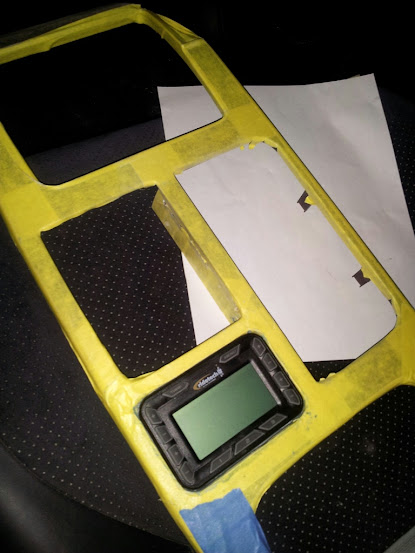
Painted the holder black for a more oem look.

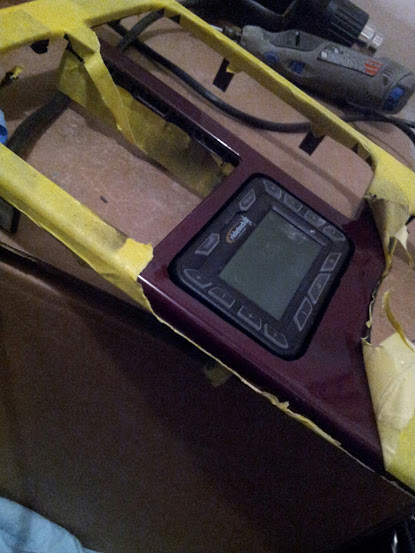
Everything looked good I drilled a hole for the micro usb plug to come through the base to plug into the controller and then realized that the controller might rattle in the holder and that would drive me crazy. Got some felt liner tape and lined the bottom and sides with it. Controller fits like a glove and is fully removable and no cracks on the wood trim!!!! Very happy with this mod.

Painted the holder black for a more oem look.
Everything looked good I drilled a hole for the micro usb plug to come through the base to plug into the controller and then realized that the controller might rattle in the holder and that would drive me crazy. Got some felt liner tape and lined the bottom and sides with it. Controller fits like a glove and is fully removable and no cracks on the wood trim!!!! Very happy with this mod.


 08-20-13, 12:53 AM
#98
Thanks Paul, been a little tied up but yeah did do some mods to the engine bay. I've been honestly slacking on these for awhile but was going to go to PA for Tuner Evolution/Black 4 meet and that kinda motivated me to finish up my engine bay really. This is a design that I thought of last year which is why I started painting my valve covers etc gold when I was doing my maintenance.

All the side panels were sanded, primed, sanded and color matched. The center engine cover I wrapped in wood grain. I bought quite a bit of this last year actually and eventually want to wrap my interior with the wood grain as well to bring it all together.. but I want to do other interior mods before I do that.


Each of the clips were wrapped as well for that little detail and a swarovski was added for that little bling detail.
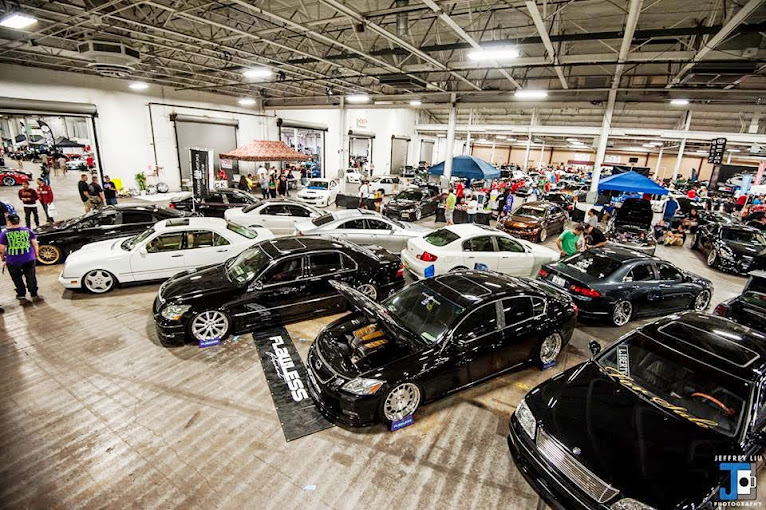
The cars at the Black 4 meet! Proud to say that we went with two cars, the LS430 and the GS430 and both won. LS came first in the LS class and the GS came second in the GS class.

Also finally figured out how to get my stickers in the front to flow with a little personalization

All the side panels were sanded, primed, sanded and color matched. The center engine cover I wrapped in wood grain. I bought quite a bit of this last year actually and eventually want to wrap my interior with the wood grain as well to bring it all together.. but I want to do other interior mods before I do that.
Each of the clips were wrapped as well for that little detail and a swarovski was added for that little bling detail.
The cars at the Black 4 meet! Proud to say that we went with two cars, the LS430 and the GS430 and both won. LS came first in the LS class and the GS came second in the GS class.
Also finally figured out how to get my stickers in the front to flow with a little personalization
Last edited by kuWuPt; 10-18-13 at 11:30 PM.
 08-20-13, 11:55 PM
#101
Apart from setting the pod that I made earlier in the build in the trunk, haven't had a chance to do anything else. I think I'm going to change it up though, I'm thinking mount the compressors in the wheel well to quieten it down some along with the everything else and just have the tank showing. Can't really fit the tank in the wheel well or else I would put it there too.. anyone have any other suggestions?
06-25-14, 05:28 PM
#105
Just wanted to update this thread:
So I've been out of the country for a couple of months and honestly haven't done much to the car in awhile. Had a couple of pending projects that I had started but didn't finish so thought I would actually finish one of them.
Our Lexus's come with a fresnal projector lens and well I wasn't very happy with the output so decided to swap in a clear tsx projector lens cause it is actually clear. Well so off to the bake booth/oven it went.

Here is the clear lens in the housing. I did this lens mod on my 2GS retrofit as well and loved the output.

With the headlight out I also wanted to make some eyelids. I couldn't find any eyelids for sale at this time and well hey how hard could it be to make right. lol.. it's a pain!!! Well first step was to mask off the headlight to create a mold per say. I used some silicon spray lube so the resin would not adhere to the tape.

I would've done this in fiberglass too but I didn't have any, but I did have some raw carbon fiber left over from another project. I cut 4 strips, the taped border is so the material doesn't fray.
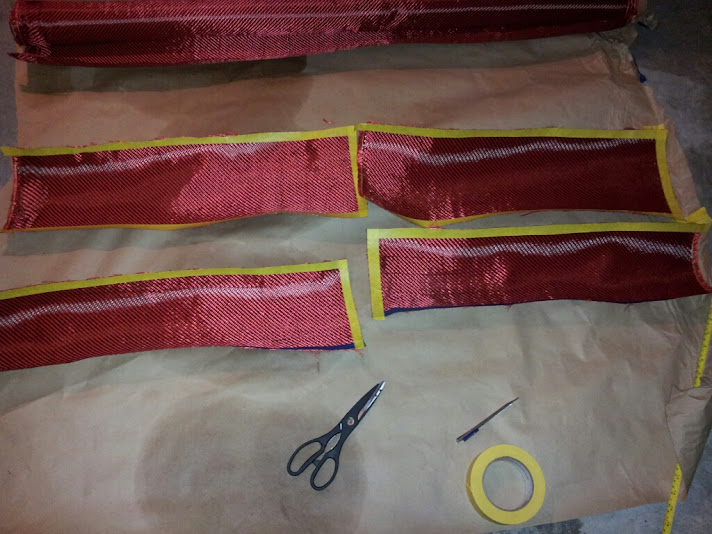
I used 2 overlay-ed strips on each headlight. Put one strip down, resin it, roll out all the air etc and then lay another strip and do the same.

So that created the form to build from. Next I had to shape it. Trimmed off the excess and taped it up to the headlights to decide on the shape. I used some vinyl tape to help me draw the lines from the factory body line on the fender to the hood. This is what I came up with.

Trimmed off the excess again and this is how everything looked .


Sanded it down, enhanced the lines a little more and a good coat of primer and this is what I was left with.

It's thin, strong, flexible and looks good on the car IMO. Will have some pics up after it is painted and on the car.
So I've been out of the country for a couple of months and honestly haven't done much to the car in awhile. Had a couple of pending projects that I had started but didn't finish so thought I would actually finish one of them.
Our Lexus's come with a fresnal projector lens and well I wasn't very happy with the output so decided to swap in a clear tsx projector lens cause it is actually clear. Well so off to the bake booth/oven it went.
Here is the clear lens in the housing. I did this lens mod on my 2GS retrofit as well and loved the output.
With the headlight out I also wanted to make some eyelids. I couldn't find any eyelids for sale at this time and well hey how hard could it be to make right. lol.. it's a pain!!! Well first step was to mask off the headlight to create a mold per say. I used some silicon spray lube so the resin would not adhere to the tape.
I would've done this in fiberglass too but I didn't have any, but I did have some raw carbon fiber left over from another project. I cut 4 strips, the taped border is so the material doesn't fray.
I used 2 overlay-ed strips on each headlight. Put one strip down, resin it, roll out all the air etc and then lay another strip and do the same.
So that created the form to build from. Next I had to shape it. Trimmed off the excess and taped it up to the headlights to decide on the shape. I used some vinyl tape to help me draw the lines from the factory body line on the fender to the hood. This is what I came up with.
Trimmed off the excess again and this is how everything looked .
Sanded it down, enhanced the lines a little more and a good coat of primer and this is what I was left with.
It's thin, strong, flexible and looks good on the car IMO. Will have some pics up after it is painted and on the car.