Daily Slideshow: Wide Fender Install, Dos and Don'ts
Outfitting your ride with DIY wide fenders is as easy as following a few easy steps, and avoiding a few common missteps.


Buy Flares
We're using photos of an AP1 Honda S2000 to illustrate the this process, but the steps are the same for most steel-bodied vehicles. The non-Lexus photos are from Speed Academy's post and video, which differ slightly—we'll point the differences out as we go.
The aftermarket already did the hardest part—they made the flares for you. All you have to do is buy good parts, and this forum is the perfect place to find advice on which manufacturers' parts work best for your vehicle. The parts featured here are ASM Yokahama rear overfenders and Downforce replacement front fenders, both made from FRP (fiberglass). Key considerations are fit and construction. A good fit will save time lining everything up, and quality construction will ensure your flares sit flush and don't crack when you fasten them to your car.
DO: Use good parts.
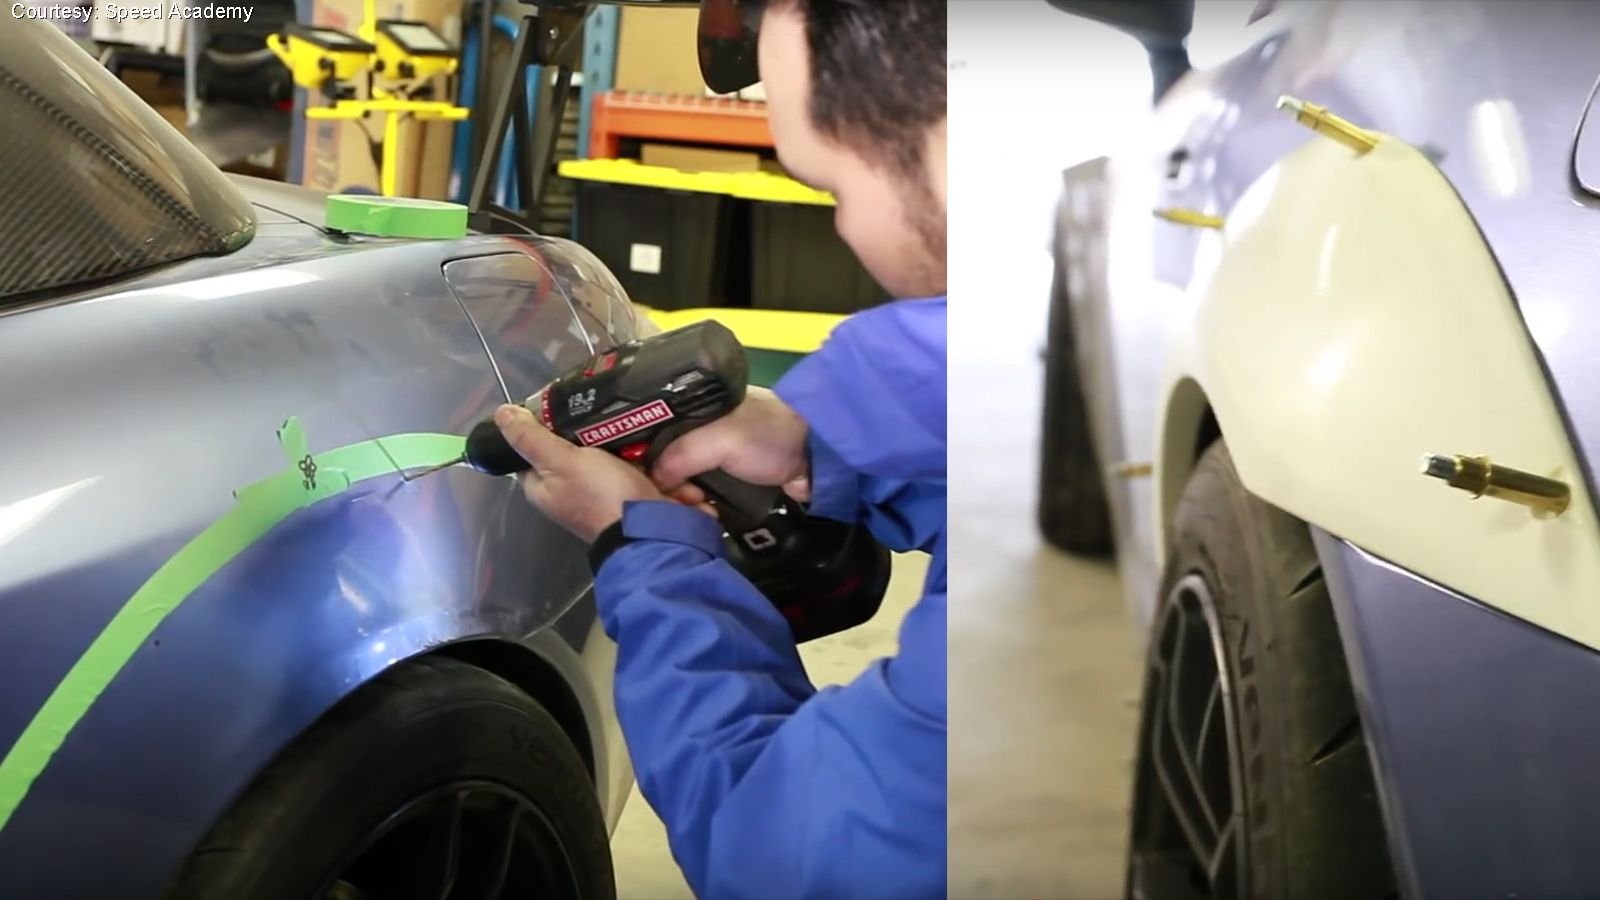
Measure Twice, Drill Once
Before you go nuts making holes, start by checking your parts for fit, and to make sure everything lines up correctly. The wrong way to drill mounting holes in your original bodywork is to tape the flares in place and then drill through the flare mounting holes into the body behind them, as is described in the S.A. post. The reason that's not recommended is that the drill will often walk out of place and chew up the hole in the perfect aftermarket piece you just spent extra money to buy. The ideal method is to tape the flare securely in position, then use a machinist transfer punch the size of the flare's pre-drilled mounting holes to mark the exact center of those holes onto the fender underneath. Next, use the marks you just made as centers to make deeper punch marks with a center punch. A spring-loaded center punch works well. The punch marks will allow your drill bit to stay on center, and not drift while you're drilling the mounting holes. It's best to drill one hole first, put a fastener or cleco through it temporarily, then double check your alignment before continuing. Repeat for the second hole to insure your marks/holes are in the right locations.
DO: Fit, align, check, drill, check, drill more.
DO: Wear eye protection whenever drilling, welding, or grinding.
DON'T: Mangle your parts with bad technique.
Clearance Original Fender
Now that you know where your flare is going to live, take it off again so that you can cut away the original fender beneath it enough to clear your new, wider tires. You can make a cut guideline with tape or draw it on with a marker. Then just use your favorite sheet-metal cutting tool to remove the excess. In the S.A. video, they ran a piece of one-inch masking tape along the fender lip and cut both the inner and outer fenders away. Then they made a second cut removing more of the outer fender and folded the inner fender outward, so that it contacted the outer fender, in order to make welding them together easier. Welding them together makes a weather-tight mechanical seal, but might also burn corrosion protection away from the area between the two layers. In addition, welds can be compromised by paint or other impurities in the area to be joined. Alternately, rivets and sealant will make a strong, weatherproof, though less factory-looking, joint. The area will be hidden under your flares anyway so how much time you spend making it pretty is your call. Caution: tape, undercoating, sealant, and/or sound deadening material can and will catch on fire when exposed to the high temperatures welding or plasma cutting generates. Helpful hints: cut so the cutting tool throws the sparks away from you, and tape up the painted area near the metal you are cutting in case you slip with your cutting tool.
DO: Provide clearance for more rubber.
DON'T: Start things on fire.
Select Fasteners
The easiest way to mount your flares is simply pop-rivet them on. Rivets are strong and can easily be drilled out if you need to repair or replace anything. The guys at Speed Academy chose to go more high tech and install rivnuts (threaded nut inserts) into the factory bodywork so that they could use fancy-looking socket head button-head cap screws to attach their flares. This is one place where the S.A. post and video differ. The post shows a countersunk (chamfered) screw with the rivnut. Do not use a countersunk fastener on a lightweight flare with a flat fastener relief, the fastener will act like a wedge and crack it. If you use a rivnut set-up, we suggest using a drop of blue Loctite to keep the screw from backing out due to vibration.
DO: Use thread locker with fasteners.
DON'T: Use countersunk fasteners in non-countersunk holes.
Fronts
Unless you prefer the look of an over fender flare, the easiest and most seamless way to flare out your front fenders is to simply replace the whole panel with a wider aftermarket one. When using over fender flares, keep in mind you'll need to clearance the factory fenders more for the front wheels than you did for the back. Be mindful of any wiring attached to or hiding underneath the factory front fenders. The S2000 flares used by Speed Academy were designed to blend into the factory front bumper. Caution: jacks are for lifting a car, jack stands are for supporting a car.
DON'T: Work on a car supported only by jacks.
Paint and Assemble
With all the metalwork done it's time to send the flares and replacement fenders out for paint. Use this opportunity to prime and paint any unprotected areas under the flares to prevent corrosion, and for a more finished look. Anytime you spray paint it's best to mask as much of the car off as you can. A draft that's too light to feel is still strong enough to blow overspray onto the opposite side of the car. All that's left is to do now is attach your flares. Speed Academy used rubber weatherstripping/molding between the over fender flares and the factory fenders for a more finished look. Buttoning up a job well done is almost as satisfying as the next step... you guessed it: driving your wider and more capable machine.
DON'T: Skimp on the masking.
DO: Enjoy!
For help getting your Lexus running well, see the how-to section in ClubLexus.com