Lexus IS: How to Wrap Your Interior in Carbon Fiber Foil
Do you want to make the interior of your Lexus stand out from the crowd? If you are looking for an easy and great looking interior upgrade, then carbon fiber is the answer. This guide on wrapping your interior in carbon fiber has everything you need to know.
This article applies to the Lexus IS 250/IS 350 (2004-2014).
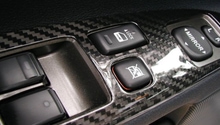
It's great to upgrade the exterior appearance of your ride, but what about the part of the car we spend the most time looking at? Interior appearance is just as important as exterior, or arguably more so depending on your opinion. One of the easiest ways to give your interior a killer makeover is by wrapping different pieces in carbon fiber. Carbon fiber has gained a lot of popularity in recent years for its lightness and great looks, and the good news is it is also pretty easy to work with. Keep reading to see how you can upgrade your interior in a big way for just a little coin.

Materials Needed
- Carbon fiber wrap, such as 3M or Neffy
- 3M Super 77 adhesive
- Exacto knife
- Phillips head screwdriver
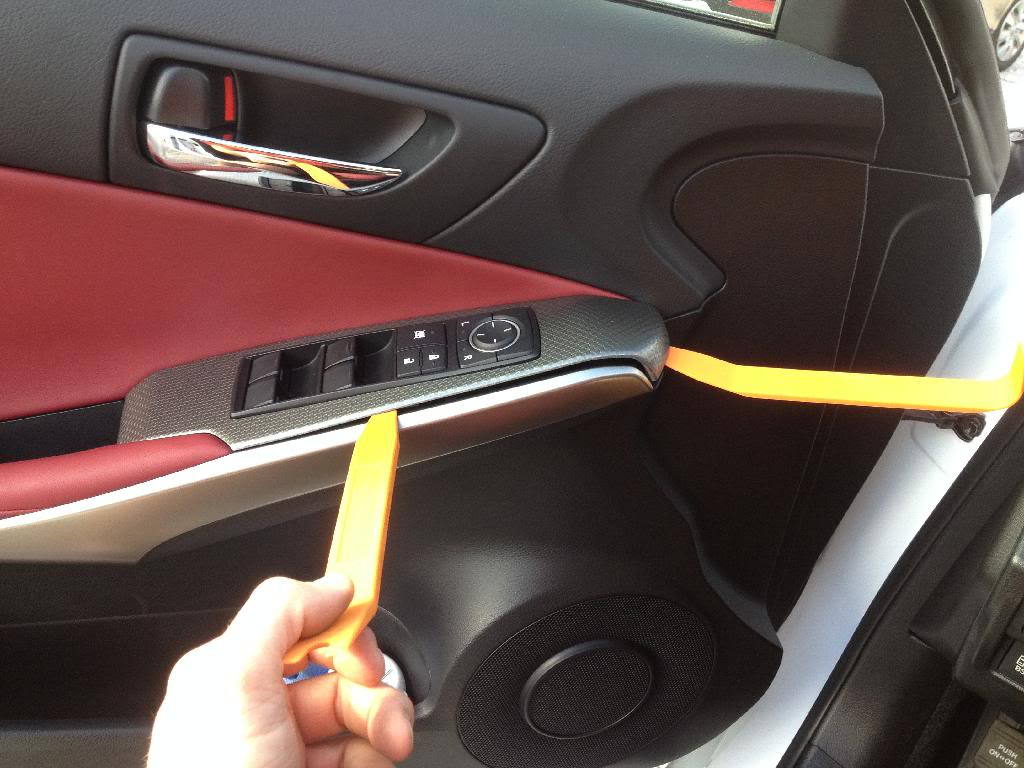
- Trim removal tool
Step 1 - Remove the trim you want to wrap
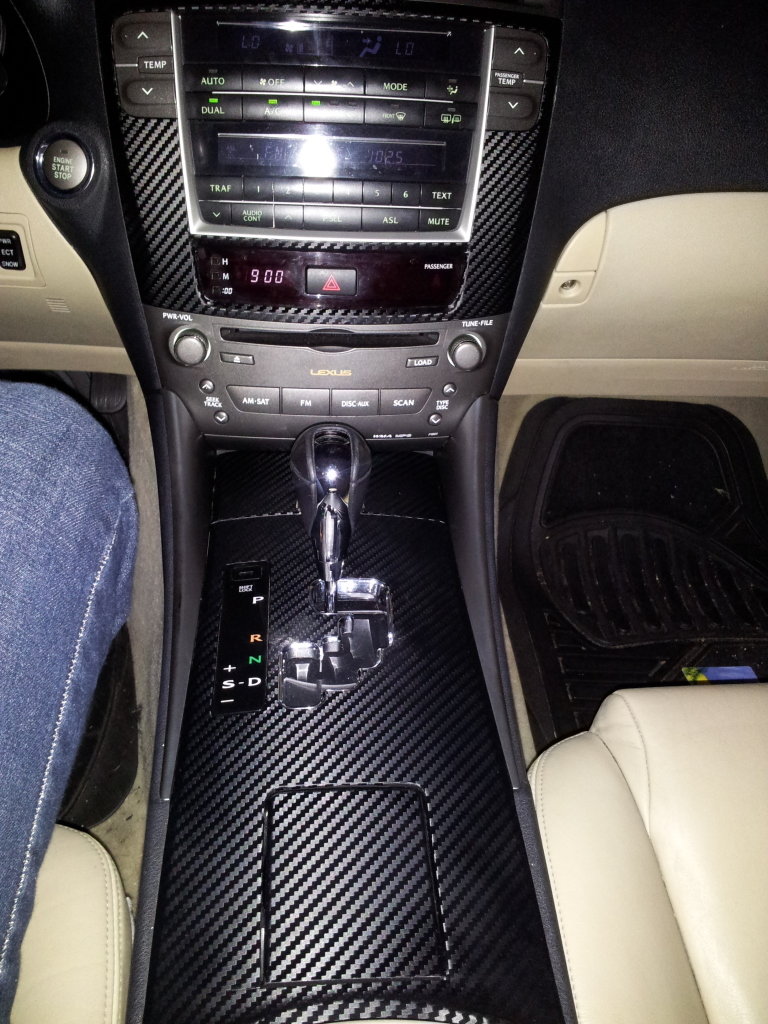
Most trim is fairly easy to remove with a screwdriver, plastic card, or trim removal tool. Pieces such as wooden door trim are very easy to remove and require only a credit card and a little bit of prying. If you want to wrap your center console, here is a great article on how to remove it.
(Related Article: How to Remove Center Console Trim - ClubLexus.com)
Step 2 - Apply carbon fiber trim
Lay out all the pieces that you want to wrap on a piece of carbon fiber wrap and cut around them. Be careful to leave enough extra wrap to fit around each piece. Spray each piece one at a time with adhesive, then spray a second time to ensure there is enough adhesive on them to hold the wrap effectively. Turn each piece over and smooth out the wrap so there are no wrinkles or bubbles. Once you have completed this step with each piece, let them sit for an hour or two so the adhesive can dry.

Step 3 - Trim the wrap to fit each piece
Use your exacto knife to cut out any appropriate holes. The best way to accomplish this is to cut an "x" wherever there is a hole, and to cut lines wherever there is a curve in the piece. This will allow you to pull and stretch the wrap through to the backside without having any bubbles or lines showing. Once you have cut the wrap, spray the bottom of each piece with adhesive and tightly wrap the carbon fiber around them.

Step 4 - Re-install interior trim pieces
After you've given the pieces proper time to dry, re-install them one at a time. Be careful not to scratch your newly wrapped parts, or you may end up doing double the work! Enjoy the fruits of your labor and be sure to show this modification off to your friends.
Featured Video: How to Carbon Wrap Interior in Lexus IS
Related Discussions
- How to Wrap Interior Trim in Carbon Fiber Vinyl - ClubLexus.com
- DIY Carbon Fiber Wrap - ClubLexus.com
- How to Remove Interior Trim Pieces - ClubLexus.com