When you click on links to various merchants on this site and make a purchase, this can result in this site earning a commission. Affiliate programs and affiliations include, but are not limited to, the eBay Partner Network.
Had a quick question for you guys that used the ball separator. I just completed the fronts using the separator and was wondering about it. It separated just fine and heard the pop, but when you torque it back after @87 ft lbs, are you supposed to feel it pop back in? Is this a ball socket? I don't see any ball or socket but was wondering why it pops apart?
Also, I am installing rsr half downs. The bottom front springs lines up to the notches/perch, but it the top hat rubber part supposed to line up like the oems to the indentation? The rubber part cannot be moved in my is350 or it won't line up putting it back up. The top part of the spring is flat and I'm just thinking it may make it's own indentation on the rubber top hat later?
Thanks in advance.
Only the bottom will line up with the strut...as the spring is shorter, the top coil ends a different spot that the original spring.
The ball/socket is the end in the arm, nut the end that fit into the steering knuckle upright.
CLUM, thank you very much for your response. I looked more at the stub from the ball joint and saw the taper. Perfect sense and at ease now.
Good to know about the rubber part as well. Orientation is 100% correct, but the flat top part of spring end is just off by 1/4 degree turn. More important to seat at the bottom correctly. Just want to make sure, bad spring install jobs cause funky suspension headaches. Creaks, rattles, safety, unevenness, etc...
Thanks Sasnuke, that's what I thought about the top coil, the indentation from OEM springs through me off. I thought maybe I was supposed to spin the rubber part of the top hat. I tried but it seemed stationary.
I guess I'm good, will load front suspension and torque the bolts. I hope the rears won't be a pain. Read your posts about bolts not lining up. Will do the screwdriver/prybar tip and place jack closer to front of the arm.
CLUM, thank you very much for your response. I looked more at the stub from the ball joint and saw the taper. Perfect sense and at ease now.
Good to know about the rubber part as well. Orientation is 100% correct, but the flat top part of spring end is just off by 1/4 degree turn. More important to seat at the bottom correctly. Just want to make sure, bad spring install jobs cause funky suspension headaches. Creaks, rattles, safety, unevenness, etc...
yes correct, as long as the bottom is seated all the way into the notch, then you're good.
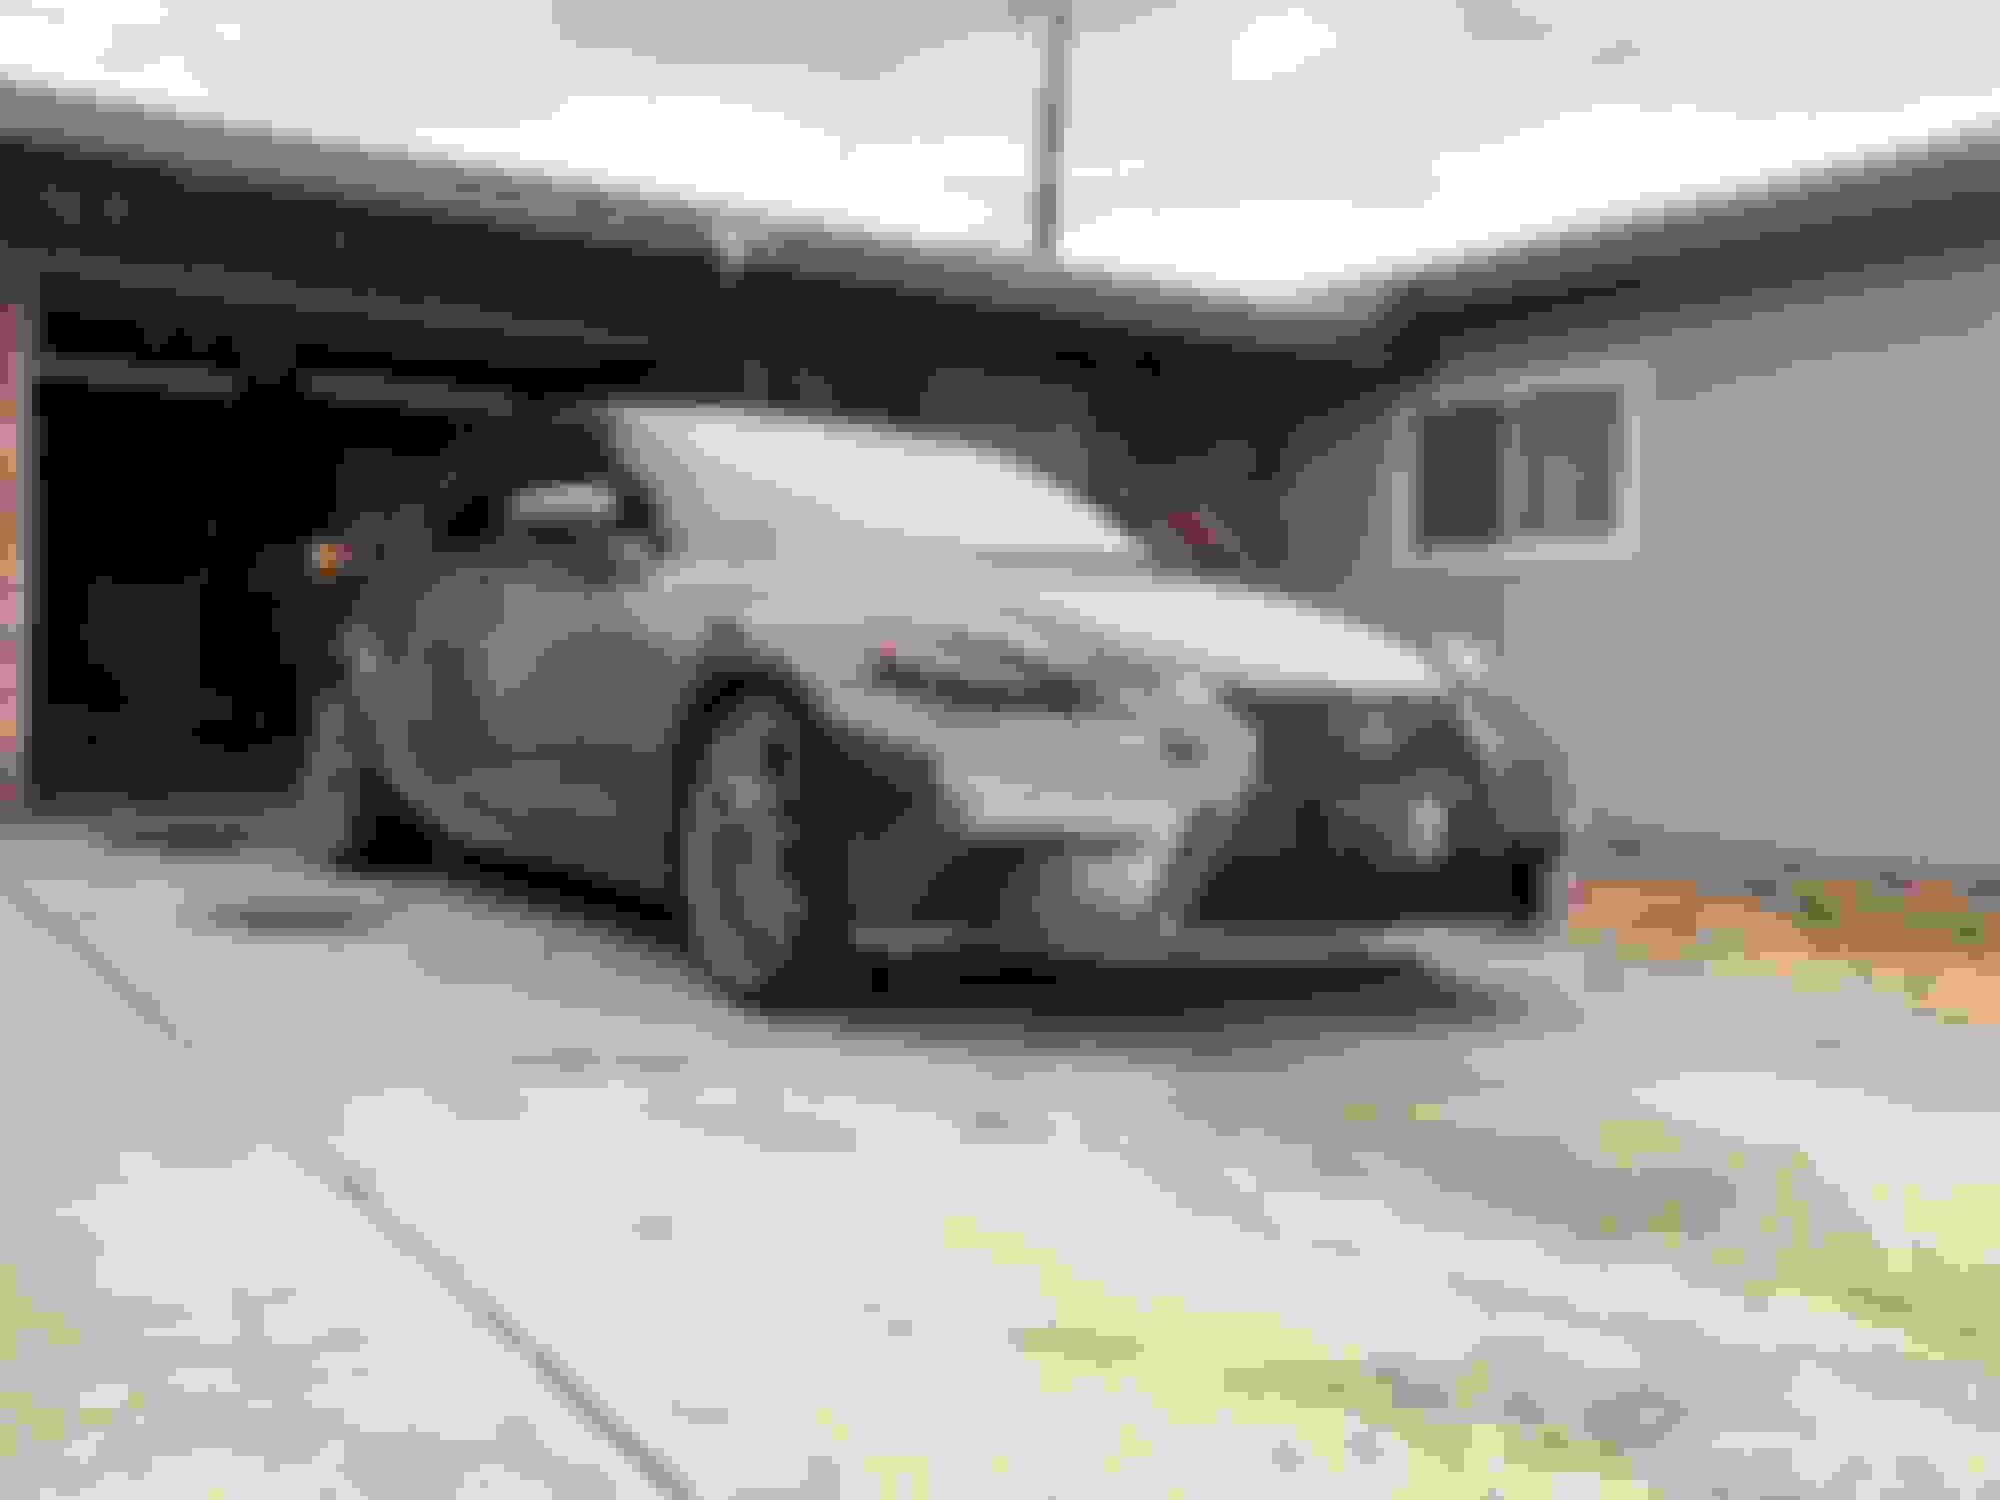
Finally finished installing the rsr half downs. Thanks for this guide and for answering my questions.
Only issue I had was torquing the inner arm bolt back. Could not get a torque wrench in there with the Invidia Q300 exhaust pipe. Felt too lazy to remove the exhaust, so just ended up tightening it with an open wrench and cheater bar.
Also, I did not have to remove the rear arm to hub bolt, I just loosened it and the spring is cleared for removal.
To put proper suspension load. Prior to jacking up vehicle, I measured from center of rim to bottom of the fender. Then when getting ready to torque everything, I just jacked the hub to the same measurements from center hub to bottom fender. It should be the same right?
All corners are even, no noise or rattles. Thank you Clublexus members.
To put proper suspension load. Prior to jacking up vehicle, I measured from center of rim to bottom of the fender. Then when getting ready to torque everything, I just jacked the hub to the same measurements from center hub to bottom fender. It should be the same right?
Looking good.
For the load part...just having the vehicle sit on the ground naturally with the bolts/nuts loose is good enough to then go ahead and torque them down.
No need to overthink it too much.
The reality is the components will be sitting in a new position now as the springs are shorter, so torquing them in the new position is what you want...not where they were in the old position.
Finally finished installing the rsr half downs. Thanks for this guide and for answering my questions.
Only issue I had was torquing the inner arm bolt back. Could not get a torque wrench in there with the Invidia Q300 exhaust pipe. Felt too lazy to remove the exhaust, so just ended up tightening it with an open wrench and cheater bar.
Also, I did not have to remove the rear arm to hub bolt, I just loosened it and the spring is cleared for removal.
To put proper suspension load. Prior to jacking up vehicle, I measured from center of rim to bottom of the fender. Then when getting ready to torque everything, I just jacked the hub to the same measurements from center hub to bottom fender. It should be the same right?
All corners are even, no noise or rattles. Thank you Clublexus members.
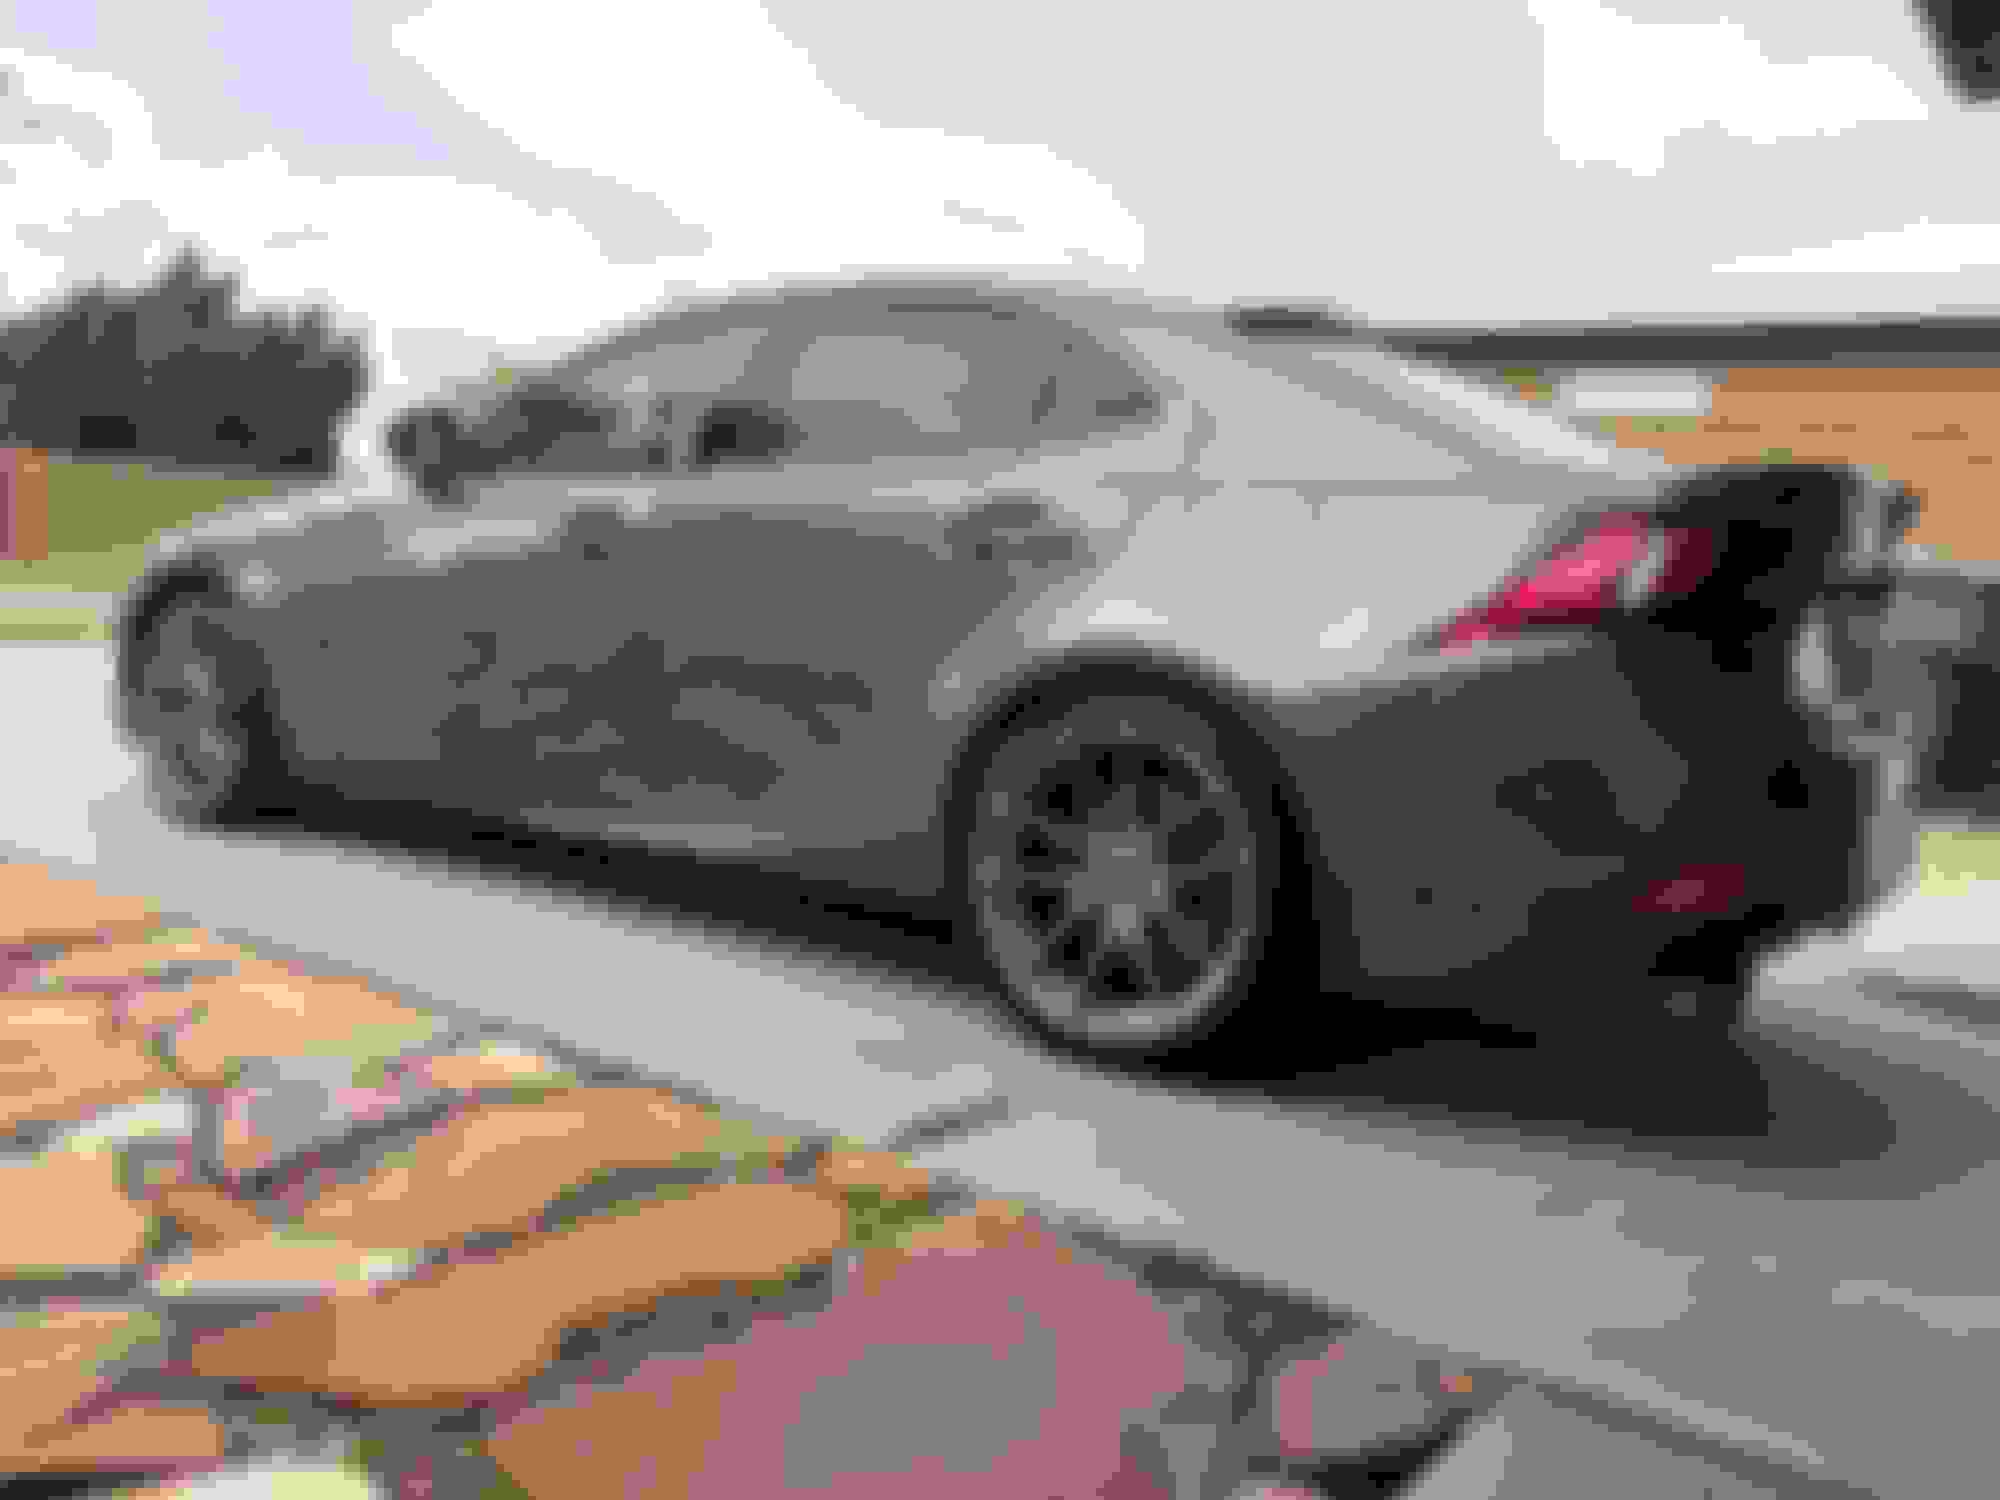
DAAAM SON that fitment is TIGHT ! what wheels are those?
For the load part...just having the vehicle sit on the ground naturally with the bolts/nuts loose is good enough to then go ahead and torque them down.
No need to overthink it too much.
The reality is the components will be sitting in a new position now as the springs are shorter, so torquing them in the new position is what you want...not where they were in the old position.
How do you torque the bolts needed when the wheel and tire is on? I�ve seen that mentuoned on another thread but couldn�t figure how.
How do you torque the bolts needed when the wheel and tire is on? I�ve seen that mentuoned on another thread but couldn�t figure how.
You would need to do it with the vehicle off the ground and supported by the wheels...ideally.
Like if the vehicle was parked on an alignment rack, where it's sitting on the wheels, but then you can lift the hoist up and just walk underneath.
I didn't realize that when you mentioned using the jack that you were doing it with the wheel off.
That's not a bad way to simulate the load. Obviously not as accurate as the vehicle sitting on the wheels with it's own weight on the suspension, but if you're doing it at home without a hoist, i think that's as good as you're gonna get.
How do you torque the bolts needed when the wheel and tire is on? I�ve seen that mentuoned on another thread but couldn�t figure how.
wheels off, put a jack underneath the lower arm and jack it up until that corner raises off the jack stands by 1cm or so. This simulates the car's full weight being supported by the suspension, then proceed to torque.
Finally got my video done with springs and wheels. I'm trying to get chase the look of my previous BMW F10, but it's not quite the same. I think it's cause the 3is just looks to short. What do you guys think F10 or 3is?
Having issues with this bolt from post 1. same exact problem. (I'm returning my car back to stock)
i did this job nearly 3 years ago when I got the car new. i remember having trouble, but seems to be harder this time. Bolt slots through the back but won't line up with the front hole of the control arm. It's as if the control arm has some torque on it. Doesn't make sense.. even using super-gorilla strength trying to twist everything with a long bar/screwdriver etc. If I remember from 3 years ago, I used a screwdriver to line the hole up and tap the bolt in from the other end. but that's easier said than done.
never had these problems on any other car. built and rebuilt plenty of m3 suspensions. everything goes together without force. like art. slide all bolts through with a pinky. this whole suspension set up on the 3IS seems very "frictiony".. like it doesn't want to go together naturally. like things don't fit right. i'm sure it's much easier at the factory when they put these together. not very DIY friendly in a garage.
anyway i'll try again tonight. my whole body is sore from trying to fanagle that bolt back in. i've done engine rebuilds easier than this.. maybe i'lll be refreshed after a night to sleep on it. thankfully i have another car and garage or i would've been so mad.
Tip for the lining up the holes when doing the rear: buy a set of punches (or use strong screwdrivers) and pry bars. You can use the punches to slot in the opposite side you're trying to put the bolt through. Use the punch to help line up the holes on one side, while you push the bolt in through the other side. Pry bars are sometimes useful for wedging into areas in order to get the arms lines up as well.
I may try to find a suitable socket to jam in there. but i'll buy a set of punches if i have to.. ugh.
I may try to find a suitable socket to jam in there. but i'll buy a set of punches if i have to.. ugh.
Did you loosen the control arm where it can drop almost all the way to the floor, then jack it up and try to get bolt in? I lined it up that way, then tightened control arm back up when the bolt was on.

 01-17-19, 11:03 AM