When you click on links to various merchants on this site and make a purchase, this can result in this site earning a commission. Affiliate programs and affiliations include, but are not limited to, the eBay Partner Network.
Great information on the forum regarding fixing/replacing the speakers in the SC430, but I was having trouble finding information on how to remove the backseat and gain access to the rear speaker and subwoofer. I tackled the project earlier this summer, but I am finally getting around to posting pictures.
First remove the lower part of the backseat, it is as simple as pulling up on the front edge of the seat.
Next remove the back of the rear headrests to gain access the the bolts.
And then the next layer to remove the headrest itself.
Then remove the bolts that hold in the upright portion of the backseat.
The side panels to gain access to the rear side speakers was a little tricky. I didn't need to repair those 2 speakers so I don't have pictures to do it. I do know there is a bolt that is was easier to access if you have the convertible top in the slightly open state. It is slightly behind the top upright portion of the back seat and is "under" the flap that goes up and down to allow the convertible to open/close.
In the last picture, I see a series of 4 or 5 screws holding the side panel in place. Is that all that is necessary to get at the side speakers? (Is that all? he asks... )
I wanted to add to sagmanaur very timely (at least for me) post. I had to replace the drivers seat belt. I needed to remove the side panel. This post and others mention hidden screws. So I wanted to show exactly where they are.
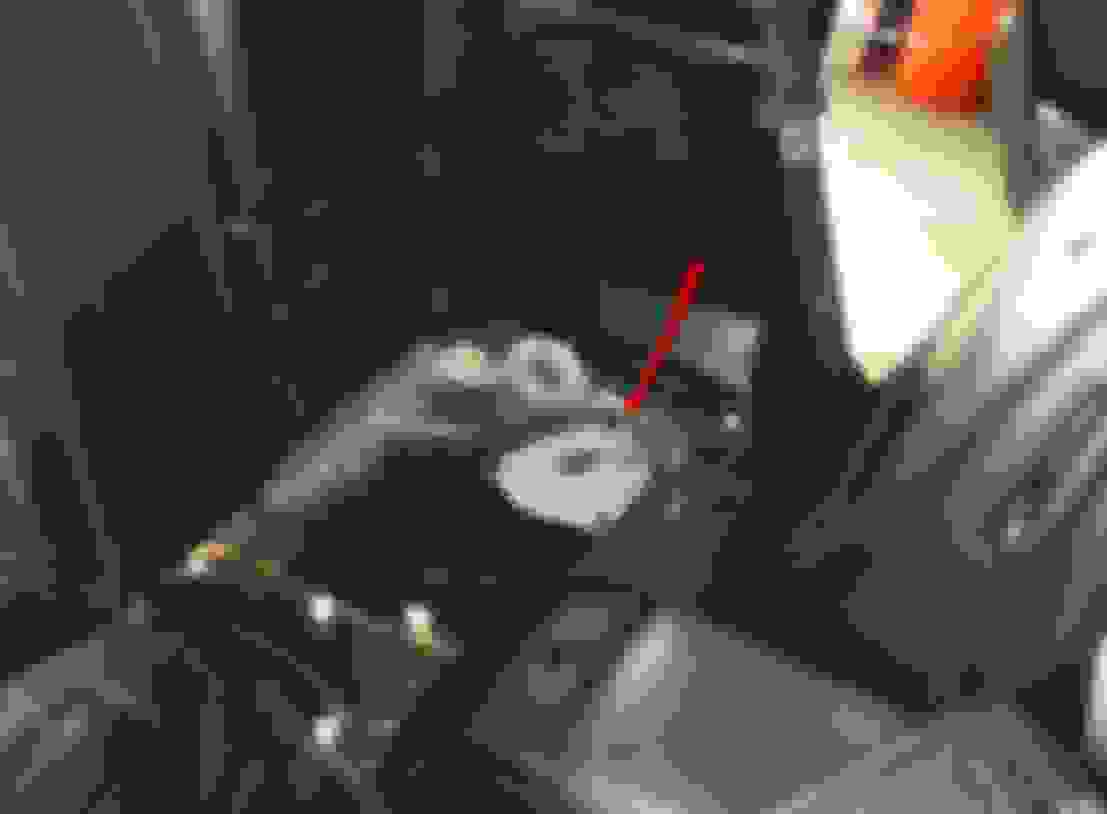
First you will need to put the roof partly up so the rear deck raises. This will expose 2 hidden fasteners. a screw and a push pin.
next use a trim removal tool to remove the trim piece where the seatbelt comes out of the side panel you will see a bolt.
That's it for the hidden fasteners. There are 4 obvious bolts you can see in sagmanaur's last image. 3 at the back edge of the panel and one near the head rest. The side panel will then come out pretty easily.
I wanted to add to sagmanaur very timely (at least for me) post. I had to replace the drivers seat belt. I needed to remove the side panel. This post and others mention hidden screws. So I wanted to show exactly where they are. First you will need to put the roof partly up so the rear deck raises. This will expose 2 hidden fasteners. a screw and a push pin.
I accessed my sub and rear speakers just a few weeks ago (the pictures in this thread were perfect!) and wanted to add my two cents. Re: the "roof partly up" comment, I did mine same as per slawless's pictures, where the roof/rear window was fully in the trunk, not halfway up in the air. Only the trunk lid and package shelf were in the up position.
For you first-timers accessing the rear speakers like I just did, take your time and it should go easier than you think. And after you button everything back up, you realize you could now do it in half the time should you ever need to do it again...
FWIW, the sub repair was easy, just had to replace the surround (completely detached from frame) with the Simply Speakers kit. The rear side speakers were fine, though I think they were replaced a few years ago by the previous owner.
Great thread. Just fixed my sub as well. Very easy to do if you have the right tools. You do need a T10 torx for at the speaker. The surround was totally disintegrated on mine. Standard Toyota 8" is perfect for the repair. Can't beat it for $24
Great information on the forum regarding fixing/replacing the speakers in the SC430, but I was having trouble finding information on how to remove the backseat and gain access to the rear speaker and subwoofer. I tackled the project earlier this summer, but I am finally getting around to posting pictures.
First remove the lower part of the backseat, it is as simple as pulling up on the front edge of the seat.
Next remove the back of the rear headrests to gain access the the bolts.
And then the next layer to remove the headrest itself.
Then remove the bolts that hold in the upright portion of the backseat.
The side panels to gain access to the rear side speakers was a little tricky. I didn't need to repair those 2 speakers so I don't have pictures to do it. I do know there is a bolt that is was easier to access if you have the convertible top in the slightly open state. It is slightly behind the top upright portion of the back seat and is "under" the flap that goes up and down to allow the convertible to open/close.
Thanks for the post! It was a tremendous help. The photos and instructions were spot on... I was able to get the seat and speaker out of the car with ease.
 09-14-18, 02:25 PM


 )
)
") )
)