
Climate Control Backlight Voltage


Thread Starter
Pole Position
Joined: Mar 2011
Posts: 308
Likes: 0
From: CA
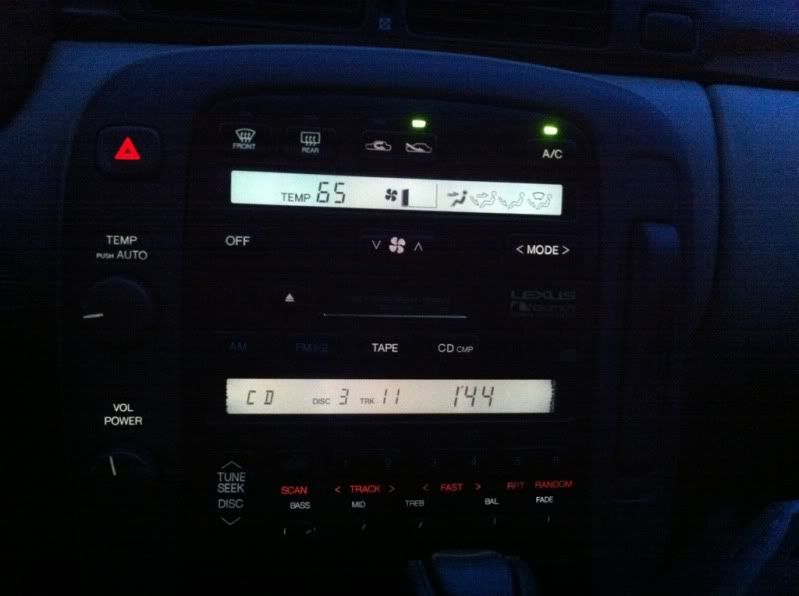
I'm not sure if this is a re-post, but after reading tons of posts about replacing climate control LCD backlights with ones from Radioshack and whatnot, I gave it a try. I had the same problem as others, they weren't as bright, strangely though, they WERE when it was on my bench tester putting 12V to them. I finally broke the tester out and put it on the terminals while in the car.... 8.35 volts running lcd backlights, 13.5 volts for the button lights. Pretty sure 7.5 Volt lights from Radio Shack will do the trick, since 12 Volt ones run at 13.5 ish. Hope this helps.
Thread Starter
Pole Position
Joined: Mar 2011
Posts: 308
Likes: 0
From: CA
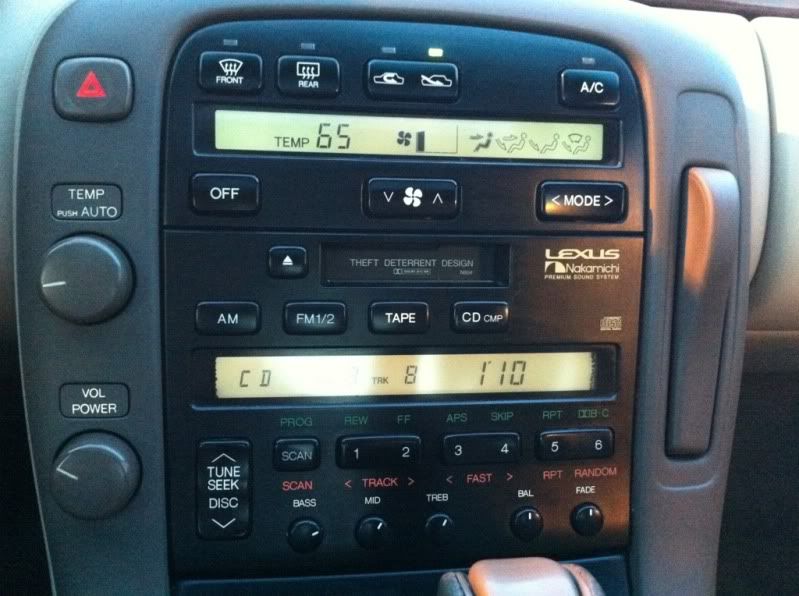
So 6 Volt bulbs didn't really work well, so I went back to radioshack 12 Volt....but I on the 3 pin connector, I removed the 8 volt lead, soldered a wire to a 12 Volt switched ignition lead on the board, then to the positive lead on one of the backlight pins, and voila! Better than factory bright, readily available bulbs at the shack for $4 bucks.

It looks great and good work. I have three questions-
The lighting doesn't seem uniform. Is that the differences in bulbs or something else?
Running at ~1V over I wonder how long they will last. I'm sure longer than the car LOL.
Also why does the radio screen have black bubbly/jagged edges?
The lighting doesn't seem uniform. Is that the differences in bulbs or something else?
Running at ~1V over I wonder how long they will last. I'm sure longer than the car LOL.
Also why does the radio screen have black bubbly/jagged edges?
Thread Starter
Pole Position
Joined: Mar 2011
Posts: 308
Likes: 0
From: CA
http://www.radioshack.com/product/in...ductId=2103780
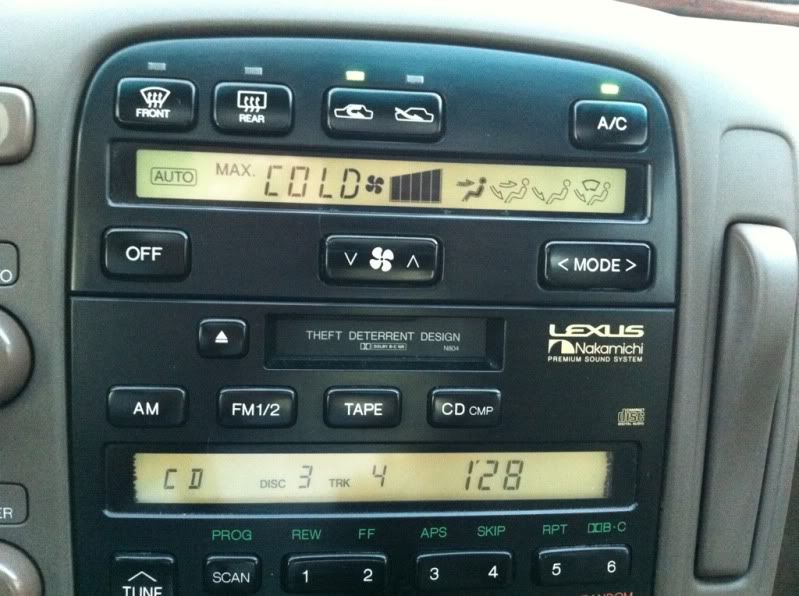
Two per pack.... But like I said, it's not as ease as solder the new bulbs in. There are two connectors between the back and front of the climate control unit, on has 3 wires (- ground, +12 Volt button illumination, +8.5 Volt LCD backlight illumination.) There is a space between the ground, and the two positives, and the LCD backlight is the outermost wire of the two illumination wires, remove that from the connector, then grab a spare piece of wire, connect it to that wire you removed (or use a tester and solder it to the + side of one of the contact points of the backlight bulbs, which is what I prefer as it's easily reversible) and run it to a switched ignition +12 Volt lead, you can remove the motherboard by the four screws at the back of the climate contrl unit and slide the two boards out, there are multiple +12 volt switched leads on the connectors there. I chose the outermost bottom corner contact (bottom left if you're looking from the back of the unit forward), there is an easy solder point on the bottom of the motherboard there, solder it, re-assemble, and you have perfect matching light.
Seriously sounds more complicated than it is, I should have taken pictures, when I have time I may pull it out to do an official DIY.

I kinda get what your saying and how the whole operation works Im sure once I get it all taken apart I will know what has to be re-wired where. But ya pix of just kinda a step by step process would be huge! I'm sure thousands of people will check this out. Great write up though.,. I love this forum!
Trending Topics
Thread Starter
Pole Position
Joined: Mar 2011
Posts: 308
Likes: 0
From: CA
I kinda get what your saying and how the whole operation works Im sure once I get it all taken apart I will know what has to be re-wired where. But ya pix of just kinda a step by step process would be huge! I'm sure thousands of people will check this out. Great write up though.,. I love this forum!

Thread
Thread Starter
Forum
Replies
Last Post
Vadim540i
SC - 1st Gen (1992-2000)
2
May 21, 2010 08:19 PM
dwebb99
SC - 1st Gen (1992-2000)
7
Jan 16, 2009 11:07 PM