DIY: Red/Clear 96-96 Tails
 09-22-07, 08:02 PM
#1
After having had success with my own 95-96 tail clearing, I attracted the attention of CL member SimplyZBes who contacted me via PM to do a tail clearing for him on a pair of 95-96 tails. This time, I decided to take a bunch of photos so that everyone could see the insanity that is involved in clearing the 95-96 tails.
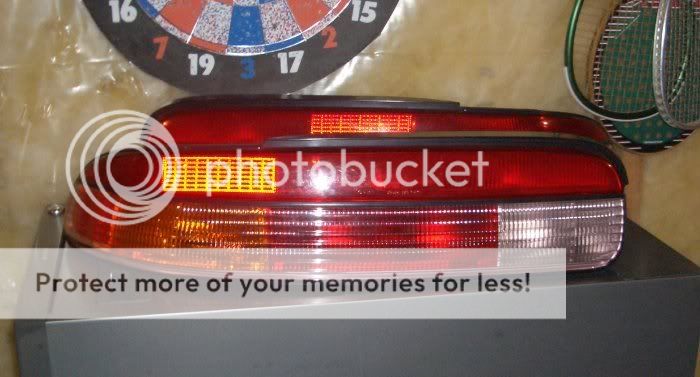
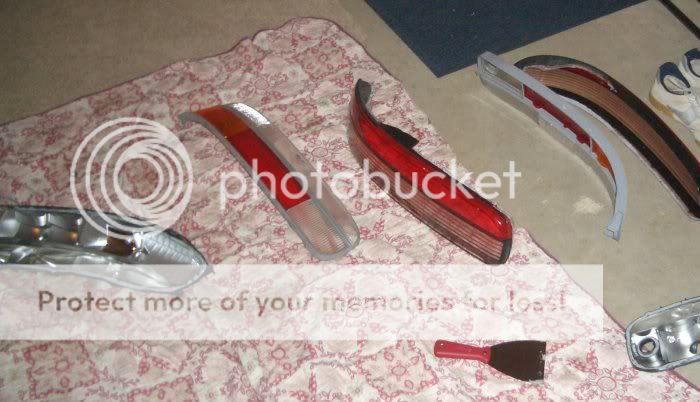
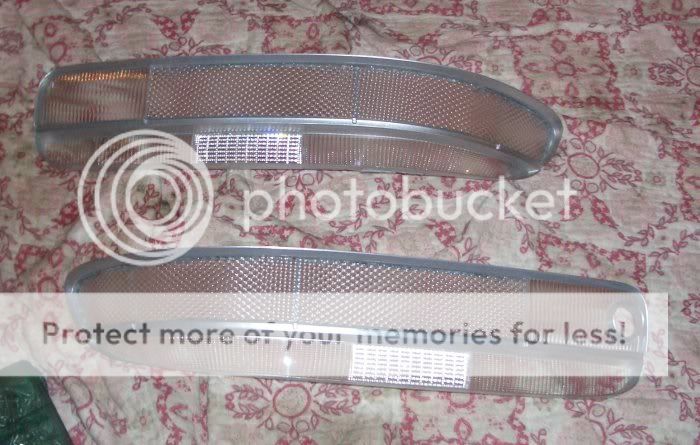
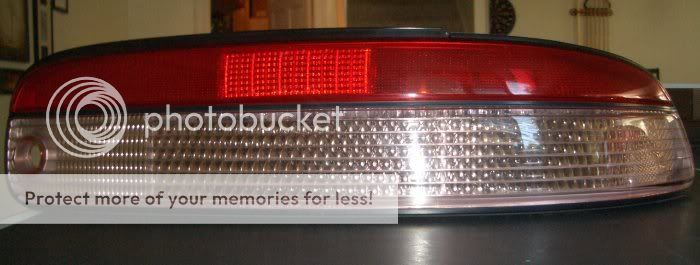
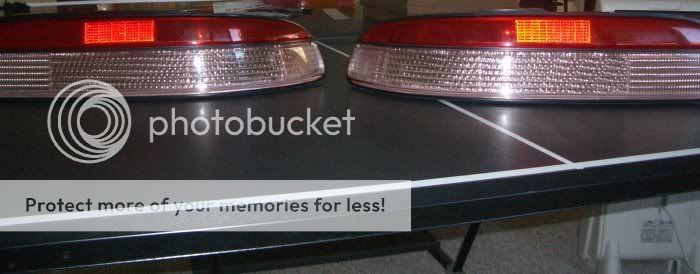
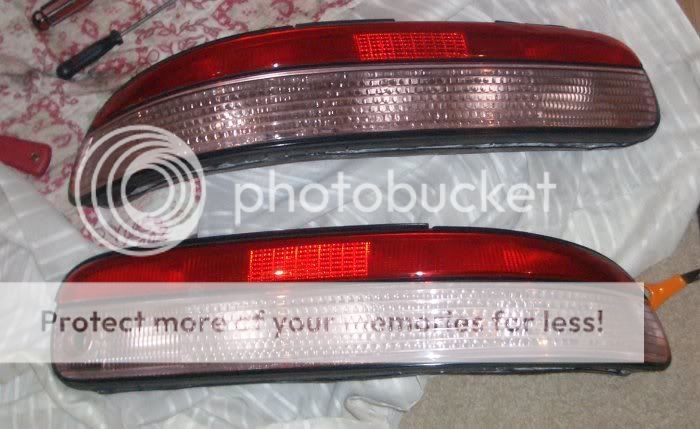
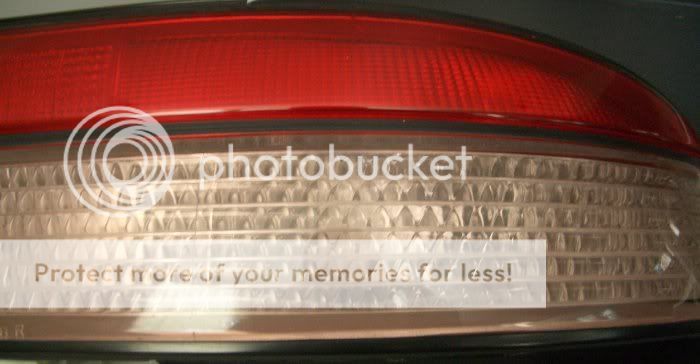
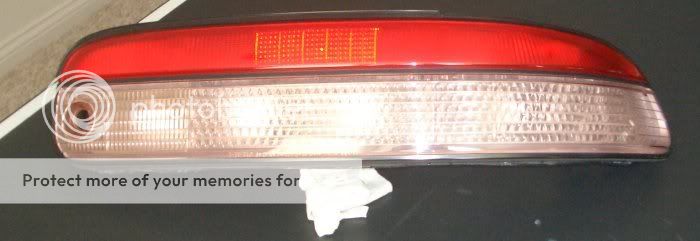
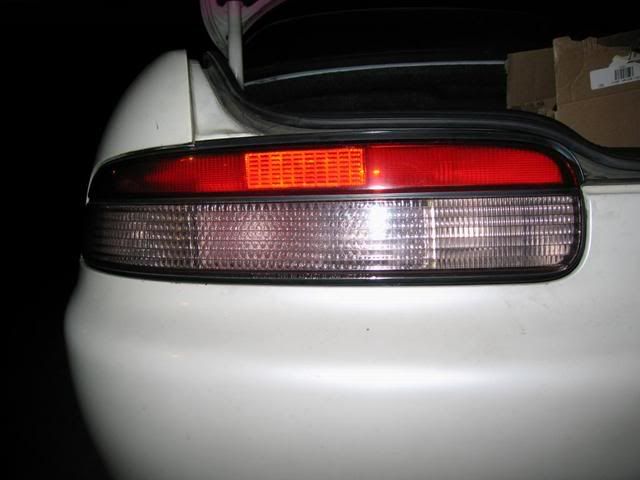
First, you need a pair of 95-96 Tails: the Rainbrow Brite kind. One of these had a loose reflector that was way out of alignement.
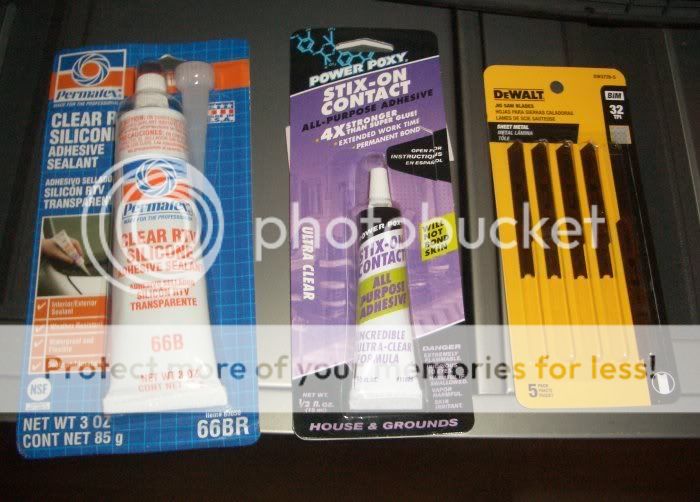
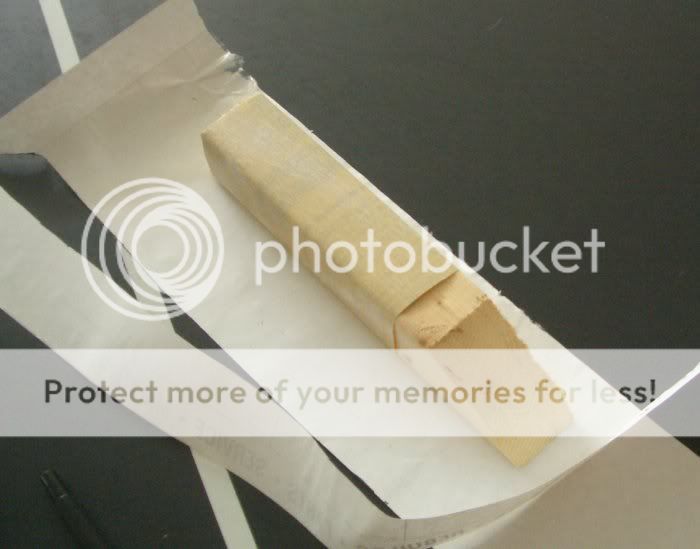
You will also need some Silcone Sealant, some Ultra Clear drying superglue, and some microtooth blades for the saber saw.
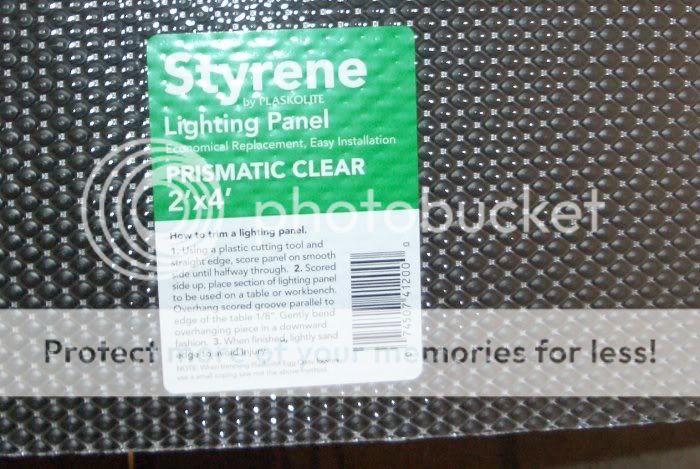
Having gazed at the different varieties of diffuser plastic at Lowe's a number of times, I am convinced that "Prismatic Clear" is the best way to go.
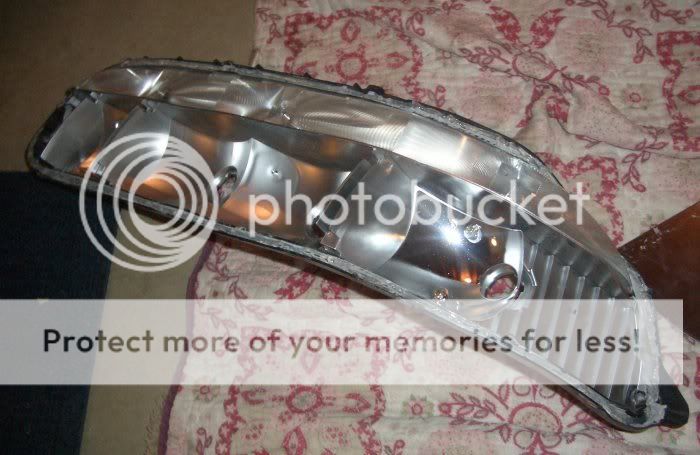
Remove the four screws from the back of each tail. With the oven preheated to 350*F, put one tail in for 3min 30sec. Once it comes out, use a wide metal putty knife to pry the lens from the housing. Because the perimeter of the tail's seal is so long, I simply broke the seal a little loose first (~5min) and put each tail back in the oven for 3min more to allow the housing to more cleanly be separated from the lens.
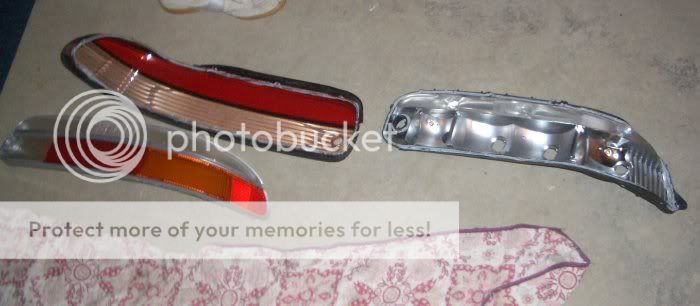
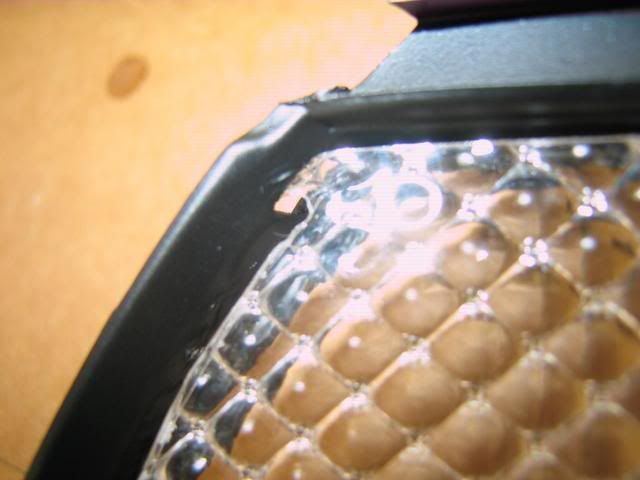
The diffuser comes out with the lens. It is imperative that while the factory sealant is still hot, you remove it from around the lip where the diffuser is recessed into the lens. I used the putty knife to scoop it out cleanly. Without this ring of extra sealant out of the way, you will be unable to remove the diffuser from the lens efficiently.
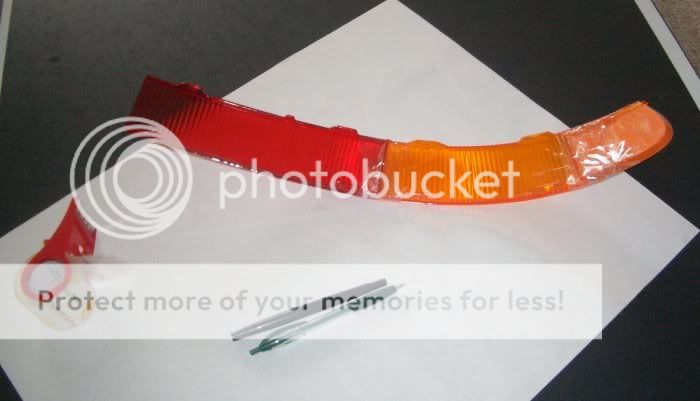
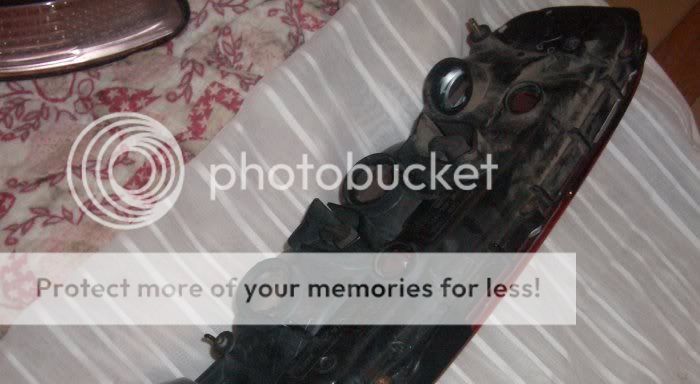
Once you get the diffuser out of the lens, you can remove the rainbow pieces. They snap out in a jiffy. Grab a pencil, some tape, and a big sheet of paper for your template.
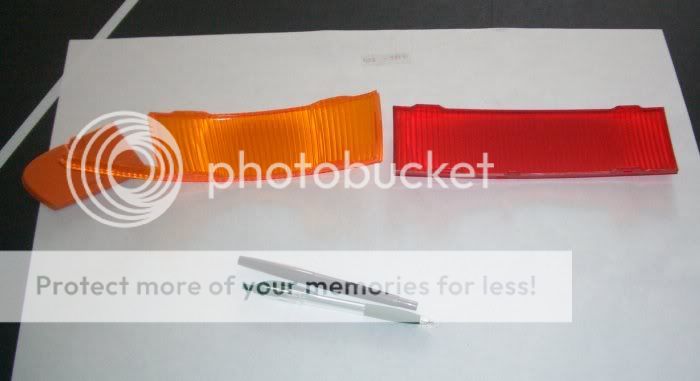
Tape the colored diffuser pieces together. They are tongue and grooved to mesh together at the natural arc of the stock tail light.
First, you need a pair of 95-96 Tails: the Rainbrow Brite kind. One of these had a loose reflector that was way out of alignement.
You will also need some Silcone Sealant, some Ultra Clear drying superglue, and some microtooth blades for the saber saw.
Having gazed at the different varieties of diffuser plastic at Lowe's a number of times, I am convinced that "Prismatic Clear" is the best way to go.
Remove the four screws from the back of each tail. With the oven preheated to 350*F, put one tail in for 3min 30sec. Once it comes out, use a wide metal putty knife to pry the lens from the housing. Because the perimeter of the tail's seal is so long, I simply broke the seal a little loose first (~5min) and put each tail back in the oven for 3min more to allow the housing to more cleanly be separated from the lens.
The diffuser comes out with the lens. It is imperative that while the factory sealant is still hot, you remove it from around the lip where the diffuser is recessed into the lens. I used the putty knife to scoop it out cleanly. Without this ring of extra sealant out of the way, you will be unable to remove the diffuser from the lens efficiently.
Once you get the diffuser out of the lens, you can remove the rainbow pieces. They snap out in a jiffy. Grab a pencil, some tape, and a big sheet of paper for your template.
Tape the colored diffuser pieces together. They are tongue and grooved to mesh together at the natural arc of the stock tail light.
 09-22-07, 08:03 PM
#2
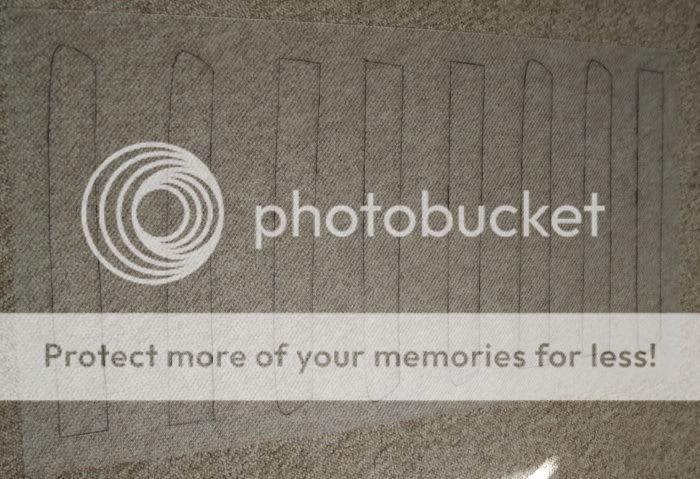
Tape the mass of diffuser pieces to the large piece of paper. The paper will have to curve with the diffuser plastic to give yourself the best stencil possible.
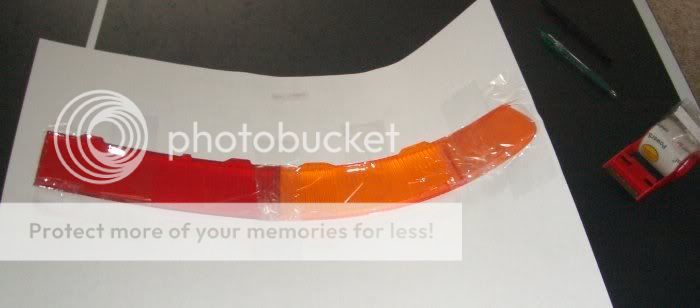
Use your grade school art class skills by rubbing the pencil over the diffuser plastic on the opposite side of the paper to inherit a template of the texture below. This will generate a well-defined edge to the exact size of the diffuser plastic.
Trim the template ever so slightly by trial and error until it sits perfectly where the old red and amber pieces used to be.
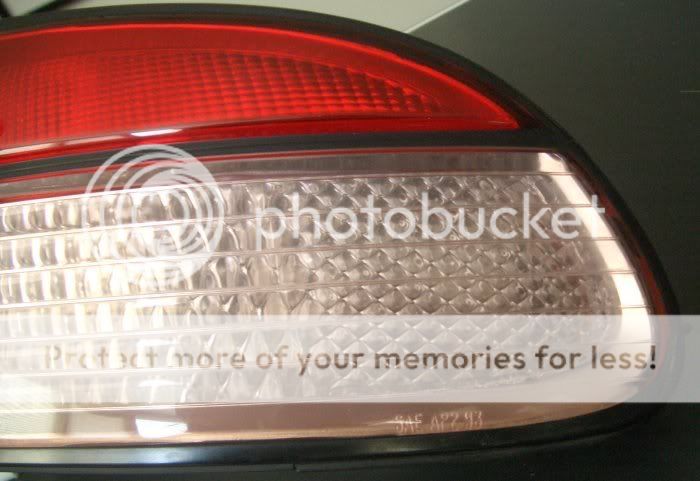
Trace the template on the diffuser plastic. Be certain to flip the template over as the pieces you cut out will be directional. The "Prismatic Clear" Styrene sheet is textured on one side and flat on the other. You will need to make sure you have the flat side flush with the tail light inners so that the superglue can bond during reassembly.
Cut out the templates with the saber saw. Work very slowly as your do this. If you try and cut fast, the plastic will break apart in chunks and ruin your piece of diffuser plastic. I ruined one of the eight templates I had drawn because of this.
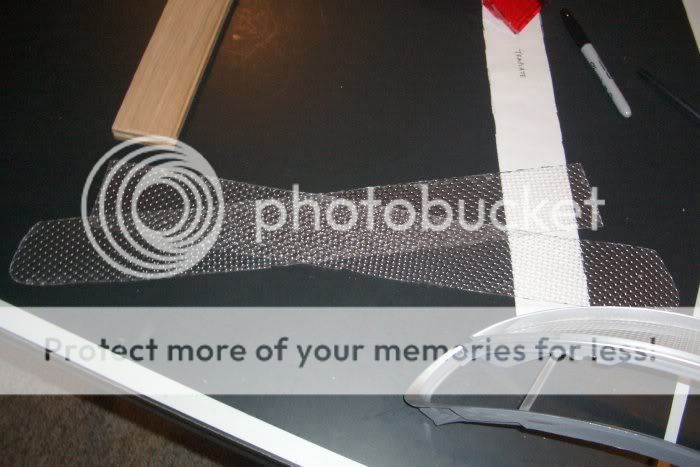
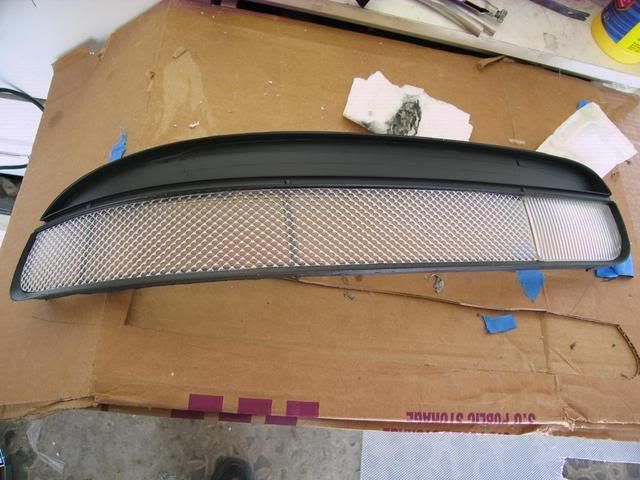
Using the stock diffuser housing insert as a guide, trim the templates you have cut so that they lie entirely flush. I used some 400 grit sandpaper on a small piece of wood for precision.
Now, apply the superglue to the perimeter of the diffuser housing and set the appropriately trimmed styrene pieces into place. Rig up some heavy objects to keep the styrene in contact with the super glue while it sets. Make sure the flat side of the styrene is in contact with the glue for maximum hold.
This might be a good time to get out the cleaning products and go to work on the lenses to make them shine since the superglue will need a couple hours to set.
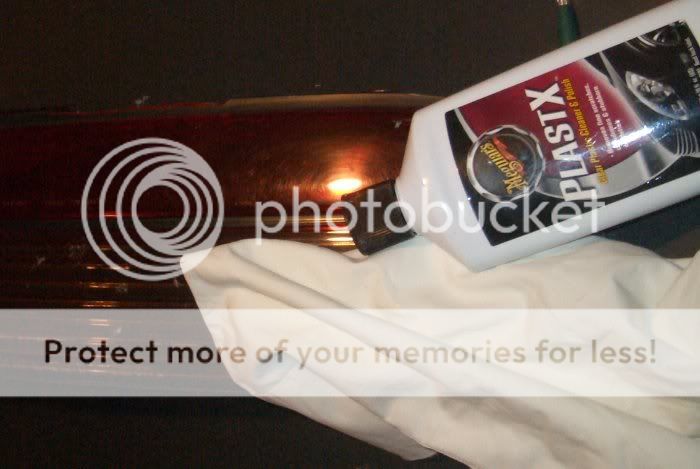
Don't be afraid to get the lenses super clean. This is the last time you will probably ever have your tails open to clean the inside.
Once the initial glue application has set, take away the weight rigs and admire your work. While you are admiring, take another bead of super glue and go around the outside of the styrene to make extra sure that it will be going nowhere.
Use your grade school art class skills by rubbing the pencil over the diffuser plastic on the opposite side of the paper to inherit a template of the texture below. This will generate a well-defined edge to the exact size of the diffuser plastic.
Trim the template ever so slightly by trial and error until it sits perfectly where the old red and amber pieces used to be.
Trace the template on the diffuser plastic. Be certain to flip the template over as the pieces you cut out will be directional. The "Prismatic Clear" Styrene sheet is textured on one side and flat on the other. You will need to make sure you have the flat side flush with the tail light inners so that the superglue can bond during reassembly.
Cut out the templates with the saber saw. Work very slowly as your do this. If you try and cut fast, the plastic will break apart in chunks and ruin your piece of diffuser plastic. I ruined one of the eight templates I had drawn because of this.
Using the stock diffuser housing insert as a guide, trim the templates you have cut so that they lie entirely flush. I used some 400 grit sandpaper on a small piece of wood for precision.
Now, apply the superglue to the perimeter of the diffuser housing and set the appropriately trimmed styrene pieces into place. Rig up some heavy objects to keep the styrene in contact with the super glue while it sets. Make sure the flat side of the styrene is in contact with the glue for maximum hold.
This might be a good time to get out the cleaning products and go to work on the lenses to make them shine since the superglue will need a couple hours to set.
Don't be afraid to get the lenses super clean. This is the last time you will probably ever have your tails open to clean the inside.
Once the initial glue application has set, take away the weight rigs and admire your work. While you are admiring, take another bead of super glue and go around the outside of the styrene to make extra sure that it will be going nowhere.
09-22-07, 08:03 PM
#3
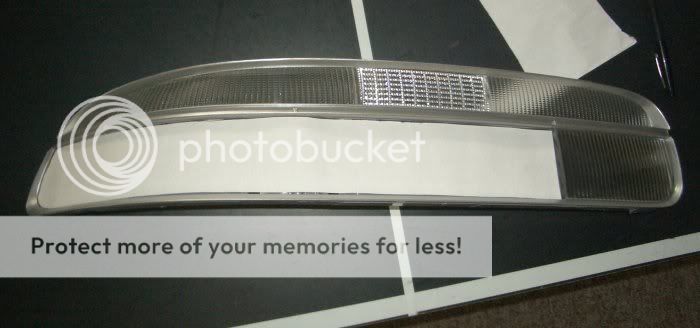
Once the superglue has set again, you can return the diffuser plastic to its recessed position inside the lens. This is extraordinarily easy with the ring of excess sealant removed from before. Now, place a bead of silicone inside the outer lip of the rear tail housing.
Place the lens/diffuser assembly on the housing. Secure the four screws that were previously removed around the perimeter of the housing. When you do this, you should feel the housing pinch tight.
Nevertheless, grab an old sheet/curtain/t-shirt and wrap it around the tail light. Use cable ties to apply additional clamping force on the tail assembly to ensure the silicone sets securely around the entire perimeter.
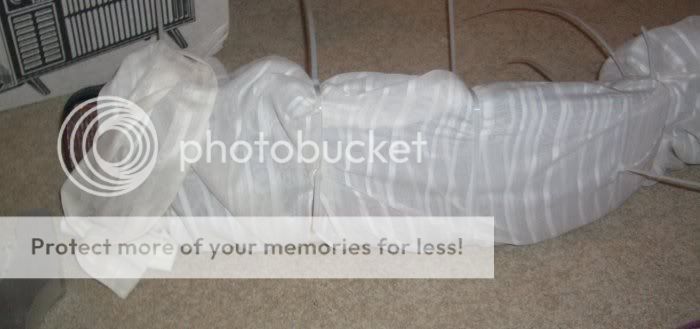
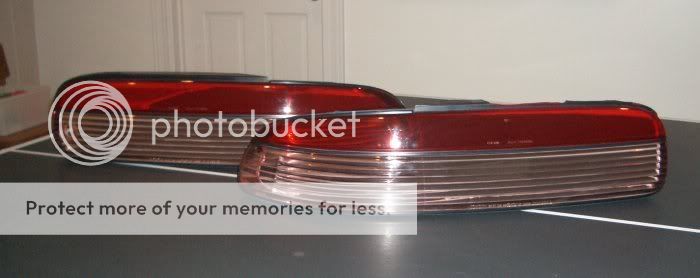
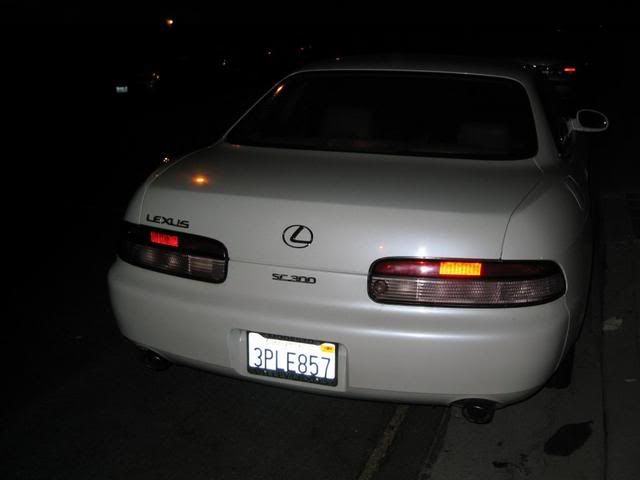
Once the silicone has set, cut the cable ties, discard the old curtain, and admire your work.

All told, this procedure will take you a few hours of active work and a weekend of passive time for letting the silicone and superglue cure properly. But, I would say it is definitely worth it since the tails will look dramatically different for the better.
Place the lens/diffuser assembly on the housing. Secure the four screws that were previously removed around the perimeter of the housing. When you do this, you should feel the housing pinch tight.
Nevertheless, grab an old sheet/curtain/t-shirt and wrap it around the tail light. Use cable ties to apply additional clamping force on the tail assembly to ensure the silicone sets securely around the entire perimeter.
Once the silicone has set, cut the cable ties, discard the old curtain, and admire your work.
All told, this procedure will take you a few hours of active work and a weekend of passive time for letting the silicone and superglue cure properly. But, I would say it is definitely worth it since the tails will look dramatically different for the better.


Trending Topics


 09-22-07, 11:01 PM
#12
Yeah I actually did the same about 3 weeks ago, and I never came around doing a DIY. I essentially did the same thing except for a few things. I used krazy glue the first time, but I noticed that the krazy glue made the plastic foggy and actually ate it up, so I made a better design with tabs...works much better and wont ever come off:
Then instead of leaving the silver trim, I decided to paint it black for a more suddle look:

And The Final Product:
But yeah, essentially the same process.
Also a word of advice:
Get this stuff http://performancenissanparts.com/products/?id=5577
Its a roll of the sealer that is in the tails. My tails got a little foggy even after resealing/reheating with the glue already in then adding silicone. So I decided to reopen it and apply this stuff. No more condensation inside. It works great.
And like i said earlier, made those tabs. If you use krazy glue and its a real hot day outside, the krazy glue might give and then your stuck with a loose clear panel inside your tail and your gonna have to open it up again. Making those tabs on each end only takes like 10 extra minutes and lets u 1, not use the krazy glue and get the foggyness and 2) ensures it wont ever come loose. It actually did come loose when I was putting the tails back in the car and i was so pissed...but I guess it worked out for the better since i made those tabs, and now its great!
Then instead of leaving the silver trim, I decided to paint it black for a more suddle look:
And The Final Product:
But yeah, essentially the same process.
Also a word of advice:
Get this stuff http://performancenissanparts.com/products/?id=5577
Its a roll of the sealer that is in the tails. My tails got a little foggy even after resealing/reheating with the glue already in then adding silicone. So I decided to reopen it and apply this stuff. No more condensation inside. It works great.
And like i said earlier, made those tabs. If you use krazy glue and its a real hot day outside, the krazy glue might give and then your stuck with a loose clear panel inside your tail and your gonna have to open it up again. Making those tabs on each end only takes like 10 extra minutes and lets u 1, not use the krazy glue and get the foggyness and 2) ensures it wont ever come loose. It actually did come loose when I was putting the tails back in the car and i was so pissed...but I guess it worked out for the better since i made those tabs, and now its great!
Last edited by evileagle; 09-22-07 at 11:08 PM.

