DIY: How to Make the Stock Grill Fit Over an Aftermarket Sub in your SC400
 02-08-13, 08:16 AM
#1
Driver School Candidate
Thread Starter
iTrader: (1)

Join Date: Oct 2011
Location: WA
Posts: 13
Likes: 0
Received 0 Likes
on
0 Posts
Assuming you have followed previous tutorials on using the stock subwoofer basket to mount your aftermarket sub, you've stumbled across the dilemma of how to cleanly fit the stock grill over the newly mounted aftermarket sub.
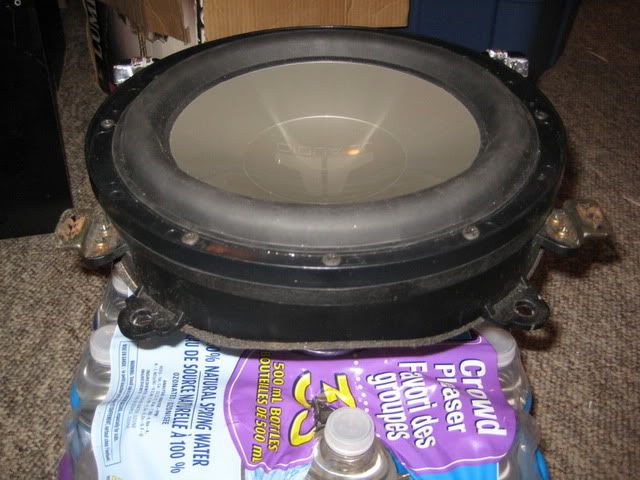
This tutorial will show you a quick and easy way to make this work with a great fit and finish.
Step 1: Prepare tools & parts
-Dremel
-Drill
-Pliers
-Screwdriver
-Super Glue
-Stanley ~1 inch Corner Brace (pack with screws)
-Stanley ~2 inch Mending Plate (pack with screws)
-Speaker Grill Carpet
-Spray on adhesive
-Packaging Foam (squishy foam, not the rigid foam)
-Butyl Sound Deadener
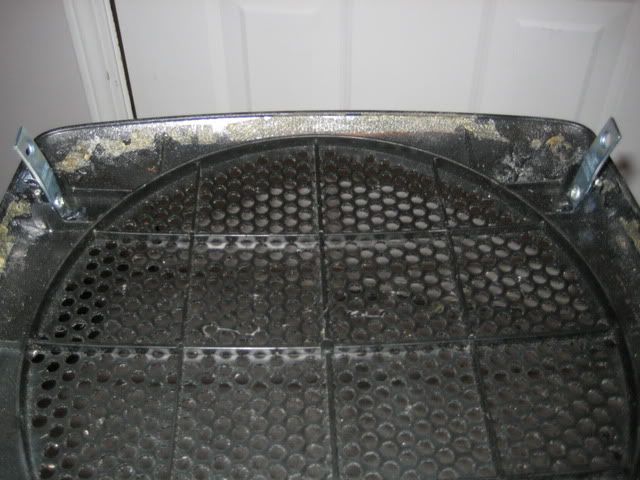
Step 2: Remove old faded carpet from sub grill. You may want to tackle the other rear speaker grills at this time as well. Dremel sand down the inside raised surfaces within the circular edges of the sub grill to allow for more excursion room for the rubber surround of your sub. Don't sand down too much, you want to leave some to ensure the rigidity of the grill.
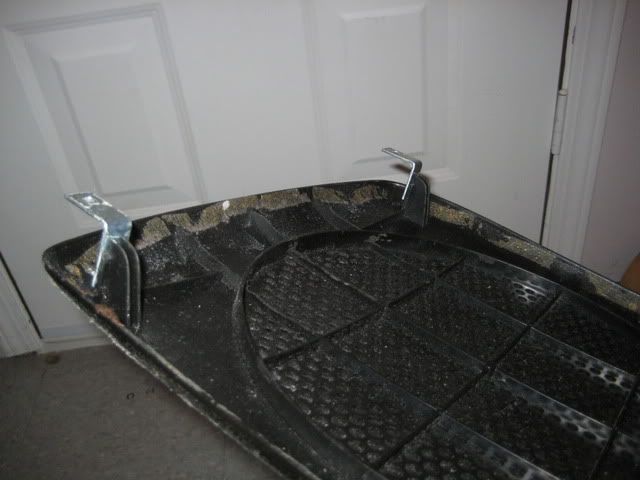
Step 3: Cut off the 90 degree bend with the Dremel tool on each rear grill mounting arm to make a flush mounting surface for the Corner Braces.
Step 4: Test fit the Corner Braces to ensure a flush mounting surface and mark your holes to pre-drill. Then drill small holes for your mounting screws.
Step 5: Apply super glue to both mounting surfaces. Then screw on each Corner Brace.
Step 6: On the front mounting posts of the grill, cut off the protruding round pieces of plastic leaving a flat mounting surface for the Mending Plates.
Step 7: Put a slight 3 degree bend on the Mending Plates in order for them to align with the subwoofer basket receiving clips.
Step 8: Mounting will be on the inside of the front mounting posts. Mark & pre-drill holes.
Step 9: Super glue & screw.
Step 10: Test fit bracket on subwoofer basket while mounted on the rear deck. Ensure proper fitment. Make re-adjustments as necessary.
Step 11: Cut grill cloth to desired size.
Step 12: Spray on adhesive on the top of the grill. Quickly stretch grill cloth over grill. Spray edges of underside and fold cloth over. Cut off excess material.
Step 13: Repeat Step 12 for other speaker grills on rear deck.
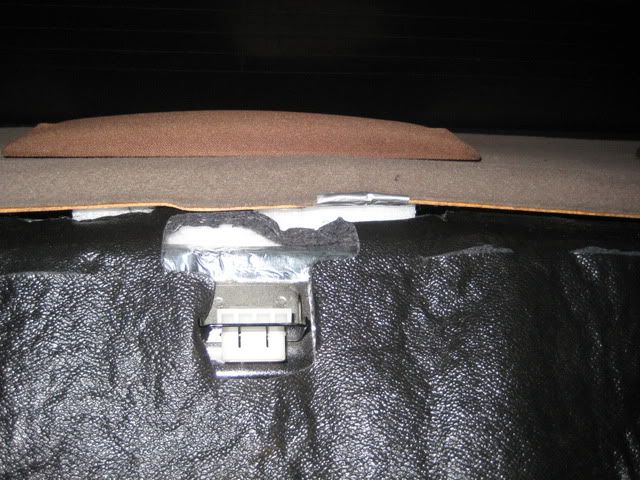
Step 14: In order to prevent vibration, place Butyl Sound Deadener in the receiving clips of the subwoofer basket in order to ensure no metal on metal contact. For the front clips, with the right amount of butyl this will also ensure that the grill will stay in place.
Step 15: Place packaging foam underneath the the rear deck cover. Cut foam and make adjustments until desired flush height is achieved.
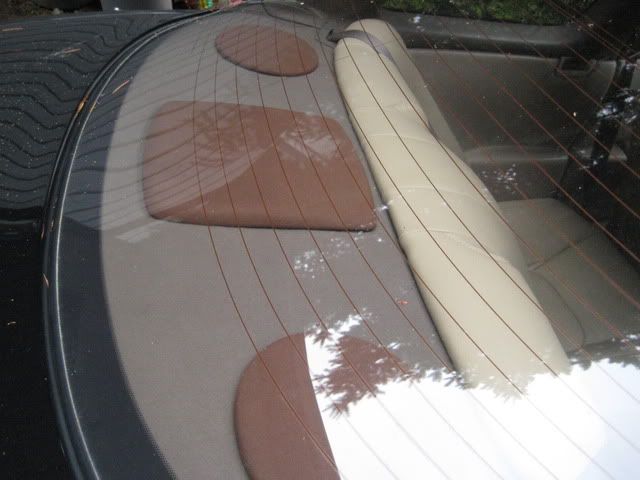
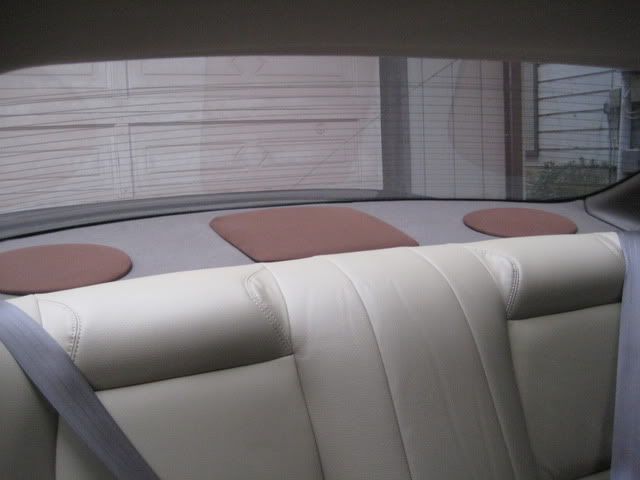
Step 16: Before installing backseat, test stereo for vibrations and make adjustments as necessary. If you already haven't done so prior to this tutorial, I recommend covering the entire rear deck metal surface with Butyl Sound Deadener.
Step 17: Please keep in mind, results may vary depending on your subwoofer specifications. Be patient in making adjustments for desired fit and finish. Once satisfied, reinstall the backseat and enjoy the results of your hard work.
This tutorial will show you a quick and easy way to make this work with a great fit and finish.
Step 1: Prepare tools & parts
-Dremel
-Drill
-Pliers
-Screwdriver
-Super Glue
-Stanley ~1 inch Corner Brace (pack with screws)
-Stanley ~2 inch Mending Plate (pack with screws)
-Speaker Grill Carpet
-Spray on adhesive
-Packaging Foam (squishy foam, not the rigid foam)
-Butyl Sound Deadener
Step 2: Remove old faded carpet from sub grill. You may want to tackle the other rear speaker grills at this time as well. Dremel sand down the inside raised surfaces within the circular edges of the sub grill to allow for more excursion room for the rubber surround of your sub. Don't sand down too much, you want to leave some to ensure the rigidity of the grill.
Step 3: Cut off the 90 degree bend with the Dremel tool on each rear grill mounting arm to make a flush mounting surface for the Corner Braces.
Step 4: Test fit the Corner Braces to ensure a flush mounting surface and mark your holes to pre-drill. Then drill small holes for your mounting screws.
Step 5: Apply super glue to both mounting surfaces. Then screw on each Corner Brace.
Step 6: On the front mounting posts of the grill, cut off the protruding round pieces of plastic leaving a flat mounting surface for the Mending Plates.
Step 7: Put a slight 3 degree bend on the Mending Plates in order for them to align with the subwoofer basket receiving clips.
Step 8: Mounting will be on the inside of the front mounting posts. Mark & pre-drill holes.
Step 9: Super glue & screw.
Step 10: Test fit bracket on subwoofer basket while mounted on the rear deck. Ensure proper fitment. Make re-adjustments as necessary.
Step 11: Cut grill cloth to desired size.
Step 12: Spray on adhesive on the top of the grill. Quickly stretch grill cloth over grill. Spray edges of underside and fold cloth over. Cut off excess material.
Step 13: Repeat Step 12 for other speaker grills on rear deck.
Step 14: In order to prevent vibration, place Butyl Sound Deadener in the receiving clips of the subwoofer basket in order to ensure no metal on metal contact. For the front clips, with the right amount of butyl this will also ensure that the grill will stay in place.
Step 15: Place packaging foam underneath the the rear deck cover. Cut foam and make adjustments until desired flush height is achieved.
Step 16: Before installing backseat, test stereo for vibrations and make adjustments as necessary. If you already haven't done so prior to this tutorial, I recommend covering the entire rear deck metal surface with Butyl Sound Deadener.
Step 17: Please keep in mind, results may vary depending on your subwoofer specifications. Be patient in making adjustments for desired fit and finish. Once satisfied, reinstall the backseat and enjoy the results of your hard work.


Thread
Thread Starter
Forum
Replies
Last Post
Solo_D33A
Lexus Audio, Video, Security & Electronics
2
03-26-08 05:17 PM