
DIY ***Official Aristo to TT Camshaft uninstall/install
 03-19-12, 08:40 PM
#1
***DISCLAIMER***
I am in now way, shape, or form, responsible for any damages that occur to your car because of this write up. No matter if your car catches on fire, or if you manage to snap a camshaft. I am not liable for any damages...k? Thanks
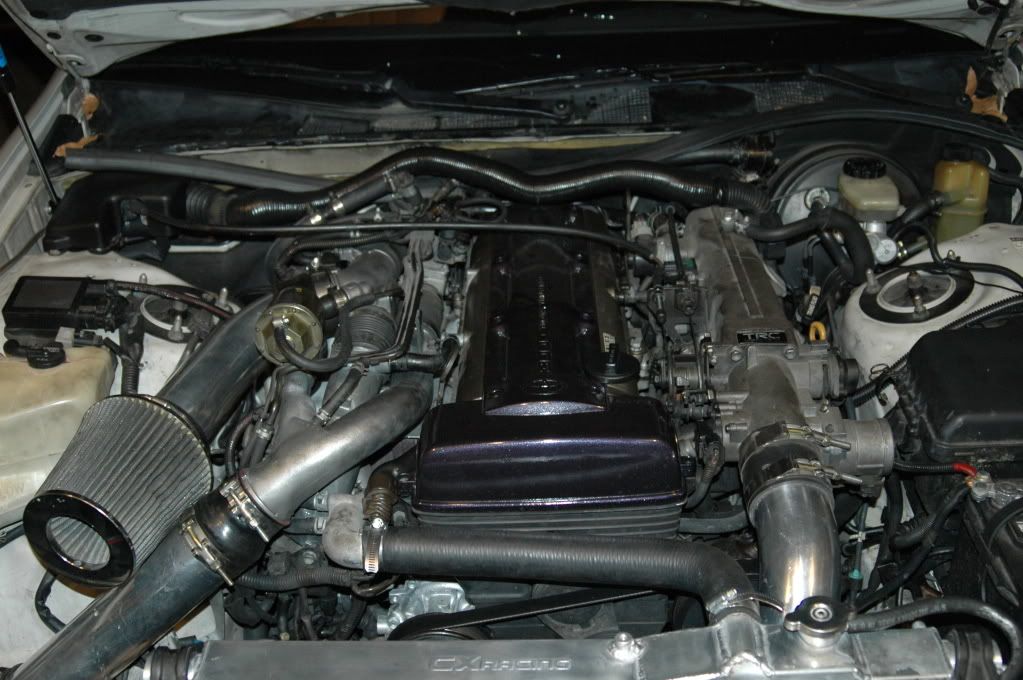
Alright guys, I currently have an Aristo 2JZGTE and wanted the TT cams which are known to be slightly bigger. I bought the cams from someone on Supraforums. Here is the DIY I did for everyone. Let me know if you have any questions...
Tools needed:
Torque Wrench
Ratchet
10mm, 12mm, 17mm
Pliers
Valve Cover gaskets (optional I guess)
Cam Seals (optional)
PCV Valve (optional)
Allen Wrenches
Paper clip
Time: This took me 3 hours, but you have to remember, I was taking pictures too. I imagine you could get this done in 2 hours if you had this DIY
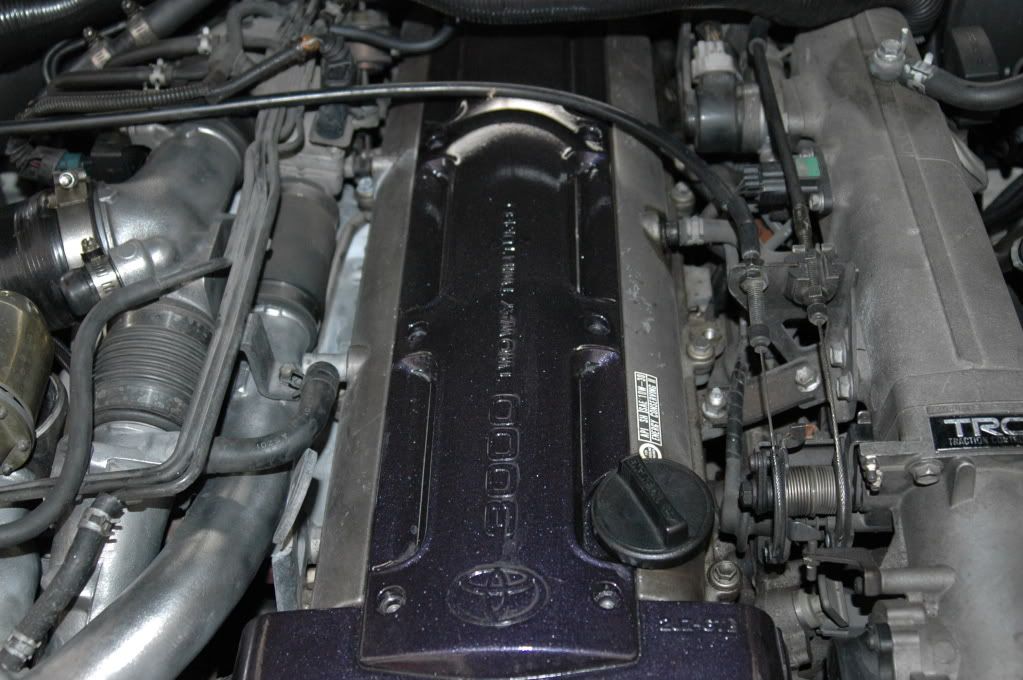
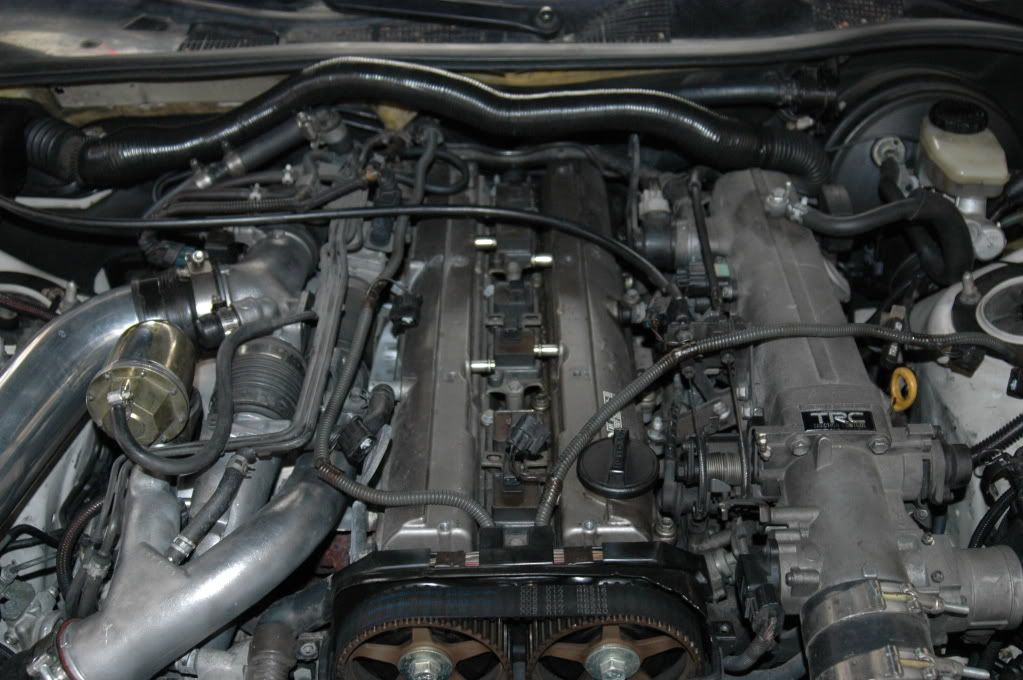
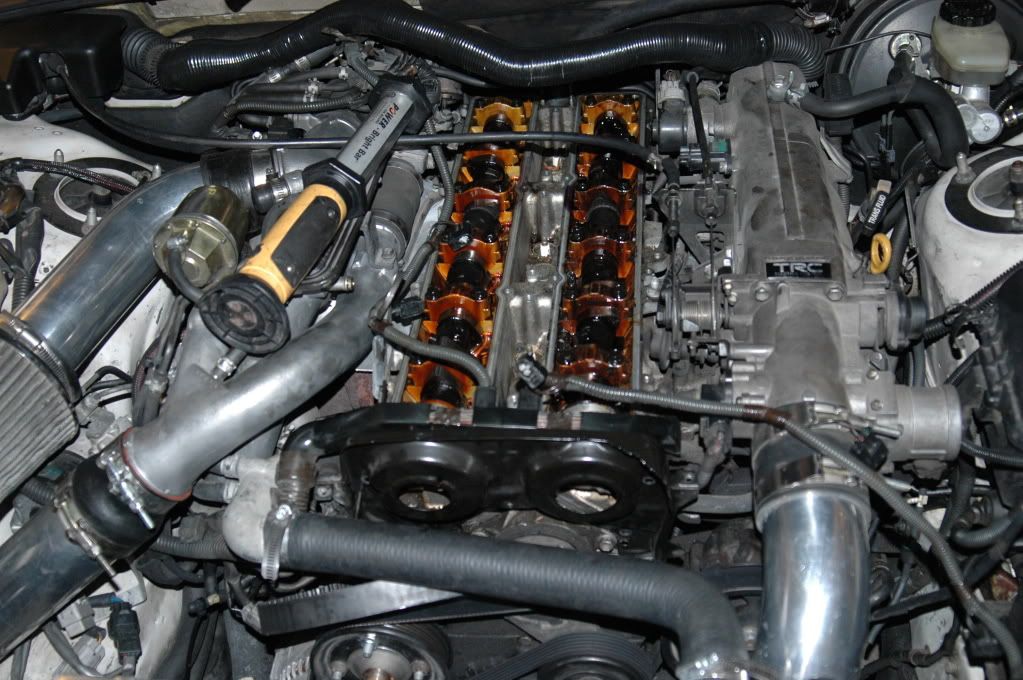
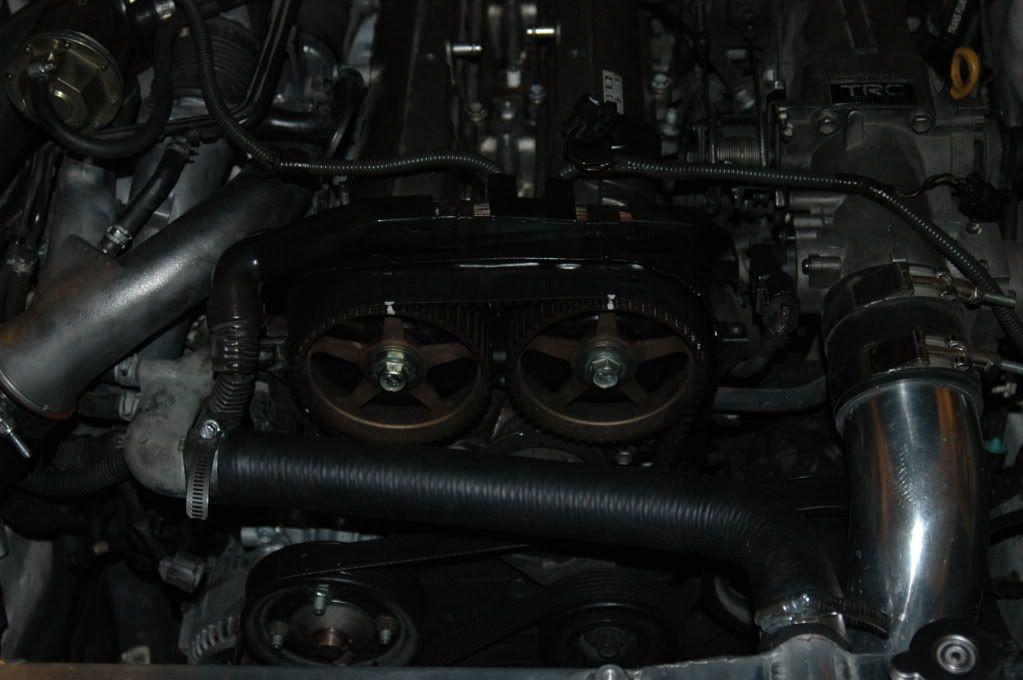
Step 1: Remove coil pack cover using the allen wrench
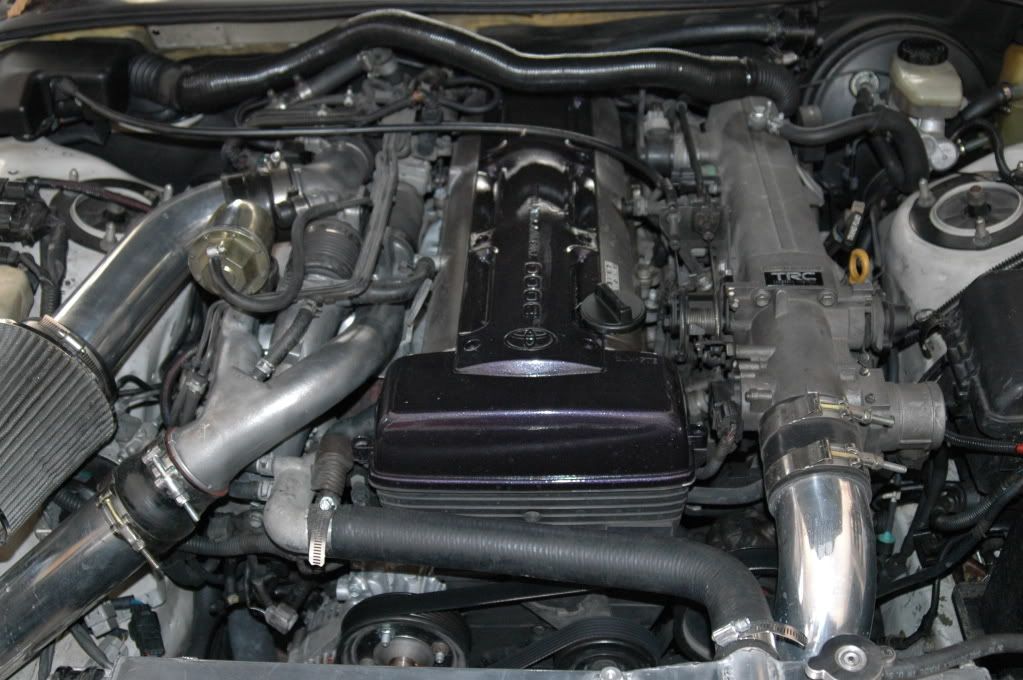
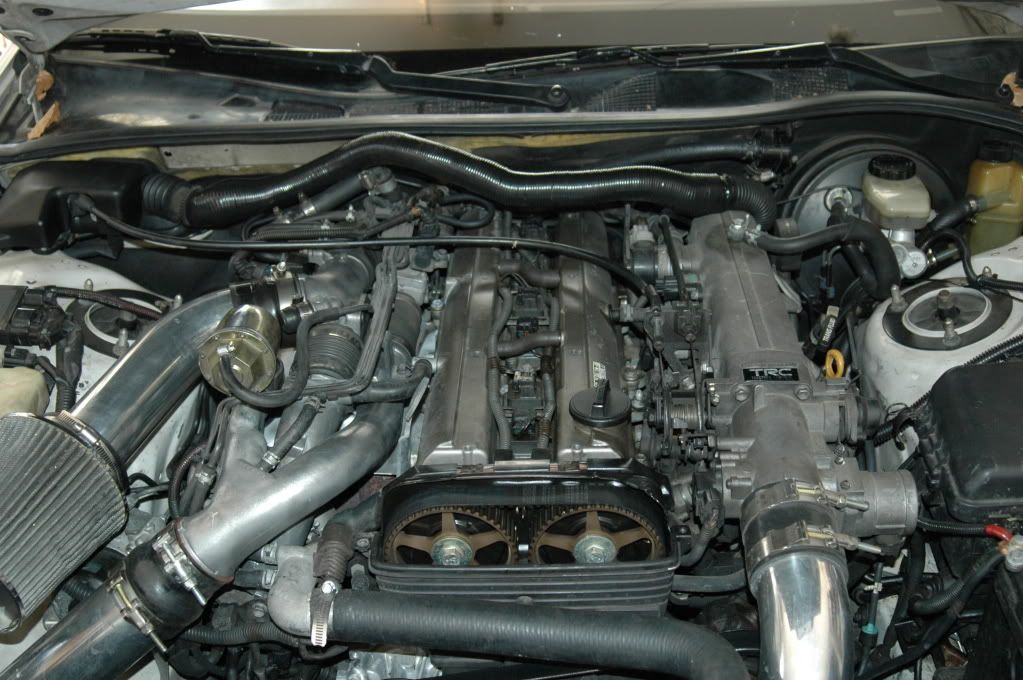
Step 2: Remove the two rubber cross over hoses and coil packs
Make sure to organize yourself when taking everything apart, to make sure you know everything goes back in
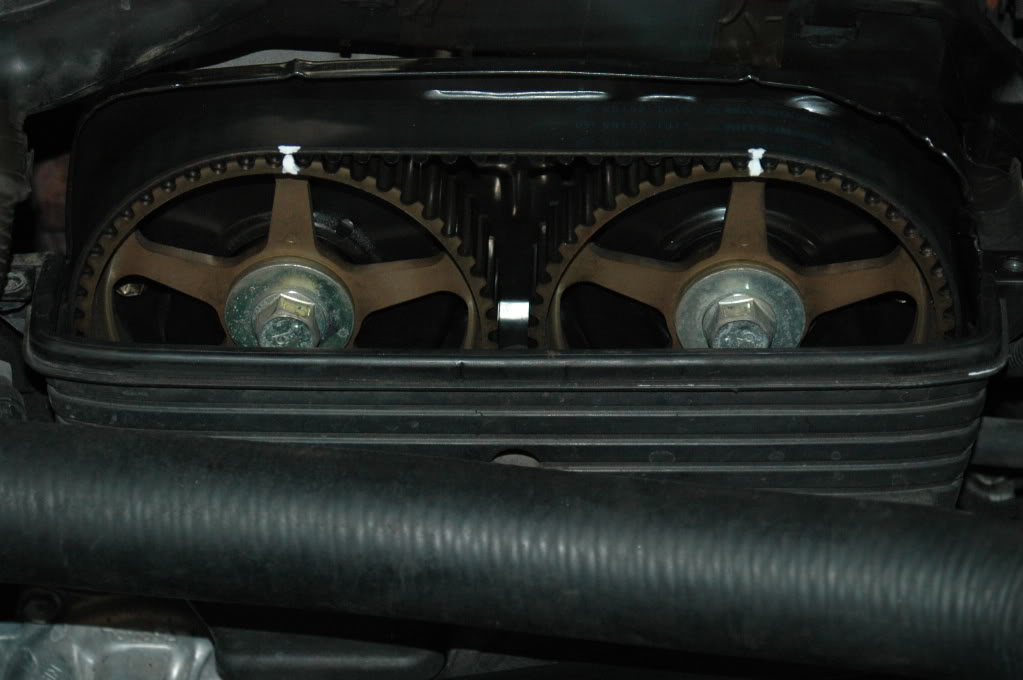
Step 3: Set timing to top dead center "TDC" just in case.

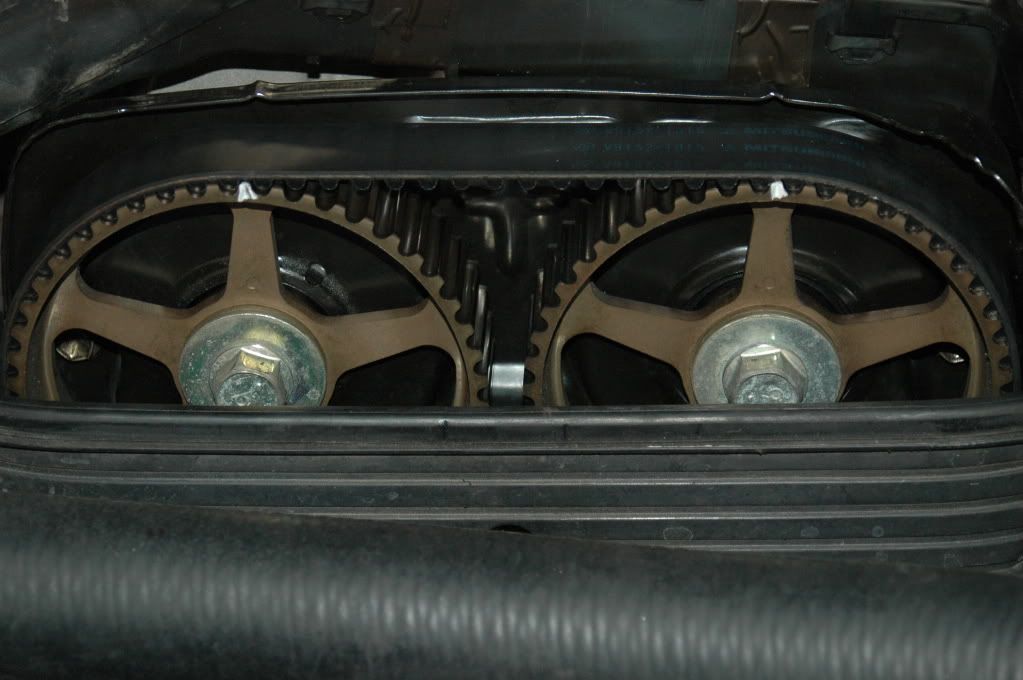
Step 4: Mark the timing belt where the notches are, to insure nothing can go wrong. This is precautionary, and in my opinion, necessary.
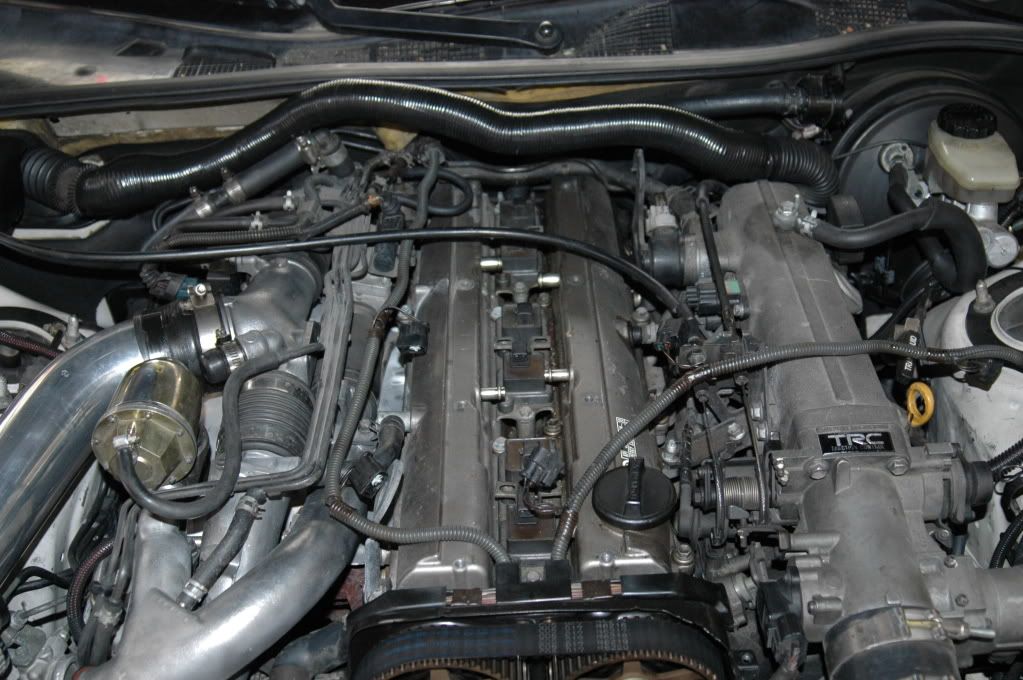
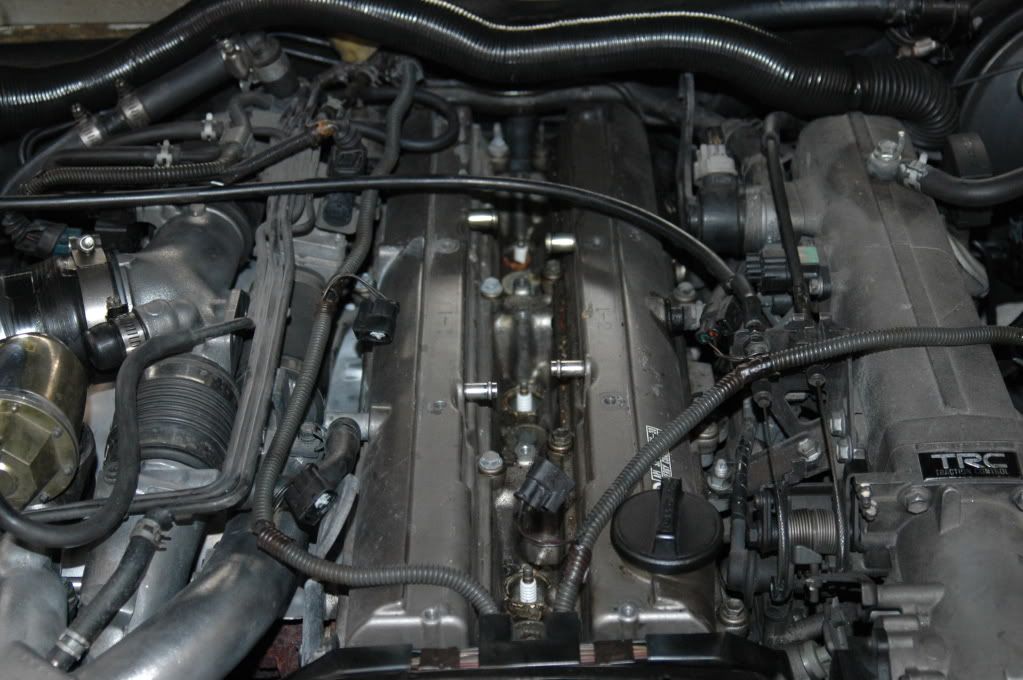
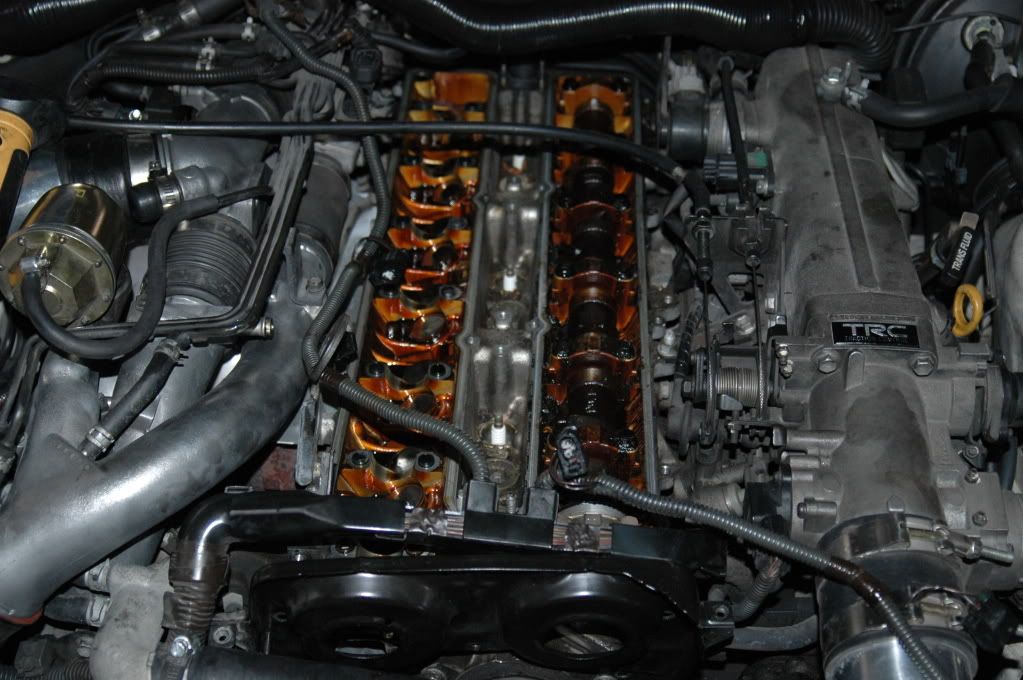
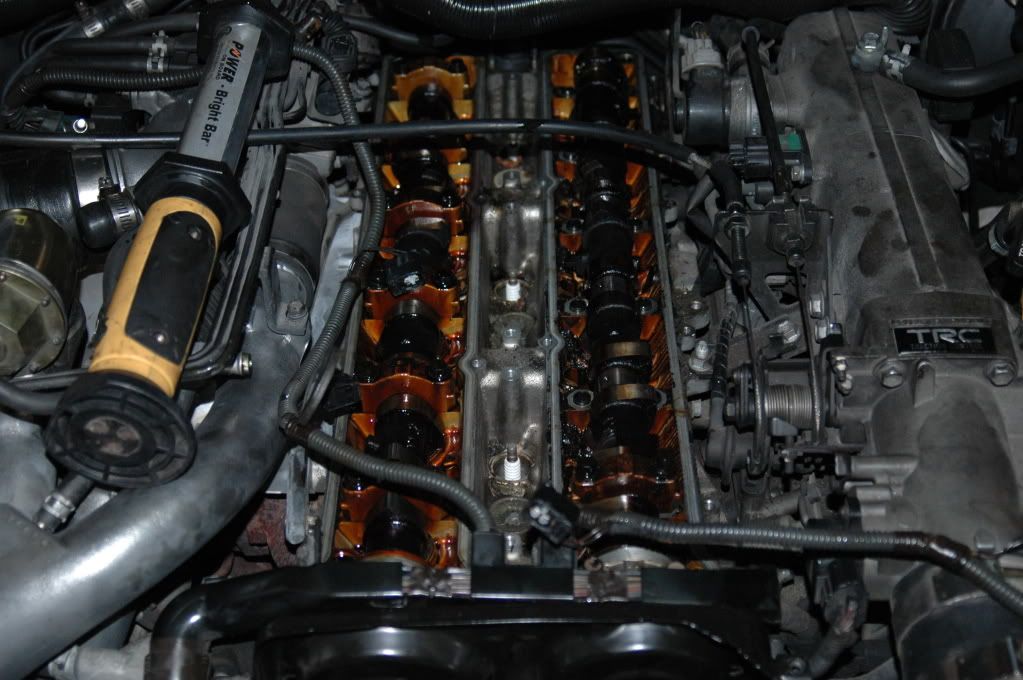
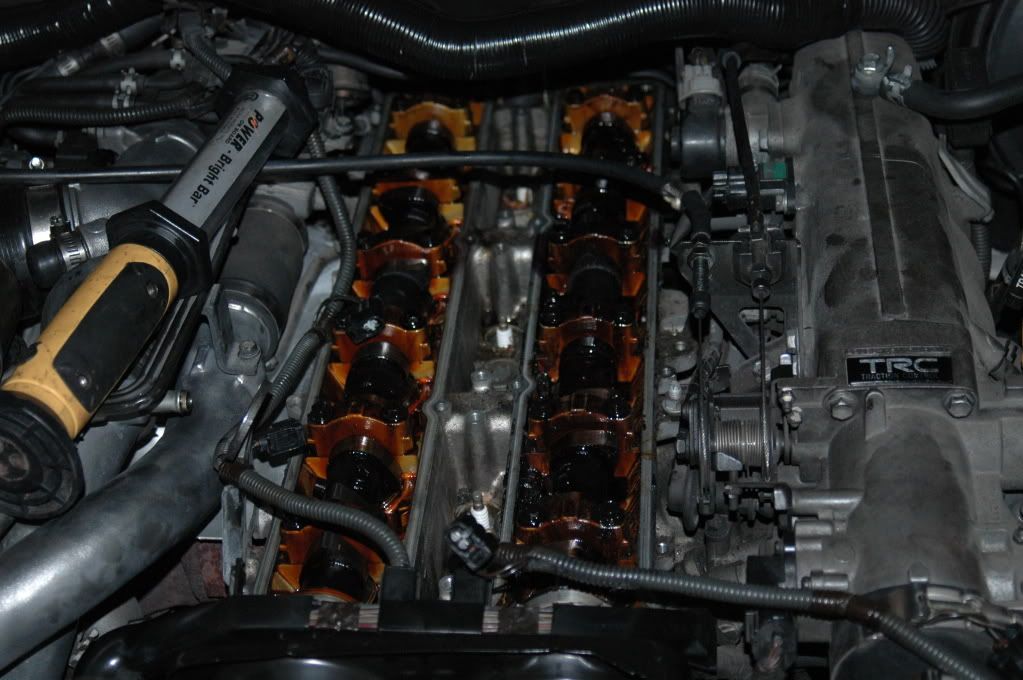
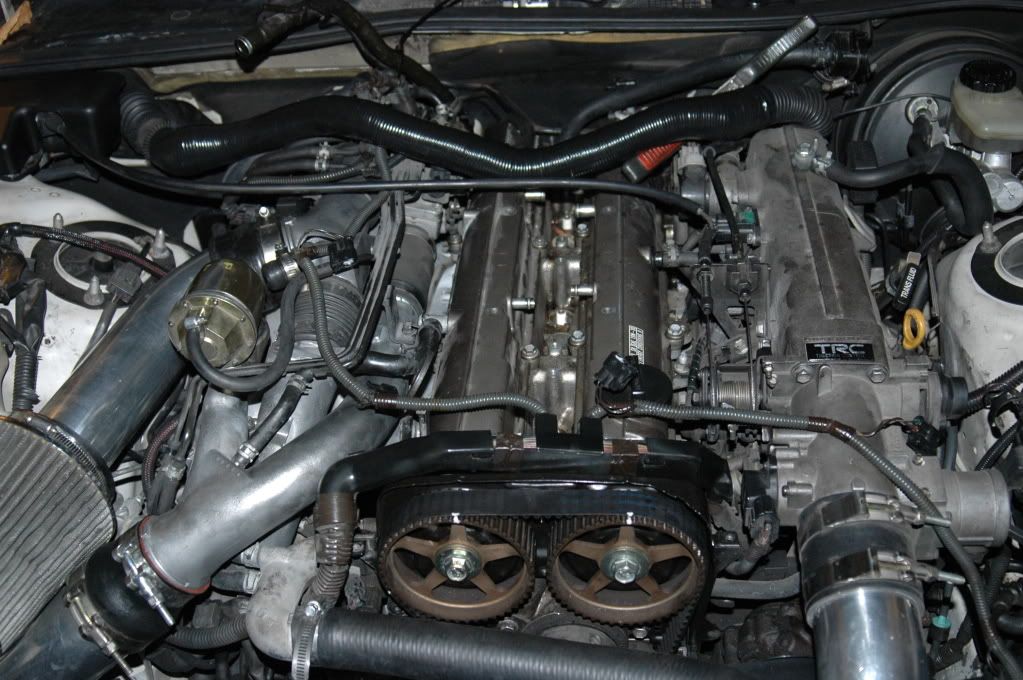
Step 5: Remove Valve cover
Remove the valve cover using a 10mm socket for all but 2 of the nuts. The two nuts on the back I had to use a 10mm wrench to get to.
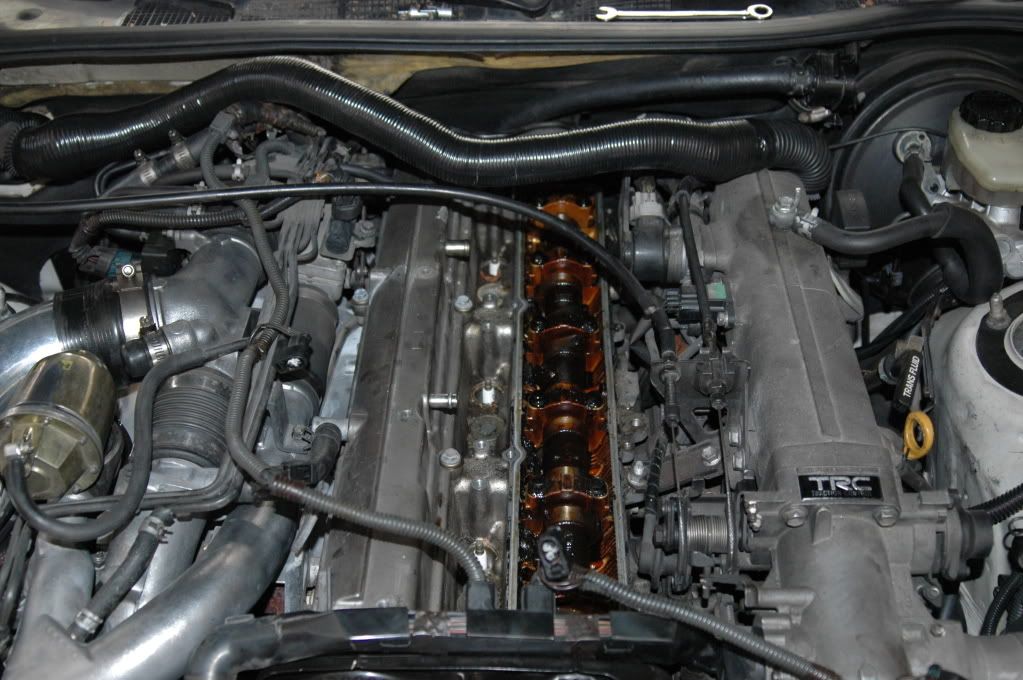
Step 6: Locate what the cam says rather it is camshaft 1 or 2. Make sure not to mix the two up. Work on one side at a time.
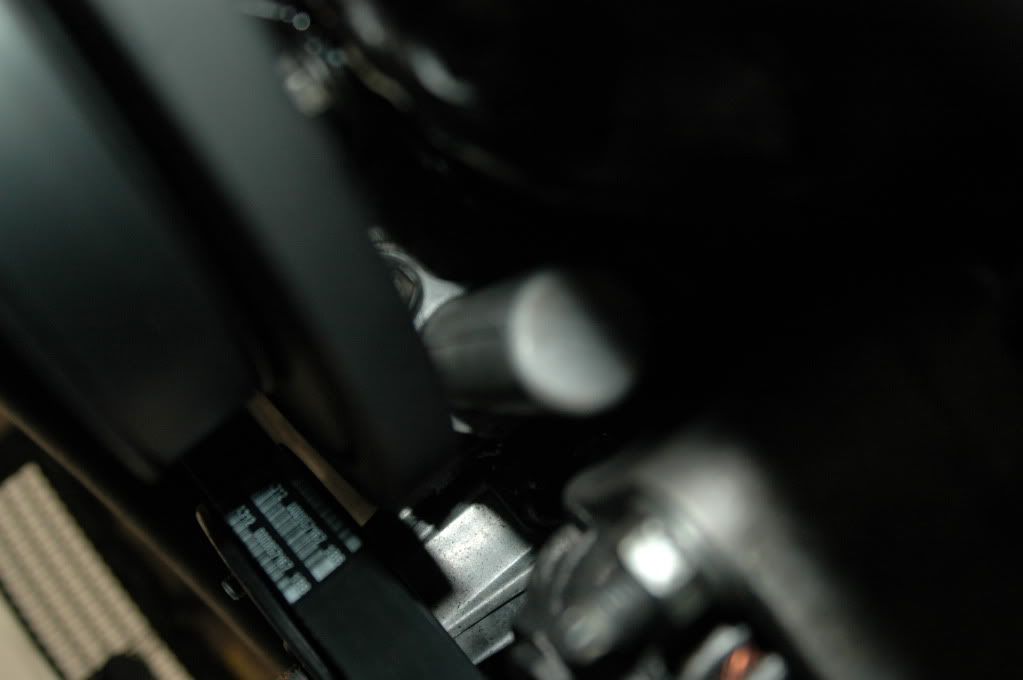
Step 7: (sorry the pictures suck in this part)
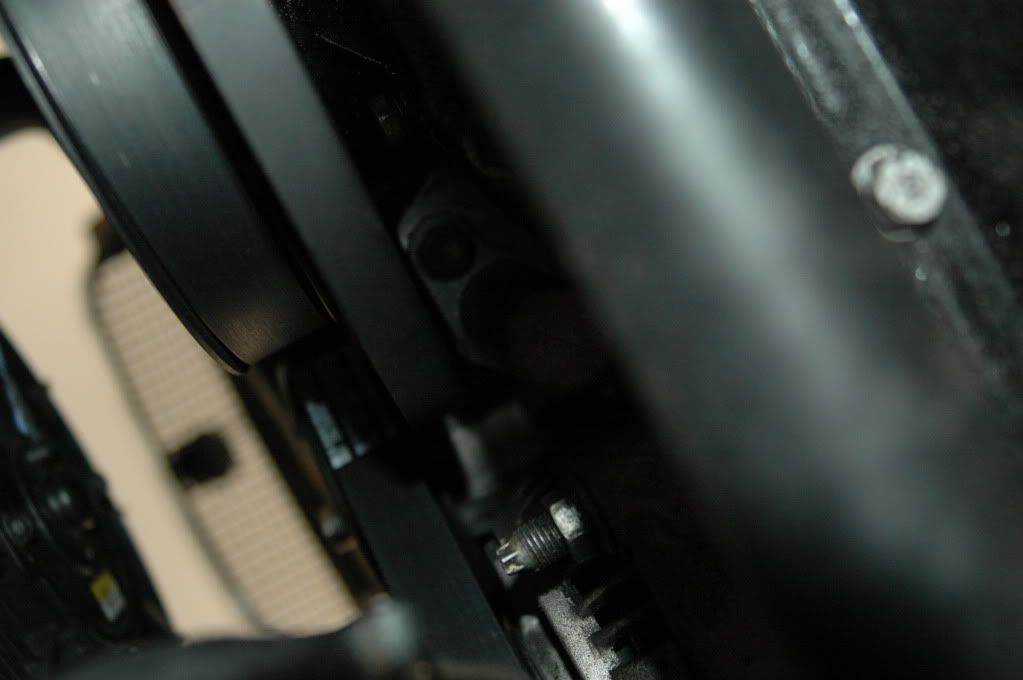
Jack the car up and look right behind the alternator in between the oil pan. You will see the timing belt tensioner. I did my best to take a picture of it, but it was hard to get a picture of. Before loosening the bolts, stick a paper clip, or some type of small round metal into the hole that is already there (close to the block, you will see it, it is black). This will insure the tensioner does not extend considering you want to release tension on the timing belt. Now you can start to unscrew the two 12mm bolts. DO NOT REMOVE THESE BOLTS. You only need to loosen them enough to where you can slide the timing belt off of the cam gears.
Step 8: Remove the timing belt
Slide the timing belt off of the two cam gears. This is pretty simple, do both sides at once.
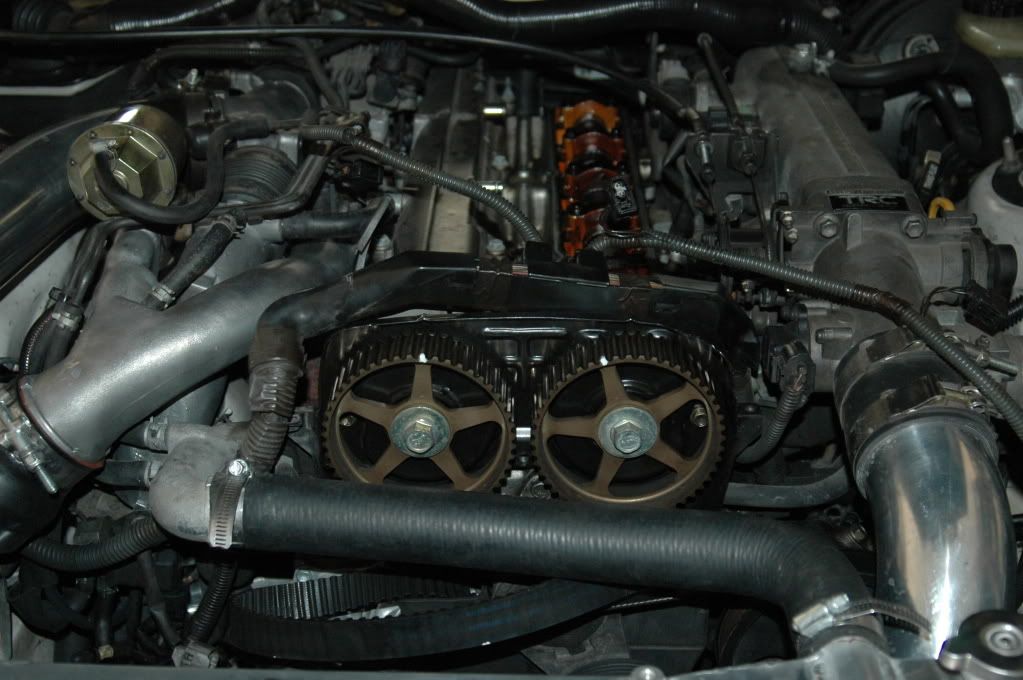
Step 9: Remove Cam Gears
Remove the cam gears using a 17mm socket. An impact wrench is helpful, or you can take vise grips and hold the camshaft (in the designated area) or use the correct size wrench. I used vise grips haha
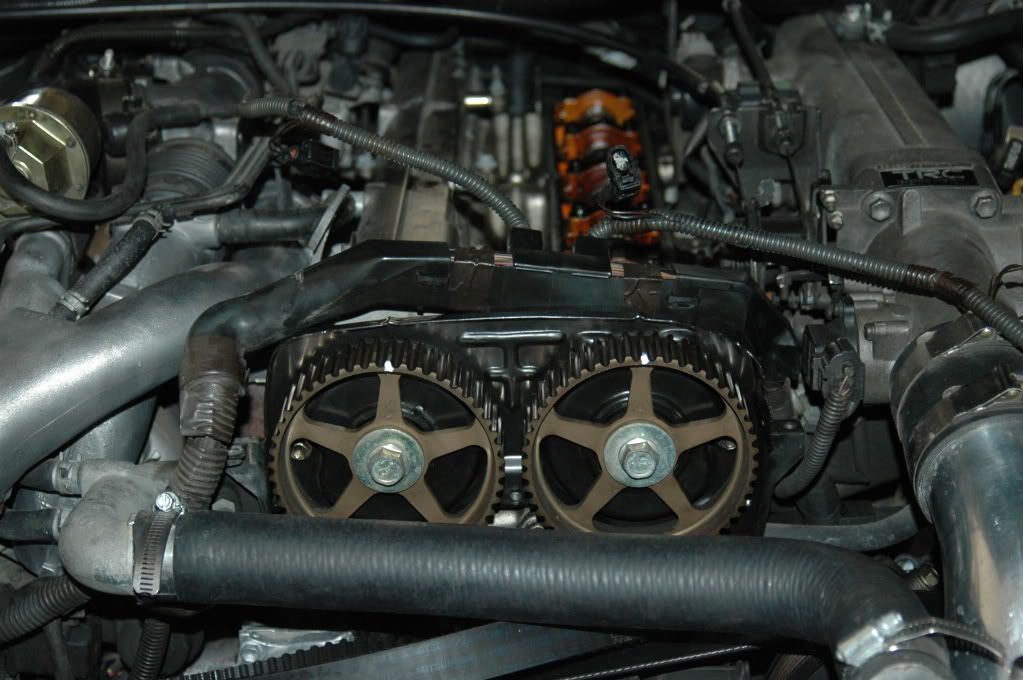
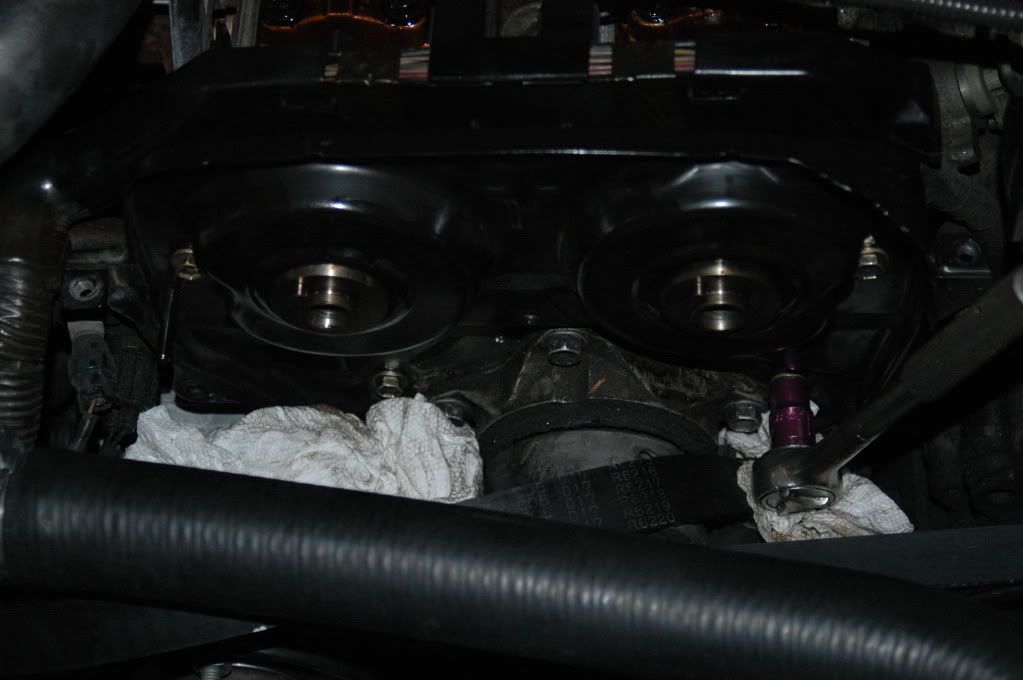
Step 10: Remove metal black cover that is behind the cam gears
You must remove the black metal plate that is behind the cam gears. It comes off with 4 10mm bolts. MAKE SURE NOT TO DROP THEM!!! they are small and short, so make sure not to drop them else the crank gear will eat them, and you will be VERY sad....I didn't actually remove mine, I just took all of the bolts out and moved it to the side when necessary.
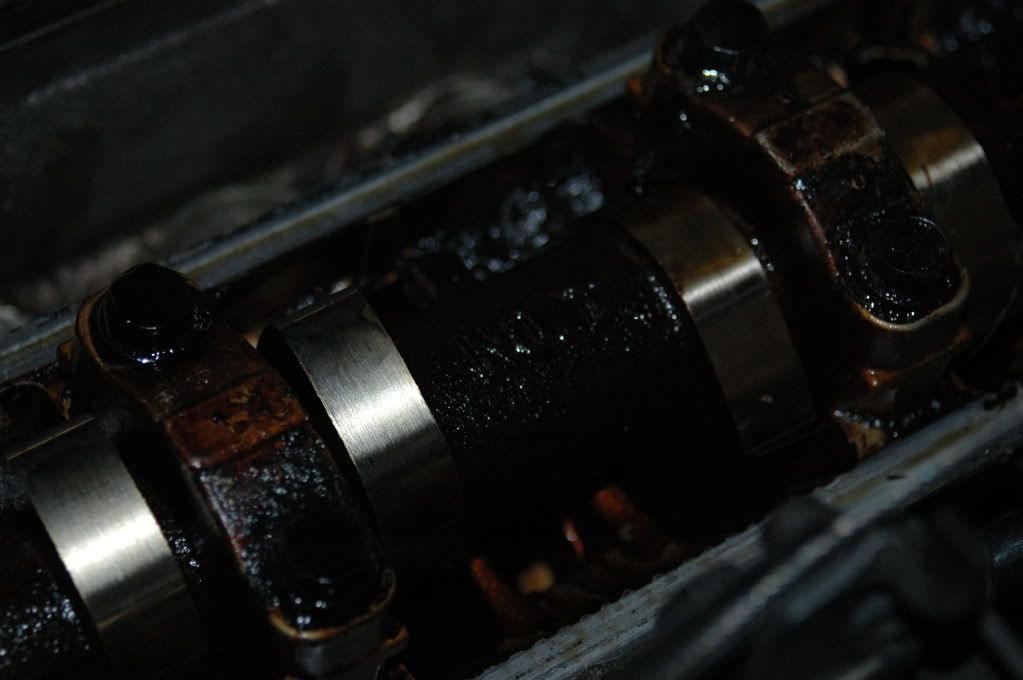
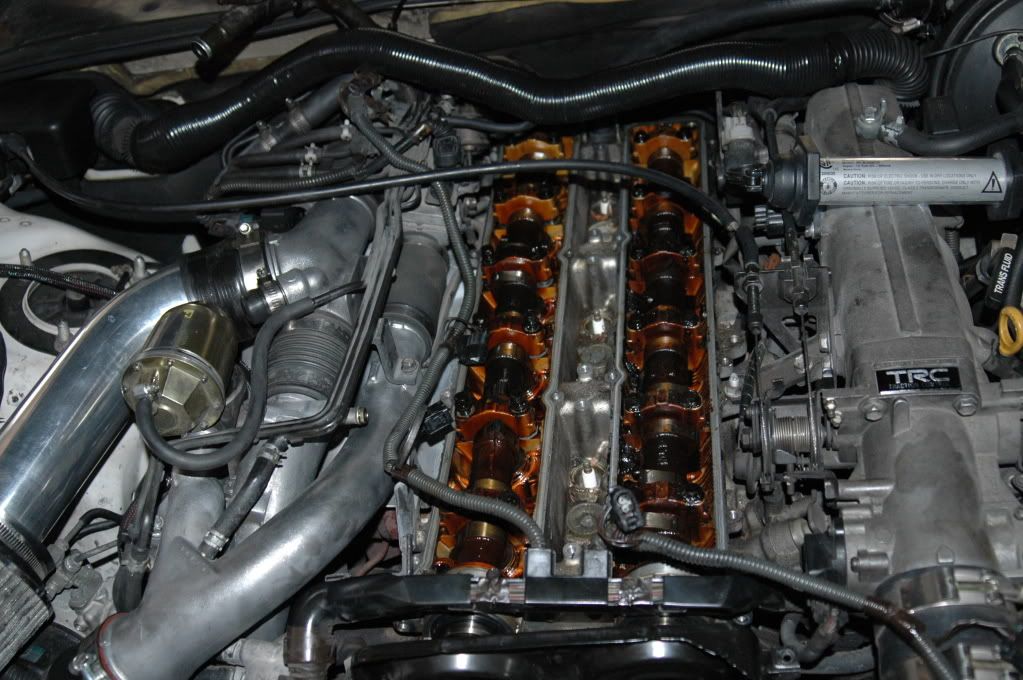
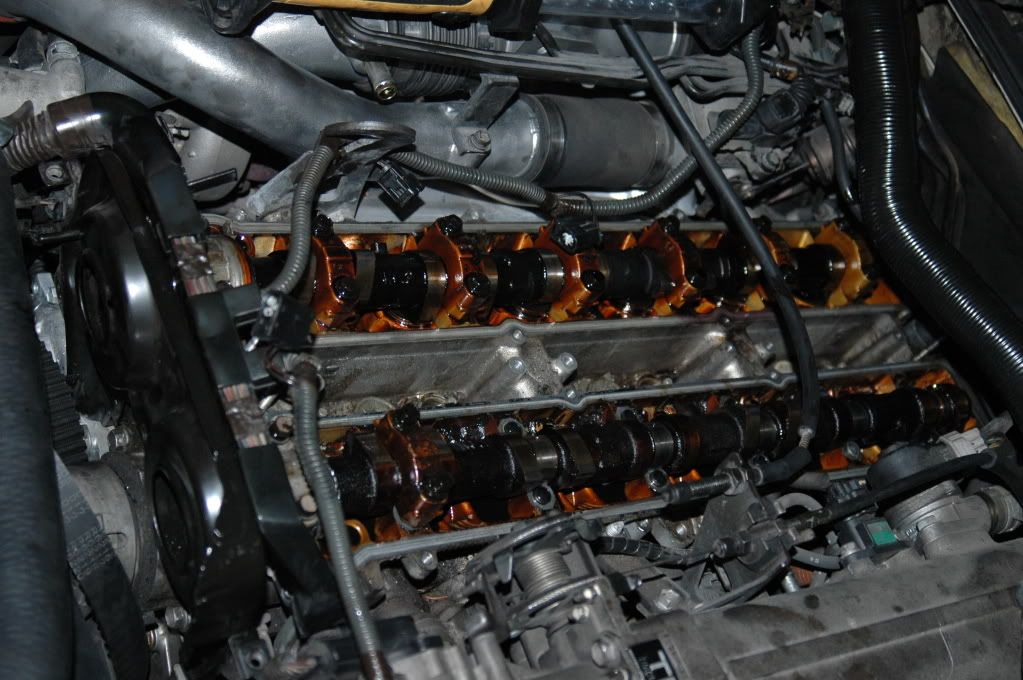
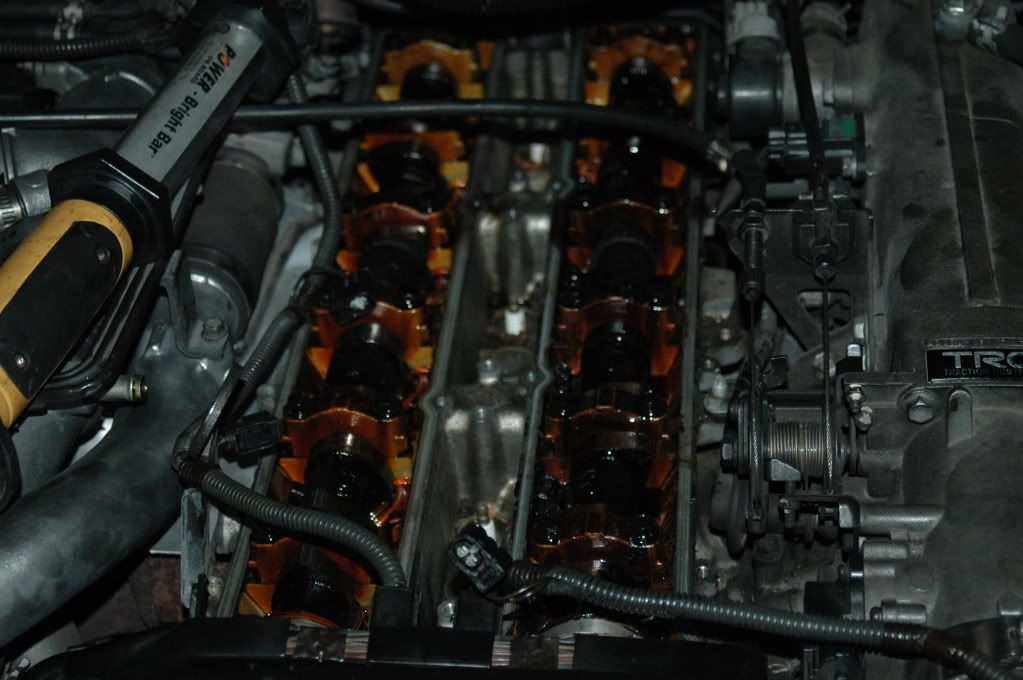
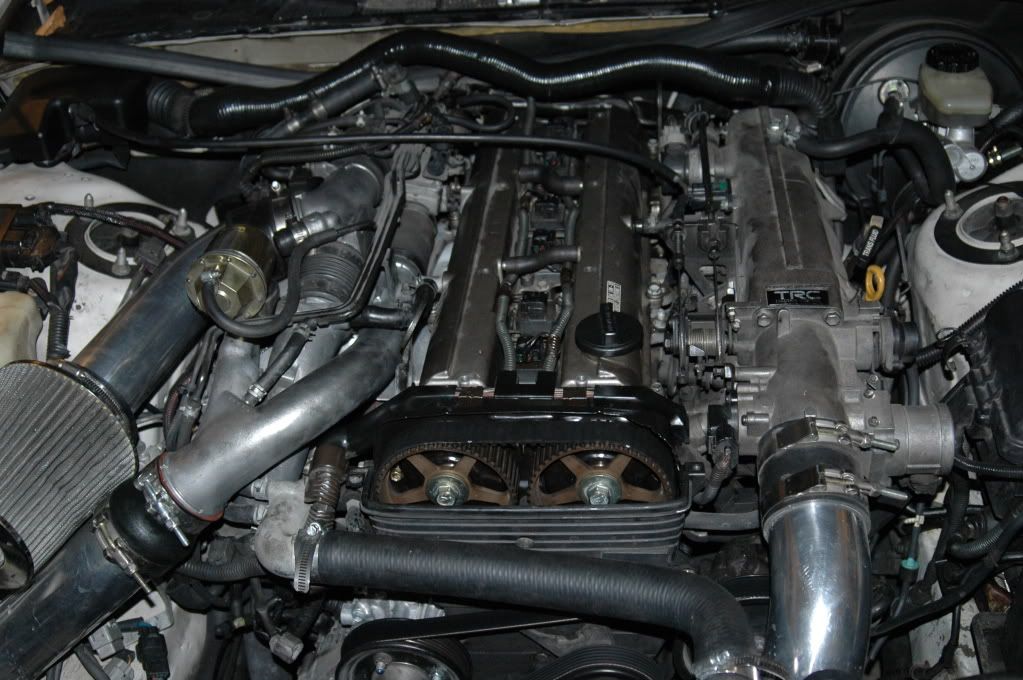
Step 11: Remove the camshaft
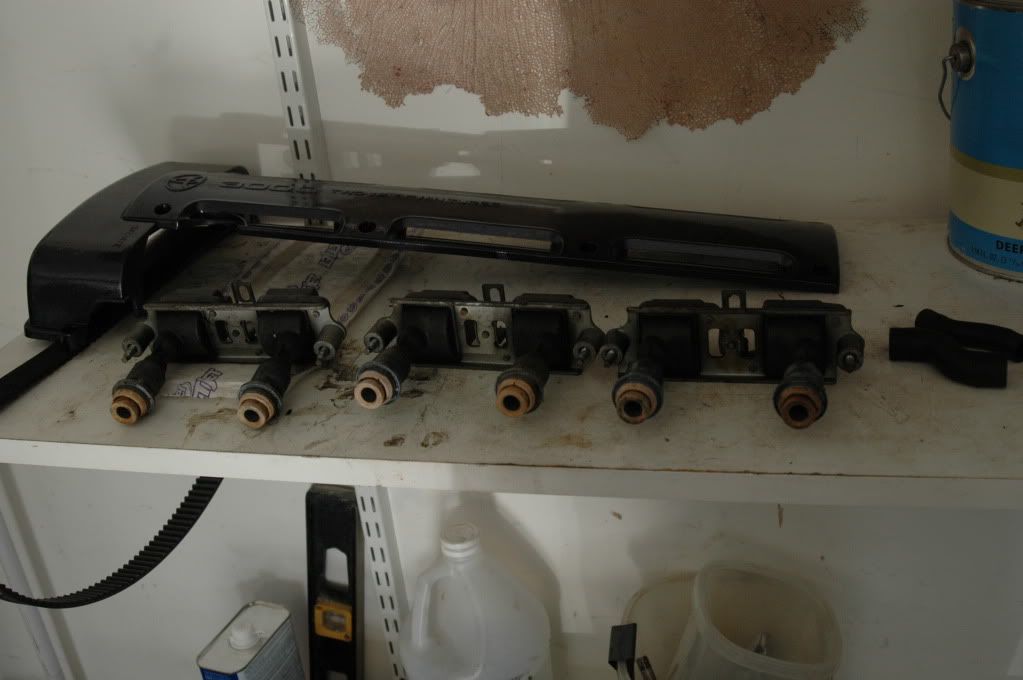
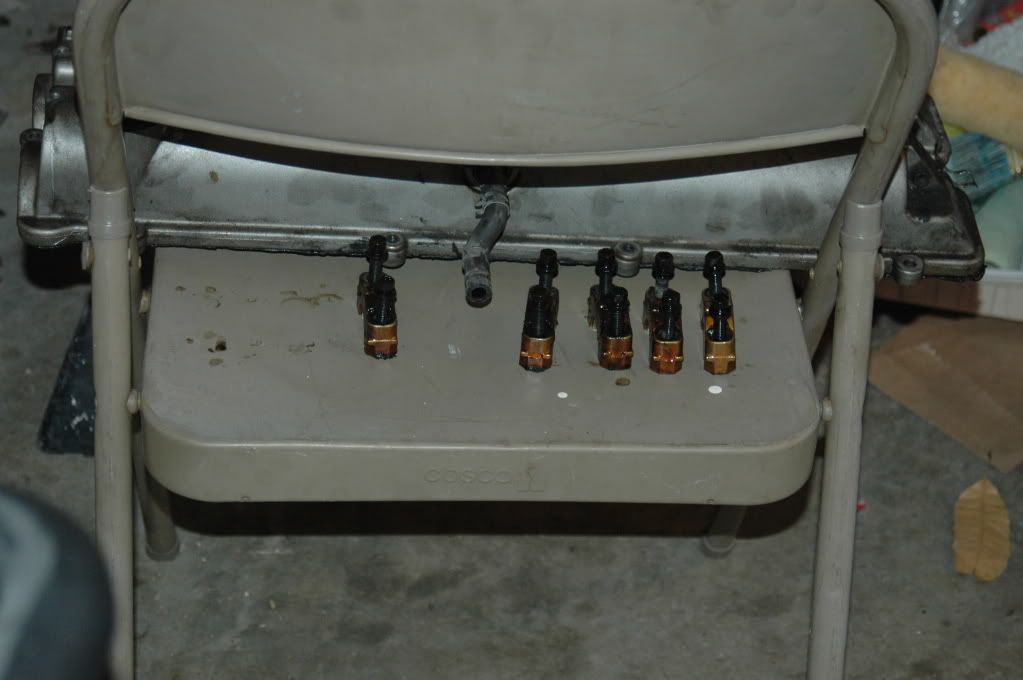
Remove the cam caps. Make sure to go in the specific order. I believe the order is outside to inside. Do this in small increments. When the bolts are completely loose, no need to remove them, keep them in there with the same cap it came off of. Remove the cam caps in the specific order you removed them. The direction, and placement of the cap DOES matter. Please refer to the picture below to see how I placed my cam caps (please note I took this picture after I had already installed two. So, the first two are missing.)
Remove the cam caps and the camshaft will come right out!


I am in now way, shape, or form, responsible for any damages that occur to your car because of this write up. No matter if your car catches on fire, or if you manage to snap a camshaft. I am not liable for any damages...k? Thanks
Alright guys, I currently have an Aristo 2JZGTE and wanted the TT cams which are known to be slightly bigger. I bought the cams from someone on Supraforums. Here is the DIY I did for everyone. Let me know if you have any questions...
Tools needed:
Torque Wrench
Ratchet
10mm, 12mm, 17mm
Pliers
Valve Cover gaskets (optional I guess)
Cam Seals (optional)
PCV Valve (optional)
Allen Wrenches
Paper clip
Time: This took me 3 hours, but you have to remember, I was taking pictures too. I imagine you could get this done in 2 hours if you had this DIY
Step 1: Remove coil pack cover using the allen wrench
Step 2: Remove the two rubber cross over hoses and coil packs
Make sure to organize yourself when taking everything apart, to make sure you know everything goes back in
Step 3: Set timing to top dead center "TDC" just in case.
Step 4: Mark the timing belt where the notches are, to insure nothing can go wrong. This is precautionary, and in my opinion, necessary.
Step 5: Remove Valve cover
Remove the valve cover using a 10mm socket for all but 2 of the nuts. The two nuts on the back I had to use a 10mm wrench to get to.
Step 6: Locate what the cam says rather it is camshaft 1 or 2. Make sure not to mix the two up. Work on one side at a time.
Step 7: (sorry the pictures suck in this part)
Jack the car up and look right behind the alternator in between the oil pan. You will see the timing belt tensioner. I did my best to take a picture of it, but it was hard to get a picture of. Before loosening the bolts, stick a paper clip, or some type of small round metal into the hole that is already there (close to the block, you will see it, it is black). This will insure the tensioner does not extend considering you want to release tension on the timing belt. Now you can start to unscrew the two 12mm bolts. DO NOT REMOVE THESE BOLTS. You only need to loosen them enough to where you can slide the timing belt off of the cam gears.
Step 8: Remove the timing belt
Slide the timing belt off of the two cam gears. This is pretty simple, do both sides at once.
Step 9: Remove Cam Gears
Remove the cam gears using a 17mm socket. An impact wrench is helpful, or you can take vise grips and hold the camshaft (in the designated area) or use the correct size wrench. I used vise grips haha
Step 10: Remove metal black cover that is behind the cam gears
You must remove the black metal plate that is behind the cam gears. It comes off with 4 10mm bolts. MAKE SURE NOT TO DROP THEM!!! they are small and short, so make sure not to drop them else the crank gear will eat them, and you will be VERY sad....I didn't actually remove mine, I just took all of the bolts out and moved it to the side when necessary.
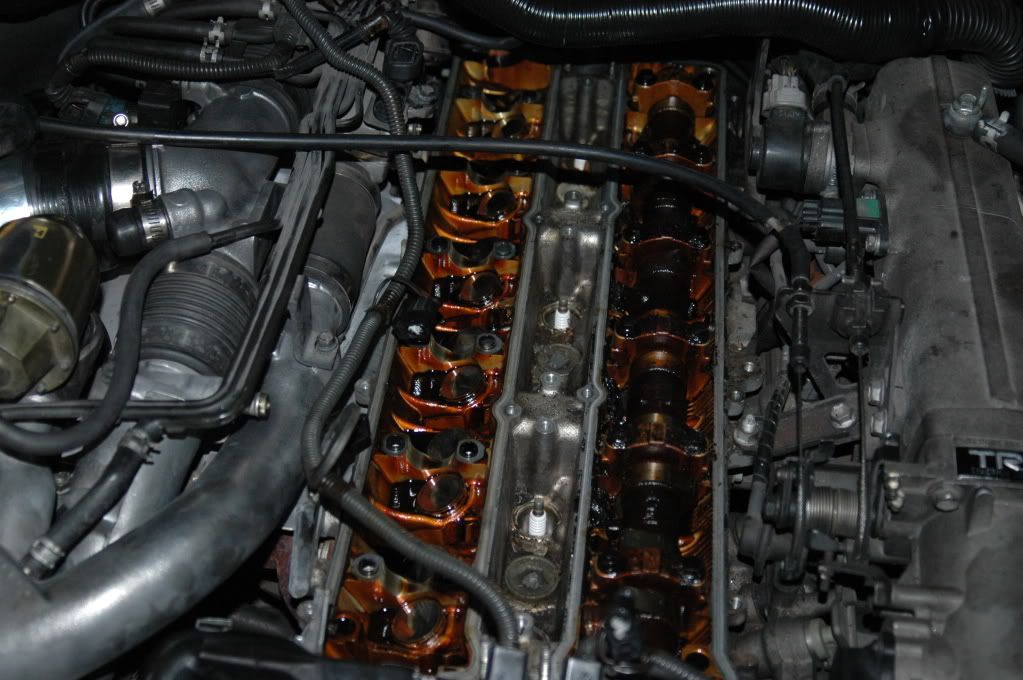
Step 11: Remove the camshaft
Remove the cam caps. Make sure to go in the specific order. I believe the order is outside to inside. Do this in small increments. When the bolts are completely loose, no need to remove them, keep them in there with the same cap it came off of. Remove the cam caps in the specific order you removed them. The direction, and placement of the cap DOES matter. Please refer to the picture below to see how I placed my cam caps (please note I took this picture after I had already installed two. So, the first two are missing.)
Remove the cam caps and the camshaft will come right out!
Last edited by Carfreak70; 03-22-12 at 10:40 PM.
 03-19-12, 08:41 PM
#2
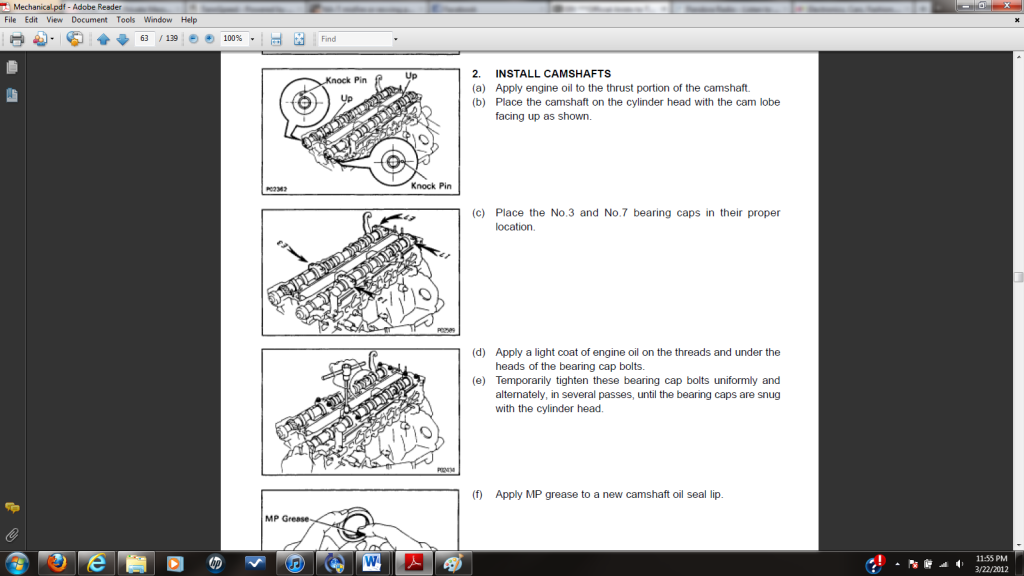
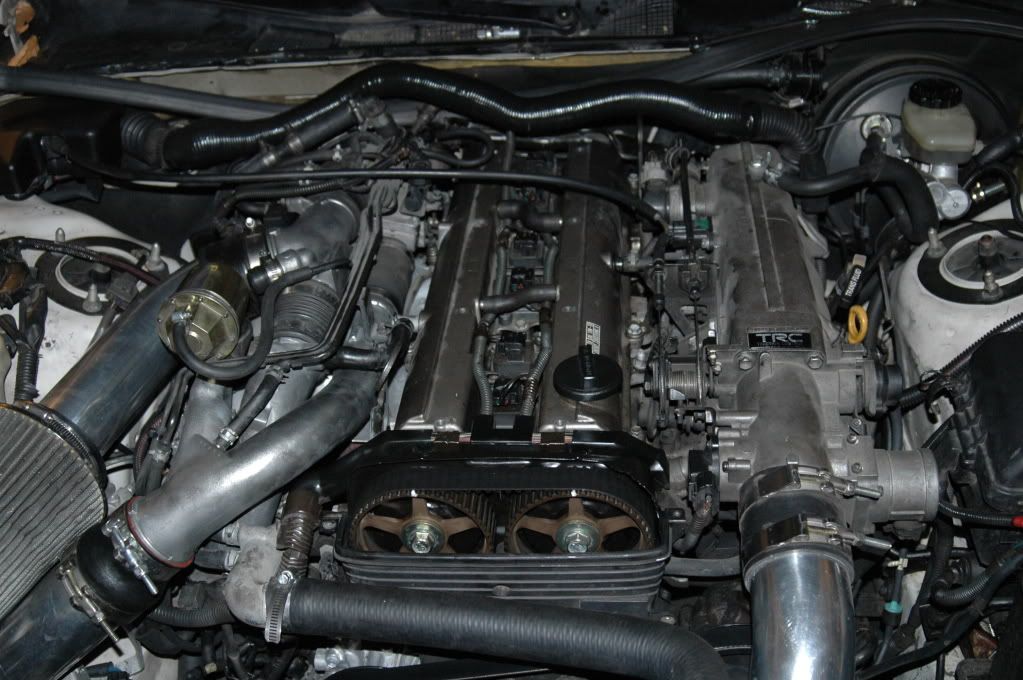
Step 12: Install TT cam shaft
First lubricate the cam journals with assembly lube. I used new engine oil to cover the journals and cam lobes, to ensure proper lubrication. Place the caps on the camshaft the same way you took them off. Screw in all of the bolts but do not tighten just yet. In the reverse order you took them out, torque each bolt individually to 14ft/lbs. Start on the outsides and move to the center.
Step 13: Uninstall and install new camshaft on opposite side. Please refer to step 11 for uninstallation of the camshaft
Step 14: Check valve clearances.
Check the valve clearances and if they are in spec proceed to the next step.
Step 15: Install black metal piece that goes behind the cam gears
I put paper towels where the timing belt goes, to insure a bolt did not fall down there. If it does fall down and you cannot get it with a magnet, you MUST remove the crank pulley without moving the crank, else you will damage the gear.
Step 16: Install Cam Gears
Make sure you put your cam seal in, and take the cam gear and line it up with the dowel pin on the camshaft. Install using the 17mm socket. Make sure to get them nice and tight. Don't want one to come loose! Realign the marks on the cam gear with the two marks on the black metal piece
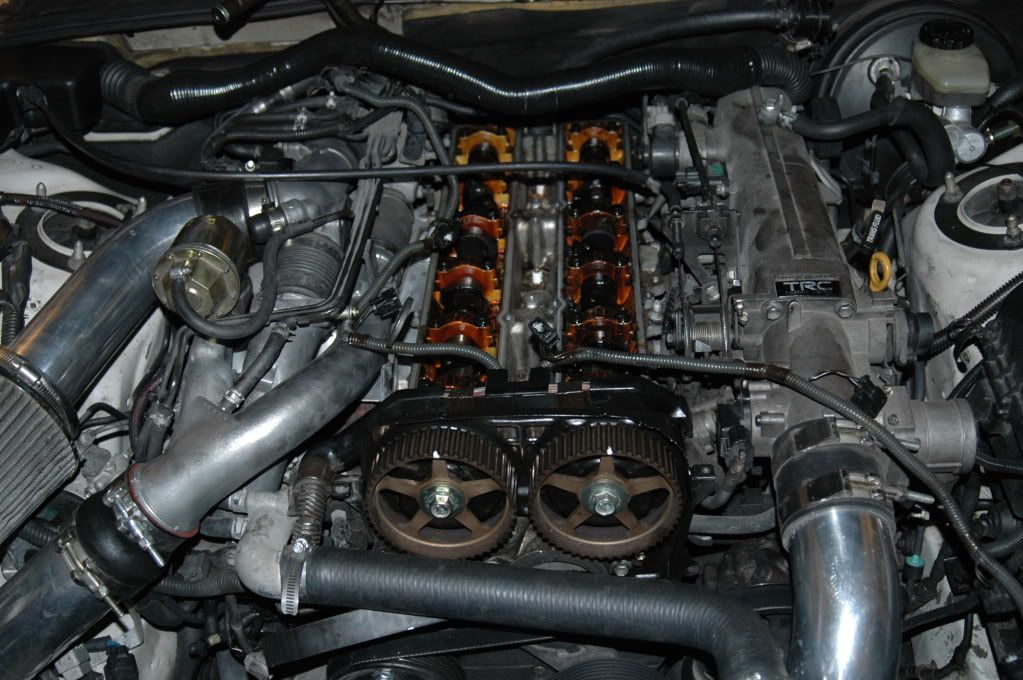
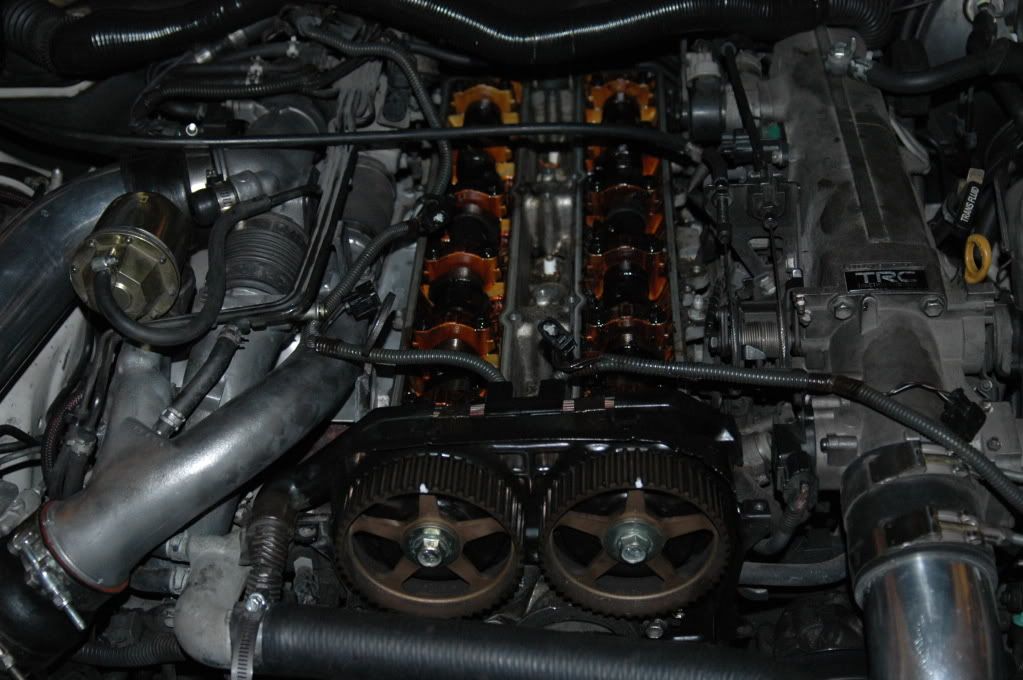
Step 17: Install Timing Belt
Put the timing belt back on. This can be a little tricky, but make sure you do both sides at once. Put it barely on, on one side, then get the other side on, and so forth.
Step 18: Install Valve Covers
Install the valve covers. Make sure not to over tighten the bolts.
Step 19: Install Middle Timing Cover, Two Cross Over Hoses, and Coilpacks
Don't forget to jack the car back up and tighten the timing belt tensioner. Remove the paper clip or metal you used. Timing belt should now be tight again.

Step 20: Install Coilpack cover and start her up! Check your work.
This install wasn't too hard, but I wanted to make this thread for people with a little less experience. You can tell a difference in the cams especially when you get into the higher RPM's just by the butt dyno. Like I said any information you want added, I can add to this first post. or if you have any questions, post them up! Make sure to double check your torqued bolts, and make sure all of the bolts go back into the engine!
Thanks guys!
First lubricate the cam journals with assembly lube. I used new engine oil to cover the journals and cam lobes, to ensure proper lubrication. Place the caps on the camshaft the same way you took them off. Screw in all of the bolts but do not tighten just yet. In the reverse order you took them out, torque each bolt individually to 14ft/lbs. Start on the outsides and move to the center.
Step 13: Uninstall and install new camshaft on opposite side. Please refer to step 11 for uninstallation of the camshaft
Step 14: Check valve clearances.
Check the valve clearances and if they are in spec proceed to the next step.
Step 15: Install black metal piece that goes behind the cam gears
I put paper towels where the timing belt goes, to insure a bolt did not fall down there. If it does fall down and you cannot get it with a magnet, you MUST remove the crank pulley without moving the crank, else you will damage the gear.
Step 16: Install Cam Gears
Make sure you put your cam seal in, and take the cam gear and line it up with the dowel pin on the camshaft. Install using the 17mm socket. Make sure to get them nice and tight. Don't want one to come loose! Realign the marks on the cam gear with the two marks on the black metal piece
Step 17: Install Timing Belt
Put the timing belt back on. This can be a little tricky, but make sure you do both sides at once. Put it barely on, on one side, then get the other side on, and so forth.
Step 18: Install Valve Covers
Install the valve covers. Make sure not to over tighten the bolts.
Step 19: Install Middle Timing Cover, Two Cross Over Hoses, and Coilpacks
Don't forget to jack the car back up and tighten the timing belt tensioner. Remove the paper clip or metal you used. Timing belt should now be tight again.
Step 20: Install Coilpack cover and start her up! Check your work.
This install wasn't too hard, but I wanted to make this thread for people with a little less experience. You can tell a difference in the cams especially when you get into the higher RPM's just by the butt dyno. Like I said any information you want added, I can add to this first post. or if you have any questions, post them up! Make sure to double check your torqued bolts, and make sure all of the bolts go back into the engine!
Thanks guys!
Last edited by Carfreak70; 03-22-12 at 10:11 PM.


 That engine needs a rebuild not a cam install. It amazes me you are driving it with that amount of sludge.
03-20-12, 07:58 AM
That engine needs a rebuild not a cam install. It amazes me you are driving it with that amount of sludge.
03-20-12, 07:58 AM
#7

but you know what's crazy... this is the most quiet 2jz i've ever heard run. the engine is dead quiet. absolutely no head noise!
anyhow, trenton, you really should have cleaned some of the gunk out of that intake cam area, at least.

Trending Topics
03-20-12, 11:51 AM
#8
No problem man! Anything to help out!
Funny you say that, I put half a can of seafoam in there after I did the install, and changed it, but the engine is actually coming out April 9th for a small overhaul. Nothing amazing or anything, but it will all get cleaned!
You don't have to change ECU's I am still running the Aristo ECU. These cams are extremely mild and do not require another ecu.
You don't have to change ECU's I am still running the Aristo ECU. These cams are extremely mild and do not require another ecu.
Last edited by Carfreak70; 03-22-12 at 10:04 PM.