
Removing center console underneath shifter- DIY


Thread Starter
Rookie
Joined: Feb 2011
Posts: 54
Likes: 1
From: CA
Hello, I recently removed the lower dash of the center console in my 2006 rx400h, which is located beneath the shifter, in order to look for a dropped bolt. While I did not find the bolt, I figured I'd post a DIY regarding the removal process.
Unfortunately, when reviewing my pictures, I realized that many were zoomed in too closely and for that I apologize. Hopefully, a relatively detailed description of each step will make up for it!
Ok, so to remove the center console, both the lower dash beneath the steering wheel and the glove compartment need to be removed first. I'll begin with instructions on how to remove the glove compartment.
Thread Starter
Rookie
Joined: Feb 2011
Posts: 54
Likes: 1
From: CA
Removal of glove compartment:
1) There are 2 bolts and 2 screws holding the glove compartment in place. The bolts are located beneath the glove compartment and the screws are located above it. The two screws can be found just by opening the glove compartment door and looking in the upper right and left of the inside of the glove compartment. I did not take pictures of these 2 screws since they were so easy to find but will go back and take them, and then add them to this thread.
2) To remove the two bolts holding the glove compartment, first remove the black piece of plastic attached to the bottom of the glove compartment. This piece of plastic spans the entire width of the bottom of the glove compartment. It is only held in by clips so simply grab the right and left hand side of it, pull down and towards you, and it will come out.
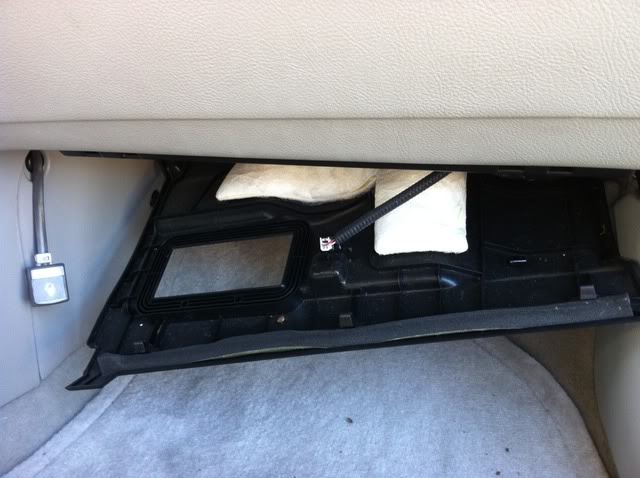
3) This will reveal a bolt on the bottom left of the glove compartment.
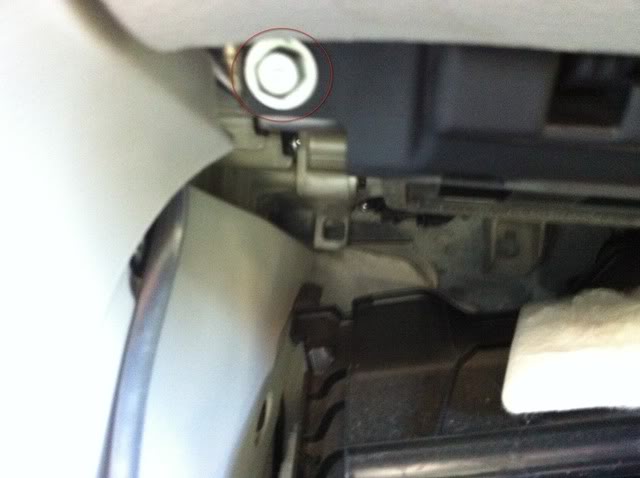
4) The other bolt is located behind the passenger side kick panel. This is also held in by clips and can be removed by pulling on it. I did not remove the kick panel completely as you can just pull away the top portion and move it to either side. WARNING: it is easy to scratch the dash when pulling away the top portion of the kick panel so wedge a towel between the top portion of the kick panel and the dash before pulling the kick panel back.
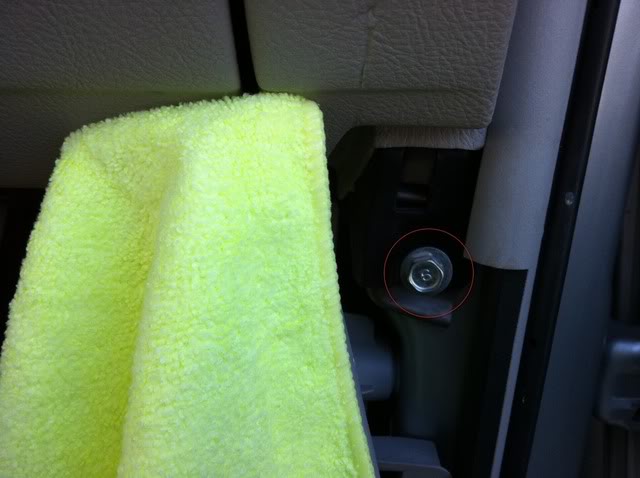
5) After you remove the 2 bolts and the 2 screws, you SHOULD be able to remove the glove compartment. The following picture is of the glove compartment being removed. ***OF NOTE: I say “SHOULD” because my glove compartment could only be removed only after removing the bottom of 2 screws to the right of the center console (see the step following the picture for an idea of which screw I’m talking about) So if you run into the problem of not being able to remove the glove compartment even after removal of the aforementioned 2 screws and 2 bolts, it could be because of this!
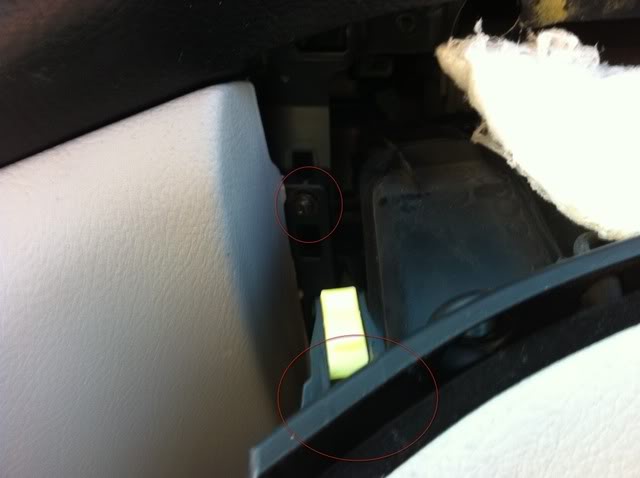
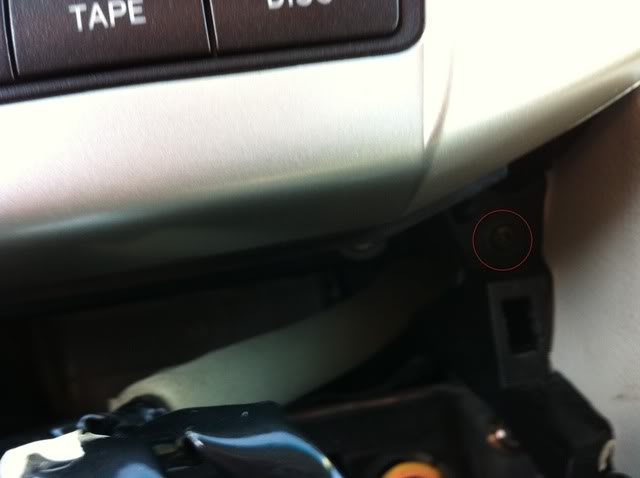
6) After removal of the glove compartment, two screws to the right of the center console will be revealed. Unfortunately, I did not take a picture of the lower of the 2 screws and in the following picture, only one is visible with the general area of the lower 2nd screw circled as well. These screws will both have to be removed to remove the center console. ***AGAIN, not sure if it was supposed to be the case, but I could only fully remove my glove compartment AFTER removing the lower 2nd screw referenced above, to the right of the center console. Just keep this in mind if you have trouble removing the glove compartment after step 5.
1) There are 2 bolts and 2 screws holding the glove compartment in place. The bolts are located beneath the glove compartment and the screws are located above it. The two screws can be found just by opening the glove compartment door and looking in the upper right and left of the inside of the glove compartment. I did not take pictures of these 2 screws since they were so easy to find but will go back and take them, and then add them to this thread.
2) To remove the two bolts holding the glove compartment, first remove the black piece of plastic attached to the bottom of the glove compartment. This piece of plastic spans the entire width of the bottom of the glove compartment. It is only held in by clips so simply grab the right and left hand side of it, pull down and towards you, and it will come out.
3) This will reveal a bolt on the bottom left of the glove compartment.
4) The other bolt is located behind the passenger side kick panel. This is also held in by clips and can be removed by pulling on it. I did not remove the kick panel completely as you can just pull away the top portion and move it to either side. WARNING: it is easy to scratch the dash when pulling away the top portion of the kick panel so wedge a towel between the top portion of the kick panel and the dash before pulling the kick panel back.
5) After you remove the 2 bolts and the 2 screws, you SHOULD be able to remove the glove compartment. The following picture is of the glove compartment being removed. ***OF NOTE: I say “SHOULD” because my glove compartment could only be removed only after removing the bottom of 2 screws to the right of the center console (see the step following the picture for an idea of which screw I’m talking about) So if you run into the problem of not being able to remove the glove compartment even after removal of the aforementioned 2 screws and 2 bolts, it could be because of this!
6) After removal of the glove compartment, two screws to the right of the center console will be revealed. Unfortunately, I did not take a picture of the lower of the 2 screws and in the following picture, only one is visible with the general area of the lower 2nd screw circled as well. These screws will both have to be removed to remove the center console. ***AGAIN, not sure if it was supposed to be the case, but I could only fully remove my glove compartment AFTER removing the lower 2nd screw referenced above, to the right of the center console. Just keep this in mind if you have trouble removing the glove compartment after step 5.
Thread Starter
Rookie
Joined: Feb 2011
Posts: 54
Likes: 1
From: CA
Now, its time to remove the left dash beneath the steering wheel
7) There is only 1 screw and 1 bolt holding it in place. The bolt is located to the left of the dash, behind the driver’s side kick panel. The kick panel, like the passenger side kick panel is removed by simply pulling on it since it is only held in by clips. As before, I did not remove the kick panel completely as you can just pull away the top portion and move it to either side. WARNING: it is easy to scratch the dash when pulling away the top portion of the kick panel so insert a towel between the top portion of the kick panel and the dash.
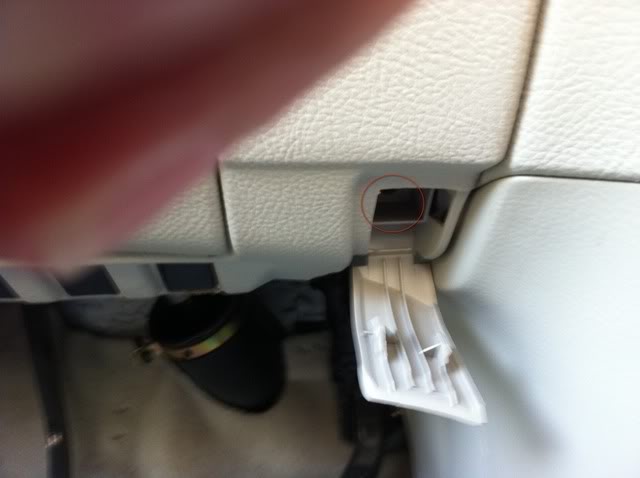
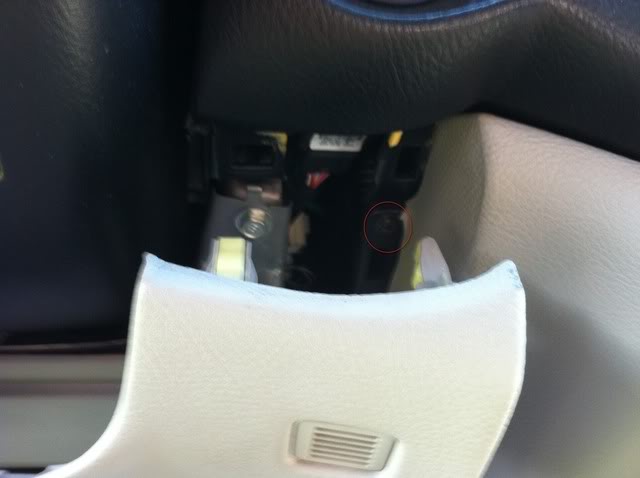
8) Now, to find the screw holding the left dash in place, look below the steering wheel, to the right of it, and you will see a small rectangular panel. Behind this panel is where the screw is located. To remove the panel, just get a flat head screwdriver and pry it open from the top. You can tape the tip of the screwdriver to avoid scratches. Once the panel is open, you will see the screw within an enclosure.
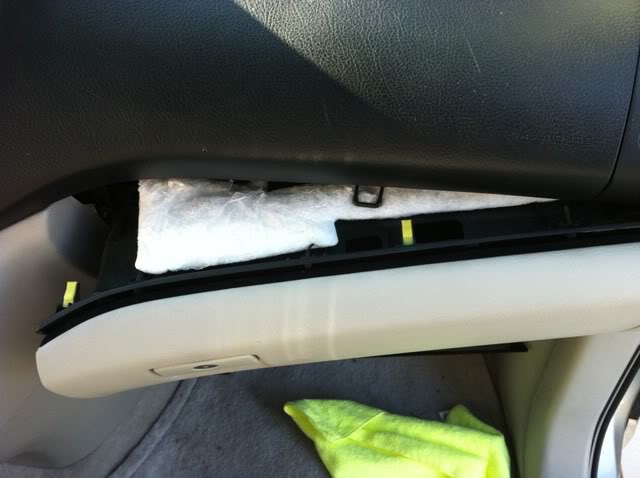
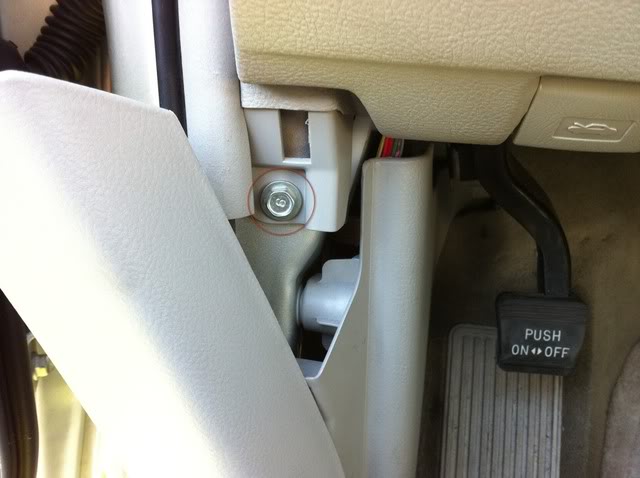
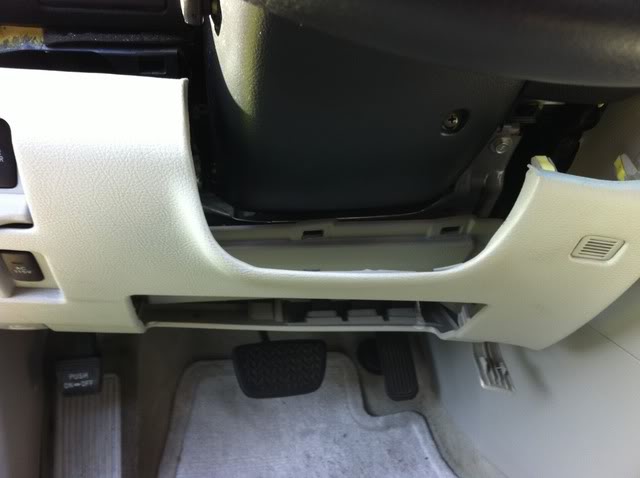
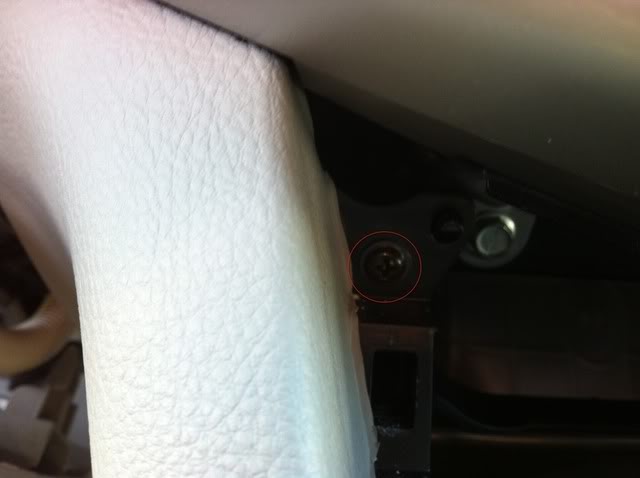
9) You should now be able to pull the left dash away. This reveals a screw to the left of the center console.
Picture of dash being pulled away:
Picture of screw revealed after pulling it away:
7) There is only 1 screw and 1 bolt holding it in place. The bolt is located to the left of the dash, behind the driver’s side kick panel. The kick panel, like the passenger side kick panel is removed by simply pulling on it since it is only held in by clips. As before, I did not remove the kick panel completely as you can just pull away the top portion and move it to either side. WARNING: it is easy to scratch the dash when pulling away the top portion of the kick panel so insert a towel between the top portion of the kick panel and the dash.
8) Now, to find the screw holding the left dash in place, look below the steering wheel, to the right of it, and you will see a small rectangular panel. Behind this panel is where the screw is located. To remove the panel, just get a flat head screwdriver and pry it open from the top. You can tape the tip of the screwdriver to avoid scratches. Once the panel is open, you will see the screw within an enclosure.
9) You should now be able to pull the left dash away. This reveals a screw to the left of the center console.
Picture of dash being pulled away:
Picture of screw revealed after pulling it away:
Last edited by mctufts; Apr 4, 2011 at 04:47 PM.
Thread Starter
Rookie
Joined: Feb 2011
Posts: 54
Likes: 1
From: CA
10) Now, assuming you�ve removed the 2 screws to the right of the center console and the 1 screw to the left of the center console (just described in previous step), you need to access 4 more screws holding the center console in place. They are all found around the shifter panel. The 2 bottom screws are found simply by pulling the shifter cover off. To pull the shifter panel off, simply lift up the panel from the bottom edge as it is only held in with clips. Once you pull it off, the 2 bottom screws are located beneath the shifter, to its left and right.
***WILL ADD PICS***
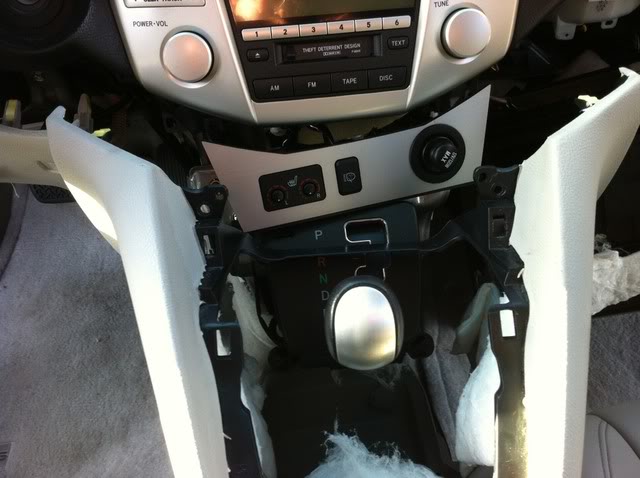
11) The 2 upper screws can be found by removing the cigarette lighter panel sitting above the shifter. To remove the panel, simply place one hand under each side of the panel and pull towards you as it is only held with clips. Then, look to the upper left and right of the space where the panel used to occupy.
Upper left screw behind panel:
Upper right screw behind panel:
12) After removing these screws, the center console is ready to be pulled off.
***WILL ADD PICS***
11) The 2 upper screws can be found by removing the cigarette lighter panel sitting above the shifter. To remove the panel, simply place one hand under each side of the panel and pull towards you as it is only held with clips. Then, look to the upper left and right of the space where the panel used to occupy.
Upper left screw behind panel:
Upper right screw behind panel:
12) After removing these screws, the center console is ready to be pulled off.


Driver School Candidate
Joined: Dec 2013
Posts: 1
Likes: 0
From: WA
So did you ever find the bolt? Mine is rattling around in there and it's driving me nuts.
I've gotten a fair amount of access through removing the center floorboard, but I'm just fishing around in there with the magnet stick to no avail.
I've gotten a fair amount of access through removing the center floorboard, but I'm just fishing around in there with the magnet stick to no avail.

Trending Topics

Driver
Joined: Feb 2014
Posts: 193
Likes: 1
From: Angola
One thing that I could not see in this great write up is that there are 3 clips (maibe they have a different name)securing the center console to the side panel behind. I followed the instructions and pushed the center console out to find out later that I damaged the clips / pins. Sorry, english is not my first language so I do not know the correct names, but it's one black plastic pin and 2 clamps / clips / pins on each side.
Hope it helps. Again, thanks for the write up.
Hope it helps. Again, thanks for the write up.


Thread
Thread Starter
Forum
Replies
Last Post