DIY: 2009 Lexus IS 250 - GReddy Spectrum Elite-SE Exhaust
 06-18-10, 11:58 AM
#1
Pole Position
Thread Starter

***USE AT YOUR OWN RISK***

CAR INFO:
- 2009 Lexus IS 250
- Rear Wheel Drive
- Manual Transmission
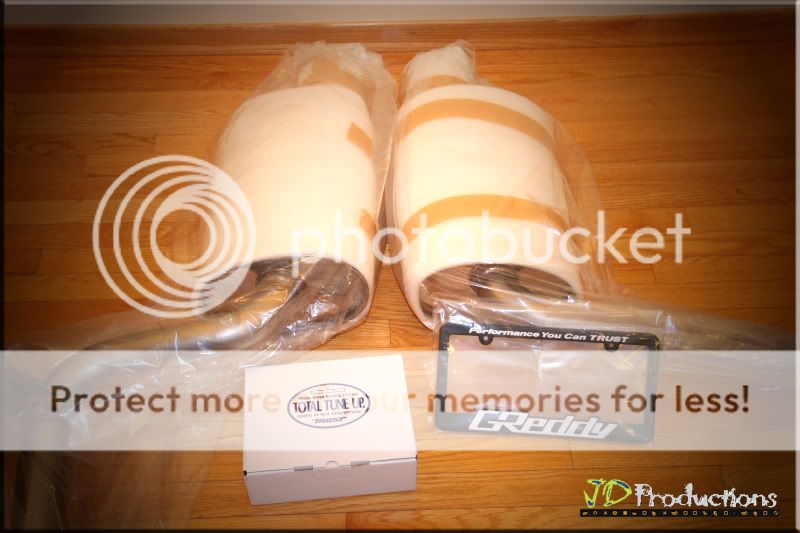
GReddy Spectrum Elite-SE Exhaust
(ordered @ NEXT MOD)
CONTENT FROM THE BOX:
* Muffler, Right Side
* Muffler, Left Side
* O-Ring Gasket
* M10 Bolt
* M10 Lock Nut
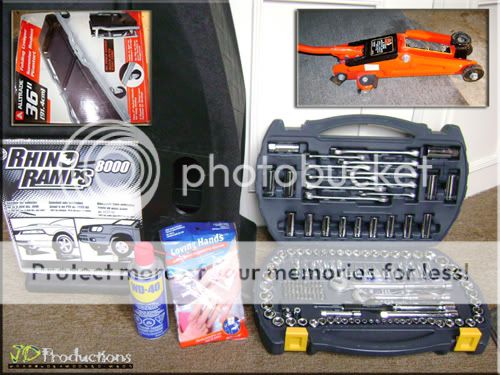
RECOMMENDED TOOLS:
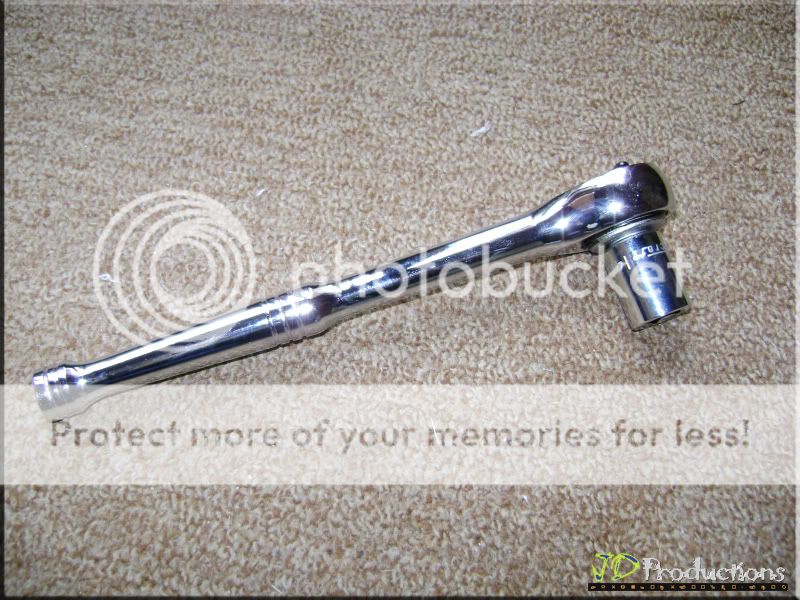
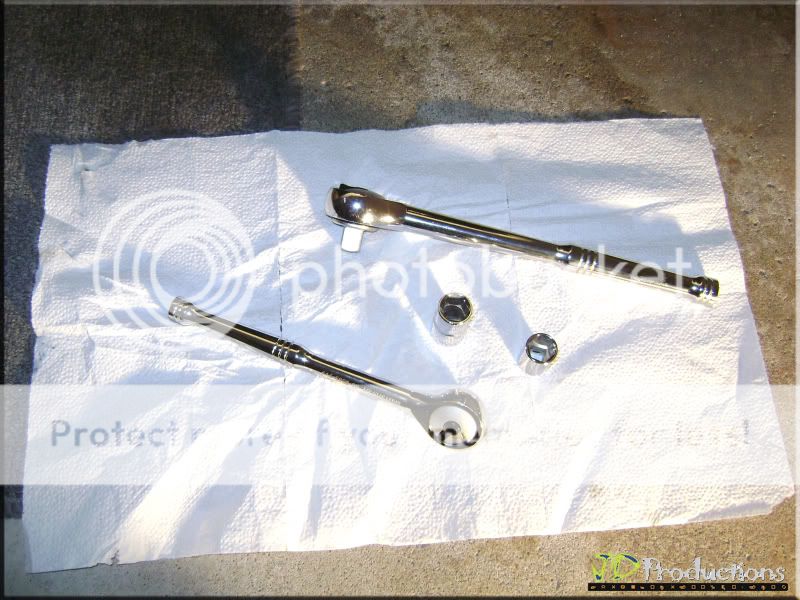
* Ratchet (Mastercraft @ Canadian Tire)
* Socket Wrench with 14mm Socket (Mastercraft @ Canadian Tire)
* Ramps (Rhino Ramps @ PartSource)
* WD-40 (Canadian Tire)
OPTIONAL:
- Disposable Gloves (Loving Hands @ Dollarama)
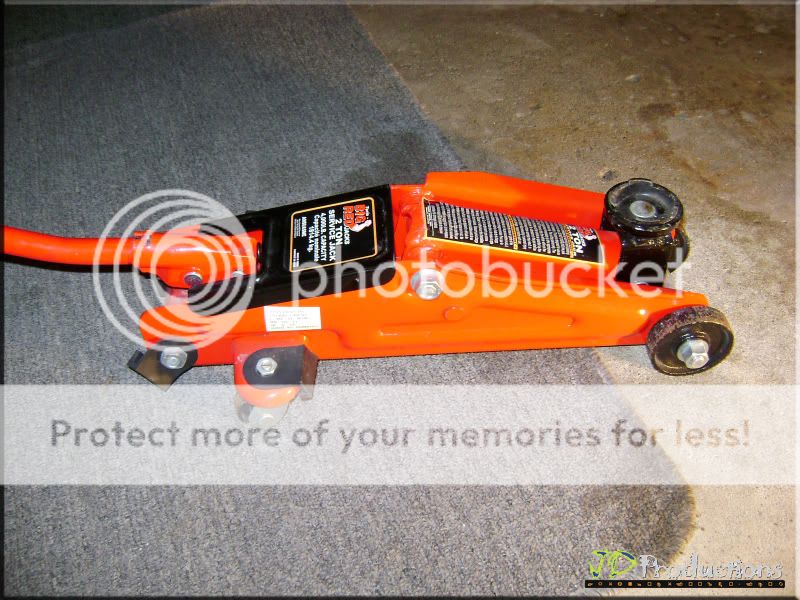
- 2Ton Service Jack (Walmart)
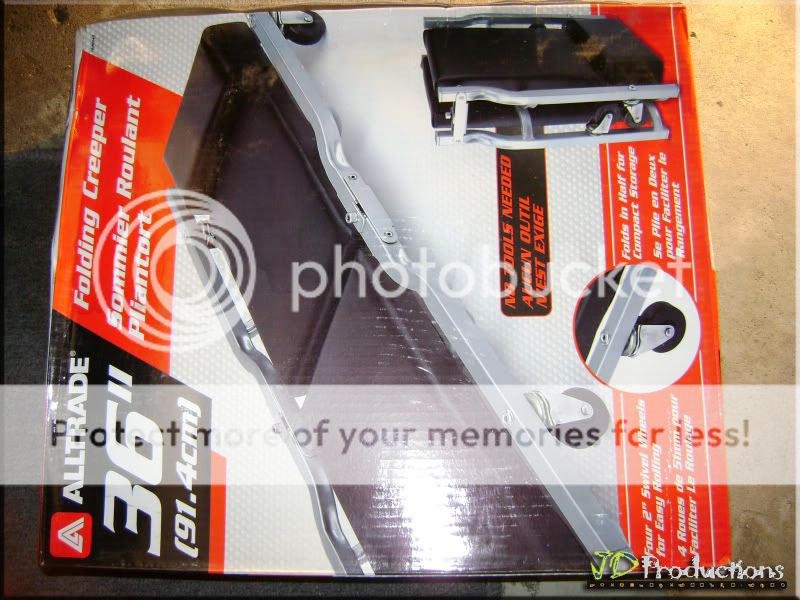
- Folding Creeper (AllTrade @ Walmart)
- Old Carpet Runner or Old Exercise Mat
~~~~~~~~~~~~~~~~~~~~~~~~~~~~~~~~~~~~~~~~~~~~~~~~~~~~~~~~~~~~~~~~~~~~~~~~~~~~~~~~
STEP 1
Place Rhino Ramps at Left & Right Rear Wheels
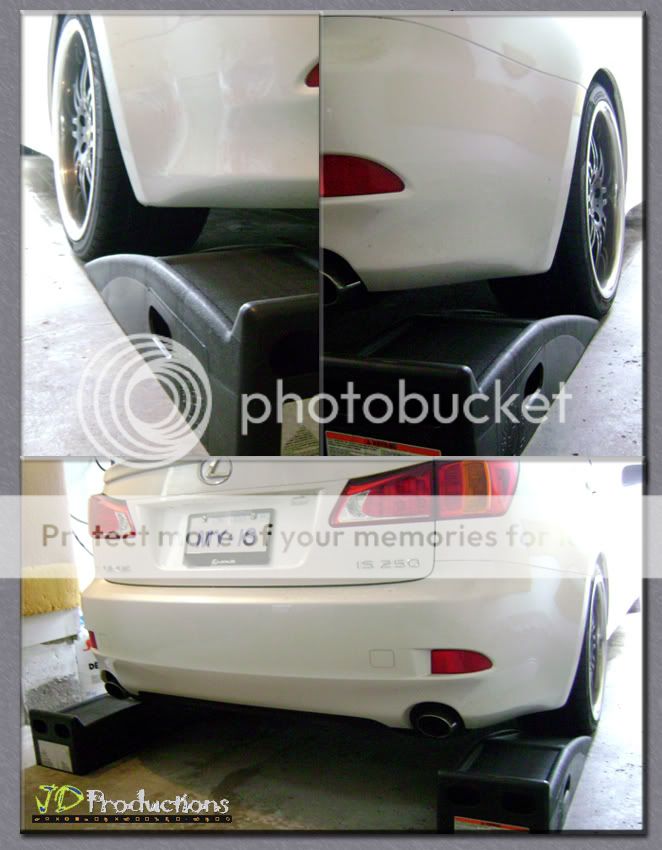
STEP 2
Press Engine Start, switch to "R" or Reverse Gear and start backing-up to the Ramp. Please have somebody assist you when backing-up.
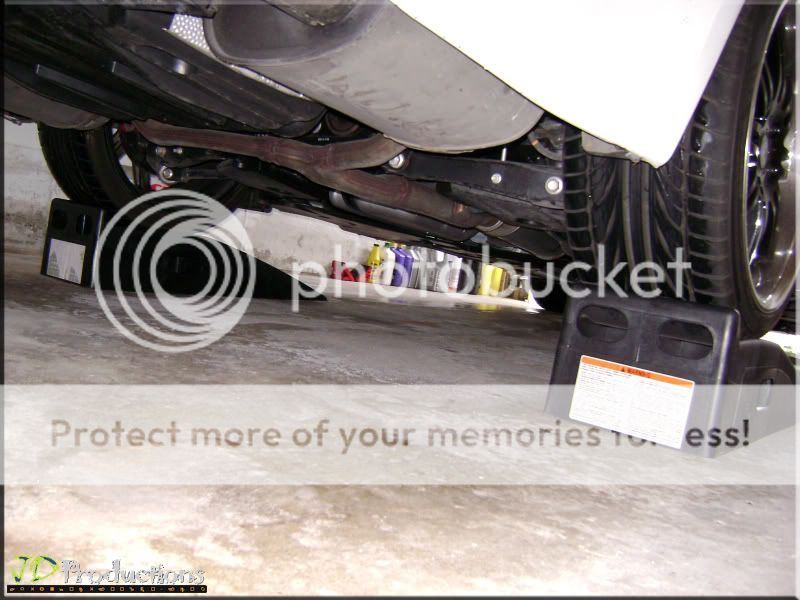
STEP 3
Put on your Gloves and let's start working . . .

Place some kind of cushion to support your Back when working underneat the vehicle. I use my Old Carpet Runner
"Caution: Exhaust system may be HOT!"
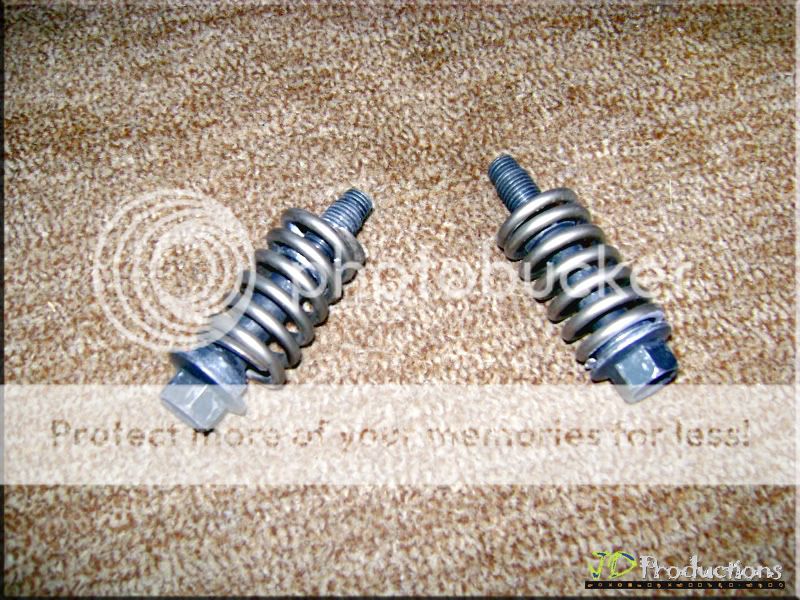
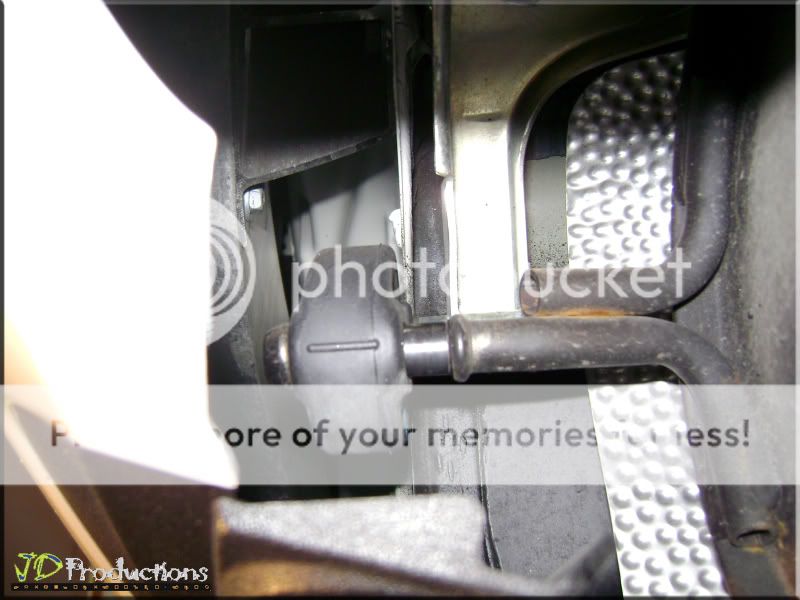
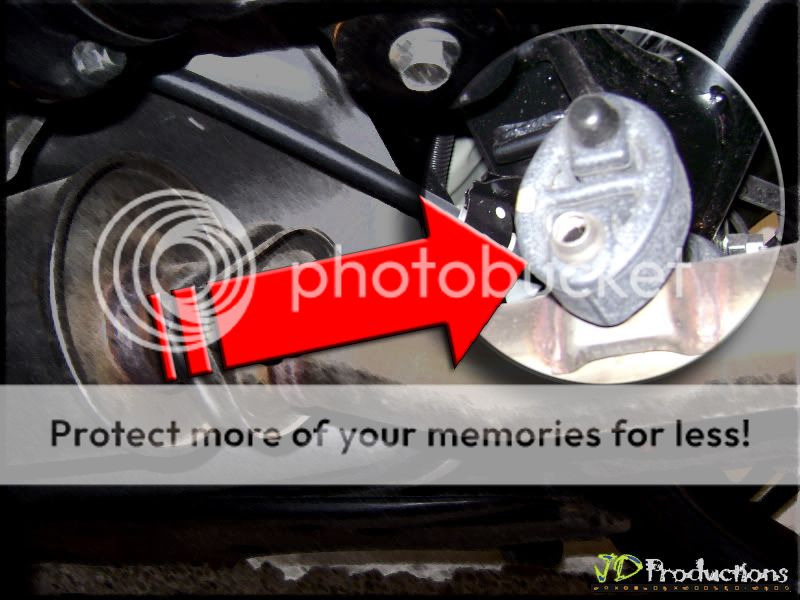
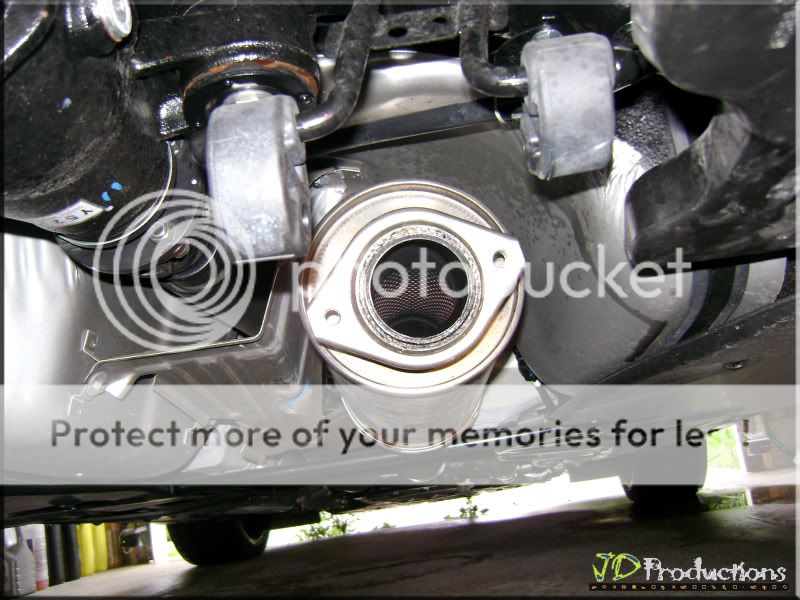
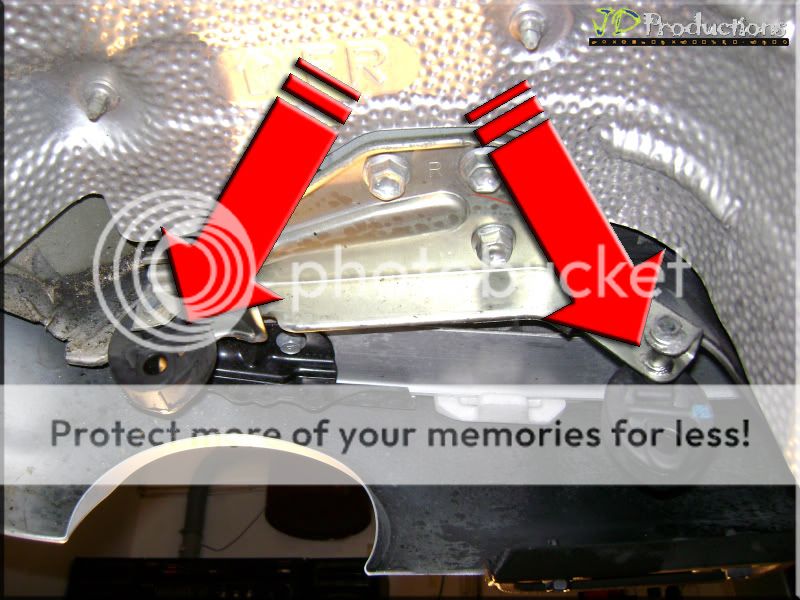
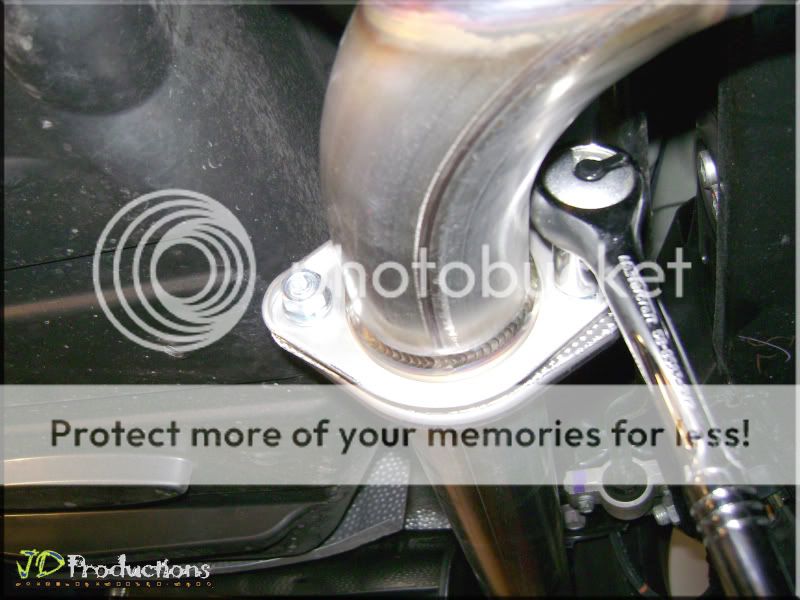
REMOVE the two Bolts & Springs from the flange
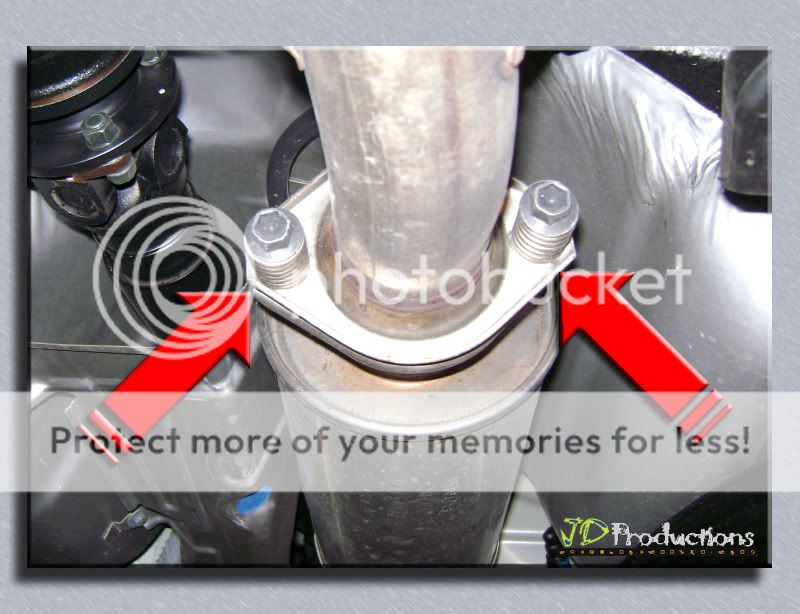
(Another View)
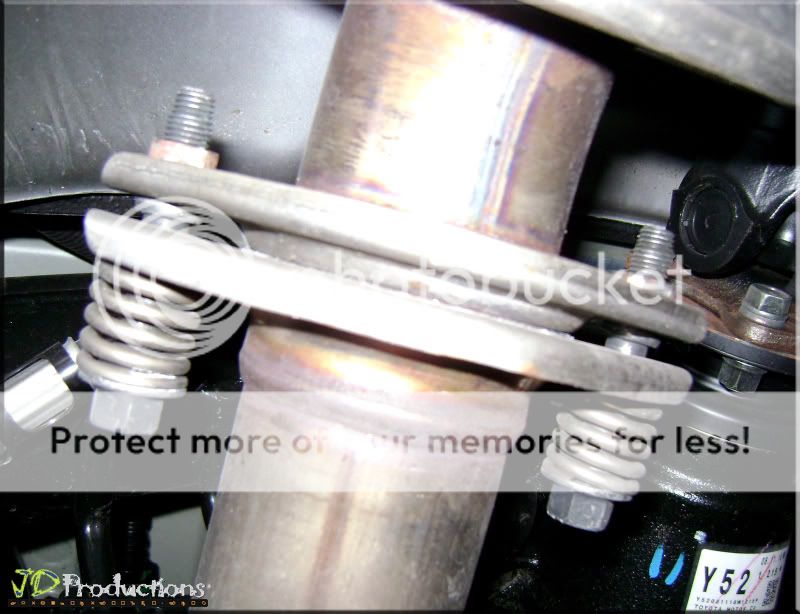
Use 14mm Ratchet/Socket Wrench
2 Bolts with Spring removed from the flange
STEP 4
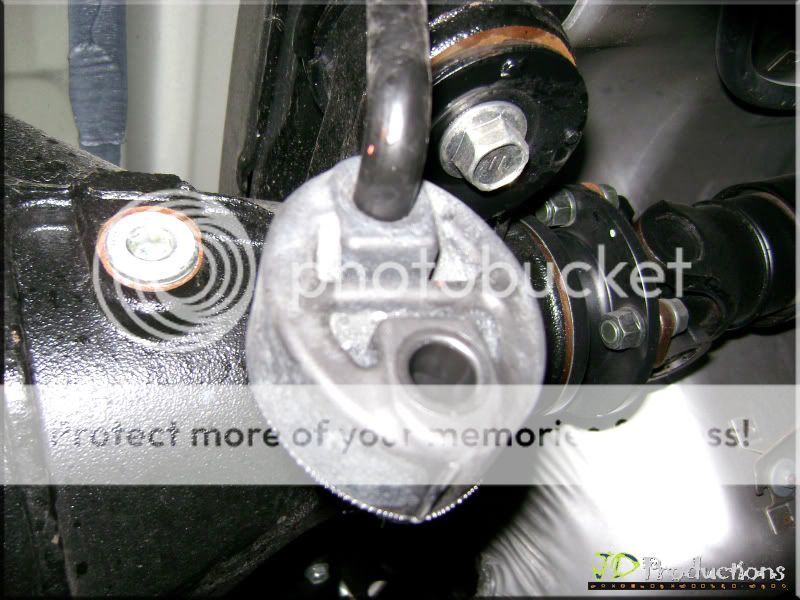
WD-40 & Rubber Hangers
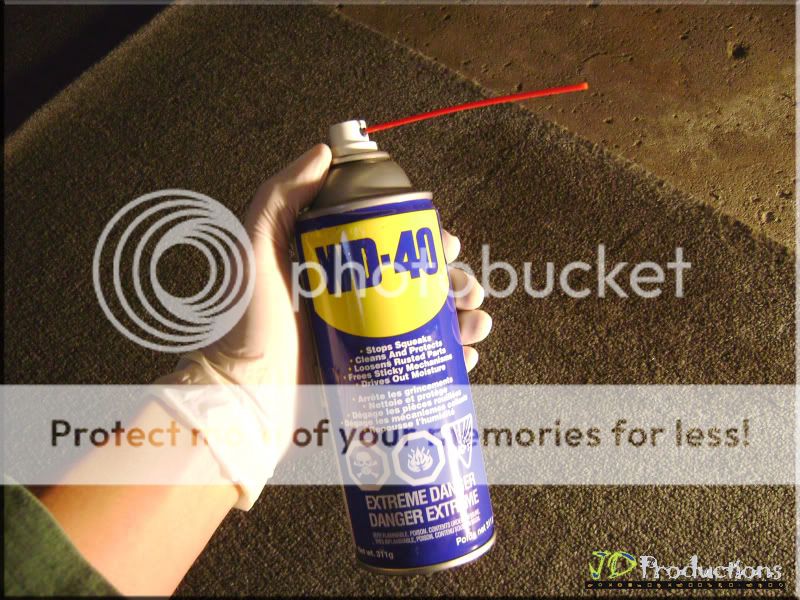
There are 6 Rubber Hangers in Total
(2 in the Middle)
2 Rubber Hangers Left Muffler & 2 Rubber Hangers Right Muffler
Spray WD-40 to the rubber hangers
STEP 5
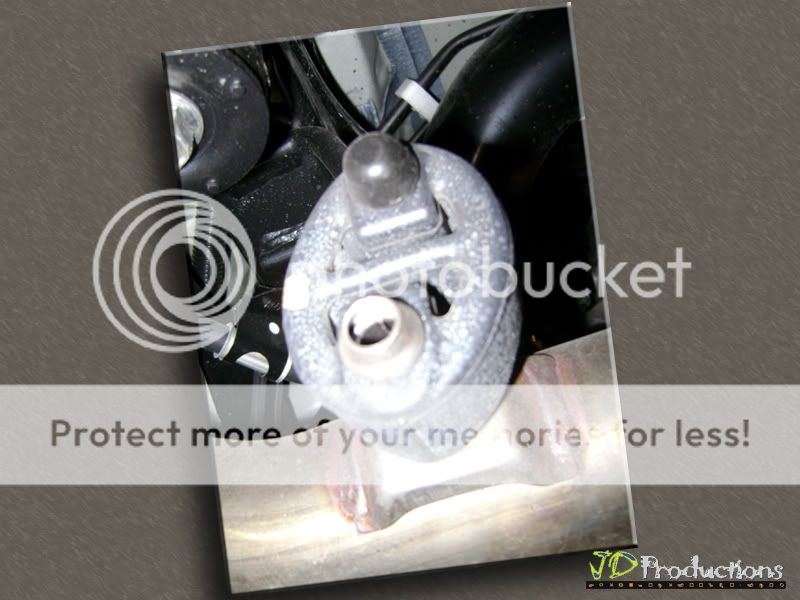
Be sure to remove the bracket from the lower hole, leaving the rubber hanger in place on the vehicle.
Use Special Hanger Removal Tool (if you have it) but it's not recommended. I used my regular 14mm Wrench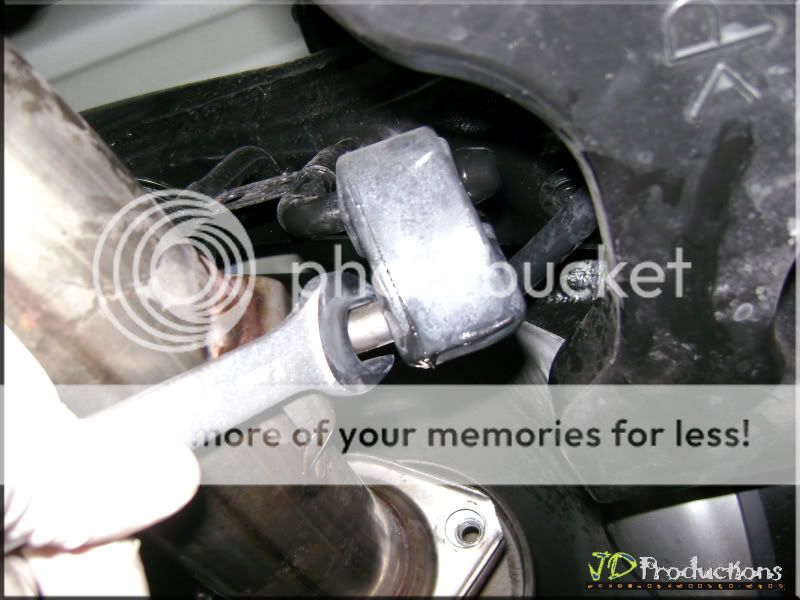
Please note that the stock Muffler assembly is 1-piece. This might be too strenuous for 1 person to handle.
Please have somebody assist you when removing the stock muffler.
I used my "2Ton Service Jack" to support in carefully lowering the stock muffler.
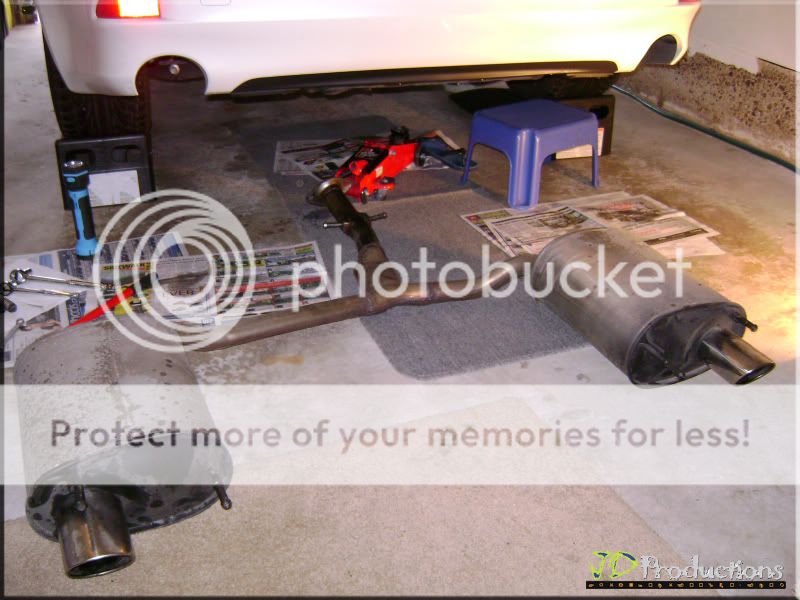
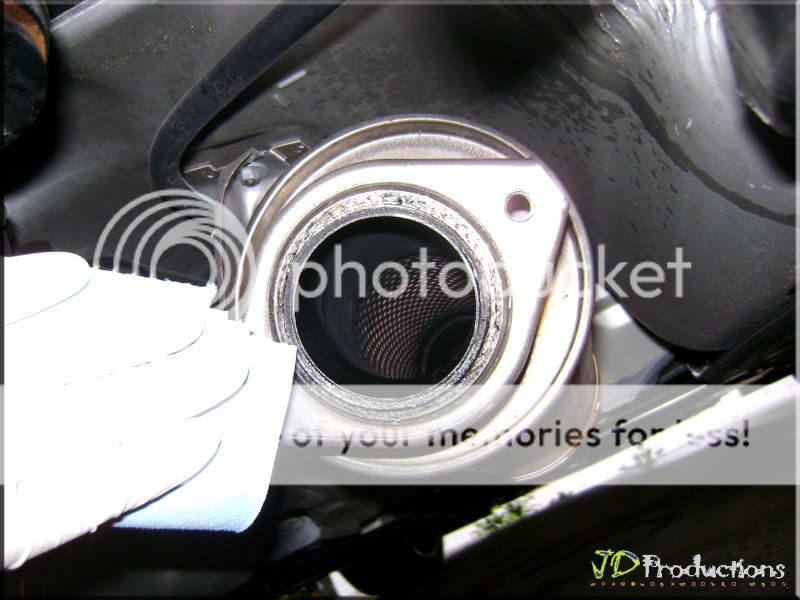
Here's the Stock Muffler completely Removed
"I'm not a Mechanic or Auto Body Specialist. I sit in-front of my computer all day at work. That being said; If I can do this Step-By-Step DIY, so can you!" . . . JD
Quote Courtesy of F-Sport Manual: Care must be taken when installing this accessory to ensure damage does not occur to the vehicle. The installation of this accessory should follow approved guidelines to ensure a quality installation
CAR INFO:
- 2009 Lexus IS 250
- Rear Wheel Drive
- Manual Transmission
GReddy Spectrum Elite-SE Exhaust
(ordered @ NEXT MOD)
CONTENT FROM THE BOX:
* Muffler, Right Side
* Muffler, Left Side
* O-Ring Gasket
* M10 Bolt
* M10 Lock Nut
RECOMMENDED TOOLS:
* Ratchet (Mastercraft @ Canadian Tire)
* Socket Wrench with 14mm Socket (Mastercraft @ Canadian Tire)
* Ramps (Rhino Ramps @ PartSource)
* WD-40 (Canadian Tire)
OPTIONAL:
- Disposable Gloves (Loving Hands @ Dollarama)
- 2Ton Service Jack (Walmart)
- Folding Creeper (AllTrade @ Walmart)
- Old Carpet Runner or Old Exercise Mat
~~~~~~~~~~~~~~~~~~~~~~~~~~~~~~~~~~~~~~~~~~~~~~~~~~~~~~~~~~~~~~~~~~~~~~~~~~~~~~~~
STEP 1
Place Rhino Ramps at Left & Right Rear Wheels
STEP 2
Press Engine Start, switch to "R" or Reverse Gear and start backing-up to the Ramp. Please have somebody assist you when backing-up.
STEP 3
Put on your Gloves and let's start working . . .
Place some kind of cushion to support your Back when working underneat the vehicle. I use my Old Carpet Runner
"Caution: Exhaust system may be HOT!"
REMOVE the two Bolts & Springs from the flange
(Another View)
Use 14mm Ratchet/Socket Wrench
2 Bolts with Spring removed from the flange
Quote Courtesy of F-Sport Manual: Keep all original equipment (OE): bolts, springs & gasket
WD-40 & Rubber Hangers
There are 6 Rubber Hangers in Total
(2 in the Middle)
2 Rubber Hangers Left Muffler & 2 Rubber Hangers Right Muffler
Spray WD-40 to the rubber hangers
STEP 5
Be sure to remove the bracket from the lower hole, leaving the rubber hanger in place on the vehicle.
Use Special Hanger Removal Tool (if you have it) but it's not recommended. I used my regular 14mm Wrench
Please note that the stock Muffler assembly is 1-piece. This might be too strenuous for 1 person to handle.
Please have somebody assist you when removing the stock muffler.
I used my "2Ton Service Jack" to support in carefully lowering the stock muffler.
Here's the Stock Muffler completely Removed
 06-18-10, 11:58 AM
#2
Pole Position
Thread Starter
INSTALLATION OF THE GREDDY SPECTRUM ELITE EXHAUST
STEP 6
Unpack and get the longer muffler (mid-pipe) ready for installation
View without the muffler
Wipe any dirt with microfibre cloth
STEP 7
I used my "Folding Creeper" to assist in moving the GReddy SE Muffler underneat the vehicle
My Install order is in Reverse of the Stock Muffler Removal . . .
1) Install Rear Muffler into the Rubber Hangers
2) Install Forward hangers into the Rubber Hangers
3) Install two OE springs & bolts evenly for proper alignment
(Use 14mm Ratchet/Socket Wrench)
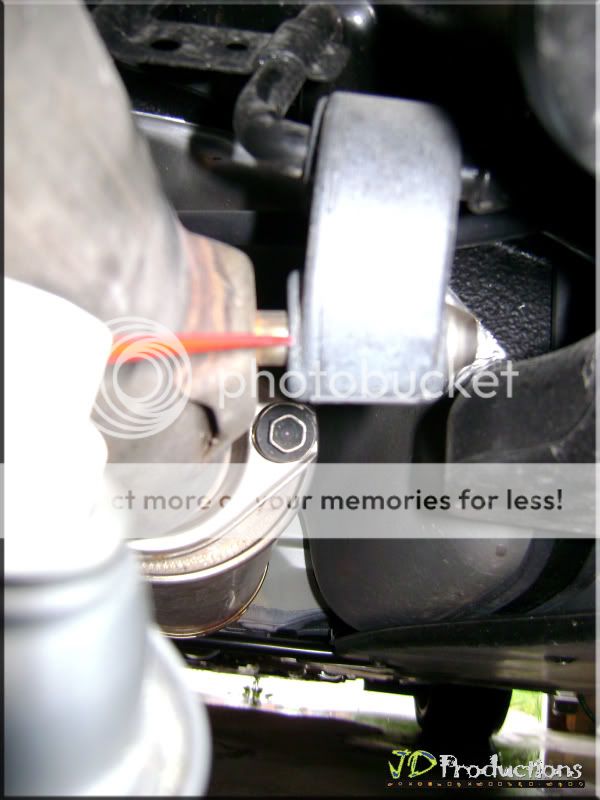
4) Install the Rear Brackets of Right-Side muffler (depending on your view/angle-Driver Side) into the rubber hangers.
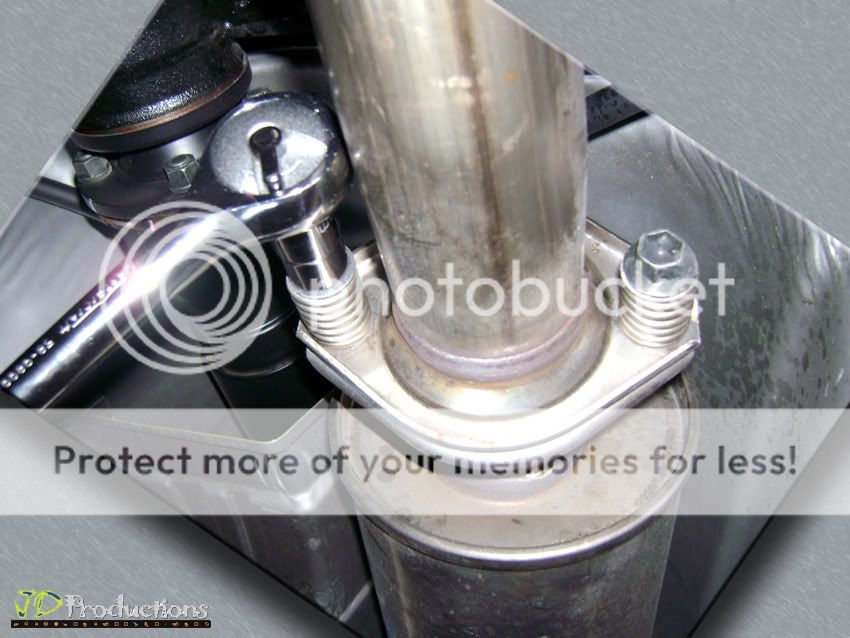
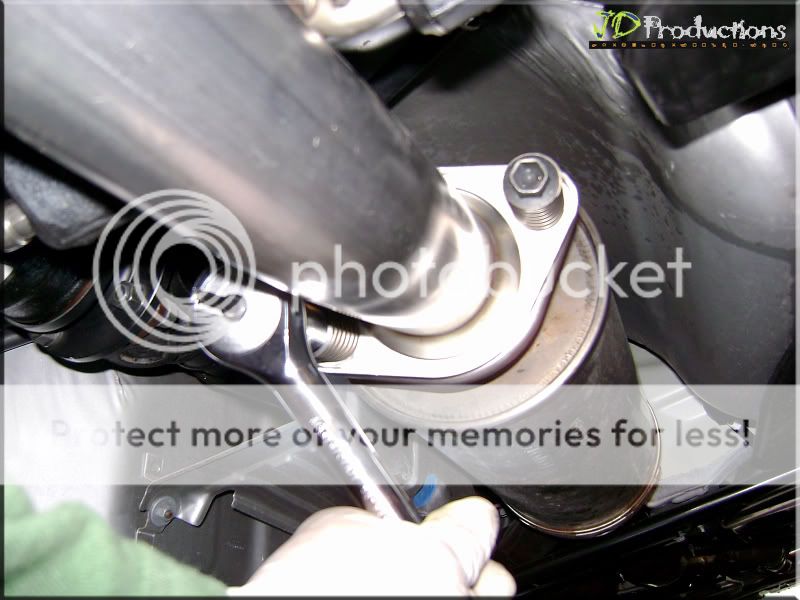
5) Install the O-Ring Gasket onto the Mid-pipe flanged ends
I used 2 14mm Ratchet/Socket Wrench to loosely tighten the M10 bolts & nuts
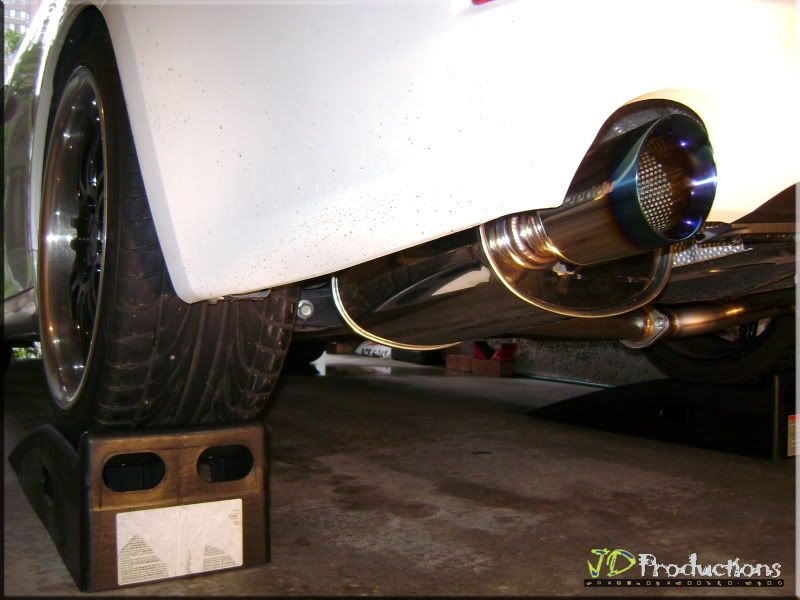
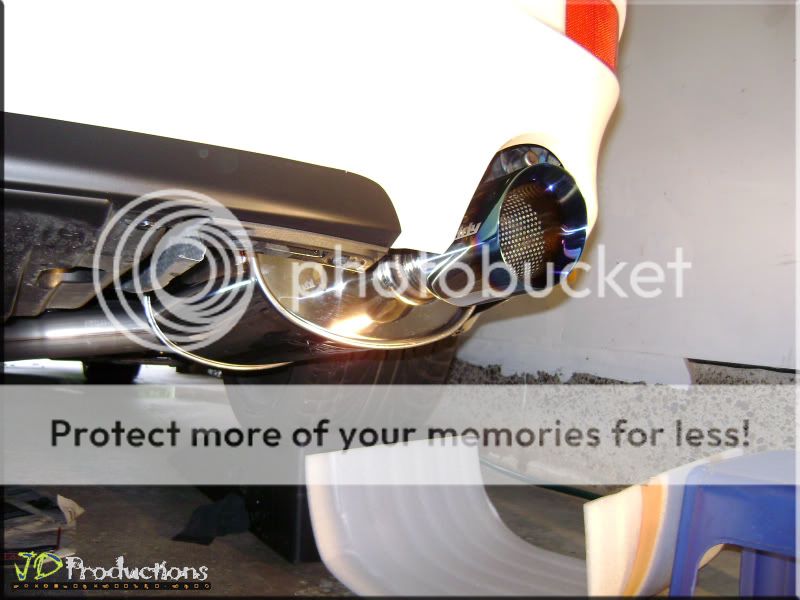
6) Visually check the exhaust tips are centered and left & right tips are aligned.
STEP 6
Unpack and get the longer muffler (mid-pipe) ready for installation
View without the muffler
Wipe any dirt with microfibre cloth
STEP 7
I used my "Folding Creeper" to assist in moving the GReddy SE Muffler underneat the vehicle
My Install order is in Reverse of the Stock Muffler Removal . . .
1) Install Rear Muffler into the Rubber Hangers
2) Install Forward hangers into the Rubber Hangers
3) Install two OE springs & bolts evenly for proper alignment
Courtesy of F-Sport Manual: Be sure that the shoulder of the bolts is correctly seated onto the flange of the Muffler for proper alignment of the mating flanges
Courtesy of F-Sport Manual: Tighten the two bolts to 32 lbf-ft (43 N-m)
4) Install the Rear Brackets of Right-Side muffler (depending on your view/angle-Driver Side) into the rubber hangers.
5) Install the O-Ring Gasket onto the Mid-pipe flanged ends
I used 2 14mm Ratchet/Socket Wrench to loosely tighten the M10 bolts & nuts
6) Visually check the exhaust tips are centered and left & right tips are aligned.
Courtesy of F-Sport Manual: Tighten the four bolts to 32 lbf-ft (43 N-m)
Courtesy of F-Sport Manual:
CHECK:
* Mating joint flanges have been securely fastened
* Brackets have been securely reattached
* Tailpipe alignment
* Leak
LOOK FOR:
* Verify joint is properly seated & bolts torqued
* Two spring-loaded bolts are torqued to 32 lbf-ft (43 N-m)
* Four M10 bolts are torqued to 32 lbf-ft (43 N-m)
* Verify brackets are securely attached
* Verify tailpipe tips are centered & aligned
* Start Engine & listen for exhaust leaks


Trending Topics

 very nice DIY write up with nice photos
  06-21-10, 11:32 AM
#9
 06-21-10, 04:50 PM
#10
Advanced

Join Date: Mar 2008
Location: Illinois
Posts: 613
Likes: 0
Received 0 Likes
on
0 Posts
 06-22-10, 08:53 AM
#11
Great write up though.

 07-07-10, 01:08 AM
#15
Pole Position
iTrader: (1)

Join Date: Mar 2010
Location: HI
Posts: 364
Likes: 0
Received 0 Likes
on
0 Posts
Nice writeup with good pics.
On a side note, is it ok to use wd40 on rubber hangers? When i did my 350z exhaust someone told me not to use it since it could eat the rubber. Ended up using white lithium grease which worked just as well.
On a side note, is it ok to use wd40 on rubber hangers? When i did my 350z exhaust someone told me not to use it since it could eat the rubber. Ended up using white lithium grease which worked just as well.