DIY: 2009 Lexus IS 250 - JOE Z INTAKE (D-AFI)
 06-02-10, 10:34 AM
#1
Pole Position
Thread Starter

***USE AT YOUR OWN RISK***
This Step-by-Step process is essentially the Installation Guide from JOE Z that comes in the Box/Package enhanced by Photos.
CAR INFO
2009 IS250 RWD, MT
JOE Z CUSTOM DIRECT AIR FLOW INTAKE for 2006+ LEXUS IS
(ordered @ Carson Toyota)
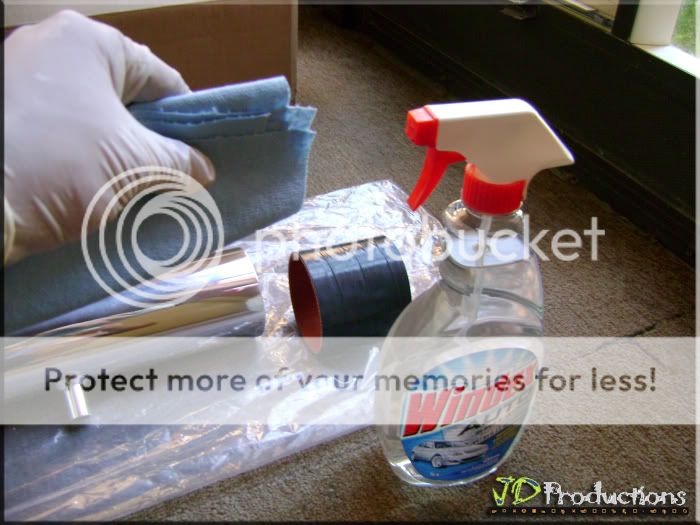
TOOLS/MATERIALS NEEDED:
* Philips or Flat Head Screwdriver (Mastercraft @ Canadian Tire)
* Socket Wrench with 10mm Socket (Mastercraft @ Canadian Tire)
* Socket Wrench with 8mm Socket (Mastercraft @ Canadian Tire)
* Optional: Disposable Gloves (for Handling the Polished Aluminum Pipe) (Loving Hands @ Dollarama)
* Windex (Trust Me; you'll Thank me for this) :wink: (Canadian Tire)

~~~~~~~~~~~~~~~~~~~~~~~~~~~~~~~~~~~~~~~~~~~~~~~~~~~~~~~~~~~~~~~~~~~~~~~~~~~~~~~~
STEP 1
Pull the hood release lever.

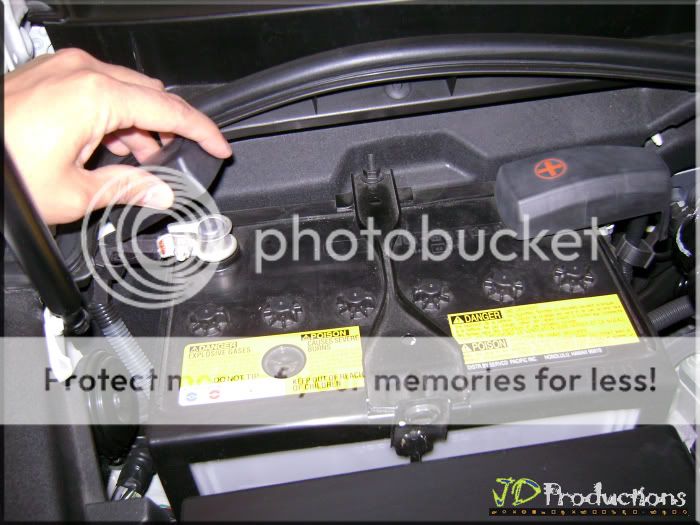
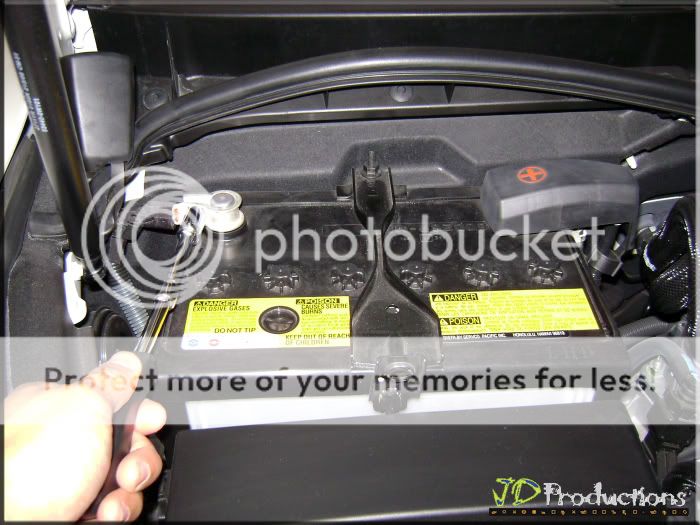
STEP 2
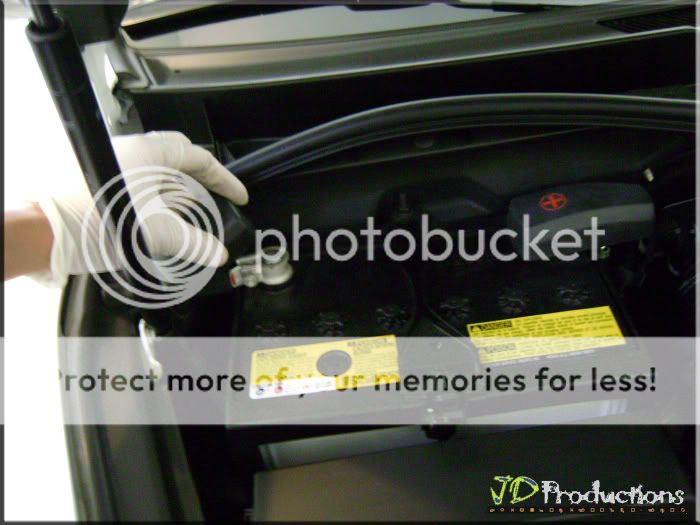
Lift the Negative Battery Cover and start loosening the bolt using 10mm socket wrench.

STEP 3
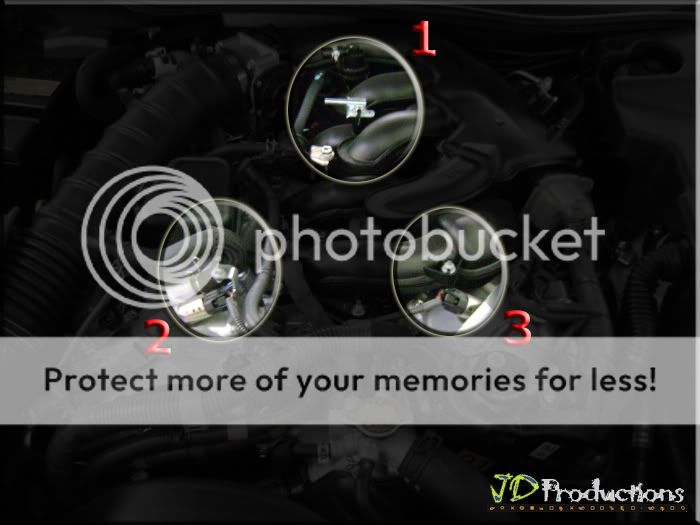
Carefully remove the Center Plastic Engine Cover.

Please note that there are 3 clip under the Engine Cover (see Pic below)
STEP 4
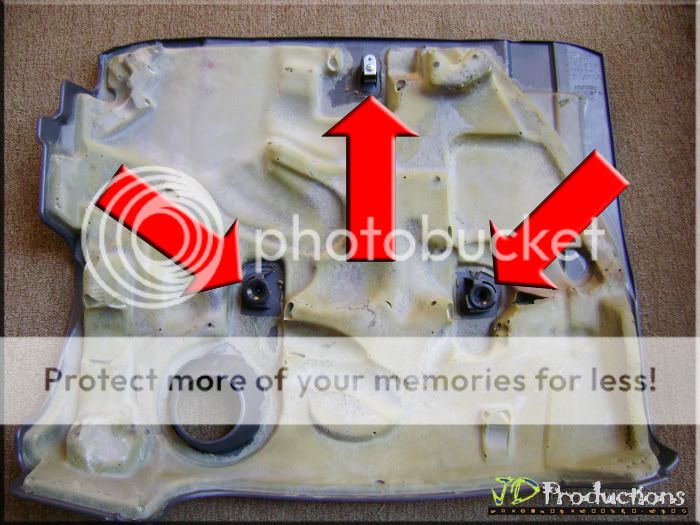
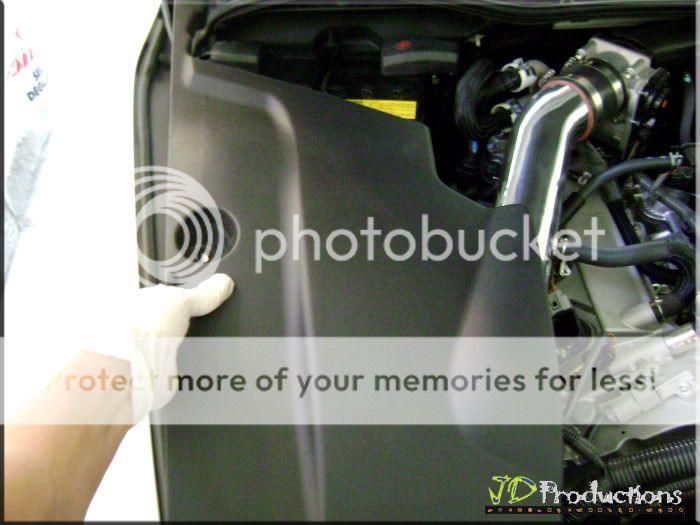
Carefully remove the Left Plastic Cover. There are 3 Plastic Clips and 1 Plastic Bolt.
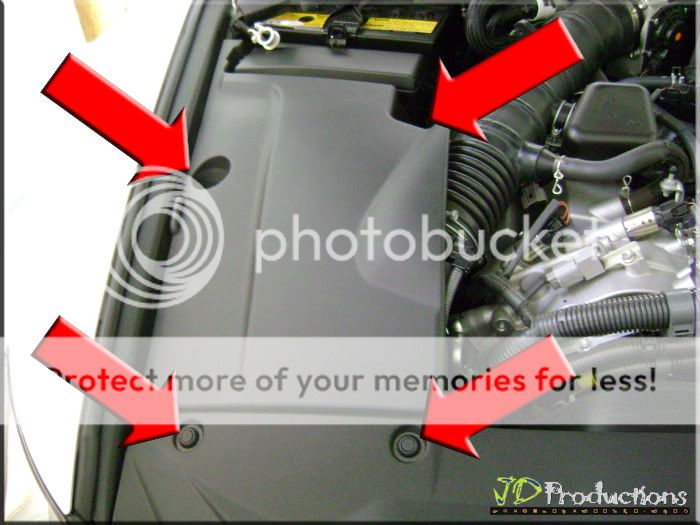
I use FlatHead Screwdriver to remove the Plastic Clip
Top Right Plastic Bolt (Close-up)
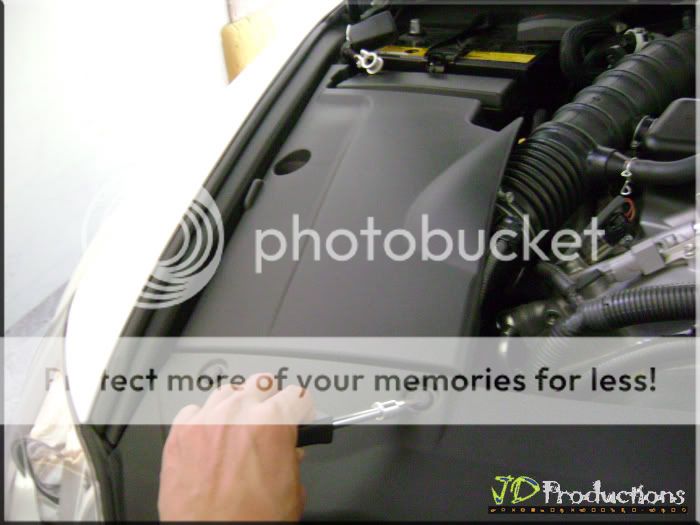
After removing the covers . . . this is how the Car looks like
STEP 5
Use 10mm Socket Wrench to remove the Top or Bottom stock clamps. You can loosen all the way . . . They will not come Off.
(Top)
(Bottom)
STEP 6
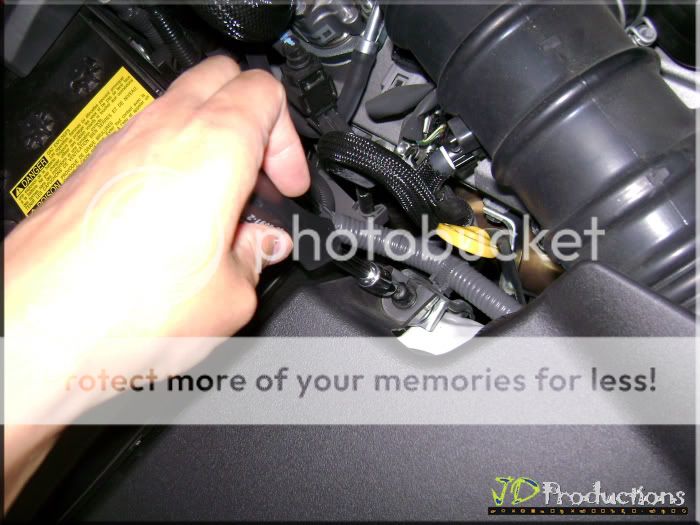
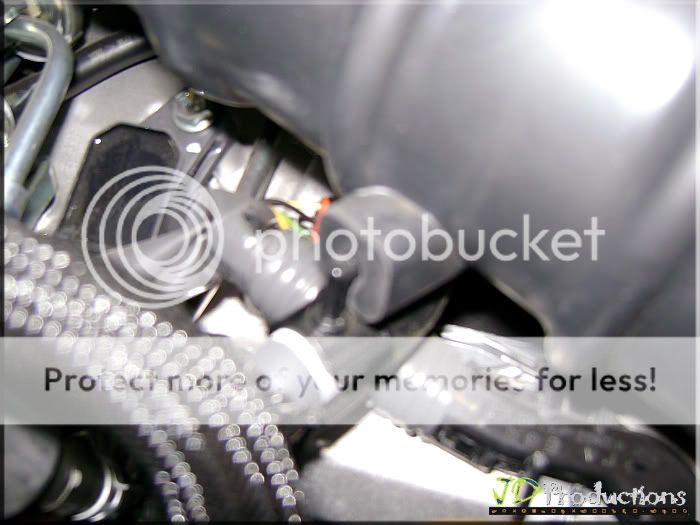
Squeeze the small Spring Clamp, slid back and remove vacuum line from the stock intake.
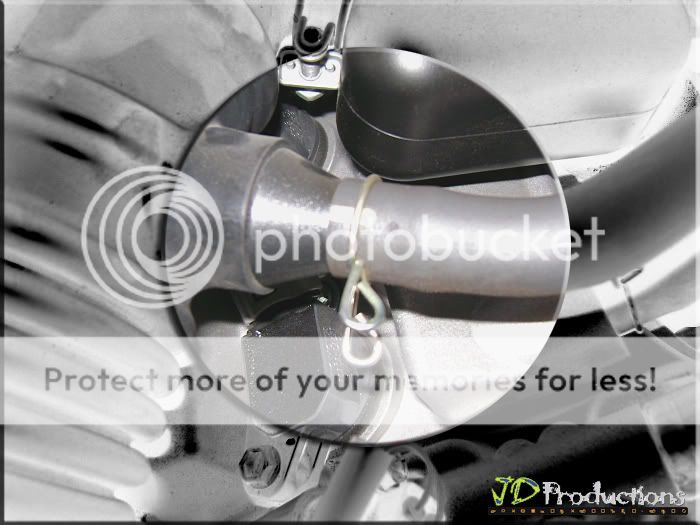
STEP 7
With both hands you can now remove the stock intake plastic pipe . . . But before you start to wiggle back & forth from Air Box & Throttle body; you need to unhook/unfasten the plastic clip in the middle part of the plastic intake pipe underneath (see Pic for reference).
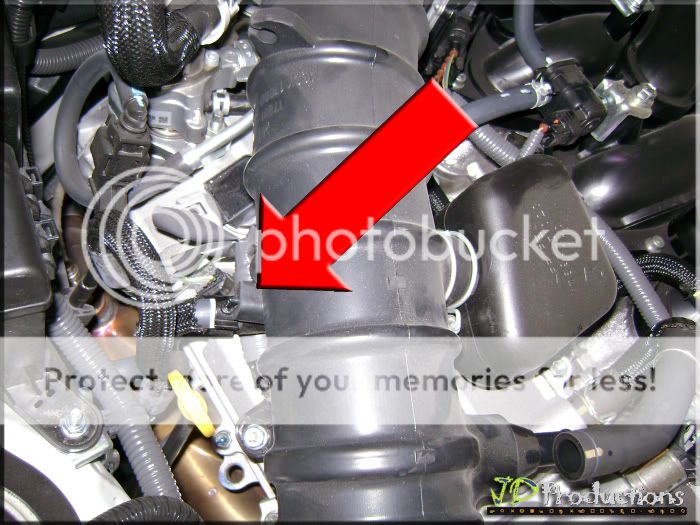
(Close Up)
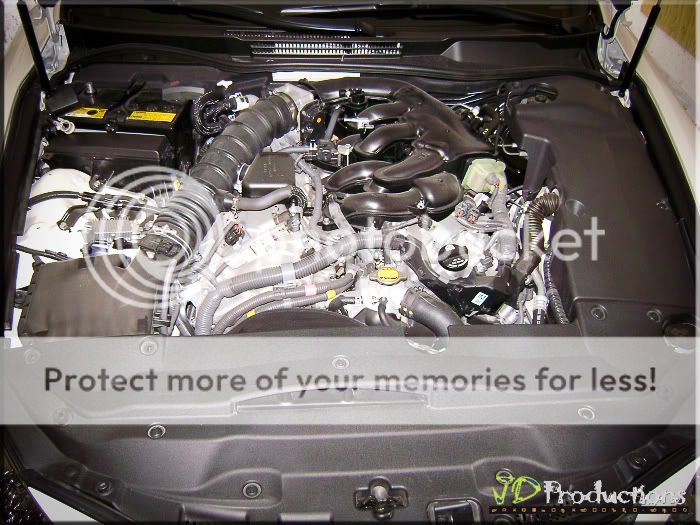
Stock Intake Pipe completely removed
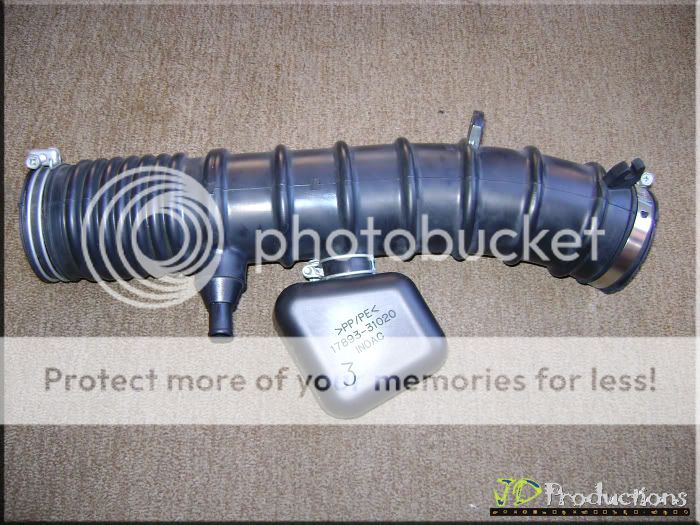
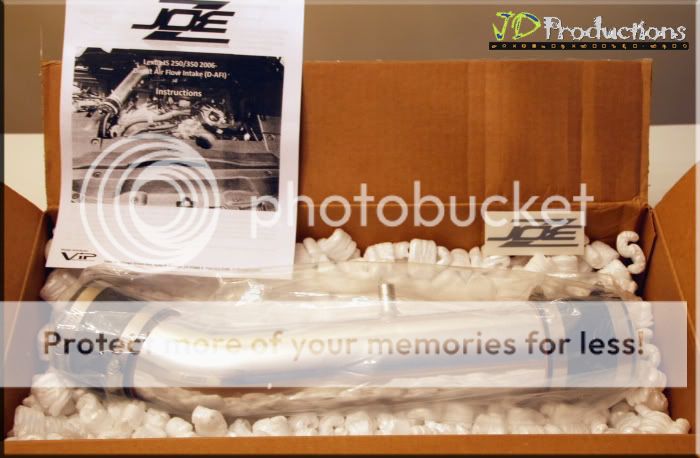
STEP 8
Unpack JOE Z Intake from the Box

"I'm not a Mechanic or Auto Body Specialist. I sit in-front of my computer all day at work. That being said; If I can do this Step-By-Step DIY, so can you!" . . . JD
This Step-by-Step process is essentially the Installation Guide from JOE Z that comes in the Box/Package enhanced by Photos.
CAR INFO
2009 IS250 RWD, MT
JOE Z CUSTOM DIRECT AIR FLOW INTAKE for 2006+ LEXUS IS
(ordered @ Carson Toyota)
TOOLS/MATERIALS NEEDED:
* Philips or Flat Head Screwdriver (Mastercraft @ Canadian Tire)
* Socket Wrench with 10mm Socket (Mastercraft @ Canadian Tire)
* Socket Wrench with 8mm Socket (Mastercraft @ Canadian Tire)
* Optional: Disposable Gloves (for Handling the Polished Aluminum Pipe) (Loving Hands @ Dollarama)
* Windex (Trust Me; you'll Thank me for this) :wink: (Canadian Tire)
~~~~~~~~~~~~~~~~~~~~~~~~~~~~~~~~~~~~~~~~~~~~~~~~~~~~~~~~~~~~~~~~~~~~~~~~~~~~~~~~
STEP 1
Pull the hood release lever.
STEP 2
Lift the Negative Battery Cover and start loosening the bolt using 10mm socket wrench.
Courtesy of JOE Z Instructions:
"By doing Step 2, you are Re-setting the ECU. Make sure it remains disconnected for minimal of 20 minutes or more is fine. ECU needs to be RESET so it can re-calibrate & Re-Learn to the new amount of AIR being sucked-in at a much higher rate of speed. The Direct AirFlow will increase air induction into Throttle Body. Hence more air intake . . . more Power! And much better sound as the silencer/resonator is removed. Your intake will now have a robust sound."
"By doing Step 2, you are Re-setting the ECU. Make sure it remains disconnected for minimal of 20 minutes or more is fine. ECU needs to be RESET so it can re-calibrate & Re-Learn to the new amount of AIR being sucked-in at a much higher rate of speed. The Direct AirFlow will increase air induction into Throttle Body. Hence more air intake . . . more Power! And much better sound as the silencer/resonator is removed. Your intake will now have a robust sound."
Carefully remove the Center Plastic Engine Cover.
Please note that there are 3 clip under the Engine Cover (see Pic below)
STEP 4
Carefully remove the Left Plastic Cover. There are 3 Plastic Clips and 1 Plastic Bolt.
I use FlatHead Screwdriver to remove the Plastic Clip
Top Right Plastic Bolt (Close-up)
After removing the covers . . . this is how the Car looks like
STEP 5
Use 10mm Socket Wrench to remove the Top or Bottom stock clamps. You can loosen all the way . . . They will not come Off.
(Top)
(Bottom)
STEP 6
Squeeze the small Spring Clamp, slid back and remove vacuum line from the stock intake.
STEP 7
With both hands you can now remove the stock intake plastic pipe . . . But before you start to wiggle back & forth from Air Box & Throttle body; you need to unhook/unfasten the plastic clip in the middle part of the plastic intake pipe underneath (see Pic for reference).
(Close Up)
Stock Intake Pipe completely removed
STEP 8
Unpack JOE Z Intake from the Box
 06-02-10, 10:35 AM
#2
Pole Position
Thread Starter
STEP 9
Don't forget to use Gloves when handling the Polished Aluminum Pipe
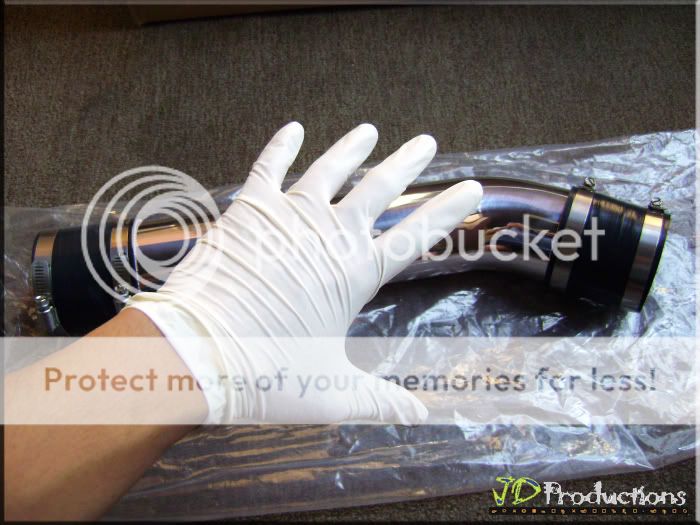
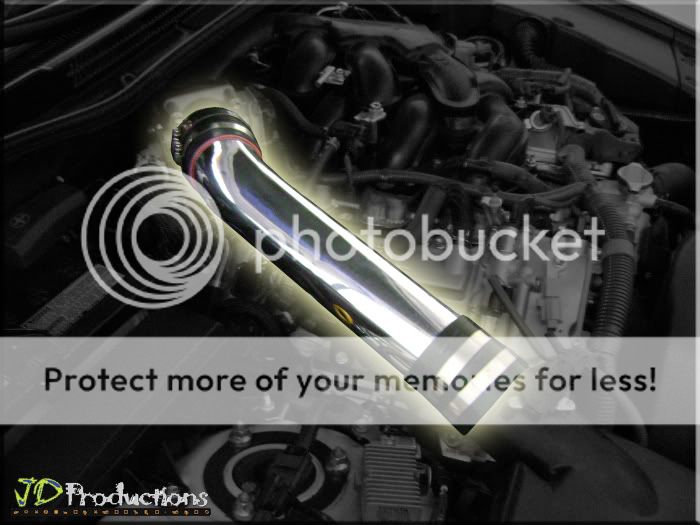
Use FlatHead Screwdriver to remove the Clamps & Sleeves from the New Joe Z Intake Pipe (Attached on both Ends)
STEP 10
Wipe the Throttle Body with Micro Fiber Cloth
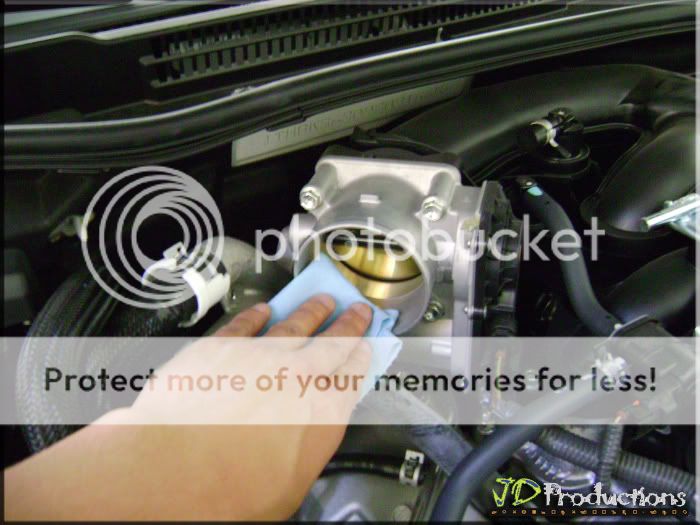
Put the 3" x 3" Sleeves onto the Throttle Body first without Pipe being attached, place the clamps on there the same time but do not tighten.

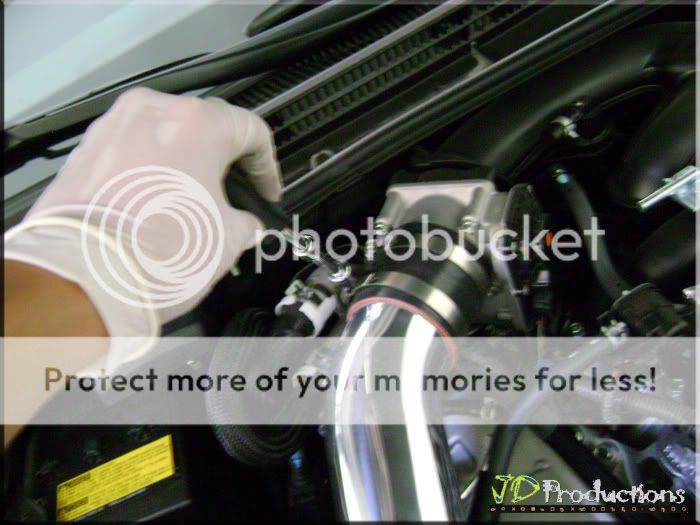
STEP 11
This Step is very important if you don't want to struggle in adjusting the Sleeves. Spray Windex to Microfiber Cloth then apply to the end of the Pipe (going to Stock Air Box) & spray Sleeves Interior as well.
Now put the end of the Pipe into Throttle Body into Sleeves at a 90' angle, so that you can turn the Pipe down to line it up with End of Air Box.
Install Second Sleeve
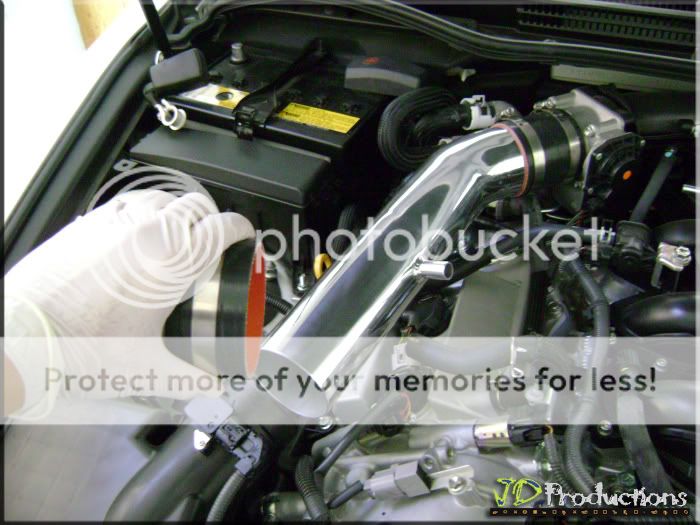
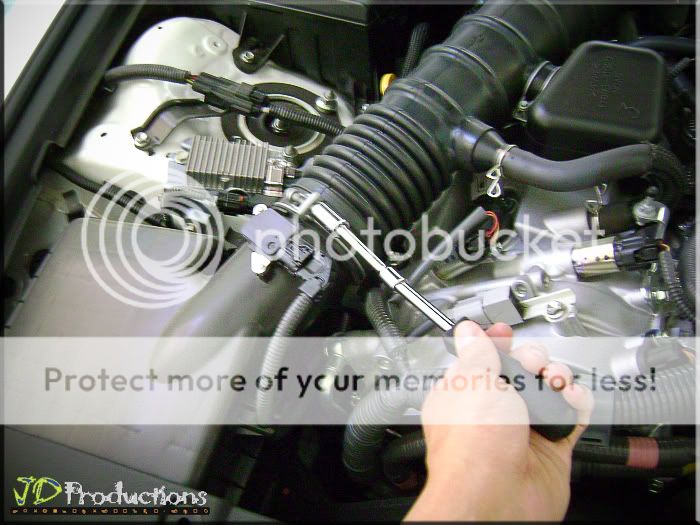
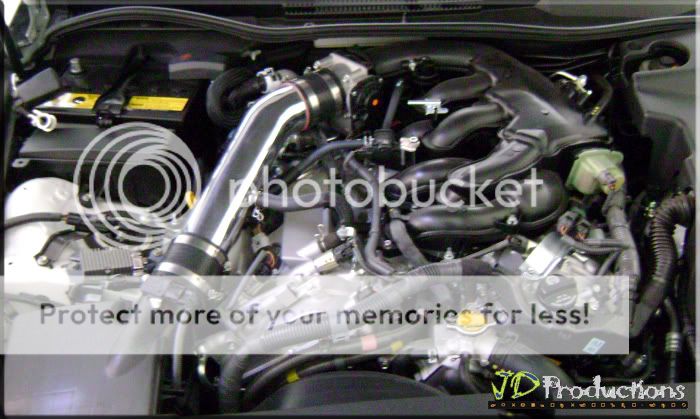
STEP 12
At this time, you will make sure that neither end of Pipe is touching the Throttle Body or Air Box. If you're not careful, you may get vibration or chatter. You basically want the Pipe to "Float in between those two sections". Slide the Sleeve onto the Air Box outlet . . . Take your time to be sure everything is lined-up correctly.
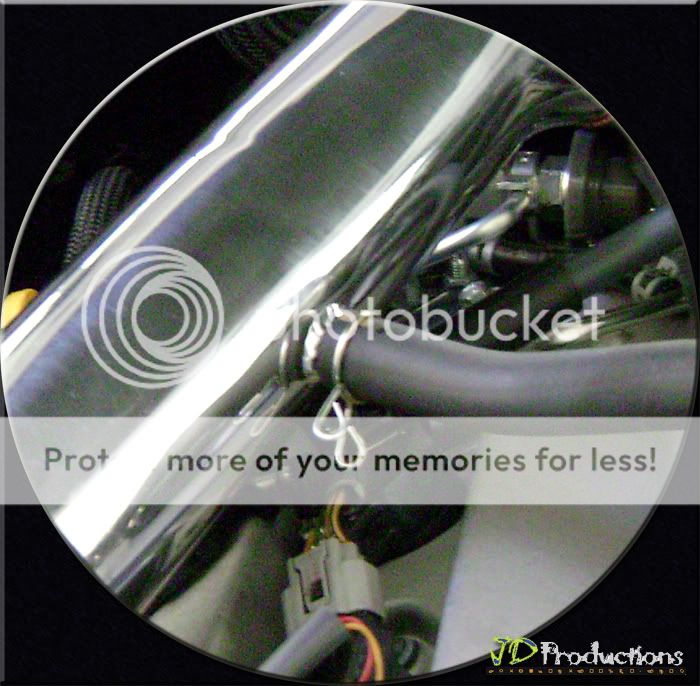
Take the end of the Vacuum Line & Insert over the New Intake Pipe nipple. Squeeze spring clamp back into place over Pipe Nipple.
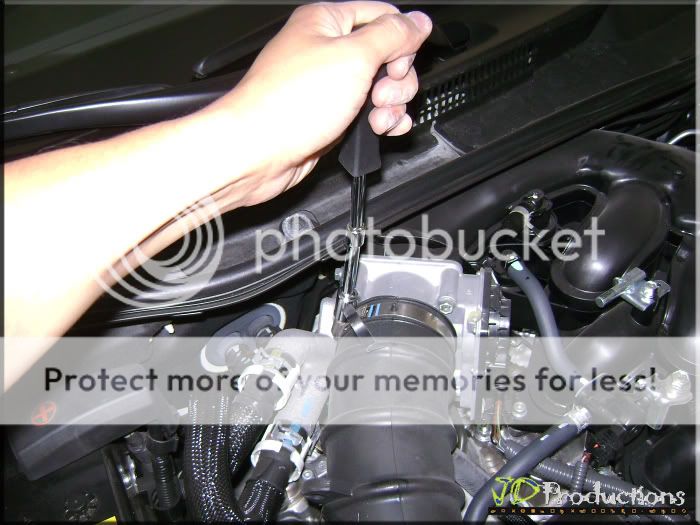
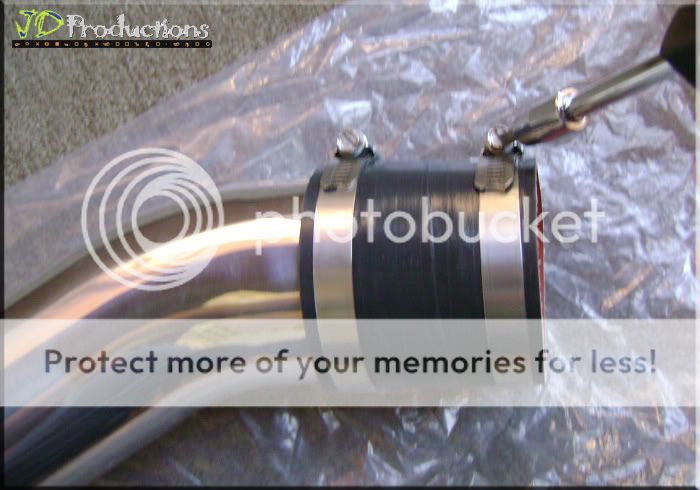
STEP 13
Tighten the Screws on clamps with Flat/Cross Head Screwdriver or 8mm Socket Wrench. Do Not Over Tighten!
(Top)
(Bottom)

STEP 14
The Most Important part . . . "The Sticker" :P


STEP 15
Now you can go ahead and place the Negative Battery Cable back ON and tighten bolt with 10mm Socket Wrench.
STEP 17
Now you can start the Car . . .
STEP 16
Place the Plastic Covers back with the appropriate clips & bolts

Don't forget to use Gloves when handling the Polished Aluminum Pipe
Use FlatHead Screwdriver to remove the Clamps & Sleeves from the New Joe Z Intake Pipe (Attached on both Ends)
STEP 10
Wipe the Throttle Body with Micro Fiber Cloth
Put the 3" x 3" Sleeves onto the Throttle Body first without Pipe being attached, place the clamps on there the same time but do not tighten.
STEP 11
This Step is very important if you don't want to struggle in adjusting the Sleeves. Spray Windex to Microfiber Cloth then apply to the end of the Pipe (going to Stock Air Box) & spray Sleeves Interior as well.
Now put the end of the Pipe into Throttle Body into Sleeves at a 90' angle, so that you can turn the Pipe down to line it up with End of Air Box.
Install Second Sleeve
STEP 12
At this time, you will make sure that neither end of Pipe is touching the Throttle Body or Air Box. If you're not careful, you may get vibration or chatter. You basically want the Pipe to "Float in between those two sections". Slide the Sleeve onto the Air Box outlet . . . Take your time to be sure everything is lined-up correctly.
Take the end of the Vacuum Line & Insert over the New Intake Pipe nipple. Squeeze spring clamp back into place over Pipe Nipple.
STEP 13
Tighten the Screws on clamps with Flat/Cross Head Screwdriver or 8mm Socket Wrench. Do Not Over Tighten!
(Top)
(Bottom)
STEP 14
The Most Important part . . . "The Sticker" :P
STEP 15
Now you can go ahead and place the Negative Battery Cable back ON and tighten bolt with 10mm Socket Wrench.
STEP 17
Now you can start the Car . . .
Courtesy of JOE Z Instructions:
"If the power Window Controls on the Driver's Side do not work after unplugging the battery; This is Normal . . . You 1st need to roll DOWN then UP each window individually with the switch on each Door. Once done, you will gain back the Driver's Door Window Controls. The radio does not loose any of it's settings/preset stations. FOR NAV owners: the system will go through a reboot process that takes about 30 seconds."
"If the power Window Controls on the Driver's Side do not work after unplugging the battery; This is Normal . . . You 1st need to roll DOWN then UP each window individually with the switch on each Door. Once done, you will gain back the Driver's Door Window Controls. The radio does not loose any of it's settings/preset stations. FOR NAV owners: the system will go through a reboot process that takes about 30 seconds."
Courtesy of JOE Z Instructions:
I recommend letting it run at IDLE for about 5-10 minutes. Be sure all accesories have been turned OFF (AC, Radio etc.). It may also run a bit rough for the first few minutes but this is NORMAL. The ECU is in the process of learning new pattern of Air Flow.
I recommend letting it run at IDLE for about 5-10 minutes. Be sure all accesories have been turned OFF (AC, Radio etc.). It may also run a bit rough for the first few minutes but this is NORMAL. The ECU is in the process of learning new pattern of Air Flow.
Courtesy of JOE Z Instructions:
While that is happening, go back to the Clamps & give it another turn or two with Socket Wrench as the Sleeves will set themselves & will need to be tightened some more . . .
While that is happening, go back to the Clamps & give it another turn or two with Socket Wrench as the Sleeves will set themselves & will need to be tightened some more . . .
Place the Plastic Covers back with the appropriate clips & bolts
Courtesy of JOE Z Instructions:
Now your car will have a nice growl in your Intake between 4K & 7K RPMS. You will also feel a nice kick in your pedal as now your Throttle will be more responsive as the "Direct Air Flow" is rushing into the Throttle without anything chopping up the air.
Also, the car will need to be driven more or less 200 miles (321.868 KM), so that the ECU will have time to reach it's Optimum Performance Levels. This is Normal & you will begin to feel the performance gains in all ranges of RPM's


 06-02-10, 12:39 PM
#5

Good job on the writeup...very nice work on the pics and the step by step... but honestly, step 2 can be skipped, making steps 15 and 17 unnecessary. The ECU is constantly learning and will adjust to the airflow on its own just fine (that's why there's an airflow meter).


Trending Topics

 11-07-10, 01:12 PM
#14
Rookie

Join Date: Jul 2010
Location: CO
Posts: 86
Likes: 0
Received 0 Likes
on
0 Posts
One of the best write ups I have seen (great photos BTW)...Also, for acefalcon I would assume he used the gloves to keep fingerprints off of his new intake. Looking at his engine bay it looks like the OP is pretty meticulous about such things.