
ArmyofOne's DIY Workshop-Front Brake Pad and Rotor Replacement

Thread Starter
Dysfunctional Veteran


Joined: Sep 2004
Posts: 8,103
Likes: 319
From: Van Alstyne, TX
Ok CL, the tools you will need To replace your brake rotors and pads on the front of your car are:
Hammer (decent sized).
Appropriate socket/ratchet or wrench (In my case it was a 3/8" allen key)
Large flathead screwdriver, or flat tipped tire-iron.
C-clamp (large)
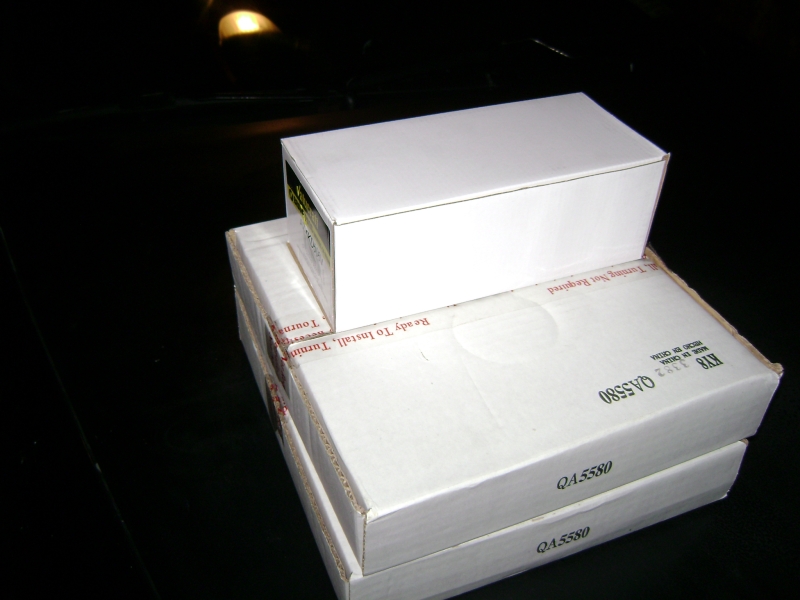
New parts:
First-Loosen your lugnuts on your wheels with your car still on the ground. DO NOT REMOVE THE LUGS! , simply back them off a half a turn or so:

^Pay no mind to the fact that the car is jacked up in this picture. I have my own air tools so i can remove lugs with the wheels in the air.
Step 2: support your car on jackstands. You cannot use ramps on this one as you have to take your wheels off .
.
Now you should see this:

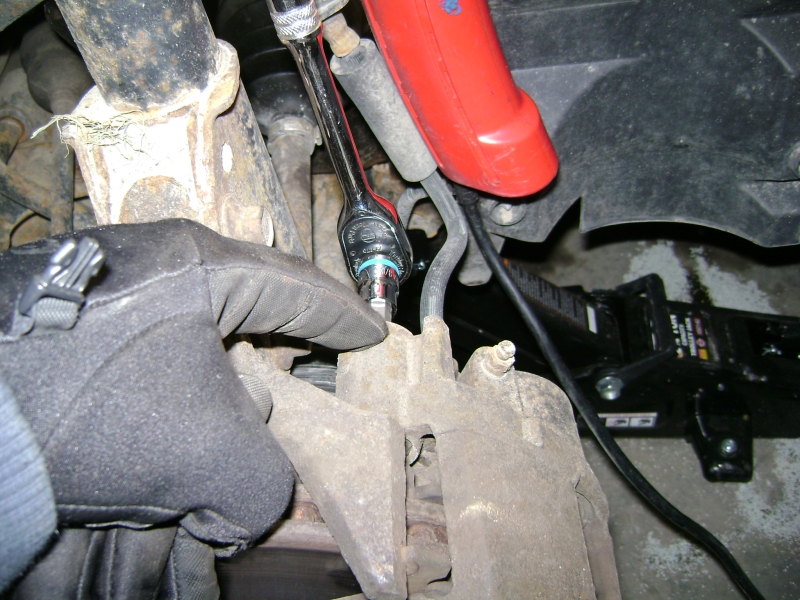
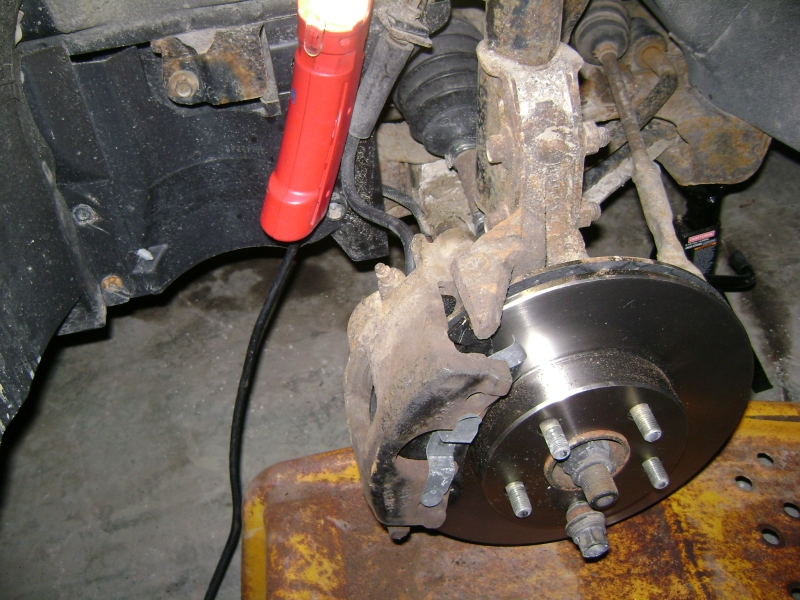
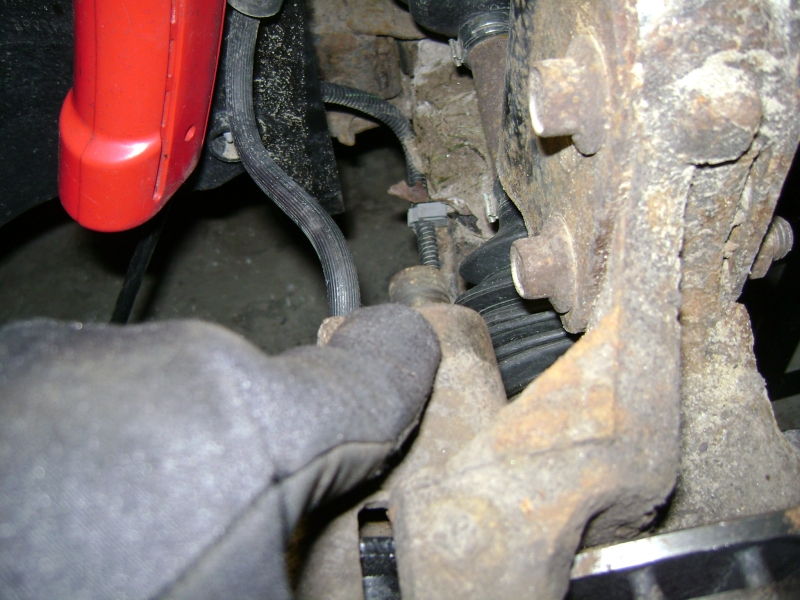
Step 3: Locate your caliper bolts (usually on the top and bottom corners of the caliper facing in toward wheel-well), and remove them.
Step 4: Remove caliper from mount. You may need the giant screwdriver to pry it off the mount.DO NOT let the caliper hang by the brake line. If you do this procedure the way I am showing you, you will not have to bleed the brakes and your pedal will retain the factory feel.
Step 5: Remove the Pads from the caliper. Mine were retained with clips, some cars just have the pads set in the caliper.


To be continued...
Hammer (decent sized).
Appropriate socket/ratchet or wrench (In my case it was a 3/8" allen key)
Large flathead screwdriver, or flat tipped tire-iron.
C-clamp (large)
New parts:
First-Loosen your lugnuts on your wheels with your car still on the ground. DO NOT REMOVE THE LUGS! , simply back them off a half a turn or so:
^Pay no mind to the fact that the car is jacked up in this picture. I have my own air tools so i can remove lugs with the wheels in the air.
Step 2: support your car on jackstands. You cannot use ramps on this one as you have to take your wheels off
.Now you should see this:
Step 3: Locate your caliper bolts (usually on the top and bottom corners of the caliper facing in toward wheel-well), and remove them.
Step 4: Remove caliper from mount. You may need the giant screwdriver to pry it off the mount.DO NOT let the caliper hang by the brake line. If you do this procedure the way I am showing you, you will not have to bleed the brakes and your pedal will retain the factory feel.
Step 5: Remove the Pads from the caliper. Mine were retained with clips, some cars just have the pads set in the caliper.
To be continued...
Thread Starter
Dysfunctional Veteran
Joined: Sep 2004
Posts: 8,103
Likes: 319
From: Van Alstyne, TX
Step 6: Remove old rotor. you may have to hit it with the hammer. Dont worry, you arent breaking anything. You will not be reusing the rotor. Just dont hit the brake line or caliper.
Step 6: You will need to open your new parts, and grab a can of brake parts cleaner.

Step 7: Grab some fine steel wool.

Step 8: Spray the first new rotor on one side with brake parts cleaner. The cleaner will remove the preservative from the metal. This is very important. If you install the rotor with the "sticky stuff" on it, you wont be able to stop and you will glaze your new pads, rendering them usless and wasting the money, in addition to whatever it costs you to repair the body damage to your car after you back into the neighbors house across the street.

Step 9: Scrub braking surface lightly with the steel wool.

Step 10: Flip rotor over and repeat.
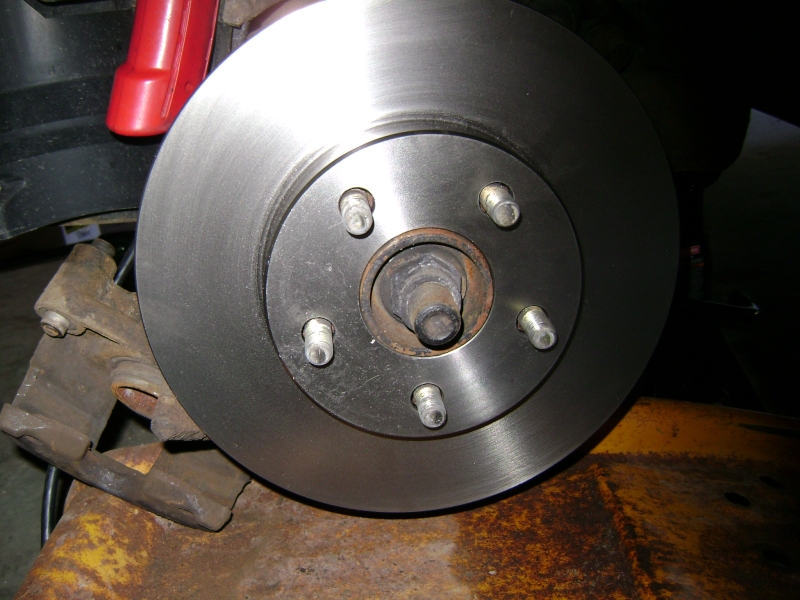
Step 11: Install new rotor.
Now for the uh...really tricky part. (Not really, if you cant do this part, stop, put away your tools and call a tow truck.
Step 12: Use the C-Clamp to compress the piston on the caliper. Be careful not to tear the rubber seal on the piston.

Step 13: install new pads
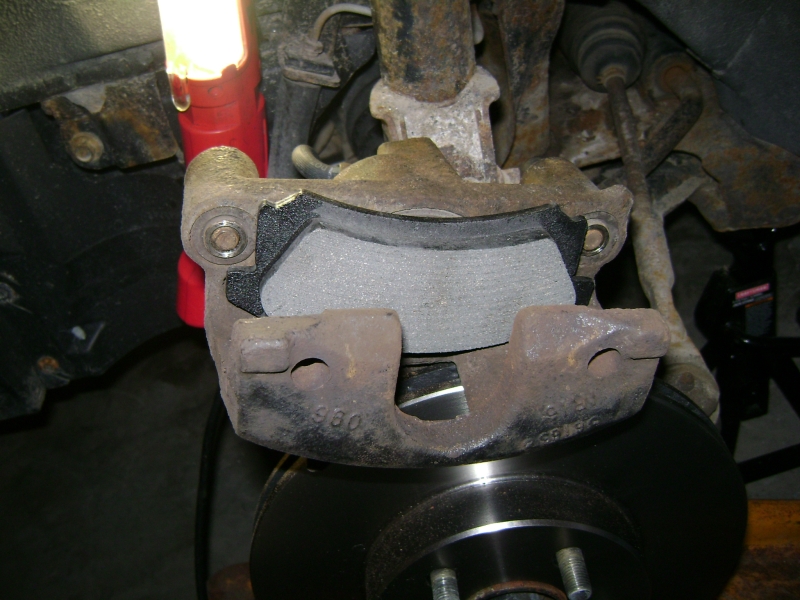
Step 14: Reinstall caliper on new rotor.
To be continued:
Step 6: You will need to open your new parts, and grab a can of brake parts cleaner.
Step 7: Grab some fine steel wool.
Step 8: Spray the first new rotor on one side with brake parts cleaner. The cleaner will remove the preservative from the metal. This is very important. If you install the rotor with the "sticky stuff" on it, you wont be able to stop and you will glaze your new pads, rendering them usless and wasting the money, in addition to whatever it costs you to repair the body damage to your car after you back into the neighbors house across the street.
Step 9: Scrub braking surface lightly with the steel wool.
Step 10: Flip rotor over and repeat.
Step 11: Install new rotor.
Now for the uh...really tricky part. (Not really, if you cant do this part, stop, put away your tools and call a tow truck.
Step 12: Use the C-Clamp to compress the piston on the caliper. Be careful not to tear the rubber seal on the piston.
Step 13: install new pads
Step 14: Reinstall caliper on new rotor.
To be continued:
Last edited by ArmyofOne; Mar 14, 2009 at 07:07 PM.
Thread Starter
Dysfunctional Veteran
Joined: Sep 2004
Posts: 8,103
Likes: 319
From: Van Alstyne, TX
Step 15: Tighten Caliper bolts.
and you should see this:
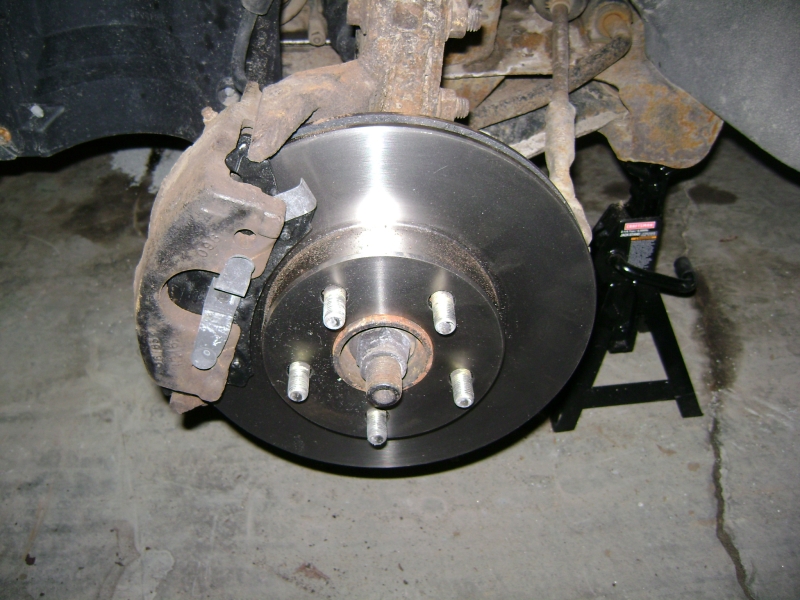
 Big, shiny new things!
Now, Put your wheel back on, Lather, rinse and repeat for the other side.
then THE VERY LAST STEP after your car is off the jackstands and on the ground:
BEFORE YOU MOVE YOUR CAR ANYWHERE, START YOUR CAR AND PUMP YOUR BRAKE PEDAL 15-20 TIMES UNTIL YOU GET YOUR "NORMAL" FEEL AGAIN. IF YOU FAIL TO DO THIS, YOUR CAR WILL NOT STOP!!!!!
and you should see this:
Big, shiny new things!Now, Put your wheel back on, Lather, rinse and repeat for the other side.
then THE VERY LAST STEP after your car is off the jackstands and on the ground:
BEFORE YOU MOVE YOUR CAR ANYWHERE, START YOUR CAR AND PUMP YOUR BRAKE PEDAL 15-20 TIMES UNTIL YOU GET YOUR "NORMAL" FEEL AGAIN. IF YOU FAIL TO DO THIS, YOUR CAR WILL NOT STOP!!!!!
Lexus Fanatic


Joined: Oct 2003
Posts: 94,521
Likes: 261
From: Virginia/D.C. suburbs
Nice post, Josh. 
Just an aside note: On a number of Toyota/Lexus products (and I even noticed it on my Subaru), the caliper assembly, over time, will shift back and forth slightly when the car's direction is changed from forward/backward and forward again, the first time the brake pedal is pressed. You hear a faint "click" as it hits the metal stops, and then after that no more clicks until the direction is reversed and the brake pedal is first touched again. This is no problem.....it is considered normal, and will not affect brake operation any.
For some reason, you usually don't hear it when the car is new, but over time (usually about 3000-4000 miles) it starts to develop. Many people get concerned about it (as I was until I found out what it was), but it is normal for many Toyota/Lexus products and some other cars as well (I noticed it on my FWD Celica, RWD IS300, and AWD Subaru).
I just wanted to bring this up so that people don't get too concerned if/when it happens.
One question, though, on a slightly different topic: After the brake job is done, don't you have to re-check the front-end alignment on some vehicles.......especially those with McPherson struts? I ask that, because on some cars, when you loosen and take off enough things to get the rotor and caliper loose, the strut just ends up hanging free in the air........with no lower support (so can the caliper and brake line sometimes, as you noted). So, when you bolt everything back on again, the strut alignment may not (?) be exactly as it was before.
Last edited by mmarshall; Mar 14, 2009 at 06:49 PM.
Thread Starter
Dysfunctional Veteran
Joined: Sep 2004
Posts: 8,103
Likes: 319
From: Van Alstyne, TX
Not the case. If you look at the strut, it is attached to the hub, which is attached to the lower ball joint, attached to the lower control arm. If you were to remove the ball joint from the hub, then you should check your alignment. I assure you, with Mcpherson struts, the only part hanging free during this procedure would be your caliper. if your car is in proper order, nothing should shift. The rotor simply slides onto the hub over the lug studs. On most cars, the only things needing unbolted for this project are the 2 caliper bolts.
as soon as I get some new Tie rod ends for my car, Ill do a DIY on alignments too.
as soon as I get some new Tie rod ends for my car, Ill do a DIY on alignments too.
Lexus Fanatic
Joined: Oct 2003
Posts: 94,521
Likes: 261
From: Virginia/D.C. suburbs
I don't want to horn in on your territory too much, Josh (this is your thread, of course), but one more thing important I'd like to bring up about a brake job:
Asbestos, a known cancer-producing substance, was once widely used, both in drum brake linings and disc-brake pads, for its good heat-resistant qualities. It was banned in the U.S. decades ago, so mechanics and technicians here no longer have to deal with it (unfortunately a friend of mine, an ex-mechanic, died from cancer.....he used to work on big school-bus brakes with large asbestos parts before it was outlawed).
So, for those of you overseas, where asbestos may (?) still be in use, if you HAVE to work with any asbestos brake part, make sure you wear protective gear and respirator for your body and lungs, if available.
Last edited by mmarshall; Mar 14, 2009 at 07:10 PM.
Lexus Fanatic
Joined: Oct 2003
Posts: 94,521
Likes: 261
From: Virginia/D.C. suburbs
Not the case. If you look at the strut, it is attached to the hub, which is attached to the lower ball joint, attached to the lower control arm. If you were to remove the ball joint from the hub, then you should check your alignment. I assure you, with Mcpherson struts, the only part hanging free during this procedure would be your caliper. if your car is in proper order, nothing should shift. The rotor simply slides onto the hub over the lug studs.

I've seen some cars getting brake jobs that had the strut hanging free, but perhaps (?) as you note, that involved more than a brake job.
Trending Topics


Just a note for most Lexus owners out there with floating calipers, if you want to replace the pads, you dont have to remove the caliper. Just remove one of the bolt that holds the caliper to its bracket (sliding pin), and you can just swing open the caliper.
One more thing... you don't need brake parts cleaner... the recommended procedure for cleaning a brake rotor, both when new or after refinishing is just good old soap and warm water... Many brake rotors have this shown right on the box. There is no need to waste money on brake parts cleaner for this.
Don't feel bad though, the guys in my shop used to go through brake cleaner like it was water, when all they needed to use was soap and water.
Don't feel bad though, the guys in my shop used to go through brake cleaner like it was water, when all they needed to use was soap and water.
This is one of the reasons we do not used compressed air to clean things, especially brake assemblies. In fact our process for removing a rear drum that will more than likely have lots of brake dust inside of it, is to use our portable parts washer to wet the drum prior to removing, and as it's being removed to continue to wet the shoes and assemblies. Don't worry, this is the same stuff that is used to clean brake pads, shoes and drums when needed, so it's not going to harm anything, but the fact that the stuff is wet keeps it from being airborne where it can be breathed.
from wikipedia: "Care to avoid inhalation of brake dust produced during operation should be practiced no matter what materials are employed. An approved filter mask should be worn when working on brakes and never blow out the brakes with compressed air."

Lexus Champion
Joined: Oct 2003
Posts: 3,350
Likes: 6
From: California
^ Brake cleaner is a heck of a lot more convenient though, but I do agree. Aftermarket rotor use an oily anti-rust, while OEM uses a water-based coating or VCI paper in the box.
What I also like to do when I do brakes is flush out the brake system with fresh fluid, I prefer ATE Super Blue or Type 200 fluid. I also like to apply a little anti-seize to the wheel studs/bolts too. Some cars - especially Hondas and Toyota are known for brake noise when aftermarket pads are installed, so stick to OEM on those. I've never had luck with Raybestos, Bendix is OK - but our beater Nissan Quest chewed through Bendix SUV pads in 1 year, and I just put in a set of Monroe Ceramics a year ago and they're down to 50%. If I have to use aftermarket on a Toyota or Honda, I find PBR/Axxis/Repco pads.
What I also like to do when I do brakes is flush out the brake system with fresh fluid, I prefer ATE Super Blue or Type 200 fluid. I also like to apply a little anti-seize to the wheel studs/bolts too. Some cars - especially Hondas and Toyota are known for brake noise when aftermarket pads are installed, so stick to OEM on those. I've never had luck with Raybestos, Bendix is OK - but our beater Nissan Quest chewed through Bendix SUV pads in 1 year, and I just put in a set of Monroe Ceramics a year ago and they're down to 50%. If I have to use aftermarket on a Toyota or Honda, I find PBR/Axxis/Repco pads.
Thread Starter
Dysfunctional Veteran
Joined: Sep 2004
Posts: 8,103
Likes: 319
From: Van Alstyne, TX
One more thing... you don't need brake parts cleaner... the recommended procedure for cleaning a brake rotor, both when new or after refinishing is just good old soap and warm water... Many brake rotors have this shown right on the box. There is no need to waste money on brake parts cleaner for this.
Don't feel bad though, the guys in my shop used to go through brake cleaner like it was water, when all they needed to use was soap and water.
Don't feel bad though, the guys in my shop used to go through brake cleaner like it was water, when all they needed to use was soap and water.
Thread Starter
Dysfunctional Veteran
Joined: Sep 2004
Posts: 8,103
Likes: 319
From: Van Alstyne, TX
I always leave my cap open, especially when I'm running back and forth pouring in fluid. The pistons will stay in the same position as long as you dont push your brake pedal. You can't get air back into the system with the cap off unless you push your pedal while the reservoir has little to no fluid. Cap on or off, there is already air in the container anyways. I also take off my cap when I compress the piston. My cap has a rubber o-ring that prevents air from going in and out of the reservoir... compressing the pistons with the cap on makes it harder.