
DIY: Headlight trim (eyeline garnish)


Thread Starter
Pole Position
iTrader: (3)
Joined: Mar 2007
Posts: 309
Likes: 5
From: Edmonton area, Alberta
DIY: Headlight trim (eyeline garnish)
I decided against spending $300+ on buying these for my Celsior and instead opted for doing it myself. Please read all the directions before you begin, as i did both headlights simultaneously rather than one at a time. The DIY is for one at a time.
Desired result:
http://www.l-tunedparts.com/product/?id=1617
http://www.l-tunedparts.com/product/?id=300
http://www.l-tunedparts.com/product/?id=1842

Supplies:
-green painters tape (1.5" to 2" wide)
-newspaper
-fiberglass repair kit
-1.5" wide soft bristle paint brush
-latex gloves
-bondo body filler
-sharpie
-dremmel
-coarse file
-60 grit sand paper
-150 grit sand paper
-super fine “wet sand” sand paper (the black stuff)
-primer spray paint (grey)
-color match spray paint (your desired end result color)
-clear coat spray paint
-3M double sided adhesive tape
-windex
-paper towel
-hair dryer
Steps:
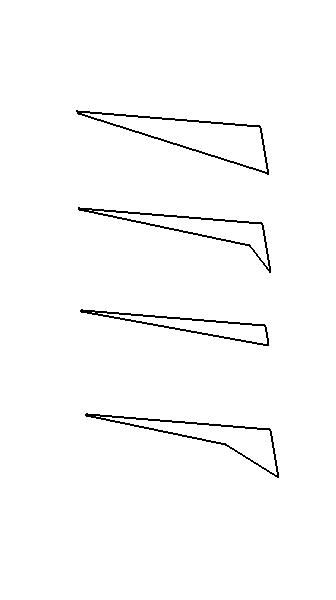
1. decide if you want the eyeline on your headlights or headlights + turn signals (i did headlights only, so the DIY will be for this. if you choose to have the eleline extend to the turn signal, modify the steps below accordingly)
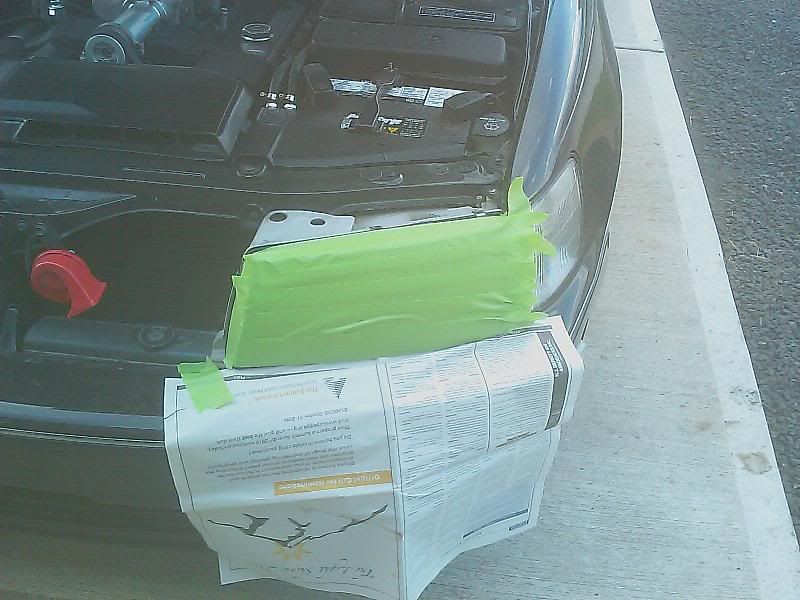
2. use green painters tape to mask off your ENTIRE headlight (front, top, and side)
3. use newspaper to mask off the bumper below the light as well as on the turn signal.
4. put on your latex gloves
5. cut two pieces of fiberglass cloth slightly bigger than the headlight
6. mix the fiberglass resin as per the directions on the box.
7. soak the first piece of fiberglass in the resin and apply to the headlight, wrapping it on the top and side of the headlight.
8. use the paint brush and brush the fiberglass to remove any air bubbles.
9. soak the second piece of fiberglass in the resin and apply to the headlight wrapping it on the top and side of the headlight.
10. again, use the paint brush to remove any air bubbles and smooth the surface (*this is important*)
11. let dry as per the instructions on the fiberglass kit box.
12. when the fiberglass is hard, use the sharpie and draw the desired profile onto the molded piece. Also draw a line on the top of the headlight (by the retaining clips) and the side of the headlight.
13. mix the bondo as per the directions on the box.
14. apply A THIN LAYER of the bondo only to the area that will be included in your final product.
15. let dry as per the instructions on the bondo box
16. carefully pry the edges until the molded piece comes off. Remove the tape and newspaper.
17. you should be able to see your sharpie lines on the inside of the molded piece (the part that was just against the headlight).
18. use the dremmel to gut along these lines. You will now have your basic eyeline shape
19. use the coarse file to obtain smooth edges and also to remove any excess bondo lumps from the front/top/side of the eyeline
20. use the 60 grit sand paper to smooth further (I did this while holding the molded piece on the headlight)
21. use the 150 grit sand paper to smooth further (I did this while holding the molded piece on the headlight)
22. wet the eyeline piece and use the black sand paper to achieve a smooth finish.
23. rinse off the eyeline
24. use the primer and apply 2 coats to the front/top/sides
25. let dry
26. wet sand using the black sand paper
27. rinse off and let dry.
28. use the color match spray paint and apply 1 coat to the BACK of the piece. This will help ensure no light shines through the finished product
29. let dry
30. use the color match spray paint and apply 2 coats to the front/top/sides
31. wet sand using the black sand paper
32. rinse off and let dry.
33. use the color match spray paint and apply 2 more coats to the front/top/sides
34. use the clear coat spray paint and apply as many coats as needed to achieve the desired amount of gloss.
35. let dry
36. clean the inside of the eyeline with the windex and wipe dry with the paper towel
37. apply the 3M adhesive tape around ALL the inner edges of the eyeline.
38. clean the headlight with the windex and wipe dry with the paper towel
39. heat the headlight and 3M tape with the hair dryer.
40. remove the backing from the 3M tape and apply the eyeline to the headlight
41. Repeat for the other side
***Disclaimer***
Do this at your own risk.
Pictures
masked area
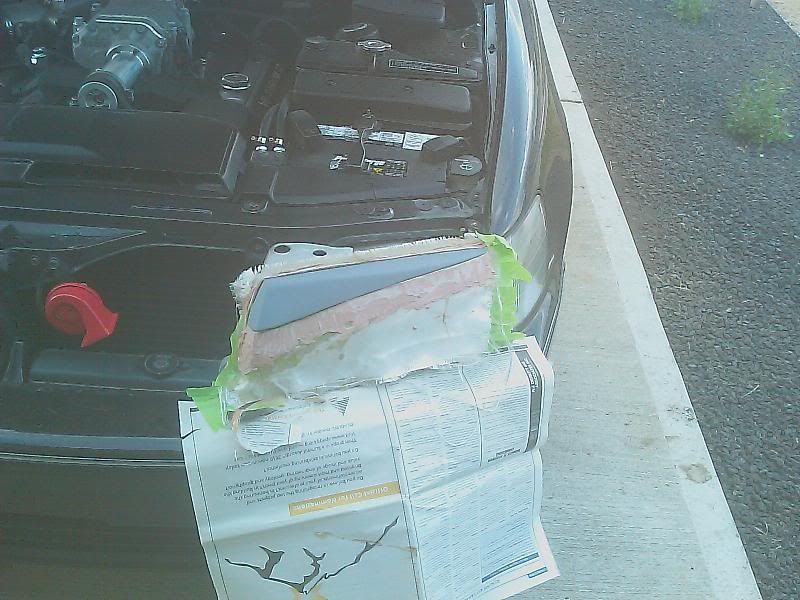
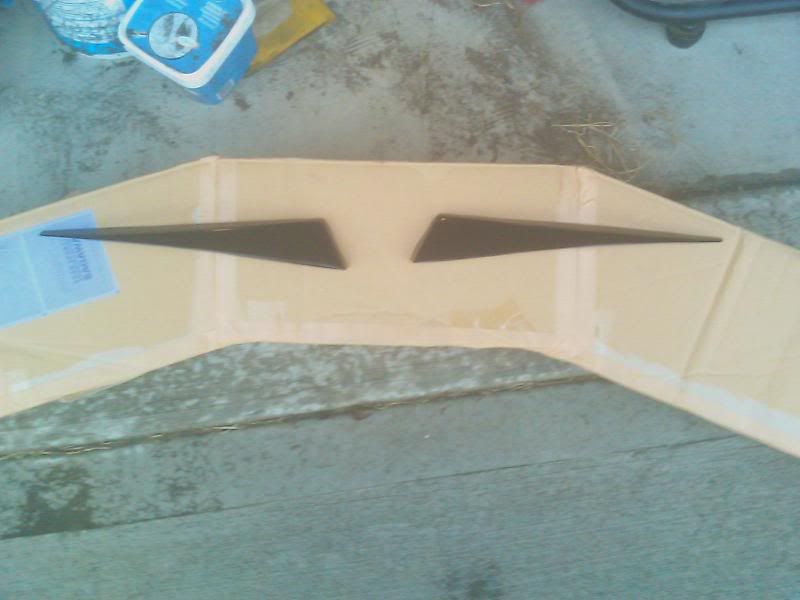
fiberglass and bondo (i had already cut and primed the piece, but put it back together to take the pic)
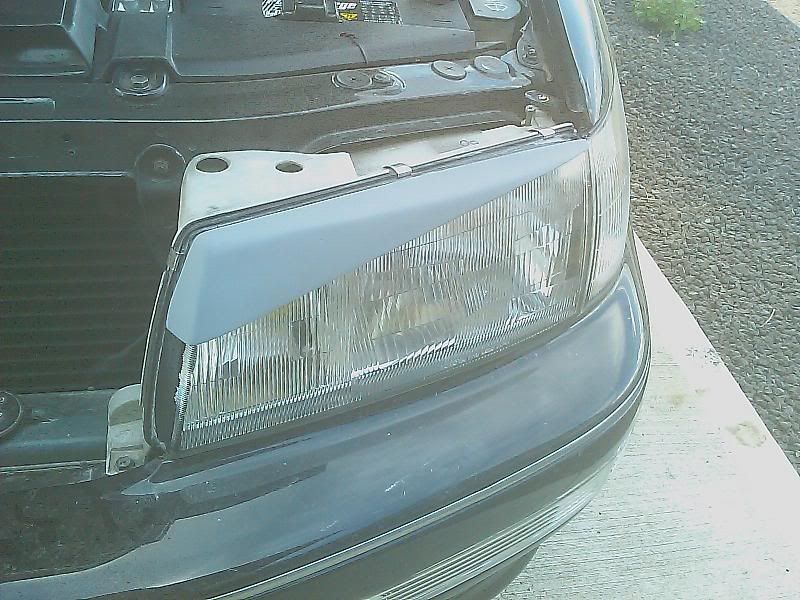
primed and wet sanded
first 2 coats of black
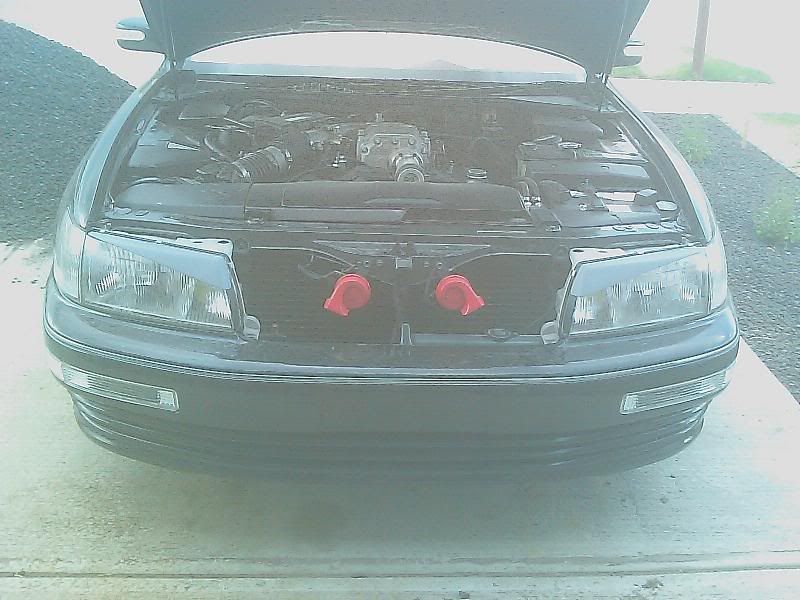
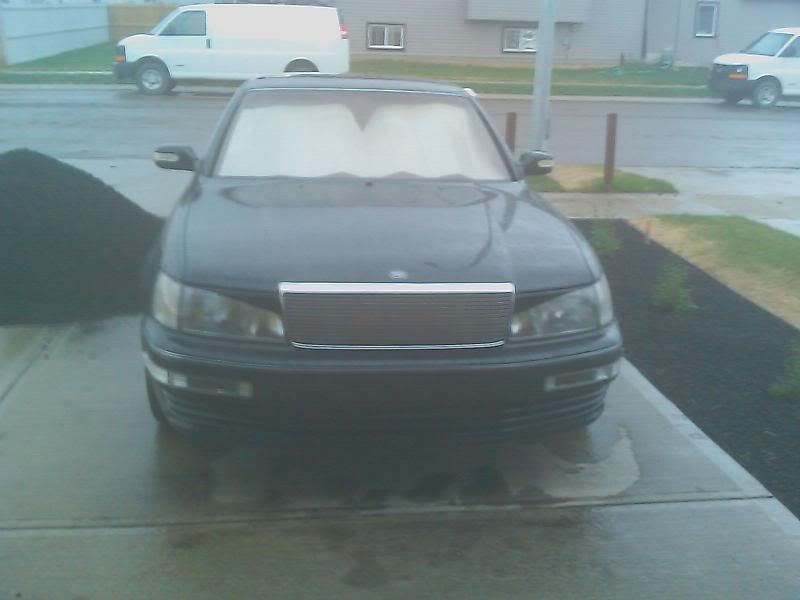
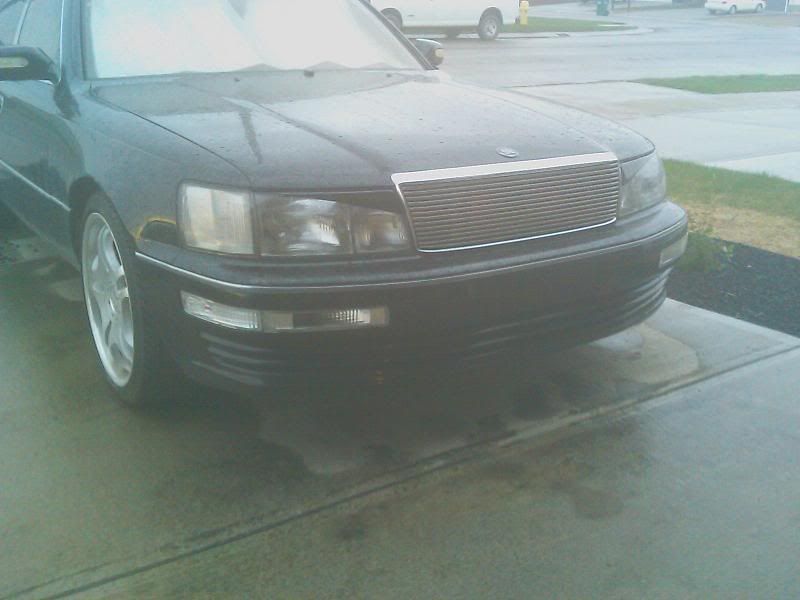
final product (clear coat not yet applied). they look 'blacker' because the car is dusty/dirty/rained on.
I decided against spending $300+ on buying these for my Celsior and instead opted for doing it myself. Please read all the directions before you begin, as i did both headlights simultaneously rather than one at a time. The DIY is for one at a time.
Desired result:
http://www.l-tunedparts.com/product/?id=1617
http://www.l-tunedparts.com/product/?id=300
http://www.l-tunedparts.com/product/?id=1842

Supplies:
-green painters tape (1.5" to 2" wide)
-newspaper
-fiberglass repair kit
-1.5" wide soft bristle paint brush
-latex gloves
-bondo body filler
-sharpie
-dremmel
-coarse file
-60 grit sand paper
-150 grit sand paper
-super fine “wet sand” sand paper (the black stuff)
-primer spray paint (grey)
-color match spray paint (your desired end result color)
-clear coat spray paint
-3M double sided adhesive tape
-windex
-paper towel
-hair dryer
Steps:
1. decide if you want the eyeline on your headlights or headlights + turn signals (i did headlights only, so the DIY will be for this. if you choose to have the eleline extend to the turn signal, modify the steps below accordingly)
2. use green painters tape to mask off your ENTIRE headlight (front, top, and side)
3. use newspaper to mask off the bumper below the light as well as on the turn signal.
4. put on your latex gloves
5. cut two pieces of fiberglass cloth slightly bigger than the headlight
6. mix the fiberglass resin as per the directions on the box.
7. soak the first piece of fiberglass in the resin and apply to the headlight, wrapping it on the top and side of the headlight.
8. use the paint brush and brush the fiberglass to remove any air bubbles.
9. soak the second piece of fiberglass in the resin and apply to the headlight wrapping it on the top and side of the headlight.
10. again, use the paint brush to remove any air bubbles and smooth the surface (*this is important*)
11. let dry as per the instructions on the fiberglass kit box.
12. when the fiberglass is hard, use the sharpie and draw the desired profile onto the molded piece. Also draw a line on the top of the headlight (by the retaining clips) and the side of the headlight.
13. mix the bondo as per the directions on the box.
14. apply A THIN LAYER of the bondo only to the area that will be included in your final product.
15. let dry as per the instructions on the bondo box
16. carefully pry the edges until the molded piece comes off. Remove the tape and newspaper.
17. you should be able to see your sharpie lines on the inside of the molded piece (the part that was just against the headlight).
18. use the dremmel to gut along these lines. You will now have your basic eyeline shape
19. use the coarse file to obtain smooth edges and also to remove any excess bondo lumps from the front/top/side of the eyeline
20. use the 60 grit sand paper to smooth further (I did this while holding the molded piece on the headlight)
21. use the 150 grit sand paper to smooth further (I did this while holding the molded piece on the headlight)
22. wet the eyeline piece and use the black sand paper to achieve a smooth finish.
23. rinse off the eyeline
24. use the primer and apply 2 coats to the front/top/sides
25. let dry
26. wet sand using the black sand paper
27. rinse off and let dry.
28. use the color match spray paint and apply 1 coat to the BACK of the piece. This will help ensure no light shines through the finished product
29. let dry
30. use the color match spray paint and apply 2 coats to the front/top/sides
31. wet sand using the black sand paper
32. rinse off and let dry.
33. use the color match spray paint and apply 2 more coats to the front/top/sides
34. use the clear coat spray paint and apply as many coats as needed to achieve the desired amount of gloss.
35. let dry
36. clean the inside of the eyeline with the windex and wipe dry with the paper towel
37. apply the 3M adhesive tape around ALL the inner edges of the eyeline.
38. clean the headlight with the windex and wipe dry with the paper towel
39. heat the headlight and 3M tape with the hair dryer.
40. remove the backing from the 3M tape and apply the eyeline to the headlight
41. Repeat for the other side
***Disclaimer***
Do this at your own risk.
Pictures
masked area
fiberglass and bondo (i had already cut and primed the piece, but put it back together to take the pic)
primed and wet sanded
first 2 coats of black
final product (clear coat not yet applied). they look 'blacker' because the car is dusty/dirty/rained on.
Last edited by Boyscout; May 19, 2010 at 08:23 AM.


Trending Topics


Or, you should do this. I saw this on the www.airdress.com website. It makes it look like the after MC headlights.


Last edited by romeo291; May 19, 2010 at 10:45 AM.
Thread Starter
Pole Position
iTrader: (3)
Joined: Mar 2007
Posts: 309
Likes: 5
From: Edmonton area, Alberta
thanks for the feedback. since these only took a couple hours to do, i will be doing some of the other styles as well and go with the ones that look best (the ones in the picture arent stuck on yet)
the ones in the picture are like these http://www.l-tunedparts.com/product/?id=300
the ones in the picture are like these http://www.l-tunedparts.com/product/?id=300
Last edited by Boyscout; May 19, 2010 at 10:54 AM.
If you're gonna spend the time to make some, I definitely suggest going all out and making them look like the Air Dress Garnish. It flows well, it's unique, and it'll give the car a more modern look.
Thread Starter
Pole Position
iTrader: (3)
Joined: Mar 2007
Posts: 309
Likes: 5
From: Edmonton area, Alberta
i am thinking of doing the Junction Produce style next with more of an arc on the grill side (like the air derss ones, but without the curved part on the back of the side marker...i like the squareness of them the way they are)