


PS Module Install DIY with pics


Thread Starter
Lexus Fanatic
Joined: Jan 2014
Posts: 5,371
Likes: 526
From: BC Canada
 PS Module Install DIY with pics
Just another Prestigious Society Module install. Thought I'd take some pics of my install as I tackled it today. It took me about 90 minutes start to finish. No surprises and everything went without a hitch. I should add that the instructions that come with the kit are outstanding - thorough, lots of pics, and very detailed. The only casualty in this install process, was a very faint hairline crack in the wood-grain near a corner of the shift console panel, however, it's barely noticeable. I believe it was caused due to stress when removing it.
The module preforms flawlessly. It's really one of the two, (along with the Vais module), best mods available to us.
[IMG]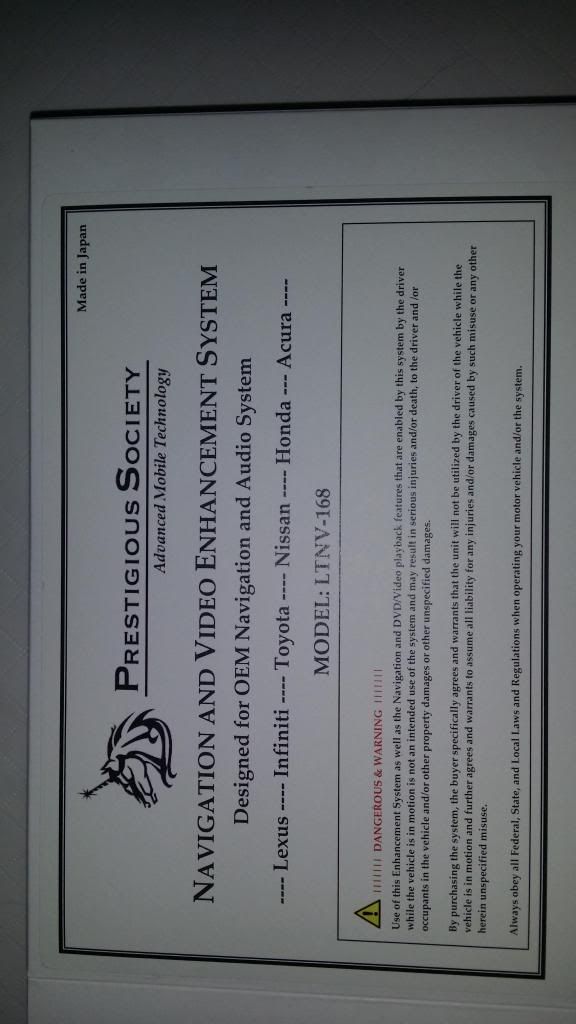 [/IMG]
[IMG] [/IMG]
The first step is to remove the side panels of the console. This is accomplished simply by firmly pulling on the panel, releasing the clips keeping it in place.
[IMG]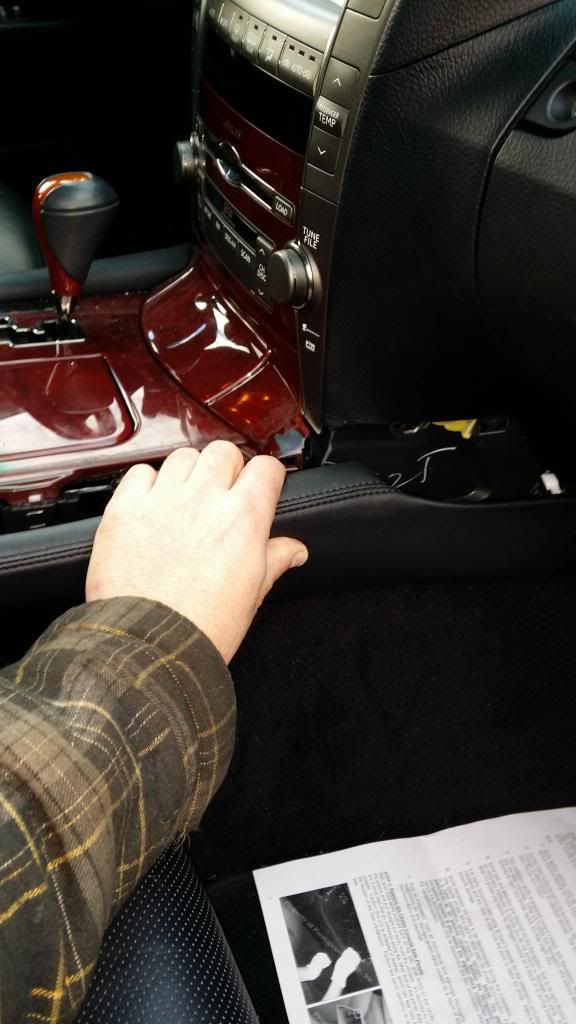 [/IMG]
The next step is to shift the transmission into drive with the engine off. This is accomplished by inserting a screwdriver into the small slot near the shift lever. Once that is done, remove the shift **** by unscrewing it counter clockwise.
[IMG]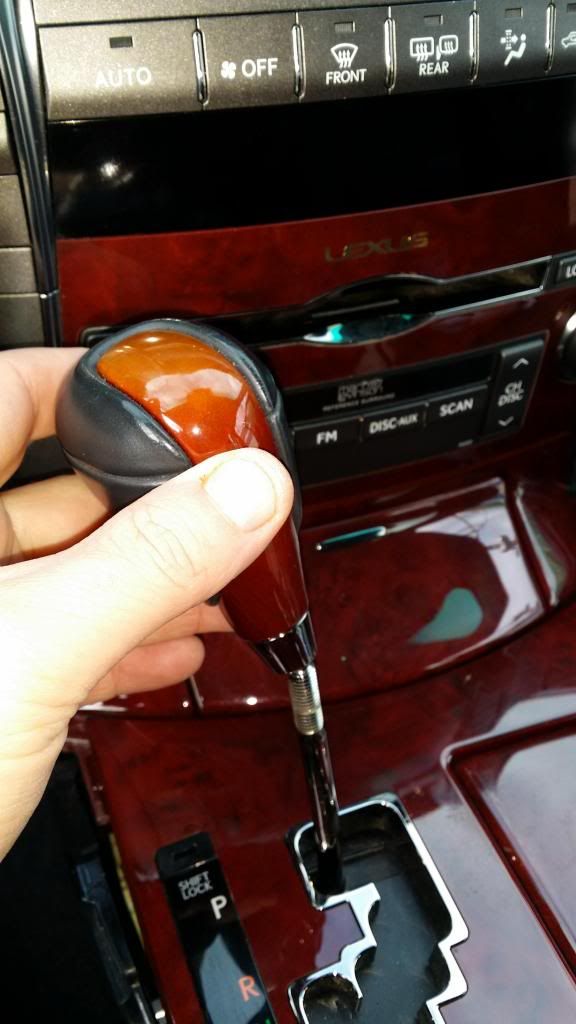 [/IMG]
There are two 10mm bolt/screws as seen in the pic that when removed, allow the console plate to pull off, as seen here:
[IMG]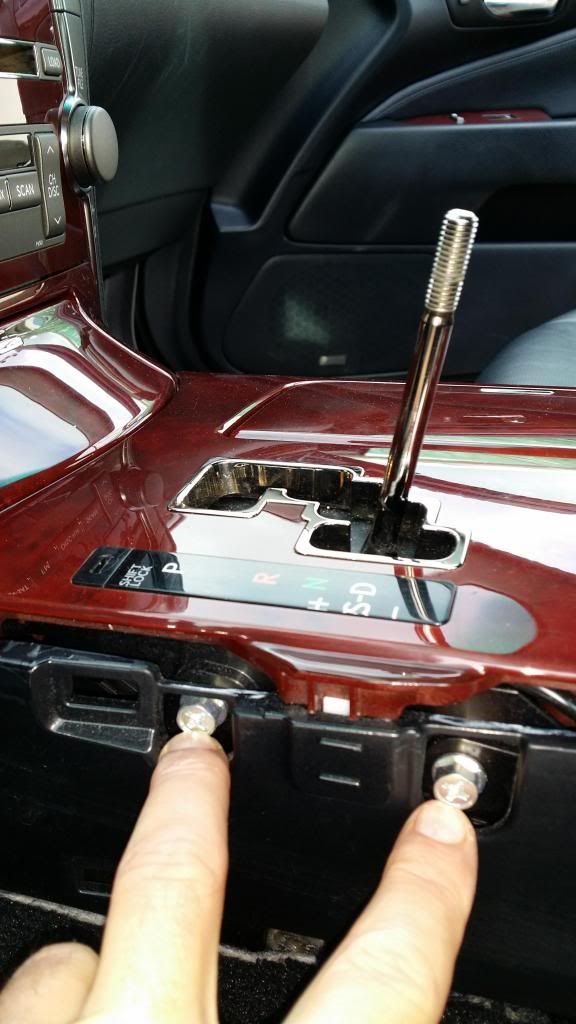 [/IMG]
The instructions advise to disconnect the various electrical connectors underneath the panel, but I just left everything alone and simply placed the panel aside out of the way. The wires are long enough to permit this and the panel never got in the way.
[IMG]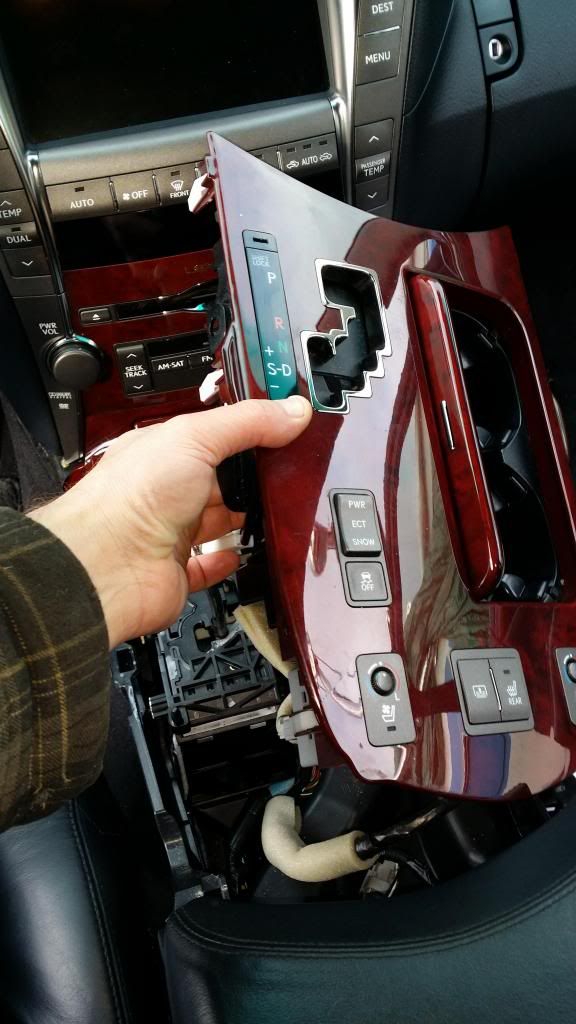 [/IMG]
This leaves just the ashtray which come out simply by pulling out at a 45 degree angle. Again, held in place only by various clips.
[IMG]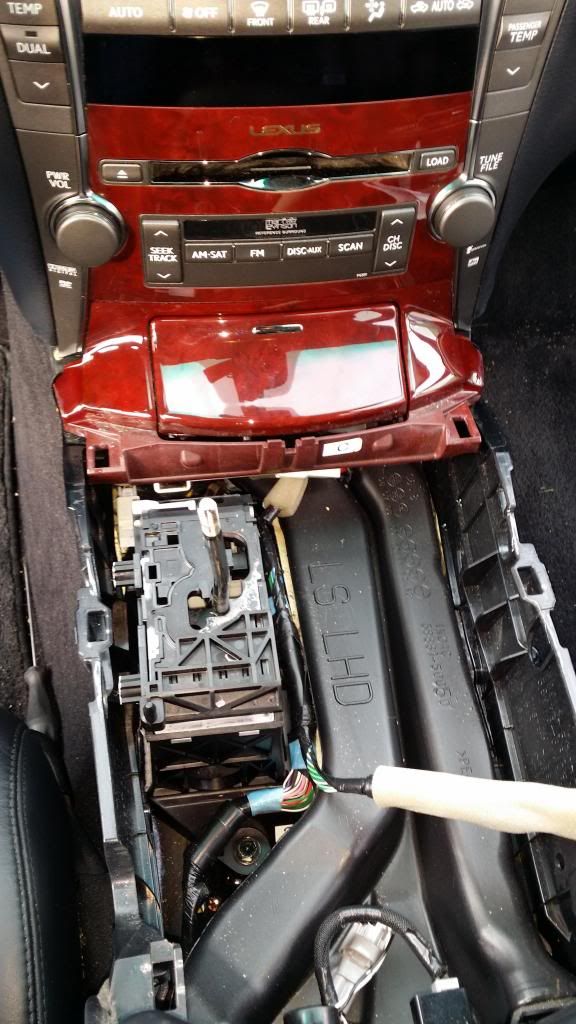 [/IMG]
[IMG]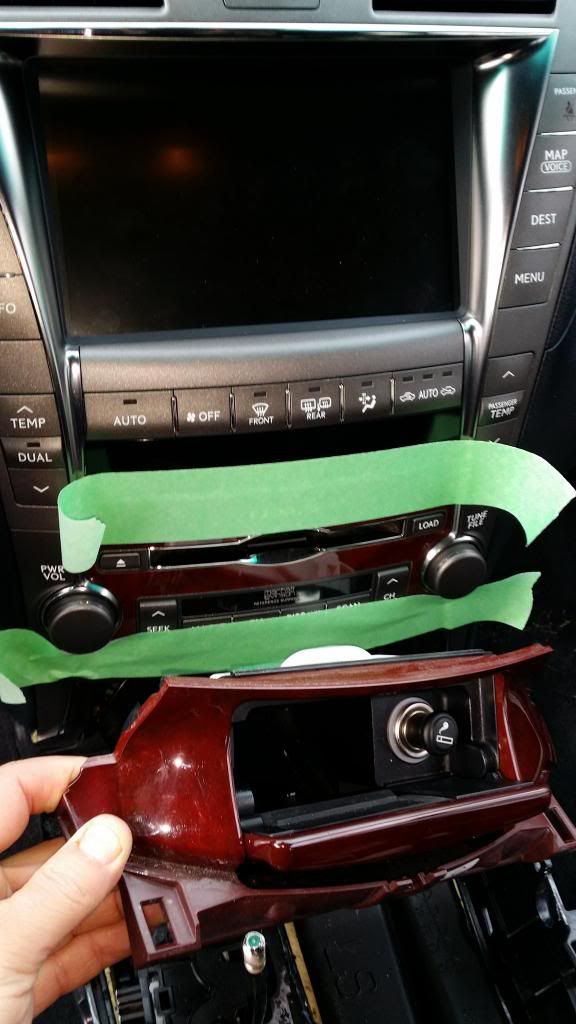 [/IMG]
You can see in the pics, that I applied strips of masking tape. This was as per the instructions which don't explain WHY the tape is applied, though I assume it's to provide some protection to the wood trim from scratches and the like, while jockeying things about.
The next step is to remove two 10mm screw/bolts (one on each side), as seen in the following picture. This will allow the radio assy to be removed and is now being held in place only by various clips.
[IMG]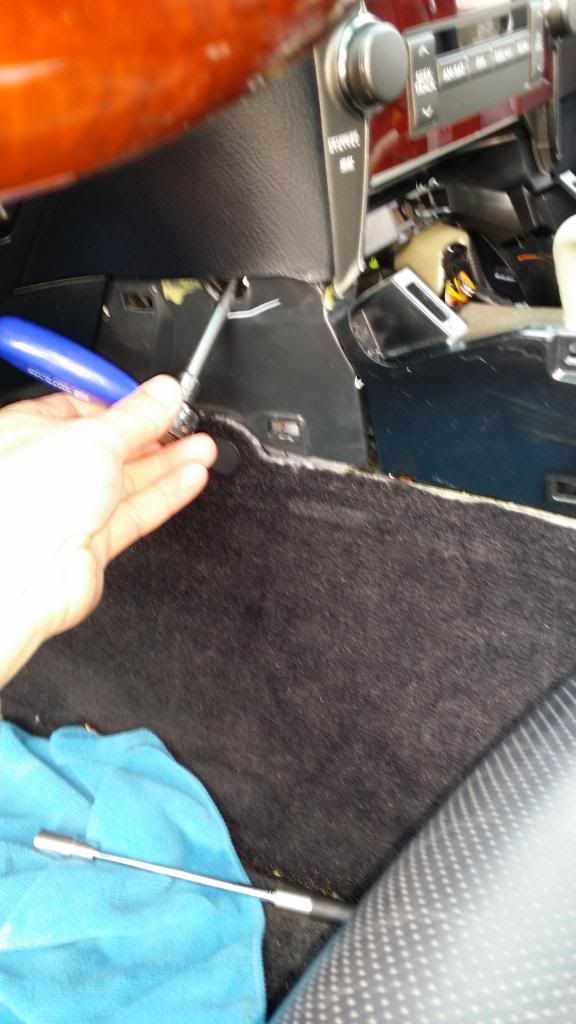 [/IMG]
In the following pic, you can see the removal of the radio unit. You can see in the pic that I placed a rag around the shift lever. This is to prevent scratching the radio unit. The radio will only pull out so far before the wire connectors (six in all) at the back of the unit prevent further movement. Simply unplug them and place the radio assy aside.
[IMG]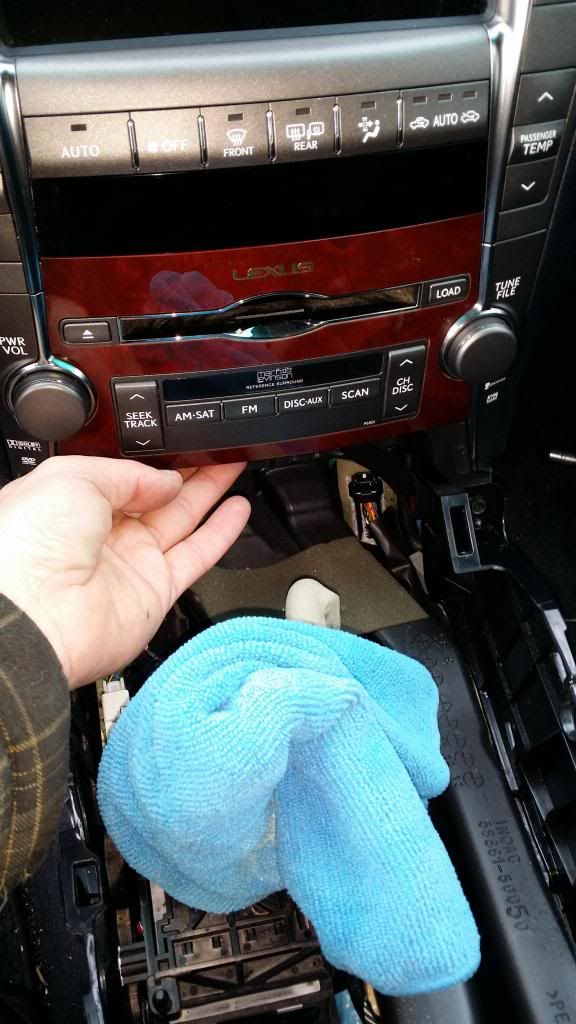 [/IMG]
[IMG]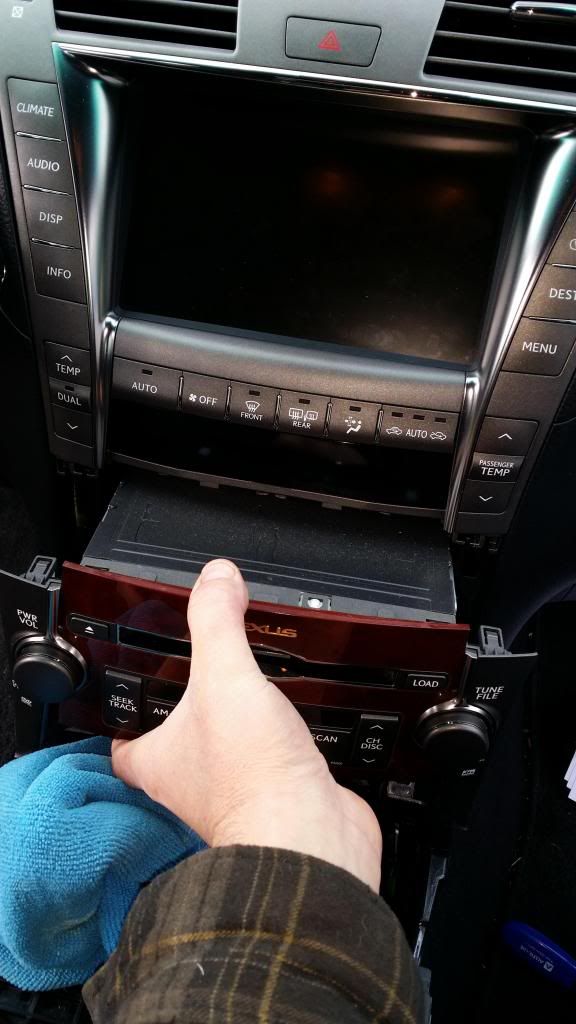 [/IMG]
This next photo shows me pulling out the Nav unit. Before doing so, there are two Phillips screws that need to be removed at the bottom and front of the unit. Then as before, the unit is held only by a few clips. Once pulled away from the dash, you'll see the various connectors at the back of the unit that the PS connectors will tap into and piggyback. Now is also a good time to route the remote switch wire to where you wish to place it. I routed mine down and under the dash to the blank area under the E brake. As well, the PS kit provides a mounting tape pad that allows you to place the module where you wish and where it won't rattle around. I mounted mine to a black plastic piece inside the dash behind where the nav unit mounts. The instructions make no mention of this step, so make sure you do this now.
[IMG]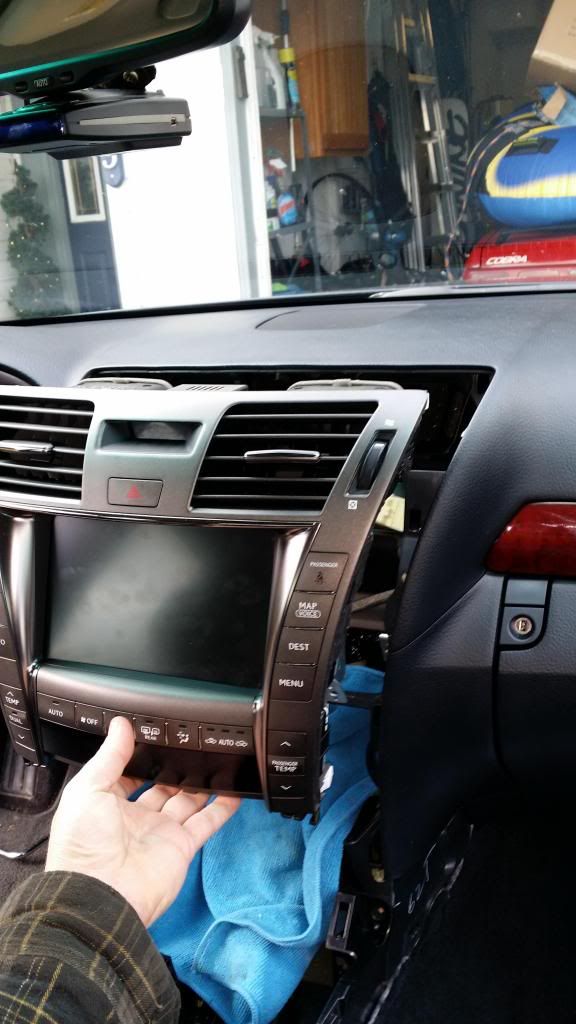 [/IMG]
All that's left now is to make sure everything works before you put everything back together. Start the car and allow the system to reinitialize, reset and setup which takes about 30 seconds (DO NOT SHUT OF THE VEHICLE WHILE THIS GOING ON). I drove around the block and was freaked out when I noticed that the lockouts were still active and wouldn't allow inputs to the Nav system. "^&#$!!!!" I thought......then realized I hadn't pushed the button on the remote! LOL.
Once I saw everything worked as it should, I replaced all the parts in reverse order of removal.
DONE!
Good Luck! Any questions, do not hesitate to ask.........
The module preforms flawlessly. It's really one of the two, (along with the Vais module), best mods available to us.
[IMG]
 [/IMG]
[IMG]
 [/IMG]
The first step is to remove the side panels of the console. This is accomplished simply by firmly pulling on the panel, releasing the clips keeping it in place.
[IMG]
 [/IMG]
The next step is to shift the transmission into drive with the engine off. This is accomplished by inserting a screwdriver into the small slot near the shift lever. Once that is done, remove the shift **** by unscrewing it counter clockwise.
[IMG]
 [/IMG]
There are two 10mm bolt/screws as seen in the pic that when removed, allow the console plate to pull off, as seen here:
[IMG]
 [/IMG]
The instructions advise to disconnect the various electrical connectors underneath the panel, but I just left everything alone and simply placed the panel aside out of the way. The wires are long enough to permit this and the panel never got in the way.
[IMG]
 [/IMG]
This leaves just the ashtray which come out simply by pulling out at a 45 degree angle. Again, held in place only by various clips.
[IMG]
 [/IMG]
[IMG]
 [/IMG]
You can see in the pics, that I applied strips of masking tape. This was as per the instructions which don't explain WHY the tape is applied, though I assume it's to provide some protection to the wood trim from scratches and the like, while jockeying things about.
The next step is to remove two 10mm screw/bolts (one on each side), as seen in the following picture. This will allow the radio assy to be removed and is now being held in place only by various clips.
[IMG]
 [/IMG]
In the following pic, you can see the removal of the radio unit. You can see in the pic that I placed a rag around the shift lever. This is to prevent scratching the radio unit. The radio will only pull out so far before the wire connectors (six in all) at the back of the unit prevent further movement. Simply unplug them and place the radio assy aside.
[IMG]
 [/IMG]
[IMG]
 [/IMG]
This next photo shows me pulling out the Nav unit. Before doing so, there are two Phillips screws that need to be removed at the bottom and front of the unit. Then as before, the unit is held only by a few clips. Once pulled away from the dash, you'll see the various connectors at the back of the unit that the PS connectors will tap into and piggyback. Now is also a good time to route the remote switch wire to where you wish to place it. I routed mine down and under the dash to the blank area under the E brake. As well, the PS kit provides a mounting tape pad that allows you to place the module where you wish and where it won't rattle around. I mounted mine to a black plastic piece inside the dash behind where the nav unit mounts. The instructions make no mention of this step, so make sure you do this now.
[IMG]
 [/IMG]
All that's left now is to make sure everything works before you put everything back together. Start the car and allow the system to reinitialize, reset and setup which takes about 30 seconds (DO NOT SHUT OF THE VEHICLE WHILE THIS GOING ON). I drove around the block and was freaked out when I noticed that the lockouts were still active and wouldn't allow inputs to the Nav system. "^&#$!!!!" I thought......then realized I hadn't pushed the button on the remote! LOL.
Once I saw everything worked as it should, I replaced all the parts in reverse order of removal.
DONE!
Good Luck! Any questions, do not hesitate to ask.........
Last edited by roadfrog; Feb 20, 2014 at 06:43 AM.

Lead Lap
Joined: Nov 2007
Posts: 620
Likes: 24
From: TX
Nice photo post. Thanx.



Moderator
Joined: May 2008
Posts: 3,761
Likes: 72
From: Atlanta, GA
Excellent DIY write up!
I added this thread to the ★ LS460 | LS460L | LS600hL FAQ (Frequently Asked Questions) and DIY Thread ★ sticky under Electronics programming tips, Smartphone Integration & Navigation and Video Enhancement.
I added this thread to the ★ LS460 | LS460L | LS600hL FAQ (Frequently Asked Questions) and DIY Thread ★ sticky under Electronics programming tips, Smartphone Integration & Navigation and Video Enhancement.
Thread Starter
Lexus Fanatic
Joined: Jan 2014
Posts: 5,371
Likes: 526
From: BC Canada

I found the process very easy and painless, so I won't hesitate to do it again. WHICH MAY BE SOON! .......The Vais module is beckoning me!



Trending Topics


Thread Starter
Lexus Fanatic
Joined: Jan 2014
Posts: 5,371
Likes: 526
From: BC Canada


Pit Crew


Joined: Sep 2014
Posts: 210
Likes: 7
From: NJ
roadfrog, looks awesome. Where did you end up buying your module from? I checked PS' website and there isn't an authorized dealer near me. I'm wondering if there are any other retail outlets I can purchase a bypass module from.
Thanks.
Thanks.
Thread Starter
Lexus Fanatic
Joined: Jan 2014
Posts: 5,371
Likes: 526
From: BC Canada
I bought it on their website and it was shipped to me.