To those who have upgraded your front speakers to a bigger size...
 06-11-10, 10:31 PM
#1
Driver
Thread Starter
iTrader: (1)
Join Date: Aug 2007
Location: arizona
Posts: 197
Likes: 0
Received 0 Likes
on
0 Posts
I bought the ebay adaptors and it seems they do not sit flush with the stock baffle. There is a big gap between the lower part of the adaptor and the baffle becuase the baffle is not flat, it slopes downward.
How did you get them to sit flush or seal the gap?
Thanks
How did you get them to sit flush or seal the gap?
Thanks

 06-12-10, 09:49 PM
#5
i had the black abs ones on ebay and they did not fit at all as far as putting the door panel back on.
once i took off the door panel i had to take off the stock speaker and the stock plastic housing and all the wiring going around the spot that goes in the hole where the speaker goes. the adapter wont sit right unless you remove all the wiring around it and make room.
i had to remove the raised part part on the adapter and just used the flat portion and drilled my own new holes. even after all that my door panel still wont fit with 6.5" speakers in there. it rests right on it. so i had to hack and trim my door panel. there was no other way to make it fit. the adapter would have to bend into the hole in the door to make it fit.
i had 6.5" in the back and the stock 4 inch in the front and after i replaced the front it made a huge difference. the sound actually sounds even now, it use to be louder in the back and now its fine.
06-13-10, 08:19 AM
#6
Here's what FuMoFFuTT and I did... it only works on non-Nakamichi speaker brackets.
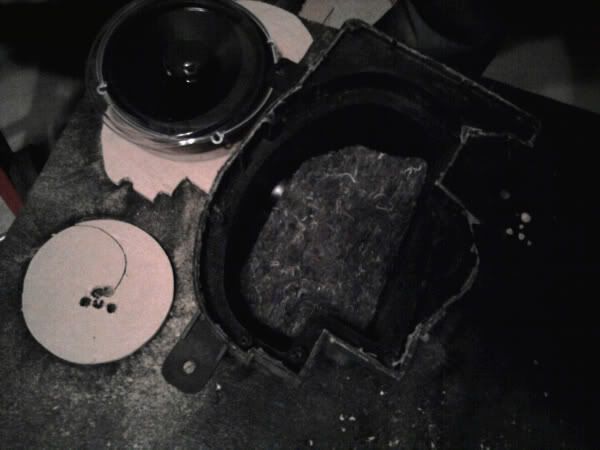
Take out your stock speaker enclosure.
Remove all screws holding it together.
Cut away at sealant holding it together. You can use something to pry the two pieces apart to help you.
You will end up with this...
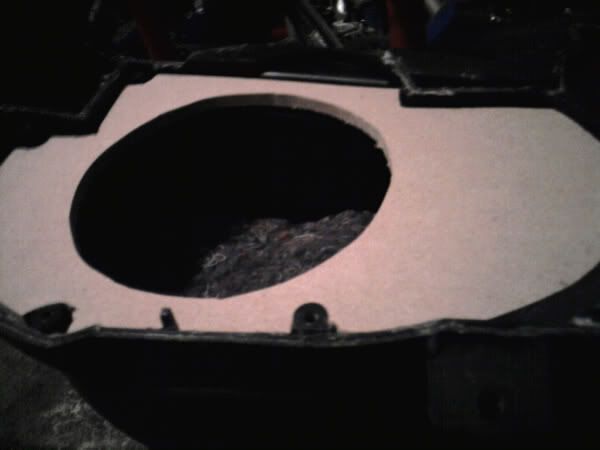
Next trace a cut-out for your MDF bracket that will sit inside the speaker enclosure. This is the hardest step because of the weird shape you have to cut. Then use your trace to cut your MDF, use a thin piece MDF, I think we used 1/2 inch. Cut with a Jig Saw.
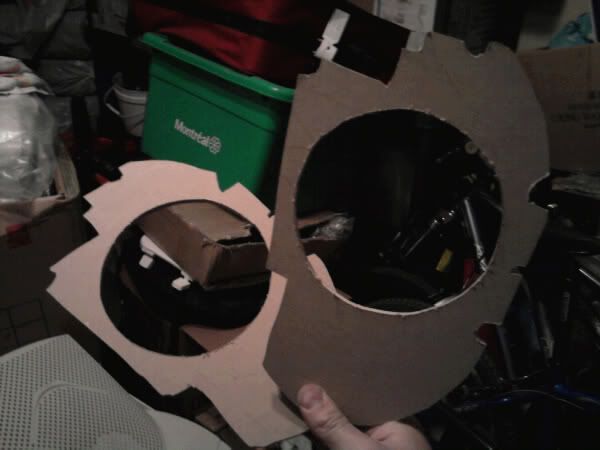
Once this is done you can copy your design for the other speaker enclosure. Both sides are identical.
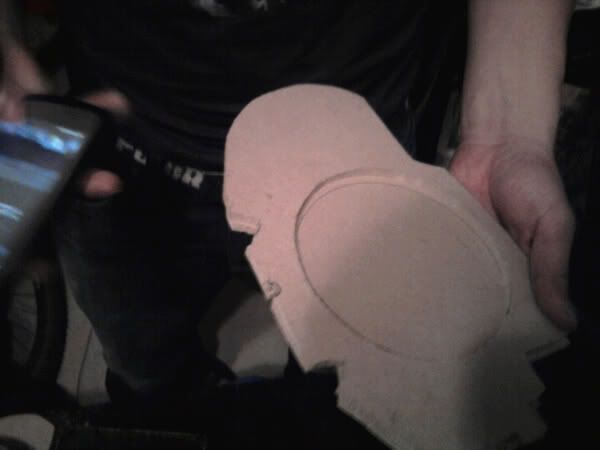
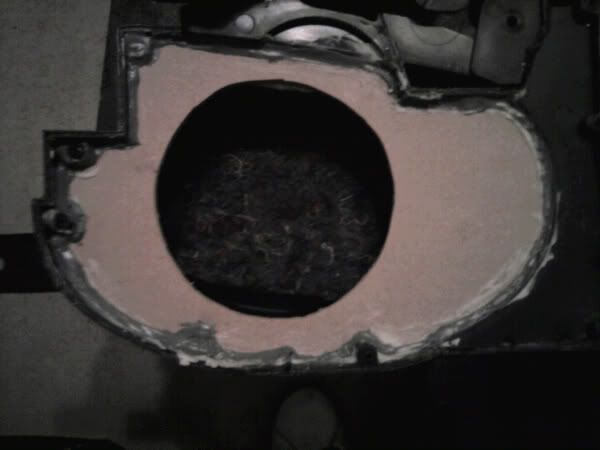
You will also have to cut out a circle in the bracket. Drill a hole in the middle of the bracket and then use your jigsaw to cut out the speaker hole the right size for your speaker.
You end up with this...
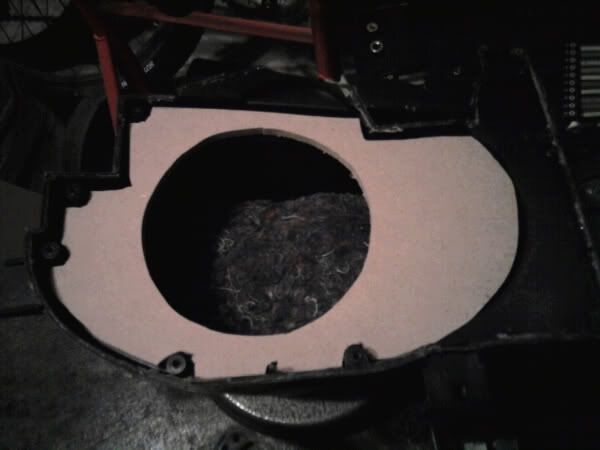
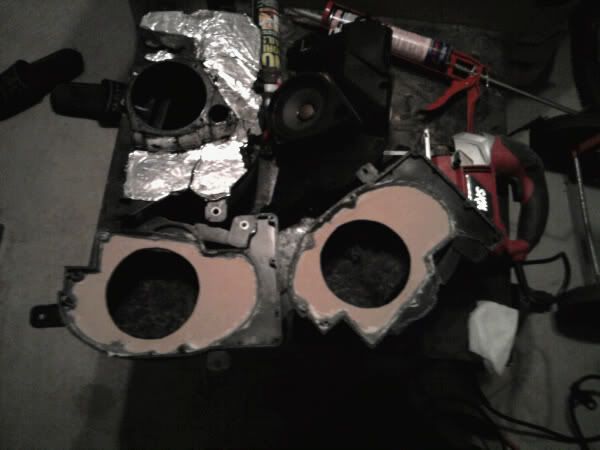
Place sealant along edges...
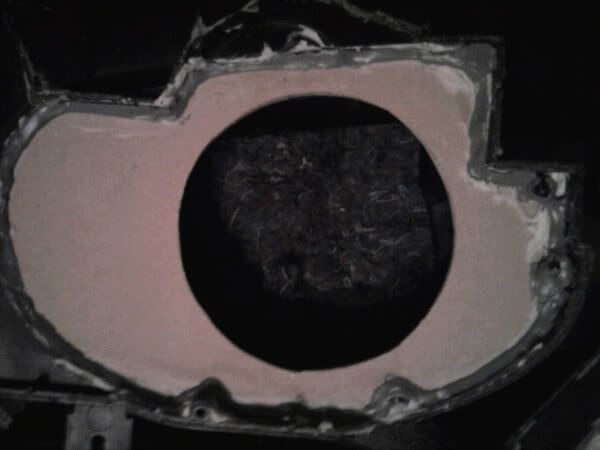
And now you have two custom speaker enclosures for your 6.5" speakers.
To make sure your speakers don't hit your door. On the inside of your door you will have to cut the excess carpet on the inside of your door panel. From the inside of the car you cannot tell the carpet was cut, the excess carpet is on the inside and is touching against the speaker. Just cut away at this and it will give the speaker enough room not to interfere with anything.
FuMoFFuTT and I saved a copy of our wooden bracket. We're going to scan the bracket so anyone can print out the actual sized scan. This way, since the bracket will be printed to scale you can just use the print-out to cut your own bracket with a jigsaw.
Take out your stock speaker enclosure.
Remove all screws holding it together.
Cut away at sealant holding it together. You can use something to pry the two pieces apart to help you.
You will end up with this...
Next trace a cut-out for your MDF bracket that will sit inside the speaker enclosure. This is the hardest step because of the weird shape you have to cut. Then use your trace to cut your MDF, use a thin piece MDF, I think we used 1/2 inch. Cut with a Jig Saw.
Once this is done you can copy your design for the other speaker enclosure. Both sides are identical.
You will also have to cut out a circle in the bracket. Drill a hole in the middle of the bracket and then use your jigsaw to cut out the speaker hole the right size for your speaker.
You end up with this...
Place sealant along edges...
And now you have two custom speaker enclosures for your 6.5" speakers.
To make sure your speakers don't hit your door. On the inside of your door you will have to cut the excess carpet on the inside of your door panel. From the inside of the car you cannot tell the carpet was cut, the excess carpet is on the inside and is touching against the speaker. Just cut away at this and it will give the speaker enough room not to interfere with anything.
FuMoFFuTT and I saved a copy of our wooden bracket. We're going to scan the bracket so anyone can print out the actual sized scan. This way, since the bracket will be printed to scale you can just use the print-out to cut your own bracket with a jigsaw.
Trending Topics
06-13-10, 11:48 AM
#9
It's probably the easiest way, unless someone else has another idea. It also sounds a lot better than the ebay bracket because the midbass can actually resonate inside the stock enclosure.
06-13-10, 01:16 PM
#10
Driver
Thread Starter
iTrader: (1)
Join Date: Aug 2007
Location: arizona
Posts: 197
Likes: 0
Received 0 Likes
on
0 Posts
Hmmm. Well the whole purpose of me purchasing such a thing off ebay is because I dont have enough time to make speaker brackets right now. Everything else on my car is higher priority.
Is the anyone on the forums who would be willing to make me/ sell me a pair?
Is the anyone on the forums who would be willing to make me/ sell me a pair?
04-08-13, 04:02 PM
#13
Here's what FuMoFFuTT and I did... it only works on non-Nakamichi speaker brackets.
Take out your stock speaker enclosure.
Remove all screws holding it together.
Cut away at sealant holding it together. You can use something to pry the two pieces apart to help you.
You will end up with this...
Next trace a cut-out for your MDF bracket that will sit inside the speaker enclosure. This is the hardest step because of the weird shape you have to cut. Then use your trace to cut your MDF, use a thin piece MDF, I think we used 1/2 inch. Cut with a Jig Saw.
Once this is done you can copy your design for the other speaker enclosure. Both sides are identical.
You will also have to cut out a circle in the bracket. Drill a hole in the middle of the bracket and then use your jigsaw to cut out the speaker hole the right size for your speaker.
You end up with this...
Place sealant along edges...
And now you have two custom speaker enclosures for your 6.5" speakers.
To make sure your speakers don't hit your door. On the inside of your door you will have to cut the excess carpet on the inside of your door panel. From the inside of the car you cannot tell the carpet was cut, the excess carpet is on the inside and is touching against the speaker. Just cut away at this and it will give the speaker enough room not to interfere with anything.
FuMoFFuTT and I saved a copy of our wooden bracket. We're going to scan the bracket so anyone can print out the actual sized scan. This way, since the bracket will be printed to scale you can just use the print-out to cut your own bracket with a jigsaw.
04-11-13, 09:29 AM
#15
Driver
Join Date: Apr 2013
Location: SGV, California
Posts: 121
Likes: 0
Received 0 Likes
on
0 Posts
i have a 94 gs300 and i upgrade to bigger speakerss n to be honest i didnt even use a template or anythin or that kind i juss ended up drillin holes into the door pannel to hold the speaker in place lol