How To: Build and Hardwire an Auxillary Input to OEM Stereo
 10-30-08, 11:38 PM
#391
Driver School Candidate

Join Date: Oct 2008
Location: Arizona
Posts: 3
Likes: 0
Received 0 Likes
on
0 Posts
the cd changer, even when playing a "silent" track, is still producing noise, a LOT of noise, so the signal/sound quality will be significantly lower than if you had used a relay array and had ONLY your aux. input. this way works, and has been done before, but isn't really the cleanest solution.
 10-31-08, 03:49 AM
#392

that is one way to do it, not sure if i trust the contacts on a 4pdt switch for sound quality...
i used relays because the contacts inside tend to be well protected and not getting dust and crap inside them as a switch inevitably will (every time u turn it off/on) and because i could mount them remotely and not have to mount a bulky switch.
i used relays because the contacts inside tend to be well protected and not getting dust and crap inside them as a switch inevitably will (every time u turn it off/on) and because i could mount them remotely and not have to mount a bulky switch.
11-02-08, 02:54 PM
#393
Driver School Candidate
Join Date: Oct 2008
Location: Arizona
Posts: 3
Likes: 0
Received 0 Likes
on
0 Posts
Those who worry about the quality of the contact in the switch may consider the 4PDT switch made for musical instrument (I saw one in guitarcenter.com.) It's could be better, but it's more expensive.
11-02-08, 03:59 PM
#394

I don't notice any noise at all (play the silent CD, turn vol to haft way, no aux input, if there's noise, I should hear it.) Perhaps, my ear isn't good. Anyway, as my concern about the short between L- and R- line and the aux-input signal get feed back to the CD changer, your solution is safer. I found a 4PDT (4 pole double through) switch ($2.25 on ebay) I think it can be used switch the 4 audio lines from the HU between the CD changer and the AUX-input. (see attached diagram.) I guess the "4PDT Latching Changeover Push-Push Switch" can also be used in place of the 4PDT switch.
 . Instead of a aux input like that, we picked up the stereo 2.5minijack from radioshack. But the idea is still the same
  11-24-08, 10:50 AM
#395
For those with SC's, you can do sort of the the same thing with the tape input, except you don't need any switches, unless you feel like wiring one in to cut the signal off for some reason (or you could just press pause)
https://www.clublexus.com/forums/sho...highlight=hack
https://www.clublexus.com/forums/sho...highlight=hack
12-02-08, 02:08 PM
#396

About a week ago, I completed the installation of XM satellite radio into the sound system of my 93 LS. (It has the Pioneer system.) I used Puredrifter's relay method with some slight modifications. Also, I fixed a couple of other problems that seem to plague the older LS models.
For the past few months, my temperature and time LCD display had been going black. Also, my cassette player stopped working about a year ago. I would insert a tape, but the system would revert back to radio without playing the tape. I assumed that the belt inside the mechanism was broken.
To fix these two things, I had to remove the radio system, so I decided this would be a good time to hardwire XM into the system.
After taking everything apart, I shipped the time/temperature module to Jim Walker in Fresno, Ca. Jim offers two options for this repair: (1) he will replace the LCD in your module for $175.00; or (2) he will ship you a replacement module for $175.00, and you send him your old one (there is a $100.00 deposit involved in this). I received the module back in about a week. (I understand also that these LCD screens can be purchased, and you can do your own installation. However, as I recall, this takes about 40-50 solder connections, and I didn't want to take on this task.)
As far as the inoperative tape player was concerned, I called Pioneer and ordered the belt from them. The system in my car has a Toyota part number 86120-50240. It has a Pioneer model number KEH-M8171ZT. The belt for the cassette player for this system is Pioneer part number CNT1055. It costs $8.50 plus shipping.
When I got the belt, I took the unit to a local TV repair shop and had them install the belt. (It turned out the belt was not broken, but was just slipping.)
While the time/temperature module was in transit, I started the wiring process to install XM.
Rather than using the four connected relays as Puredrifter did, I looked for a relay that had all the connection points in one piece. The relay I ordered was NTE type R12-17A3-12P. It was about $9.00. It works fine in switching the radio sound input from CD to XM. The CD sound is a bit louder than the XM sound, even after raising the sound level on the XM tuner to the max.
One big negative in using a relay such as this is the small pins where you have to solder the wires that are the sound inputs and output and the power + and -. There are 14 pins that are very small, and they are close together. I am not very good at soldering, and it turned out to be quite a task.
I purchased the Roady XT for the XM tuner. I also ordered a transformer to convert the car's 12 volt power to the 5 volts that XM needs. I did this because I did not want to have to tie up the cigarette lighter for power. To connect the tuner to the relay, I got a mini RCA plug at Radio Shack. They have a plug that has solder points for the R+ and L+ and a crimp for the - wires. I placed the tuner inside the console. The Roady was about $50.00 with a $20.00 rebate, and the transformer was about $18.00.
In the 93 LS, the wires that must be cut and spliced are pink (R+), blue (R-), violet (L+), and light green (L-). These four wires are all located together at one end of the large connector (white) in the back of the radio. You have to be careful about which wires are cut. The harness has two pink and two violet wires going to the same connector. The pink and violet wires that need to be cut are in pin positions 1 and 2 on the connector. The other pink and violet wires are in positions 11 and 10, respectively. The connector (designated as C8) has 14 connection points, but only 12 are used.
For power for the relay and XM transformer, I tapped into the windshield wiper and cigarette lighter positions in the fuse box. I first tried the small fuse taps but gave up on this because I was having to push so hard to get the fuse into place with the tap attached to it. I was afraid I was going to damage the fuse box. So I went to Advance and bought two of the add-a-fuse connectors. These are Bussman products and work great. They are about $6.00 each.
The add-a-fuse gadgets come with a wire pigtail and a butt connector. There is a bracket close to the fuse box that holds the parking brake in place. I loosened a nut on one side of this bracket and placed the power negatives behind this nut.
The relay is controlled by a toggle switch (Radio Shack) which I placed in the lower part of the dash. When the switch is off, no power goes to the relay, and the XM sound is used. When the switch is on, the CD sound is used.
All of the warnings about where to put the XM antenna had me concerned. I didn't really want to put it outside (as XM tells you to), so I just ran it to the back of the rear shelf. It works fine. The XM display shows 3 bars (that is the max) practically all the time, and all of these are satellite (nothing shows for the repeaters). The 93 LS has a significant slant to the rear window, and this enables an antenna in this position to have a good view of the sky.
All things considered, the process went smoothly. The soldering was time-consuming and frustrating, but it all worked out. The sound quality of the XM is great. I had tried the FM transmission input and tape cassette input before and was not pleased with either one.
Puredrifter is to be commended for his creativity in developing this installation.
 12-02-08, 06:00 PM
#398
Driver School Candidate

Join Date: Dec 2008
Location: fl
Posts: 7
Likes: 0
Received 0 Likes
on
0 Posts
I would love to do something like this for my girlfriend's 1999 ES300 (just in time for Christmas). She has been using a tape adapter + cigarette lighter power adapter for months. Although the sound quality is pretty good, the whole setup is quite cumbersome.
My ideal connection is through the ashtray in front of the shifter like this:
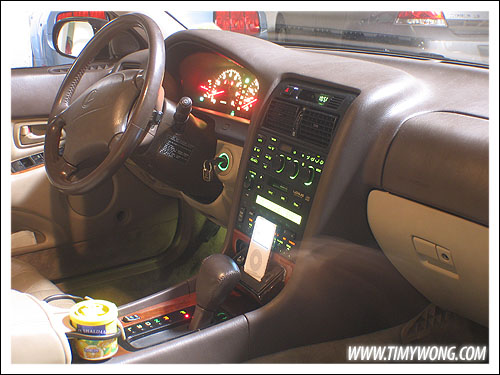
...but instead of a dock to mount the iPod there would simply be an iPod cable coming out of the bottom of the ashtray. My first thought was to drill a hole slightly larger than the thickness of the cable. This would allow her to close the ashtray if she's not using the iPod, and it (should) give her enough slack to pull the iPod out a foot or so, making it easier to change songs without losing the connection.
My biggest problem is that while I can (and did) read all 27 pages of this thread and understand the concepts, much of the discussion goes way over my head. I know basically nothing about circuits, and I certainly don't know how to solder. The only time I "worked" on any part of my car was to install an aftermarket CD player. That involved little more than connecting a dozen wires using butt connectors, plugging in the adapter included with the new CD player, and then plugging in an RCA-to-headphone cable so my iPod woks on AUX (but does not charge of course).
Is this mod beyond my reach? In the last 2 years has anyone developed a plug and play version? What are my chances of finding a car audio installer who could do the wiring for me?
I have seen some $200+ products, but all appear to be for 2004+ models. Plus the biggest selling point for them seems to be controlling the iPod (playlists only?) through the head unit, which is not something I need or want. Is this mod any more/less difficult if the iPod cable supplies power to the iPod and sound to the amp, but no control to the head unit? Is it any easier if the CD changer is bypassed completely (i.e. replaced by the iPod)?
Thanks in advance!
My ideal connection is through the ashtray in front of the shifter like this:
...but instead of a dock to mount the iPod there would simply be an iPod cable coming out of the bottom of the ashtray. My first thought was to drill a hole slightly larger than the thickness of the cable. This would allow her to close the ashtray if she's not using the iPod, and it (should) give her enough slack to pull the iPod out a foot or so, making it easier to change songs without losing the connection.
My biggest problem is that while I can (and did) read all 27 pages of this thread and understand the concepts, much of the discussion goes way over my head. I know basically nothing about circuits, and I certainly don't know how to solder. The only time I "worked" on any part of my car was to install an aftermarket CD player. That involved little more than connecting a dozen wires using butt connectors, plugging in the adapter included with the new CD player, and then plugging in an RCA-to-headphone cable so my iPod woks on AUX (but does not charge of course).
Is this mod beyond my reach? In the last 2 years has anyone developed a plug and play version? What are my chances of finding a car audio installer who could do the wiring for me?
I have seen some $200+ products, but all appear to be for 2004+ models. Plus the biggest selling point for them seems to be controlling the iPod (playlists only?) through the head unit, which is not something I need or want. Is this mod any more/less difficult if the iPod cable supplies power to the iPod and sound to the amp, but no control to the head unit? Is it any easier if the CD changer is bypassed completely (i.e. replaced by the iPod)?
Thanks in advance!
12-02-08, 11:40 PM
#399
if you can solder/understand basic electronics you SHOULD be able to do this.
you could actually use a dock, but it would have to be very specific, one with a line out. i thought about it but didnt want the ipod in front of the radio nor did i want to make that big a hole in my dash/ashtray.
if you completely bypass the CD player then you can't use the mod at all, the headunit will not switch to the CD source if the changer isn't present and at least able to turn on.
12-03-08, 01:29 PM
#400
Driver School Candidate
Join Date: Dec 2008
Location: fl
Posts: 7
Likes: 0
Received 0 Likes
on
0 Posts
What do you think about combining this cable and switch?
iPod Cable
I like this iPod cable a little better than the one you linked (David Navone I think) because it does not have the extra 3.5mm stereo plug so it looks a little cleaner, and it's the same price.
Automated AUX switch
I'm sure the RCA cable ends would need to be stripped in order to connect the switch to the CD changer and to the head unit, but that seems no more difficult than what I've done before so I think I can handle it. Plus if I'm reading the description correctly there is no physical switch because the device detects your iPod when you plug it in (or at least when you play a song) and then cuts off the audio signal from the CD changer.
Last edited by gcvftw; 12-03-08 at 02:46 PM. Reason: updated links
12-03-08, 02:49 PM
#402
the cable should be fine. the other link i'm not so sure because i've never used one nor seen the schematics for one, your risk.
i have mine in the center console in the bottom, i can pull the ipod out to lie near the gearshifter or just leave it in the console since i normally run it on playlists.
i have mine in the center console in the bottom, i can pull the ipod out to lie near the gearshifter or just leave it in the console since i normally run it on playlists.
12-03-08, 03:04 PM
#403
Driver School Candidate
Join Date: Dec 2008
Location: fl
Posts: 7
Likes: 0
Received 0 Likes
on
0 Posts
Did you have to extend the RCA lines? That cable is only about 4ft long before it splits to RCA. It doesn't seem like it would reach the glove box and still have enough slack to pull the iPod out of the center console.
12-04-08, 01:46 PM
#405
Driver School Candidate
Join Date: Dec 2008
Location: fl
Posts: 7
Likes: 0
Received 0 Likes
on
0 Posts
I'm fairly certain she has the Pioneer. If she had the Nakamichi there would be a logo printed on the head unit, right?
Assuming hers is a Pioneer, then could I follow your LS400 mod exactly? That is, are the only wires I need to hack at the amp under the passenger seat (including power to charge the iPod)? If so, what's the easiest way to run the iPod cable from the amp into the center console?
Assuming hers is a Pioneer, then could I follow your LS400 mod exactly? That is, are the only wires I need to hack at the amp under the passenger seat (including power to charge the iPod)? If so, what's the easiest way to run the iPod cable from the amp into the center console?