
Just Installed Valentine One (V1) with Blend Mount

 Cops don't care here.


 08-25-12, 01:15 PM
#21
Driver School Candidate
Thanks for the DIY. I just installed my escort 9500 on my IS today and just a heads up the direct mirror pigtail cord is a bit tight but. I still managed to get a nice clean install out of it
09-26-12, 10:26 AM
#22
Driver
iTrader: (3)
Join Date: Jul 2012
Location: SC
Posts: 106
Likes: 0
Received 0 Likes
on
0 Posts
Hello, hope you guys are enjoying the last day of 2011.
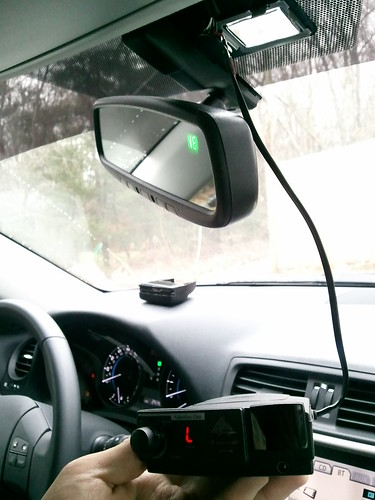
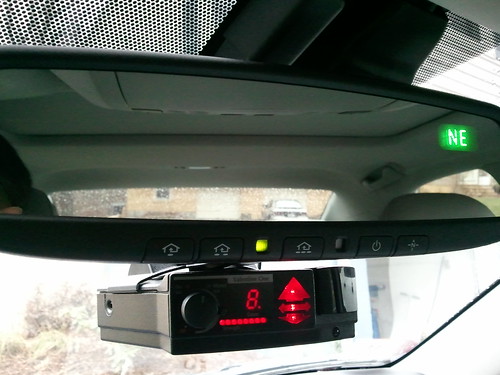
Today I just installed my V1 on 2010 IS250 using Blend Mount.
Of course, I did read many threads here about this topic and very thankful that I wanted to share how I did it. I know everyone has different preferences so bear with me if don't like the way I did
1. I read many threads here line by line including this one.
https://www.clublexus.com/forums/is-...l-post-14.html
2. I ordered Blend Mount (http://www.blendmount.com/valentine.html)
Remember to use coupon code "friend" for an upfront 12.5% off.
3. Then I ordered V1 Radar Direct Stealth Mirror Cord kit from eBay ($9.50 with Free Shipping)
I was going to use regular phone cord but found out that it's so thin that I don't have patience and skill to make it work. And also, I like the idea of extra protection with built-in fuse that Stealth Mirror Cord offers.

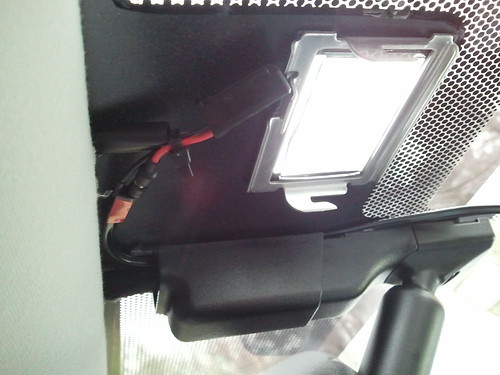
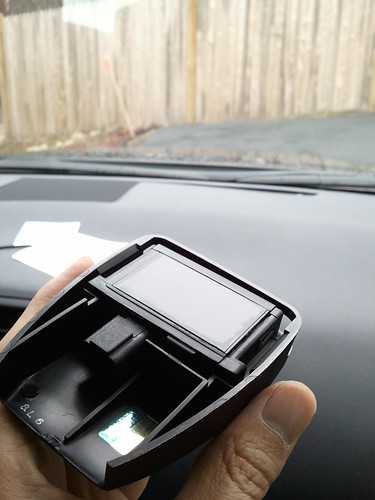
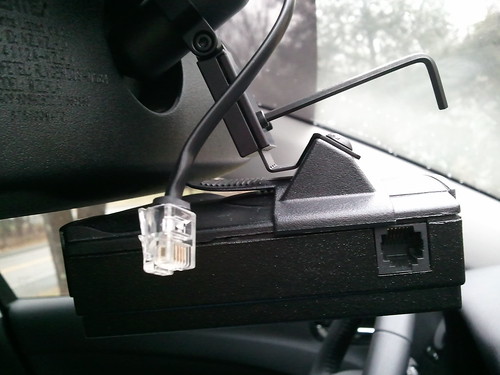
4. I decided to use Rain Sensor for power source since this seems easier that I don't like to take out the mirror unit. On the Rain Sensor cover, there is a small tab you can take out with your finger tip.
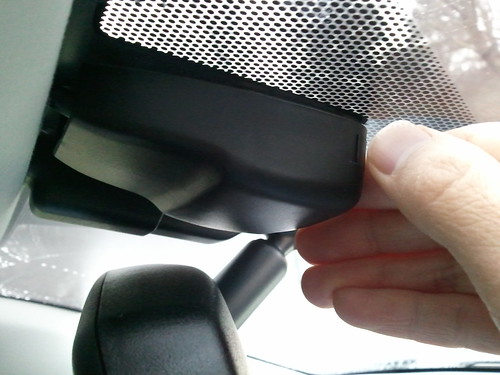
5. Pull out plastic tab. Don't force it too hard. It should come out nicely.
Then pull down the whole rain sensor unit cover.


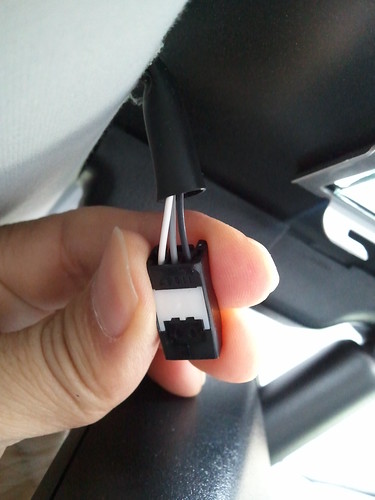
6. Take the wire harness out carefully. And You may need to bend the tips of Stealth Cord so it fits in the harness tightly.
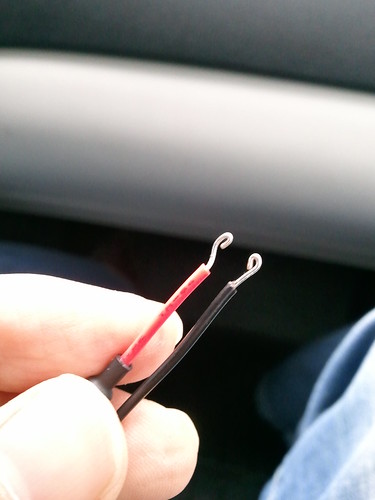
7. "BLACK" cord from Stealth kit goes to "WHITE" of harness.
"RED" cord goes to "BLACK" of harness from car.
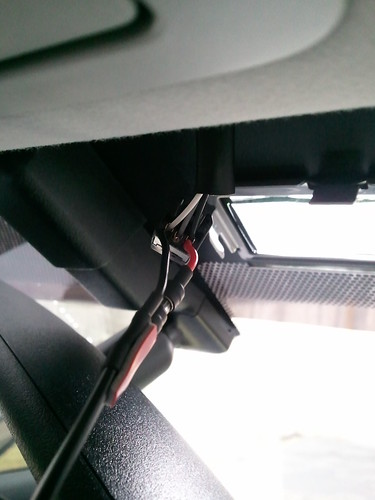
8. Test and make sure the connection is good.
9. Zip tie the cords together and tuck them away. I put them through the mirror cords plastic covers.
10. Put the Rain Sensor unit back in place. Make sure the glass sensor is clean and free of any lint, smudges, etc.
11. Blend Mount fits nicely but I cut a strip of electric tape and lay it inside of mount to protect the mirror base just in case.
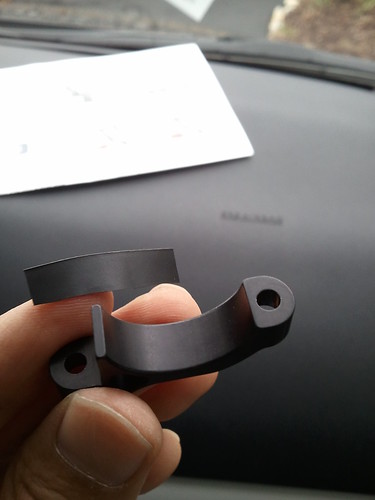
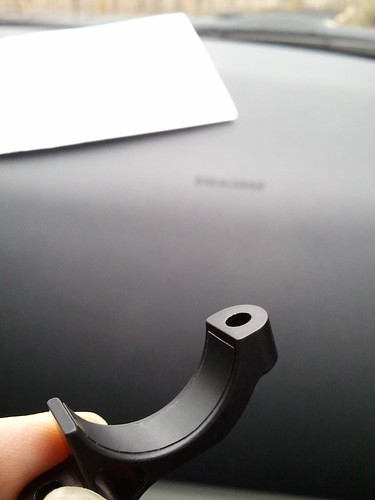
12. Loosely tighten the Blend Mount so you can adjust the location and direction.

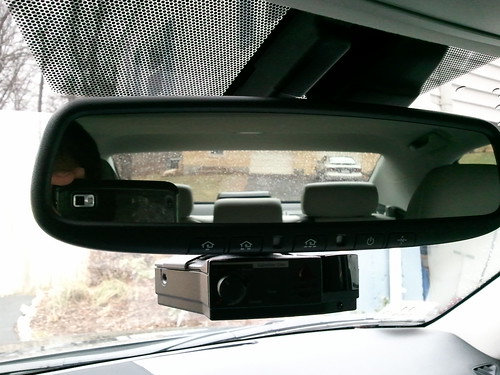
13. Put V1 unit on the mount and adjust the height and angle again.
Note that you can adjust height with 2 screws on the front.
14. I made sure it's all level and straight.


15. Adjust back mirror from the base of mirror unit not from the stem so it doesn't affect the V1's position.
16. Clean inside of your windshield with "Tint Safe" glass cleaner if needed.
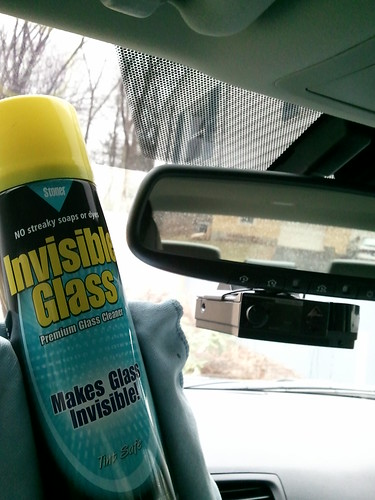
17. Enjoy your V1!


Hope this thread is helpful to someone!
Happy New Year CL members!
Today I just installed my V1 on 2010 IS250 using Blend Mount.
Of course, I did read many threads here about this topic and very thankful that I wanted to share how I did it. I know everyone has different preferences so bear with me if don't like the way I did
1. I read many threads here line by line including this one.
https://www.clublexus.com/forums/is-...l-post-14.html
2. I ordered Blend Mount (http://www.blendmount.com/valentine.html)
Remember to use coupon code "friend" for an upfront 12.5% off.
3. Then I ordered V1 Radar Direct Stealth Mirror Cord kit from eBay ($9.50 with Free Shipping)
I was going to use regular phone cord but found out that it's so thin that I don't have patience and skill to make it work. And also, I like the idea of extra protection with built-in fuse that Stealth Mirror Cord offers.
4. I decided to use Rain Sensor for power source since this seems easier that I don't like to take out the mirror unit. On the Rain Sensor cover, there is a small tab you can take out with your finger tip.
5. Pull out plastic tab. Don't force it too hard. It should come out nicely.
Then pull down the whole rain sensor unit cover.
6. Take the wire harness out carefully. And You may need to bend the tips of Stealth Cord so it fits in the harness tightly.
7. "BLACK" cord from Stealth kit goes to "WHITE" of harness.
"RED" cord goes to "BLACK" of harness from car.
8. Test and make sure the connection is good.
9. Zip tie the cords together and tuck them away. I put them through the mirror cords plastic covers.
10. Put the Rain Sensor unit back in place. Make sure the glass sensor is clean and free of any lint, smudges, etc.
11. Blend Mount fits nicely but I cut a strip of electric tape and lay it inside of mount to protect the mirror base just in case.
12. Loosely tighten the Blend Mount so you can adjust the location and direction.
13. Put V1 unit on the mount and adjust the height and angle again.
Note that you can adjust height with 2 screws on the front.
14. I made sure it's all level and straight.
15. Adjust back mirror from the base of mirror unit not from the stem so it doesn't affect the V1's position.
16. Clean inside of your windshield with "Tint Safe" glass cleaner if needed.
17. Enjoy your V1!
Hope this thread is helpful to someone!
Happy New Year CL members!


 03-08-14, 05:17 AM
#27
Hello, hope you guys are enjoying the last day of 2011.
Today I just installed my V1 on 2010 IS250 using Blend Mount.
Of course, I did read many threads here about this topic and very thankful that I wanted to share how I did it. I know everyone has different preferences so bear with me if don't like the way I did
1. I read many threads here line by line including this one.
https://www.clublexus.com/forums/is-...l-post-14.html
2. I ordered Blend Mount (http://www.blendmount.com/valentine.html)
Remember to use coupon code "friend" for an upfront 12.5% off.
3. Then I ordered V1 Radar Direct Stealth Mirror Cord kit from eBay ($9.50 with Free Shipping)
I was going to use regular phone cord but found out that it's so thin that I don't have patience and skill to make it work. And also, I like the idea of extra protection with built-in fuse that Stealth Mirror Cord offers.
4. I decided to use Rain Sensor for power source since this seems easier that I don't like to take out the mirror unit. On the Rain Sensor cover, there is a small tab you can take out with your finger tip.
5. Pull out plastic tab. Don't force it too hard. It should come out nicely.
Then pull down the whole rain sensor unit cover.
6. Take the wire harness out carefully. And You may need to bend the tips of Stealth Cord so it fits in the harness tightly.
7. "BLACK" cord from Stealth kit goes to "WHITE" of harness.
"RED" cord goes to "BLACK" of harness from car.
8. Test and make sure the connection is good.
9. Zip tie the cords together and tuck them away. I put them through the mirror cords plastic covers.
10. Put the Rain Sensor unit back in place. Make sure the glass sensor is clean and free of any lint, smudges, etc.
11. Blend Mount fits nicely but I cut a strip of electric tape and lay it inside of mount to protect the mirror base just in case.
12. Loosely tighten the Blend Mount so you can adjust the location and direction.
13. Put V1 unit on the mount and adjust the height and angle again.
Note that you can adjust height with 2 screws on the front.
14. I made sure it's all level and straight.
15. Adjust back mirror from the base of mirror unit not from the stem so it doesn't affect the V1's position.
16. Clean inside of your windshield with "Tint Safe" glass cleaner if needed.
17. Enjoy your V1!
Hope this thread is helpful to someone!
Happy New Year CL members!
