


Need tips for new project


Thread Starter
Driver School Candidate
iTrader: (1)
Joined: Sep 2011
Posts: 38
Likes: 0
From: florida

Check out kbcarstuff and PM XenonDepot for their HID kits! They sell Volt Kits on there, and I believe they're still having their 60% off sale + free shipping. I just recently got new bulbs from them and all my friends love em. Haha. They turn on the same color as OEM HiDs, turn pretty blue, then fade into the 6000k look. They're great! Plus, customer service was great - shipping was a little slow, but they're in Canada, so I'm not complaining. Heh.

Pole Position
Joined: May 2011
Posts: 279
Likes: 6
From: AL
DDM tuning HID is a good kit. I have ordered about 5 or 6 from them. would not go over a 6k 55w thats just me though. (ddmtuning.com) Paint, I have used Krylon fusion flat black. The CCFL is far better than an LED, I have pics of the 2 compared and its night and day.
You will have to determine what MM the projector is, because the CCFL comes in mm. You will also need a way to fasten the CCFL to the projector. I used hot glue on my project but it came loose, and I used automotive adhesive. Once you use this, its pretty much there. IF you you might get tired of the Halo's id think it through on how the best way to secure them, and keeping in mind how you might remove them without messing up your lights.
link to CCFL's
http://www.retrosolutionsllc.com/ser...yes/Categories
You will have to determine what MM the projector is, because the CCFL comes in mm. You will also need a way to fasten the CCFL to the projector. I used hot glue on my project but it came loose, and I used automotive adhesive. Once you use this, its pretty much there. IF you you might get tired of the Halo's id think it through on how the best way to secure them, and keeping in mind how you might remove them without messing up your lights.
link to CCFL's
http://www.retrosolutionsllc.com/ser...yes/Categories
Thread Starter
Driver School Candidate
iTrader: (1)
Joined: Sep 2011
Posts: 38
Likes: 0
From: florida
DDM tuning HID is a good kit. I have ordered about 5 or 6 from them. would not go over a 6k 55w thats just me though. (ddmtuning.com) Paint, I have used Krylon fusion flat black. The CCFL is far better than an LED, I have pics of the 2 compared and its night and day.
You will have to determine what MM the projector is, because the CCFL comes in mm. You will also need a way to fasten the CCFL to the projector. I used hot glue on my project but it came loose, and I used automotive adhesive. Once you use this, its pretty much there. IF you you might get tired of the Halo's id think it through on how the best way to secure them, and keeping in mind how you might remove them without messing up your lights.
link to CCFL's
http://www.retrosolutionsllc.com/ser...yes/Categories
You will have to determine what MM the projector is, because the CCFL comes in mm. You will also need a way to fasten the CCFL to the projector. I used hot glue on my project but it came loose, and I used automotive adhesive. Once you use this, its pretty much there. IF you you might get tired of the Halo's id think it through on how the best way to secure them, and keeping in mind how you might remove them without messing up your lights.
link to CCFL's
http://www.retrosolutionsllc.com/ser...yes/Categories
Pole Position
Joined: May 2011
Posts: 279
Likes: 6
From: AL
With 3 positive reviews of ddmtuning's hid kits, it sounds like it's almost a done deal with which kit I'm getting. For the way to fasten the CCFL's, where would I get the automotive adhesive? I would guess autozone/discount autoparts, but I guess it doesn't hurt to ask. I doubt I would ever get tired enough of something on my car to not be lazy and take it off.
I got some at walmart, but yes any parts store. I just had to use something strong because they can vibrate off. Maybe some other can add other ways to fasten them. The DDM kit is 45 or 50 plus shipping. Id def go for the 55w kit. They also sell replacement parts, cheap if you happen to blow a bulb or ballast.
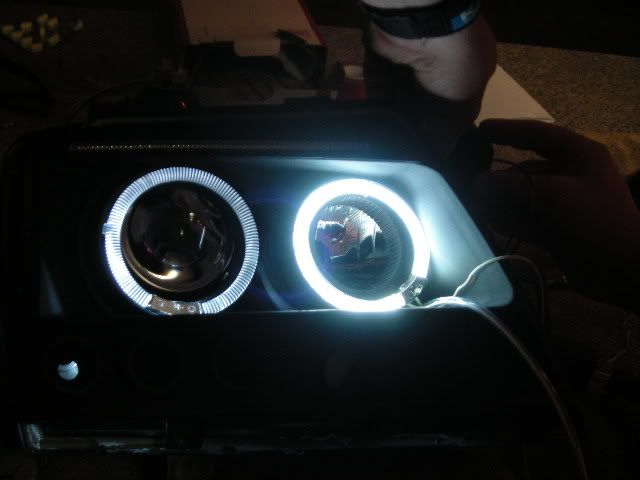
just to show you the diff between a CCFL and LED...
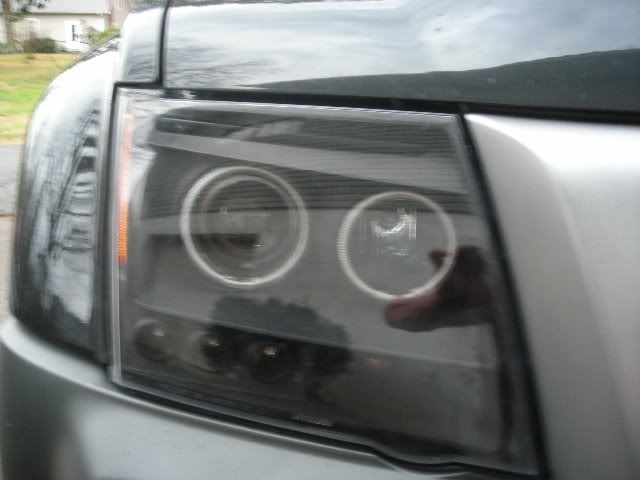
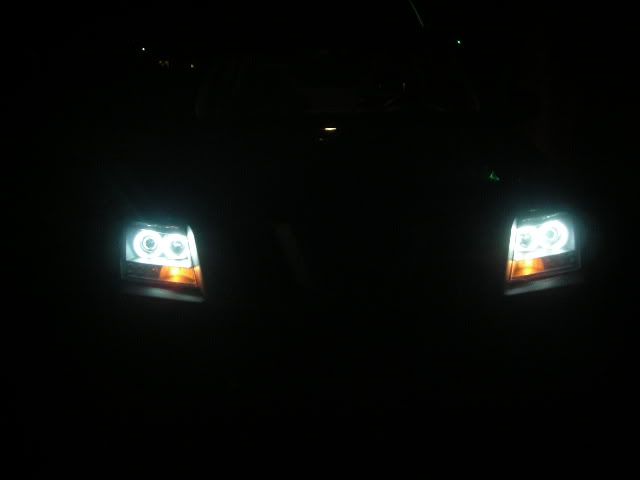
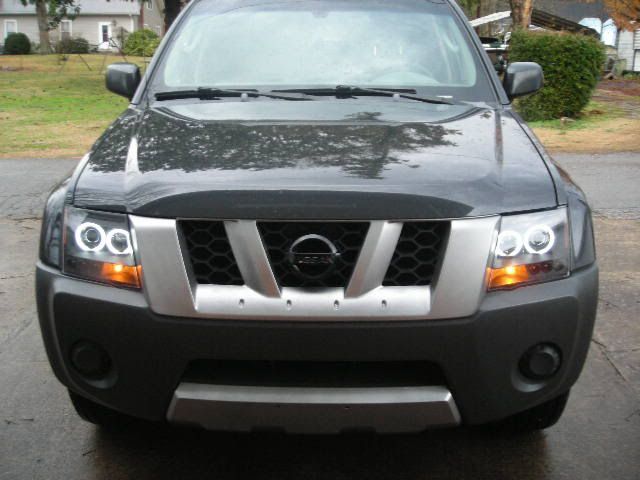
Here they are installed on my Xterra...
night time..
day time..
Thread Starter
Driver School Candidate
iTrader: (1)
Joined: Sep 2011
Posts: 38
Likes: 0
From: florida
I got some at walmart, but yes any parts store. I just had to use something strong because they can vibrate off. Maybe some other can add other ways to fasten them. The DDM kit is 45 or 50 plus shipping. Id def go for the 55w kit. They also sell replacement parts, cheap if you happen to blow a bulb or ballast.
just to show you the diff between a CCFL and LED...
Here they are installed on my Xterra...
night time..
day time..
just to show you the diff between a CCFL and LED...
Here they are installed on my Xterra...
night time..
day time..

The ddm kit was the one for $35. Very easy plug and play install! I just wrapped all the wires in electrical tape.
Forgot to add I ordered 35 watt 6K for fogs and lows
Thread Starter
Driver School Candidate
iTrader: (1)
Joined: Sep 2011
Posts: 38
Likes: 0
From: florida
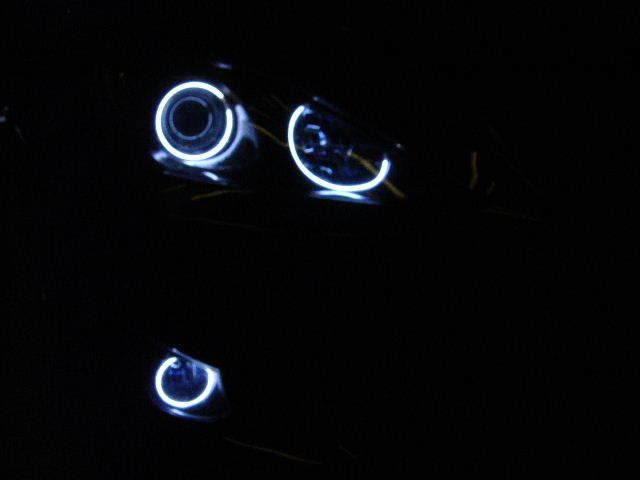
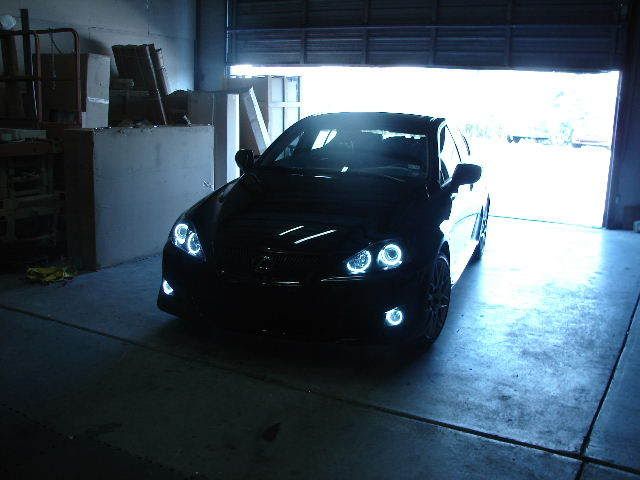
More ISX50 halos
http://https://www.clublexus.com/for...ics-added.html
http://https://www.clublexus.com/for...ics-added.html

My oven has a pizza stone on the lower rack. It adds thermal mass which keeps the temperature constant. You can add something to retain the heat like a brick or all metal frying pans. Before I heat the oven, I put the second rack right above the thermal mass. I also get a piece of light cardboard to keep the light off the metal rack. Make sure your light fits before the oven gets hot.
Heat the oven to 200*F. Let it preheat for a few minutes to get the thermal mass up to temperature. While you're waiting, get some butter knives, chop sticks, a flat bladed screwdriver or two, etc. to pry the light apart. You might need gloves and a pair of kitchen scissors is handy. You use the scissors to cut the adhesive if it acts like pizza cheese.
I turn the oven off so nothing melts and put the light in for ten minutes. Stick the second light in while working on the first one. Raise the temperature/time if needed. I like to work bare handed so I use lower temperatures. Don't be tempted to pry on the sharp corners at the start. If the adhesive isn't loose enough, you'll snap the plastic. Start at a gentle curve or straight area. If it's not moving, raise the temperature or let it sit in the heat longer.
Good luck!

Yeah once you've opened them up on the flat area it gets easier. Keep a blow dryer in hand in case they cool off too much. It's pretty simple. Just make sure you don't get the glue inside the headlight lens. I've seen that happen before.
Thread Starter
Driver School Candidate
iTrader: (1)
Joined: Sep 2011
Posts: 38
Likes: 0
From: florida
I opened several pairs of headlights and tail lights. This is what has been working for me.
My oven has a pizza stone on the lower rack. It adds thermal mass which keeps the temperature constant. You can add something to retain the heat like a brick or all metal frying pans. Before I heat the oven, I put the second rack right above the thermal mass. I also get a piece of light cardboard to keep the light off the metal rack. Make sure your light fits before the oven gets hot.
Heat the oven to 200*F. Let it preheat for a few minutes to get the thermal mass up to temperature. While you're waiting, get some butter knives, chop sticks, a flat bladed screwdriver or two, etc. to pry the light apart. You might need gloves and a pair of kitchen scissors is handy. You use the scissors to cut the adhesive if it acts like pizza cheese.
I turn the oven off so nothing melts and put the light in for ten minutes. Stick the second light in while working on the first one. Raise the temperature/time if needed. I like to work bare handed so I use lower temperatures. Don't be tempted to pry on the sharp corners at the start. If the adhesive isn't loose enough, you'll snap the plastic. Start at a gentle curve or straight area. If it's not moving, raise the temperature or let it sit in the heat longer.
Good luck!
My oven has a pizza stone on the lower rack. It adds thermal mass which keeps the temperature constant. You can add something to retain the heat like a brick or all metal frying pans. Before I heat the oven, I put the second rack right above the thermal mass. I also get a piece of light cardboard to keep the light off the metal rack. Make sure your light fits before the oven gets hot.
Heat the oven to 200*F. Let it preheat for a few minutes to get the thermal mass up to temperature. While you're waiting, get some butter knives, chop sticks, a flat bladed screwdriver or two, etc. to pry the light apart. You might need gloves and a pair of kitchen scissors is handy. You use the scissors to cut the adhesive if it acts like pizza cheese.
I turn the oven off so nothing melts and put the light in for ten minutes. Stick the second light in while working on the first one. Raise the temperature/time if needed. I like to work bare handed so I use lower temperatures. Don't be tempted to pry on the sharp corners at the start. If the adhesive isn't loose enough, you'll snap the plastic. Start at a gentle curve or straight area. If it's not moving, raise the temperature or let it sit in the heat longer.
Good luck!


You can just heat up the adhesive that's already on the headlights. If you want more, lots of people recommend nissan rubber butyl.
Just fyi... I took almost two hours getting a headlight open. But it was my first time and I didn't really know what I was doing. Good luck!
Just fyi... I took almost two hours getting a headlight open. But it was my first time and I didn't really know what I was doing. Good luck!
https://www.clublexus.com/forums/is-...ics-added.html
Thread Starter
Driver School Candidate
iTrader: (1)
Joined: Sep 2011
Posts: 38
Likes: 0
From: florida
Honestly I got the 35w because they were $10 cheaper and so did several of my friends, the lighting is great...no need in my opinion to go to 55w
https://www.clublexus.com/forums/is-...ics-added.html
https://www.clublexus.com/forums/is-...ics-added.html
Anyone know all the sizes for all 3 places. Someone posted 70mm for fogs and 80mm for low beams. But shouldn't there be three measurements? This is in case I buy from a place that sells by size.