
Finally a DIY for LED DRL in Fogs!!!

Well, this took me a while because I got lazy and kept putting it off for weeks. But I finally got it done. It's not really hard to do just takes time and have to be precise with the drilling for the holes.
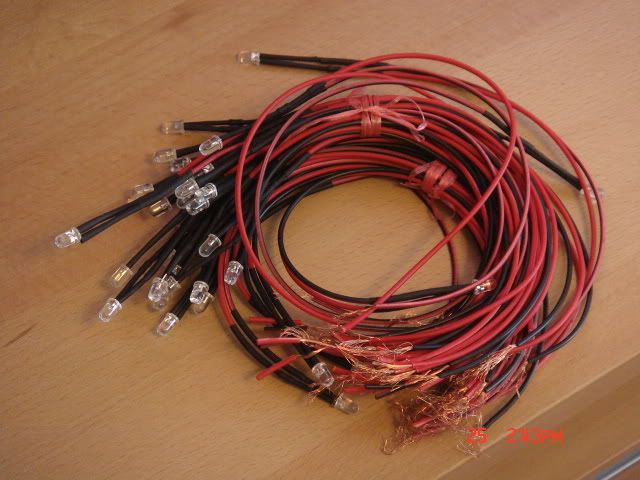
For the LED DRLs I will be doing the cluster just like the JDM fogs. I am not really that good with circuit boards so that is out of the question. It would've been a lot simpler if I can fab one up of that shape. So instead I went with pre-wired LEDs. They can be had on ebay for fairly cheap. Also they are 5mm white LEDs.
Here they are:
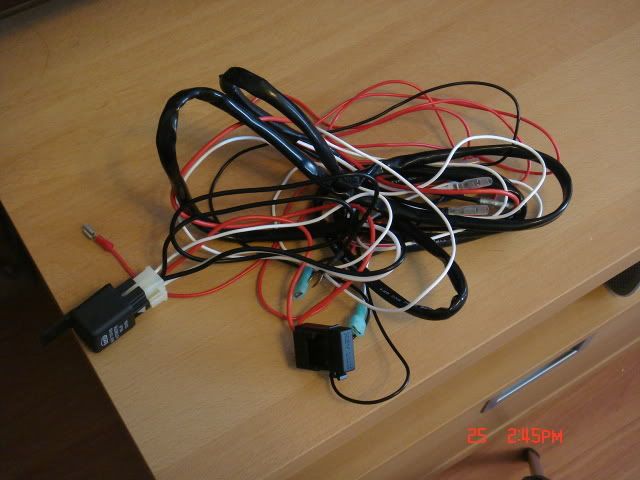
I will also be using a foglight wire harness for this too.
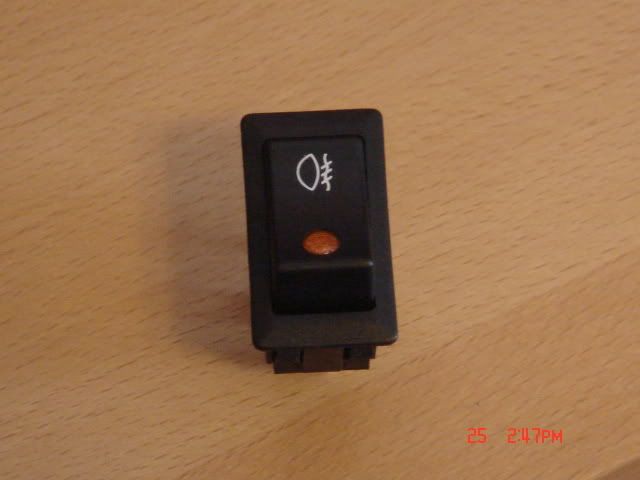
To activate the LED DRLs I will be using a foglight switch. This is the Toyota Tacoma switch that I purchased on ebay. It's the nicest looking one I found so far, plus it keeps it looking OEM.
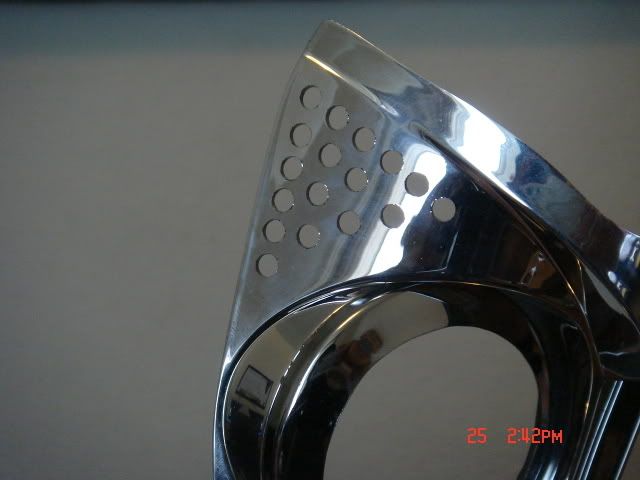
Now on to the prep. Well of course you have to open up the fogs and remove the shroud from the fog lens. Then I proceeded to mark the back of the shrouds with a permenant marker with dots as to where I am going to drill.
Like so:
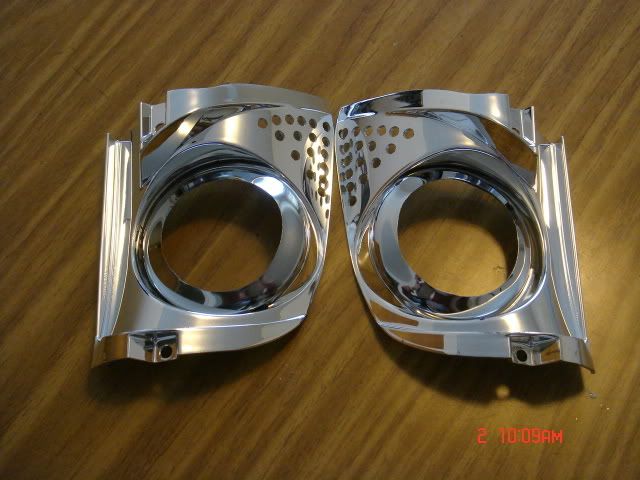
This is how it looks like after I am done drilling.
Compared with the other side.
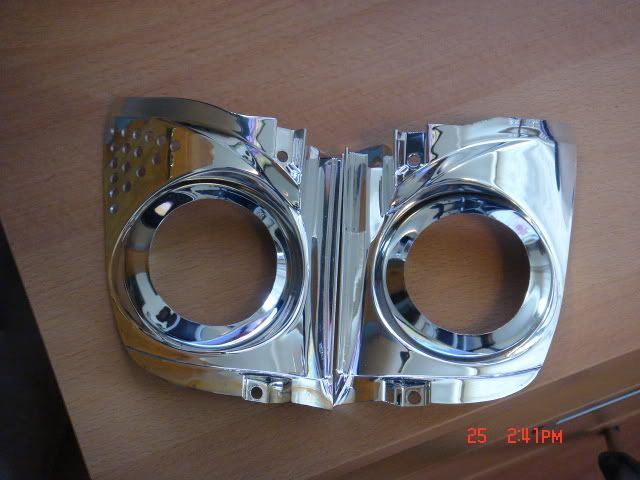
Both sides.
After I am done drilling the wholes for the LEDs I start sticking them in. But I didn't insert it all the way in, because I didn't like how it looked like with it protruding so far out. So I left it halfway. After I was done with fitting the LEDs in, I used clear RTV silicone to make it stay in place. After that was dry I used JB quik on top of it. I did this because the silicone is flexible and I was worried that if I move it around too much the silicone would peel off. But the JB weld is more stiff so there would be no movement.
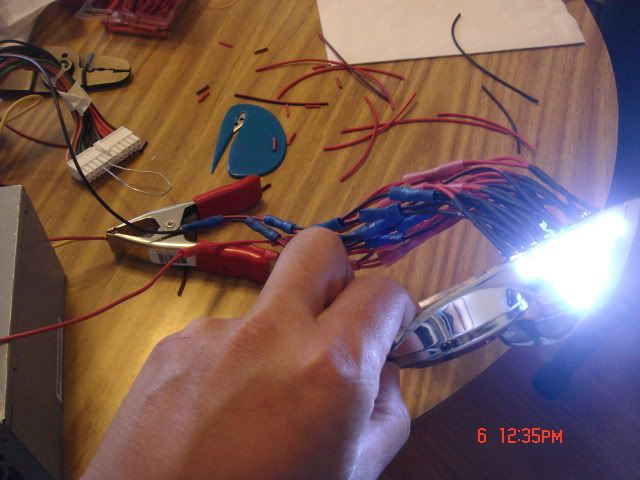
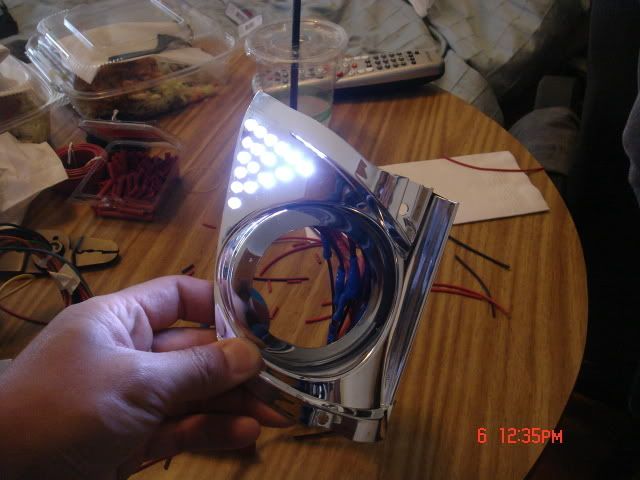
Once that was done I started consolidating the wires into one. It was a long process, it was two wires crimped into one. I used a total of 16 LEDs on each side and there is a positive and negative wire so there was a whole lot of crimping.
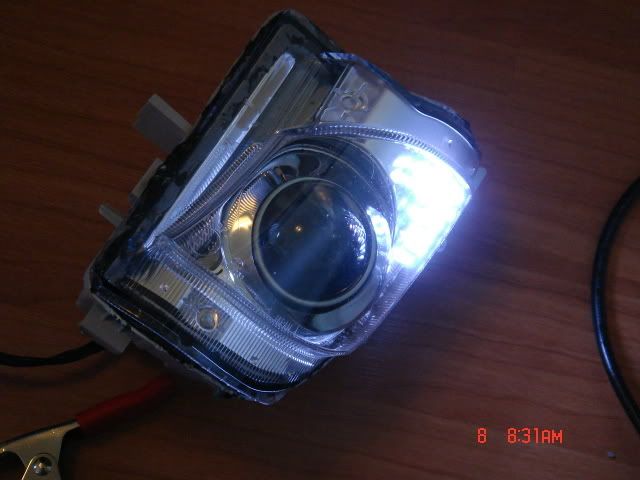
This is how the end product looks and it is hooked up to a power supply.
And another
Here is how the end product looks.
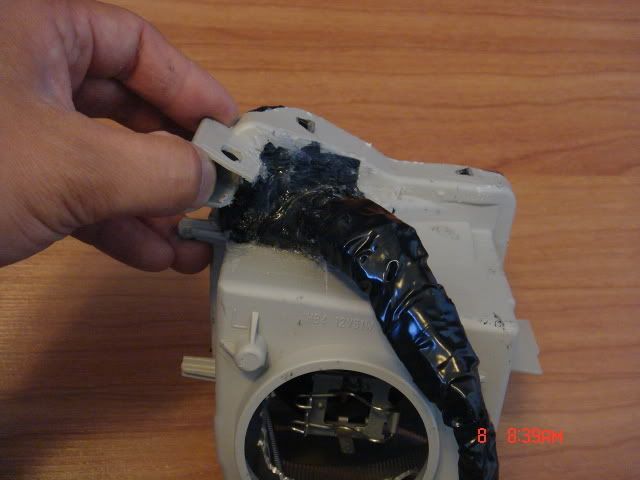
I had so much wires that it wouldn�t fit into the foglight housing. So I had to make a hole in the back of the housing so that the wires can stick out. I used electric tape to make a shape for the hole and cover it up. It acts like a molding so that I can put RTV silicone on it.
Now it�s nice and sealed up.
Overall, this project was a total cost of less than 100 bucks. It doesn't look perfect compared to the the real JDM fogs but it's only 1/5 of the cost of it including the cost of my projector project.
I am about to install the fogs so I won't have pics of it yet. I will also try to get night shots of it later tonight.
Thanks for looking and I hope this helps out people who are interested in this!!
For the LED DRLs I will be doing the cluster just like the JDM fogs. I am not really that good with circuit boards so that is out of the question. It would've been a lot simpler if I can fab one up of that shape. So instead I went with pre-wired LEDs. They can be had on ebay for fairly cheap. Also they are 5mm white LEDs.
Here they are:
I will also be using a foglight wire harness for this too.
To activate the LED DRLs I will be using a foglight switch. This is the Toyota Tacoma switch that I purchased on ebay. It's the nicest looking one I found so far, plus it keeps it looking OEM.
Now on to the prep. Well of course you have to open up the fogs and remove the shroud from the fog lens. Then I proceeded to mark the back of the shrouds with a permenant marker with dots as to where I am going to drill.
Like so:
This is how it looks like after I am done drilling.
Compared with the other side.
Both sides.
After I am done drilling the wholes for the LEDs I start sticking them in. But I didn't insert it all the way in, because I didn't like how it looked like with it protruding so far out. So I left it halfway. After I was done with fitting the LEDs in, I used clear RTV silicone to make it stay in place. After that was dry I used JB quik on top of it. I did this because the silicone is flexible and I was worried that if I move it around too much the silicone would peel off. But the JB weld is more stiff so there would be no movement.
Once that was done I started consolidating the wires into one. It was a long process, it was two wires crimped into one. I used a total of 16 LEDs on each side and there is a positive and negative wire so there was a whole lot of crimping.
This is how the end product looks and it is hooked up to a power supply.
And another
Here is how the end product looks.
I had so much wires that it wouldn�t fit into the foglight housing. So I had to make a hole in the back of the housing so that the wires can stick out. I used electric tape to make a shape for the hole and cover it up. It acts like a molding so that I can put RTV silicone on it.
Now it�s nice and sealed up.
Overall, this project was a total cost of less than 100 bucks. It doesn't look perfect compared to the the real JDM fogs but it's only 1/5 of the cost of it including the cost of my projector project.
I am about to install the fogs so I won't have pics of it yet. I will also try to get night shots of it later tonight.
Thanks for looking and I hope this helps out people who are interested in this!!


ahhh someone beat me to this. i was in the middle of working on this. looks great bro! would you mind take some pictures when you get it mounted on the car and possibly some pictures that are a little further out.
you could of used these holders though to keep the led's in place.
http://cgi.ebay.com/20x-5mm-5-mm-LED...3A1%7C294%3A50
http://cgi.ebay.com/5-mm-LED-Holders...3A1%7C294%3A50
you could of used these holders though to keep the led's in place.
http://cgi.ebay.com/20x-5mm-5-mm-LED...3A1%7C294%3A50
http://cgi.ebay.com/5-mm-LED-Holders...3A1%7C294%3A50
Last edited by fluxx; Jul 8, 2009 at 09:17 AM.


