

Rookie
Installed motogfx on three IS's over last few weeks including my own. They've worked out nicely and are perfectly transparent.


Pit Crew
Quote:
aerotect
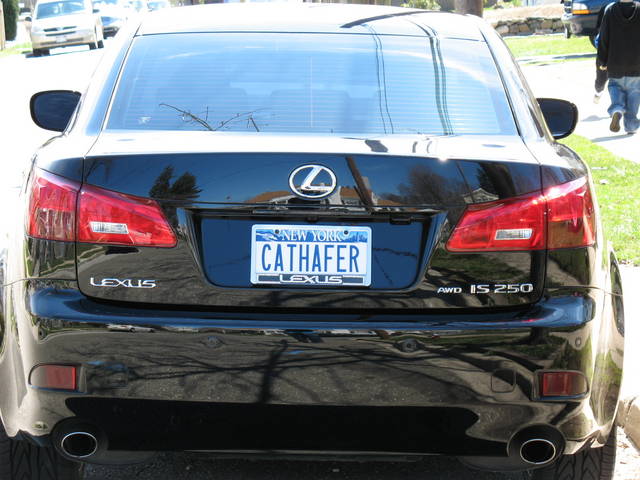
rvinyl

ok...i'm off to go put on my smoke tail overlays :P
Rvinyl looks much better.Originally Posted by CaThaFeR
i have a black IS...i've had both the rvinyl and the aerotect redouts...here are pics of bothaerotect
rvinyl
ok...i'm off to go put on my smoke tail overlays :P


Driver School Candidate
I just got my Rvinyls in today, I really don't want to mess around with the wet install method. After I clean the area with alcohol can I just install it using the dry method? What are the risks of doing dry vs wet? I really want to make sure I get this right as I am very picky with my vehicle. Would using the wet method reduce the life of the adhesive on the vinyl? If I do dry do I still need to use a hair dryer? Sorry just need some major clarification I have read to many different things in this thread!


Driver
Quote:
I'm the guy to answer this for ya. I bet I'm more picky than you. You must use the wet method if you want it perfect - this gives you the ability to slide it a few millimeters in any direction to get it spot on. The dryer helps to adhere it to your car and sucks the moisture out underneath. If there is a tiny bubble or two don't freak out. Remember you are working on a curved surface. Use a pin or needle and pop one hole in the bubble and use the dryer again. After a week in the sun you it will be perfect. Originally Posted by Megaman096
I just got my Rvinyls in today, I really don't want to mess around with the wet install method. After I clean the area with alcohol can I just install it using the dry method? What are the risks of doing dry vs wet? I really want to make sure I get this right as I am very picky with my vehicle. Would using the wet method reduce the life of the adhesive on the vinyl? If I do dry do I still need to use a hair dryer? Sorry just need some major clarification I have read to many different things in this thread!
I've had this stuff on my car, gone through hand and car washes and it looks as good as new. Good luck.

Racer
I just installed my RVinyl red-outs. I highly recommend the wet method. If you don't do the wet method, you're essentially just hoping that you stick it on correctly the first time, which I can guarantee you won't do. You'll try and line it up with one edge then it'll end up sticking somewhere it shouldn't or it'll leave a bubble or something else you don't want. And once it's on there dry, it's on there. Peeling it off will reduce the adhesiveness.
I did the wet method, combined a bit of car soap with water and put it in a sprayer. I wetted the adhesive side of the vinyl as well as the tail light and then stuck it on as best I could, then shifted it into place and smoothed out the bubbles with a credit card as I had a hair dryer blowing on it.
It turned out perfectly, but here's one tip. If you can, have a buddy with you to continually spray the outside of the vinyl once it's in place and you're smoothing out the bubbles. Unless this area is continually wetted down, as you scrape out the bubbles with the credit card you'll leave scratch marks on the vinyl. You can of course do this yourself, but then you have to keep switching back and forth from credit card to sprayer. It's best to focus on smoothing out the vinyl while a buddy focuses on continually spraying water on the outside so the credit card runs smoothly over the vinyl and doesn't scratch it.
Hope that makes sense. I was really nervous about doing it and it turned out great.
I did the wet method, combined a bit of car soap with water and put it in a sprayer. I wetted the adhesive side of the vinyl as well as the tail light and then stuck it on as best I could, then shifted it into place and smoothed out the bubbles with a credit card as I had a hair dryer blowing on it.
It turned out perfectly, but here's one tip. If you can, have a buddy with you to continually spray the outside of the vinyl once it's in place and you're smoothing out the bubbles. Unless this area is continually wetted down, as you scrape out the bubbles with the credit card you'll leave scratch marks on the vinyl. You can of course do this yourself, but then you have to keep switching back and forth from credit card to sprayer. It's best to focus on smoothing out the vinyl while a buddy focuses on continually spraying water on the outside so the credit card runs smoothly over the vinyl and doesn't scratch it.
Hope that makes sense. I was really nervous about doing it and it turned out great.

istarzan
Instructor
close


Mar 30, 2026
- Join DateJun 2011
- LocationNC
- Posts:1,189
-
iTrader Positive Feedback100
-
iTrader Feedback Score(8)
-
Likes:119
-
Liked:12 Times in 10 Posts
Wet method. You can move it around. I did the dry method and it stuck on good and hard to position it and I tore it a little. I learned from my mistake and then used wet method on my fog overlays. You can use a spray bottom with a dab of soap and water. Then use a credit card to squeeze out the air bubbles.

Pole Position
I've skimmed through the postings here and it seems rvinyl is the way to go. I'm looking at their website and it's $20 bucks for the kit?! I've read here it should be around 10 and using rvinyl gives it a 2 buck discount?
Am i looking at the wrong product? BTW is there any other way to get these rather than shipping it to me?
Am i looking at the wrong product? BTW is there any other way to get these rather than shipping it to me?

Driver School Candidate
Quote:
Am i looking at the wrong product? BTW is there any other way to get these rather than shipping it to me?
I got mine on ebay for $11 shipped. Matches perfectly. As for your second question, are you trying to buy at a local store or something? I'm not sure if there would be anyone who does that.Originally Posted by g2bme
I've skimmed through the postings here and it seems rvinyl is the way to go. I'm looking at their website and it's $20 bucks for the kit?! I've read here it should be around 10 and using rvinyl gives it a 2 buck discount? Am i looking at the wrong product? BTW is there any other way to get these rather than shipping it to me?
Pole Position
Quote:
Originally Posted by fredster2
I got mine on ebay for $11 shipped. Matches perfectly. As for your second question, are you trying to buy at a local store or something? I'm not sure if there would be anyone who does that.
Do you have the seller who you bought it from? I'm looking on ebay and they sell sheets rather than precut.

Rookie
i did this but i smoked mine out, instead of red out i bought dark smoke, same concept and they hid the ugly amber, i have a set of OEM tail lights for sale for cheap if anyone wants to experiment, PM me for details
Rookie
a good site for the vinyl is RVinyl, i order from them all the time, excellent quality and very cheap www.rvinyl.com

Rookie
I used the rvinyls redouts and in installed them using the dry method. I was lucky to get them perfect. I would do the method if I had to do it again. It wasn't easy to line it up perfect. The look great though, I haven't seen one other ISx50 in my area with them. Most of the ISx50s are stock here anyway.

Pole Position
Got pre-cut redouts from motogfx. Tried one tail light using wet method and another dry method.
Dry method turned out perfect and its faster. So if i would have to do it again i would choose dry method.
Dry method turned out perfect and its faster. So if i would have to do it again i would choose dry method.
Driver School Candidate
Quote:
here you goOriginally Posted by g2bme
Do you have the seller who you bought it from? I'm looking on ebay and they sell sheets rather than precut.
link
