Separated ML speaker
 03-22-12, 05:58 PM
#1
Lexus Champion
Thread Starter
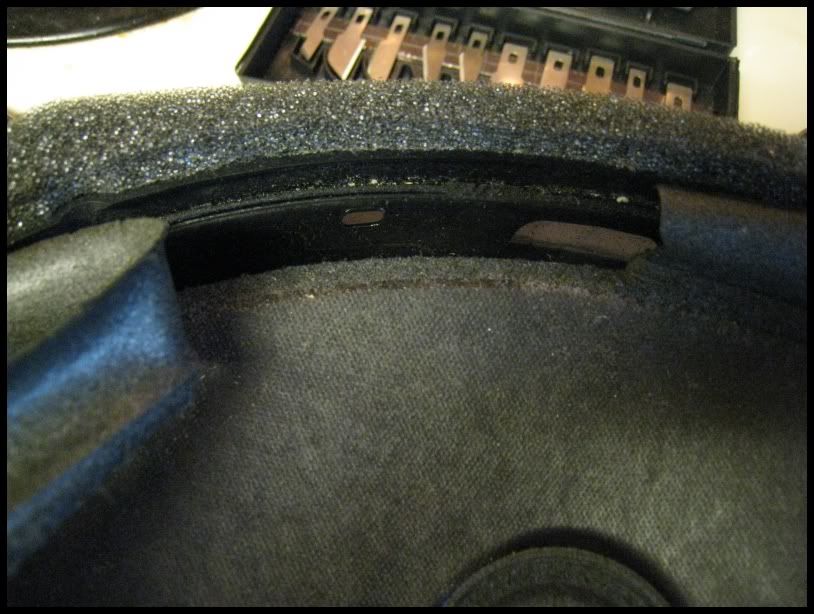
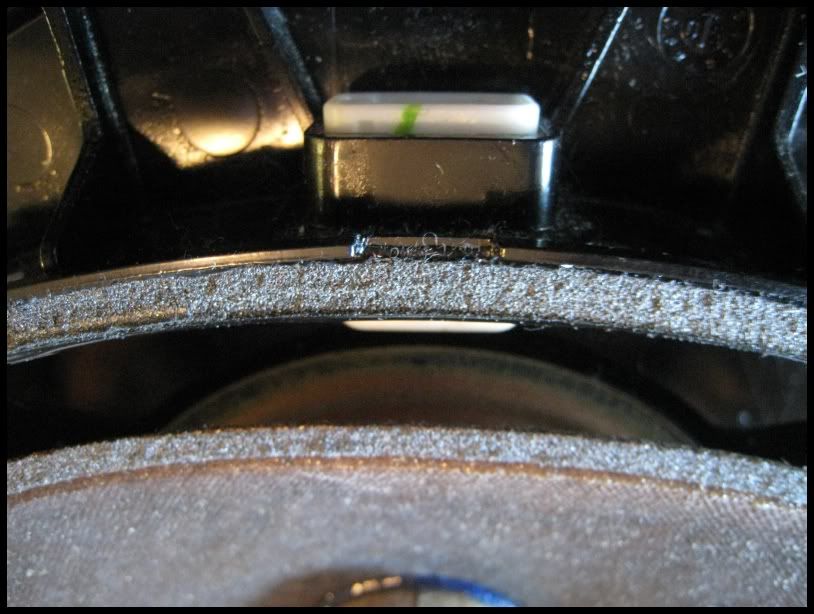
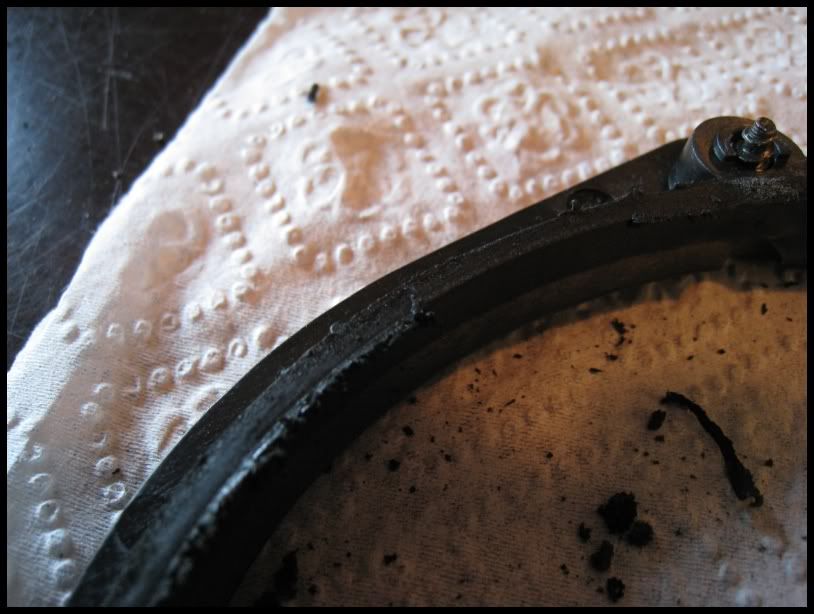
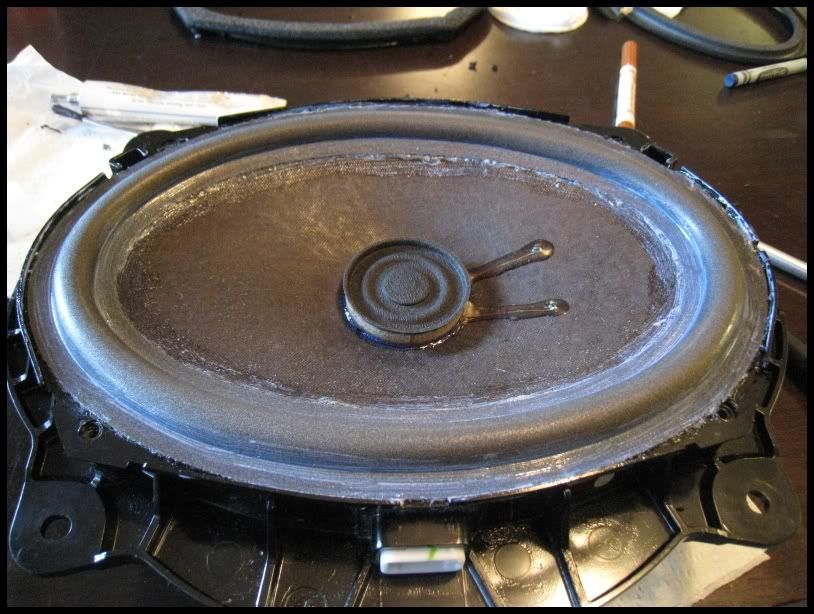
Ive had my GX for less than 2 weeks and both of my front 6x9 speakers foam trim separated from the speaker bracket.
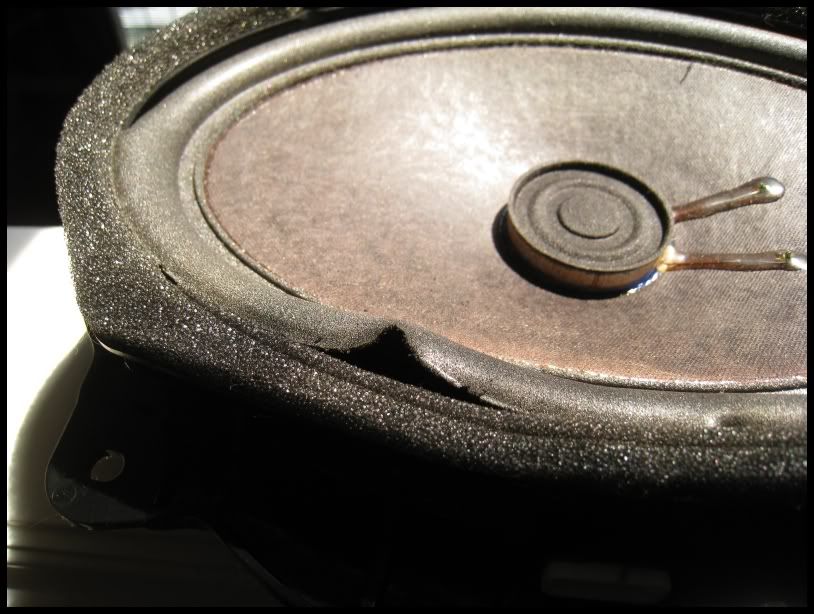
Sewell has the ML speakers for $143.46 a piece but why waste $300 on new speakers when the coils arent damaged? The new ones will eventually separate again anyway, so a $25 repair kit seems like the logical choice because it uses better foam or so they say.
I ended up buying the speaker repair kit and foam sealer from simply speakers. I'll let yall know how it turns out. I have nothing to loose and if I end up completely damaging the speakers theres always Sewell.
EDIT:
The repair kit was delivered today and I repaired the drivers side front. It took less than an hour and thats including removing the door panel which took about 3mins. It was very easy to repair, if you can remove a door panel you can repair your speaker. Heres how I did it:
STEP 1 : REMOVING THE OLD FOAM SURROUND
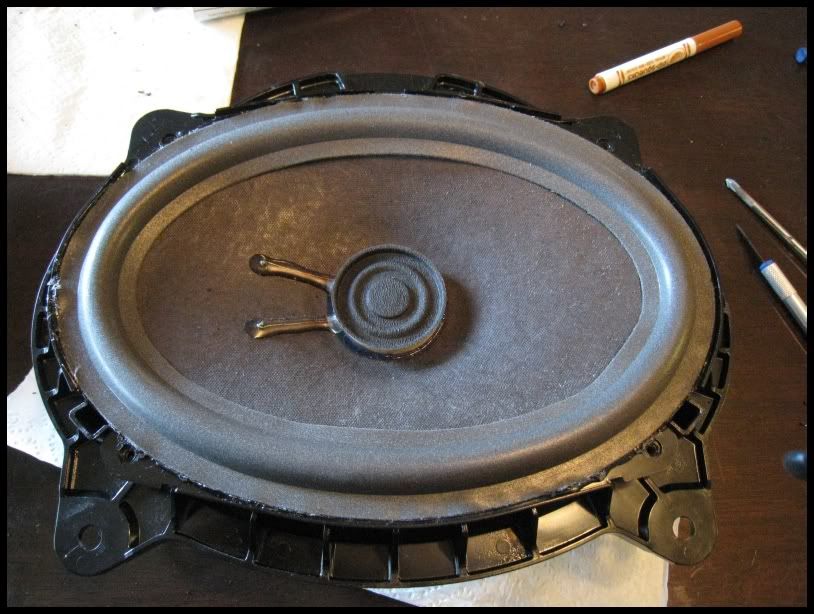
Obviously remove the door panel and speaker.
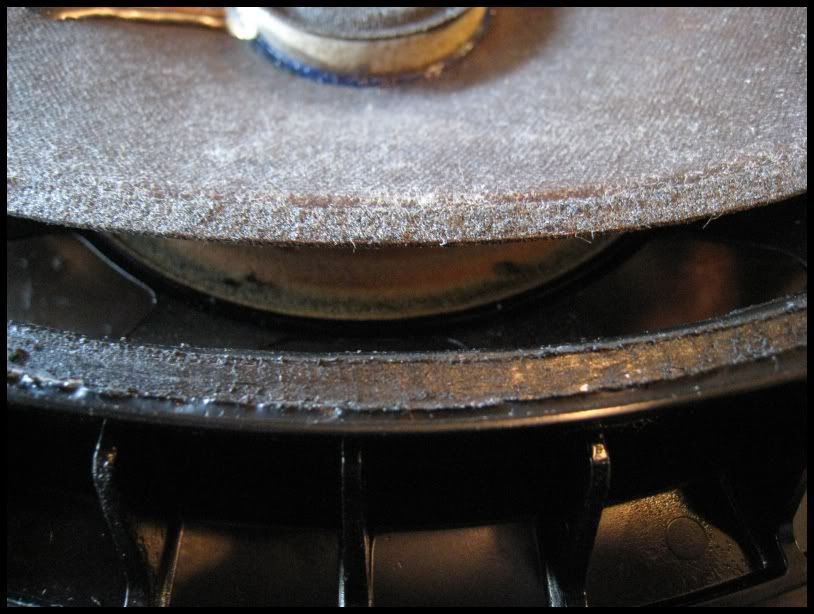
Next you need to get the old foam surround off. Use a sharp razor blade to peel back the foam from the speaker cone.
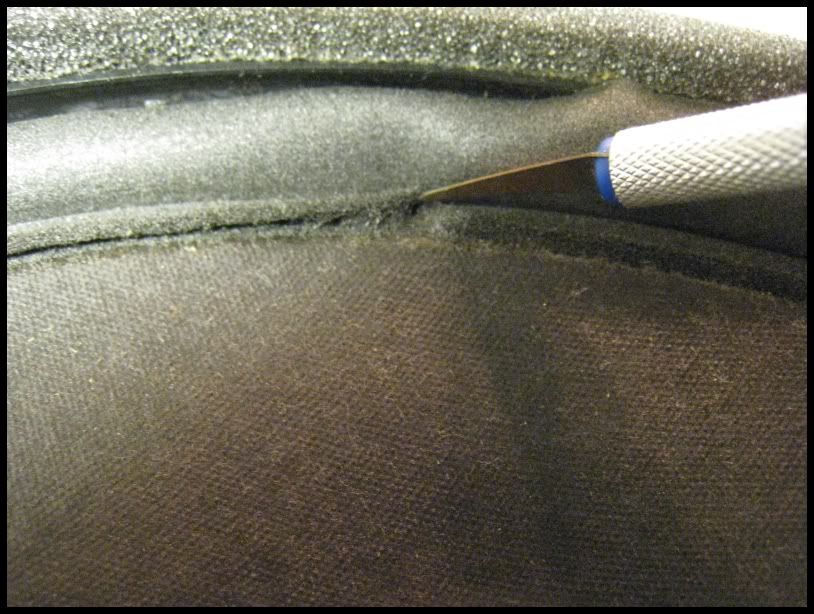
Once you have it lifted up, cut the surround in half.
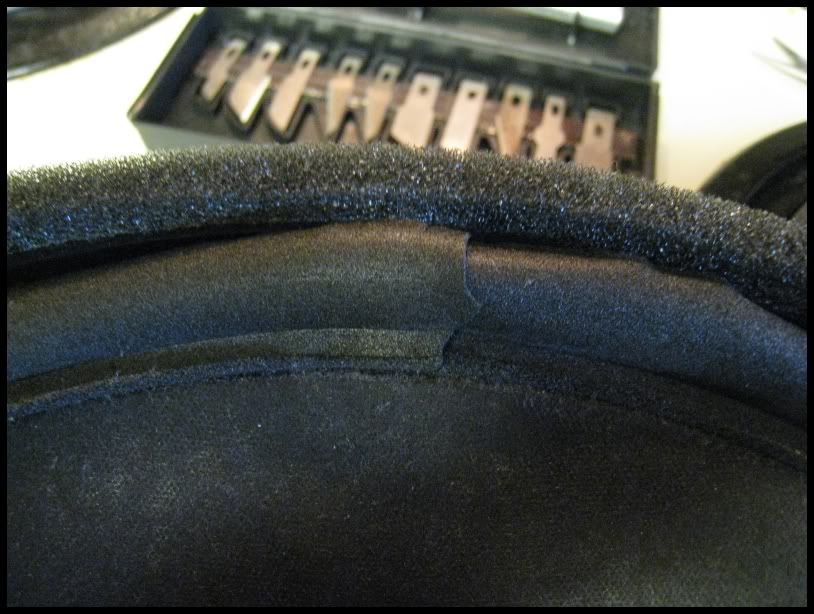
Then peel it off, it comes off very easily.
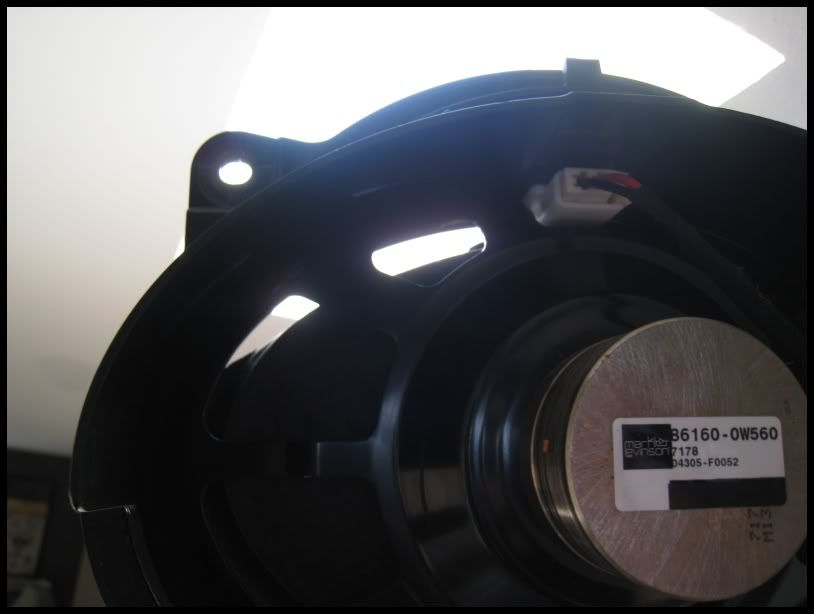
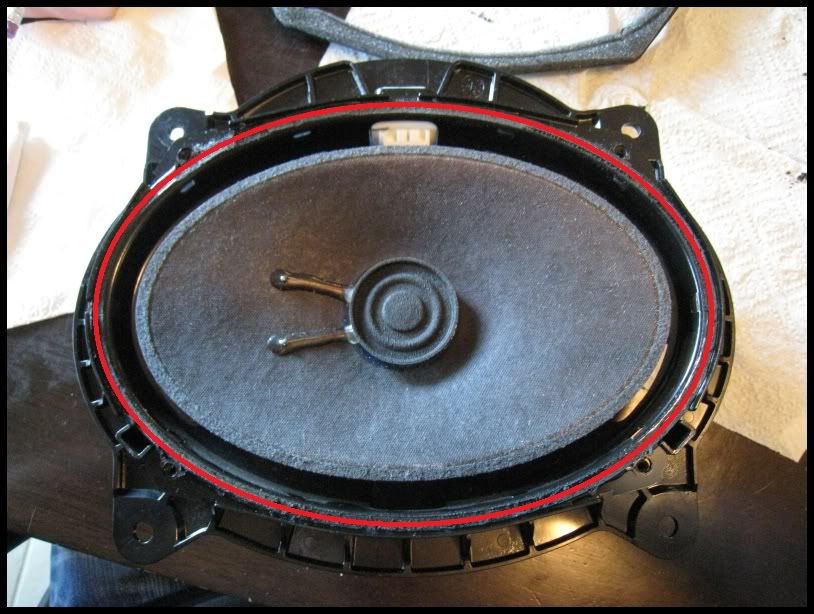
Next you need to remove the top part of the speaker bracket. Theres 4 philips head screws under the foam cover (circled in red). Peel back the foam over the screws and remove the screws.
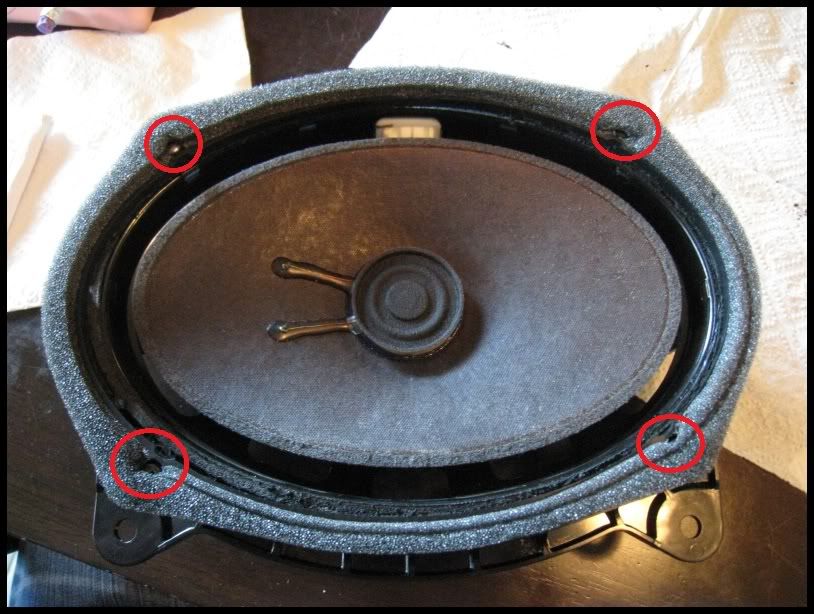
Next you need to pop the top bracket off. Its held on by some butyl (rubber adhesive) so youll have to pull a little hard at first. If need be, pull it towards you and use the razor to cut the butyl and the top will come right off
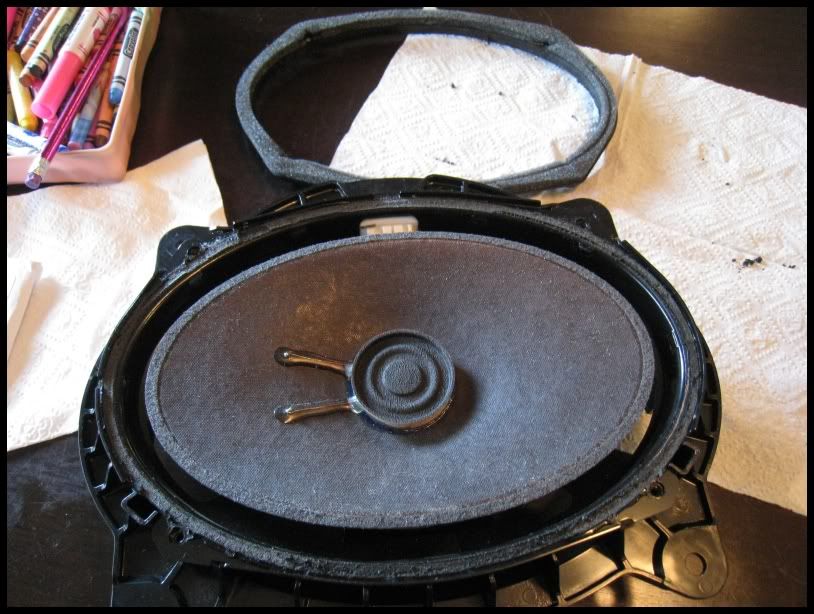
Now youre left with this.
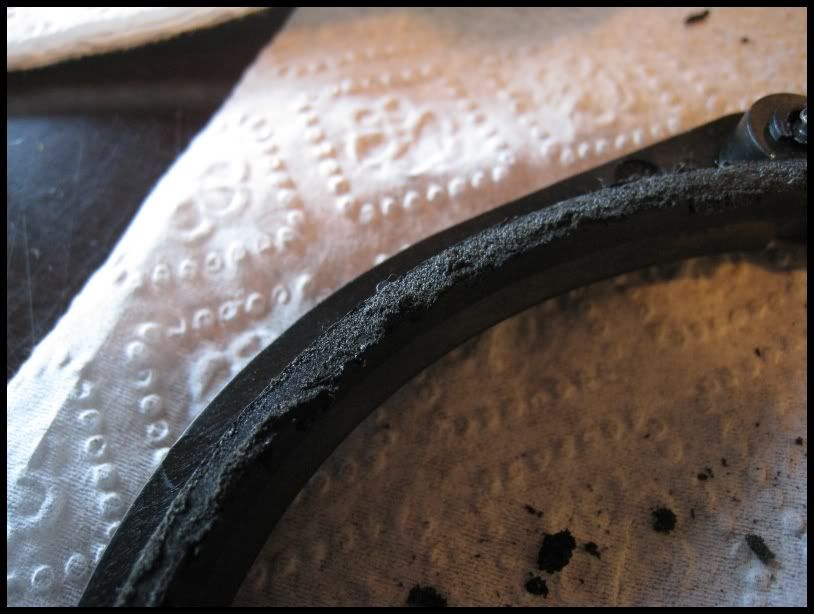
Now comes the hard part, its not hard, just time consuming. You need to remove the old adhesive and foam from around the top and bottom speaker bracket (circled in red) I first scrapped the old foam / adhesive off with the razor then used a qtip dipped in nail polish remove and went over it and scraped it again. You can use rubbing alcohol too.
Bottom bracket
Top bracket
*forgot to take a picture of the complete bracket but its the part you removed thats held on with 4 screws
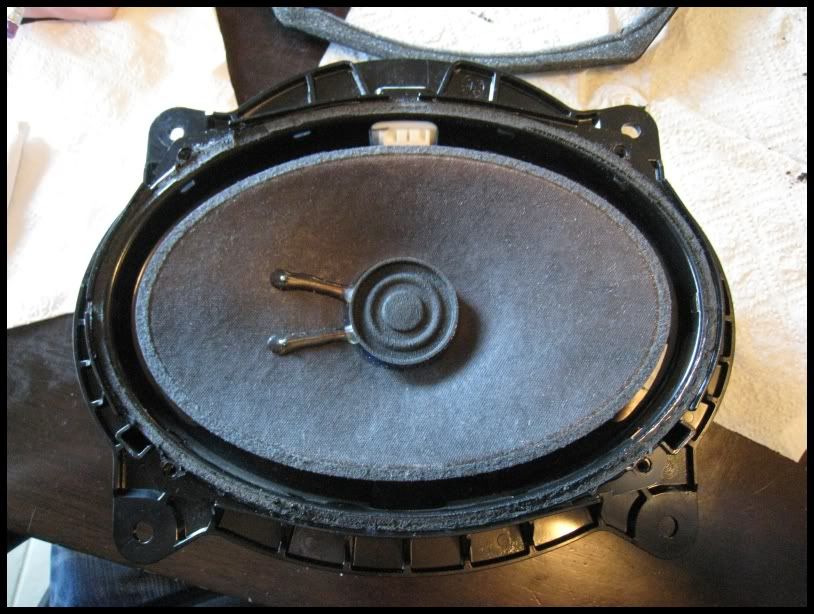
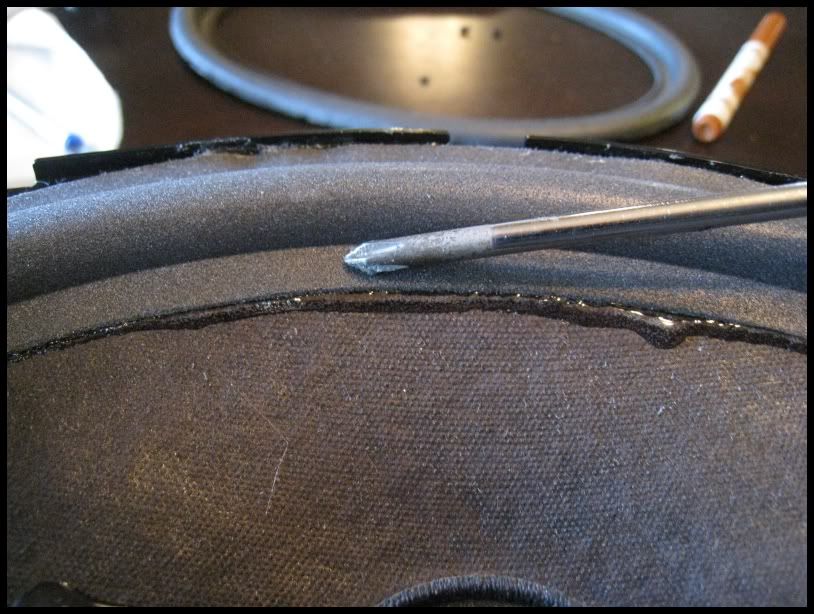
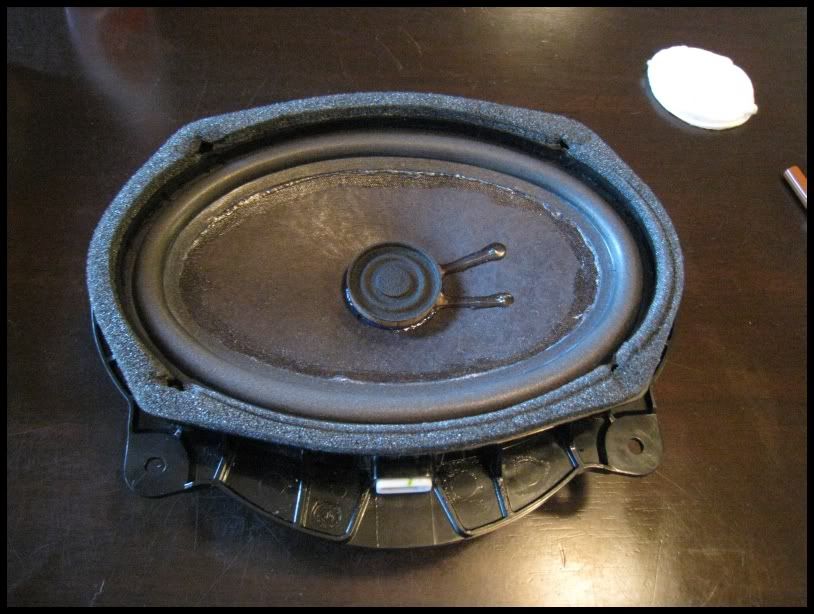
STEP 2 : INSTALLING THE NEW FOAM SURROUND
The instructions said to glue the new surround to the cone first but I did the bracket first. Either way is fine.
Apply the glue from the repair kit to the bottom bracket (part where you removed the old foam / adhesive) and place the new foam surround on the bracket and smooth it down. I used the tip of a philips head screw driver to push down the new foam and I rolled the tip towards me to make sure I got the entire lip of the surround down good and flush on the bracket.
This stuff needs a few minutes to tack up or gets sticky and once it does it gets really sticky! While its tacking up you'll need to keep going around the new foam and pressing it down for the next 3-4 mins.
Repeats the same process for the cone
Thats it, youre done!
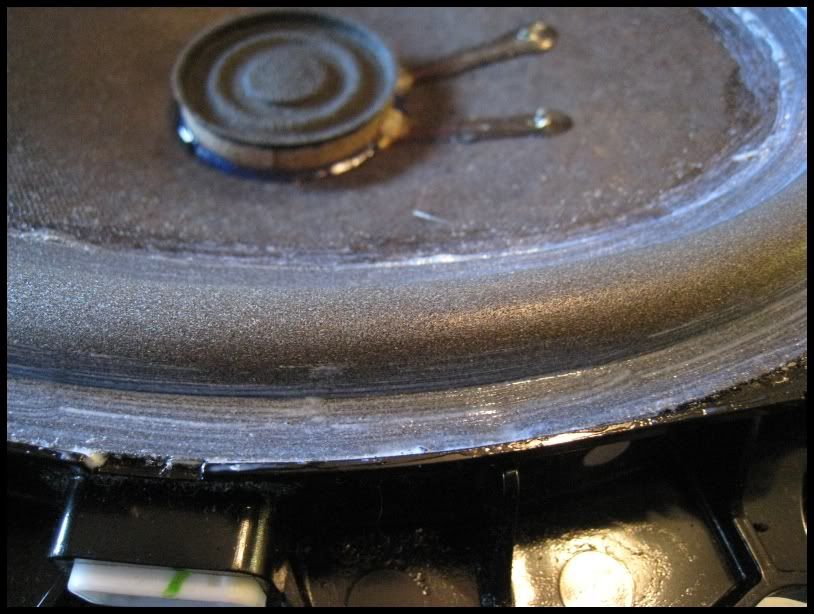
This next part is up to you, you dont have to do it but I did it. I bought the foam sealer....which I found out by smelling it was nothing more than elmers glue watered down a little bit . It says to apply it to the entire foam but I just choose to apply it to the cone and where the factory separated
Next screw the top bracket back on
Thats it youre done and if youre like me and had both of your front speakers foam surround crap out on you, you just saved $200+ dollars fixing it yourself. Now go put your GX back together and DONT forget to clean your mess up or the wife will be pissed!
It said it takes an hour for the foam glue to dry but Im giving it a day or two to be safe. So in the mean time Im only using the rear speakers but I did test it out at 15 on the volume level and it held up fine. If it holds up I'll do the passenger side.
If anyone has any questions dont hesitate to ask.
Sewell has the ML speakers for $143.46 a piece but why waste $300 on new speakers when the coils arent damaged? The new ones will eventually separate again anyway, so a $25 repair kit seems like the logical choice because it uses better foam or so they say.
I ended up buying the speaker repair kit and foam sealer from simply speakers. I'll let yall know how it turns out. I have nothing to loose and if I end up completely damaging the speakers theres always Sewell.
EDIT:
The repair kit was delivered today and I repaired the drivers side front. It took less than an hour and thats including removing the door panel which took about 3mins. It was very easy to repair, if you can remove a door panel you can repair your speaker.
Heres how I did it:STEP 1 : REMOVING THE OLD FOAM SURROUND
Obviously remove the door panel and speaker.
Next you need to get the old foam surround off. Use a sharp razor blade to peel back the foam from the speaker cone.
Once you have it lifted up, cut the surround in half.
Then peel it off, it comes off very easily.
Next you need to remove the top part of the speaker bracket. Theres 4 philips head screws under the foam cover (circled in red). Peel back the foam over the screws and remove the screws.
Next you need to pop the top bracket off. Its held on by some butyl (rubber adhesive) so youll have to pull a little hard at first. If need be, pull it towards you and use the razor to cut the butyl and the top will come right off
Now youre left with this.
Now comes the hard part, its not hard, just time consuming. You need to remove the old adhesive and foam from around the top and bottom speaker bracket (circled in red) I first scrapped the old foam / adhesive off with the razor then used a qtip dipped in nail polish remove and went over it and scraped it again. You can use rubbing alcohol too.
Bottom bracket
Top bracket
*forgot to take a picture of the complete bracket but its the part you removed thats held on with 4 screws
STEP 2 : INSTALLING THE NEW FOAM SURROUND
The instructions said to glue the new surround to the cone first but I did the bracket first. Either way is fine.
Apply the glue from the repair kit to the bottom bracket (part where you removed the old foam / adhesive) and place the new foam surround on the bracket and smooth it down. I used the tip of a philips head screw driver to push down the new foam and I rolled the tip towards me to make sure I got the entire lip of the surround down good and flush on the bracket.
This stuff needs a few minutes to tack up or gets sticky and once it does it gets really sticky! While its tacking up you'll need to keep going around the new foam and pressing it down for the next 3-4 mins.
Repeats the same process for the cone
Thats it, youre done!
This next part is up to you, you dont have to do it but I did it. I bought the foam sealer....which I found out by smelling it was nothing more than elmers glue watered down a little bit
. It says to apply it to the entire foam but I just choose to apply it to the cone and where the factory separatedNext screw the top bracket back on
Thats it youre done and if youre like me and had both of your front speakers foam surround crap out on you, you just saved $200+ dollars fixing it yourself. Now go put your GX back together and DONT forget to clean your mess up or the wife will be pissed!
It said it takes an hour for the foam glue to dry but Im giving it a day or two to be safe. So in the mean time Im only using the rear speakers but I did test it out at 15 on the volume level and it held up fine. If it holds up I'll do the passenger side.
If anyone has any questions dont hesitate to ask.
Last edited by RCsGX; 03-26-12 at 06:21 PM.
 03-24-12, 09:22 AM
#2
Driver School Candidate

Join Date: Jul 2010
Location: TX
Posts: 5
Likes: 0
Received 0 Likes
on
0 Posts
I'm excited to see how it turns out...all my 6x9's have done this, and it's plain annoying. I just haven't had the time to pull them out (I was going to hot glue the foam to the trim ring).
03-24-12, 10:54 AM
#3
Lexus Champion
Thread Starter
Removing the panel took about 5mins, its very easy to do. You can use hot glue, but at deep bass it might rip apart again since its not flexible. Ive read of people using silicone, that would probably work great. Once fully cured it sticks strong and is flexible but the kit I bought comes with some glue, probably a hyped up superglue so that should work fine.
Right now I have all my music to the back speakers, I couldnt stand the rattle of the front speakers anymore. For factory, the rears dont sound bad at all either. Im impressed by the ML system, but the quality is lacking since its not just a GX issue with these speakers separating!? Thats why I couldnt justify spending almost $300 if theyre just a ticking timebomb waiting to separate again.
Right now I have all my music to the back speakers, I couldnt stand the rattle of the front speakers anymore. For factory, the rears dont sound bad at all either. Im impressed by the ML system, but the quality is lacking since its not just a GX issue with these speakers separating!? Thats why I couldnt justify spending almost $300 if theyre just a ticking timebomb waiting to separate again.
03-27-12, 04:05 PM
#7
Lexus Champion
Thread Starter
If you need pictures (like I do sometimes) I'll take some this weekend when I repair the passenger side speaker. Its very easy trust me!
Trending Topics
03-28-12, 11:20 AM
#8
Driver School Candidate

Join Date: Aug 2009
Location: ny
Posts: 27
Likes: 0
Received 0 Likes
on
0 Posts
If you need any help along the way just post up in this thread.
Really it takes less than 5 mins. See post # 3 here: https://www.clublexus.com/forums/gx-...tructions.html
If you need pictures (like I do sometimes) I'll take some this weekend when I repair the passenger side speaker. Its very easy trust me!
Really it takes less than 5 mins. See post # 3 here: https://www.clublexus.com/forums/gx-...tructions.html
If you need pictures (like I do sometimes) I'll take some this weekend when I repair the passenger side speaker. Its very easy trust me!
03-31-12, 10:39 AM
#9
Lexus Champion
Thread Starter
Youll need a plastic trim remover or a thin blade flathead screw driver with tape around the blade so you dont scrape or mar the plastic. You can also use a plastic putty knife, theyre under a dollar from home depot.
(Im including thumbnail pictures. If you click on them they will open up larger in another tab. If you need to view them even larger, click on them again.)
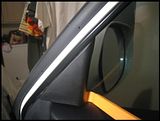
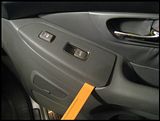
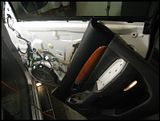
Remove the triangle piece by the door mirror.
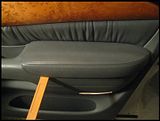
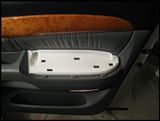
Slide the trim remover under the armrest and lift up until you hear the clips release.
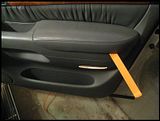
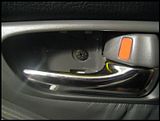
Remove the gold screw.
Slide the trim remover under the door switch and lift up until you hear the clips release.
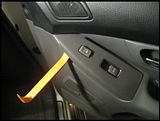
Pull the switch out and remove the 2 electrical clips.
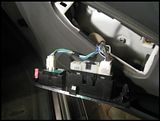
Remove the gold screw.
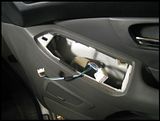
Open the door handle and remove the plastic cover.
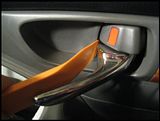
Remove the black screw.
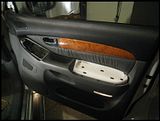
Now you need to remove the door panel. Its held on by multiple panel clips. Start at the bottom corner and put the plastic trim remover inbetween the door panel / sheet metal and pull towards you until you hear the clip release.
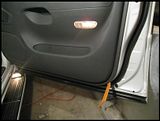
Once you have the corner release use your hand and pull the door panel away from sheet metal in red.
The door panel is now separate from the sheet metal. Grad the armrest handle and pull up on the door panel. Once you lift it up 2-3" bring it towards you. Dont let it hang because theres 3 electrical connector you need to disconnect first.
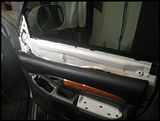
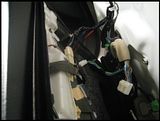
It was hard for me to disconnect them so just pull on them to get more slack. Theyre held in by a body clip; similar to how the door panel is held onto the sheet metal. Once you pull them youll have more room to work with.
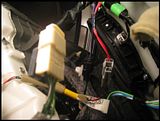
Once you disconnect those, the door panel will still be held into place by the door latch wire. *You can disconnect those if you want but I didnt.* Let the door panel slide down.
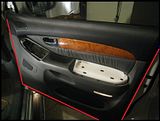
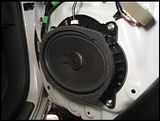
Remove the 4 bolts holding the speaker into place. You can use a philips head screwdriver or a 10mm socket. Unclip the top electrical clip. Remove the speaker. You will probably have to use the plastic trim tool to pry the speaker away from the sheet metal.
When you take the speaker to repair it, grab the armrest handle and hook it back up top so its not putting strain on the door latch wires.
Thats all there is to it. If you need any help dont hesitate to ask.
(Im including thumbnail pictures. If you click on them they will open up larger in another tab. If you need to view them even larger, click on them again.)
Remove the triangle piece by the door mirror.

Slide the trim remover under the armrest and lift up until you hear the clips release.


Remove the gold screw.

Slide the trim remover under the door switch and lift up until you hear the clips release.


Pull the switch out and remove the 2 electrical clips.

Remove the gold screw.

Open the door handle and remove the plastic cover.

Remove the black screw.

Now you need to remove the door panel. Its held on by multiple panel clips. Start at the bottom corner and put the plastic trim remover inbetween the door panel / sheet metal and pull towards you until you hear the clip release.

Once you have the corner release use your hand and pull the door panel away from sheet metal in red.

The door panel is now separate from the sheet metal. Grad the armrest handle and pull up on the door panel. Once you lift it up 2-3" bring it towards you. Dont let it hang because theres 3 electrical connector you need to disconnect first.


It was hard for me to disconnect them so just pull on them to get more slack. Theyre held in by a body clip; similar to how the door panel is held onto the sheet metal. Once you pull them youll have more room to work with.

Once you disconnect those, the door panel will still be held into place by the door latch wire. *You can disconnect those if you want but I didnt.* Let the door panel slide down.

Remove the 4 bolts holding the speaker into place. You can use a philips head screwdriver or a 10mm socket. Unclip the top electrical clip. Remove the speaker. You will probably have to use the plastic trim tool to pry the speaker away from the sheet metal.

When you take the speaker to repair it, grab the armrest handle and hook it back up top so its not putting strain on the door latch wires.

Thats all there is to it.
If you need any help dont hesitate to ask.
03-31-12, 12:18 PM
#10
Lexus Champion
Thread Starter
I just finished repairing the passenger side speaker but I forgot to give an update on the drivers side. The drivers side works great. I even turned up the bass / volume on the song that originally ripped them apart and it help up just fine. Im so glad I tried this $25 kit before spending $200+ on new speakers.
03-31-12, 02:04 PM
#11
Driver School Candidate
Join Date: Aug 2009
Location: ny
Posts: 27
Likes: 0
Received 0 Likes
on
0 Posts
Youll need a plastic trim remover or a thin blade flathead screw driver with tape around the blade so you dont scrape or mar the plastic. You can also use a plastic putty knife, theyre under a dollar from home depot.
(Im including thumbnail pictures. If you click on them they will open up larger in another tab. If you need to view them even larger, click on them again.)
Remove the triangle piece by the door mirror.
Slide the trim remover under the armrest and lift up until you hear the clips release.
Remove the gold screw.
Slide the trim remover under the door switch and lift up until you hear the clips release.
Pull the switch out and remove the 2 electrical clips.
Remove the gold screw.
Open the door handle and remove the plastic cover.
Remove the black screw.
Now you need to remove the door panel. Its held on by multiple panel clips. Start at the bottom corner and put the plastic trim remover inbetween the door panel / sheet metal and pull towards you until you hear the clip release.
Once you have the corner release use your hand and pull the door panel away from sheet metal in red.
The door panel is now separate from the sheet metal. Grad the armrest handle and pull up on the door panel. Once you lift it up 2-3" bring it towards you. Dont let it hang because theres 3 electrical connector you need to disconnect first.
It was hard for me to disconnect them so just pull on them to get more slack. Theyre held in by a body clip; similar to how the door panel is held onto the sheet metal. Once you pull them youll have more room to work with.
Once you disconnect those, the door panel will still be held into place by the door latch wire. *You can disconnect those if you want but I didnt.* Let the door panel slide down.
Remove the 4 bolts holding the speaker into place. You can use a philips head screwdriver or a 10mm socket. Unclip the top electrical clip. Remove the speaker. You will probably have to use the plastic trim tool to pry the speaker away from the sheet metal.
When you take the speaker to repair it, grab the armrest handle and hook it back up top so its not putting strain on the door latch wires.
Thats all there is to it. If you need any help dont hesitate to ask.
(Im including thumbnail pictures. If you click on them they will open up larger in another tab. If you need to view them even larger, click on them again.)
Remove the triangle piece by the door mirror.
Slide the trim remover under the armrest and lift up until you hear the clips release.
Remove the gold screw.
Slide the trim remover under the door switch and lift up until you hear the clips release.
Pull the switch out and remove the 2 electrical clips.
Remove the gold screw.
Open the door handle and remove the plastic cover.
Remove the black screw.
Now you need to remove the door panel. Its held on by multiple panel clips. Start at the bottom corner and put the plastic trim remover inbetween the door panel / sheet metal and pull towards you until you hear the clip release.
Once you have the corner release use your hand and pull the door panel away from sheet metal in red.
The door panel is now separate from the sheet metal. Grad the armrest handle and pull up on the door panel. Once you lift it up 2-3" bring it towards you. Dont let it hang because theres 3 electrical connector you need to disconnect first.
It was hard for me to disconnect them so just pull on them to get more slack. Theyre held in by a body clip; similar to how the door panel is held onto the sheet metal. Once you pull them youll have more room to work with.
Once you disconnect those, the door panel will still be held into place by the door latch wire. *You can disconnect those if you want but I didnt.* Let the door panel slide down.
Remove the 4 bolts holding the speaker into place. You can use a philips head screwdriver or a 10mm socket. Unclip the top electrical clip. Remove the speaker. You will probably have to use the plastic trim tool to pry the speaker away from the sheet metal.
When you take the speaker to repair it, grab the armrest handle and hook it back up top so its not putting strain on the door latch wires.
Thats all there is to it.
If you need any help dont hesitate to ask.
04-03-12, 12:58 PM
#13
Driver School Candidate

Join Date: Jun 2009
Location: TX
Posts: 2
Likes: 0
Received 0 Likes
on
0 Posts
A quick fix option that worked like a champ for me is a hot glue gun. Search for my post under GS / Third Generation...
Topic: "Mark Levinson sub rattle?? could it be blown???"
Reply title: "Cheap fix for subwoofer distortion"
Dan
Topic: "Mark Levinson sub rattle?? could it be blown???"
Reply title: "Cheap fix for subwoofer distortion"
Dan