
60mph Vibrations - DIY Steering Tensioner Adjustment

Thread Starter
Advanced
Joined: Nov 2005
Posts: 637
Likes: 6
From: New York City
I know this has been posted on other threads before. The difference in this one is that its on the first page.
Today I did the steering tensioner adjustment. I have not yet tested out the car. Ill post tomorrow if it really worked
1: go to your local hardware and get a 5/8 x2 bolt and nut.
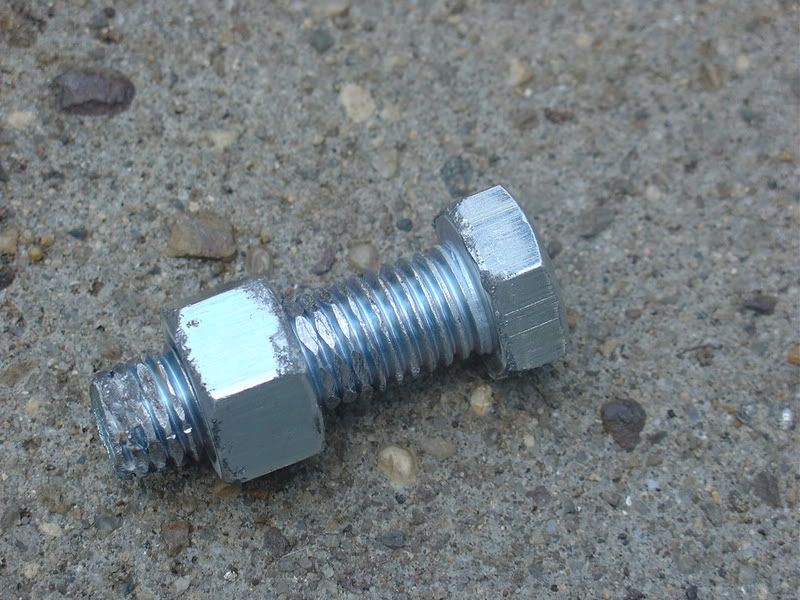
as you can see the tread is smashed. I did that so that the nut does not spin out of place.
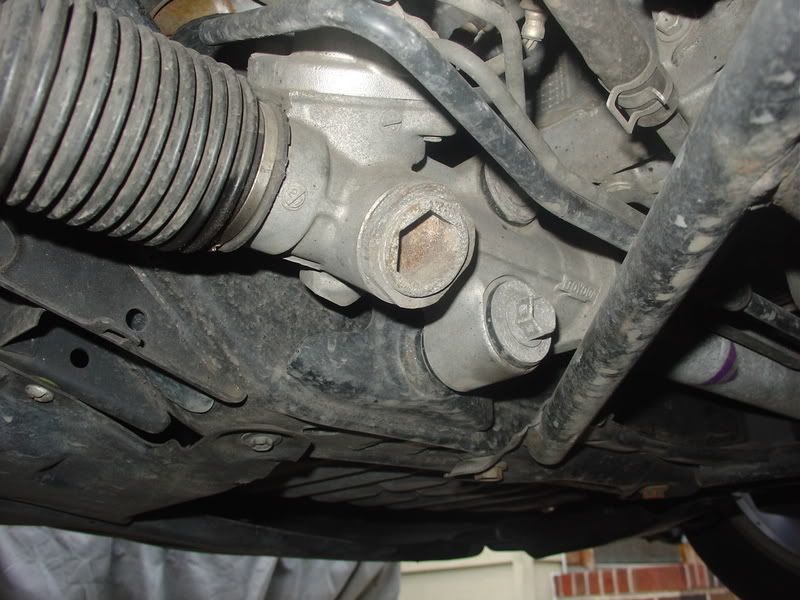
2: Mark the position of the tensioner
3: Use a flat head screw driver and a hammer to take out the the nut that secures the tensioner in place. Hit it on an angle untill it comes out. Use w40 and be patient.
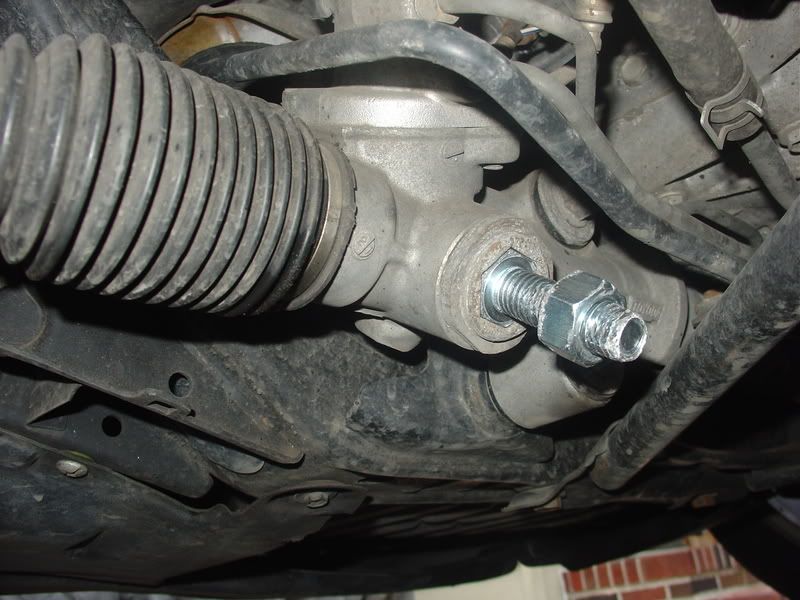
3: Once you loosen the exterior nut then tighten the main bolt 1/8 turn clock wise. Adjust nut that secures the tensioner and you are done.
I hope this helps the vibrations. Ill post tomorrow.
total cost .... 60cents for bolt 20cents for nut = 80 cents. Nice....
Today I did the steering tensioner adjustment. I have not yet tested out the car. Ill post tomorrow if it really worked
1: go to your local hardware and get a 5/8 x2 bolt and nut.
as you can see the tread is smashed. I did that so that the nut does not spin out of place.
2: Mark the position of the tensioner
3: Use a flat head screw driver and a hammer to take out the the nut that secures the tensioner in place. Hit it on an angle untill it comes out. Use w40 and be patient.
3: Once you loosen the exterior nut then tighten the main bolt 1/8 turn clock wise. Adjust nut that secures the tensioner and you are done.
I hope this helps the vibrations. Ill post tomorrow.
total cost .... 60cents for bolt 20cents for nut = 80 cents. Nice....
Last edited by PR FIEBRU; Jun 21, 2008 at 08:53 AM.


Thanks for the tutorial. I was actually able to solve my vibration problems completely by switching to 16" rims, the car glides down the road smooth as silk. It was vibrating with the old 17's, but interestingly enough, right now I have these 17's on my LS, and there are no vibration whatsoever, none, smooth as silk. I think 2GS steering rack just sucks and is too prone to vibrations.
One thing I do not understand from your tutorial, why did you smash that nut like that? Your turning that pretension nut clockwise, right? And to tighten the nut on that bolt, you would also be turning it clockwise, right? So how would it come out?
One thing I do not understand from your tutorial, why did you smash that nut like that? Your turning that pretension nut clockwise, right? And to tighten the nut on that bolt, you would also be turning it clockwise, right? So how would it come out?

Thread Starter
Advanced
Joined: Nov 2005
Posts: 637
Likes: 6
From: New York City
Yep also to turn back the tensioner. Now it works both ways
Ok, so you banged the thread on below and above the nut? I kind of see that now.
Trending Topics


Pole Position
Joined: Nov 2006
Posts: 239
Likes: 3
From: IE
What it simply does is tightens up your rack so you can have the steering as hard or as easy to turn as you want. There is an exact torque setting, but it does not suit everybody's car or personal taste.
This mod is used here to get the pre-tensioner to absorb the vibrations before it travels up the steering shaft where you feel it.
With this you can have BMW effort to turn the wheel or as light as some small mico-cars, word of caution: if its too tight, your steering will not auto-center (when you let go of the wheel after a turn and it centers itself).
The best thing to do is tighten (clockwise) by 1/8 turn go for a test drive and repeat and repeat until you find your sweet spot.
PS for those living in metric lands, the bolt size is an M16
Last edited by gs-ireland; Jun 21, 2008 at 05:19 AM.
Thread Starter
Advanced
Joined: Nov 2005
Posts: 637
Likes: 6
From: New York City
Great news! The 60mph vibrations are very slight now. Like gs-ireland stated you adjust a little at a time until you find the sweet spot.
Before I readjust, I will get the front tires high speed balanced.
Thanks to everyone prior to me that did this adjustment and gave me the ideas. There are a few threads on this forum that explained what I just did in a lot more detail. All I did was take that information and Do It Myself.
Before I readjust, I will get the front tires high speed balanced.
Thanks to everyone prior to me that did this adjustment and gave me the ideas. There are a few threads on this forum that explained what I just did in a lot more detail. All I did was take that information and Do It Myself.


Pole Position
Joined: Nov 2007
Posts: 319
Likes: 0
From: NJ
Can someone explain this step to me? I'm stupid.
3: Use a flat head screw driver and a hammer to take out the the nut that secures the tensioner in place. Hit it on an angle untill it comes out. Use w40 and be patient.
3: Use a flat head screw driver and a hammer to take out the the nut that secures the tensioner in place. Hit it on an angle untill it comes out. Use w40 and be patient.