
Notices
GS - 4th Gen (2013-2020) Discussion about the 2013 and up GS models

F-Sport Fog Light Installation!

Thread Tools
 
Search this Thread
 
Old May 22, 2013 | 06:30 PM
  #1  
bigblack06's Avatar
bigblack06
Thread Starter
CL Community Team
15 Year Member
Liked
Loved
Community Favorite
iTrader: (20)
 
Joined: Nov 2009
Posts: 7,103
Likes: 368
From: Beantown
Default F-Sport Fog Light Installation!
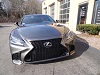
Ok so got the pictures today and it's a lot of them so this thread will be big and I will try my best to narrate this out. I gotta give thanks to Safi at AVI Boston for doing this work, as I was the first GS F-Sport they have done. If anyone wants the shop number or info please PM me for it. Also from the looks of the pics it really isn't how to wire the fogs he told me that they taped into the headlights and made a connection to the black wire within the wiring for lighting.


OMG so many pics still working on it.

Last edited by bigblack06; May 23, 2013 at 04:15 AM.
Reply
Old May 22, 2013 | 06:52 PM
  #2  
bigblack06's Avatar
bigblack06
Thread Starter
CL Community Team
15 Year Member
Liked
Loved
Community Favorite
iTrader: (20)
 
Joined: Nov 2009
Posts: 7,103
Likes: 368
From: Beantown
Default

Continued.


Last edited by bigblack06; May 23, 2013 at 05:56 AM.
Reply
Old May 22, 2013 | 07:06 PM
  #3  
bigblack06's Avatar
bigblack06
Thread Starter
CL Community Team
15 Year Member
Liked
Loved
Community Favorite
iTrader: (20)
 
Joined: Nov 2009
Posts: 7,103
Likes: 368
From: Beantown
Default

Continued.


Last edited by bigblack06; May 23, 2013 at 06:09 AM.
Reply
Old May 22, 2013 | 07:49 PM
  #4  
bigblack06's Avatar
bigblack06
Thread Starter
CL Community Team
15 Year Member
Liked
Loved
Community Favorite
iTrader: (20)
 
Joined: Nov 2009
Posts: 7,103
Likes: 368
From: Beantown
Default

Continued.


Last edited by bigblack06; May 23, 2013 at 06:21 AM.
Reply
Old May 22, 2013 | 08:02 PM
  #5  
bigblack06's Avatar
bigblack06
Thread Starter
CL Community Team
15 Year Member
Liked
Loved
Community Favorite
iTrader: (20)
 
Joined: Nov 2009
Posts: 7,103
Likes: 368
From: Beantown
Default

Continued.


Here is the last step, I hope this helped in some way, I don't think they had the chance to take pics of the wiring as it was done in one day and was when I left it from the morning, so they were trying to rush it for me.

Last edited by bigblack06; May 23, 2013 at 06:31 AM.
Reply
Old May 22, 2013 | 08:36 PM
  #6  
GS350Dat's Avatar
GS350Dat
Driver
iTrader: (2)
 
Joined: May 2013
Posts: 130
Likes: 4
From: KS
Default

Wow looks like alot of work!
Reply
Old May 22, 2013 | 09:15 PM
  #7  
bigblack06's Avatar
bigblack06
Thread Starter
CL Community Team
15 Year Member
Liked
Loved
Community Favorite
iTrader: (20)
 
Joined: Nov 2009
Posts: 7,103
Likes: 368
From: Beantown
Default

Originally Posted by GS350Dat
Wow looks like alot of work!
Yeah, He said going the OEM way takes a little more time because they have to connect it to the OEM stalk. This is probably why most people go the secondary switch method. The Wiring has to be made for the fog lights as there isn't any.
Reply
Old May 23, 2013 | 12:29 AM
  #8  
terrycs's Avatar
terrycs
Instructor
10 Year Member
 
Joined: Jan 2013
Posts: 869
Likes: 6
From: CA
Default

Whoa!
Reply
Old May 23, 2013 | 04:42 AM
  #9  
jscgs350's Avatar
jscgs350
Driver
 
Joined: Jun 2012
Posts: 177
Likes: 1
From: NC
Default

What happened to the pics? Starting from post #3 all the pics are gone and it says "Sorry, the person moved or deleted the image"
Reply
Old May 23, 2013 | 06:00 AM
  #10  
sydtoosic's Avatar
sydtoosic
Lexus Champion
 
Joined: Mar 2011
Posts: 4,423
Likes: 16
From: GA
Default

yeah, too much work for me. can't see a lot of the pics bigblack. how long did it take them?
Reply
Old May 23, 2013 | 06:32 AM
  #11  
bigblack06's Avatar
bigblack06
Thread Starter
CL Community Team
15 Year Member
Liked
Loved
Community Favorite
iTrader: (20)
 
Joined: Nov 2009
Posts: 7,103
Likes: 368
From: Beantown
Default

Yep just fixed all the pics. cleaned them up as well.

Last edited by bigblack06; May 23, 2013 at 08:36 AM.
Reply
Old May 23, 2013 | 06:48 AM
  #12  
jtrue28's Avatar
jtrue28
Lead Lap
15 Year Member
Liked
Loved
Community Favorite
 
Joined: Sep 2008
Posts: 3,706
Likes: 235
From: #BBNine
Default

WOW! Good Lord, what a process. I knew the steering wheel had to be removed, but the amount of work to do just that seems intimidating.

Thank you for posting the pics....gives everyone an idea of the process involved.
Reply
Old May 23, 2013 | 08:43 AM
  #13  
djpeakSD's Avatar
djpeakSD
Lead Lap
 
Joined: Mar 2012
Posts: 426
Likes: 5
From: California
Default

Ok, OEM stalk is out!
Reply
Old May 23, 2013 | 10:19 AM
  #14  
puckhead85's Avatar
puckhead85
Lead Lap
 
Joined: Dec 2012
Posts: 495
Likes: 2
From: NY
Default

that looks scary
Reply
Old May 23, 2013 | 11:14 AM
  #15  
praetor's Avatar
praetor
Racer
10 Year Member
Liked
Loved
Community Favorite
 
Joined: May 2013
Posts: 1,497
Likes: 205
From: IL
Default

That's a lot of work but most clean installs are like that.
Reply


All times are GMT -7. The time now is 11:19 AM.