
Weekend Project - Painted Calipers with Lexus Logo
 09-24-12, 04:53 PM
#16

Matt@Motogfx.com
Eventually where it will show up under:
http://www.motogfx.com/lexus/
Reference this post if need be.
 08-15-13, 09:12 AM
#17
Driver

Join Date: Aug 2013
Location: CA
Posts: 149
Likes: 0
Received 0 Likes
on
0 Posts
Hello, I'm reall ynew in this forum.
So I've been looking around to research information on painting calipers.
Your post is very helpful for me.
Now I can get the necessary items for my own calipers.
So I've been looking around to research information on painting calipers.
Your post is very helpful for me.
Now I can get the necessary items for my own calipers.
08-15-13, 11:14 AM
#18

For now just email Matt and tell him your looking for the 2013 GS350 caliper decals. He's supposed to update the website very soon:
Matt@Motogfx.com
Eventually where it will show up under:
http://www.motogfx.com/lexus/
Reference this post if need be.
Matt@Motogfx.com
Eventually where it will show up under:
http://www.motogfx.com/lexus/
Reference this post if need be.
 10-30-13, 08:53 PM
#24
thinking about getting these in either yellow or red
http://www.bombgrafx.com/Brake-Calip...cals-p262.html
not sure if they'll fit but I'm pretty sure they do. somebody on here said they fit the 3gs and it can't be much changed
http://www.bombgrafx.com/Brake-Calip...cals-p262.html
not sure if they'll fit but I'm pretty sure they do. somebody on here said they fit the 3gs and it can't be much changed
02-05-14, 06:23 PM
#25
Driver School Candidate
I went to a local store here and they want $1010 to paint them. I almost thru a brick thru their window!!! Another place said they would do for $500 but now I'm scared about the seal!!
02-05-14, 10:40 PM
#26
Damn thats crazy a grand for a simple caliper paint job? Just do it yourself bro it isnt that hard. Just buy the lexus decals off ebay
02-06-14, 07:45 AM
#28
Had to get the calipers spruced up a bit as there isn't a reason why they need to look plan jane.
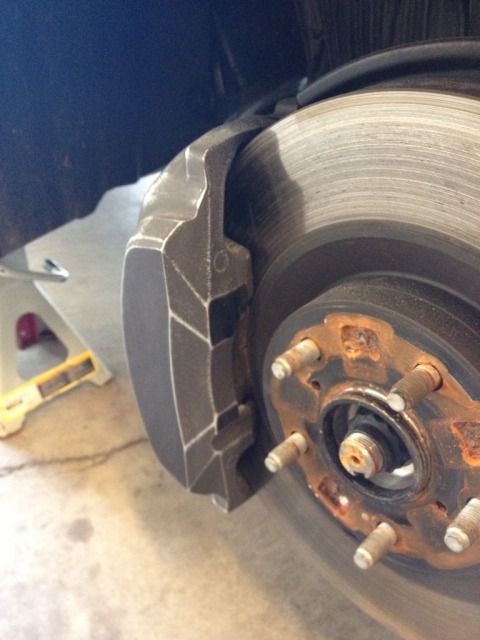
In order to get the right sized decal dialed in, I contacted Matt from MotoGFX. Here is a pic of the test fit.
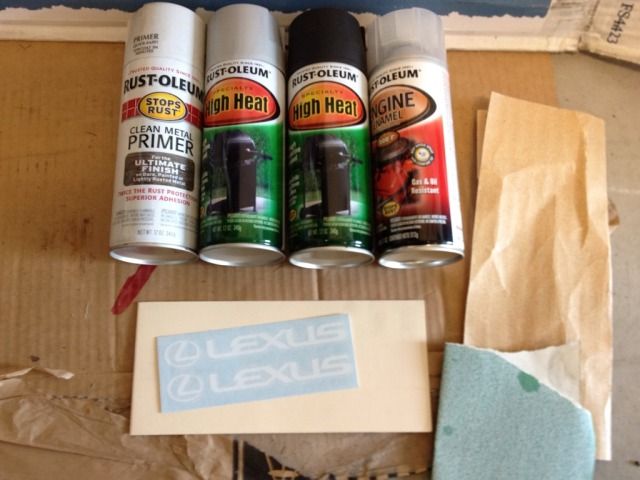
After I received the decals, it was time to get dirty. Here is a pic of all the materials I needed. Sandpaper, primer, silver, black, clear coat, and the decals of course.
After a good scrubbing and clean the calipers and ready for the primer coat.
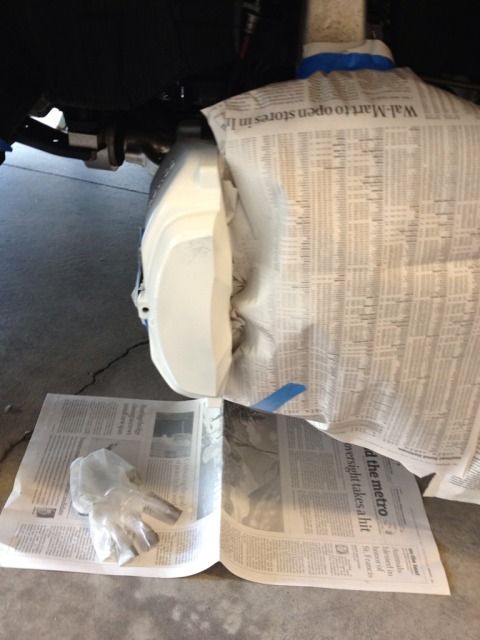
Time to tape up the car, don't want any spray going where it shouldn't be!

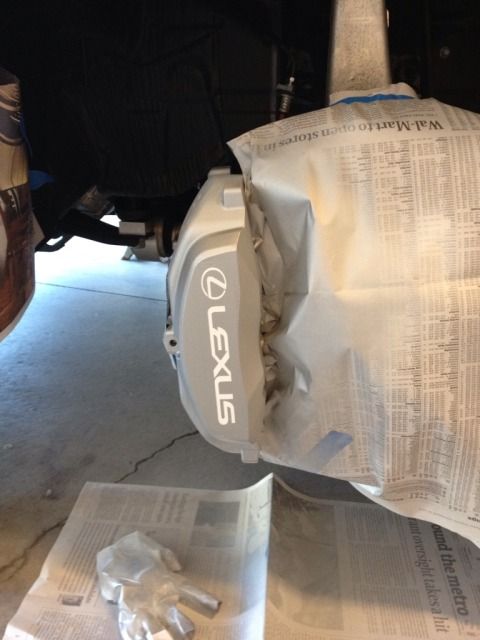
Primer layer going on, nice and easy strokes. 2 coats worked for me.
After the primer coat was workable I added the silver coats. After it dried up I went ahead and applied the decals. Some folks at the point would go ahead and apply the clear coat afterwards. I did not, read on.
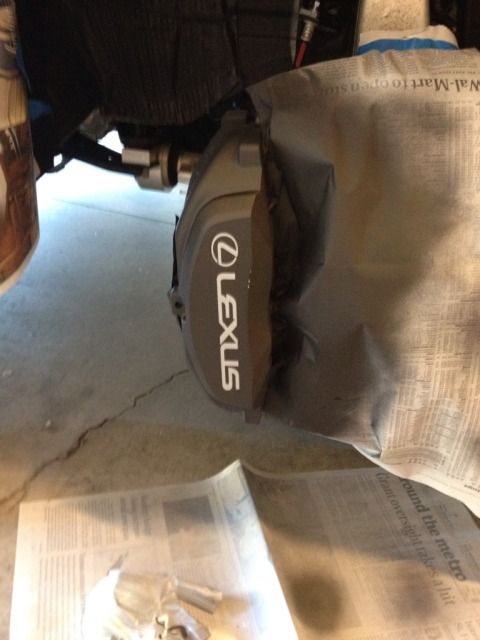
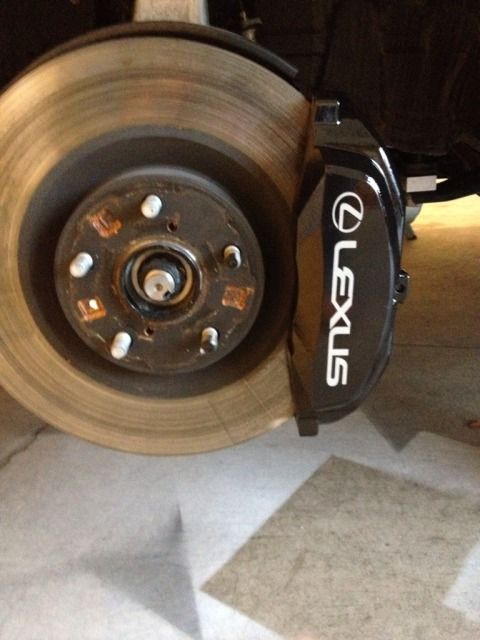
I then painted the caliper the final color, black. As you see here, the decal is also being painted over. I went 3 coats here until you could barely see the decal.
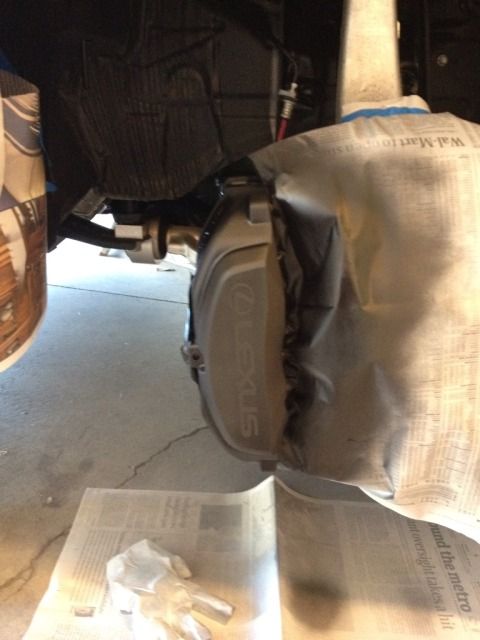
Now you're asking, how did you remove the decal? Very carefully. I used a pin to remove the decals, You need to be very delicate here in order to not ruin the work you already did.
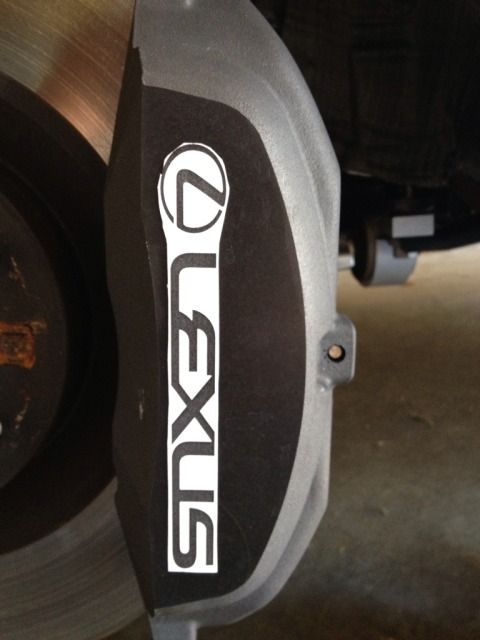
Now the clear coat, another 3 coats was used here. For some reason the silver looks more white, could be just the lighting, cell phone combo.
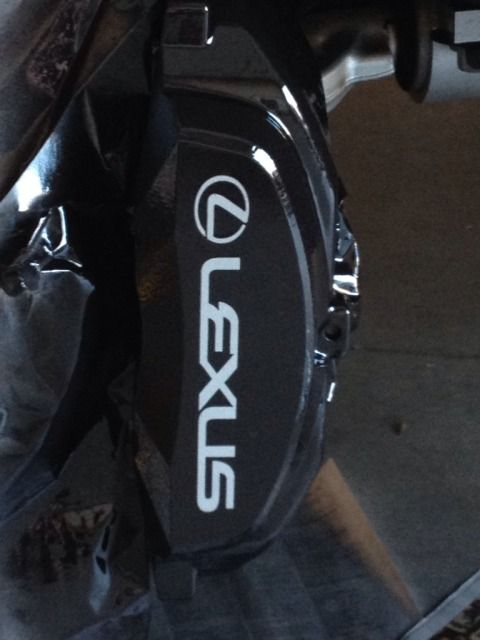
Another finished pic
And a final pic with the wheel back on:
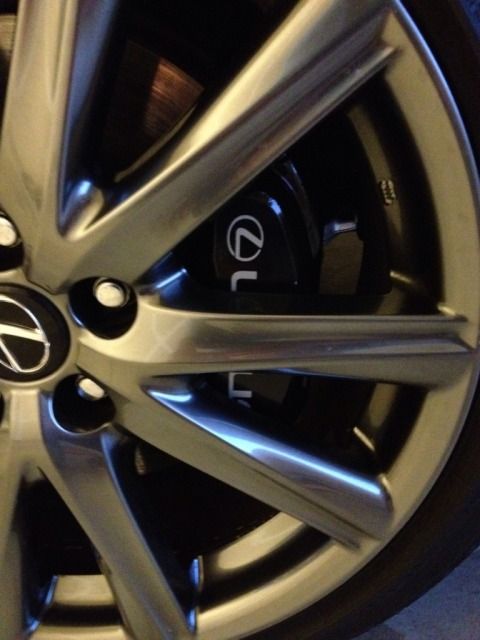
So now the fronts look better - what do you guys think?
In order to get the right sized decal dialed in, I contacted Matt from MotoGFX. Here is a pic of the test fit.
After I received the decals, it was time to get dirty. Here is a pic of all the materials I needed. Sandpaper, primer, silver, black, clear coat, and the decals of course.
After a good scrubbing and clean the calipers and ready for the primer coat.
Time to tape up the car, don't want any spray going where it shouldn't be!
Primer layer going on, nice and easy strokes. 2 coats worked for me.
After the primer coat was workable I added the silver coats. After it dried up I went ahead and applied the decals. Some folks at the point would go ahead and apply the clear coat afterwards. I did not, read on.
I then painted the caliper the final color, black. As you see here, the decal is also being painted over. I went 3 coats here until you could barely see the decal.
Now you're asking, how did you remove the decal? Very carefully. I used a pin to remove the decals, You need to be very delicate here in order to not ruin the work you already did.
Now the clear coat, another 3 coats was used here. For some reason the silver looks more white, could be just the lighting, cell phone combo.
Another finished pic
And a final pic with the wheel back on:
So now the fronts look better - what do you guys think?
02-06-14, 08:40 AM
#29
Nothing much to brakes at all. All you have to do try to cover the complete rotors from getting paint on it. Try not to paint the brake pads. Its okay to get some paint on it. I have paint my LS460 calipers in the past and I did not use any brake cleaners, just water and soap to get the dust off and then painted them black. Just cover the area you do not want paint on that's it. Pretty simple. If you get paint on the rotors, no worries when you drive the pads will burn them off. This is probably the easiest mod you can do, way easier than an oil change (oil change is not a mod  )! Good Luck, I will paint my GS-Fsport logo sometime when it gets warmer.
)! Good Luck, I will paint my GS-Fsport logo sometime when it gets warmer.
02-06-14, 08:53 AM
#30
Driver School Candidate

Join Date: Feb 2012
Location: TX
Posts: 42
Likes: 0
Received 0 Likes
on
0 Posts