


 great great job!


TriniGS Carson Tuned LED Mirror Caps Documentary and DIY
Installed these for TriniGS yesterday. Took some pics along with the install.
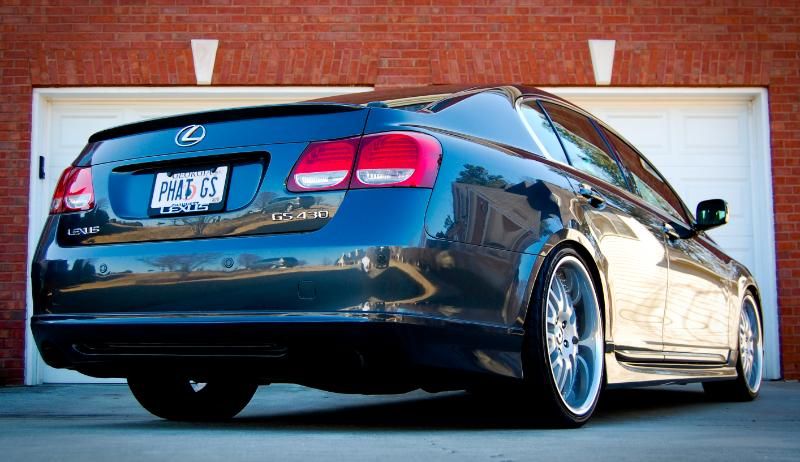
His car sits so nice in my driveway lol. The neighbors were like another GS? Really? lol

Used this thread for the references but I compiled some steps that were skipped.
https://www.clublexus.com/forums/gs-...iy-thread.html
Start with opening up the door panel, Here's how
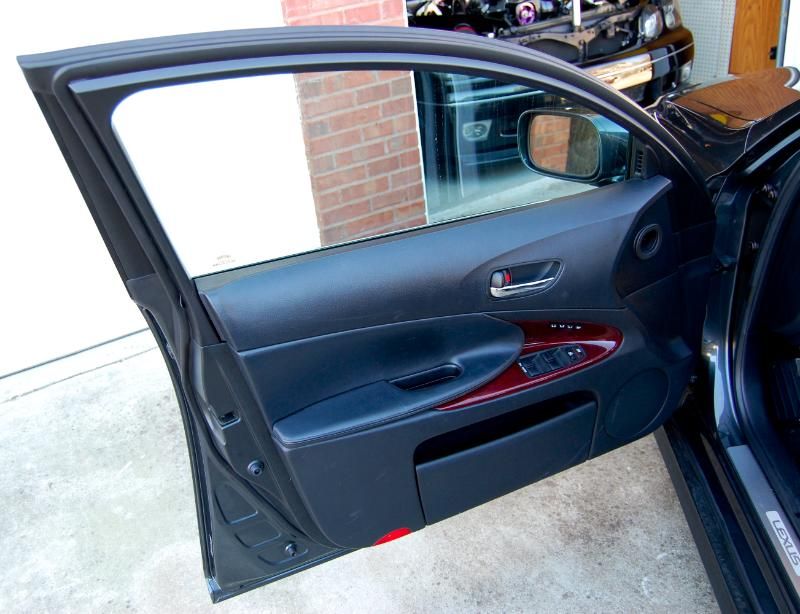
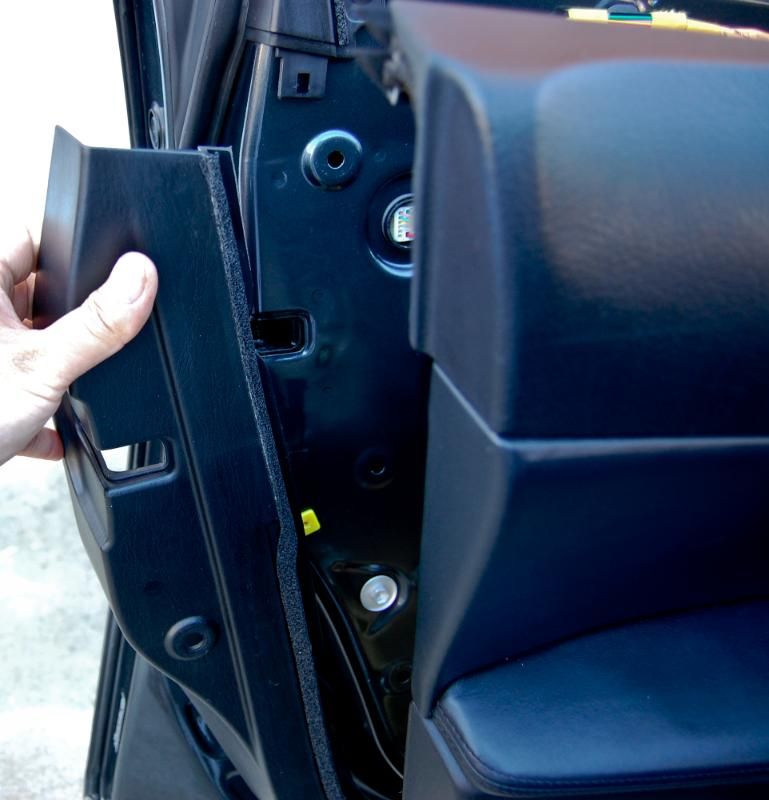
Use a small flathead screwdriver to slowly pry off the cap behind the handle from left to right.
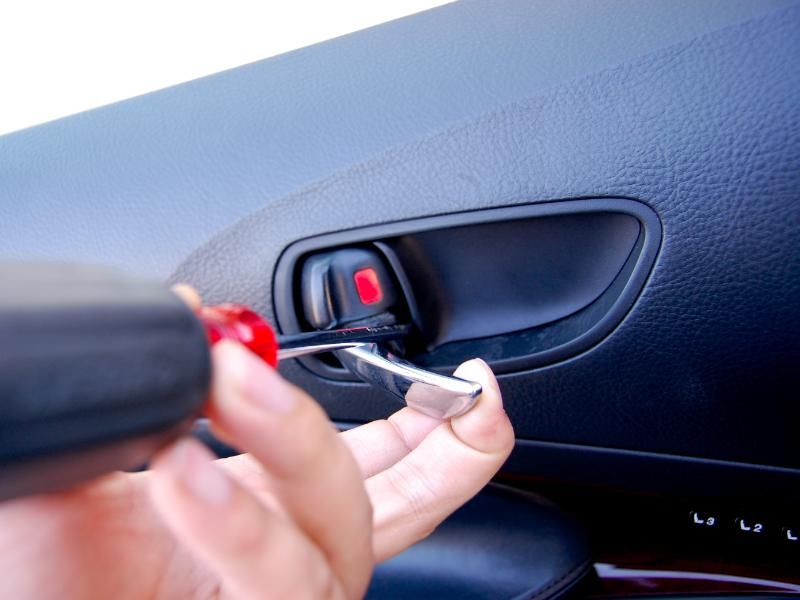
Once the cover comes off there will be a phillips head screw to take out
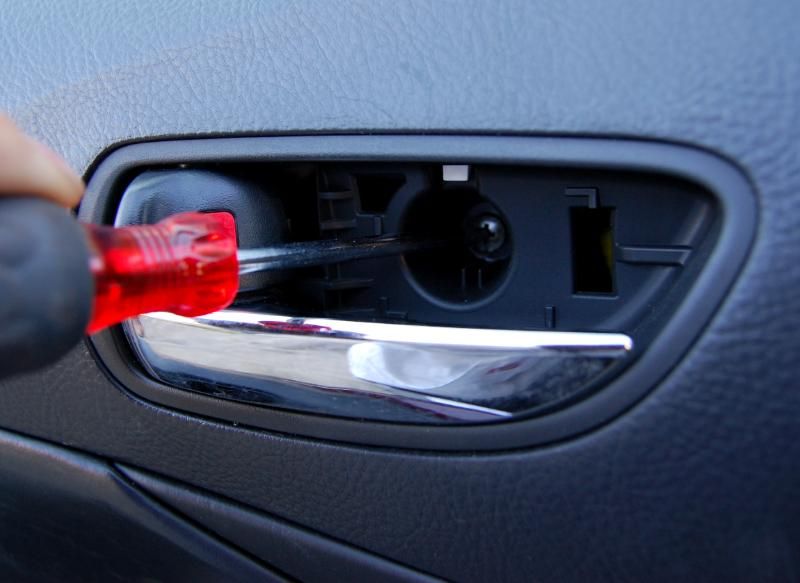
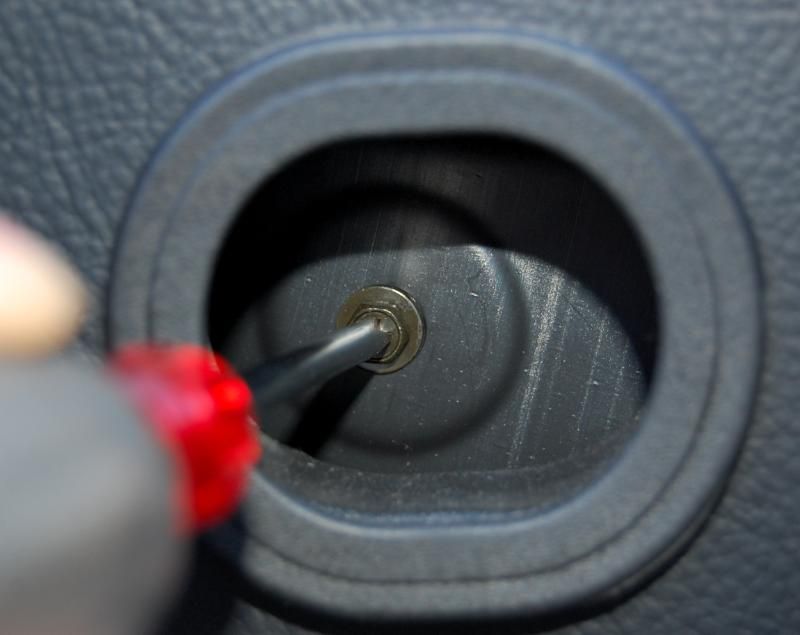
Then there is a phillips head screw behind the hole for the air vent which comes from the dash to the door.
Then use a small flathead screwdriver to take off the led light housing
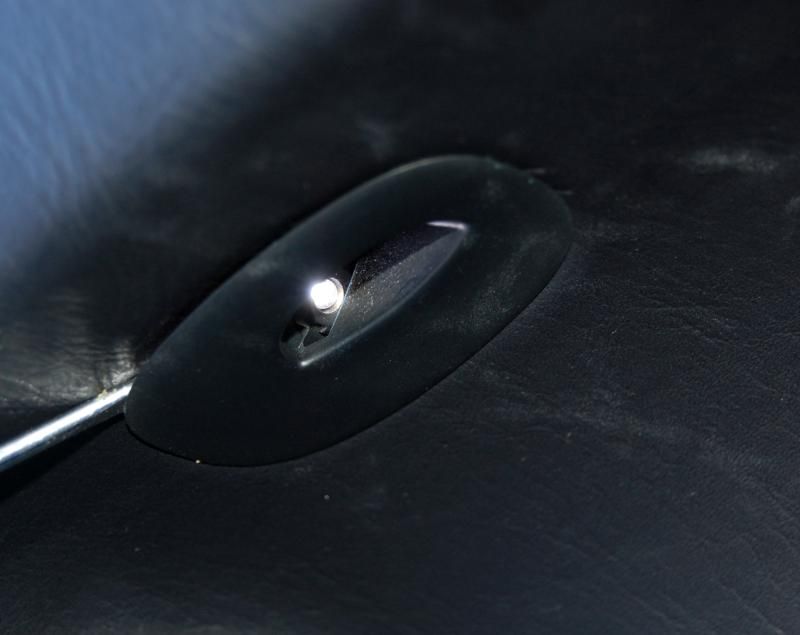
Remove the LED for easy access later
There is a long phillips head screw behind there
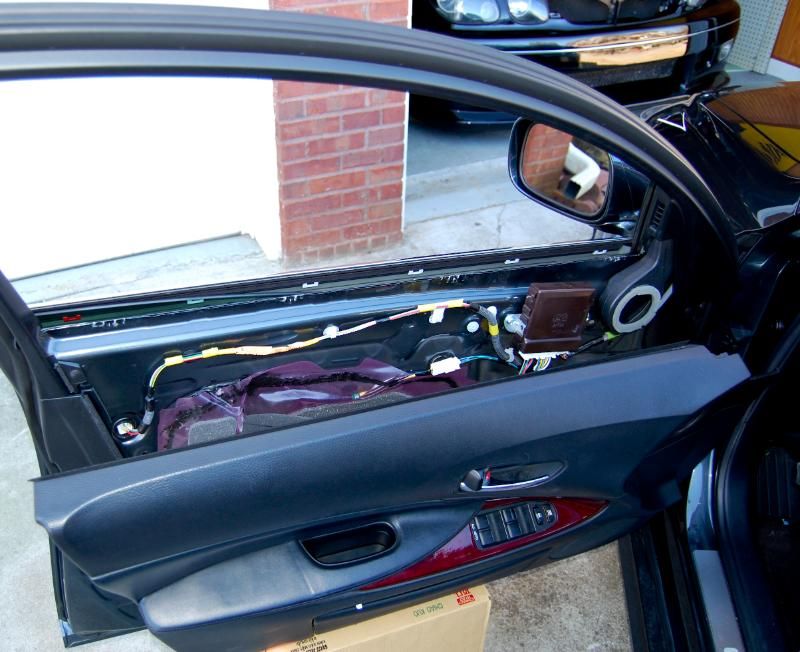
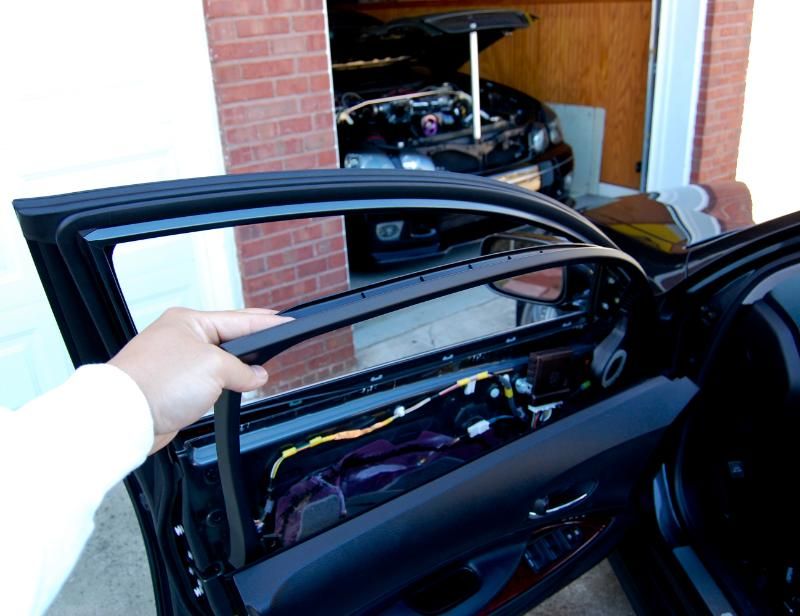
First roll down your windows it will make thins much easier! Then by pulling towards you pull the panel from right to left starting at the lower right hand corner there should be 9 tabs. Then once the bottom and side are free start at the top corner furthest away from the side mirror and gently pull up. The door panel should separate and pull of. I used a cardboard box to rest it on. Easier to leave it on then to take everything off.
Then there is a phillips head screw on the side panel that covers the door latch take that off
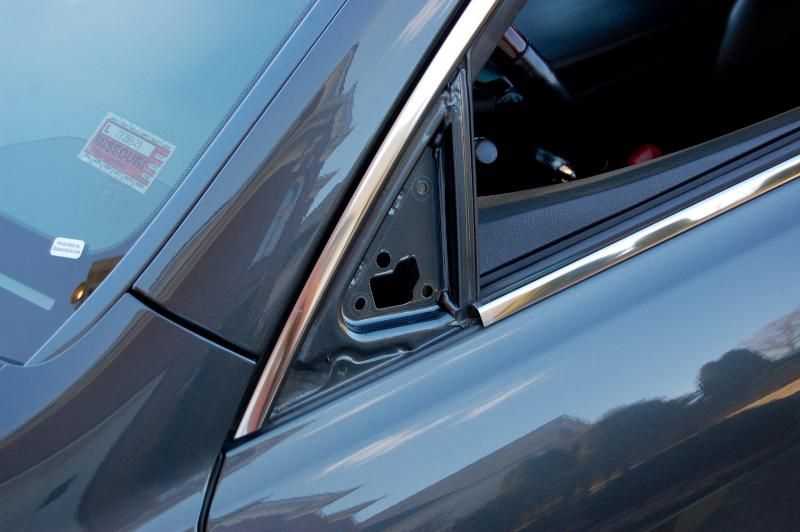
Then there is the door trim moulding that is held in with two tabs. One on each side. Simply use a flat head or small needle nose pliers to pry them off.
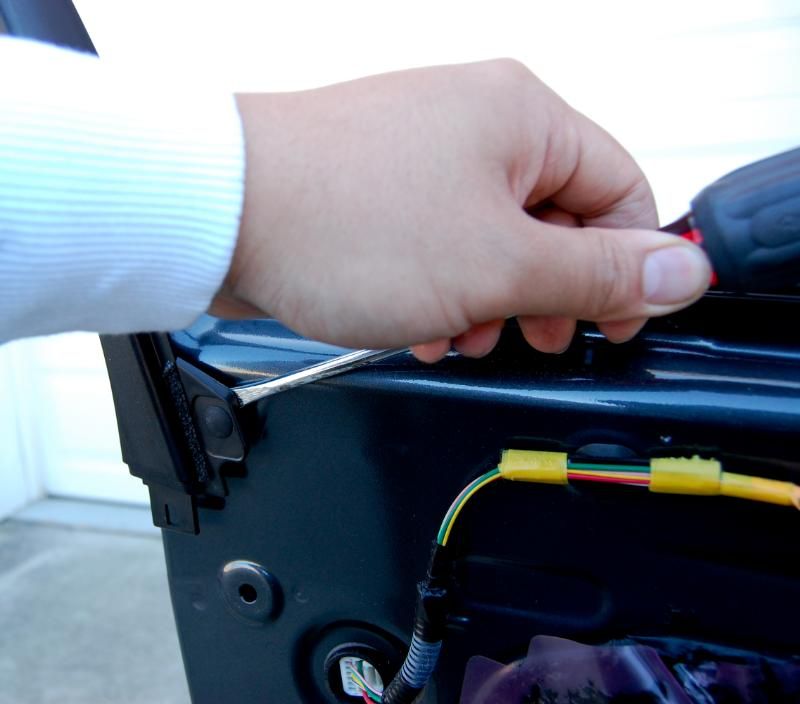
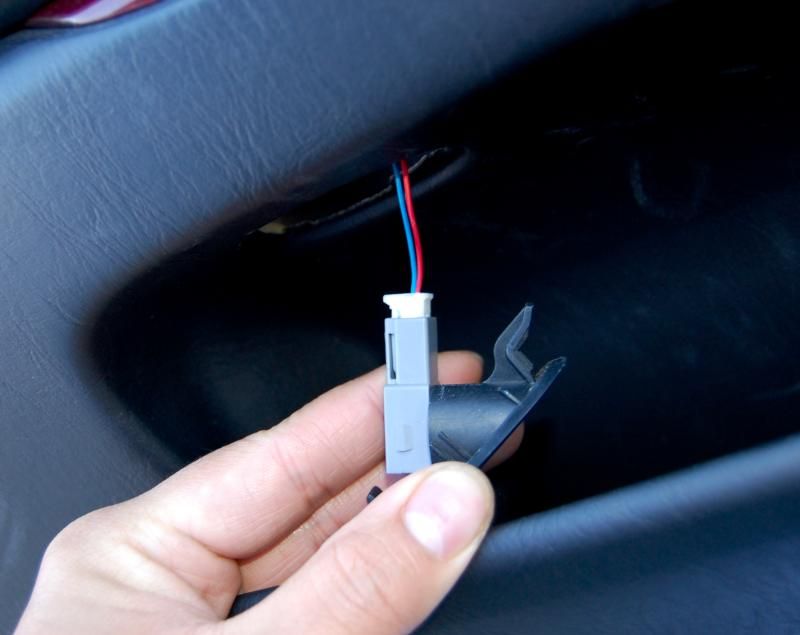
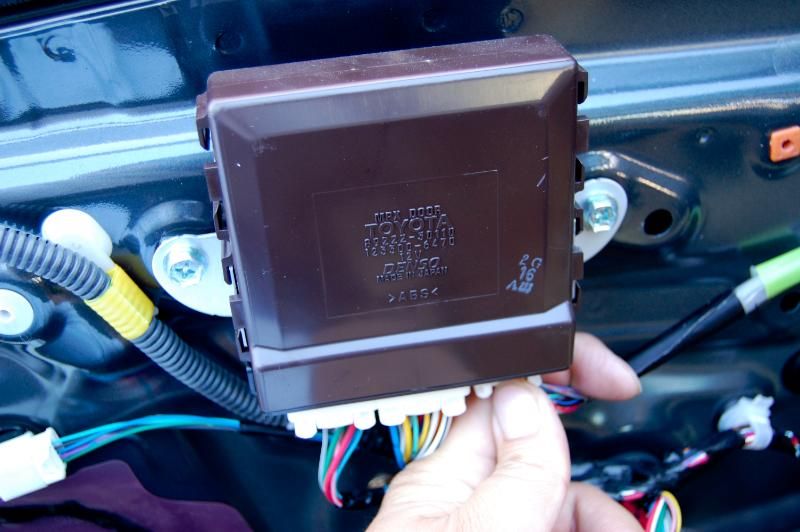
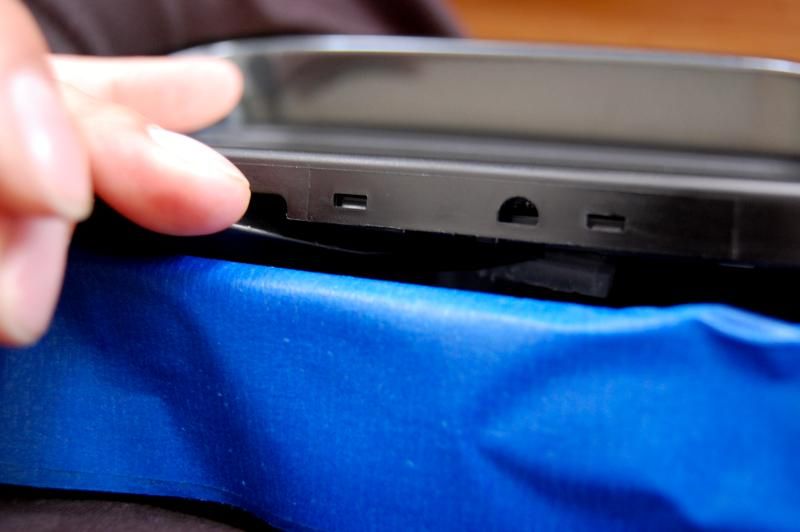
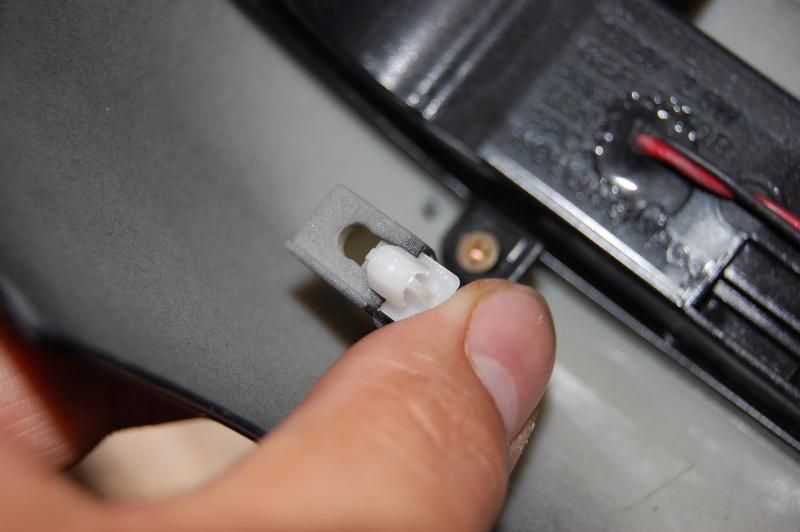
On the ABS unit on the door locate the clip that goes to the side mirror. It should be the one on the right. Disconnect it.
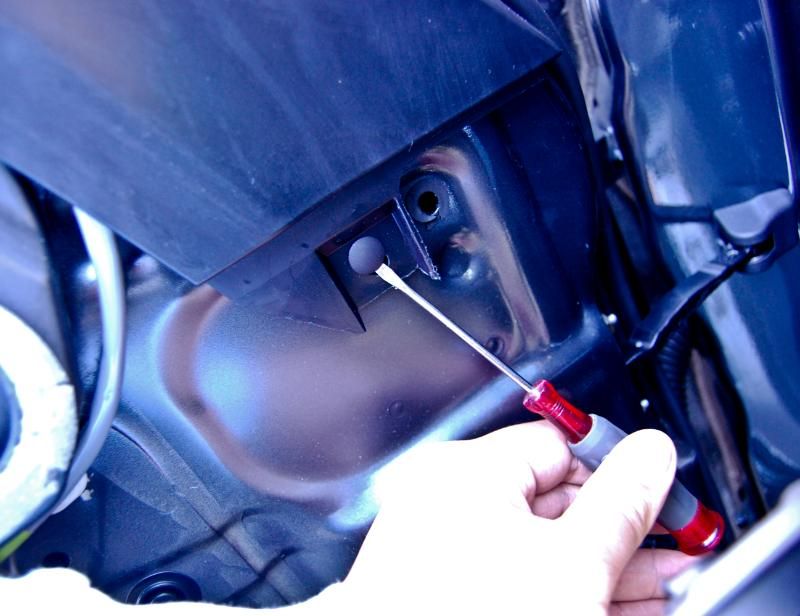
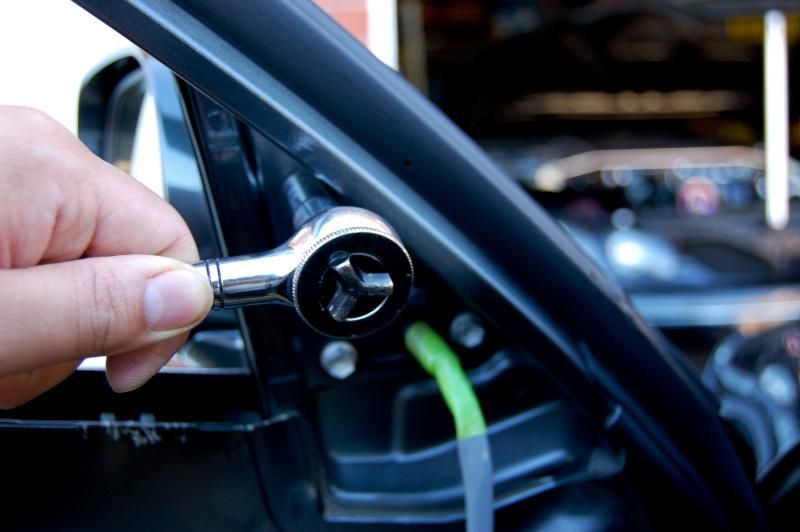
Remove the side mirror bolts. There are three 10mm bolts. Don't worry about the mirror falling off there is a plastic rod that holds it in place.
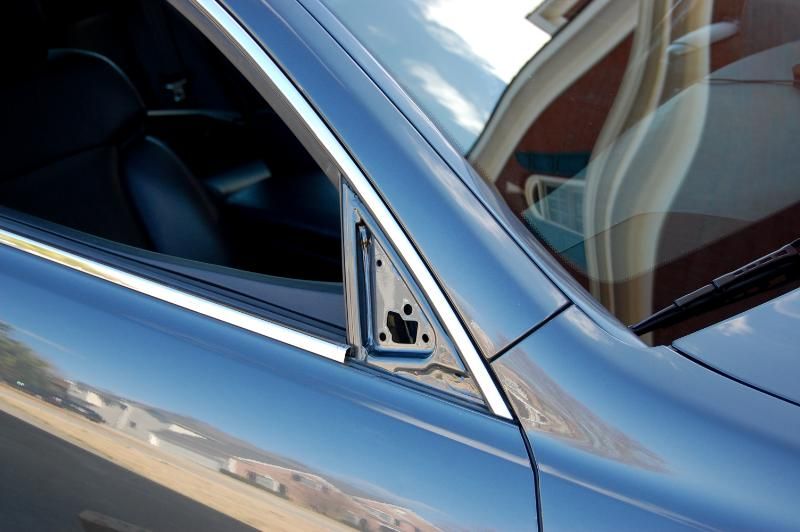
Pull from the outside and it should come off nicely
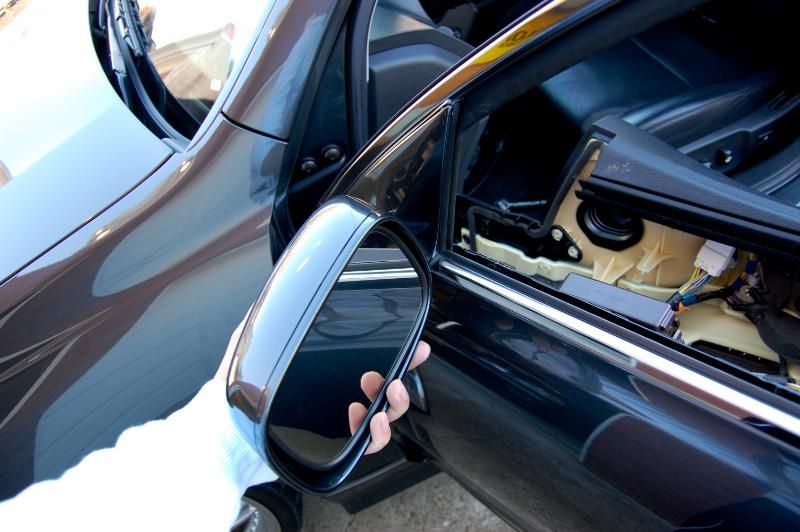
Make sure the clip comes with it through the hole on the door
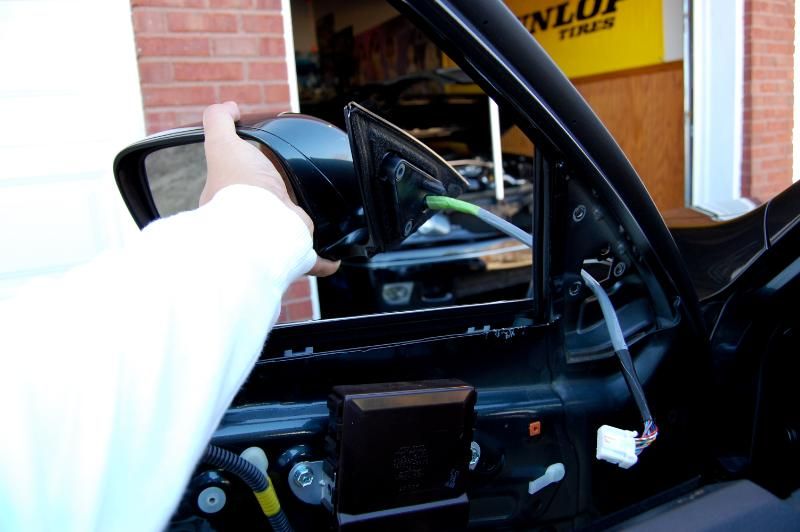
Done
Do everything again on the passenger side and you are ready for the hard work
Bring the mirrors to an open space where you can spread out and work
His car sits so nice in my driveway lol. The neighbors were like another GS? Really? lol
Used this thread for the references but I compiled some steps that were skipped.
https://www.clublexus.com/forums/gs-...iy-thread.html
Start with opening up the door panel, Here's how
Use a small flathead screwdriver to slowly pry off the cap behind the handle from left to right.
Once the cover comes off there will be a phillips head screw to take out
Then there is a phillips head screw behind the hole for the air vent which comes from the dash to the door.
Then use a small flathead screwdriver to take off the led light housing
Remove the LED for easy access later
There is a long phillips head screw behind there
First roll down your windows it will make thins much easier! Then by pulling towards you pull the panel from right to left starting at the lower right hand corner there should be 9 tabs. Then once the bottom and side are free start at the top corner furthest away from the side mirror and gently pull up. The door panel should separate and pull of. I used a cardboard box to rest it on. Easier to leave it on then to take everything off.
Then there is a phillips head screw on the side panel that covers the door latch take that off
Then there is the door trim moulding that is held in with two tabs. One on each side. Simply use a flat head or small needle nose pliers to pry them off.
On the ABS unit on the door locate the clip that goes to the side mirror. It should be the one on the right. Disconnect it.
Remove the side mirror bolts. There are three 10mm bolts. Don't worry about the mirror falling off there is a plastic rod that holds it in place.
Pull from the outside and it should come off nicely
Make sure the clip comes with it through the hole on the door
Done
Do everything again on the passenger side and you are ready for the hard work
Bring the mirrors to an open space where you can spread out and work
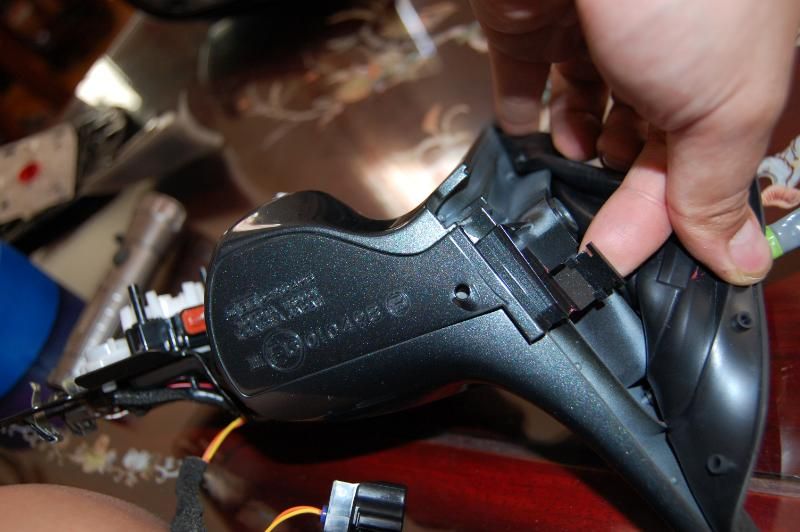
I used three layers of masking tape along the bottom of the mirror. You will need to do this in order to keep the mirror from scratches and pry marks later.
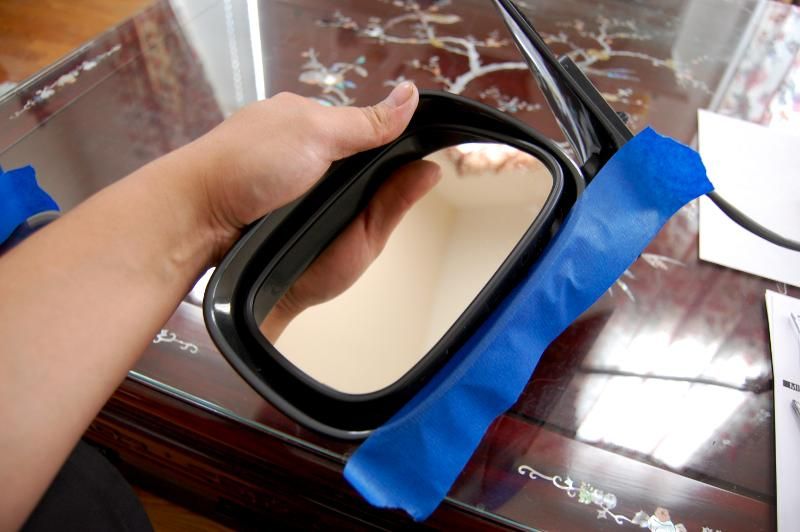
From the bottom you will need to pry up using a pry bar or flexhead flat head screwdriver.
There are two plastic clips holding the mirror onto the plate. Once you get them to separate then it is all easy work
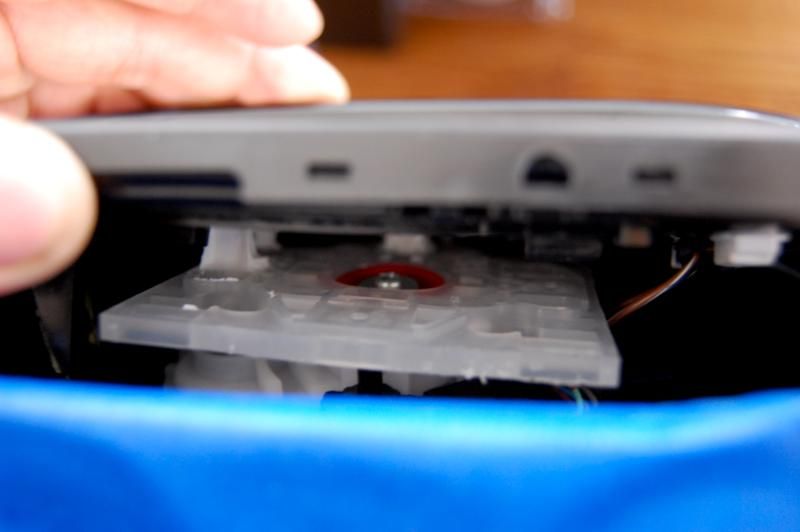
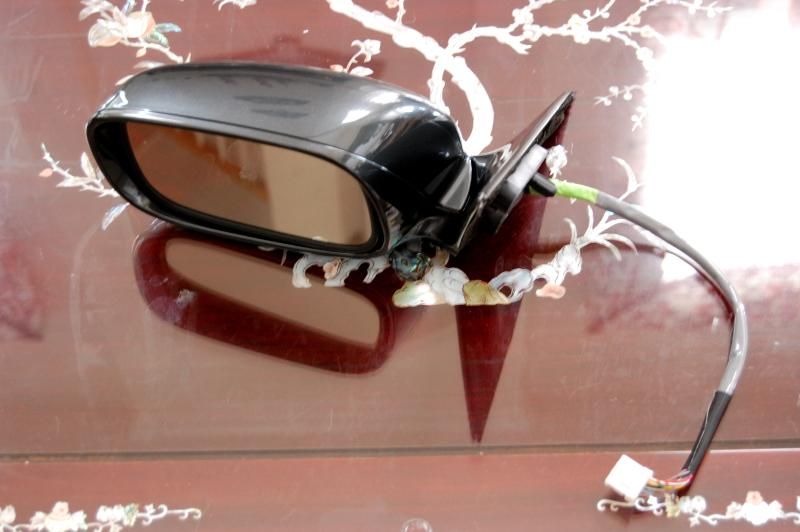
Take off the two plugs on the mirror with a small flat head screwdriver
Then the mirror should lift from the housing
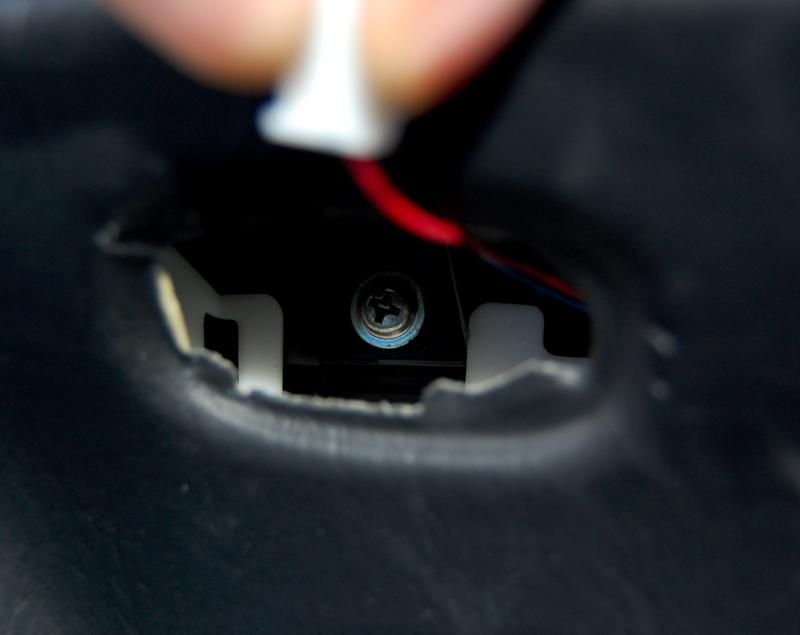
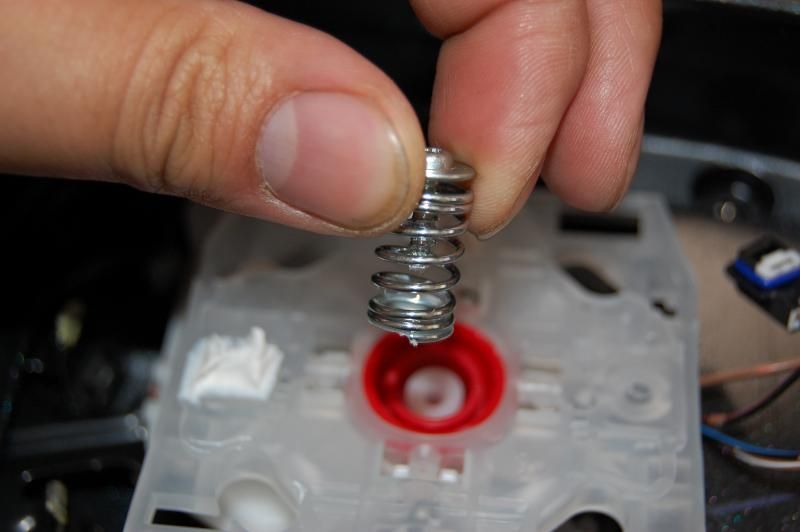
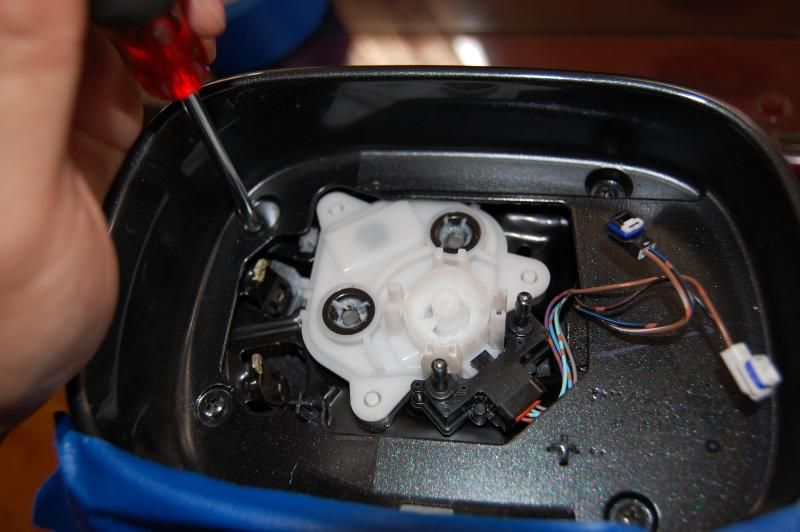
Take off the phillips head screw on the plate
It should come off with the spring attached
Pull the plate off carefully, there will be some clicking noise from the ribbed rods that are holding it in place
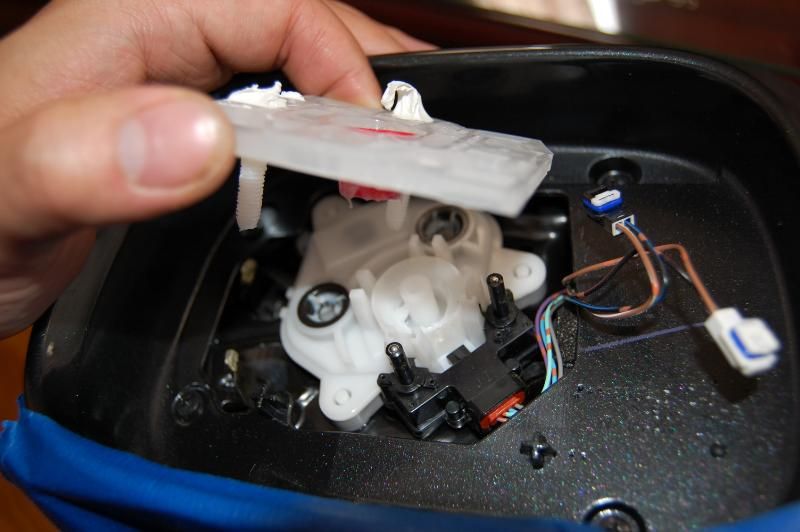
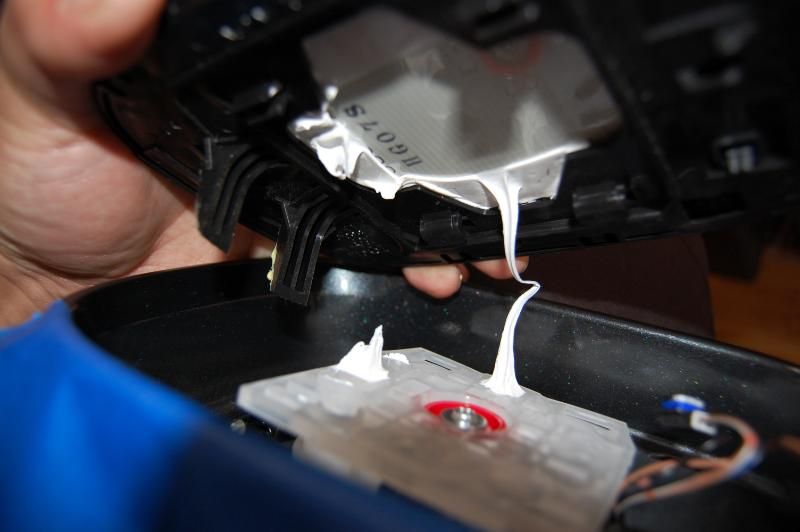
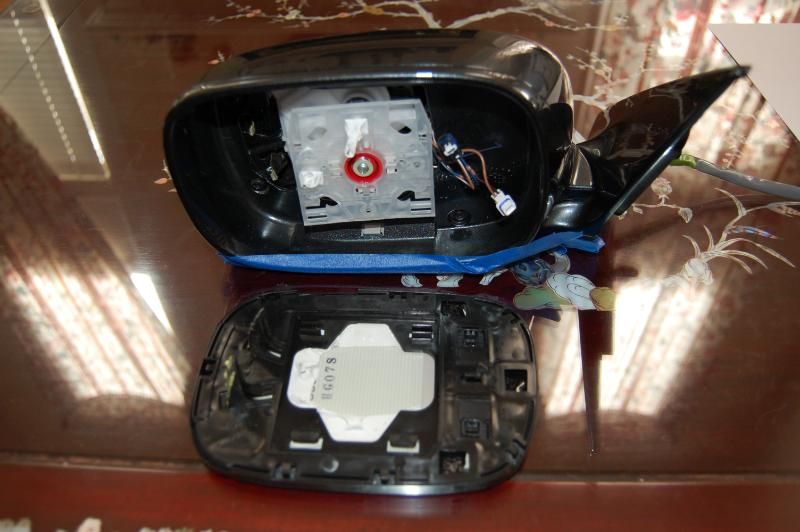
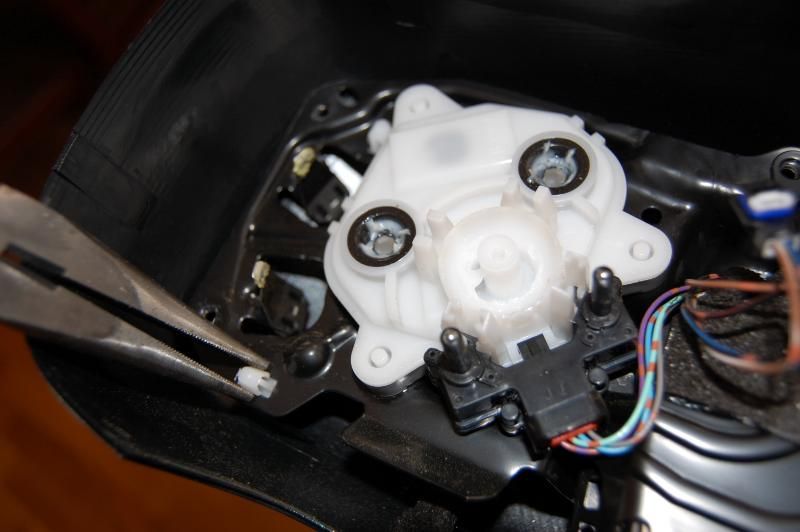
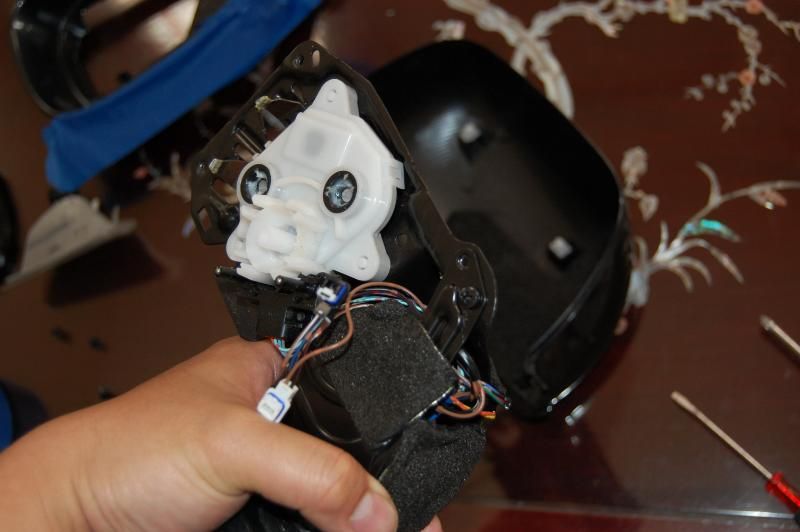
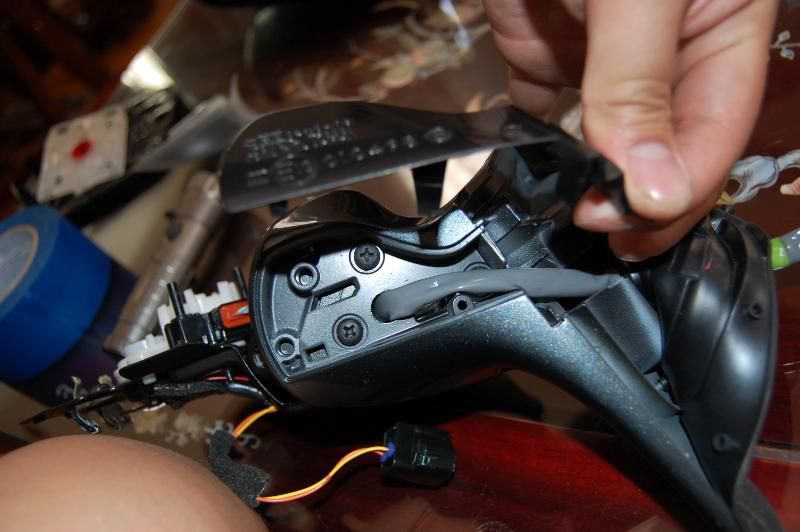
Remove the 4 phillips head screws this will release the top part of the housing away from the mirror cap
What you should see
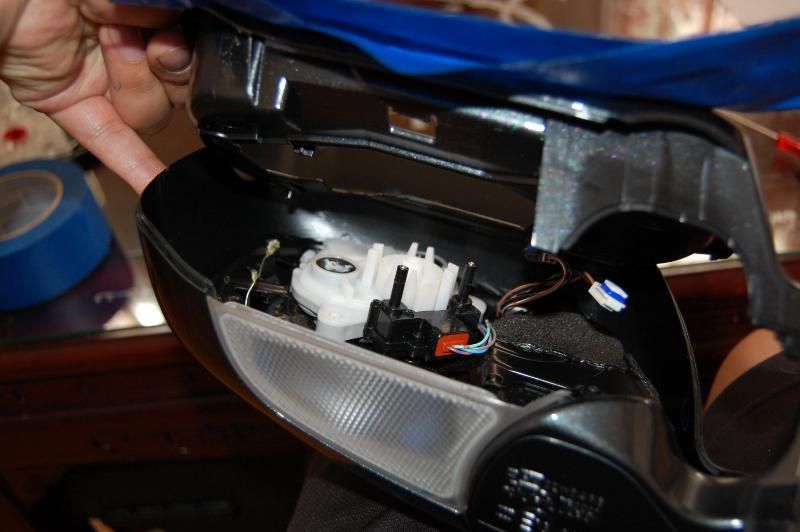
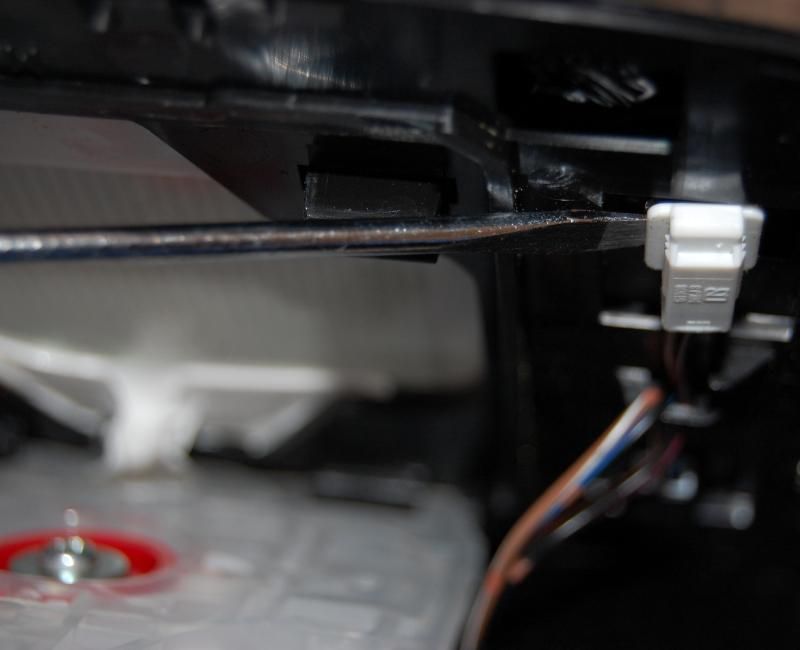
Then remove the puddle lamp housing


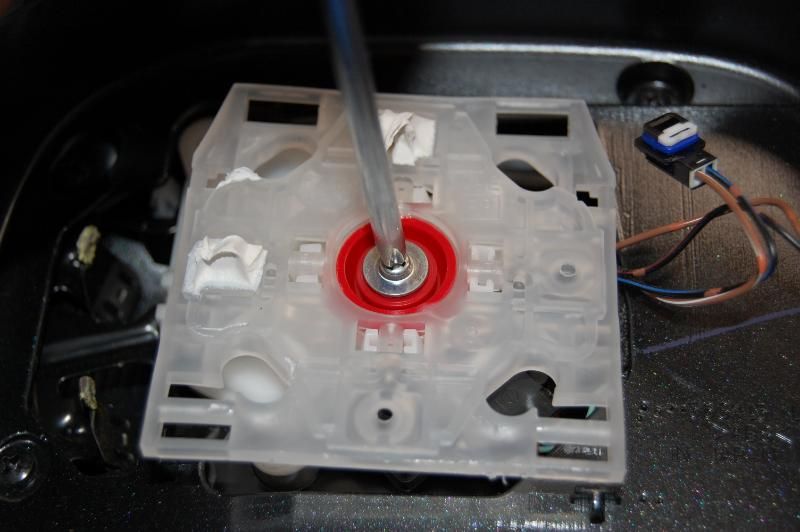
Use needle nose pliers to take off the mirror guts from the housing. There should be three
Pull the insides out
Comparing the caps. The new one is on top the OEM is on the bottom
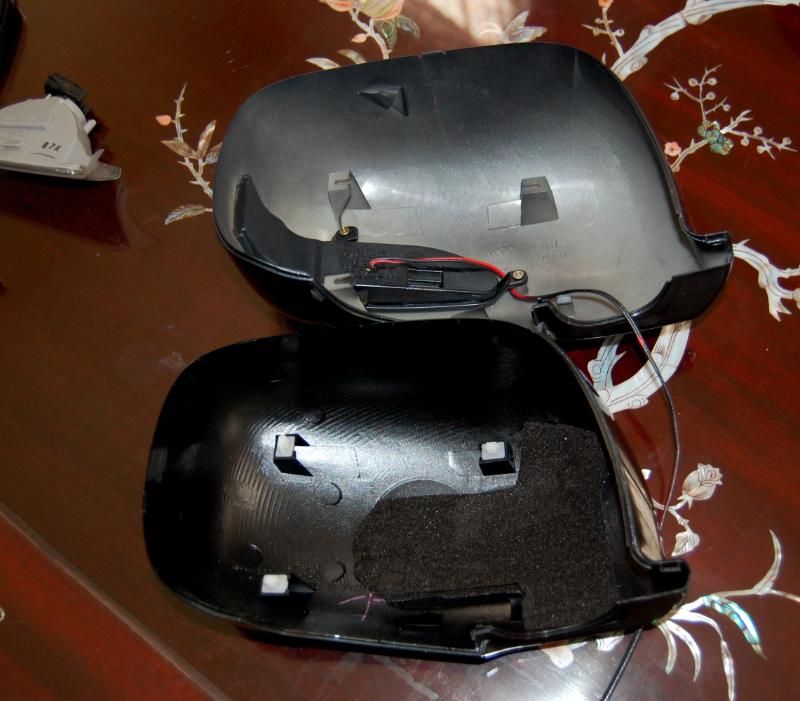
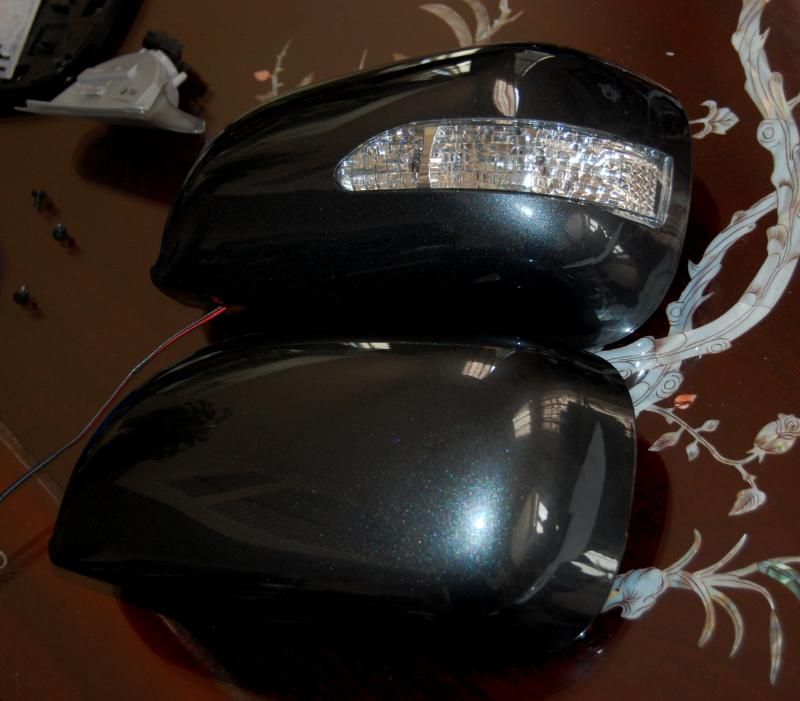
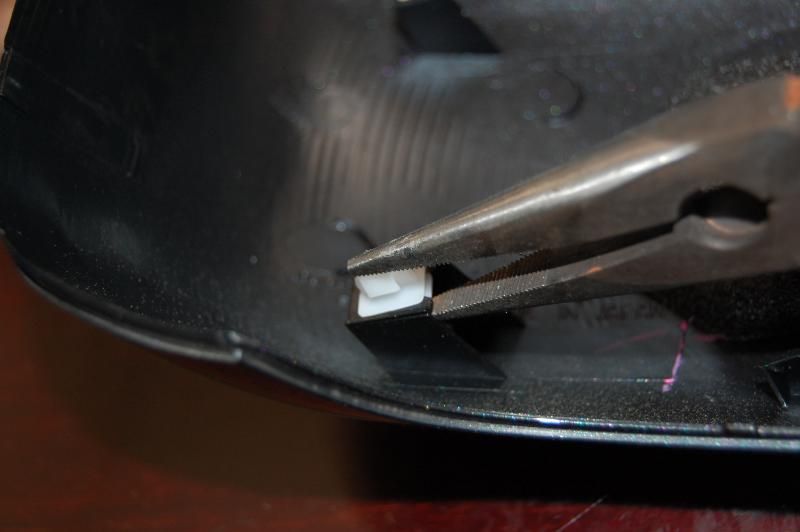
Transferring the tabs
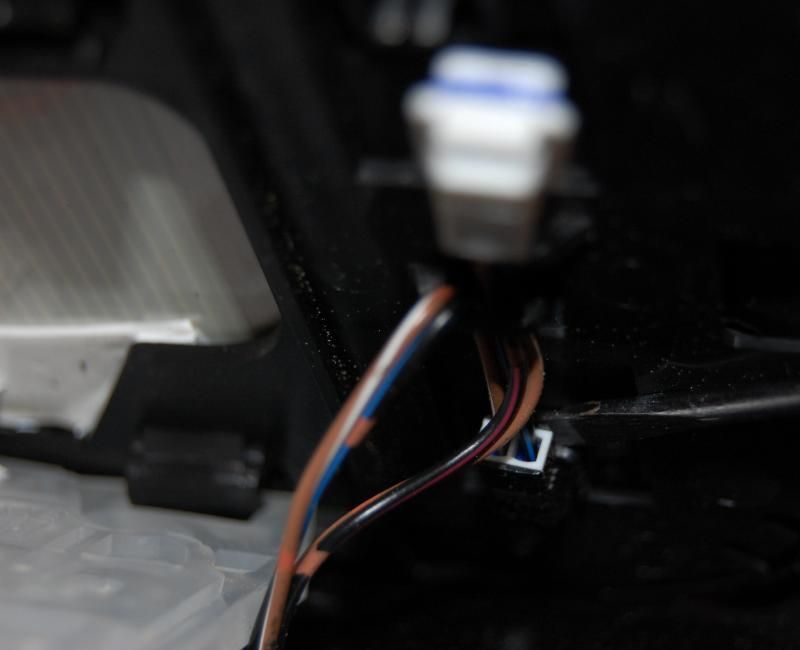
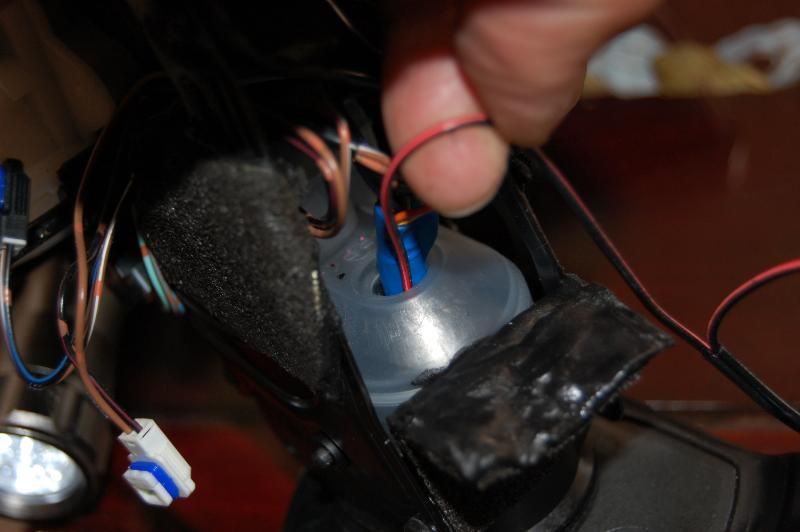
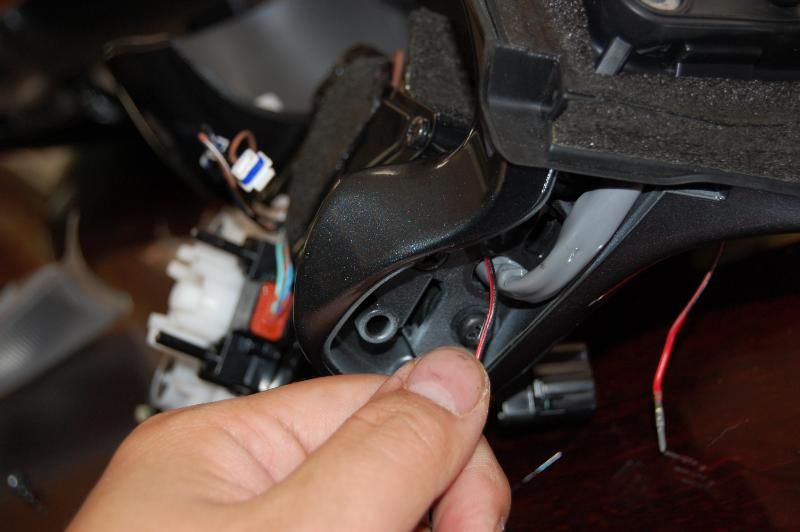
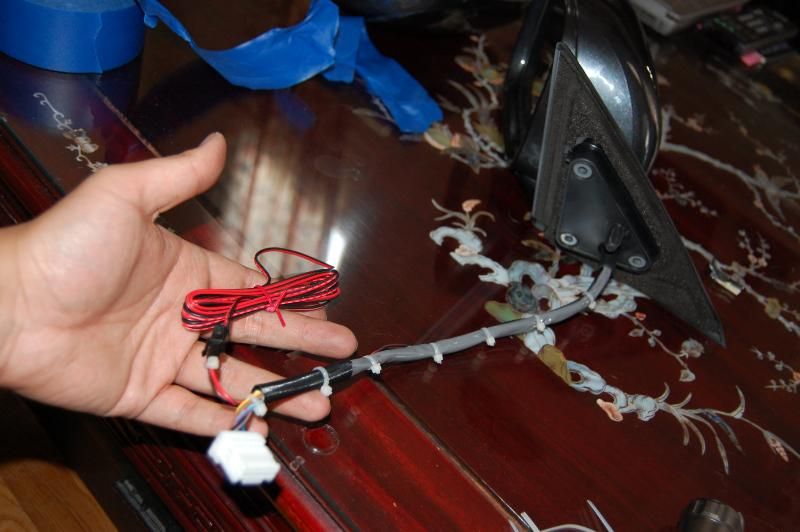
Now for wiring. Pull the rubber grommet off of the triangle piece that bolts to the car. You will see this clip underneath of it
Pull towards you and it should pop off

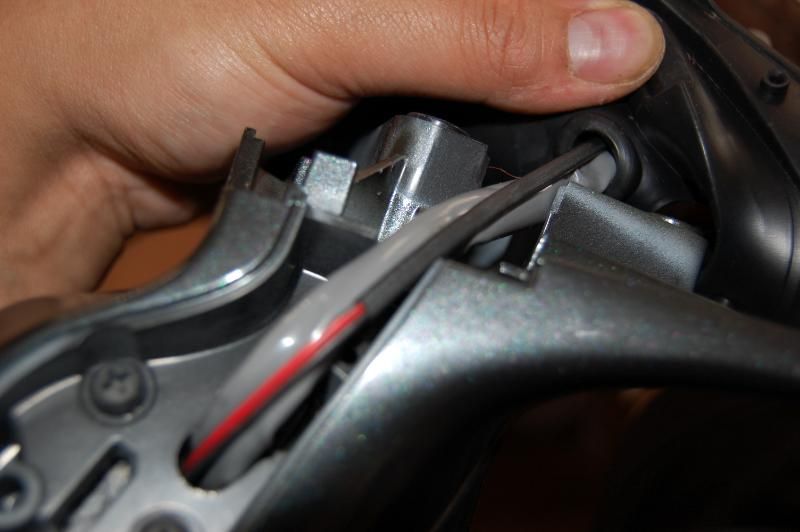
Run the wire through the pipe.
From the bottom you will need to pry up using a pry bar or flexhead flat head screwdriver.
There are two plastic clips holding the mirror onto the plate. Once you get them to separate then it is all easy work
Take off the two plugs on the mirror with a small flat head screwdriver
Then the mirror should lift from the housing
Take off the phillips head screw on the plate
It should come off with the spring attached
Pull the plate off carefully, there will be some clicking noise from the ribbed rods that are holding it in place
Remove the 4 phillips head screws this will release the top part of the housing away from the mirror cap
What you should see
Then remove the puddle lamp housing
Use needle nose pliers to take off the mirror guts from the housing. There should be three
Pull the insides out
Comparing the caps. The new one is on top the OEM is on the bottom
Transferring the tabs
Now for wiring. Pull the rubber grommet off of the triangle piece that bolts to the car. You will see this clip underneath of it
Pull towards you and it should pop off
Run the wire through the pipe.
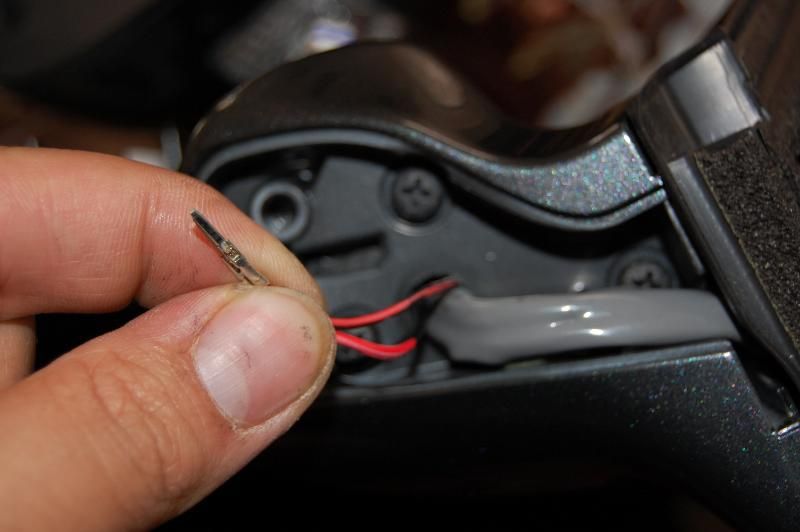
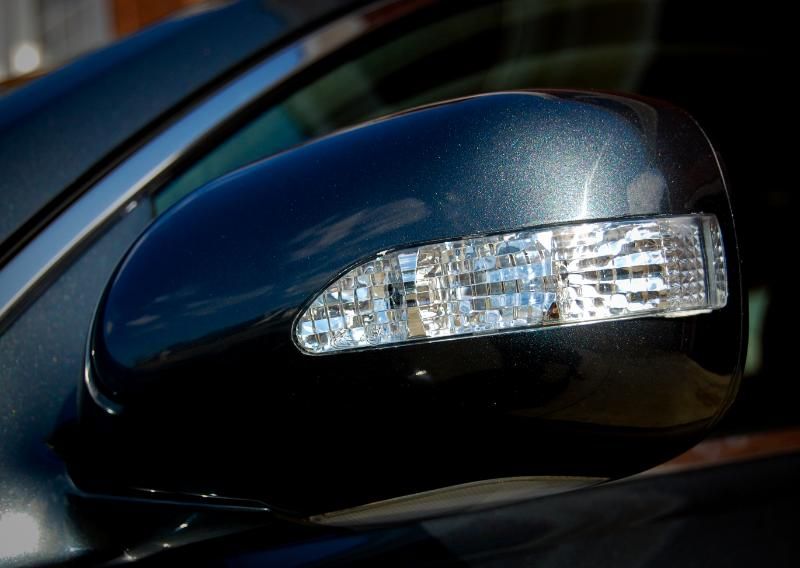
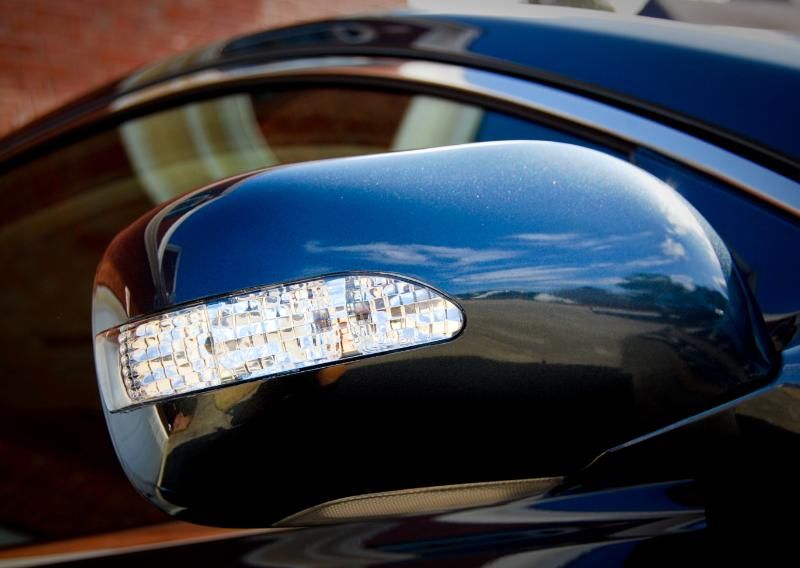
Pass the line through the grommet, reassemble, and done!
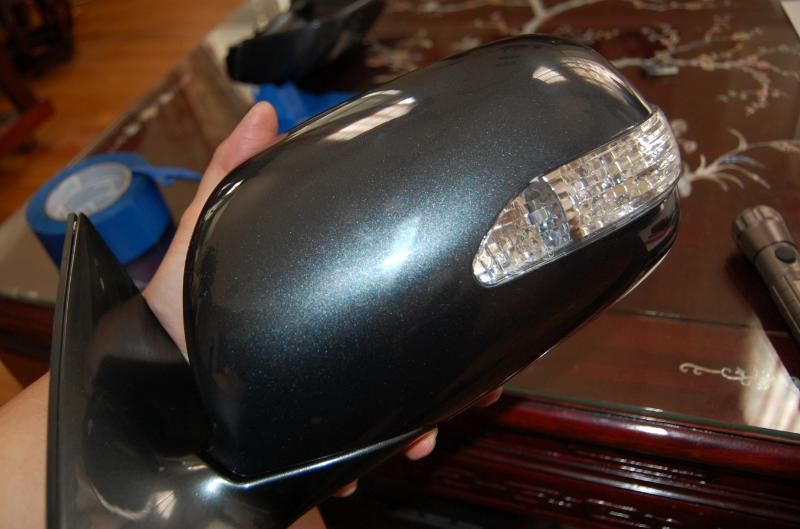
Everything back together and wired up
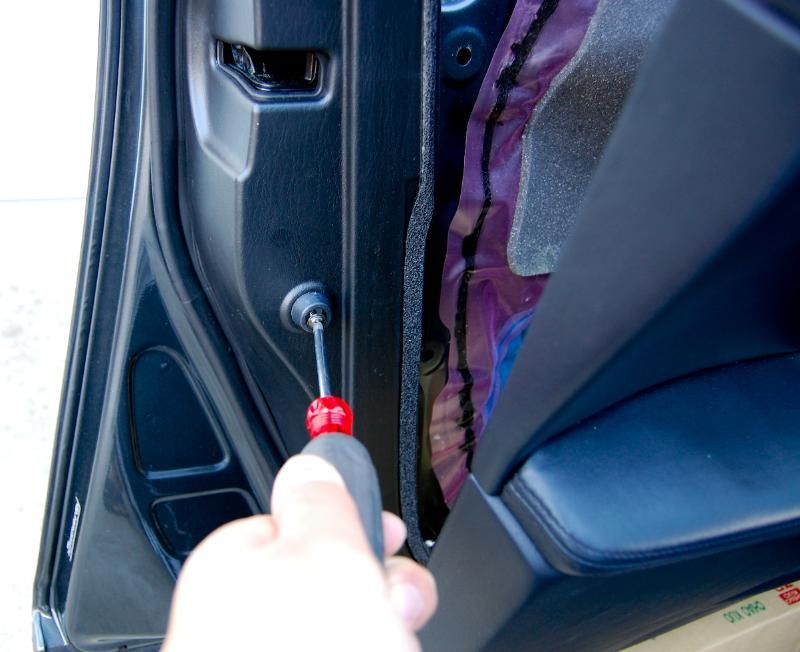
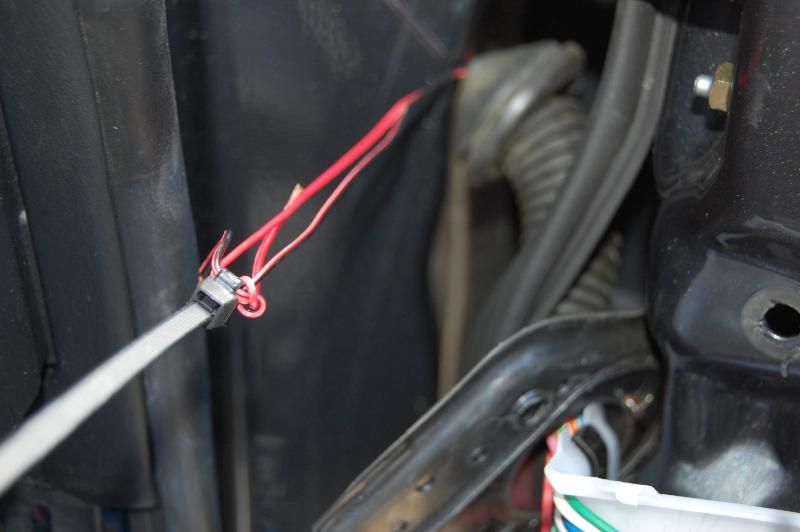
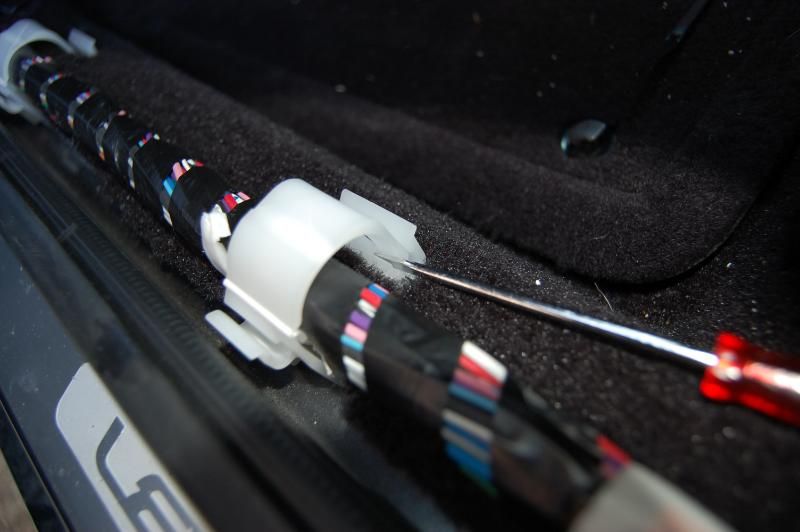
On the side of the door locate the grommet and hosing from the door to the car. There are two 10mm bolts holding in the door side of the grommet. Take those off and using a flathead screwdriver you can pull the grommet from the car.

I attached the wires to a long zip tie and ran that through the grommet and through the car. Inside the car you will have to remove the plastic and carpet and feel for the wire coming through.
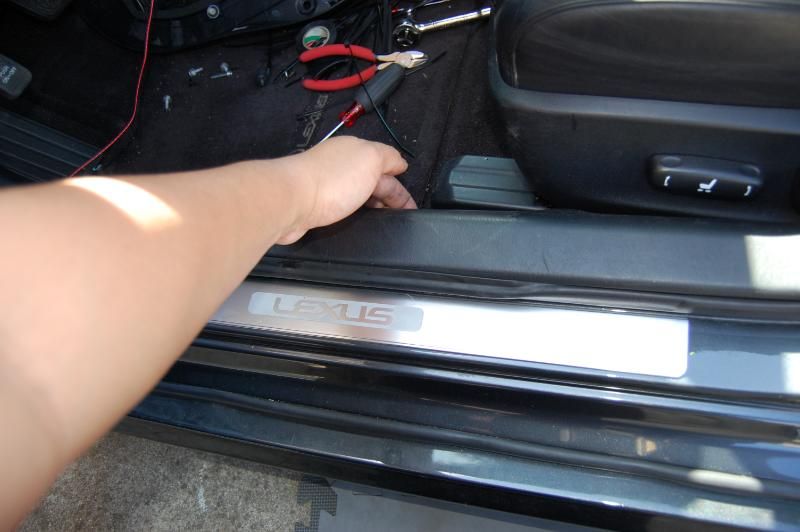
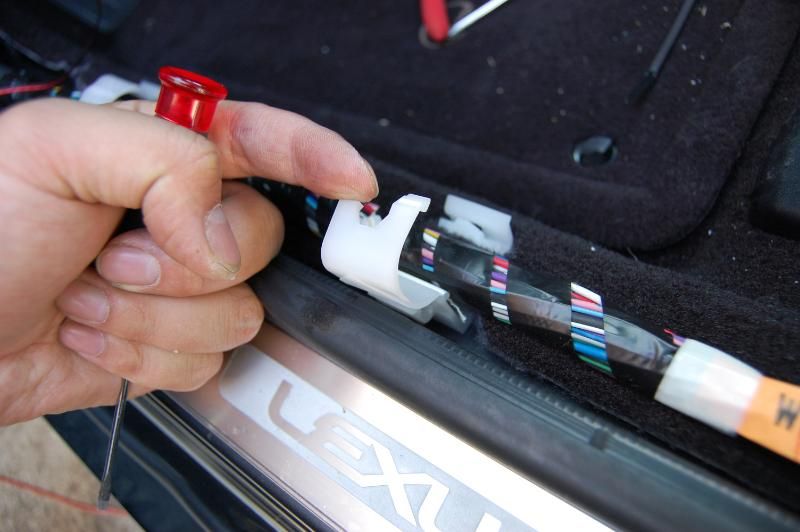
Pulling up the driver's side scuff plate to get to the main harness
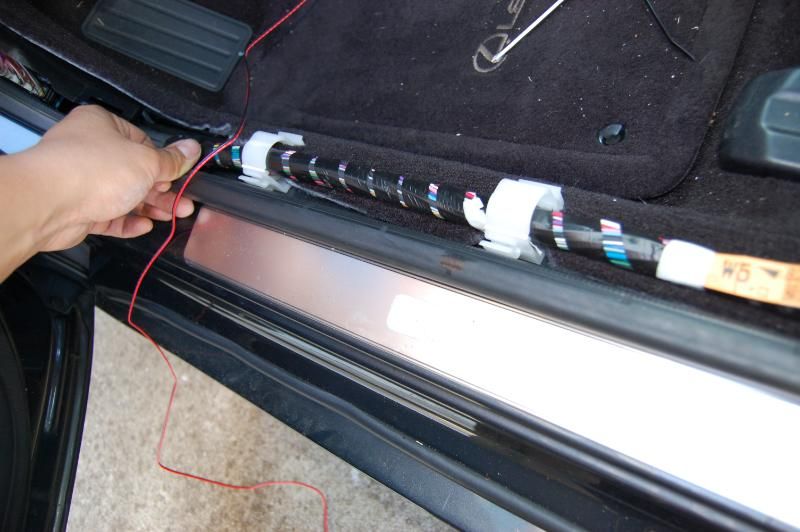
As the other thread stated look for the large green and large yellow wires. Those are the ones you tap into. Yellow = driver's side. Green = passenger side.
All buttoned up


Nicely done, I am glad the thread I made was helpful....just a couple of things I would add, silicone around the LED housing is something I added to make sure moisture stays out. I also used some silicone caulk for the mirror to mimick the factory "glue" that you separate. Lastly, I cut off the LED wire connectors, since they can come loose, but it looks like you zip secured them. WTG
Last edited by EyeKutr; Mar 17, 2010 at 03:24 PM.
Nicely done, I am glad the thread I made was helpful....just a couple of things I would add, silicone around the LED housing is something I added to make sure moisture stays out. I also used some silicone caulk for the mirror to mimick the factory "glue" that you separate. Lastly, I cut off the LED wire connectors, since they can come loose, but it looks like you zip secured them. WTG
Thanks
Trending Topics
I've thought about this mod but was afraid to take my door apart that way. I thought it might give me squeaks once put back together.
Strangely, my door has started squeaking anyway. Started about 2 weeks ago.
Anyway, props for the DIY mod. Good stuff.
Strangely, my door has started squeaking anyway. Started about 2 weeks ago.
Anyway, props for the DIY mod. Good stuff.
ClubLexus Stories
Celebrating Lexus & Toyota from Around the Globe

8 Tips for Improving Your Hybrid or Plug-in Hybrid's Efficiency!
Michael S. Palmer
10 Best Lexus Models No One Remembers
Joe Kucinski
TRD Off-Road Premium: Best 2026 4Runner, Except This One Thing
Michael S. Palmer
Top 10 Lexus & Toyotas to Drive Before You Die!
Joe Kucinski
Top 10 Lexus/Toyotas With The LEAST 5-Year Depreciation
Joe Kucinski
Lexus LC500 Convertible Auction: A Preview of Rising Values?
Brett Foote
GX 550 vs TX 550: Best 3-Row Luxury Lexus Family Hauler
Michael S. Palmer
9 Best Lexus Models You Can Buy for Half Price (And 1 You Shouldn't!)
Joe Kucinski
2026 Lexus NX Buyer's Guide: Models, Features, Prices & More!
Brett Foote


Lexus Fanatic
Joined: Dec 2006
Posts: 6,806
Likes: 7
From: californication
https://docs.google.com/uc?id=0Bz0UX...nload&hl=en_US
archived for posterity should pictures disappear
archived for posterity should pictures disappear


