


Double Din Players


Thread Starter
Driver School Candidate
Joined: Dec 2009
Posts: 31
Likes: 0
From: FL

They all look great gives me a ton of ideas.
Does anyone know of a bezel kit that makes the DD almost look like its pushed back it to the console?
Thanks again for all the replies.
Does anyone know of a bezel kit that makes the DD almost look like its pushed back it to the console?
Thanks again for all the replies.


Also, you may have to do a little custom fiberglass work on the trim to make it look better too if you go too far back.

Alpine Navi/dvd unit forgot what model.. Thought about getting a black climate to match the surround, but i think i'll stick with my two tone and silver SD climate..
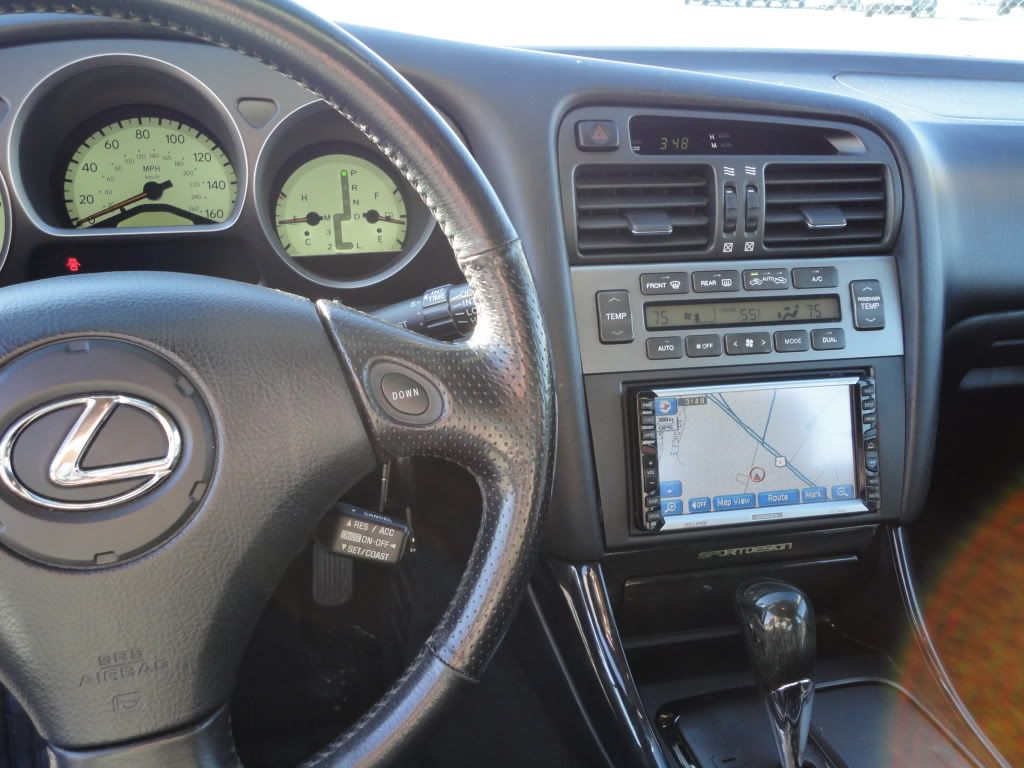

You just have to redrill some of the mounting holes on the bracket. Even the Toyota JDM one that I have would cause the DD to stick out further than the flush mount that I have if mounted in the normal mounting holes. Most of us that have it flush mounted had to modify the mounting holes further back. In that case, you can inset the DD as far back as spacing allows. There isn't that much room behind the deck so you can't go too far back unless you have a rather shallow DD deck.
Also, you may have to do a little custom fiberglass work on the trim to make it look better too if you go too far back.
Also, you may have to do a little custom fiberglass work on the trim to make it look better too if you go too far back.

Driver School Candidate
Joined: Jun 2006
Posts: 32
Likes: 0
From: CA
hey bro, i have the pioneer x920bt on my gs300, there's a space around the head unit. can you just buy a little frame that will fit around it to fill the gap around the unit? thanks
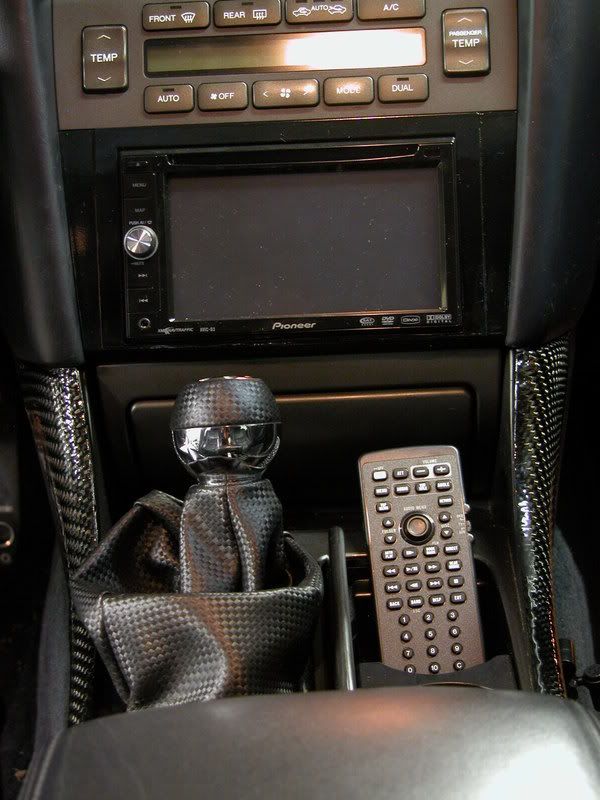
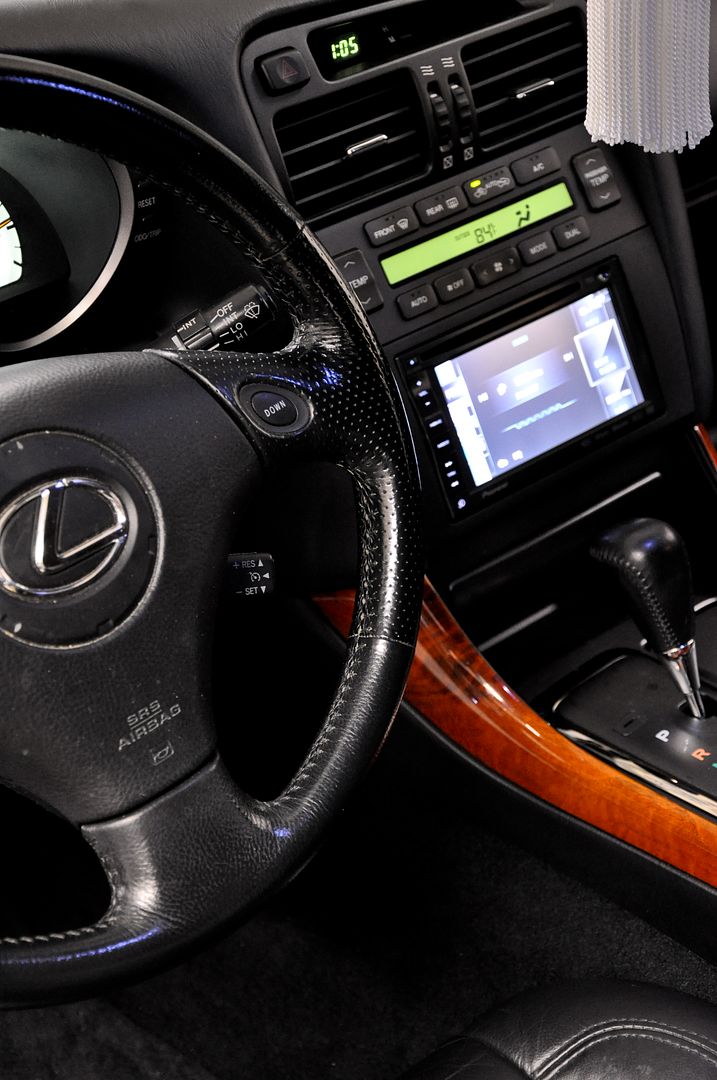


 flushed...
Flush mounted.... 

Notice the side brackets. Only 2 screws one each side. On the bracket, you will see (2) dimples to help align the deck to the bracket. Drill the hole at the dimple on the bracket and use that hole for mounting the deck. If you see, i drilled out the rear dimples as well. This may not be needed but since the new mounting holes are moved, the dimples will not line up on the deck. So i opted to drill them out as well because i do not want it to fit funny. really up to you... (2) screws on each side will suffice for me and i am not worried of it being crooked..
Eclipse AVN50 with oem DD kit.

For the wiring, you need to be clean with it. I tucked the bunch of wires under the deck and continued to route it to bypass the OEM pioneer AMP.
Notice the side brackets. Only 2 screws one each side. On the bracket, you will see (2) dimples to help align the deck to the bracket. Drill the hole at the dimple on the bracket and use that hole for mounting the deck. If you see, i drilled out the rear dimples as well. This may not be needed but since the new mounting holes are moved, the dimples will not line up on the deck. So i opted to drill them out as well because i do not want it to fit funny. really up to you... (2) screws on each side will suffice for me and i am not worried of it being crooked..
Eclipse AVN50 with oem DD kit.
For the wiring, you need to be clean with it. I tucked the bunch of wires under the deck and continued to route it to bypass the OEM pioneer AMP.
Last edited by istundra; Jan 23, 2011 at 11:40 PM.


