DEAD EASY! Changing Foglights 97-99 + More!
 12-27-07, 07:12 PM
#1
Intermediate
Thread Starter
Hi everyone,
Finally, I am going to share with you my ULTIMATE SECRET for changing fog light globes/bulbs on a 97-99 ES. IT IS DEAD EASY!! I have seen many members on the site become frustrated at changing the globes in their fog lights but it is so easy I want everyone to know how to do it. YOU DON'T HAVE TO MESS AROUND JACKING THE CAR UP, GETTING UNDER THE CAR OR REMOVING PARTS UNDERNEATH!
I have spent a lot of time on this write-up to help others, so comments are welcome!!
Before we start PLEASE NOTE:
This is for 97-99 ES models. It may work on other ES years but I'm not sure as I only own a 97 model. Also, I have an Australian Spec ES, but I'm pretty sure this will work on ES's of the same year.
I accept no responsibility for any loss, damage or injury you may cause if you try this. This is how I change the globes and it works like magic for me. This is my information only.
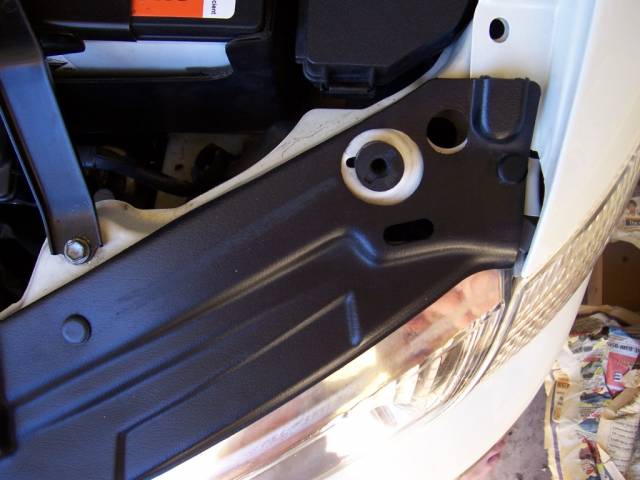
First of all, pop the bonnet/hood and you will see the black plastic splash guard on top of the headlights and signal lights. You need to remove the Guard (or at least the first end section of it): WE WILL BE ACCESSING THE FOG LIGHTS FROM THE TOP.
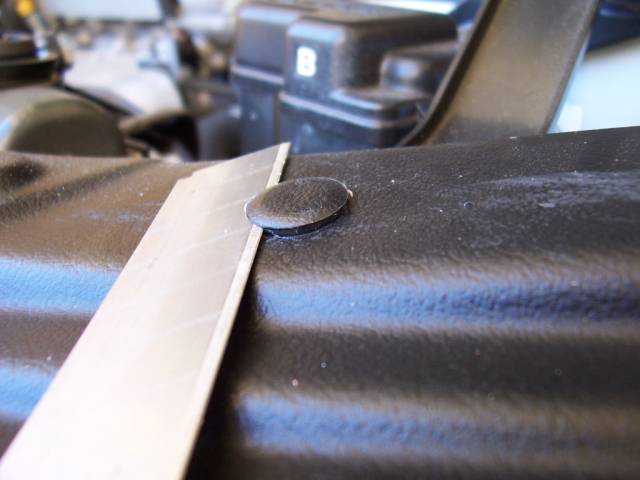
The guard is held in by a series of small plastic plugs that you need to remove.

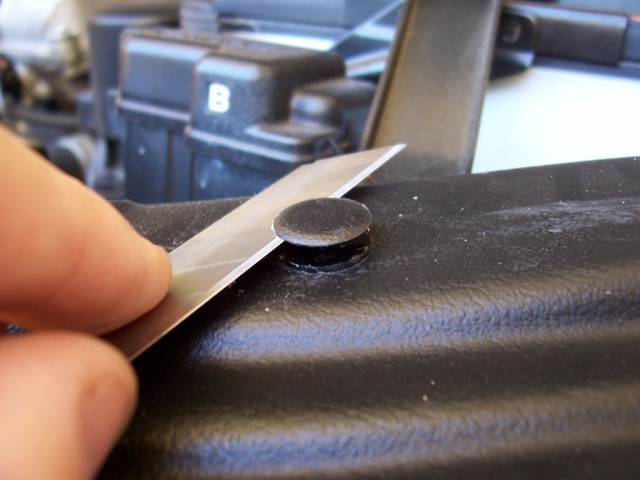
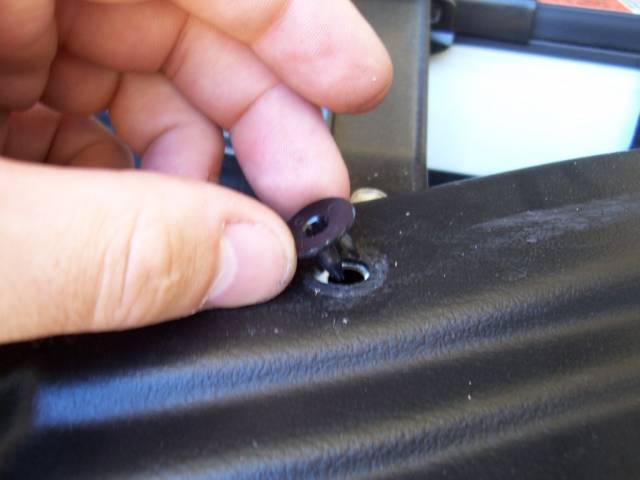
It�s important to note that while the plugs look like one complete piece they are in fact TWO pieces. YOU NEED TO REMOVE THE TOP PIECE FIRST. This can be quite difficult the first time, but once you know that they are two pieces it�s easy. You need to prise the pieces apart by prising from the top section NOT at the bottom. Don�t try to use screwdriver it is too thick. You need something fine to find the join. I use a sharp blade, but it works just as well by using some fine thread or fishing line to floss around and find the join. If you chose to use a blade - BE VERY CAREFUL. You will see in this next pic
NOTE! I�m not actually cutting anything, just using the blade to find the join.
Separate and remove the top cap piece. � You can see how fine the cap is and how it would look like one piece when pressed together.
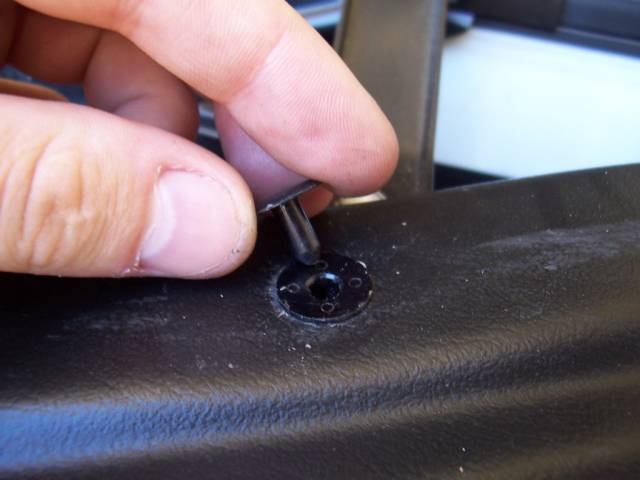
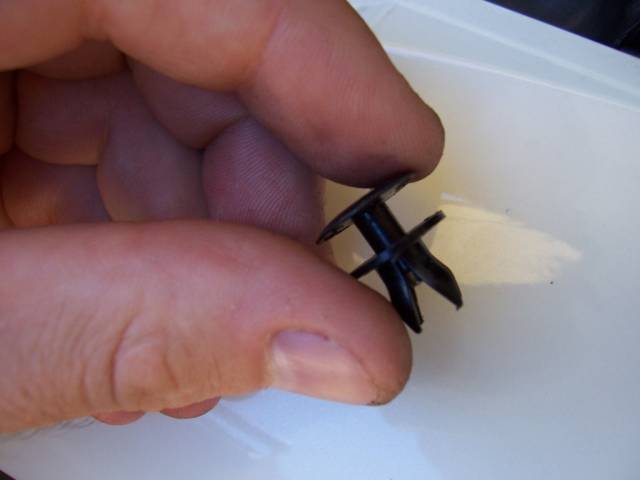
Then pull out the bottom part to the plug.
Here's a pic of the two pieces of the plugs - You can see why you need something fine to separate the two pieces.
Plugs removed on the splash guard:
Splash guard removed so you can access underneath:
Finally, I am going to share with you my ULTIMATE SECRET for changing fog light globes/bulbs on a 97-99 ES. IT IS DEAD EASY!! I have seen many members on the site become frustrated at changing the globes in their fog lights but it is so easy I want everyone to know how to do it. YOU DON'T HAVE TO MESS AROUND JACKING THE CAR UP, GETTING UNDER THE CAR OR REMOVING PARTS UNDERNEATH!
I have spent a lot of time on this write-up to help others, so comments are welcome!!
Before we start PLEASE NOTE:
This is for 97-99 ES models. It may work on other ES years but I'm not sure as I only own a 97 model. Also, I have an Australian Spec ES, but I'm pretty sure this will work on ES's of the same year.
I accept no responsibility for any loss, damage or injury you may cause if you try this. This is how I change the globes and it works like magic for me. This is my information only.
First of all, pop the bonnet/hood and you will see the black plastic splash guard on top of the headlights and signal lights. You need to remove the Guard (or at least the first end section of it): WE WILL BE ACCESSING THE FOG LIGHTS FROM THE TOP.
The guard is held in by a series of small plastic plugs that you need to remove.
It�s important to note that while the plugs look like one complete piece they are in fact TWO pieces. YOU NEED TO REMOVE THE TOP PIECE FIRST. This can be quite difficult the first time, but once you know that they are two pieces it�s easy. You need to prise the pieces apart by prising from the top section NOT at the bottom. Don�t try to use screwdriver it is too thick. You need something fine to find the join. I use a sharp blade, but it works just as well by using some fine thread or fishing line to floss around and find the join. If you chose to use a blade - BE VERY CAREFUL. You will see in this next pic
NOTE! I�m not actually cutting anything, just using the blade to find the join.
Separate and remove the top cap piece. � You can see how fine the cap is and how it would look like one piece when pressed together.
Then pull out the bottom part to the plug.
Here's a pic of the two pieces of the plugs - You can see why you need something fine to separate the two pieces.
Plugs removed on the splash guard:
Splash guard removed so you can access underneath:

The following 2 users liked this post by LEX ES300:
BMeek (01-22-21),
static1646 (04-11-24)
12-27-07, 07:24 PM
#2
Intermediate
Thread Starter
To get to the foglights you need to remove the turn signal/indicator lense. Undo the one screw :
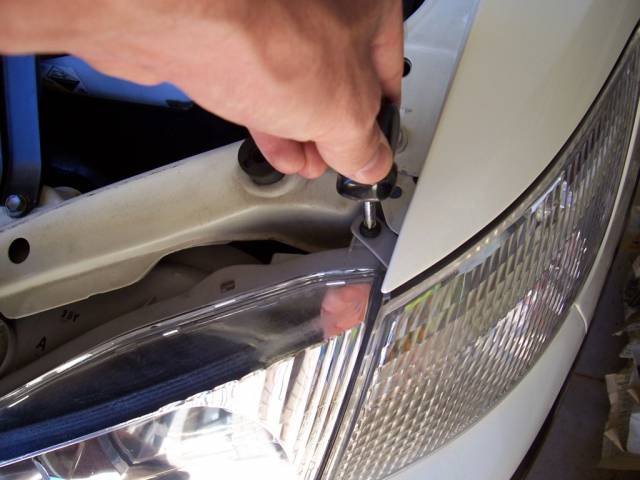
Once the screw is removed gently but firmly pull the turn signal lense FORWARS TOWARDS THE FRONT OF THE CAR.

You can see the clips that hold the turn signal in when you put it back on later.
Once removed, undo/remove the plugs attached to the back of the turn signal lense.
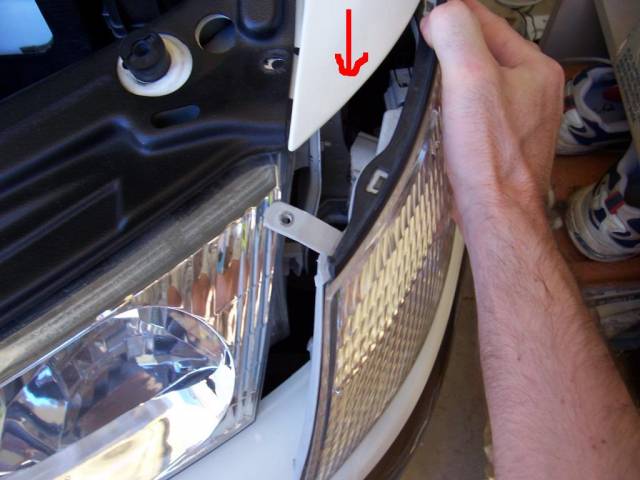
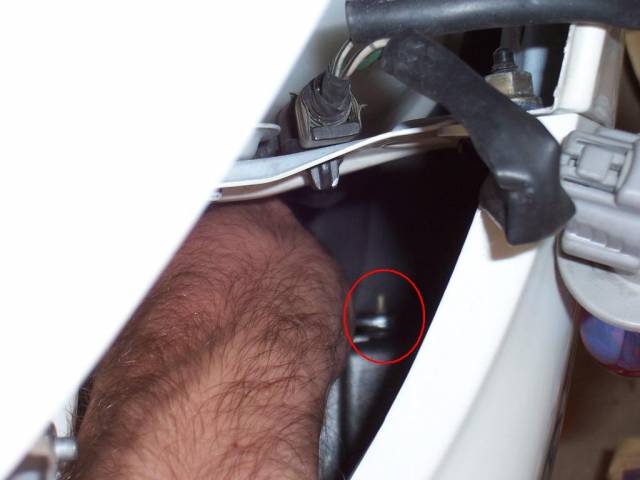
Now that the turn signal is removed look down into the gap and you will see the FOG LIGHT!!!.

The fog light is held in place by two sections � 1. is the small nut (10mm) and 2, on the other side there is a small plastic clip. (can't show you the clip in this picture - it's underneath!)
The nut is 10mm so get a small 10mm spanner.

Reach down into the hole and undo the 10mm nut. Once the nut is loosened use your hand to undo it so you don�t drop/lose the nut in the hole.
Once the screw is removed gently but firmly pull the turn signal lense FORWARS TOWARDS THE FRONT OF THE CAR.
You can see the clips that hold the turn signal in when you put it back on later.
Once removed, undo/remove the plugs attached to the back of the turn signal lense.
Now that the turn signal is removed look down into the gap and you will see the FOG LIGHT!!!.
The fog light is held in place by two sections � 1. is the small nut (10mm) and 2, on the other side there is a small plastic clip. (can't show you the clip in this picture - it's underneath!)
The nut is 10mm so get a small 10mm spanner.
Reach down into the hole and undo the 10mm nut. Once the nut is loosened use your hand to undo it so you don�t drop/lose the nut in the hole.
The following users liked this post:
BMeek (01-22-21)
12-27-07, 07:40 PM
#3
Intermediate
Thread Starter
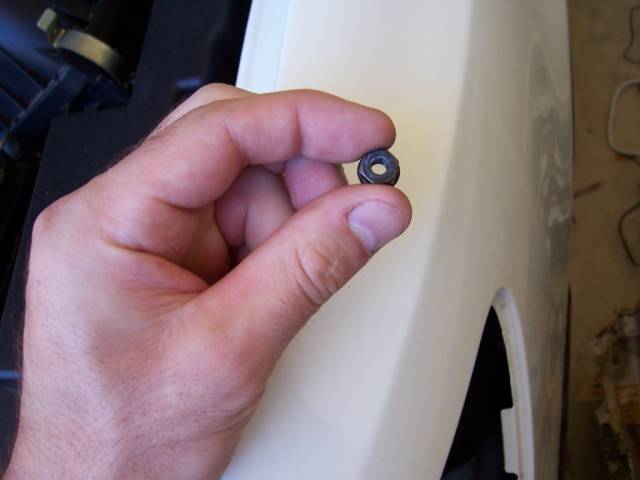
Here�s the nut removed:
Now the next bit can be tricky but DON�T WORRY!! � Looking at the next few pictures will really help you!!
You need to release the clip that is holding the lense in place on the bumper. This can be quite tricky to find the first time. You need to feel around for it and using your hand squeeze the clips together and push at the same time and you will release the fog light and pop it out forwards from the bumper.
Look carefully at the next few pics and you will know where to feel around and release the clip. YOU MUST RELEASE THE CLIP BEFORE TRYING TO PULL FOGLIGHT OUT!
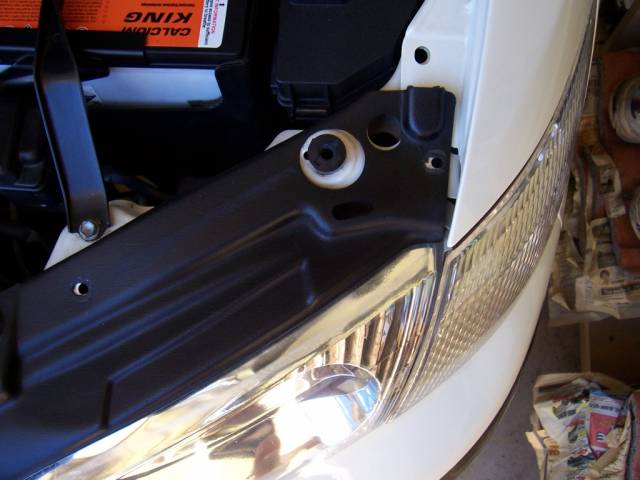
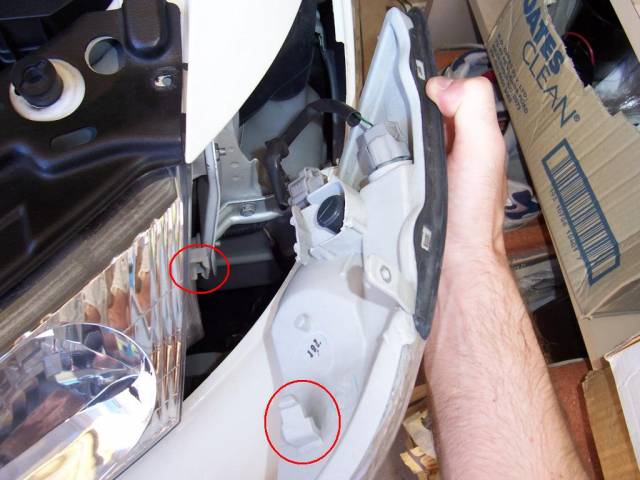
Here in this pic you can see the thread that holds the 10mm nut on, and on the left of the pic is the location of the clip (you still can't see it in this pic very well)
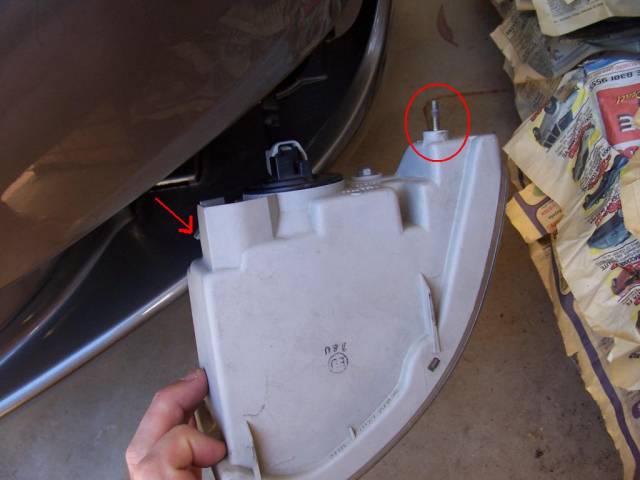
Now you can see the clip and where it is when you're feeling around for it! As I have mentioned you need to squeeze the two tabs in while pushing it forwards to release the foglight and pop it out forwards towards the front of the car.
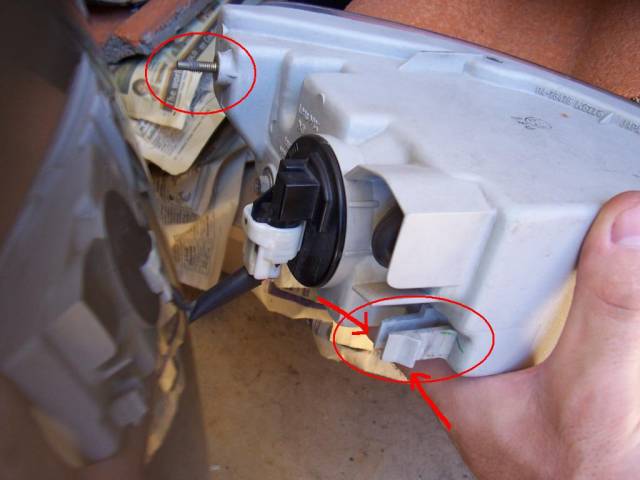
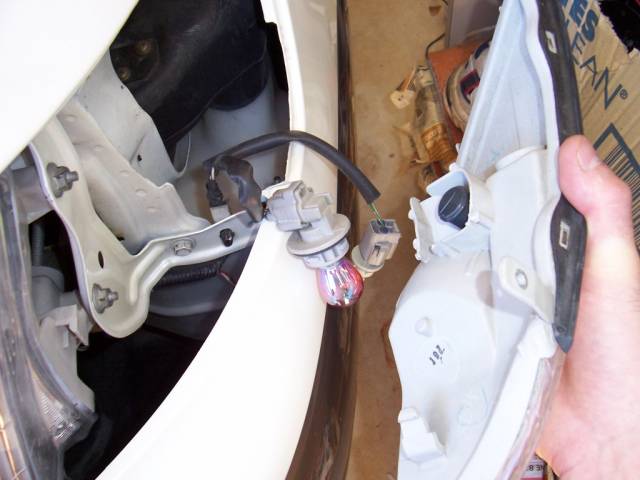
Another shot:

Once the fog light is removed simply undo (twist) the wiring plug at the back of the foglight lense and replace the globe.
Now the next bit can be tricky but DON�T WORRY!! � Looking at the next few pictures will really help you!!
You need to release the clip that is holding the lense in place on the bumper. This can be quite tricky to find the first time. You need to feel around for it and using your hand squeeze the clips together and push at the same time and you will release the fog light and pop it out forwards from the bumper.
Look carefully at the next few pics and you will know where to feel around and release the clip. YOU MUST RELEASE THE CLIP BEFORE TRYING TO PULL FOGLIGHT OUT!
Here in this pic you can see the thread that holds the 10mm nut on, and on the left of the pic is the location of the clip (you still can't see it in this pic very well)
Now you can see the clip and where it is when you're feeling around for it! As I have mentioned you need to squeeze the two tabs in while pushing it forwards to release the foglight and pop it out forwards towards the front of the car.
Another shot:
Once the fog light is removed simply undo (twist) the wiring plug at the back of the foglight lense and replace the globe.
The following 2 users liked this post by LEX ES300:
AllenC (09-25-20),
static1646 (04-11-24)
12-27-07, 07:41 PM
#4
Pole Position
iTrader: (3)
Join Date: Apr 2005
Location: Colorado
Posts: 391
Likes: 0
Received 0 Likes
on
0 Posts
lol this is the way i've been changing my fog lights as well. discovered this while making my custom cold air intake. beats the hell out of taking out the bottom panels.
12-27-07, 07:41 PM
#5
Intermediate
Thread Starter
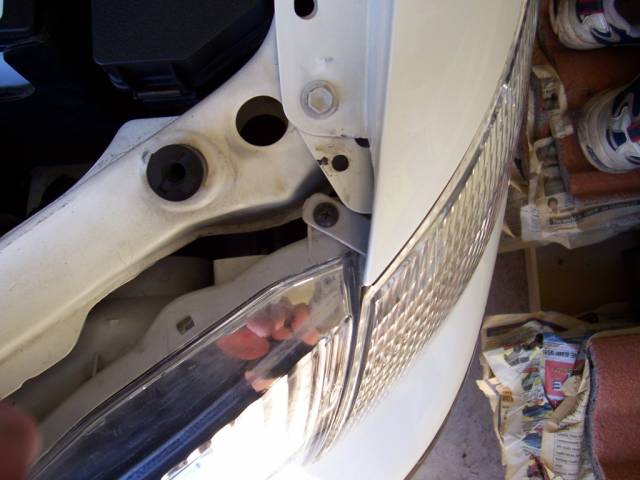
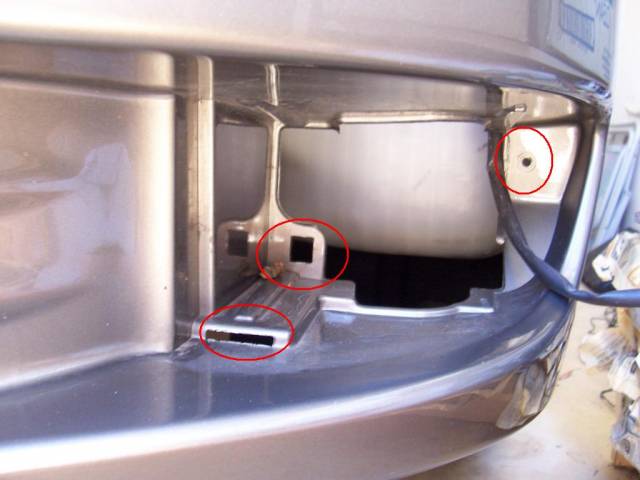
Here's a pic of the bumper with the fog light removed. You can see the hole on the right for the thread and 10mm nut, and on the left of the pic you can see the square hole where the plastic clip clips into. Just below this square hole you can also see a slot. This is where a plastic tab on the foglight also slots into.
Then follow the instructions in reverse and you�re all done!!
EASY!!!!
Takes approx 1/2 an hour to do - quicker when you know how.
I hope this helps everyone change those pesky globes!!
LEX ES300
Then follow the instructions in reverse and you�re all done!!
EASY!!!!
Takes approx 1/2 an hour to do - quicker when you know how.
I hope this helps everyone change those pesky globes!!
LEX ES300
The following users liked this post:
poppop3339 (02-15-18)
Trending Topics


 12-31-07, 11:35 AM
#14
Intermediate
Thread Starter
Thanks for all the great comments guys.
I hope you find it useful. The days of getting under the car are over!
Who's the moderator on the site nowdays? I hope they can add it to the sticky DIY section.
If any one else has any other DIY's don't forget to post them up with pics! It can be a bit time consuming, but at the end of the day you get to help your fellow ES owners, and that's what it's all about.
If you have been helped by one of the DIY's then why not return the favour and post up your own DIY write up on tips and mods too. They're great to see and read about.
LEX ES300