

Wires, wires, everywhere: Cluster Swap

Thread Starter
Lexus Champion
Joined: Aug 2012
Posts: 1,729
Likes: 132
From: Toronto, Canada
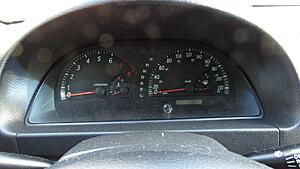
I upgraded the instrument cluster on my Toyota Camry from the older 02-04 plain face gauges to the LED backlit gauges of the 05-06 model.
Boy was it a wiring maze, but I eventually figured it out and wanted to share with you all the process...if you were wondering what's involved in rewiring your own cluster.
Here's the video I made detailing the process:
Here's some photos of the process:
Old cluster:
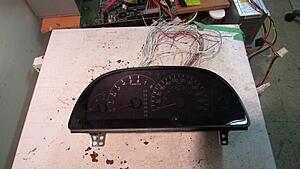
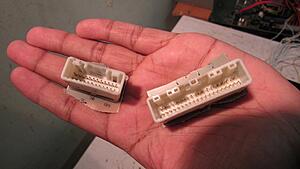
New cluster to be swapped in. I got it from the junkyard for $35. I also snipped off the pigtails for an extra $6, which will make rewiring much easier and reversible:
I also ripped the female connectors off of another board:
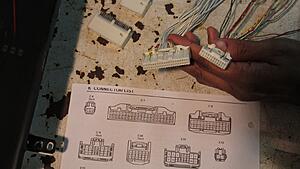
The next piece to the puzzle is the wiring diagrams of the old (02-04) and new (05-06) instrument clusters. Since the clusters are wired differently I have to swap wires. By comparing the diagrams for each cluster, wire by wire I was able to figure out what wires needed to be swapped.
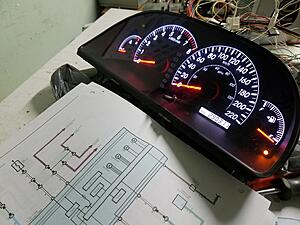
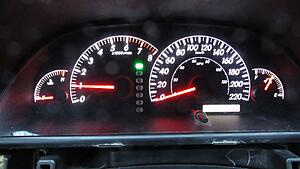
I tested the cluster to make sure it worked:
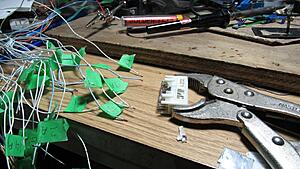
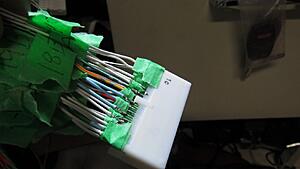
Using the pinouts I numbered each wire:
The idea is that I'd solder together a conversion harness, so I don't have to modify my car or the cluster to get it work, and I can reverse it if need be, and wouldn't have to deal with depinning the dash harness.
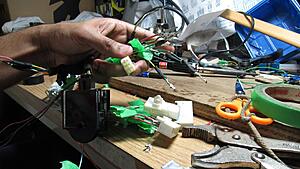
So on I went, soldering up 50+ wires to each pin according to the diagram. One tip is to add solder to each wire and each pin before putting them together. That way, as soon as you touch the two with the soldering iron, they fuse together.
I also soldered/heatshrinked on a separate connector for the new rheostat, so I can dim this new LED panel.
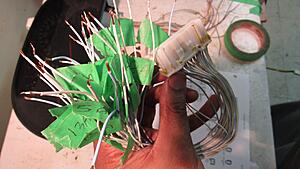
Here's my conversion harness...the huge jumble of wires:
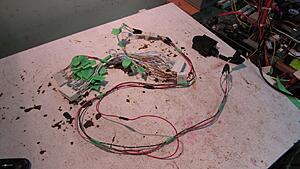
For testing, I insulated each wire so they don't accidentally short against each other behind the dash:
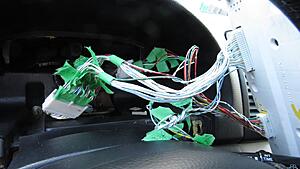
Next I wired up the new cluster, literally a plug and play operation. I ran the new rheostat down where the old one was for an OEM like installation.
With all those wires you'd expect some mistakes to be made right? Turns out I only misplaced one pin for the fuel gauge. After fixing that, everything worked perfectly!
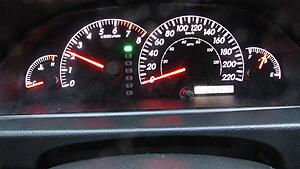
Except the tachometer. I realized that I needed a V6 cluster to make my tachometer read properly on my V6 car. I had the 4 cylinder cluster. So I went back to the junkyard and swapped in a V6 cluster and everything reads correct.
The next step was reprogramming the odometer, there's a little 8 pin EEPROM chip on the back of the board that needs to be desoldered and connected to an EERPOM reader to be reprogrammed so it reads the correct mileage for the vehicle:
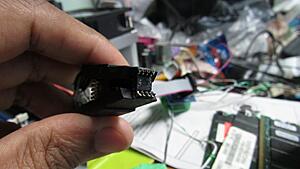
I used a chip clip test probe to connect the SMD chip:
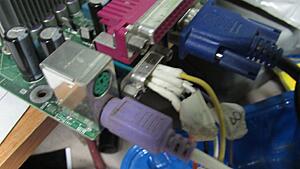
Connected it to my home made EEPROM reader:

Which plugs straight into the serial port on my pentium 4 computer:
And that yields a hex dump, to which we can decode the odometer reading here in line 60:
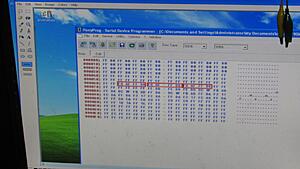
By editing the HEX characters, I was able to reprogram the 4 cylinder cluster.
Now I have more details in my odometer reprogramming video, which you can see here:
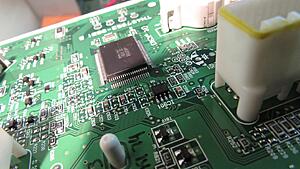
Unfortunately during desoldering, a blob of solder dropped onto the main cluster chip on my V6 cluster. I tried saving it but it was toast:
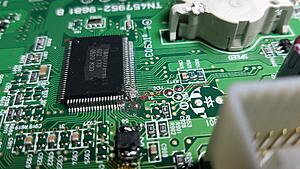
I guess I'm back on the hunt for another V6 cluster! I'm still enjoying the 4 cylinder cluster which is much, much better than the old cluster it replaced!
Enjoy!
Boy was it a wiring maze, but I eventually figured it out and wanted to share with you all the process...if you were wondering what's involved in rewiring your own cluster.
Here's the video I made detailing the process:
Here's some photos of the process:
Old cluster:

New cluster to be swapped in. I got it from the junkyard for $35. I also snipped off the pigtails for an extra $6, which will make rewiring much easier and reversible:

I also ripped the female connectors off of another board:

The next piece to the puzzle is the wiring diagrams of the old (02-04) and new (05-06) instrument clusters. Since the clusters are wired differently I have to swap wires. By comparing the diagrams for each cluster, wire by wire I was able to figure out what wires needed to be swapped.
I tested the cluster to make sure it worked:

Using the pinouts I numbered each wire:


The idea is that I'd solder together a conversion harness, so I don't have to modify my car or the cluster to get it work, and I can reverse it if need be, and wouldn't have to deal with depinning the dash harness.
So on I went, soldering up 50+ wires to each pin according to the diagram. One tip is to add solder to each wire and each pin before putting them together. That way, as soon as you touch the two with the soldering iron, they fuse together.

I also soldered/heatshrinked on a separate connector for the new rheostat, so I can dim this new LED panel.

Here's my conversion harness...the huge jumble of wires:

For testing, I insulated each wire so they don't accidentally short against each other behind the dash:

Next I wired up the new cluster, literally a plug and play operation. I ran the new rheostat down where the old one was for an OEM like installation.

With all those wires you'd expect some mistakes to be made right? Turns out I only misplaced one pin for the fuel gauge. After fixing that, everything worked perfectly!

Except the tachometer. I realized that I needed a V6 cluster to make my tachometer read properly on my V6 car. I had the 4 cylinder cluster. So I went back to the junkyard and swapped in a V6 cluster and everything reads correct.

The next step was reprogramming the odometer, there's a little 8 pin EEPROM chip on the back of the board that needs to be desoldered and connected to an EERPOM reader to be reprogrammed so it reads the correct mileage for the vehicle:

I used a chip clip test probe to connect the SMD chip:

Connected it to my home made EEPROM reader:

Which plugs straight into the serial port on my pentium 4 computer:

And that yields a hex dump, to which we can decode the odometer reading here in line 60:

By editing the HEX characters, I was able to reprogram the 4 cylinder cluster.
Now I have more details in my odometer reprogramming video, which you can see here:
Unfortunately during desoldering, a blob of solder dropped onto the main cluster chip on my V6 cluster. I tried saving it but it was toast:

I guess I'm back on the hunt for another V6 cluster! I'm still enjoying the 4 cylinder cluster which is much, much better than the old cluster it replaced!
Enjoy!


Thread Starter
Lexus Champion
Joined: Aug 2012
Posts: 1,729
Likes: 132
From: Toronto, Canada


Thread
Thread Starter
Forum
Replies
Last Post