When you click on links to various merchants on this site and make a purchase, this can result in this site earning a commission. Affiliate programs and affiliations include, but are not limited to, the eBay Partner Network.
Been on the lookout for an LS460 for a long time now and then decided I wanted the long wheel base. I've debated between the 2007-2009, 2010-2012 and 2013 and up. Everything that I was finding at my price range had higher miles. I wanted something once said and done I could just get in a drive and not really worry about anything. With the higher miles I made a list of parts that would require replacement etc and the list just kept growing. With everything I knew I wanted changed that threw the 2013 up LS' out of the picture. The 2010 and up had it's advantages and disadvantages. They come with the newer head units with more options to integrate Android auto and CarPlay etc but fewer body kit options that I liked, but I didn't rule those out. I finally came across a mica gray 2007 LS460L with alabaster interior and shy of 155k on the clock. It was a NC car, completely maintained at Lexus and had the ultra luxury package.
When I checked the car out it showed some issues. The automatic parking brakes showing errors off and on. Techstream showed communication with parking brake module at times and at times no communications. There are signs of the module being exposed to water so it possibly needs a parking brake module. The fuel pump gasket and valve cover gasket had a slight leak but otherwise seemed like a solid car with a clean interior. The car had also recently undergone the water inlet pipe leak into the engine valley fix. Car had been traded in for an LX. Took the gamble and picked it up at a reasonable price. Only pic of it as of now but I'll take some pics shortly.
Just wanted to share my LS460 journey with you guys as well.
Thanks guys! Interior looked good but my OCD-ness made me want to clean it and I noticed color coming off. The dealership must have gotten it sprayed to make it look fresh, So I went ahead and took the rest of the cover up off and the seats are still in pretty decent shape, no rips, tears or fillers used to patch anything up just shows age. On a black interior this would not have been a big issue but because of the light color it shows the age more prominently. I'm going to end up re-dying the seats to freshen it up, that's the plan for now anyway.
Congrats. Look forward to seeing what you do. There is a build section if you're going to be doing a lot to the car. As for the interior, there is a recall on the interior, not including the seats. It made my 08 look brand new again. Good luck!!
The LS460 had the horrible gummy trunk button issue. Instead of buying a switch and cover I chose to spend only $6 and get just a cover off of ebay and thought I'd just point out a couple of tips and tricks while doing this swap. The trunk button fix has been pretty well documented so I'm not going through the process to show you how to remove and install etc do a search and you shall find what you seek, a thank you for the guys who did post the how to's!
With the trunk trim removed go ahead and clean the area behind the trim. Mine wasn't too bad and chances are neither will yours but the edges etc are hard to get to and this lets you clean it unobstructed.
The same goes for the back of the trim itself. I cleaned it and because it is plastic I went ahead and just gave it a quick spray down with 303 aerospace or any sort of conditioner on the whole trim and the clips.
My key access hole was pretty disgusting so I cleaned that and thought it was an appropriate time to spray some silicone grease into the key hole itself.
As you can see my switch cover was pretty melted and it kinda filled in all the cracks and crevices of the switch itself making the switch inoperable. The only way to open the trunk was through the switch inside the car or the keyfob.
Dismantling the switch is not rocket science it comes apart as in the picture above, again do so at your own risk but it is pretty straight forward. scrape all the rubber off the parts etc. Tip: once you scrape most of the rubber off you can use brake cleaner on a rag to wipe up any residue etc.
Once all the goo is off putting it back together is reverse of disassembly and viola you have a working switch. I think the switch is like $80 which is really not a bad price. But if you dont have an hour to kill I'd just get a complete switch and swap it out. Good luck...
So my plan when getting the car as I do with all cars is to change out all degrading, wear and tear parts so that it is reliable and I don't have worry about things for awhile after it is done. With 155000 miles on the motor I figured it was time to change a couple of parts.
Belt Tensioner - Dayco (89380)
Idler pulley - Dayco (89537)
Serpentine Belt - Bando (6PK2100)
Water Pump - Aisin (WPT187)
Thermostat - Aisin (THT005)
Coolant recovery tank cap - Gates (31541)
Radiator - Denso (2219223)
Gates Lower radiator hose (23477)
Gates Upper Radiator Hose (23478)
Idler pulley upper- Dayco (89537)
Idler pulley lower - Dayco 89580
Toyota Super Long Life Coolant - 00272SLLC2 x 3
Toyota Valve Cover gaskets - Right - 11213-38030
Toyota Valve Cover gaskets - Left - 11214-38020
Toyota Spark Plug Gasket (11193-38020) x 8
Toyota Throttle Body Gasket (22271-50050)
NGK Plugs DFH6B-11A
K&N Air Filter 33-2381 x 2
Amsoil Performance improver APICN (x2)
Amsoil Signature Series 0W-20 oil x 10 qts
Fuel pump spacer gasket (23224-38010 x 2)
Fuel pump insulator (23915-46011 x 2)
O-Ring (90301-A0029 x 4)
Pulsation damper gasket (23279-74010 x 4)
GASKET, CAMSHAFT BEARING CAP OIL HOLE, LH (11159-0P010) X 2
GASKET, CAMSHAFT BEARING CAP OIL HOLE (11159-0S010) X 2
GASKET, CAMSHAFT BEARING CAP OIL HOLE (90430-A0001) X 2
Above was my parts list. The idea was to change the radiator, water pump, pulleys, belts tensioners, all the gaskets involved with valve cover, throttle body, basically anything that I was removing which was a wear and tear item got replaced with new parts and all the old parts got cleaned in the process. The valve cover gasket had a slight leak to it and the fuel pump gasket had a pretty decent amount of oil seepage that I could see, so new valve cover gaskets, fuel pump spacer gasket, insulators, o-rings and spark plug gaskets were in the to do list.
It started off well, removed the radiator support, fans, radiator, water pump etc etc and everything went fairly smoothly, in an hour or so most parts were off. I did spray most of the bolts etc with PB Blaster and all the plastic clips and connectors with WD40 the night before so that it would make things easier to remove and plastic connectors and clips less susceptible to breaking. These plastic pieces especially are over 12 years old at this point so anything helps.
When it came time to remove the tensioner, the center bolt was seized on there. I tried soaking it etc but it wouldn't budge. I did manage to get the bolt off eventually except and chunk came out with it. Where the bolt is mounted to the timing chain cover stress cracks formed I guess during the process of un-seizing the bolt and by the time I got the bolt out everything had cracked and the cast aluminum cover broke off.
I've checked everywhere for another instance of this happening but I think this is an isolated incident caused more due to user error and lack of experience than anything else.
Well, no point crying over spilt milk so was trying to research what can be done to fix the issue. After some reading there were two options, first was change the timing chain cover or second see if the piece could be welded in. The welding I thought would work because there is no oil pressure behind the cover and also from images of the cover I saw the chain and other parts were a ways away from possible harm due to the heat cause by welding. I thought it was worth a try as opposed to taking off the timing chain cover which would involve removing everything else around it to get to it. Called a buddy of mine to see if that was something that was doable. He said it was worth a try too, so he came the next day with a welder etc to try to fix my mess up. I tried to clean along the cracks etc as best as I could with with a wire brush, and lightly sanded the area and cleaned it off with brake cleaner etc. Well long story short it was not working as planned and we ended up not being able to weld. The oil behind the cover could be to blame for not being able to get any good welds. So we tried and it didn't work. Thanks Danny! Since this was not going to be a weekend project anymore I just had it towed to the shop and asked Danny to fix it.
So in order to change the timing chain cover the alternator, compressor, valve covers, basically everything attached to the cover which is a lot of things, all needed to be removed.
I was traveling out of the country while this was getting done but Danny kept me updated on the progress. With the timing chain cover removed, he sent me a video of the timing chains which had some slack in it.
Maybe it was the heat during welding, maybe it just stretched over time. Either way didn't want to just put the cover back on with that being an issue later. Labor to put the chains on while everything is apart anyway is far less than if it needed to be done again later. So another list of parts were ordered
The valve covers and other parts were put in the CUDA to get cleaned while they were out.
Everything related to the timing chain was changed. When everything was getting put back together all the other gaskets etc were put in too.
The new radiator went in as well and with everything put back together she is purring like a kitten with no oil leaks.
I know it might be excessive but the car is in otherwise good condition and I want to keep it for a long time without any major headaches.Knowing everything was done gives me peace of mind. I want to thank Danny for fixing everything for me the way I would like and dealing with my OCD-Ness. Also Jeremy for letting me use his shop where I tinker with my cars!
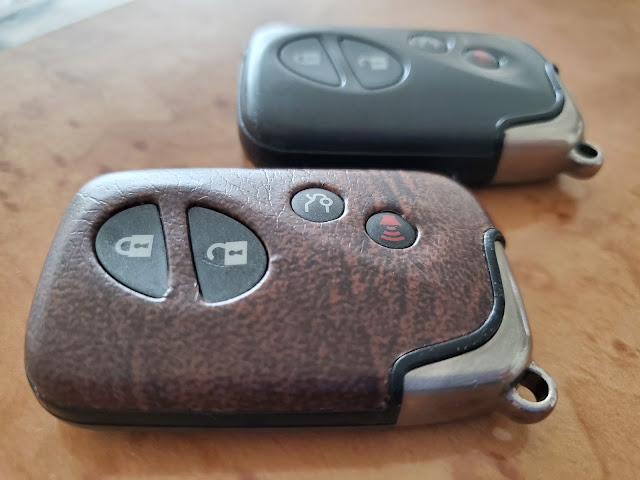
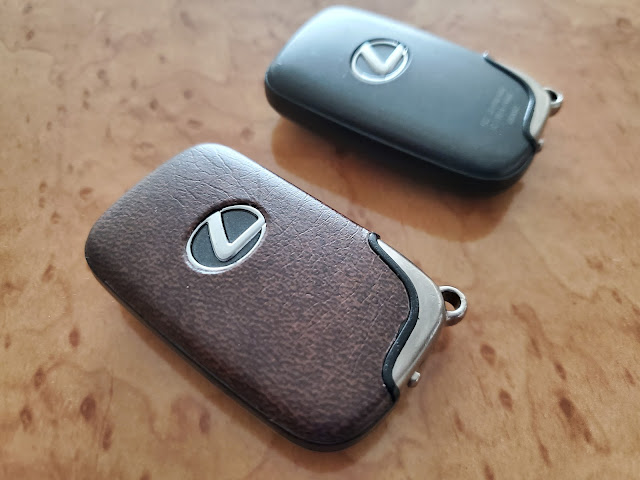
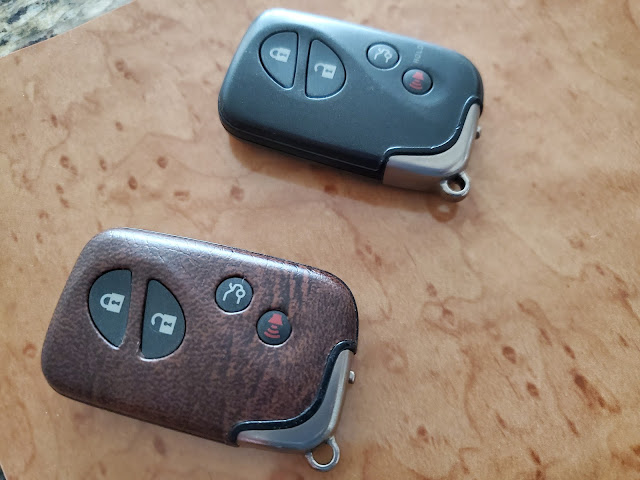
Wanted to personalize the key fob a little and I had a bunch of 3M samples of different finish and texture etc. Took longer than I thought it would but basically disassembled the key fob cleaned it and then degreased it with IPA. Used some 3M adhesive promoter around the edges to help the edges stick better and then armed with a heat gun, squeegees, plastic wedges, time and patience was able to wrap it. I picked a finish that simulated a leather finish and in Brown to go with my wood trim.
I was pretty happy with it so I decided to wrap the remote for my SC430 as well. Had a walnut finish close to the color of the wood trim in the SC so went with that.
Pretty happy with how both turned out. Guess time will tell how it will hold up.
I love how detailed you are with all of this. My mind works the exact same way except I�ve never had a chance to work on my car like that. I wish I knew some guys around me to do this with! I�m in Cincinnati Ohio.
Last edited by leisinjp; Jan 30, 2020 at 03:05 PM.