
My 13 Year OCD Build in the pursuit of perfection - GS300
 12-01-14, 06:17 AM
#31
Lexus Champion
Thread Starter

When I got the parts back from the machine shop I was really happy with everything but the rods.
I know this is standard practice shaving off the sides of the rod for balancing purposes, but I wasn't happy that so much material needed to be taken off and that I wasn't told.


That was the balancing for the big end. The machining on the small end was even more concerning.
Looked like too much was taken off on one rod and the rest had to have more taken off to make the total weights balance.
The machinist told me not to worry about it, and that machine work just like this is used in his really high HP builds.
I always say trust but verify, so I took them to two other machine shops to get their feedback.
Both of the other shops said it would be fine, even when I told them I want to spin the motor a little less than 8k rpm and make around 800hp.

I know this is standard practice shaving off the sides of the rod for balancing purposes, but I wasn't happy that so much material needed to be taken off and that I wasn't told.
That was the balancing for the big end. The machining on the small end was even more concerning.
Looked like too much was taken off on one rod and the rest had to have more taken off to make the total weights balance.
The machinist told me not to worry about it, and that machine work just like this is used in his really high HP builds.
I always say trust but verify, so I took them to two other machine shops to get their feedback.
Both of the other shops said it would be fine, even when I told them I want to spin the motor a little less than 8k rpm and make around 800hp.
 12-03-14, 06:26 AM
#32
Lexus Champion
Thread Starter
When I got the parts back from the machine shop I was really happy with everything but the rods.
I know this is standard practice shaving off the sides of the rod for balancing purposes, but I wasn't happy that so much material needed to be taken off and that I wasn't told.
That was the balancing for the big end. The machining on the small end was even more concerning.
Looked like too much was taken off on one rod and the rest had to have more taken off to make the total weights balance.
The machinist told me not to worry about it, and that machine work just like this is used in his really high HP builds.
I always say trust but verify, so I took them to two other machine shops to get their feedback.
Both of the other shops said it would be fine, even when I told them I want to spin the motor a little less than 8k rpm and make around 800hp.
12-03-14, 06:27 AM
#33
Lexus Champion
Thread Starter
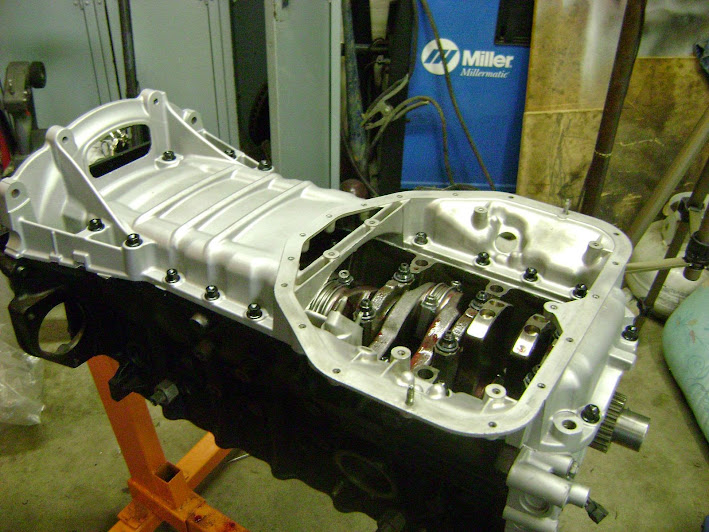
So with that said, I picked up some ARP main studs and went ahead and assembled the short block (circa 2007)
I'm not showing the measuring process or the plasti-gauge in these photos because I cant find them.


I'm not showing the measuring process or the plasti-gauge in these photos because I cant find them.
12-03-14, 06:29 AM
#34
Lexus Champion
Thread Starter
After reading about all of the FMS failures, I wanted to make sure to do everything I could to avoid that situation.
I picked up a low mileage pump and began to modify it.
I've since gone back and worked on this again... you'll have to keep following the thread.
You use an impact driver to remove the Philips head screws on the backside of the pump.


I found dimensions on this forum for the mod that people say works to alleviate the blown FMS, so I started here.


I picked up a low mileage pump and began to modify it.
I've since gone back and worked on this again... you'll have to keep following the thread.
You use an impact driver to remove the Philips head screws on the backside of the pump.
I found dimensions on this forum for the mod that people say works to alleviate the blown FMS, so I started here.
12-03-14, 06:30 AM
#35
Lexus Champion
Thread Starter
Always go back and debur and smooth out areas that are rough.


Here's some more of the goodies from Mark


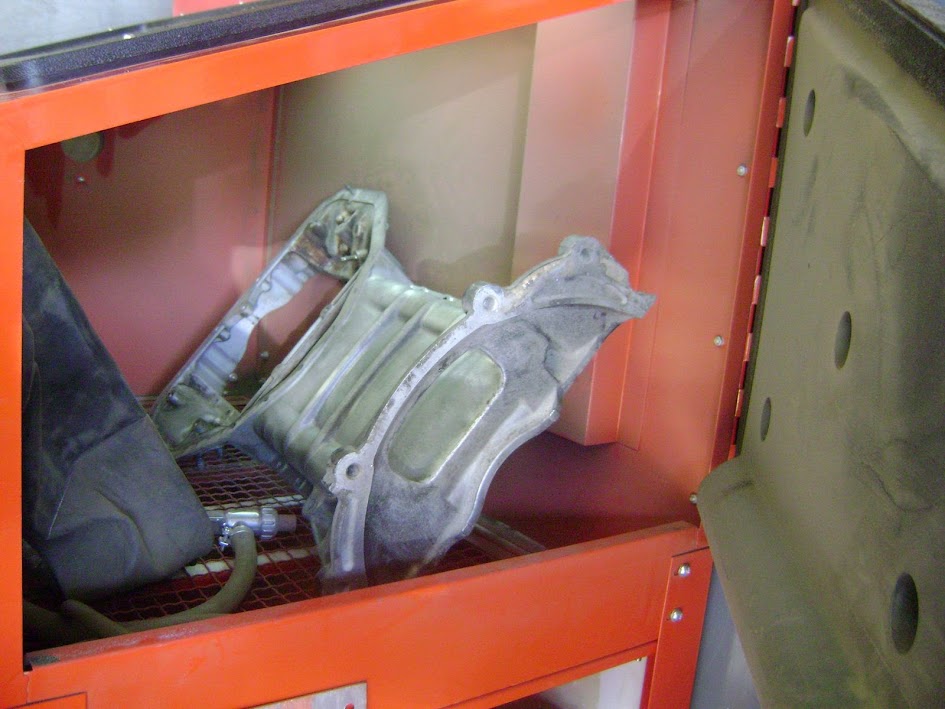
I blasted the housing and used the cast finish on this part also.

I used an old Honda alternator pulley to drive the new FMS into the housing.

Reassembly of the pump using my preffered permatex assembly lube


I used red loctite to secure the fasteners before driving them in with the impact driver

Here's some more of the goodies from Mark
I blasted the housing and used the cast finish on this part also.
I used an old Honda alternator pulley to drive the new FMS into the housing.
Reassembly of the pump using my preffered permatex assembly lube
I used red loctite to secure the fasteners before driving them in with the impact driver
 12-04-14, 09:16 AM
#37
Lexus Champion
Thread Starter
Time to mount the oil pump with fresh Toyota o-rings. These are fairly inexpensive and are worth spending money on.


CAS mounted

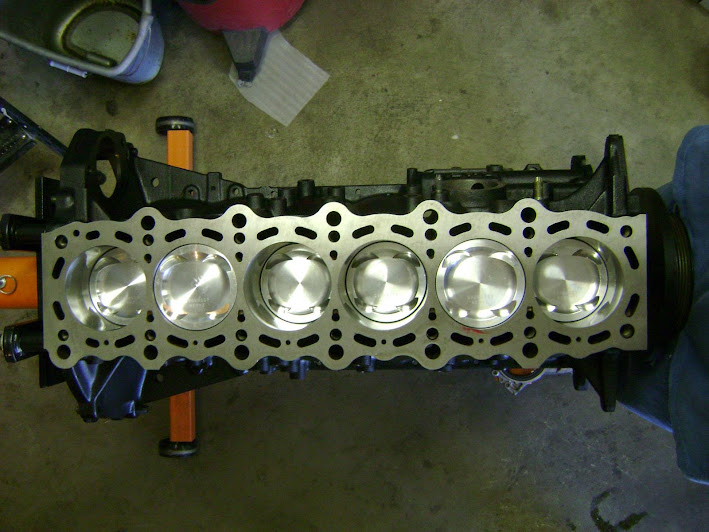
This is the only picture of pistons and rods together I can find right now for some reason

Here's the slugs going in, with the crank slid on to spine the crank as the holes get lubed up. And so the caps can get tightened on the rod ends.


Cleaned up the lower oil pan girdle
CAS mounted
This is the only picture of pistons and rods together I can find right now for some reason
Here's the slugs going in, with the crank slid on to spine the crank as the holes get lubed up. And so the caps can get tightened on the rod ends.
Cleaned up the lower oil pan girdle


 12-04-14, 09:19 AM
#40
Lexus Champion
Thread Starter
So next up was the head assembly.
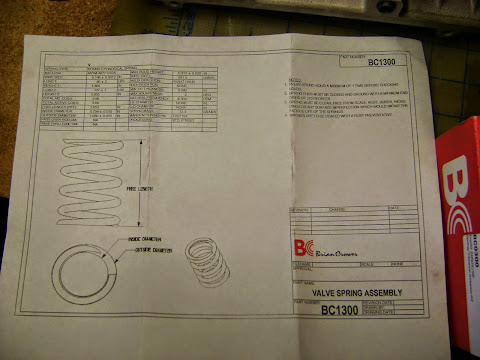
I picked up some ARP Head studs, BC 264 in/ex cams with springs and ti-retainers.


Some nitrile valve stem seals

My installation tool was a 10mm deep socket on 1/4 drive handle


I picked up some ARP Head studs, BC 264 in/ex cams with springs and ti-retainers.
Some nitrile valve stem seals
My installation tool was a 10mm deep socket on 1/4 drive handle
12-04-14, 09:20 AM
#41
Lexus Champion
Thread Starter
Cleaned up the OEM valve spring seats for reuse

Drop those snitches on the head

Then a spring

Next a retainer


Next some keepers

Look like this when they go in the retainer


Borrowed a Toyotool from Ron and it made life easier to install these, though it was still a ****


And voila - an completed valve spring assembly

And half of the valves into the head

Drop those snitches on the head
Then a spring
Next a retainer
Next some keepers
Look like this when they go in the retainer
Borrowed a Toyotool from Ron and it made life easier to install these, though it was still a ****
And voila - an completed valve spring assembly
And half of the valves into the head


 12-05-14, 08:13 AM
#44
Lexus Champion
Thread Starter
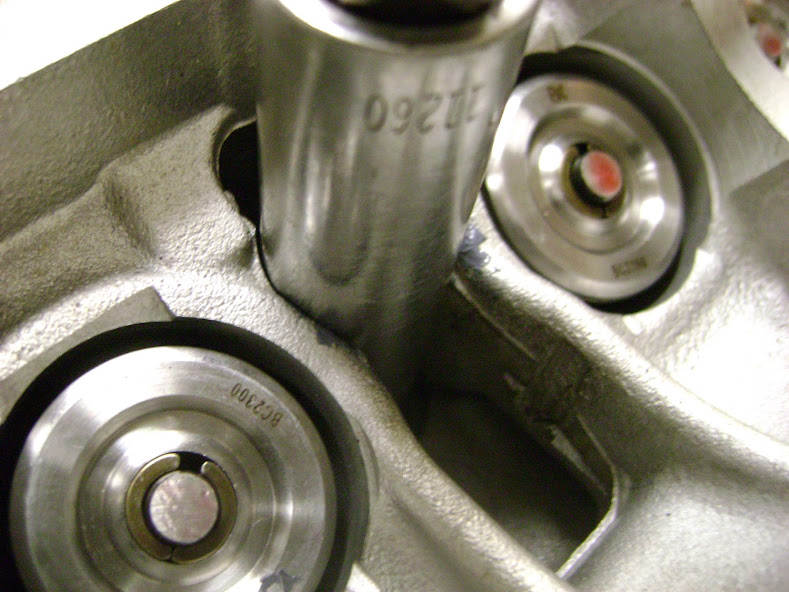
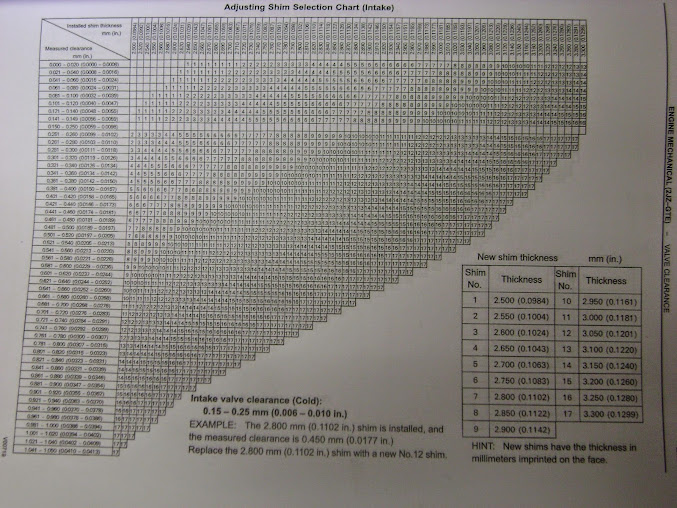
So shimming the head is kind of a ****. Since I had the valve seats freshened up, the valve stems were ground and shortened.
I kept the valve shims labeled and put them back in the same order but none of them were close at all, so I reorganized them and
was able to get away with only having to order a few from Mark.


I kept the valve shims labeled and put them back in the same order but none of them were close at all, so I reorganized them and
was able to get away with only having to order a few from Mark.


