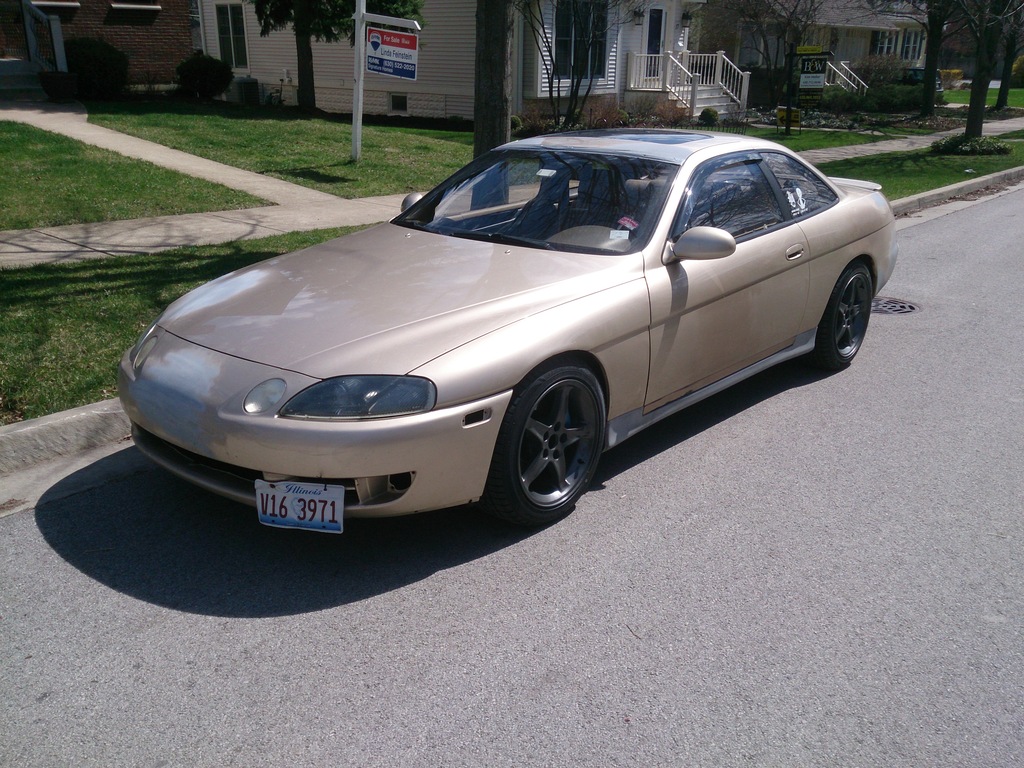
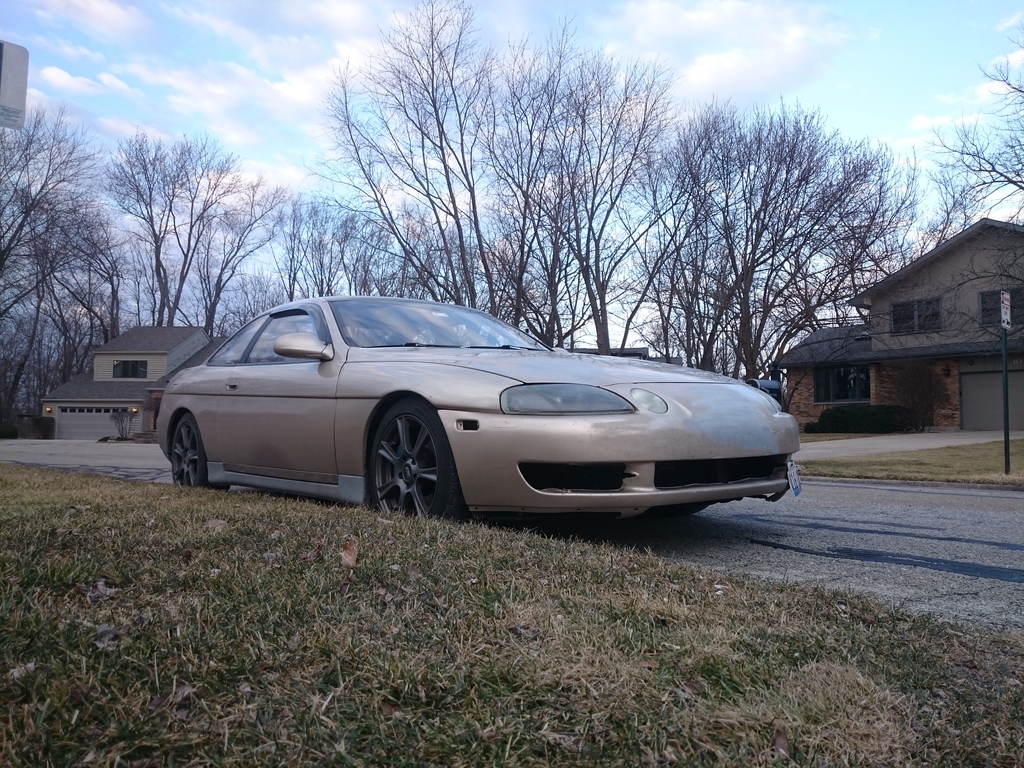
92 SC400 cleaning it up geewwddd
 11-04-15, 12:05 PM
#181
Lexus Champion
Thread Starter

so for some weird reason, i'm guessing colder weather, the paint on the upper part of the door decided to just completely turn gray and peel off...
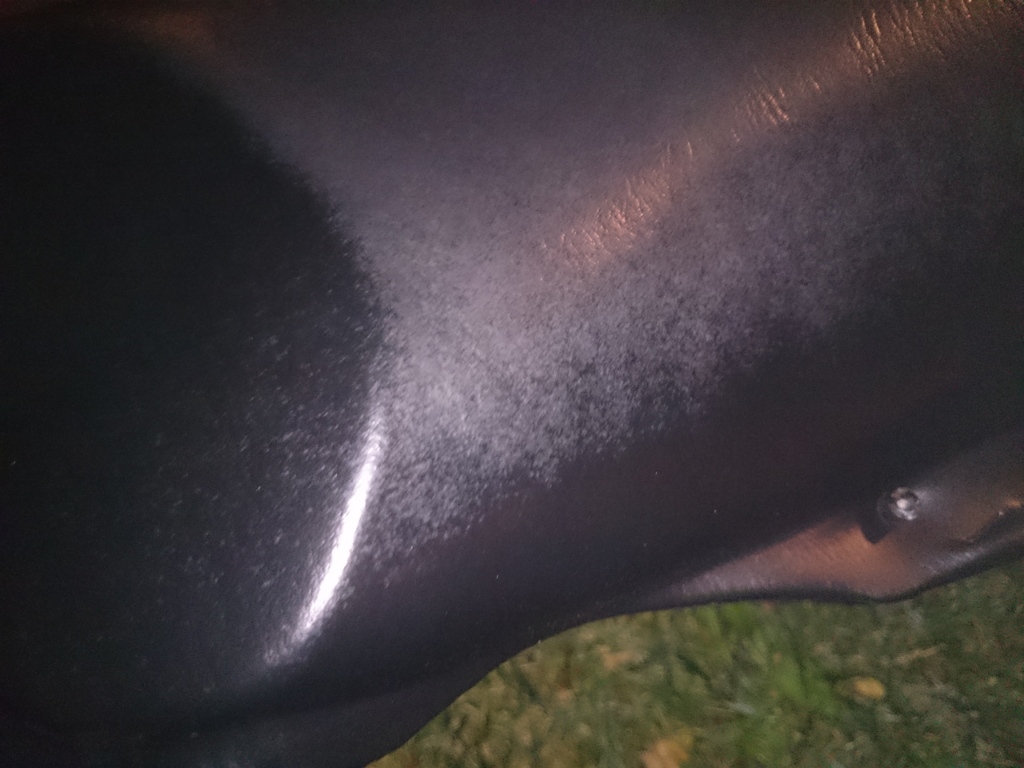
so i'm gonna have to redo the passenger door, and part of the driver side door. really upset about this. heads up to anyone using this, it's really sensitive to temperature, it needs to be above 70, the paint that is.
the wood trims however, turned out pretty awesome, i polished and waxed them and they turned out pretty sweet, a couple had some orange peel but it was a good learning experience since i haven't painted much before.
i'm probably done with painting interior stuff for the winter since the paint is so sensitive and i don't wanna be redoing things twice or three times, so for the rest of the winter i'll be building my headlights and tail lights, ordered tons of fiberglass so let the modding begin


so i'm gonna have to redo the passenger door, and part of the driver side door. really upset about this. heads up to anyone using this, it's really sensitive to temperature, it needs to be above 70, the paint that is.
the wood trims however, turned out pretty awesome, i polished and waxed them and they turned out pretty sweet, a couple had some orange peel but it was a good learning experience since i haven't painted much before.

i'm probably done with painting interior stuff for the winter since the paint is so sensitive and i don't wanna be redoing things twice or three times, so for the rest of the winter i'll be building my headlights and tail lights, ordered tons of fiberglass so let the modding begin
 11-10-15, 08:05 AM
#182
Lexus Champion
Thread Starter
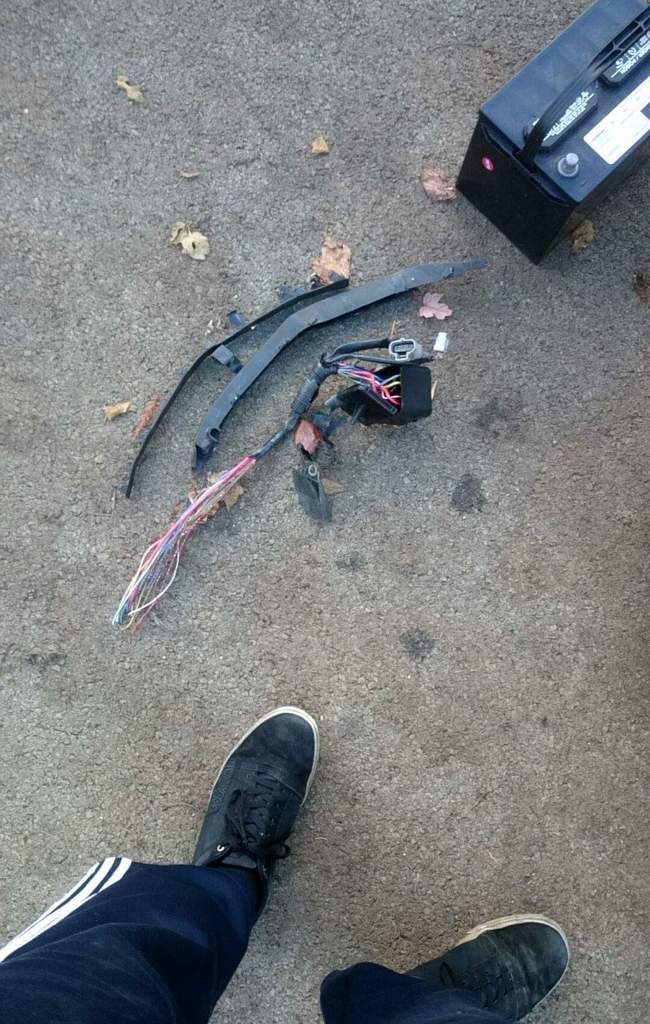
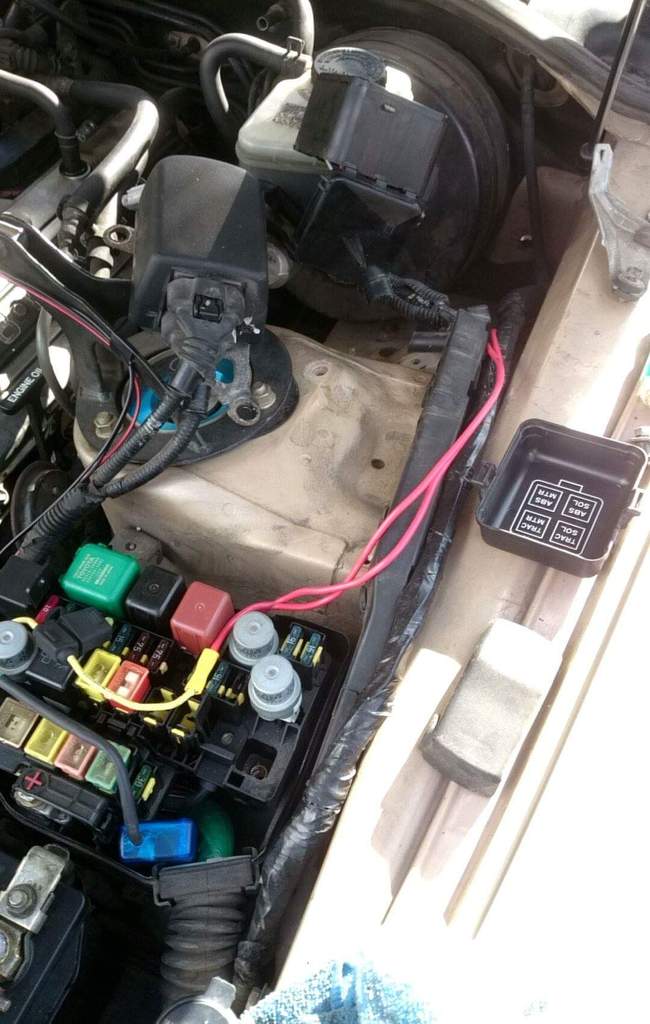
here's how the car is looking right now, removed the last remaining pieces of the ABS system with all these relays and some of the wire harness, still gotta do the same on the other side, i think i'll try to remove all of the ABS wiring that went to the ABS ECU, wonder if it's doable.
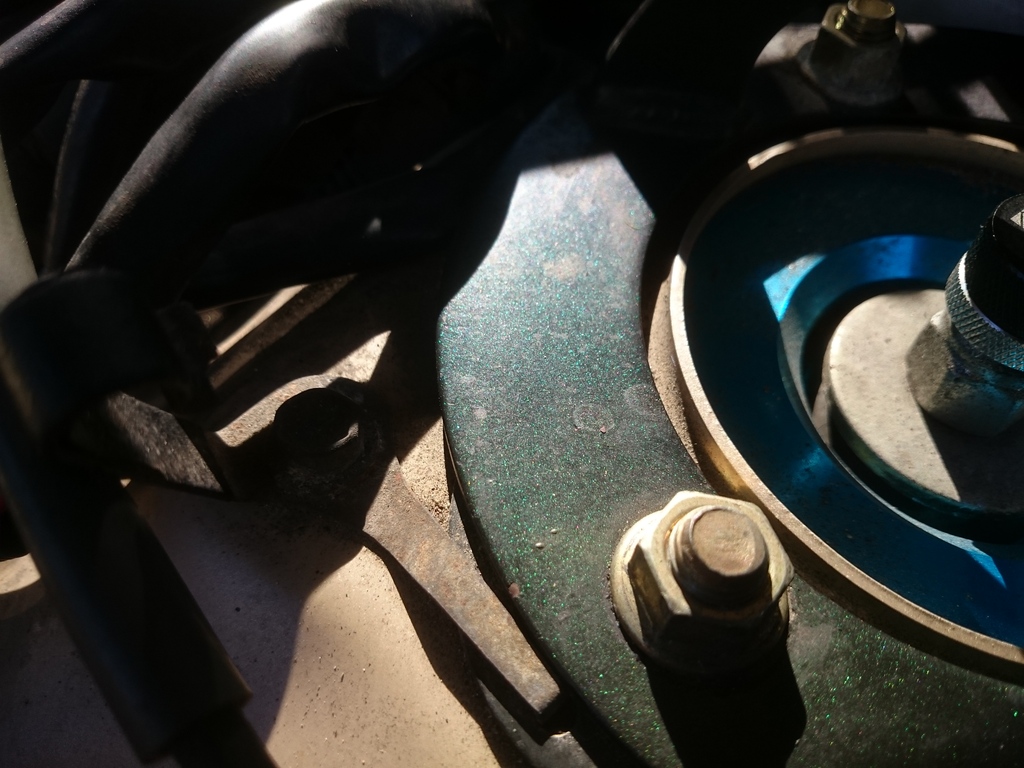
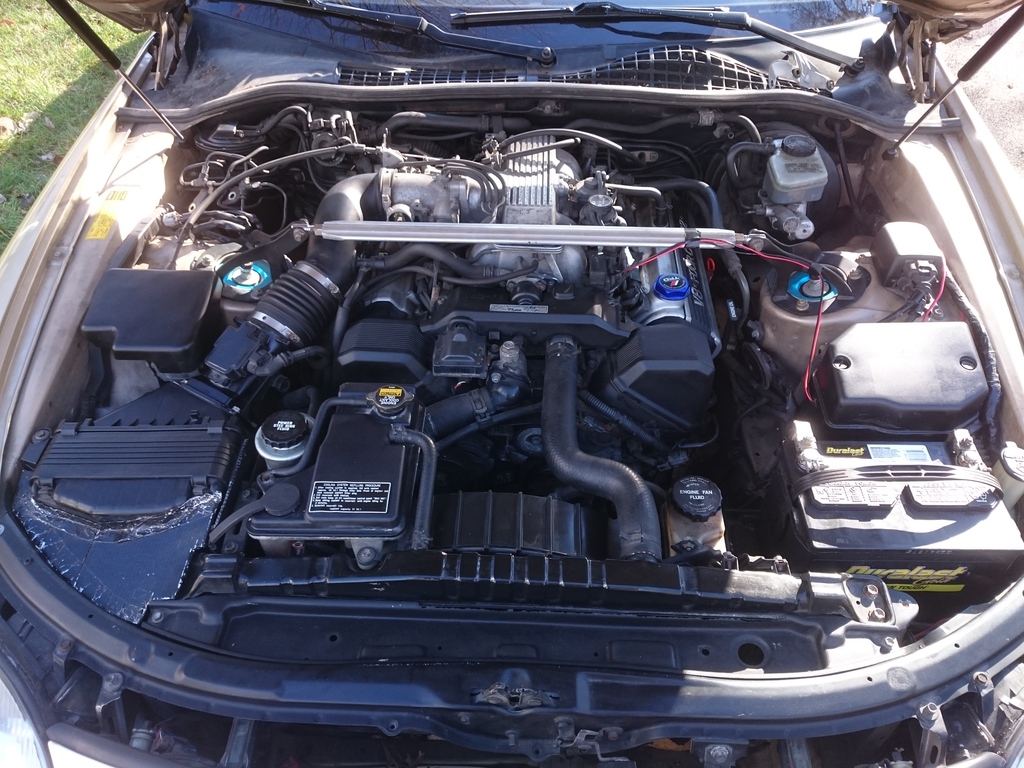
cleaned up my bay a little with silicon spray, and realized my strut brace, after cleaning it, is actually green and not black lol
so interior is nearly done, but it's too cold to finish, the vinyl paint is really really sensitive to cold and humidity so i can't really finish anything this year unless i could do it inside somewhere, which is doubtful. still haven't done the timing belt hopefully i will this month.


cleaned up my bay a little with silicon spray, and realized my strut brace, after cleaning it, is actually green and not black lol


so interior is nearly done, but it's too cold to finish, the vinyl paint is really really sensitive to cold and humidity so i can't really finish anything this year unless i could do it inside somewhere, which is doubtful. still haven't done the timing belt
hopefully i will this month.
11-17-15, 08:09 AM
#183
Lexus Champion
Thread Starter
Put the hawk pads on, brakes are now really squishy, have a tiny leak on one of the bleeder valves that seems to be getting worse, i took the valve out and it looked fine, no scratches on it, everything seemed fine, i don't get why it's leaking, hopefully a new one will fix the issue because i really don't wanna buy a new caliper right now, i'm trying to save money, not dump more into this car. also the clunking is just getting awful now. i checked everything and there's absolutely nothing loose. there's some wiggle back and forth on the tie rod but that's normal right?
11-18-15, 07:43 AM
#184
Lexus Champion
Thread Starter
ok so checked tie rods again after reading up on them, they're horrible, floppy and loose in every direction, now i'm scared, already ordered new ones, so that's the first thing i'll be fixing. rebled the brakes again, can not find any leaks anywhere, even the valve doesn't seem to be leaking anymore after i cleaned it. brakes still soft but seem to be getting better, maybe the cylinders are sticking? i'm thinking i should rebuild my caliper, it doesn't seem very hard, just pull the cylinders out, replace the rubber surround boots and done, since it's recommended not to open up the TT calipers because the inner seals are not sold anywhere that i know of.
11-27-15, 04:02 PM
#185
Lexus Champion
Thread Starter
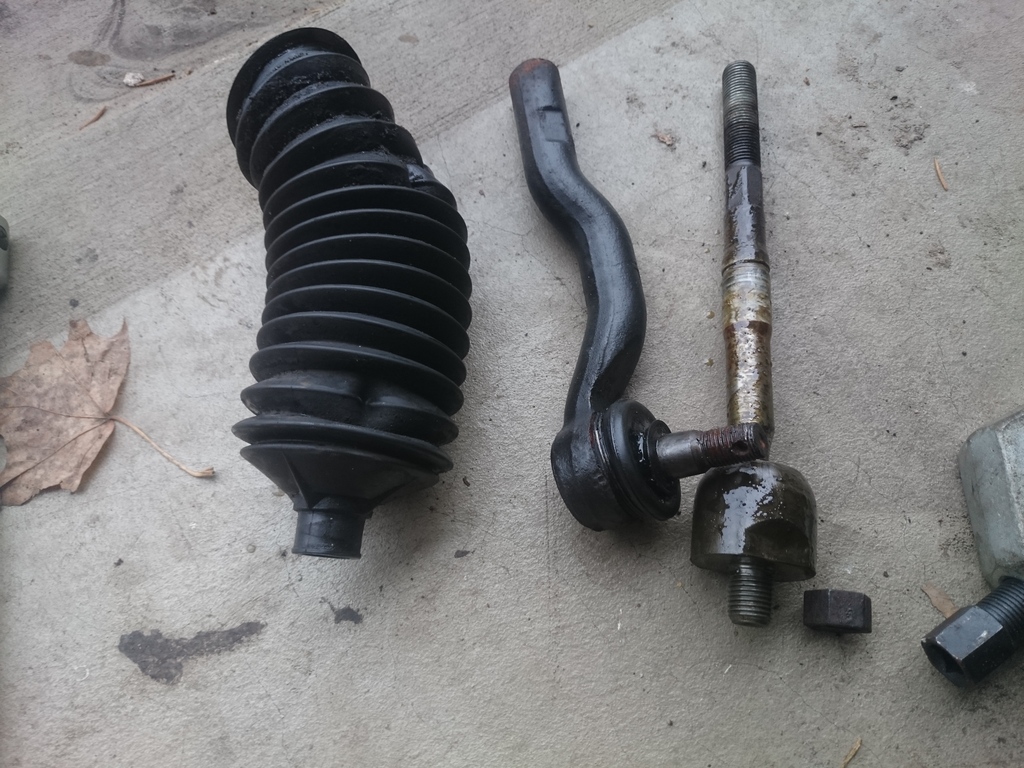
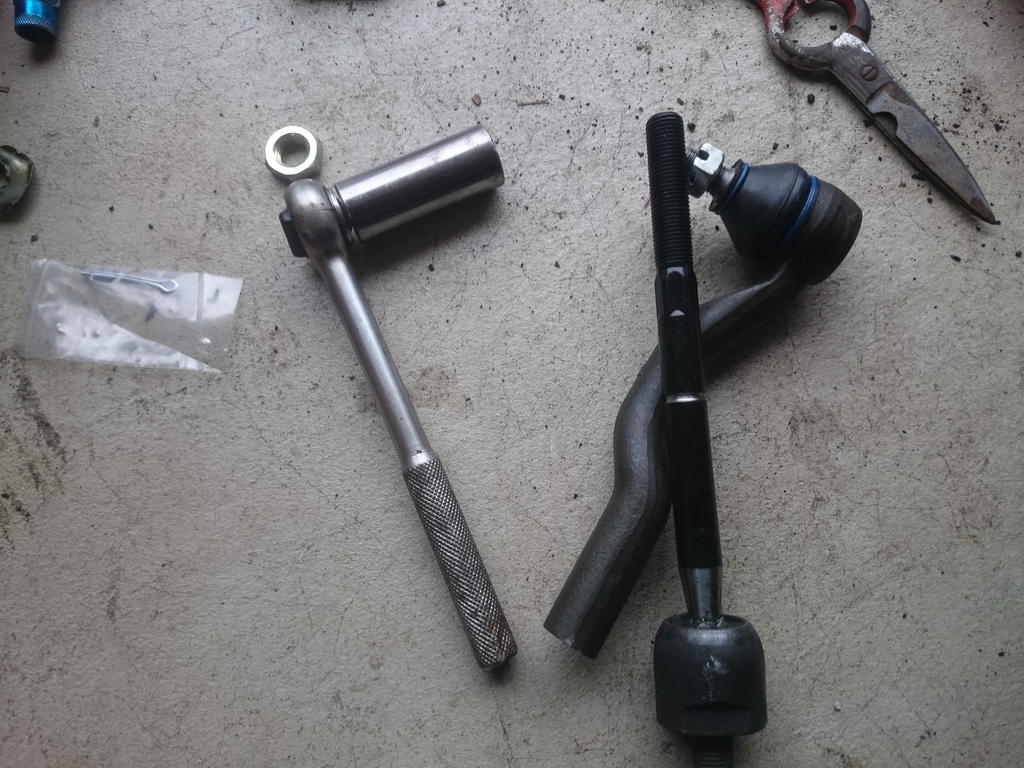
Tie Rod ends changed, realligned, still clunking . ordered new sway bar links already, those were pretty floppy too so hopefully that fixes it. car feels great now though, it's so responsive, smooth and nice to drive i love it.
as for the tie rods, they were completely worn out, the ball joints were floppy and had no tension at all, when i took the passenger side bellow/boot off, tons of fluid came out, it didn't smell like ATF or PS fluid though, but it was brown fluid, so not sure what that was, maybe just dirt and water because the boot had a hole in it and it's been raining non stop here.
OLD
NEW
got my brake rebuild kits, will probably do it tomorrow night, just need to get some more brake fluid. installed a speed bleeder in the problematic caliper and no more leak, i guess that bleeder valve just didn't wanna work. i'm surprised the speed bleeder actually works, some air came out obviously because i had to replace it, but the bubble just stayed at the tip of the bleeder when i let go of the brake pedal, it would not go back in the brake, which was awesome. i got them off rock auto they were only 9 dollars for 2. as for the rebuild kits i got centric rebuild kit, i've heard people using them a lot on the supra forums.
. ordered new sway bar links already, those were pretty floppy too so hopefully that fixes it. car feels great now though, it's so responsive, smooth and nice to drive i love it. as for the tie rods, they were completely worn out, the ball joints were floppy and had no tension at all, when i took the passenger side bellow/boot off, tons of fluid came out, it didn't smell like ATF or PS fluid though, but it was brown fluid, so not sure what that was, maybe just dirt and water because the boot had a hole in it and it's been raining non stop here.
OLD

NEW

got my brake rebuild kits, will probably do it tomorrow night, just need to get some more brake fluid. installed a speed bleeder in the problematic caliper and no more leak, i guess that bleeder valve just didn't wanna work. i'm surprised the speed bleeder actually works, some air came out obviously because i had to replace it, but the bubble just stayed at the tip of the bleeder when i let go of the brake pedal, it would not go back in the brake, which was awesome. i got them off rock auto they were only 9 dollars for 2. as for the rebuild kits i got centric rebuild kit, i've heard people using them a lot on the supra forums.
01-31-16, 08:20 PM
#186
Lexus Champion
Thread Starter
Well changed the sway bar links in the front finally and the clunking has gotten so loud it's unbearable, it's so freaking loud, hopefully sway bar bushings fixes it, that's the next thing I ordered. Also got a few others things, fuel filter, changed the oil, and dizzy caps and rotors and i think that's it.
I've been losing interest in the car because it's all maintenance and no fun, and since the body isn't clean and interior sucks I'm kinda just wanting a new car, specifically FRS, but I'm waiting to see the 2017 face lift and power increase so I'll still be holding on to this car for a while.
The after market for this car, compared to the FRS, is basically non existent, i can't believe the amount of options FRS guys and I'm feeling envious lol. I'm still gonna maintain this car and then probably part it out, so we'll see where this year takes us.
02-07-16, 11:50 AM
#187
Lexus Champion
Thread Starter
sway bar link noise was 1 loose bolt on the pass side sway bar link, tightened that down, changed the sway bar bushings and all my noises and clunks are gone. now i'm gonna try to wire up an amp with the stock wiring cz i'm too lazy to feed wires to all the speakers.
02-08-16, 06:41 PM
#188
Lexus Champion
Thread Starter
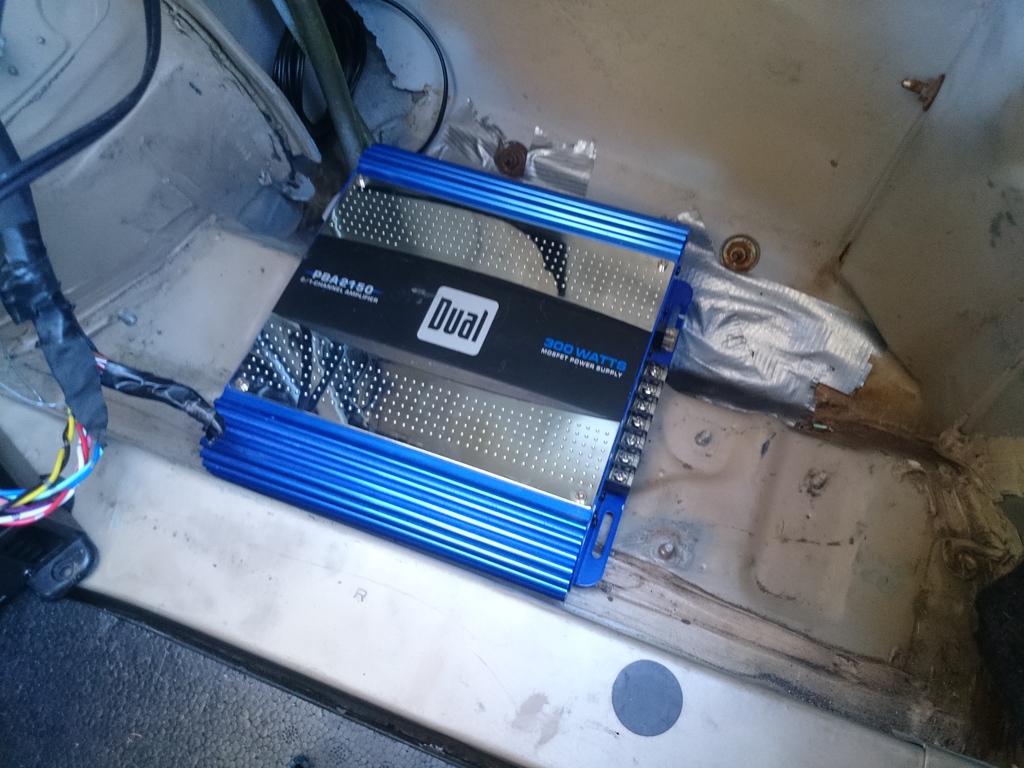
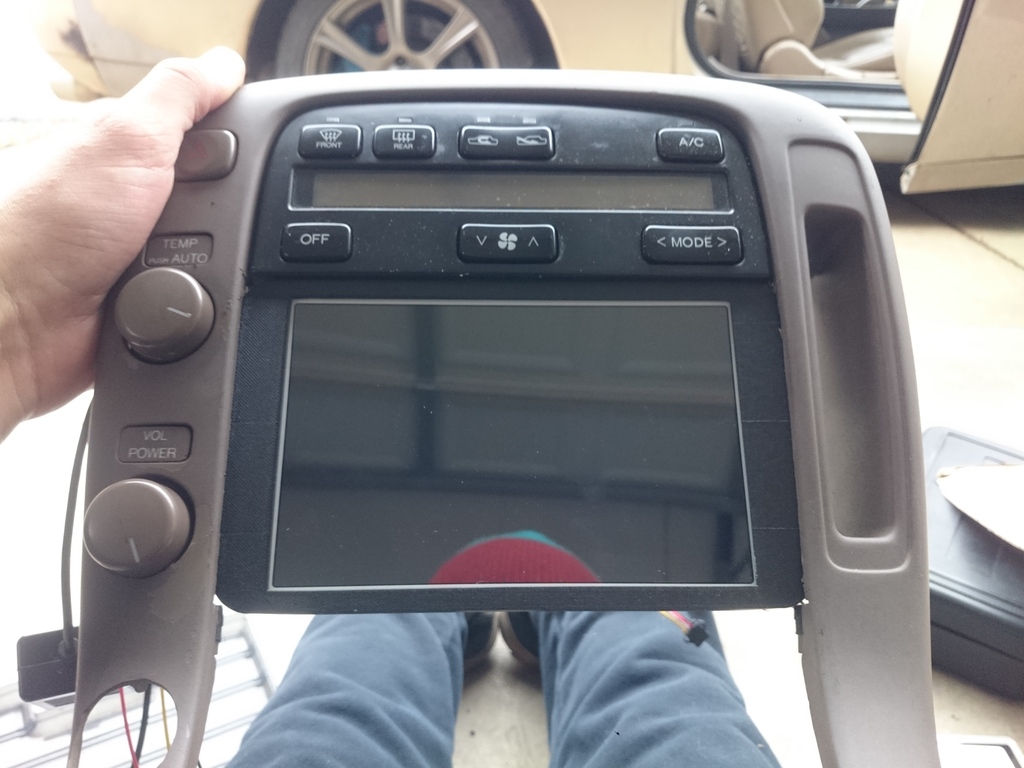
so i got a free 4 channel amp and hooked it up to the stock wiring off the old amp harness. got an RCA to 3.5 Aux adapter and ran a long AUX cable to the front and now have music again!
haven't had music in my car for over a year since my old headunit only played one side for some reason so i tossed it. car has brand new speakers from PO so i knew i didn't need to do anything there. everything is ziptied to the old amp frame so i need to make a better frame to mount everything to. waiting for a few adapters and splitters so i could hook up the sub as well from a separate amp i also got for free lol.
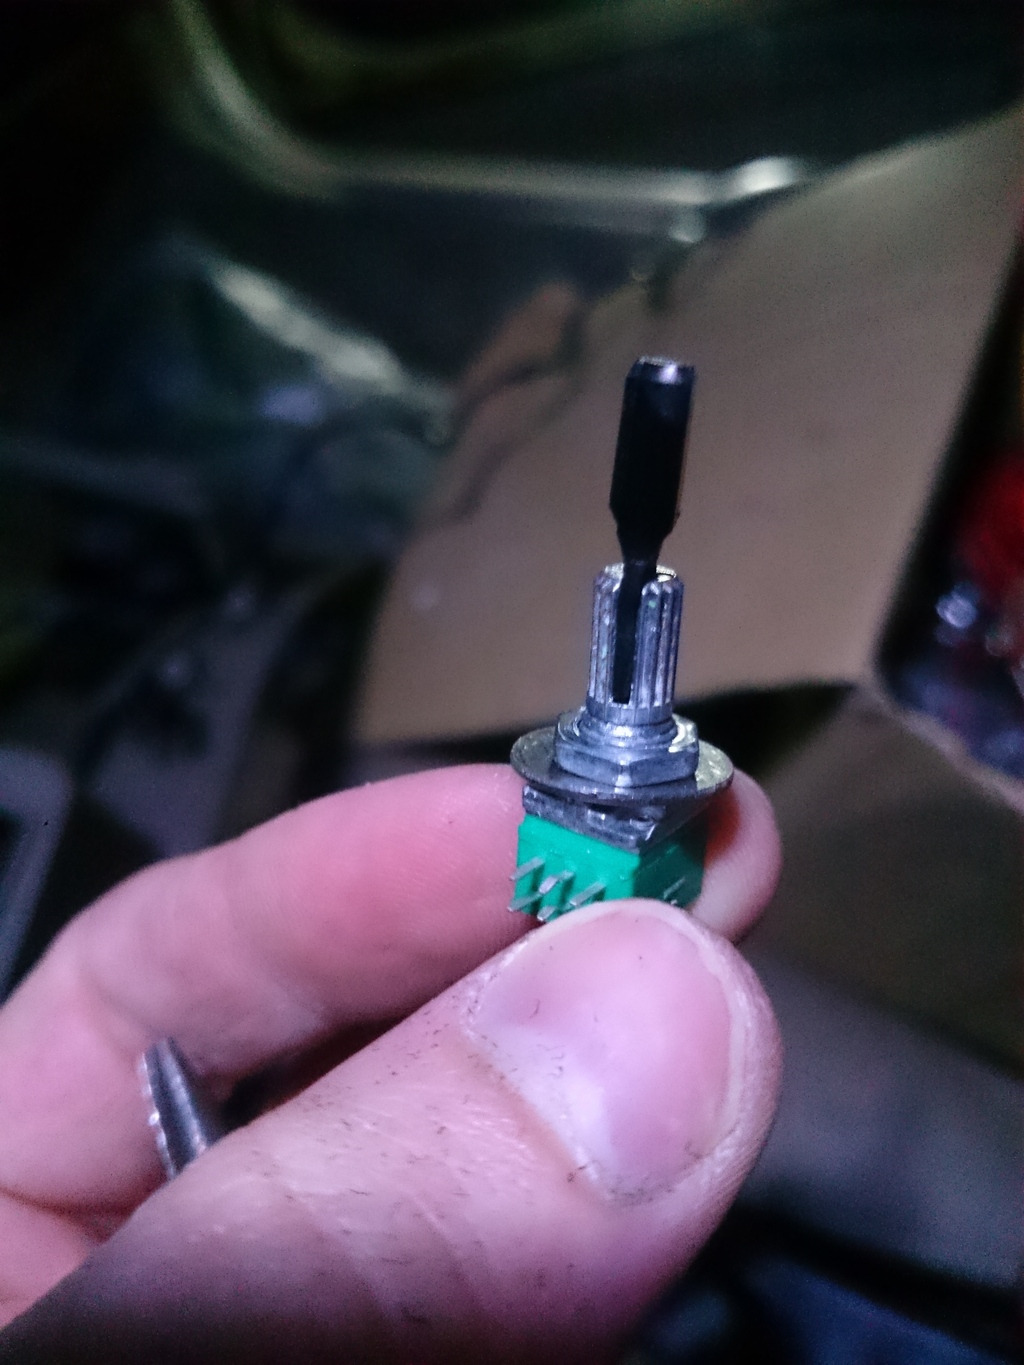
Free sound system why not! i'm also gonna get a potentiometer and try to stuff it in the spot where the original volume **** is and use the original **** for extra stealth points, then get an NFC bluetooth receiver and run it through the pot so i don't have to connect any cords to my phone, just tap and boom connected. i might eventually get a tablet, but we'll see about that since i'm trying to save for a new car anyways so spending on this car is on the down low. i'll get pics up once it's all wired up and clean.
haven't had music in my car for over a year since my old headunit only played one side for some reason so i tossed it. car has brand new speakers from PO so i knew i didn't need to do anything there. everything is ziptied to the old amp frame so i need to make a better frame to mount everything to. waiting for a few adapters and splitters so i could hook up the sub as well from a separate amp i also got for free lol.
Free sound system why not! i'm also gonna get a potentiometer and try to stuff it in the spot where the original volume **** is and use the original **** for extra stealth points, then get an NFC bluetooth receiver and run it through the pot so i don't have to connect any cords to my phone, just tap and boom connected. i might eventually get a tablet, but we'll see about that since i'm trying to save for a new car anyways so spending on this car is on the down low. i'll get pics up once it's all wired up and clean.
02-22-16, 02:26 PM
#189
Lexus Champion
Thread Starter
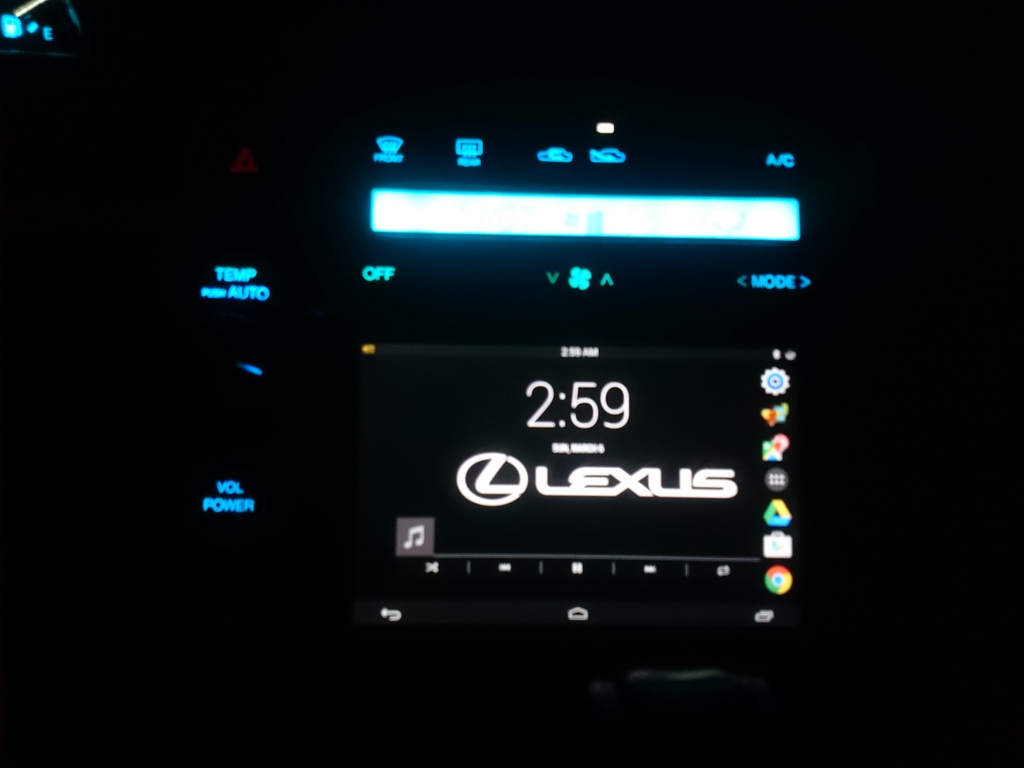
i got music!!!!!!!!
finally hooked up the amps and speakers and the sub! got a potentiometer and tablet today, hopefully i'll install those this weekend, weather looks like it will be decent enough.
now some pictures!
made a bracket from the old amp bracket and i cut a piece of the false floor from the rear seat (removed cz weight reduction bro)
drilled some holes and stuck some screws and nuts through the 2 to hold them together, one of the bolts doubled as a mounting point for one of the amps
first went the sub amp
then the bracket on top
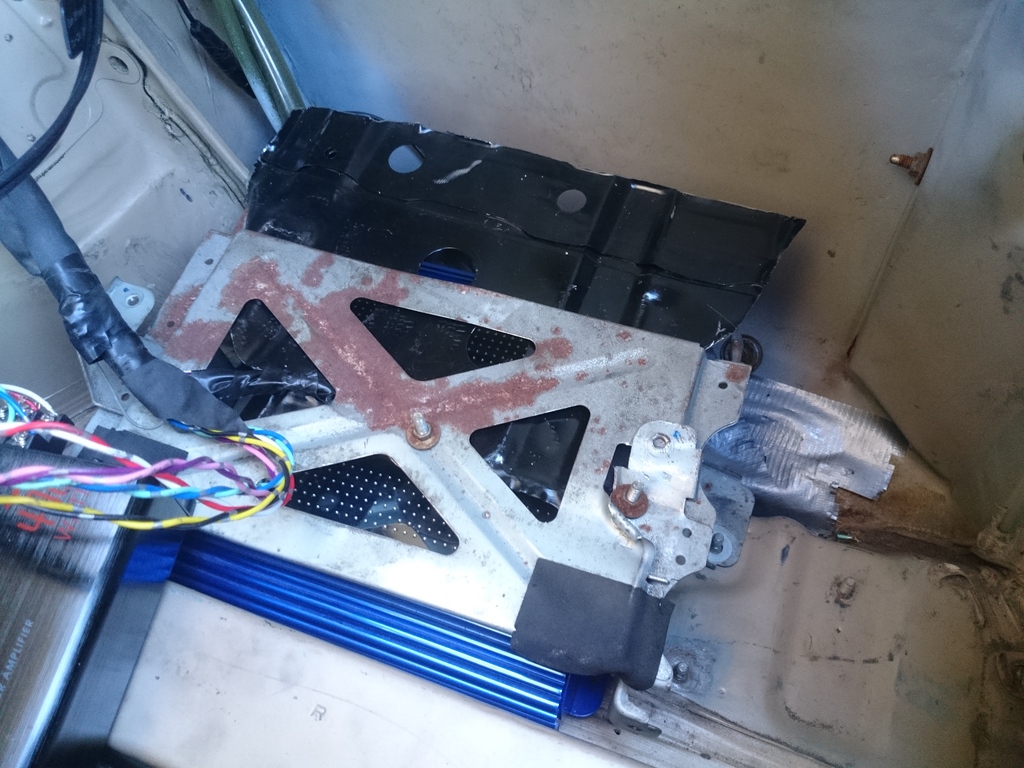
and the speaker amp on top!
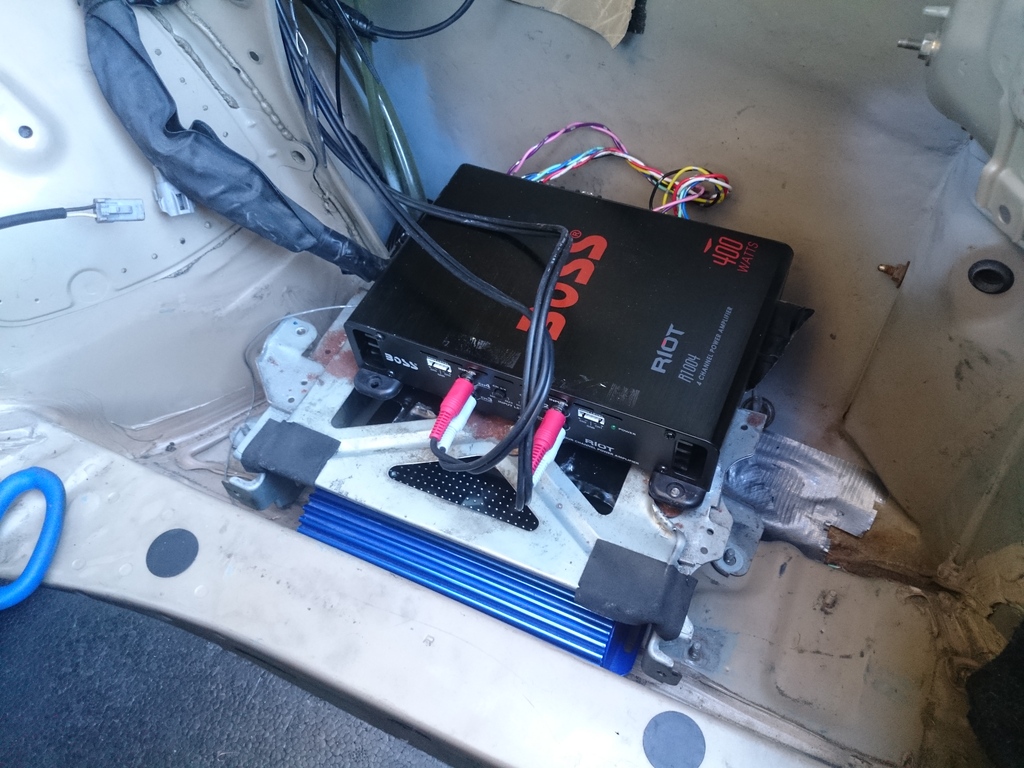
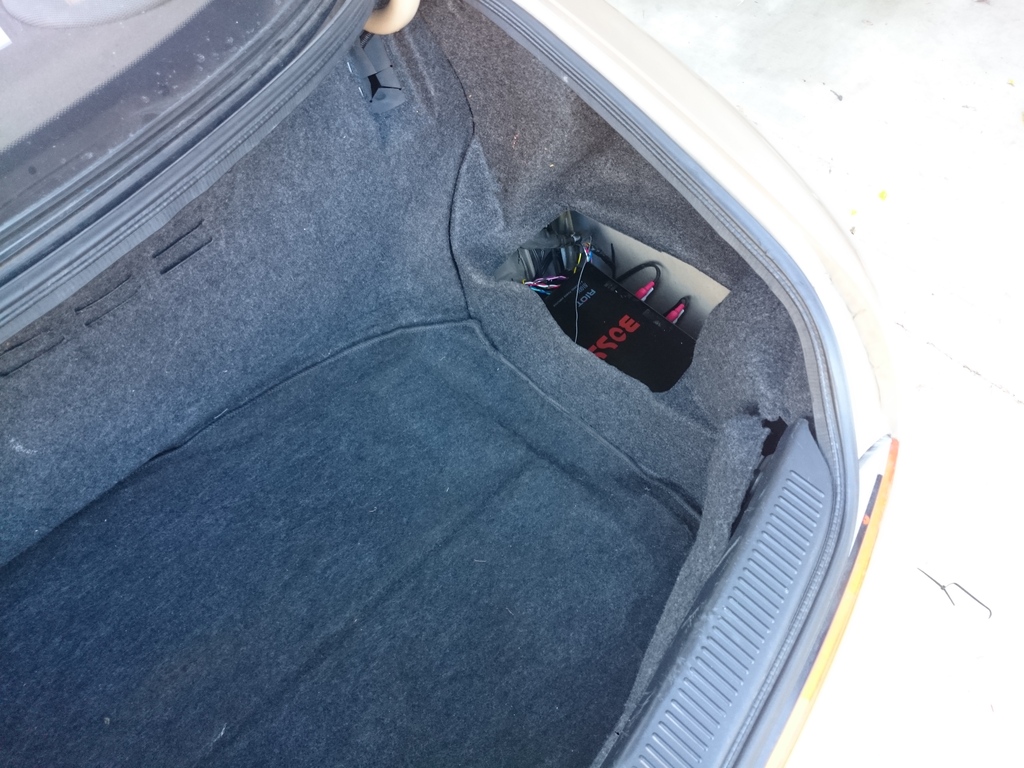
and the finished product!
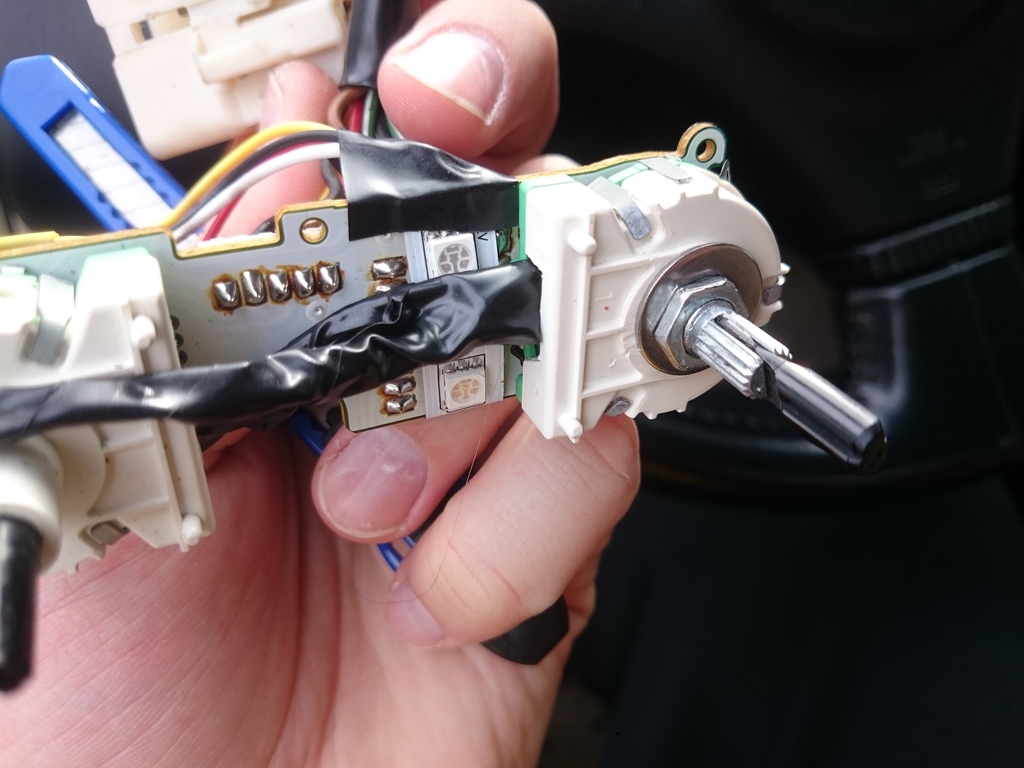
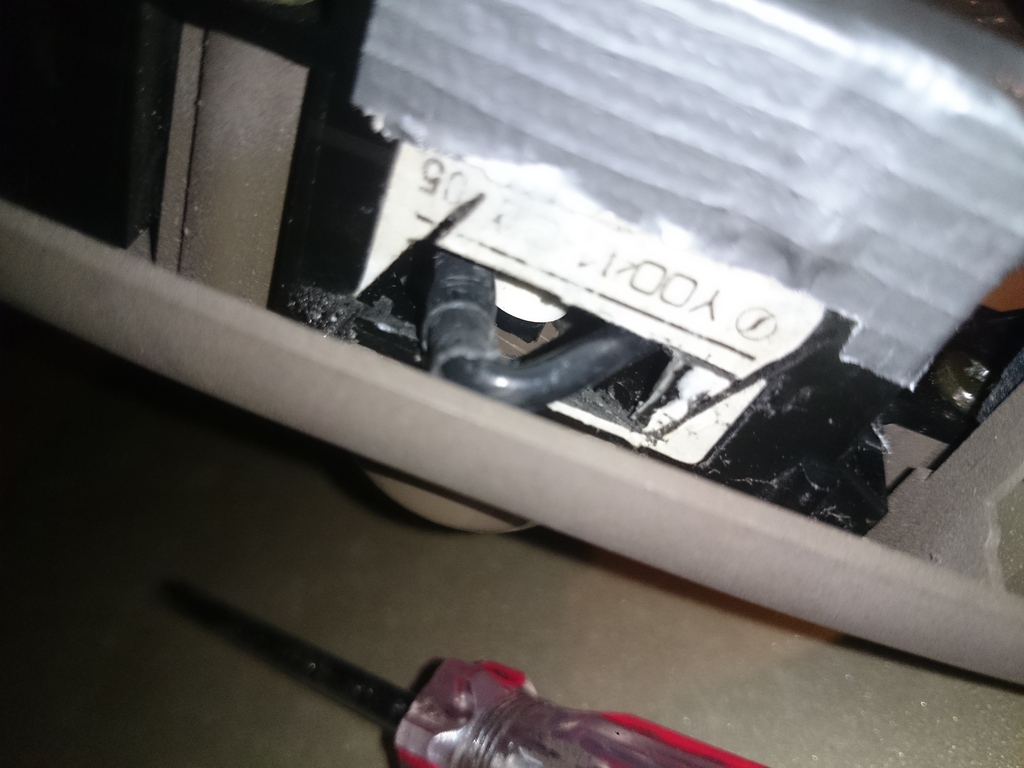
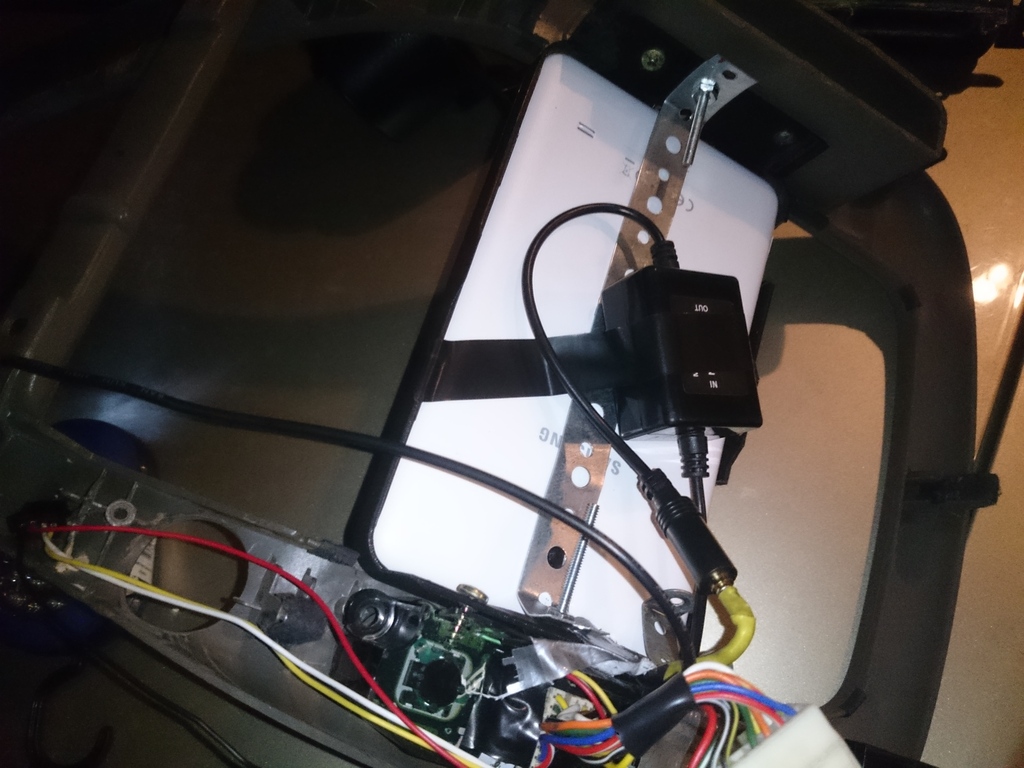
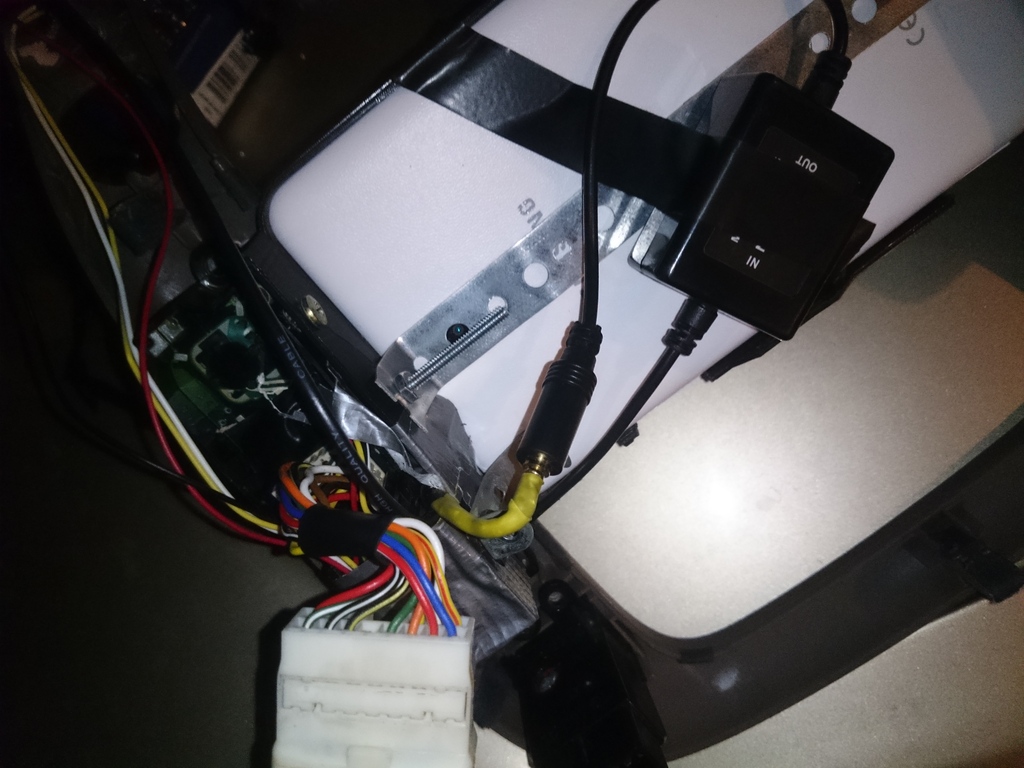
if anyone is wondering how i wired up the speakers i actually used the original wiring from the old amp, it's very easy, i just cut the harness and plugged everything into the amp. i then found a 12v source from another harness, which happened to be a little gray wire and used that as a remote to turn the amps on and off. ran the power wire from the battery and used a little distribution block to power the amps.
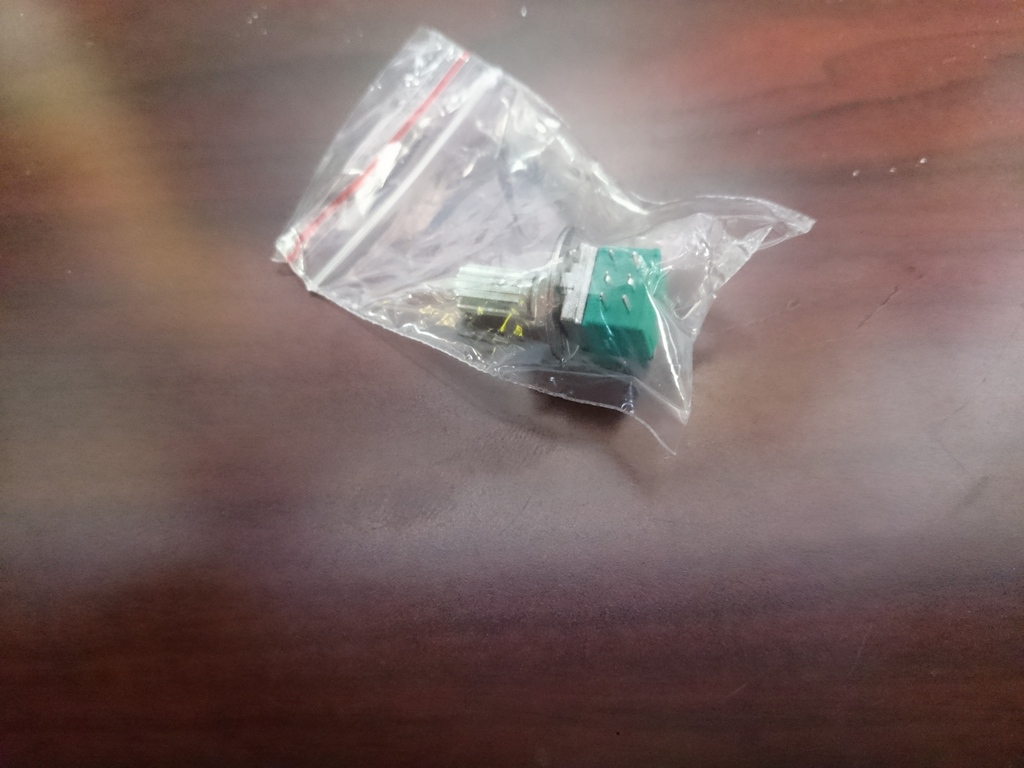
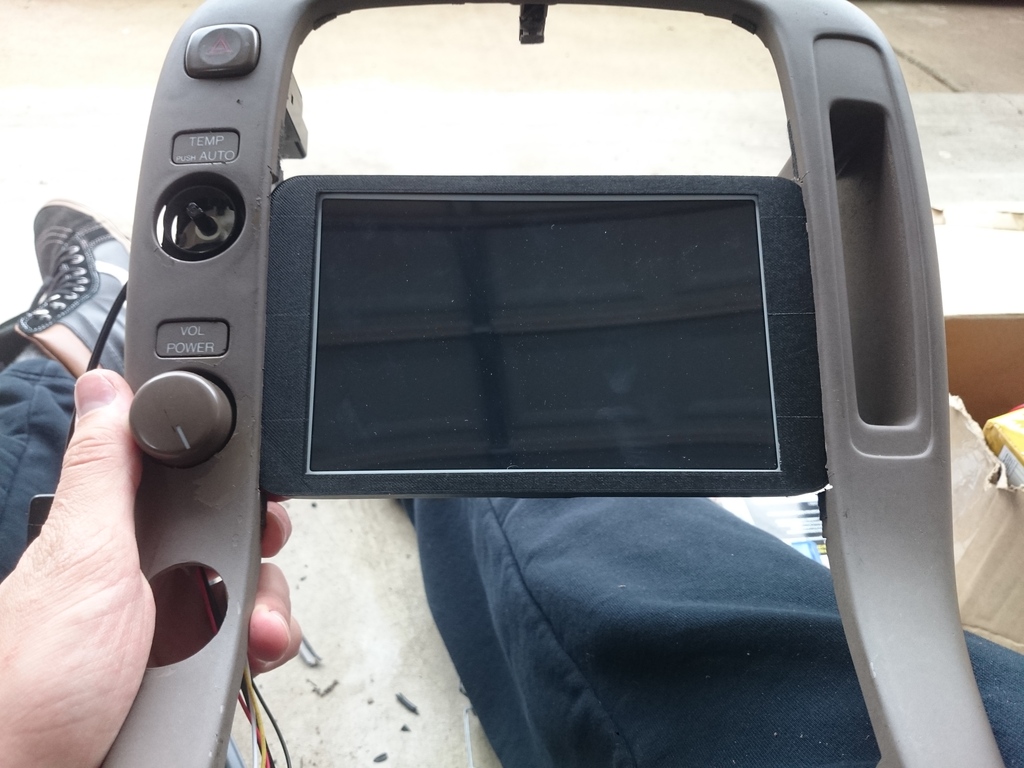
as for the inputs to the amps, i used a 20ft aux cable run to the front which i'll then wire a pot to to control volume,
here's the pot
the aux cord goes to 2 aux splitters which are then connected to 3 aux to RCA adapters which are connected to the amps and done!. now i'm looking for a case for the tablet to 3D print. i'll use the 3D print file to modify it in software to build a bracket to mount the tablet so it's not just hanging there with tape or something.
first i gotta root the tablet and load a custom rom on it to disable the home button because it's a samsung tablet and get some on screen buttons on it. i'm gonna try to find some sort of car rom maybe that's used for android head units.
finally hooked up the amps and speakers and the sub! got a potentiometer and tablet today, hopefully i'll install those this weekend, weather looks like it will be decent enough.
now some pictures!
made a bracket from the old amp bracket and i cut a piece of the false floor from the rear seat (removed cz weight reduction bro)
drilled some holes and stuck some screws and nuts through the 2 to hold them together, one of the bolts doubled as a mounting point for one of the amps

first went the sub amp

then the bracket on top

and the speaker amp on top!

and the finished product!

if anyone is wondering how i wired up the speakers i actually used the original wiring from the old amp, it's very easy, i just cut the harness and plugged everything into the amp. i then found a 12v source from another harness, which happened to be a little gray wire and used that as a remote to turn the amps on and off. ran the power wire from the battery and used a little distribution block to power the amps.
as for the inputs to the amps, i used a 20ft aux cable run to the front which i'll then wire a pot to to control volume,
here's the pot

the aux cord goes to 2 aux splitters which are then connected to 3 aux to RCA adapters which are connected to the amps and done!. now i'm looking for a case for the tablet to 3D print. i'll use the 3D print file to modify it in software to build a bracket to mount the tablet so it's not just hanging there with tape or something.
first i gotta root the tablet and load a custom rom on it to disable the home button because it's a samsung tablet and get some on screen buttons on it. i'm gonna try to find some sort of car rom maybe that's used for android head units.
02-29-16, 08:53 AM
#190
Lexus Champion
Thread Starter
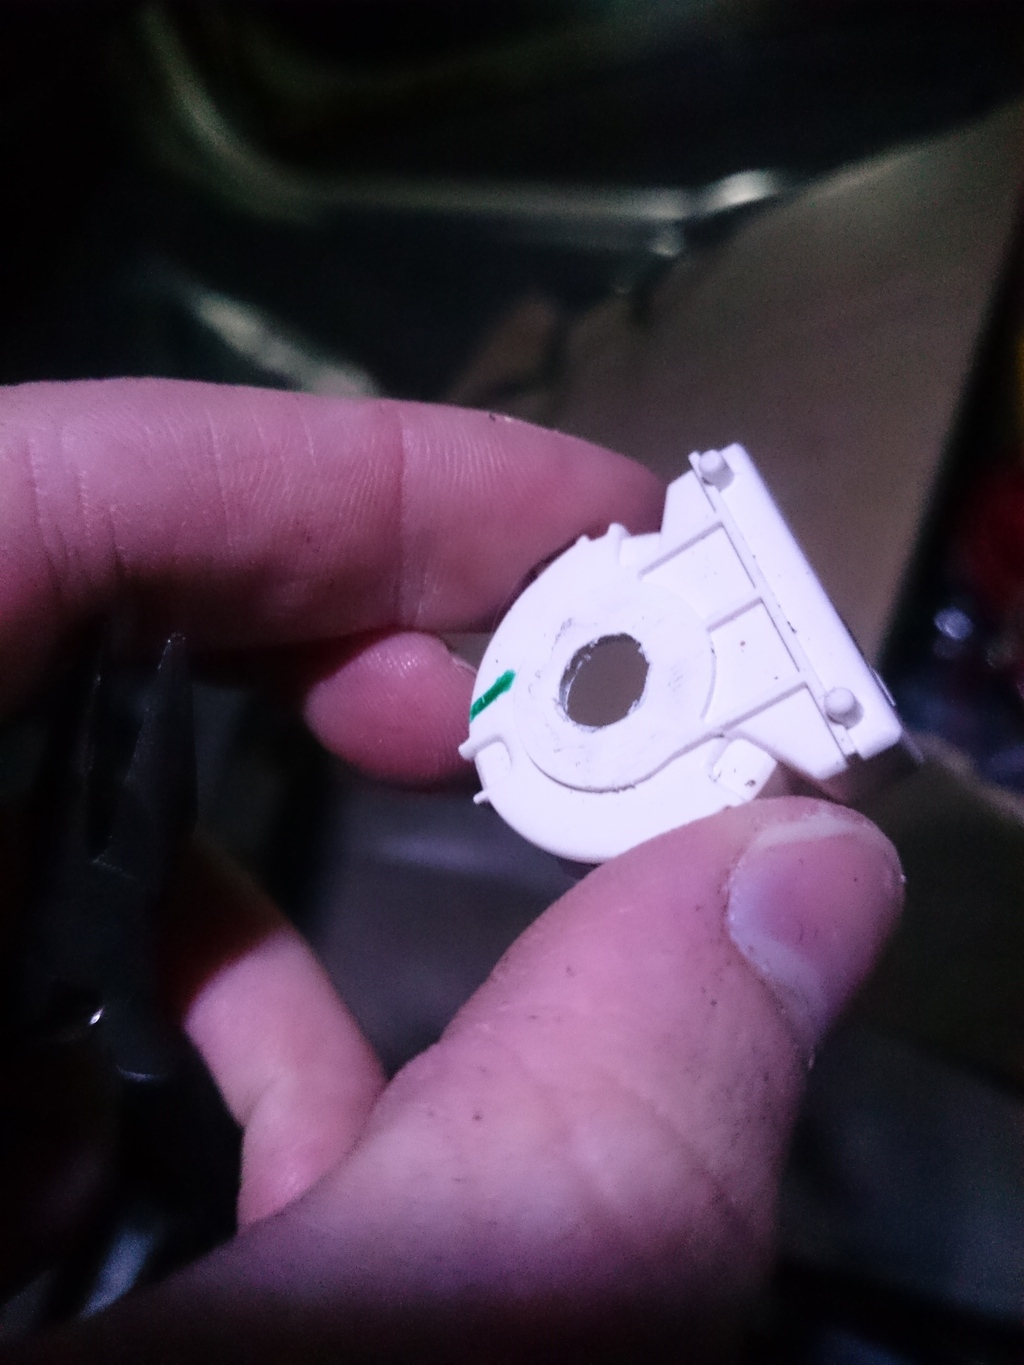
so installed the volume **** this weekend, was actually pretty easy and went smoothly! next up is the tablet itself! almost done modeling the case, just have to think of a latch mechanism to hold it inside the case. besides that nothing else positive.
took the old volume **** shaft grinded it down and fit it inside the new Pot
then also modified the old housing to make the hole bigger
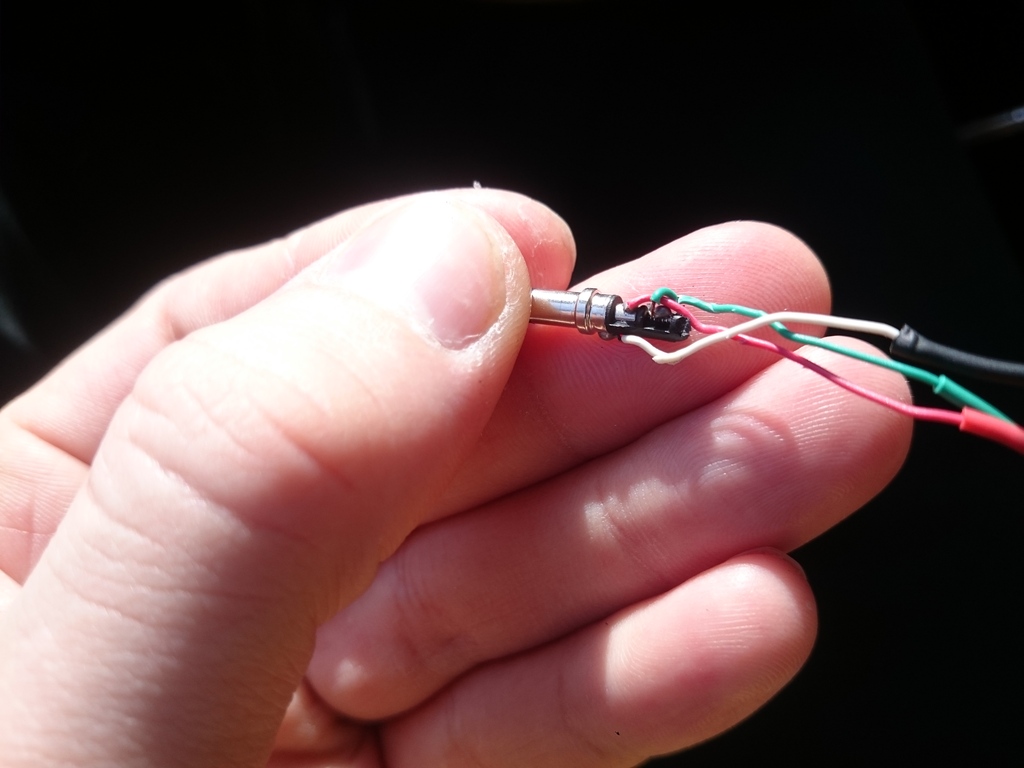
completely stripped the aux down to nothing then heat shrunk it so it takes up the least amount of room possible
here's how it looks all closed up and packed away
still looking bummy as ever
more great news, my window track broke, was at the ATM, put the window down and halfway through heard a crunch sound and the window dropped. I managed to get it up all the way and stuck some suction cups on the window and let it rest on the window trim. so gonna have to look what happened there.
took the old volume **** shaft grinded it down and fit it inside the new Pot

then also modified the old housing to make the hole bigger

completely stripped the aux down to nothing then heat shrunk it so it takes up the least amount of room possible

here's how it looks all closed up and packed away

still looking bummy as ever

more great news, my window track broke, was at the ATM, put the window down and halfway through heard a crunch sound and the window dropped. I managed to get it up all the way and stuck some suction cups on the window and let it rest on the window trim. so gonna have to look what happened there.
03-08-16, 05:05 PM
#191
Lexus Champion
Thread Starter
Tablet install!!!!
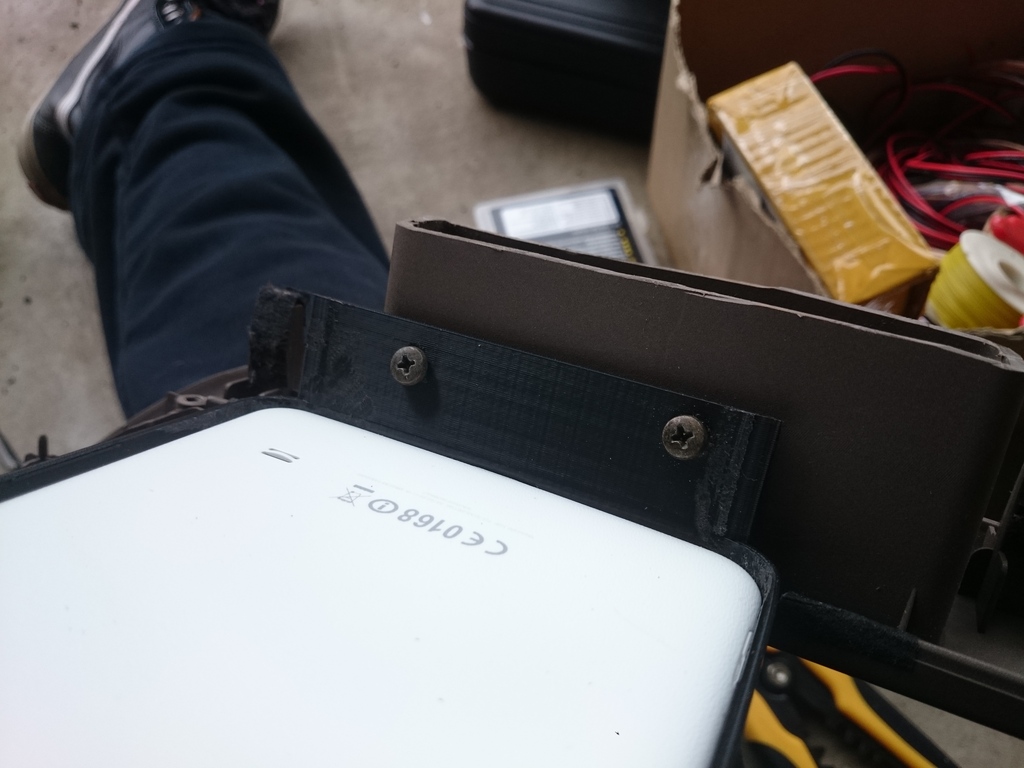
test fit, i will probably print another case, if not i'll just mold this one with some fiberglass and bondo. i want it to be a seamless transition between the center console and the tablet.

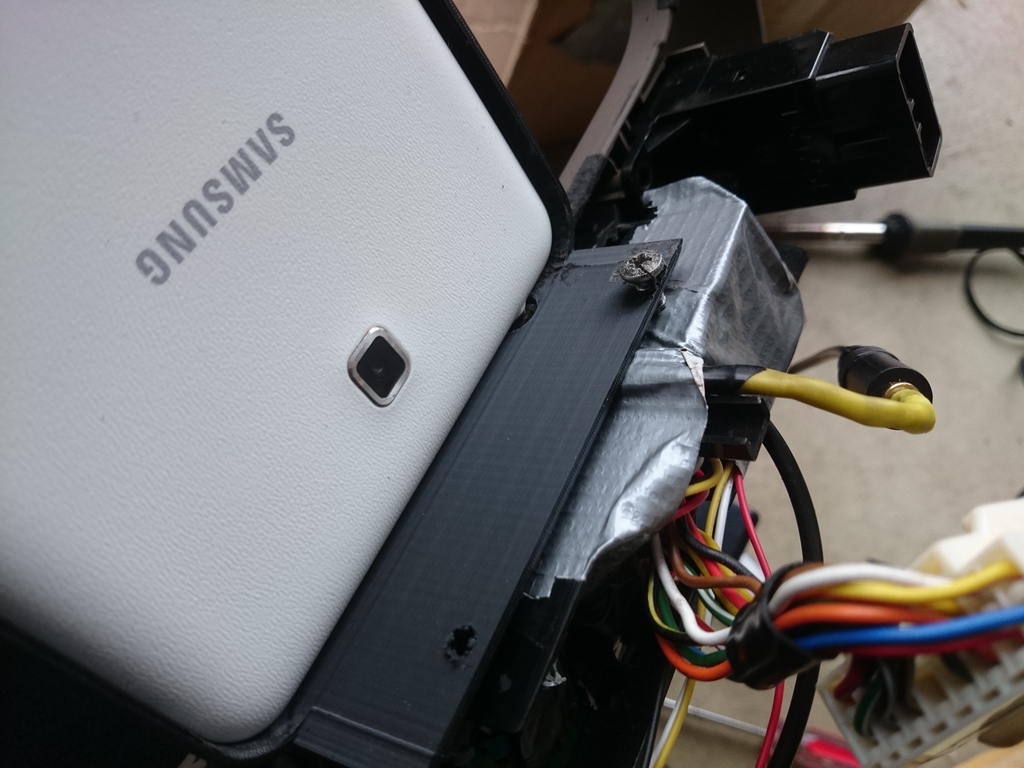
cut the back of the cup holder housing off, gonna run USB and AUX through there for my phone in case i wanna play something else off of it, or if a friend has some tunes.
also, mounted the case just by drilling some holes
duct tape, duct tape everywhere, you're not gonna see it so who cares
perfect fit, except the tiny gaps at the top where the case is beveled, that's why i might print another one with the edges not beveled
had a problem with the original AUX not fitting between the 2 center console pieces, so i snaked it inside the **** housing

also added a bracket to the tablet to make it sit more flush with the case and not move when i'm pressing on it
all installed

next up will be my switch board and filling in all the gaps, then painting it. will probably do Piano black like the wood trim.
test fit, i will probably print another case, if not i'll just mold this one with some fiberglass and bondo. i want it to be a seamless transition between the center console and the tablet.


cut the back of the cup holder housing off, gonna run USB and AUX through there for my phone in case i wanna play something else off of it, or if a friend has some tunes.
also, mounted the case just by drilling some holes

duct tape, duct tape everywhere, you're not gonna see it so who cares

perfect fit, except the tiny gaps at the top where the case is beveled, that's why i might print another one with the edges not beveled

had a problem with the original AUX not fitting between the 2 center console pieces, so i snaked it inside the **** housing


also added a bracket to the tablet to make it sit more flush with the case and not move when i'm pressing on it


all installed


next up will be my switch board and filling in all the gaps, then painting it. will probably do Piano black like the wood trim.
03-13-16, 06:23 PM
#192
Lexus Champion
Thread Starter
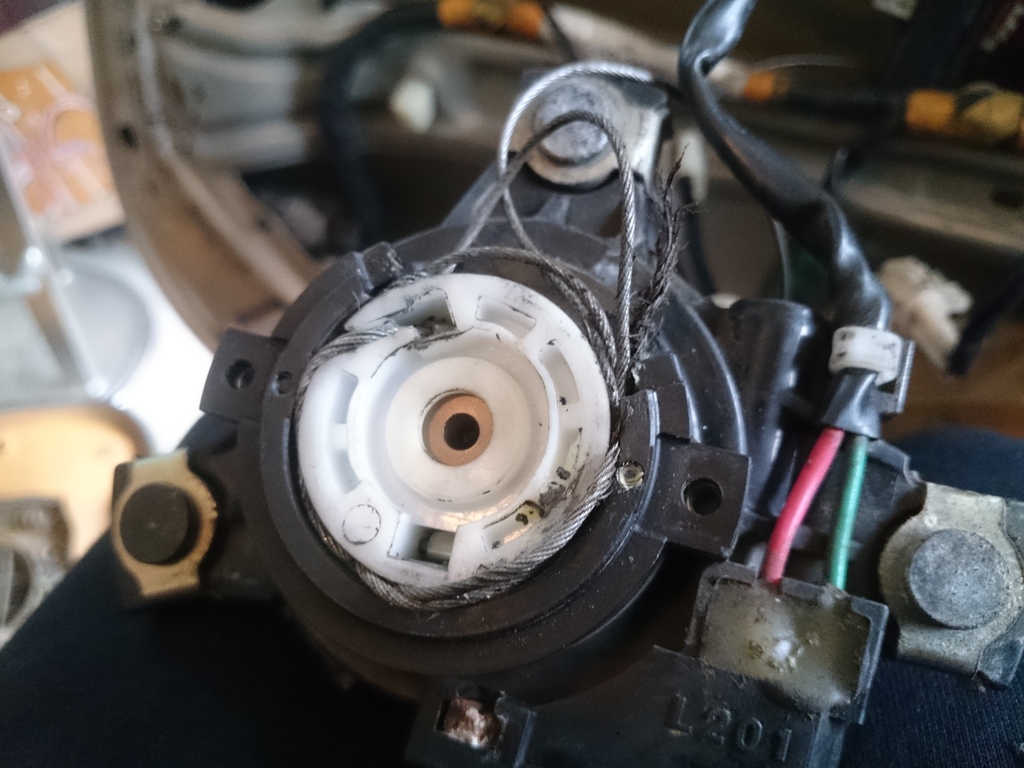
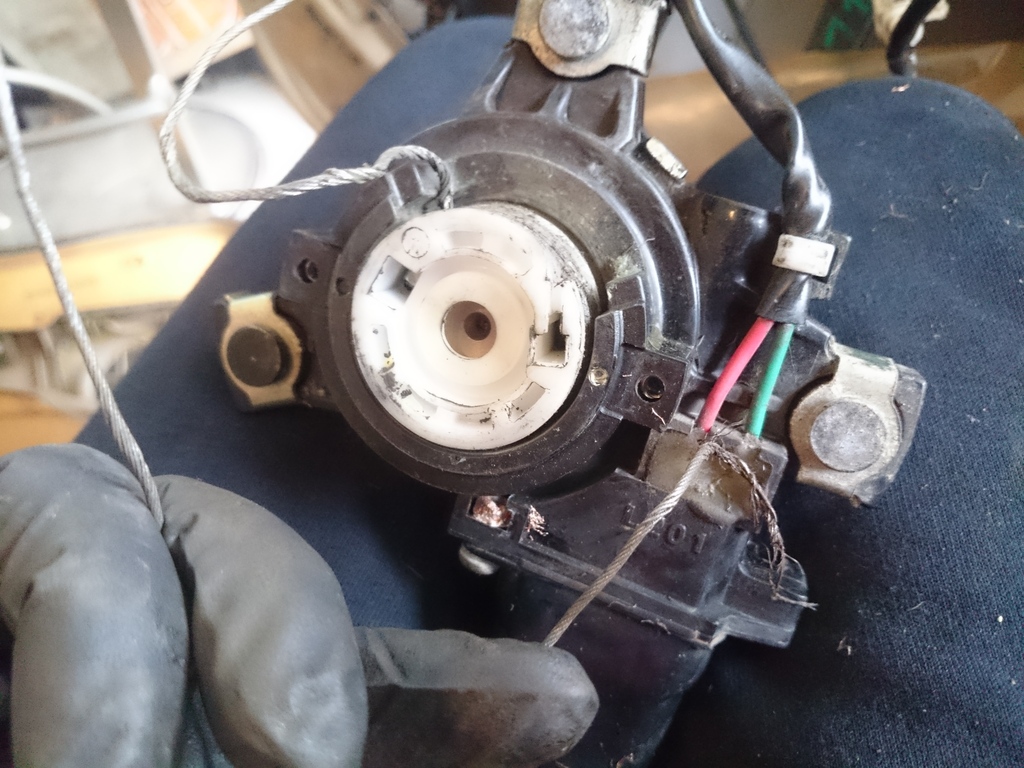
so i figured out my window problem. much worse than i expected
the cable that drives the window up and down broke and got tangled inside the motor. i got it undone and tried to put a new cable in there but just can't keep it from tangling again. no idea why. buddy has a new motor that he'll let me use so hopefully i'll fix that soon.
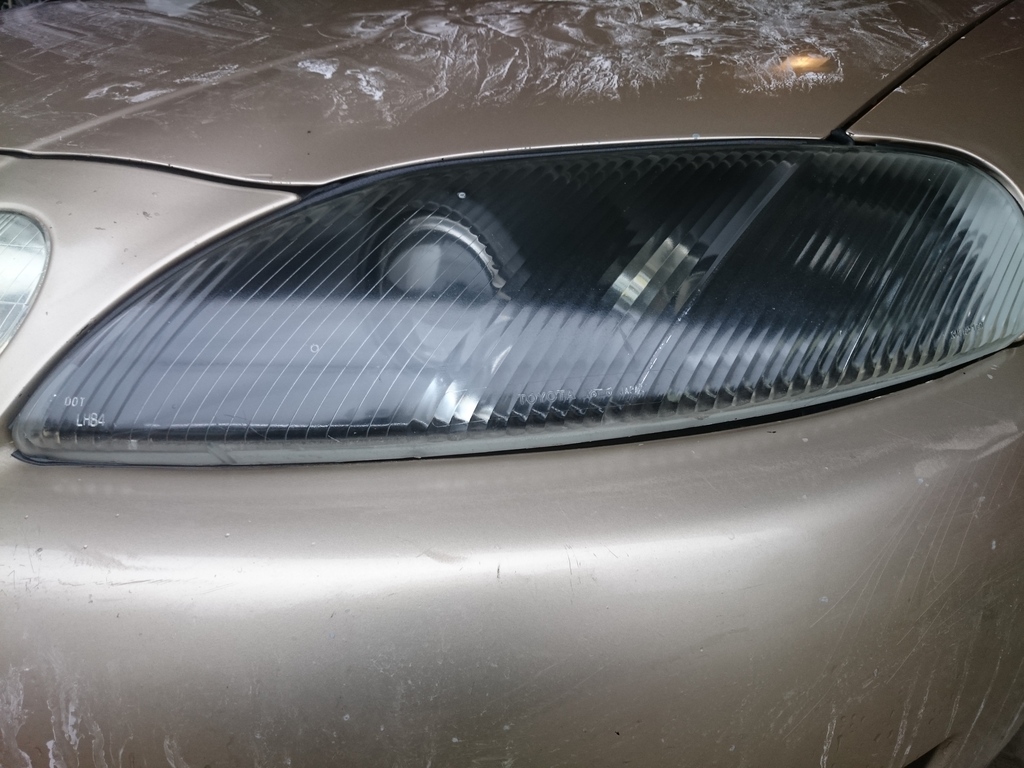
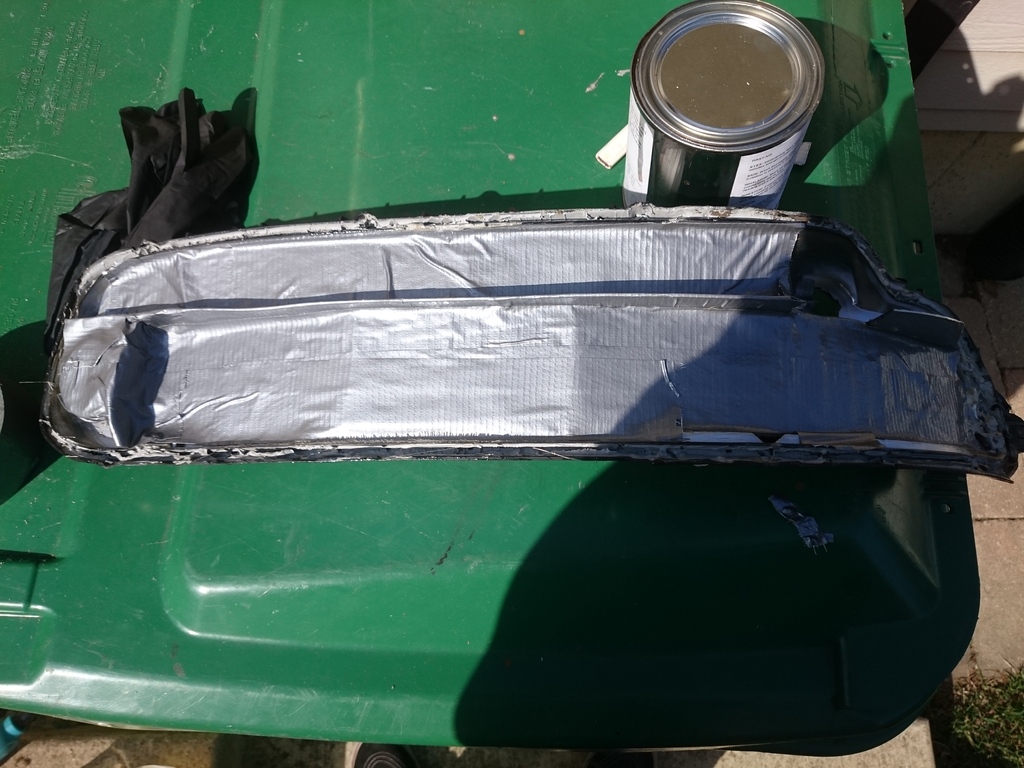
it was raining today so it was the perfect time to wet sand the headlights. also clear coated them and will polish next weekend. the light output is 10000000 times better now.
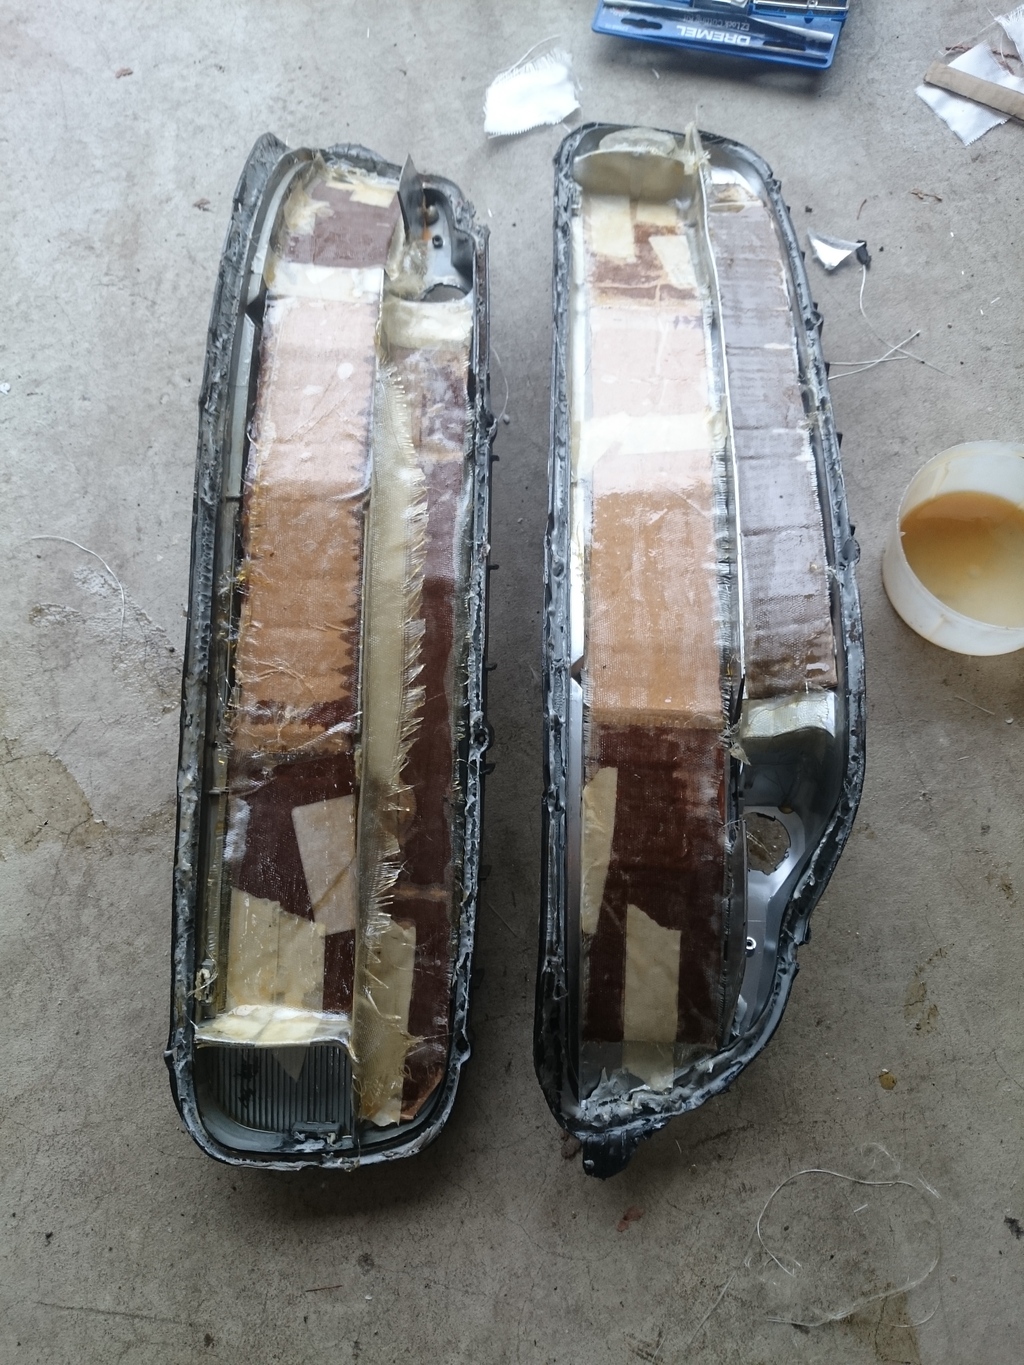
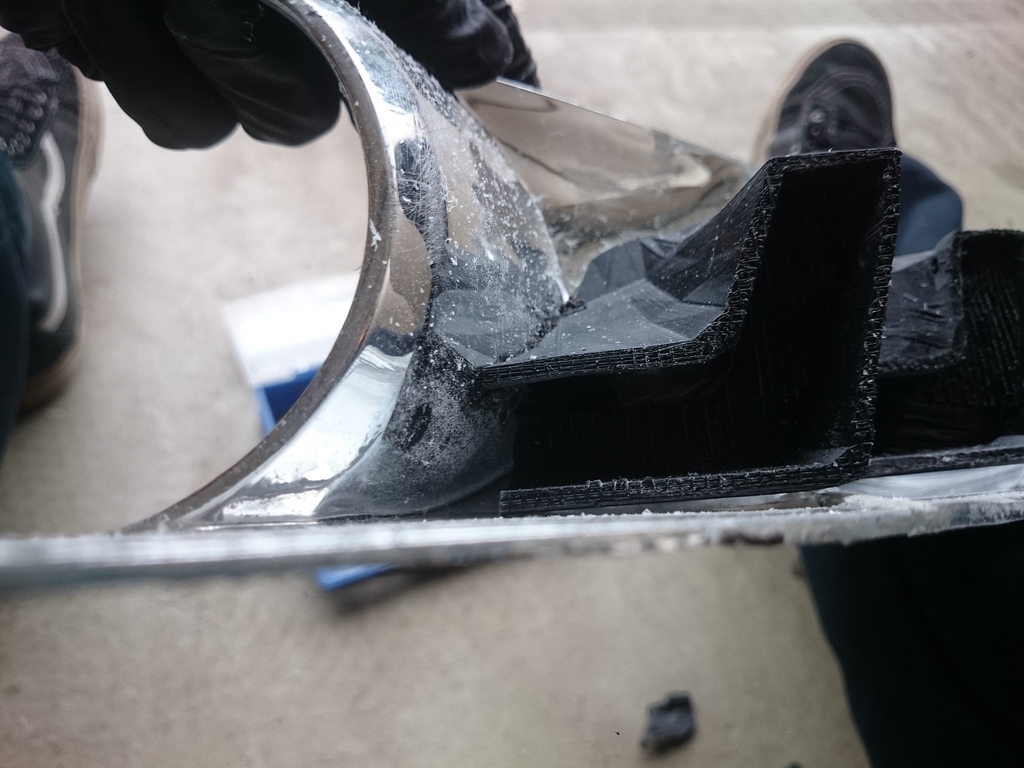
and lastly i started laying fiberglass on my custom tail lights and test fitted another iteration of the headlight build
had to do some trimming, gonna make the adjustments and print another one
the cable that drives the window up and down broke and got tangled inside the motor. i got it undone and tried to put a new cable in there but just can't keep it from tangling again. no idea why. buddy has a new motor that he'll let me use so hopefully i'll fix that soon.


it was raining today so it was the perfect time to wet sand the headlights. also clear coated them and will polish next weekend. the light output is 10000000 times better now.

and lastly i started laying fiberglass on my custom tail lights and test fitted another iteration of the headlight build

had to do some trimming, gonna make the adjustments and print another one


 03-23-16, 11:23 AM
#193
Lexus Champion
Thread Starter
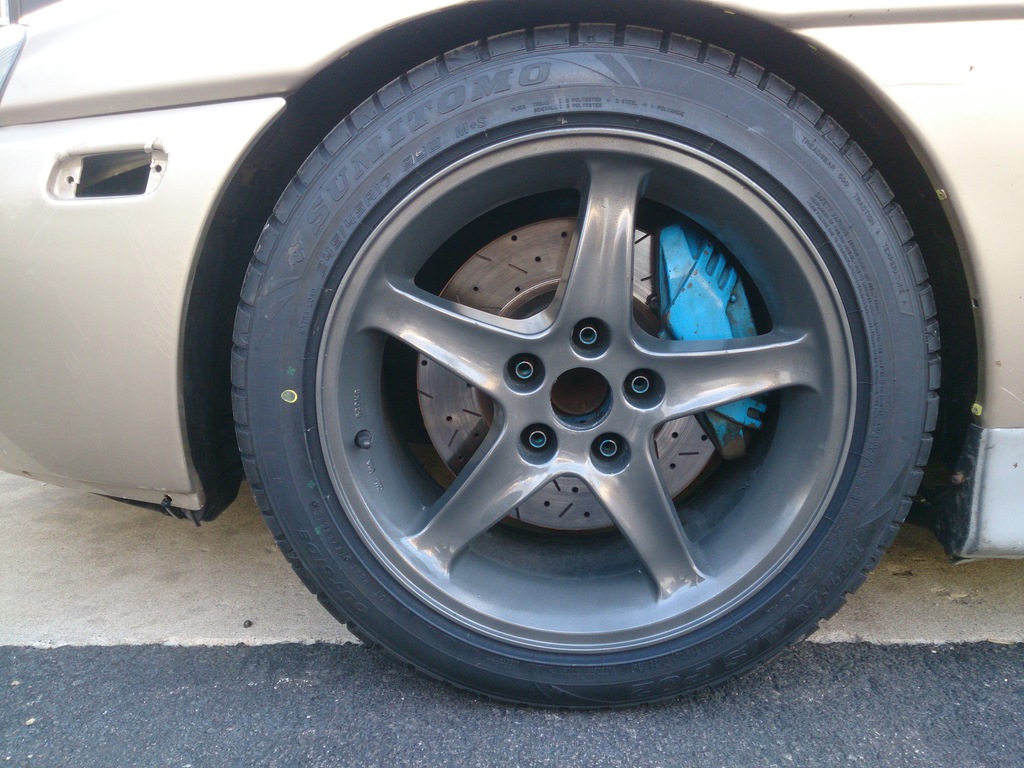
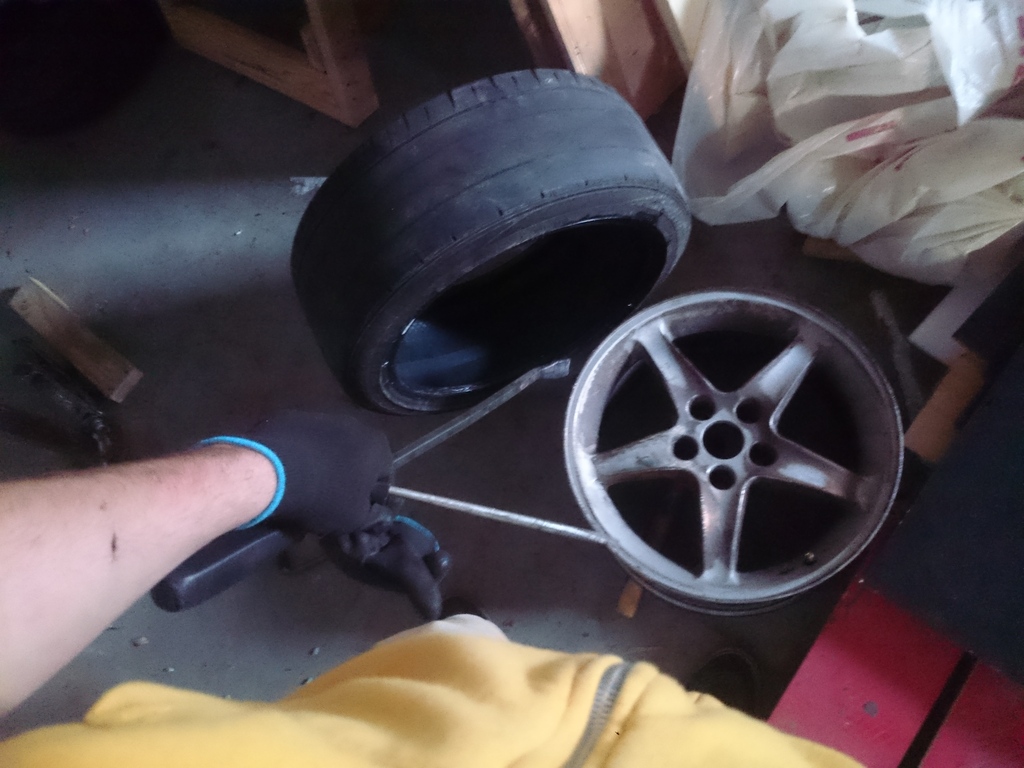
unmounted my old summer tires with a screw driver and pry bar lol, didn't feel like paying to get them unmounted just so i could paint the wheels.
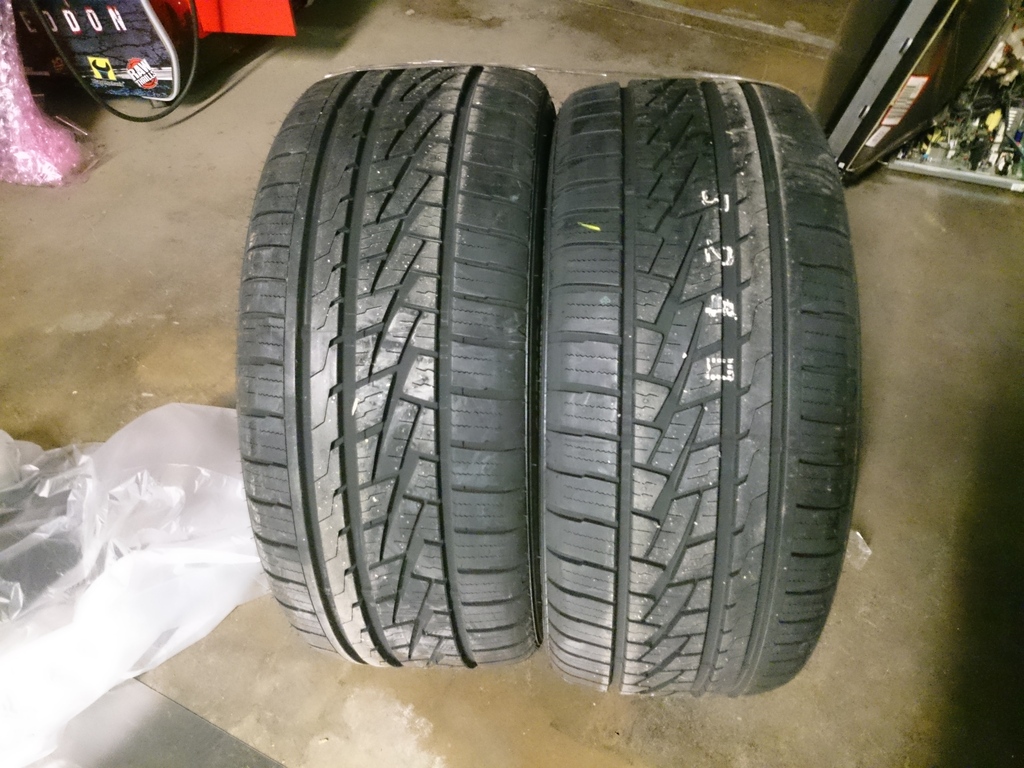
started prepping the wheels for paint and the tires came in today. 245 45 17. Sumitomo something tires i forget their name, but they were 326 shipped for all 4. i'm not planning to keep the car more than 2 years so the 45k mile warranty on these should be plenty.
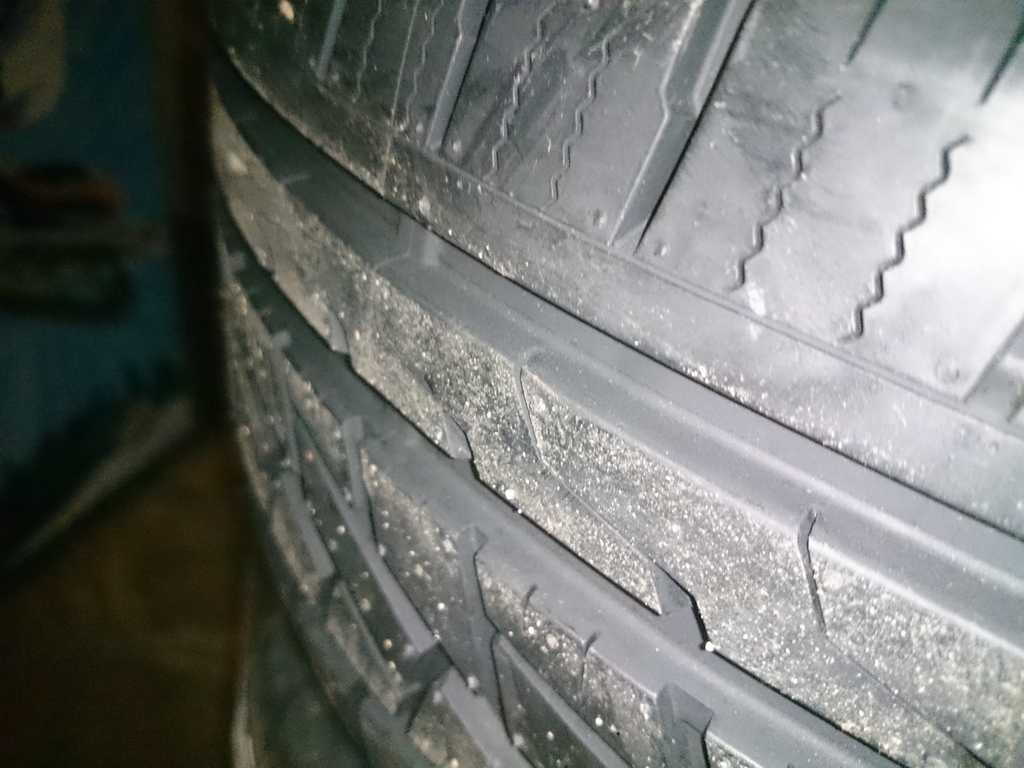
check out that tread depth

started prepping the wheels for paint and the tires came in today. 245 45 17. Sumitomo something tires i forget their name, but they were 326 shipped for all 4. i'm not planning to keep the car more than 2 years so the 45k mile warranty on these should be plenty.

check out that tread depth
 03-28-16, 06:15 PM
#194
Lexus Champion
Thread Starter
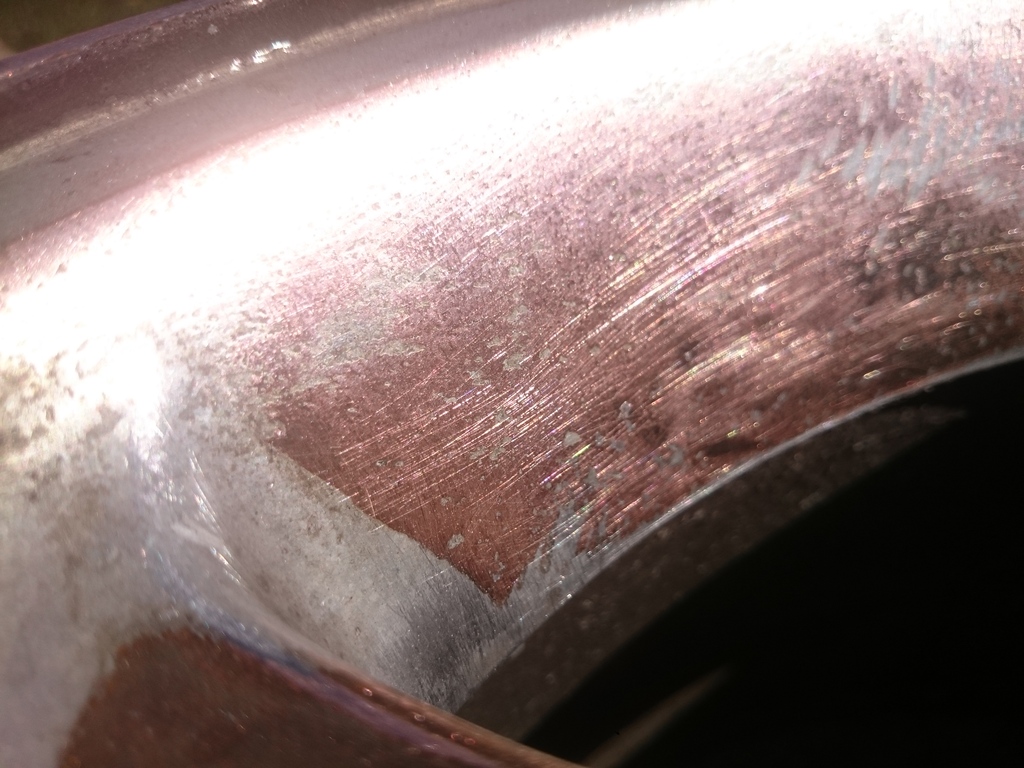
so i finished painting my wheels! i think they turned out awesome. Kinda wish i got a darker color but oh well, looks sweet nonetheless. Also worked on the tail lights a bit, trimmed the except glass and covered it in duct tape to smooth everything, then painted it with primer. gonna go over it all with bondo and start molding some shapes into. Haven't decided on what material to use yet, if anyone knows of some easy to work with moldable material that dries hard let me know.
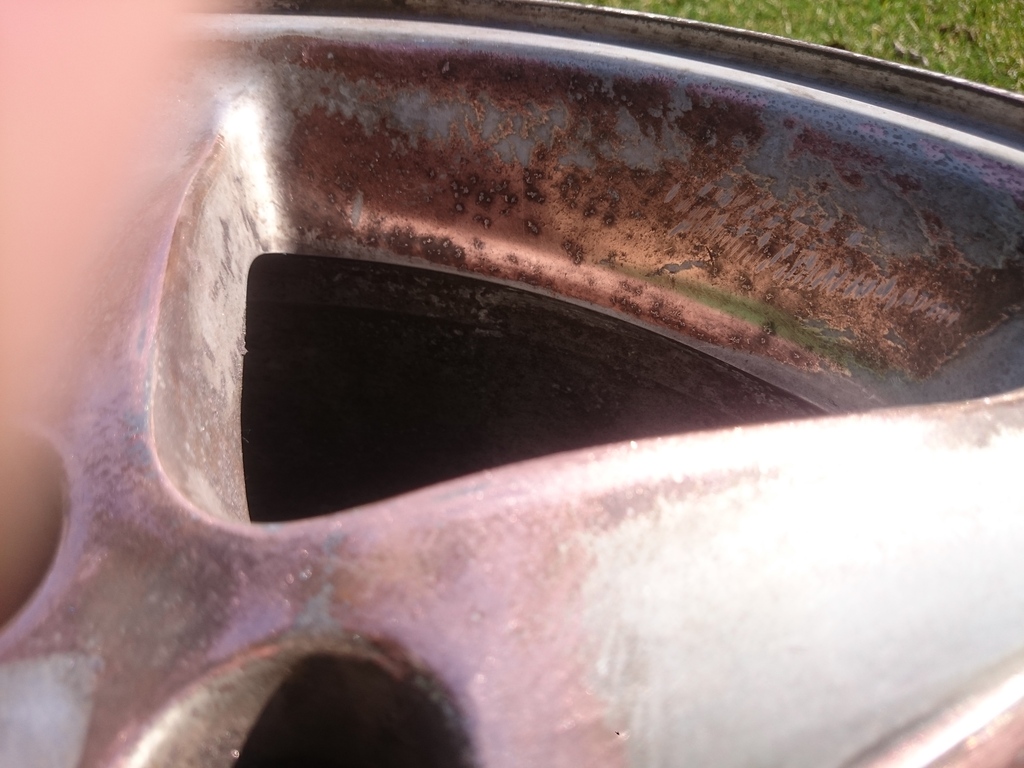
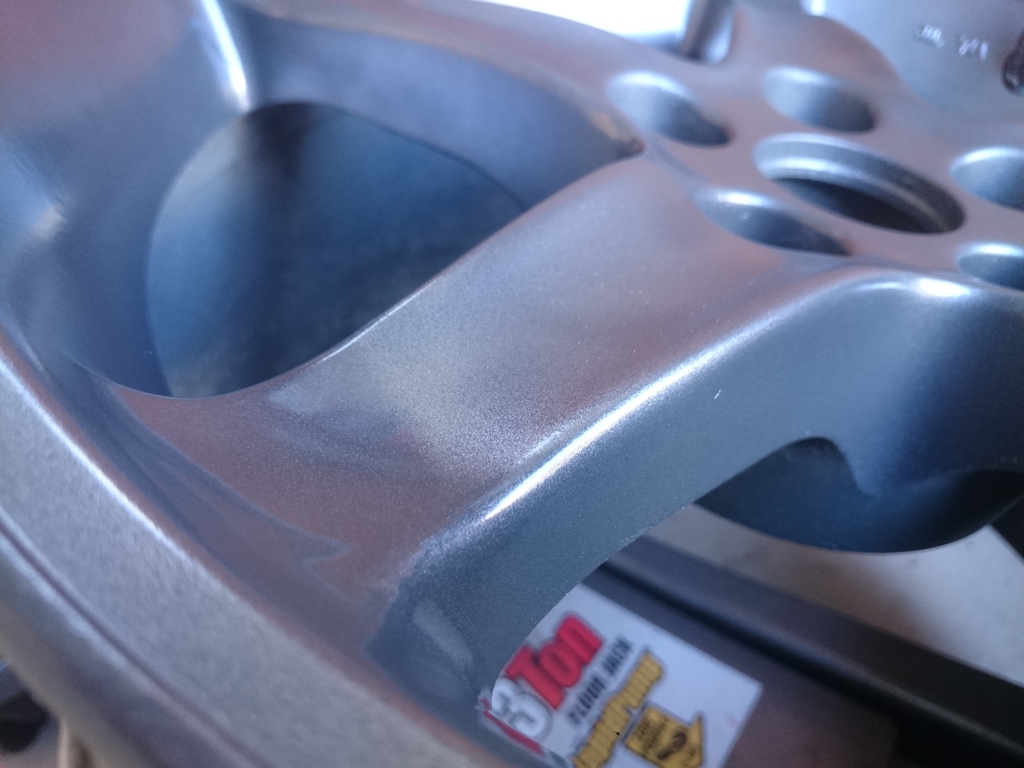
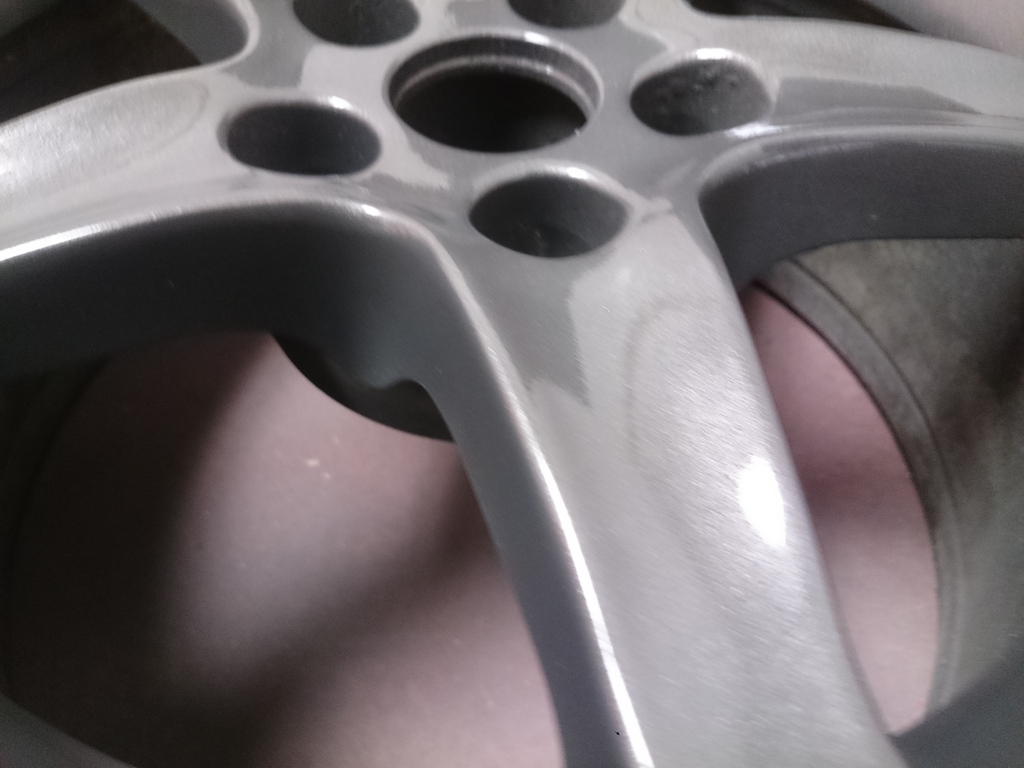
here's what one of the wheels looked like before. it wasn't fully stripped of the copper when the chrome was removed so it looked horrible.
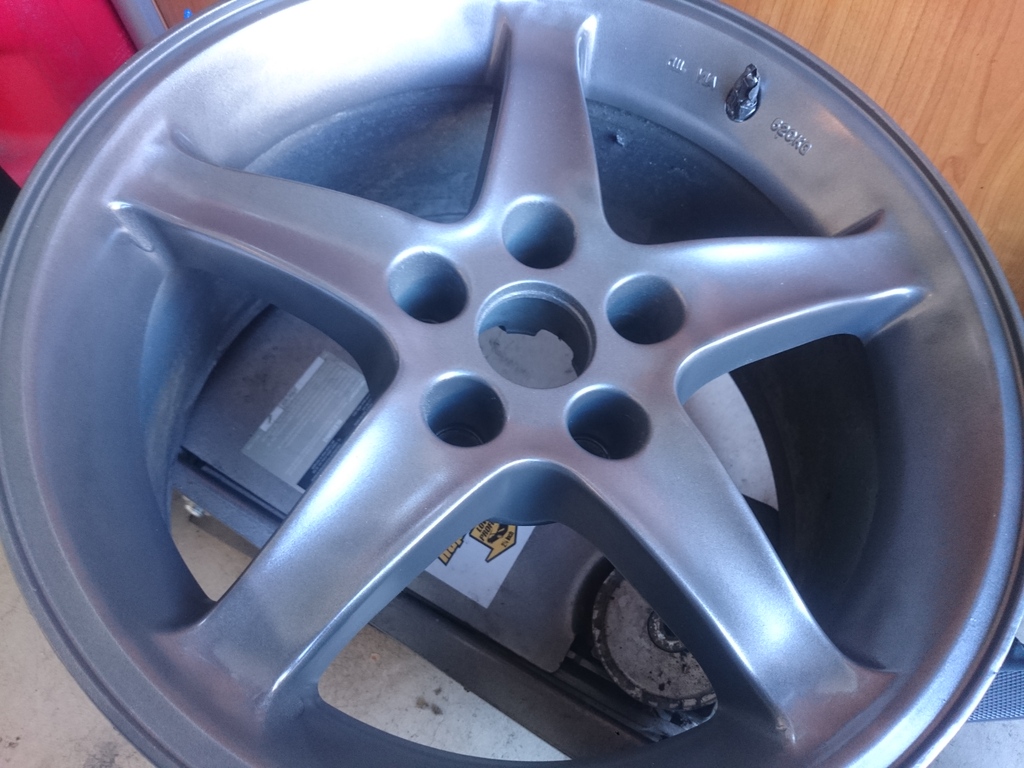
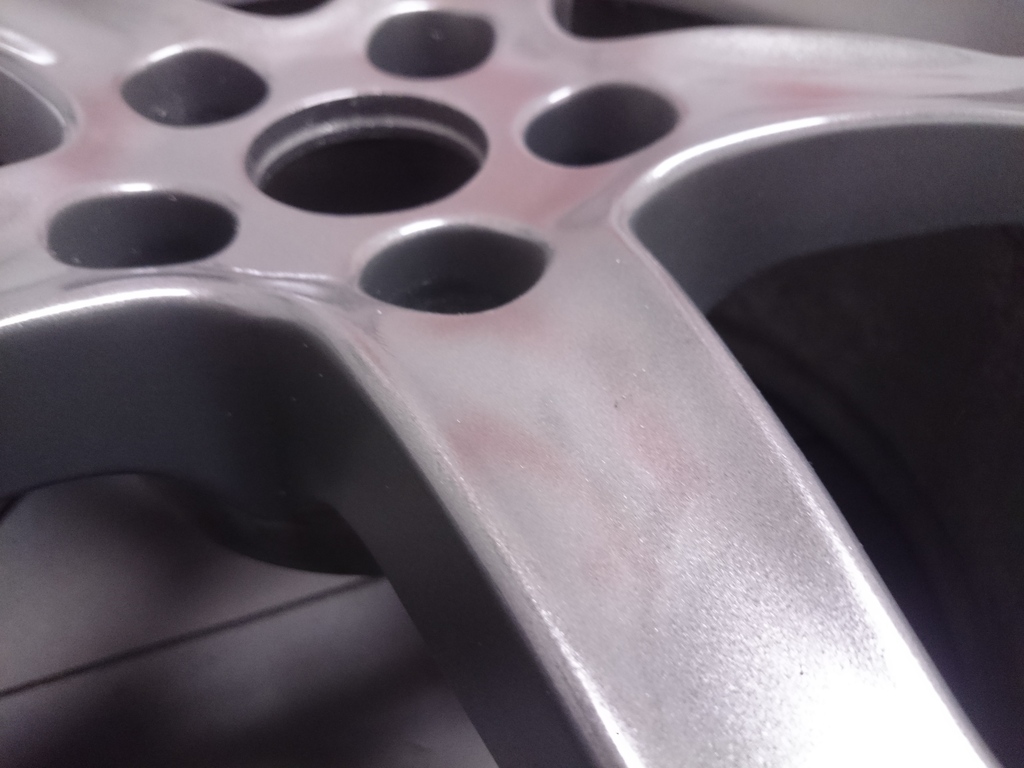
and the wheels before clear coat
and AFTER CLEAR COAT!!!
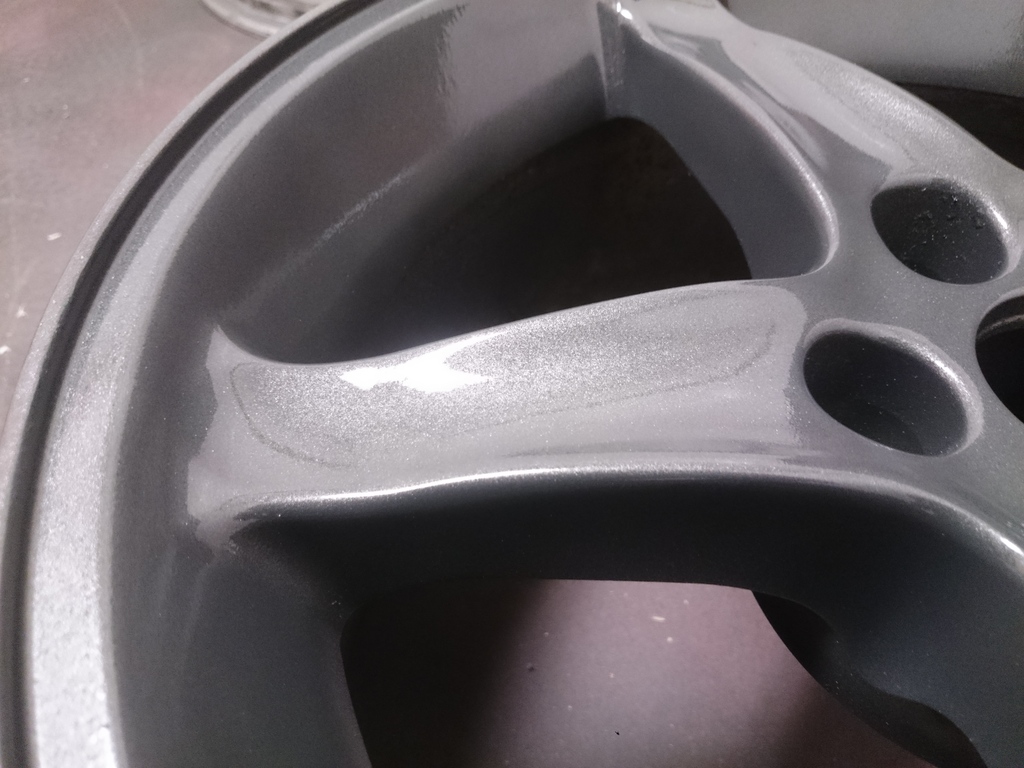
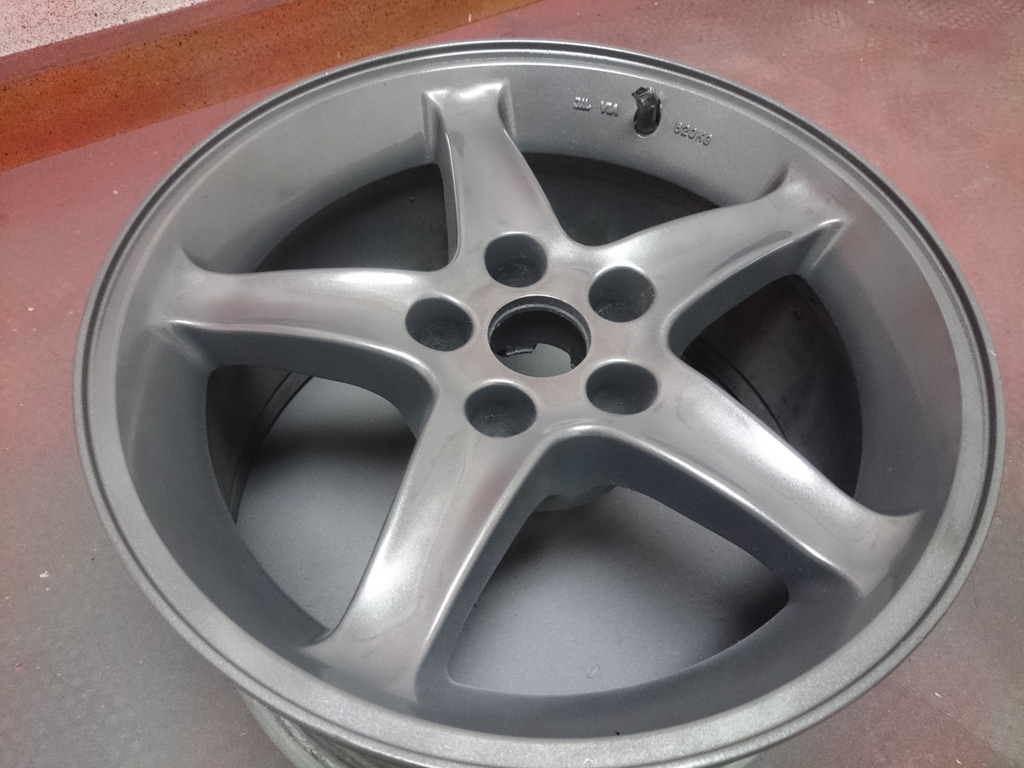
Clear coat seriously does wonders. i did 2 thick coats on all the wheels.
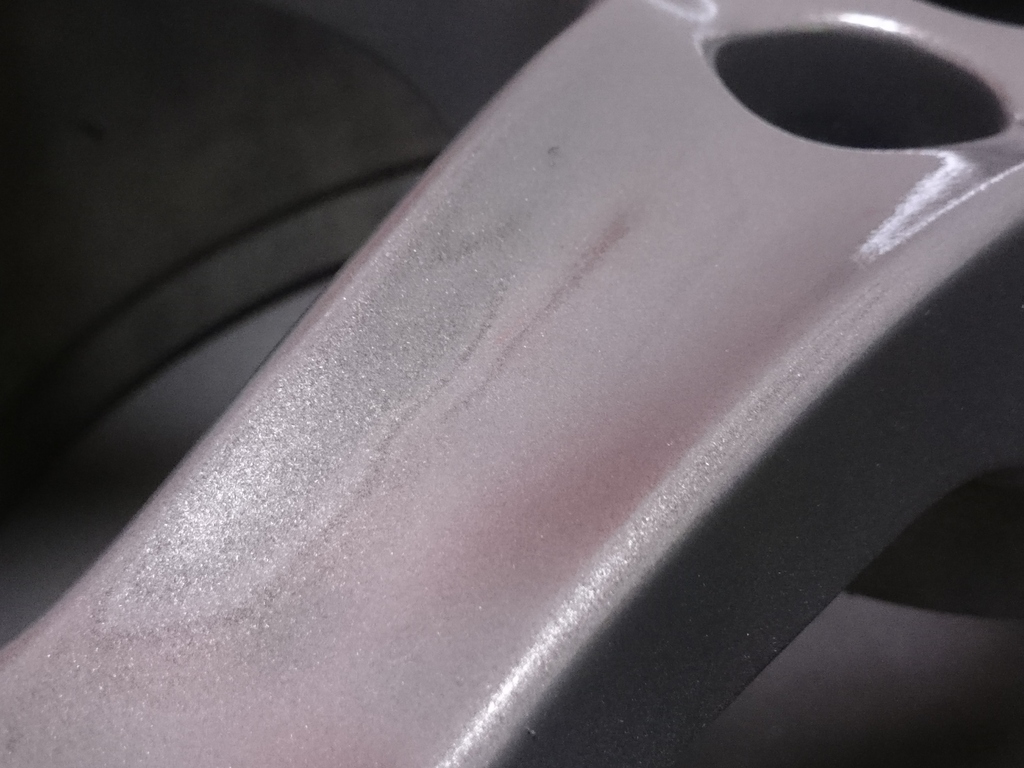
look at that shimmer, i don't htink i'll even need to polish them
and lastly the tail light before i put primer on it. Have a nice flat surface to do anything to now. gonna be lots of fun
here's what one of the wheels looked like before. it wasn't fully stripped of the copper when the chrome was removed so it looked horrible.


and the wheels before clear coat


and AFTER CLEAR COAT!!!


Clear coat seriously does wonders. i did 2 thick coats on all the wheels.
look at that shimmer, i don't htink i'll even need to polish them

and lastly the tail light before i put primer on it. Have a nice flat surface to do anything to now. gonna be lots of fun
 04-04-16, 02:16 PM
#195
Lexus Champion
Thread Starter
wheels mounted!!!!!! i'm completely in love with the functional stance. plenty of room, no rubbing, got some forward rake going on. absolutely love how it turned out.