


 !! legit..


winter build teaser?
I bought a new vis Cf trunk n fitment is great.. Whoever said they suck must of got a crap one or something.. The vis hood fits nice too and they are sooo much lighter.. Cf trunk takes like 1-2 fingers to carry compared to a 1-2 hands to hold the oem one haha.

Rookie
Joined: Jun 2007
Posts: 71
Likes: 0
From: Texas
No. Just the Turbo. The XS power kit from na-t is legit, there is a lot of good feedback from everyone who has purchased it. I just didn't have like 1200$ on hand to opt for the whole kit. Its essentially the same thing, na-t kit comes with universal I/c piping that you need to modify, same goes for the downpipe. But I'm not hating on it, I would have bought it if I had all the money at once.

Thread Starter
Pole Position
Joined: Jun 2008
Posts: 315
Likes: 1
From: Moorpark, CA
See me and you are on the same boat. I'm only aiming at 300-350 HP. Dangishchris has the same Turbo as me and he's been daily driving it for quite some time. It runs great too. I'm not posting up my build in the go faster section of my.is because I know ill get flamed for not getting a full kit for 5g's LOL. Anyways ill take as many pics of the installation for you guys...hopefully ill be getting on that soon.
ClubLexus Stories
Celebrating Lexus & Toyota from Around the Globe

10 Lexus Bargains That are Cheaper Than a New Toyota RAV4
Joe Kucinski
8 Weirdest Things Lexus Has Ever Built
Verdad Gallardo
10 Lexus Designs That Have Aged Like Fine Wine
Verdad Gallardo
8 Tips for Improving Your Hybrid or Plug-in Hybrid's Efficiency!
Michael S. Palmer
10 Best Lexus Models No One Remembers
Joe Kucinski
TRD Off-Road Premium: Best 2026 4Runner, Except This One Thing
Michael S. Palmer
Top 10 Lexus & Toyotas to Drive Before You Die!
Joe Kucinski
Top 10 Lexus/Toyotas With The LEAST 5-Year Depreciation
Joe Kucinski
Lexus LC500 Convertible Auction: A Preview of Rising Values?
Brett Foote

Thread Starter
Pole Position
Joined: Jun 2008
Posts: 315
Likes: 1
From: Moorpark, CA
Before i show you the pics and progress. I want to let everyone here know that Gabe (Lexguy300) did most of the work you are about to see. He's a super cool guy, and knows what he is doing. I would highly recommend his help to anyone in So Cal who needs help with any kind of mechanic work done. Also, shout out to Dangishchris for referring me to Gabe, helping out with the oil pan, and the entire build, and keeping company on the way to Gabe's.
So it only took about 2 hours to get everything done, which was amazingly fast (excluding the time it took to wait for the sealant to dry).
Engine lifted:


Oil pan out:

Cleaning the residue off the sides/inside

Cleaning done, dont mind the paint scratches:

Hole drilled to -10an, with 3/8 threading:
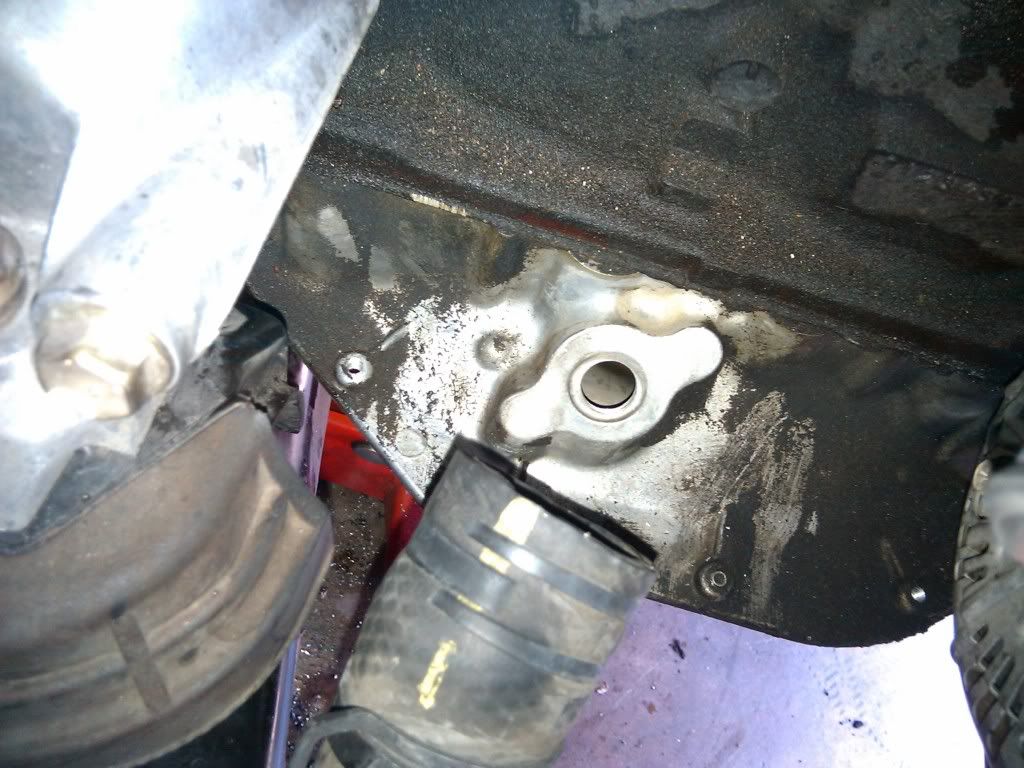
...And this is why you take off the pan to drill the hole...unless you want this metal catastrophe distributed throughout your engine:


Fits like a glove:

Back to the oil pan, we used this sealant:


back to the top! or bottom, i should say:

We let the sealant set about 2 1/2 hours before putting in the new oil (Mobil 1 synthetic 5w-30). Drove back home for another 2 hours or so, still no leaks now, looks like its sealed up pretty good. And i am not using the barb fitting for the oil drain, it was given to me from an old and dated oil drain/receive xs power kit. as of now its capped off and will be replaced with something more...fitting ha. NOW ON TO TURBOO! stay tuned.
So it only took about 2 hours to get everything done, which was amazingly fast (excluding the time it took to wait for the sealant to dry).
Engine lifted:
Oil pan out:
Cleaning the residue off the sides/inside
Cleaning done, dont mind the paint scratches:
Hole drilled to -10an, with 3/8 threading:
...And this is why you take off the pan to drill the hole...unless you want this metal catastrophe distributed throughout your engine:
Fits like a glove:
Back to the oil pan, we used this sealant:
back to the top! or bottom, i should say:
We let the sealant set about 2 1/2 hours before putting in the new oil (Mobil 1 synthetic 5w-30). Drove back home for another 2 hours or so, still no leaks now, looks like its sealed up pretty good. And i am not using the barb fitting for the oil drain, it was given to me from an old and dated oil drain/receive xs power kit. as of now its capped off and will be replaced with something more...fitting ha. NOW ON TO TURBOO! stay tuned.
Thread Starter
Pole Position
Joined: Jun 2008
Posts: 315
Likes: 1
From: Moorpark, CA
so i started the install today. everything went well, didnt get too much done cause i was dicking around a bit. oh well. most of the day was me moving stuff out of the RV access cause the Camaro is in the garage...anyways, here are the pics!
Intake off:
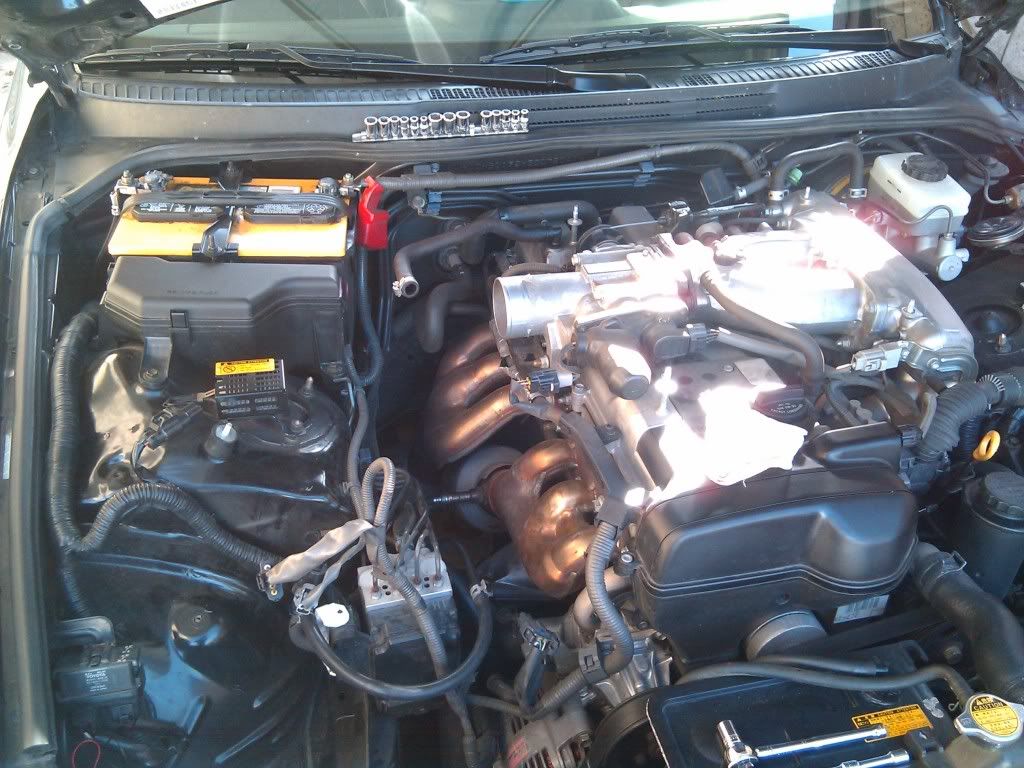
headers off, Chris took them out in like 30 seconds, literally. he should get a reward:


test fitting manifold:


The turbo housing is too big, we need to move those ABS lines outta the way!

jesus...

ah, dreaming. intercooler just belongs there!

and here is the workspace lol:

this turned out good, didnt even mean for it to look like a photoshoot.

Intake off:
headers off, Chris took them out in like 30 seconds, literally. he should get a reward:
test fitting manifold:
The turbo housing is too big, we need to move those ABS lines outta the way!
jesus...
ah, dreaming. intercooler just belongs there!
and here is the workspace lol:
this turned out good, didnt even mean for it to look like a photoshoot.

Thread
Thread Starter
Forum
Replies
Last Post
Thelife
SC - 1st Gen (1992-2000)
51
Mar 12, 2010 04:02 AM
1siksc
SC - 1st Gen (1992-2000)
26
Jan 16, 2010 04:24 PM